
Articles
How To Change Whirlpool Microwave Light Bulb
Modified: August 26, 2024
Learn how to change the light bulb in your Whirlpool microwave with this step-by-step guide. Read this article for easy instructions and troubleshooting tips.
(Many of the links in this article redirect to a specific reviewed product. Your purchase of these products through affiliate links helps to generate commission for Storables.com, at no extra cost. Learn more)
Introduction
A kitchen is a place where functionality and convenience are key, and one essential appliance that we rely on is the microwave. It’s a quick and efficient way to heat up our food and make our lives easier. However, like any other appliance, a microwave may require maintenance and occasional replacement of certain components, such as the light bulb. If you notice that the light inside your Whirlpool microwave is not working, don’t worry! In this article, we will guide you through the step-by-step process of changing the light bulb in your Whirlpool microwave, ensuring that you can illuminate your food and use your microwave more effectively.
Before we dive into the process, it’s crucial to prioritize safety. Remember to always exercise caution and follow the manufacturer’s instructions when working with any electrical appliance. Make sure to unplug the microwave from the power source before attempting any repairs or replacements. Keep in mind that it’s recommended to refer to your microwave’s user manual for specific instructions tailored to your model. With that in mind, let’s get started on changing the light bulb in your Whirlpool microwave.
Key Takeaways:
- Easily change the light bulb in your Whirlpool microwave by following simple steps and safety precautions. Enjoy a well-lit cooking space with proper illumination for hassle-free culinary adventures.
- Prioritize safety, gather necessary tools, and follow step-by-step instructions to successfully replace the light bulb in your Whirlpool microwave. Maintain optimal condition and convenience in your kitchen.
Read more: How To Change A Light Bulb
Safety Precautions
Before we begin the process of changing the light bulb in your Whirlpool microwave, it’s important to ensure your safety. Here are some essential safety precautions to keep in mind:
- Unplug the microwave: Always unplug the microwave from the power source before attempting any repairs or replacements. This will prevent any risk of electric shock.
- Allow the microwave to cool: Microwaves can get hot while in use. Allow the microwave to cool down before attempting any repairs to avoid burning yourself.
- Read the user manual: Familiarize yourself with the manufacturer’s instructions and guidelines provided in the user manual specific to your Whirlpool microwave model.
- Wear protective gloves: It’s a good practice to wear protective gloves, such as rubber or latex gloves, while working with electrical appliances to prevent any injuries.
- Handle the light bulb with care: Light bulbs can be fragile, so handle them gently to avoid breakage. If the bulb is broken or damaged, ensure that you dispose of it properly.
- Assess the stability of the microwave: Make sure that your microwave is stable and secure before attempting any repairs. If needed, place the microwave on a sturdy surface to provide a stable working space.
By following these safety precautions, you can ensure a safe and successful experience when changing the light bulb in your Whirlpool microwave. Now, let’s move on to the detailed steps for replacing the light bulb.
Step 1: Gather Necessary Tools
Before you begin the process of changing the light bulb in your Whirlpool microwave, it’s important to gather all the necessary tools and equipment. Having everything you need at hand will make the process smoother and more efficient. Here are the tools you’ll need:
- Safety gloves: Protect your hands by wearing safety gloves. Rubber or latex gloves are recommended.
- Screwdriver: Depending on your microwave model, you may need either a Phillips head or a flathead screwdriver to remove the screws.
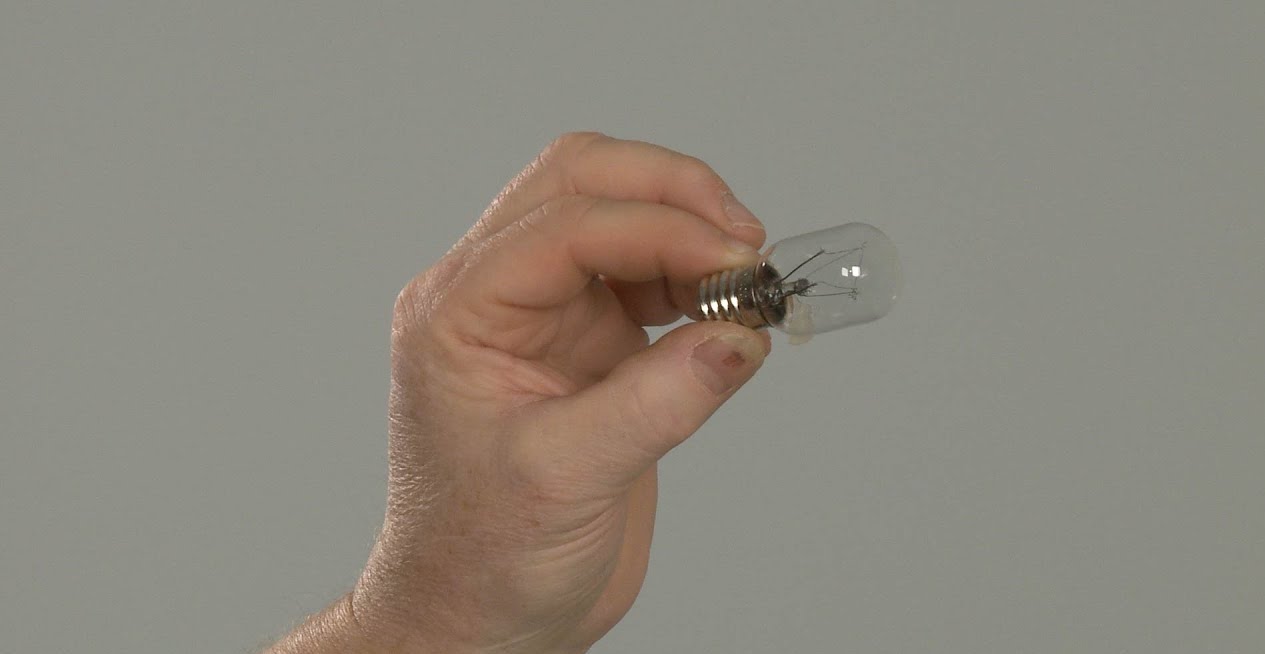
- Replacement light bulb: Make sure you have the correct replacement light bulb for your Whirlpool microwave. Refer to your microwave’s user manual or check the existing bulb for specifications.
- Tweezers or pliers: These tools will be useful for removing the old light bulb and inserting the new one if it’s difficult to reach.
- Flashlight: A flashlight will help you see better inside the microwave, especially if the light bulb is burnt out.
Double-check to ensure you have all the necessary tools and equipment before proceeding to the next step. This will save you time and prevent any delays or interruptions during the process. Once you have everything ready, move on to the next step: unplugging the microwave.
Step 2: Unplug the Microwave
Before you begin working on your Whirlpool microwave, it’s crucial to unplug it from the power source. This ensures your safety and eliminates any risk of electric shock. Follow these steps to unplug your microwave:
- Locate the power cord at the back of the microwave. It is usually connected to an electrical outlet or a power strip.
- Gently pull the power cord out from the outlet or power strip.
- Ensure that the microwave is completely disconnected from the power source by checking that the display is no longer illuminated.
By unplugging the microwave, you create a safe working environment. Remember to never work on an appliance that is still plugged in, as it can be dangerous. With your microwave safely unplugged, you can now move on to the next step: locating the light bulb casing.
Step 3: Locate the Light Bulb Casing
Once your Whirlpool microwave is safely unplugged, it’s time to locate the light bulb casing. The light bulb casing is usually situated inside the microwave, near the top or at the back, depending on the model. Follow these steps to find the light bulb casing:
- Open the microwave door and inspect the interior. Look for any visible screws or panels that may indicate the location of the light bulb casing.
- If you don’t see any obvious signs, consult your microwave’s user manual for specific instructions on locating the light bulb casing. The user manual will provide detailed diagrams and explanations tailored to your microwave model.
- Take note of any cautionary labels or warnings near the light bulb casing, as these may provide additional guidance or safety precautions.
It’s important to locate the light bulb casing before proceeding to the next step. Properly identifying the casing will make it easier to access and replace the light bulb. Once you’ve located the light bulb casing, you’re ready to move on to the next step: removing the old light bulb.
Before attempting to change the light bulb in your Whirlpool microwave, make sure to unplug the appliance to avoid any electrical accidents. Use a screwdriver to remove the cover and carefully replace the old bulb with a new one of the same wattage and type.
Read more: How To Replace Light Bulb In Microwave
Step 4: Remove the Old Light Bulb
Now that you have located the light bulb casing in your Whirlpool microwave, it’s time to remove the old light bulb. Follow these steps to safely remove the old light bulb:
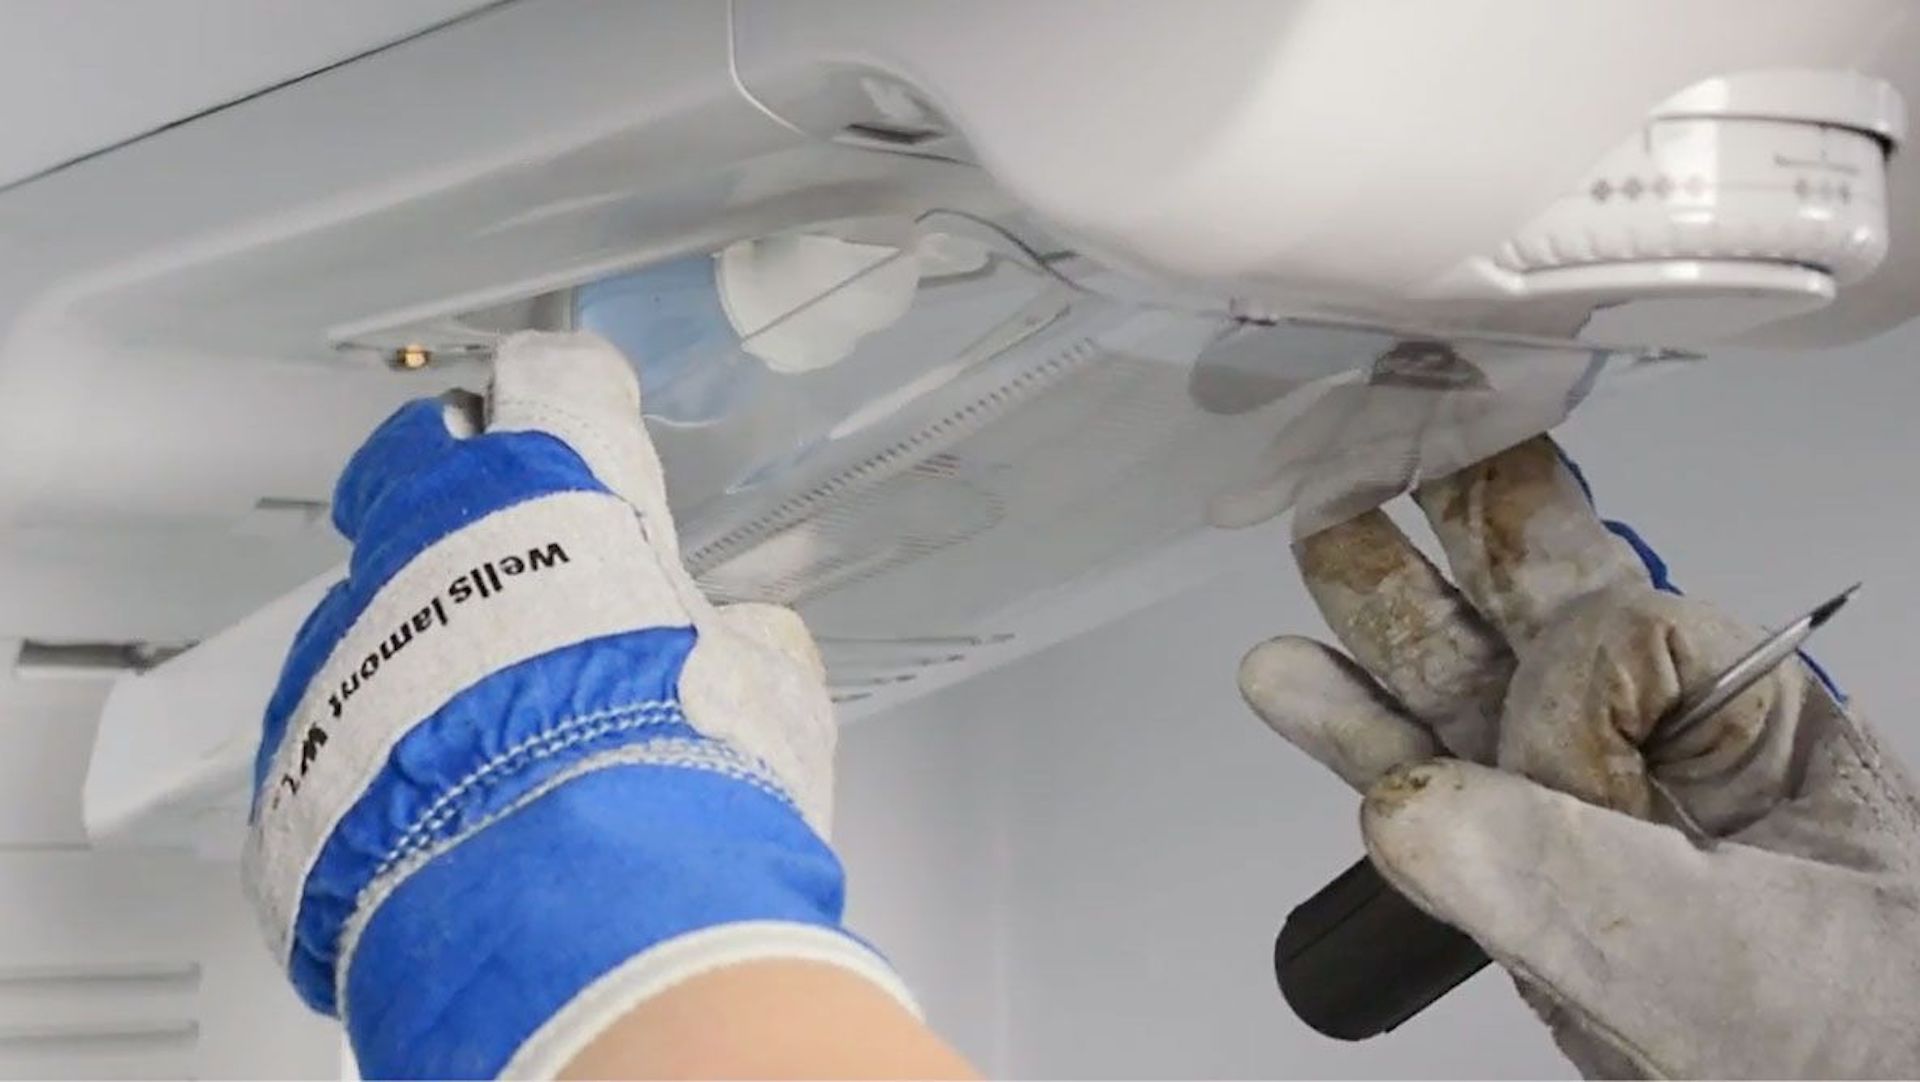
- Put on your safety gloves to protect your hands from any sharp edges or broken glass.
- Inspect the light bulb casing for any screws or clips holding it in place. Use a screwdriver or your fingers to loosen and remove any screws if necessary.
- Gently twist or unscrew the old light bulb counterclockwise to remove it from the socket. Take care not to put too much pressure on the bulb to avoid breakage.
- Once the old light bulb is free from the socket, carefully pull it out from the casing. Set it aside for proper disposal.
If the old light bulb is stubborn and difficult to remove, you can use tweezers or pliers to help grip it and twist it out. However, be cautious not to exert too much force to prevent damaging the socket or causing injury.
With the old light bulb removed, you’re now ready to move on to the next step: installing the new light bulb in your Whirlpool microwave.
Step 5: Install the New Light Bulb
With the old light bulb removed from your Whirlpool microwave, it’s time to install the new one. Follow these steps to safely and properly install the new light bulb:
- Take the new light bulb that is specifically designed for your Whirlpool microwave model.
- Ensure that the new light bulb matches the wattage and size specifications mentioned in your microwave’s user manual or on the old bulb itself.
- Hold the new light bulb by the base and gently insert it into the socket.
- Rotate the new light bulb clockwise until it is securely in place. Make sure it is snug and not loose.
It’s important to handle the new light bulb with care and avoid touching the glass portion with your bare hands. If you do touch it accidentally, clean it with a soft cloth to remove any oils or residue, which could cause the bulb to heat unevenly and reduce its lifespan.
Once the new light bulb is properly installed, you’re ready to move on to the next step: reassembling your Whirlpool microwave.
Step 6: Reassemble the Microwave
After successfully installing the new light bulb in your Whirlpool microwave, it’s time to reassemble the microwave. Follow these steps to put everything back together:
- Check for any loose screws or clips around the light bulb casing. If any were removed during the previous steps, reattach them securely to ensure proper assembly.
- Place the light bulb casing back into its original position in the microwave. Make sure it fits snugly and aligns properly.
- If there were any panels or covers that were removed, carefully reattach them by inserting and fastening any screws or clips.
- Double-check that all the components are back in place and securely tightened.
During the reassembly process, refer to your microwave’s user manual for any specific instructions or diagrams that may be relevant to your model. Taking the time to ensure proper reassembly will help maintain the integrity and functionality of your Whirlpool microwave.
With the microwave reassembled, you’re ready to move on to the final step: testing the new light bulb.
Step 7: Test the New Light Bulb
Now that you have successfully reassembled your Whirlpool microwave, it’s time to test the new light bulb to ensure it is functioning properly. Follow these steps to test the new light bulb:
- Plug your Whirlpool microwave back into the power source.
- Open the microwave door and check if the light bulb illuminates when you turn on the microwave.
- If the light bulb doesn’t turn on, double-check that it is securely screwed in place. Sometimes, a slight adjustment may be necessary.
- If the new light bulb still doesn’t work, it’s possible that there is an electrical issue or a problem with the microwave’s wiring. In this case, it is recommended to consult a professional technician.
- If the new light bulb is working properly, you can close the microwave door and use your Whirlpool microwave as usual.
It’s important to ensure that the new light bulb is functioning correctly, as it provides vital illumination inside the microwave, allowing you to monitor your food while it is cooking. If you encounter any issues, it’s always best to seek professional assistance to address the problem properly.
Congratulations! You have successfully changed the light bulb in your Whirlpool microwave. By following these steps and taking proper safety precautions, you can continue to enjoy the convenience and functionality of your microwave.
Disclaimer: The instructions provided in this article are general guidelines. Always refer to your Whirlpool microwave’s user manual for specific instructions and safety guidelines tailored to your model.
Read more: How To Change A Brake Light Bulb
Conclusion
Changing the light bulb in your Whirlpool microwave is a simple and straightforward process that can be done with just a few tools and a little bit of time. By following the steps outlined in this guide and taking the necessary safety precautions, you can successfully replace the light bulb and restore proper illumination to your microwave.
Remember to always prioritize safety by unplugging the microwave and wearing protective gloves when working with electrical appliances. Take your time to locate the light bulb casing and carefully remove the old light bulb. Install the new light bulb with caution, ensuring it is securely fastened and matches the specifications of your microwave model.
Reassembling the microwave is just as important, as it ensures all components are securely in place. Finally, test the new light bulb to verify its functionality and enjoy the improved visibility inside your microwave.
However, if you encounter any difficulties during the process or if the new light bulb does not work, it is recommended to consult a professional technician or refer to your microwave’s user manual for further assistance.
By following these instructions, you can keep your Whirlpool microwave in optimal condition and continue to benefit from its convenience and efficiency in your kitchen. Maintain a well-lit microwave and enjoy hassle-free cooking experiences with proper illumination.
Remember to always prioritize your safety and refer to the user manual for specific instructions regarding your Whirlpool microwave model. With the right knowledge and tools, you can easily change the light bulb and ensure a well-lit cooking space for all your culinary adventures.
Frequently Asked Questions about How To Change Whirlpool Microwave Light Bulb
Was this page helpful?
At Storables.com, we guarantee accurate and reliable information. Our content, validated by Expert Board Contributors, is crafted following stringent Editorial Policies. We're committed to providing you with well-researched, expert-backed insights for all your informational needs.



0 thoughts on “How To Change Whirlpool Microwave Light Bulb”