
Articles
How To Change Car Light Bulb
Modified: March 1, 2024
Learn how to change your car light bulb with this informative article. Step-by-step instructions and tips to safely replace your car's light bulb.
(Many of the links in this article redirect to a specific reviewed product. Your purchase of these products through affiliate links helps to generate commission for Storables.com, at no extra cost. Learn more)
Introduction
Car light bulbs play a crucial role in ensuring our safety on the road. These bulbs provide illumination for various aspects of your vehicle, including headlights, taillights, turn signals, brake lights, and more. Over time, these bulbs may burn out and need to be replaced. While it may seem like a daunting task, changing a car light bulb is actually a simple process that can be done at home with just a few tools and materials.
In this article, we will guide you through the step-by-step process of changing a car light bulb. Whether you are a novice or have some experience in automotive maintenance, this guide will provide you with the necessary information to successfully replace a burnt-out bulb and have your vehicle’s lights shining brightly again.
Before we dive into the details, it is important to note that different vehicles may have varying methods of accessing and replacing light bulbs. Therefore, it is always recommended to consult your vehicle’s owner’s manual to ensure you are following the correct procedure for your specific make and model.
Without further ado, let’s gather the necessary tools and materials to get started!
Key Takeaways:
- Changing a car light bulb is a simple DIY task that can be accomplished with the right tools and knowledge. Prioritize safety, locate the bulb, choose the correct replacement, and ensure proper installation for optimal visibility and road safety.
- Regular maintenance and timely replacement of car light bulbs are crucial for maintaining optimal visibility and safety while driving. By following the step-by-step guide and prioritizing safety, you can confidently replace burnt-out bulbs and enjoy a well-lit and safe journey on the road.
Read more: How To Change A Light Bulb
Tools and Materials Needed
Before you begin the process of changing a car light bulb, it is essential to gather the necessary tools and materials. Having everything prepared beforehand will save you time and frustration during the task. Here is a list of items you will need:
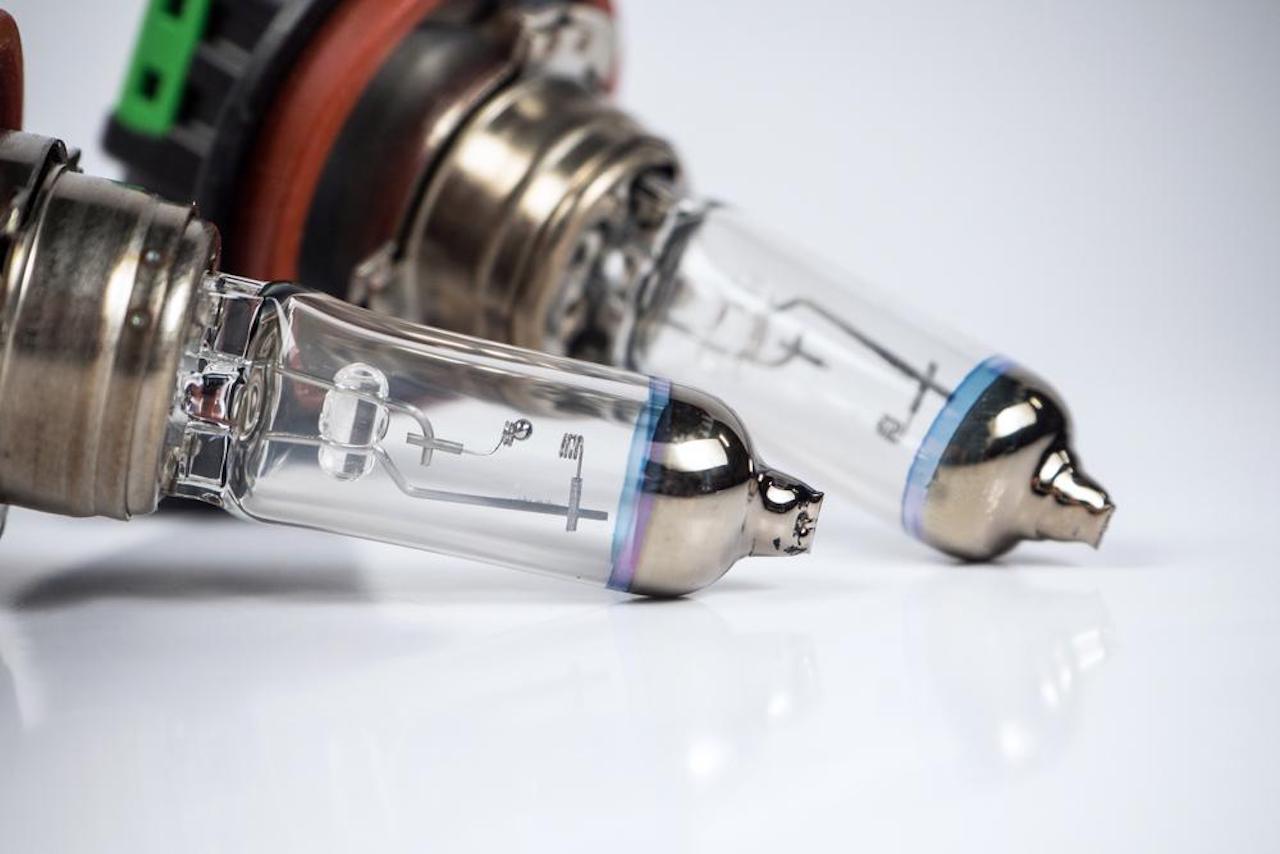
- A replacement bulb: Make sure you have the correct type and size of bulb for your specific vehicle. This information can be found in your vehicle’s owner’s manual or by consulting with a professional.
- A pair of gloves: It is advisable to wear gloves to prevent any oils from your hands from sticking to the bulb’s glass, which can cause it to heat unevenly and potentially reduce its lifespan.
- Safety glasses: Protect your eyes from potential debris or shattering glass while working on the bulb.
- A small towel or cloth: Use this to handle the bulb, as direct contact with your skin can also affect its lifespan.
- A screwdriver or socket set: Depending on your vehicle, you may need to remove screws or bolts to access the bulb. Check your vehicle’s manual to determine the type of tool required.
- Electrical contact cleaner (optional): This can be used to clean the electrical connection points before installing the new bulb, ensuring a good connection and optimal performance.
Having these tools and materials on hand will allow you to complete the task efficiently and with minimal hassle. Double-check that you have all the necessary items before proceeding to the next steps.
Step 1: Gather Safety Equipment
Before you begin the process of changing a car light bulb, it is important to prioritize your safety. By gathering the necessary safety equipment, you can ensure a smooth and accident-free experience. Here is what you need to do:
- Put on your gloves: Wearing gloves will protect your hands from any potential injuries or burns that may occur during the process. It is recommended to use gloves made of a non-slip material to provide a better grip on the bulb and prevent accidents.
- Wear safety glasses: To protect your eyes from any debris or glass shards that may be present, it is advisable to wear safety glasses. This will safeguard your eyes from any potential harm.
By wearing gloves and safety glasses, you are taking the necessary precautions to protect yourself during the bulb replacement process. Now that you have your safety equipment on, let’s move on to the next step, which involves locating the bulb that needs to be replaced.
Step 2: Locate the Bulb
In order to replace a car light bulb, you first need to locate the specific bulb that needs to be changed. The location of the bulb will vary depending on the type of light and the make and model of your vehicle. Here’s how you can locate the bulb:
- Consult your vehicle’s owner’s manual: The owner’s manual is a valuable resource that contains detailed information about the various components of your vehicle. Check the manual to find the specific location of the bulb you wish to replace. It will provide instructions on how to access the housing or assembly that contains the bulb.
- Inspect the exterior of the vehicle: For some bulbs, such as headlights or taillights, you can easily locate them by visually examining the exterior of the vehicle. Look for any discolored or non-functioning bulbs. For example, a burnt-out headlight bulb will only have one functioning headlight, making it relatively easy to identify the non-working bulb.
- Examine the interior of the vehicle: Some interior lights, such as dome lights or map lights, can be accessed from inside the car. Look for the plastic lens cover housing the bulb and gently remove it to access the bulb.
It is important to note that certain bulbs may require the removal of specific components or panels to access them properly. In these cases, refer to your vehicle’s manual or seek professional assistance if you are unsure about the process.
Once you have located the bulb that needs to be replaced, you are ready to move on to the next step, which involves removing the old bulb.
Step 3: Remove the Old Bulb
Now that you have located the bulb that needs to be replaced, it’s time to remove the old bulb. Follow these steps to safely remove the old bulb:
- Turn off the vehicle: Before beginning any work on the bulbs, make sure to turn off your vehicle and remove the key from the ignition. This will prevent any accidental activation of lights, minimizing the risk of electrical shock.
- Access the bulb housing or assembly: Depending on the type of bulb you are replacing, you may need to remove a cover, trim, or housing to access the bulb. If necessary, consult your vehicle’s owner’s manual for specific instructions on how to remove these components safely.
- Disconnect the electrical connector: Most bulbs are secured with an electrical connector. Carefully disconnect the connector by gently pressing on the release tab or twisting it counterclockwise, depending on the type of connector used.
- Remove the bulb: Once the connector is disconnected, you can remove the old bulb. Gently twist the bulb counterclockwise or pull it straight out, depending on the specific design of the bulb. Be careful not to apply excessive force or torque, as it may cause damage to the bulb or its socket.
- Inspect the bulb socket: While you have the old bulb removed, take a moment to inspect the socket for any signs of corrosion, damage, or loose connections. If necessary, clean the socket using electrical contact cleaner and a small brush or cloth.
After removing the old bulb and inspecting the socket, you are now ready to choose the right replacement bulb. This is our next step, so let’s move on!
When changing a car light bulb, make sure to disconnect the car battery to avoid any electrical accidents. Always wear gloves to prevent oil and dirt from getting on the new bulb, which can cause it to overheat and fail prematurely.
Read more: How To Change Porch Light Bulb
Step 4: Choose the Right Replacement Bulb
Choosing the correct replacement bulb is essential for ensuring proper functionality and compatibility with your vehicle. Here are the steps to follow when selecting the right replacement bulb:
- Refer to your vehicle’s manual: The owner’s manual will provide you with the necessary information, such as bulb type, wattage, and part number for the specific light you are replacing. Cross-reference this information with the options available in the market to find the correct replacement bulb.
- Visit an auto parts store: If you prefer to physically inspect and purchase the bulb, head to an auto parts store with the bulb you removed or the owner’s manual. The staff can assist you in finding the right product based on your vehicle’s make and model.
- Research online: Online retailers and automotive websites offer a wide selection of replacement bulbs. Enter your vehicle’s make, model, and year, along with the type of bulb you need, to find compatible options. Be sure to check customer reviews and product specifications to ensure the reliability and quality of the bulb.
- Consider upgrading: If you want to enhance your vehicle’s lighting performance, you may opt for an upgrade to a brighter or longer-lasting bulb. Keep in mind that certain upgrades may require modifications or adjustments to the electrical system, so it’s always best to consult an expert if you’re unsure.
Once you have chosen the right replacement bulb, you can proceed to the next step, which involves installing the new bulb into the socket. Stay tuned!
Step 5: Install the New Bulb
Now that you have chosen the correct replacement bulb, it’s time to install it into the socket. Follow these steps to safely install the new bulb:
- Ensure the vehicle is turned off: As a safety precaution, make sure your vehicle is turned off and the key is removed from the ignition before proceeding.
- Handle the new bulb carefully: Remove the new bulb from its packaging, being careful not to touch the glass surface. Use a clean cloth or towel to handle the bulb to prevent any oils from your skin from transferring onto the glass.
- Align the new bulb: Look for notches, tabs, or guides on the bulb and the socket to ensure proper alignment. Gently push the new bulb into the socket, making sure it is secure and fully seated.
- Secure the bulb: Depending on the specific housing or assembly, you may need to twist the bulb clockwise to secure it in place. Refer to your vehicle’s manual for proper instructions on securing the bulb.
- Reconnect the electrical connector: Once the new bulb is properly installed, reconnect the electrical connector by aligning it with the socket and pushing it in until you hear or feel a click.
It is crucial to ensure that the new bulb is securely installed to avoid any potential issues, such as flickering or uneven lighting. Take your time to align the bulb correctly and ensure proper connectivity.
Now that the new bulb is installed, it’s time to move on to the next step, which involves testing the lights to ensure they are working correctly. Let’s proceed!
Step 6: Test the Lights
After installing the new bulb, it is crucial to test the lights to ensure they are functioning correctly. Follow these steps to test the lights:
- Turn on the vehicle: Start your vehicle and make sure it is in a safe and well-lit location.
- Activate the lights: Test each light that you replaced individually. Turn on the headlights, taillights, turn signals, brake lights, and any other lights you replaced.
- Check for functionality: Go around the vehicle and visually inspect each light to ensure it is illuminating properly. If any light does not turn on or appears dim, it may indicate a problem with the bulb installation or the electrical connection.
- Test the signals: To further ensure proper functionality, test the turn signals and hazard lights. Activate them one at a time and check if the bulbs are flashing at the expected speed and rhythm.
If any of the lights are not functioning correctly, double-check the bulb installation and ensure the electrical connectors are securely connected. In some cases, a faulty bulb or a wiring issue may be the problem. If you encounter persistent issues, it may be advisable to seek professional assistance.
Once you have confirmed that all the lights are working correctly, you can proceed to the final step, which involves securing the bulb housing or assembly. Keep reading!
Step 7: Secure the Bulb Housing
Now that you have successfully installed and tested the new bulb, it’s time to secure the bulb housing or assembly to ensure it remains in place. Follow these steps to securely fasten the bulb housing:
- Align the housing: Position the bulb housing or assembly back into its original location. Make sure it aligns with the mounting points or brackets.
- Replace any covers or trims: If you removed any covers or trims to access the bulb, carefully reattach them. Ensure they are secured properly and aligned correctly.
- Tighten any screws or bolts: If necessary, use a screwdriver or socket set to tighten any screws or bolts that hold the bulb housing in place. Make sure not to overtighten to avoid damaging the housing or components.
It is important to properly secure the bulb housing to prevent any vibration or movement that can cause damage to the bulb or affect its performance. Take the time to ensure everything is securely fastened before moving on.
With the bulb housing securely in place, you have successfully completed the process of changing a car light bulb. Congratulations on your accomplishment!
Remember to dispose of the old bulb responsibly. Check with your local regulations or recycling centers to ensure proper disposal methods for automotive bulbs.
By following these steps, you can now confidently change a car light bulb whenever needed. However, it is always recommended to consult your vehicle’s owner’s manual for specific instructions and seek professional assistance if you encounter any difficulties or have concerns about your vehicle’s electrical system.
Keep in mind that regular maintenance and timely bulb replacements will ensure optimal visibility and safety while driving. Take the time to inspect your vehicle’s lights periodically to identify any bulbs that may need replacement and address them promptly.
Thank you for reading! Stay safe on the road with properly functioning car light bulbs!
Read more: How To Change A Brake Light Bulb
Conclusion
Changing a car light bulb may seem like a daunting task, but with the right tools and knowledge, it can be a straightforward process. By following the step-by-step guide provided in this article, you can confidently replace a burnt-out bulb and ensure the proper functioning of your vehicle’s lights.
Remember to prioritize safety by wearing gloves and safety glasses throughout the process. Take the time to locate the bulb, remove the old bulb carefully, choose the correct replacement bulb, and install it securely. Test the lights to ensure they are functioning correctly and secure the bulb housing in place to prevent any vibrations or movement.
Regularly checking and replacing car light bulbs is essential for maintaining optimal visibility and safety on the road. By having properly functioning headlights, taillights, turn signals, and brake lights, you can ensure that other drivers can see you clearly and react accordingly.
If you have any doubts or are unsure about the process, it is always best to consult your vehicle’s owner’s manual or seek professional assistance. They can provide you with specific instructions and guidance based on your vehicle’s make and model.
Changing a car light bulb is a simple maintenance task that can be done at home with minimal tools and materials. By being proactive in replacing burnt-out bulbs, you can maintain a safer driving experience for yourself and others on the road.
Thank you for reading this comprehensive guide on changing car light bulbs. Now go out there, confidently replace those bulbs, and enjoy a well-lit and safe journey!
Frequently Asked Questions about How To Change Car Light Bulb
Was this page helpful?
At Storables.com, we guarantee accurate and reliable information. Our content, validated by Expert Board Contributors, is crafted following stringent Editorial Policies. We're committed to providing you with well-researched, expert-backed insights for all your informational needs.


0 thoughts on “How To Change Car Light Bulb”