
Articles
How To Change Light Bulb With Cover
Modified: August 31, 2024
Learn how to change a light bulb with a cover easily with our informative articles.
(Many of the links in this article redirect to a specific reviewed product. Your purchase of these products through affiliate links helps to generate commission for Storables.com, at no extra cost. Learn more)
Introduction
Changing a light bulb may seem like a simple task, but when it comes to replacing a light bulb with a cover, things can get a bit more complicated. Light bulb covers are commonly found in ceiling fixtures, lamps, and various other lighting fixtures. These covers not only provide an aesthetically pleasing look but also serve to protect the bulb from dust, dirt, and accidental damage.
Understanding how to change a light bulb with a cover is essential for every homeowner or DIY enthusiast. Whether you’re replacing a burnt-out bulb or upgrading to a more energy-efficient option, knowing the proper steps will save you time and frustration. In this article, we will guide you through the process of changing a light bulb with a cover, providing you with the knowledge and confidence to handle this task with ease.
Before we dive into the step-by-step instructions, let’s first familiarize ourselves with the different types of light bulb covers you may encounter. There are typically two main types: screw-on covers and clip-on covers. Screw-on covers require twisting or unscrewing to remove, while clip-on covers can be removed by gently prying or releasing the clips that hold them in place.
Now, let’s gather the necessary tools and materials to ensure a smooth and successful light bulb replacement.
Key Takeaways:
- Safely and efficiently change a light bulb with a cover by following step-by-step instructions, prioritizing safety, and using the right tools. Enjoy a well-lit space with renewed brightness and functionality.
- Understanding the purpose and characteristics of light bulb covers is essential for successful replacement. Prioritize safety, handle bulbs with care, and seek professional assistance if needed for a seamless process.
Read more: How To Change A Light Bulb
Understanding the Light Bulb Cover
The light bulb cover, also known as a lamp shade or bulb enclosure, is a protective element that surrounds the light bulb. It serves several purposes, such as diffusing the light, preventing glare, and adding a decorative touch to the lighting fixture. Additionally, the cover acts as a barrier, keeping dust, dirt, and other debris away from the bulb, which helps to prolong its lifespan.
Light bulb covers come in various shapes, sizes, and materials to complement different styles of lighting fixtures. Common materials include glass, plastic, metal, and fabric. Glass covers are often used in more traditional or elegant designs, while plastic covers are more commonly found in modern or practical lighting fixtures.
The design of the cover can greatly impact the distribution and intensity of light in a room. Some covers have translucent or frosted finishes, which diffuse the light and create a soft, ambient glow. Others have open, lattice-like patterns that create interesting patterns and shadows on the surrounding walls and ceiling. The choice of cover will depend on personal preference and the desired lighting effect.
It’s important to note that while light bulb covers add beauty and functionality to a lighting fixture, they can also pose a challenge when it comes to changing the bulb. Unlike uncovered bulbs, which can be easily accessed and replaced, covers require additional steps to remove and replace the bulb. However, with the right approach and proper tools, this task can be accomplished without much difficulty.
Now that we have a better understanding of the purpose and characteristics of light bulb covers, let’s move on to the tools and materials you will need to successfully change a light bulb with a cover.
Tools and Materials Needed
Before you begin the process of changing a light bulb with a cover, it’s important to gather the necessary tools and materials. Having everything prepared ahead of time will make the task much easier and more efficient. Here’s a list of what you’ll need:
1. Step ladder or sturdy platform: Since most light fixtures are mounted on ceilings or in high places, having a step ladder or sturdy platform will help you reach the fixture safely and comfortably. Ensure that the ladder or platform is stable and secure before climbing on it.
2. Safety gloves: It’s always a good idea to wear safety gloves when handling light bulbs. Gloves provide protection against accidental breakage and minimize the risk of cuts or injury from sharp edges.
3. Replacement bulb: Select a bulb that is compatible with your lighting fixture and meets your desired brightness and energy efficiency requirements. Check the wattage and bulb type (incandescent, LED, CFL) recommended by the manufacturer of the fixture.
4. Screwdriver or pliers (if necessary): Depending on the type of light bulb cover, you may need a screwdriver or pliers to loosen any screws or fasteners that hold the cover in place. This is typically required for screw-on covers.
5. Cleaning cloth: Dust and debris can accumulate on the cover over time. Having a cleaning cloth handy will allow you to wipe away any dirt before removing and replacing the bulb.
6. Optional: Light bulb changer tool or suction cup: If your light fixture is located in a high ceiling or in a hard-to-reach area, using a light bulb changer tool or suction cup can simplify the process. These tools provide a secure grip on the bulb, allowing you to remove and replace it without straining or stretching too far.
By having these tools and materials ready, you’ll have everything you need to safely and effectively change a light bulb with a cover. With that in mind, let’s move on to the step-by-step instructions on how to change the light bulb.
Step 1: Turn Off the Power Supply
Before you begin any work on your lighting fixture, it’s crucial to ensure your safety by turning off the power supply. Working with electricity can be dangerous, so take the following precautions:
1. Locate the circuit breaker: Find the circuit breaker that corresponds to the room or area where the light fixture is located. It is usually located in the main electrical panel of your home.
2. Switch off the power: Flip the corresponding circuit breaker to the off position. This will cut off power to the fixture and make it safe to proceed with the bulb replacement.
3. Double-check the power: Use a non-contact voltage tester to confirm that there is no electric current flowing to the fixture. This handy device will detect the presence of electricity without making direct contact with the wires.
4. Consider additional safety measures: If there are multiple light switches controlling the same fixture, tape them in the off position or notify other family members or occupants to avoid accidentally turning on the light while you are working on it.
Taking the time to turn off the power supply will prevent any accidental shocks or electrical mishaps. While it may seem like an extra step, it is essential for your safety. Once you have confirmed that the power is off, you can proceed to the next step: allowing the bulb to cool down.
Step 2: Allow the Bulb to Cool Down
After turning off the power supply, it’s important to give the light bulb enough time to cool down before attempting to remove it. Light bulbs can become hot, especially if they have been recently in use. Allowing the bulb to cool will prevent any burns or injuries caused by touching a hot surface. Follow these steps to ensure a safe and successful bulb replacement:
1. Wait for at least 10 minutes: Give the light bulb sufficient time to cool down. Waiting for 10 to 15 minutes should be enough for the bulb to reach a safe temperature for handling.
2. Test the bulb’s temperature: Use the back of your hand to check if the bulb is still warm. If you feel any residual heat, wait a few more minutes until it has completely cooled down.
3. Proceed with caution: Handling a hot bulb can increase the risk of injury. Always prioritize safety when working with any type of lighting fixture.
By allowing the bulb to cool down, you minimize the risk of burns and ensure a safe working environment. Once you have confirmed that the bulb is cool to touch, you can move on to the next step: locating and removing the cover.
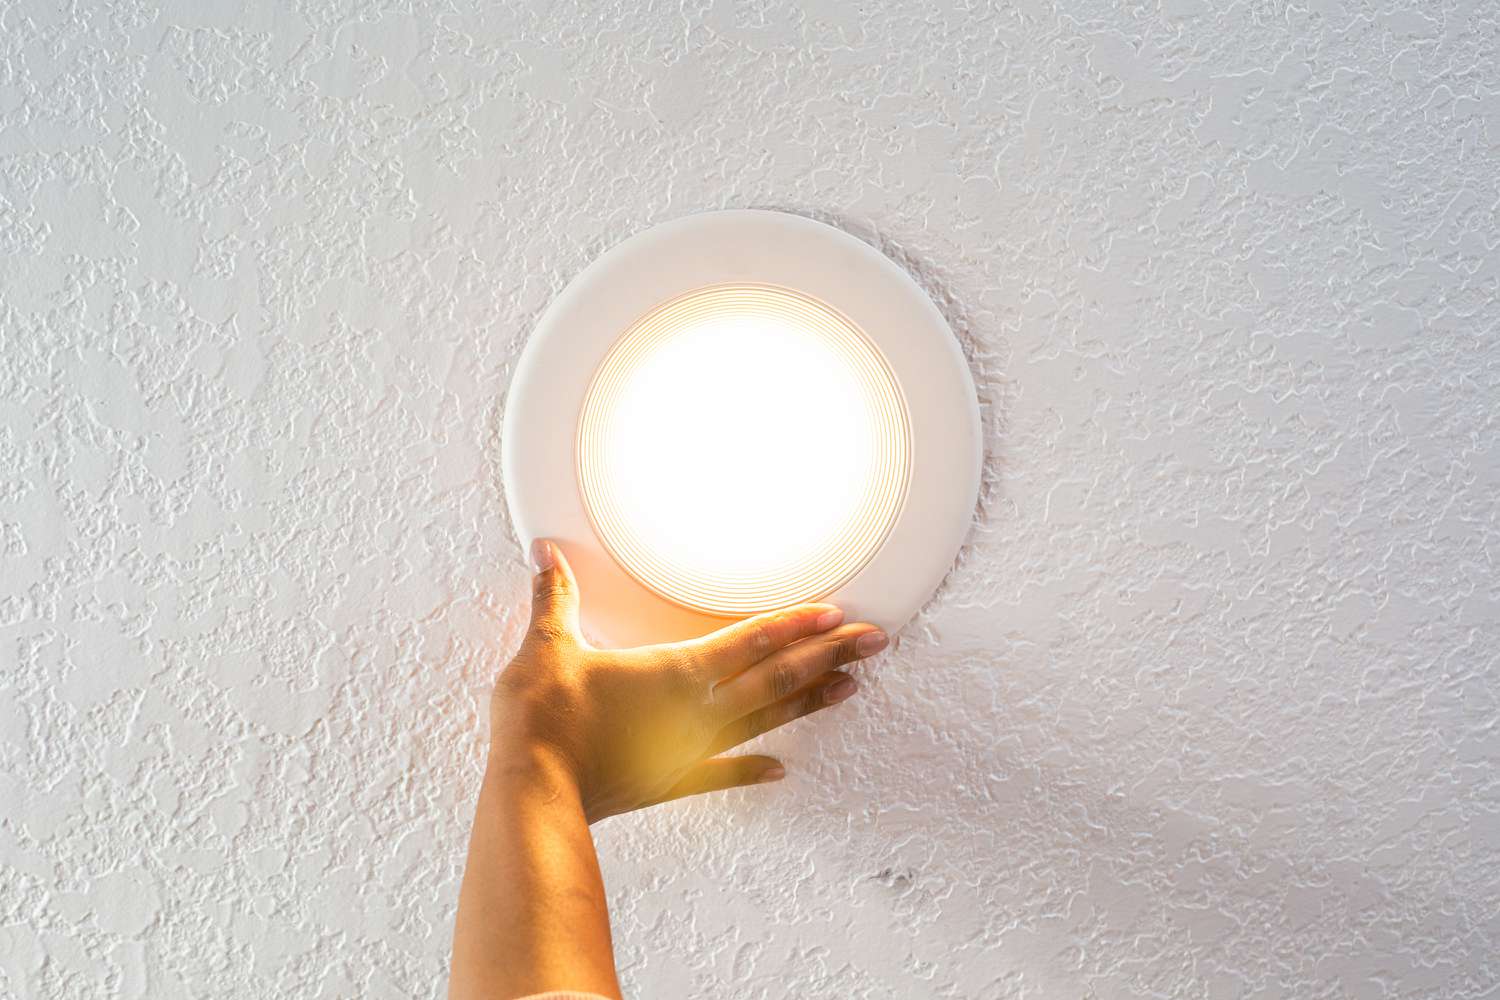
Step 3: Locate and Remove the Cover
Now that the bulb has cooled down, it’s time to locate and remove the cover. The process may vary depending on the type of light bulb cover you have. Whether it’s a screw-on cover or a clip-on cover, here are the general steps to follow:
1. Inspect the cover: Take a close look at the light fixture and identify the type of cover it has. Look for any screws, clips, or fasteners that are holding the cover in place.
2. Screw-on cover: If you have a screw-on cover, you’ll need to use a screwdriver to loosen the screws. Carefully rotate them counterclockwise until they are loose enough for the cover to be removed. Set the screws aside in a safe place, as you’ll need them later when attaching the new bulb.
3. Clip-on cover: For a clip-on cover, gently press or squeeze the clips that hold the cover in place. This will release the tension and allow you to remove the cover. Be cautious not to apply too much force, as it may cause the clips to break.
4. Remove the cover: Once the screws or clips have been loosened, gently pull the cover downward or twist it counterclockwise (depending on the type of cover) to release it from the fixture. Take extra care not to drop or damage the cover during removal.
5. Set aside the cover: Place the cover in a safe location where it won’t get scratched or damaged. You may want to clean the cover at this point using a soft cloth or mild cleaning solution if it has accumulated any dirt or dust.
By following these steps, you should be able to locate and successfully remove the cover. Take your time and be gentle while handling the cover to avoid any unnecessary damage. Now, let’s move on to the next step: removing the old bulb.
When changing a light bulb with a cover, make sure to turn off the power to the fixture before removing the cover. Use a step stool if needed and handle the cover carefully to avoid any damage.
Step 4: Remove the Old Bulb
With the cover successfully removed, it’s time to move on to the next step: removing the old bulb. It’s important to handle the bulb with care to prevent breakage or injury. Follow these steps to safely remove the old bulb:
1. Prepare a safe space: Find a stable surface or container where you can place the old bulb after removal. A small box or tray can be handy for holding the bulb during the process.
2. Firmly grip the bulb: Using a gentle but firm grip, hold the base of the bulb and carefully twist it counterclockwise. Most bulbs have a standard thread system, so turning it in the opposite direction will loosen and detach it from the socket.
3. Remove the bulb from the socket: Once the bulb is loose, continue twisting until you can easily lift it out of the socket. Avoid pulling on the bulb abruptly, as this can cause it to break or shatter.
4. Check for any signs of damage: Inspect the bulb for any signs of damage, such as cracks or blackened areas. If you notice any damage, it’s important to dispose of the bulb properly and replace it with a new one.
5. Place the old bulb in a safe container: After removing the old bulb, carefully place it in a container designated for proper disposal. Check your local regulations for the appropriate method of disposing of incandescent, LED, or CFL bulbs.
By following these steps, you can safely and effectively remove the old bulb from the socket. Remember to handle the bulb with caution and avoid touching the glass surface to minimize the chances of breakage. Now, let’s move on to the next step: inserting the new bulb.
Step 5: Insert the New Bulb
Now that the old bulb has been safely removed, it’s time to insert the new bulb into the socket. Follow these steps to ensure a successful installation:
1. Check the wattage and bulb type: Before inserting the new bulb, take a moment to double-check that it matches the recommended wattage and bulb type specified by the manufacturer of the fixture. Using the wrong bulb can lead to poor performance or even damage to the fixture.
2. Hold the new bulb by the base: When handling the new bulb, make sure to hold it by the base and avoid touching the glass surface. Oils from your skin can create hot spots on the bulb, reducing its lifespan.
3. Align the base with the socket: Position the base of the new bulb directly over the socket. Ensure that the bulb is aligned properly and ready for insertion.
4. Gently twist the bulb clockwise: Begin rotating the new bulb in a clockwise direction. Slowly thread it into the socket, being careful not to cross-thread or apply excessive force. The bulb should glide smoothly into place.
5. Tighten the bulb securely: Continue twisting the bulb until it is firmly in place. This will ensure a proper connection and prevent any loose fitting.
6. Avoid over-tightening: While it’s important to securely tighten the bulb, be cautious not to over-tighten. Tightening it excessively can lead to damage or breakage.
By following these steps, you can successfully insert the new bulb into the socket. Remember to handle the bulb with care and secure it properly to ensure a safe and effective lighting solution. Now that the new bulb is in place, let’s move on to the next step: replacing the cover.
Step 6: Replace the Cover
With the new bulb securely installed, it’s time to replace the cover. The cover not only adds a decorative element to the lighting fixture but also provides protection for the bulb. Follow these steps to properly replace the cover:
1. Align the cover with the fixture: Position the cover over the fixture, ensuring that it aligns properly with the openings or slots intended for attachment.
2. Screw-on cover: If you have a screw-on cover, locate the screw holes on the fixture and align them with the corresponding holes on the cover. Insert the screws and use a screwdriver to tighten them in a clockwise direction until they are snug but not overly tight.
3. Clip-on cover: For a clip-on cover, gently press or squeeze the cover against the fixture to engage the clips. Listen for a clicking or snapping sound, which indicates that the clips have securely fastened the cover in place.
4. Test the cover’s stability: Once the cover is in position, give it a gentle shake or tap to ensure it is securely attached. If it feels loose or unstable, double-check that all screws or clips are properly fastened.
5. Inspect the cover for alignment and stability: Take a step back and visually inspect the cover to ensure it sits evenly and securely on the fixture. Make any necessary adjustments to ensure a proper fit and aesthetic appeal.
By following these steps, you can successfully replace the cover and restore the fixture to its original appearance. A properly secured cover not only enhances the overall look of the lighting fixture but also provides important protection for the bulb. Now that the cover is back in place, let’s move on to the final step: turning on the power supply.
Read more: How To Change A Brake Light Bulb
Step 7: Turn On the Power Supply
After successfully replacing the cover, it’s time to restore power to the lighting fixture. Before doing so, double-check that you have completed all the previous steps correctly and ensured the safety of your work area. Here’s how to turn on the power supply:
1. Return to the electrical panel: Locate the circuit breaker that corresponds to the room or area where the lighting fixture is located.
2. Flip the circuit breaker: Carefully switch the circuit breaker back to the “on” position. This will restore power to the fixture.
3. Verify the functionality: Once the power is restored, test the functionality of the light bulb by flipping the wall switch or operating the switch specific to the fixture. The light should turn on without any issues.
4. Check for any problems: Observe the light bulb to ensure it is functioning properly. If there are any flickering lights, dimness, or other issues, turn off the power supply again and recheck the installation of the bulb, cover, and connections.
5. Rejoice in your successful bulb replacement: Congratulations! You have successfully changed the light bulb with a cover. Enjoy the renewed illumination and the ambiance it adds to your space.
Remember to exercise caution when working with electrical components and follow all safety procedures. If issues persist or you encounter any difficulties during the process, it’s recommended to consult a professional electrician for assistance.
By following these steps, you can confidently turn on the power supply and enjoy the bright, well-lit space with your newly replaced bulb. Always prioritize safety and double-check your work before completing the process.
Safety Precautions to Keep in Mind
When performing any tasks involving electricity, it’s crucial to prioritize safety. Here are some important safety precautions to keep in mind while changing a light bulb with a cover:
1. Turn off the power supply: Before starting any work, always turn off the power supply to the lighting fixture. This will prevent the risk of electrical shock or injury.
2. Allow the bulb to cool down: Before removing the cover or replacing the bulb, give the bulb enough time to cool down. This will prevent burns or injuries caused by hot surfaces.
3. Use a stable platform: When working with fixtures positioned at a height, ensure you have a stable platform, such as a step ladder, to reach the fixture safely. Make sure the ladder or platform is secure and firmly positioned on the ground.
4. Wear safety gloves: It’s recommended to wear safety gloves when handling bulbs to protect your hands from cuts and to prevent oils from your skin from damaging the bulb.
5. Avoid touching the bulb with bare hands: When handling light bulbs, avoid touching the glass surface with bare hands. Oils from your skin can lead to hot spots on the bulb, reducing its lifespan.
6. Use the correct wattage and bulb type: Always use the correct wattage and bulb type as recommended by the manufacturer of the lighting fixture. Using the wrong bulb can cause safety hazards, poor performance, or damage to the fixture.
7. Dispose of old bulbs properly: Handle and dispose of old bulbs with care. Check local regulations for proper disposal methods of incandescent, LED, or CFL bulbs. Some bulbs may contain hazardous materials and should not be thrown into regular trash.
8. Securely fasten the cover: Ensure that the cover is securely fastened to the fixture after replacing the bulb. Loose or unstable covers can pose a safety risk.
9. Check for any damage: Before installing a new bulb, inspect it for any cracks or damage. Damaged bulbs should be properly disposed of and replaced.
10. Consult a professional if needed: If you are unsure about any step of the process or encounter any electrical issues, it’s best to seek assistance from a qualified electrician.
By following these safety precautions, you can ensure a safe and successful light bulb replacement with a cover. Prioritizing safety will help protect yourself, prevent damage to the fixture, and maintain the functionality of the lighting system.
Conclusion
Changing a light bulb with a cover may seem like a daunting task, but armed with the right knowledge and tools, you can accomplish it safely and efficiently. Understanding the purpose of the light bulb cover and the different types available is essential for a successful replacement.
By following the step-by-step instructions provided in this article, you can confidently navigate each stage of the process. From turning off the power supply and allowing the bulb to cool down to locating and removing the cover, replacing the old bulb, and finally reattaching the cover and turning on the power supply, each step is important in achieving a seamless bulb replacement.
Remember to prioritize safety throughout the process. Use the appropriate tools, wear safety gloves if necessary, and ensure a stable platform when working at heights. Double-check that the power supply is turned off and that the bulb has cooled down before proceeding with any steps. Dispose of old bulbs properly and handle new bulbs with caution.
By adhering to these safety measures and taking care in each step, you can successfully change a light bulb with a cover and enjoy a well-lit space once again. If you ever feel unsure or encounter any difficulties, do not hesitate to seek assistance from a professional electrician.
So, go ahead and confidently tackle the task of changing a light bulb with a cover. Illuminate your home with a renewed brightness and enjoy the beauty and functionality of properly maintained lighting fixtures.
Now that you've mastered changing a light bulb with a cover, why not tackle more around your house? Keeping up with routine upkeep not only enhances your living space but also prevents future headaches. Dive into our detailed guide on essential upkeep tasks every homeowner should know. Whether you're new to home care or looking to refresh your skills, this article is packed with practical advice to keep your residence in top shape year-round.
Frequently Asked Questions about How To Change Light Bulb With Cover
Was this page helpful?
At Storables.com, we guarantee accurate and reliable information. Our content, validated by Expert Board Contributors, is crafted following stringent Editorial Policies. We're committed to providing you with well-researched, expert-backed insights for all your informational needs.


0 thoughts on “How To Change Light Bulb With Cover”