Articles
How To Clean A Small Water Pump
Modified: October 19, 2024
Learn effective methods for cleaning a small water pump in these informative articles. Discover expert tips and techniques to keep your pump running smoothly.
(Many of the links in this article redirect to a specific reviewed product. Your purchase of these products through affiliate links helps to generate commission for Storables.com, at no extra cost. Learn more)
Introduction
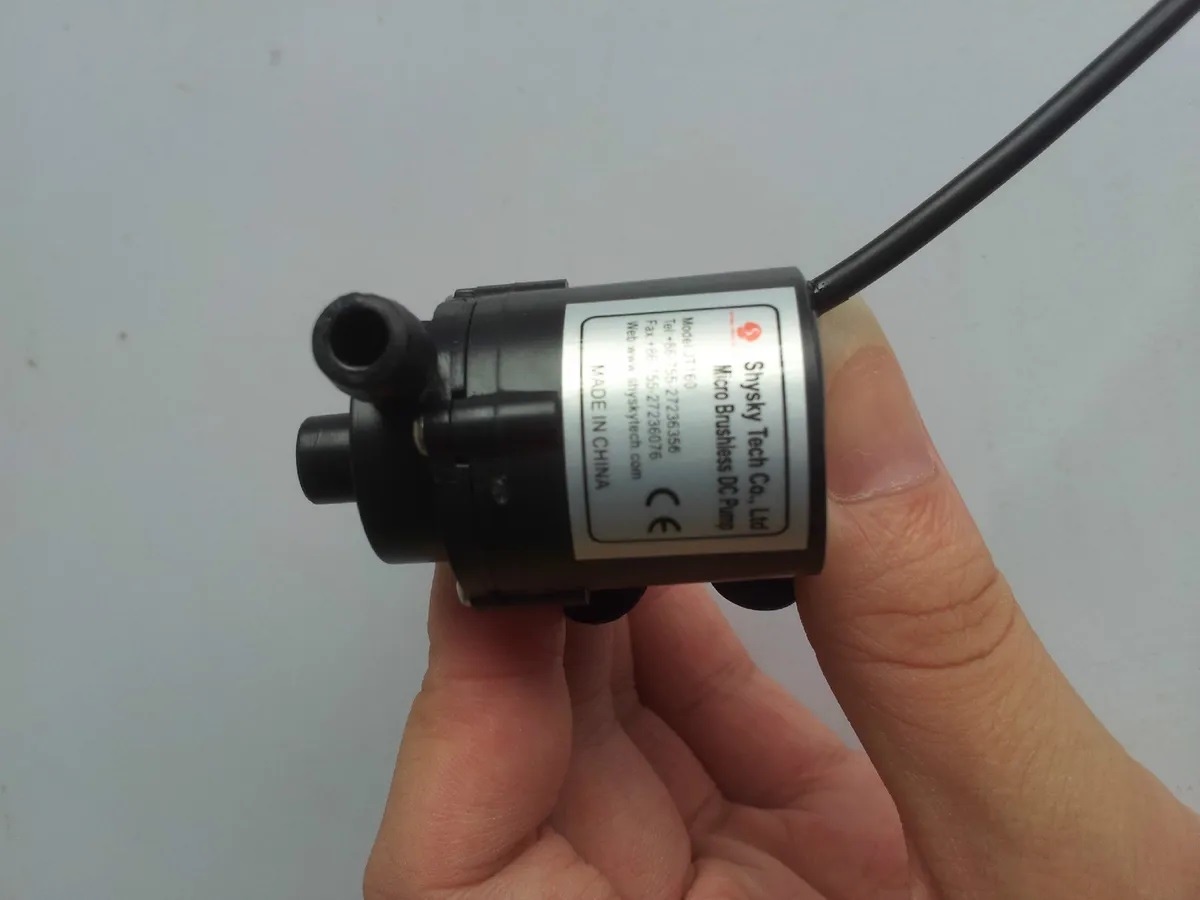
Welcome to our guide on how to clean a small water pump. Whether you have a fountain, aquarium, or any other water-based system, regular maintenance and cleaning of the pump are essential for optimal performance and longevity. Over time, the pump can accumulate debris, algae, and other impurities, which can affect its efficiency and potentially damage the system.
In this article, we will provide step-by-step instructions on how to effectively clean a small water pump. Before we dive into the process, it’s important to note that safety must always be a priority. Make sure to follow the safety precautions outlined below and use the appropriate tools.
By dedicating some time to cleaning your water pump, you can ensure that it continues to run smoothly, maintaining a healthy and clean environment for your aquatic or decorative setup. So, let’s get started with the necessary safety precautions before jumping into the cleaning process.
Key Takeaways:
- Regular cleaning and maintenance of small water pumps is crucial for optimal performance and longevity, ensuring a clean and healthy environment for aquatic or decorative setups.
- Prioritizing safety, gathering necessary supplies, following manufacturer’s guidelines, and thorough testing post-cleaning are essential steps for effective small water pump maintenance.
Read more: How To Clean Water Pump Filter
Safety Precautions
Before starting the cleaning process, it is crucial to keep in mind the following safety precautions:
- Disconnect the power source: To avoid any electrical accidents, make sure to unplug the pump from the power source before starting the cleaning process. This will ensure your safety and prevent any damage to the pump or injury to yourself.
- Wear protective gear: It’s always wise to wear protective gear such as gloves and safety glasses to protect your hands and eyes during the cleaning process.
- Work in a well-ventilated area: Cleaning a water pump may involve the use of cleaning agents or solutions. Make sure to work in a well-ventilated area to prevent any inhalation of fumes.
- Follow manufacturer’s instructions: Different water pumps may have specific cleaning instructions provided by the manufacturer. It is important to familiarize yourself with these guidelines and follow them accordingly to avoid any damage to the pump or voiding any warranties.
- Take note of water temperature: Depending on the type of pump and its specifications, certain parts may be temperature-sensitive. Ensure that the water is not too hot or cold when cleaning the pump to prevent any potential damage.
- Be cautious with sharp objects: When cleaning the pump, be mindful of any sharp objects or edges that could potentially cause injuries. Handle all tools and equipment with care.
By following these safety precautions, you can minimize the risks and ensure a safe and successful cleaning process. Now that we have covered the safety aspects, let’s move on to the next step: gathering the necessary supplies.
Gathering the Necessary Supplies
Before you begin the cleaning process, it’s important to gather all the necessary supplies. Having everything on hand will make the cleaning process more efficient and ensure you have everything you need. Here are the supplies you will need:
- Gloves: Wear a pair of gloves to protect your hands from any dirt, debris, or cleaning solutions.
- Safety glasses: It’s always a good idea to wear safety glasses to protect your eyes from any splashes or debris.
- Bucket: Use a bucket to collect water, debris, and cleaning solutions during the cleaning process.
- Soft brush or toothbrush: A soft brush or toothbrush will be helpful for gently scrubbing and removing any dirt or grime from the pump components.
- White vinegar or mild cleaning solution: White vinegar can be an excellent natural cleaning agent for removing mineral deposits or algae. Alternatively, you can use a mild cleaning solution recommended by the pump manufacturer.
- Old toothpicks or small brushes: These tools can be handy for cleaning small crevices or removing debris from hard-to-reach places in the pump.
- Microfiber cloth or soft towel: Use a microfiber cloth or soft towel to dry the pump and its components after cleaning.
- Owner’s manual: If you have the owner’s manual for your water pump, keep it handy. It may provide specific cleaning instructions or additional tips for maintaining the pump.
Once you have gathered all the necessary supplies, you are ready to move on to the next step: disconnecting the power source. It’s important to ensure the pump is not connected to any power source before starting the cleaning process to avoid any accidents. Let’s see how to do that in the next section.
Disconnecting the Power Source
Before you start cleaning the water pump, it is crucial to disconnect it from the power source. This step is essential to ensure your safety and prevent any electrical accidents. Follow these steps to disconnect the power source:
- Unplug the pump: If your water pump is plugged into a power outlet, unplug it from the socket. This will cut off the power supply to the pump.
- Turn off the circuit breaker: If your water pump is connected to a circuit breaker or an electrical panel, locate the corresponding switch and turn it off. This will provide an additional layer of safety by cutting off power at the circuit level.
- Remove batteries: If your pump is battery-operated, remove the batteries from the pump to ensure it is completely disconnected from any power source.
Once you have completed these steps, you can proceed with confidence, knowing that the water pump is safely disconnected from any power sources. In the next section, we will learn how to remove the pump housing in order to access the internal components for cleaning.
Removing the Pump Housing
Removing the pump housing is the next step in the cleaning process. This will allow you to access the internal components of the pump and thoroughly clean them. Follow these steps to remove the pump housing:
- Refer to the owner’s manual: If you have the owner’s manual for your water pump, consult it for specific instructions on how to remove the pump housing. Different pumps may have different mechanisms for housing removal, so it’s important to follow the manufacturer’s guidelines.
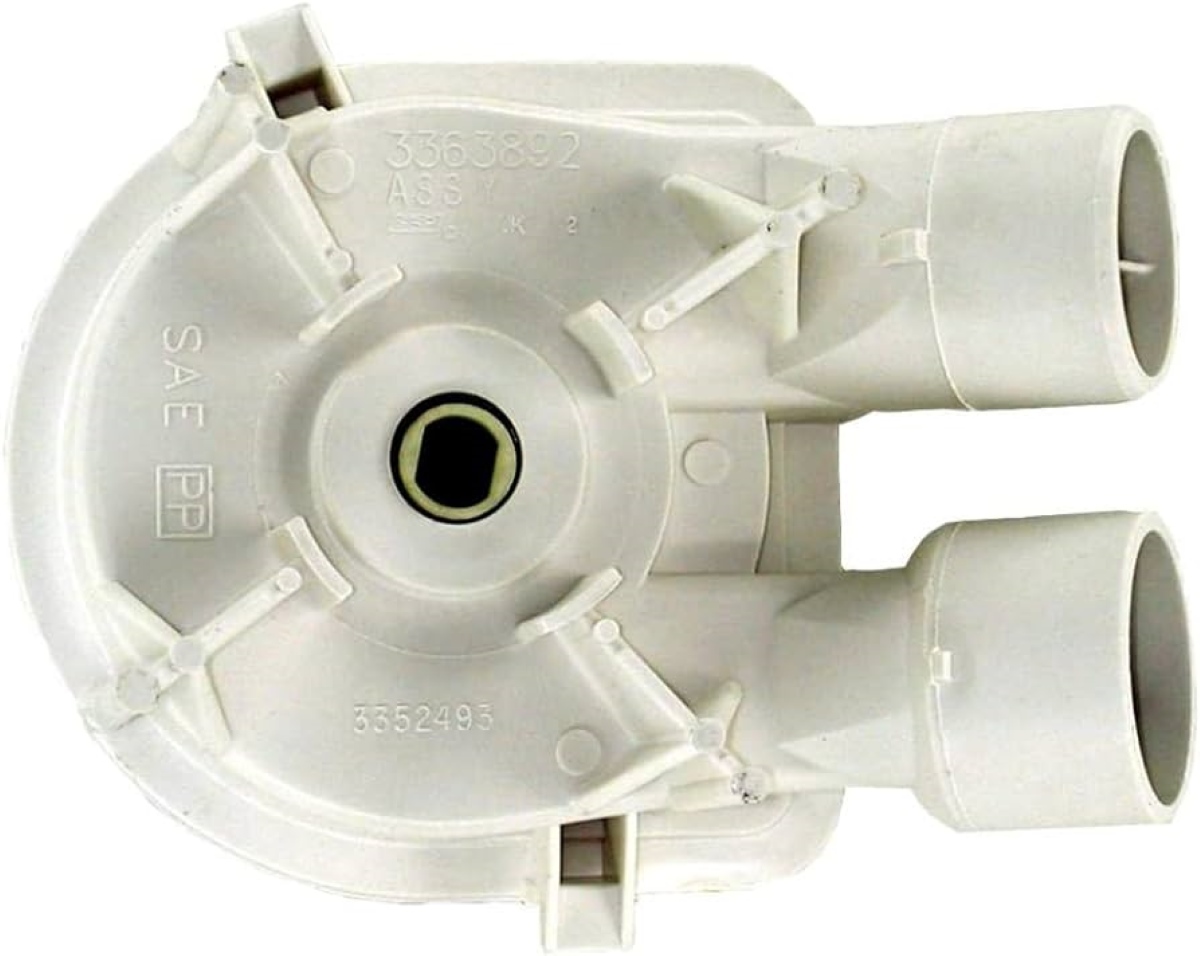
- Identify the housing: Look for the outer casing or cover that encloses the pump components. This housing is typically secured in place with screws or clips.
- Use the appropriate tools: Once you have located the housing, use the appropriate tools such as a screwdriver or pliers to remove the screws or unclip the housing.
- Gently remove the housing: Carefully lift or pull off the housing, taking note of any gaskets or seals that may be attached. Set the housing aside in a safe place where it won’t get damaged.
With the pump housing removed, you now have access to the internal components of the pump. In the next section, we will discuss how to clean the pump impeller, a crucial part of the pump that can accumulate debris and affect its performance.
Read also: 11 Best Small Water Pump for 2025
Cleaning the Pump Impeller
The pump impeller is a vital component of the water pump responsible for moving water through the system. Over time, it can become clogged with debris, affecting the pump’s efficiency. Cleaning the pump impeller is essential to ensure proper water flow and prevent any damage to the pump. Follow these steps to clean the pump impeller:
- Inspect the impeller: Take a close look at the impeller to identify any visible debris or blockage. Use a flashlight if necessary to get a better view.
- Remove any visible debris: Carefully use a pair of tweezers or small pliers to remove any visible debris, such as leaves, small rocks, or algae, from the impeller. Be gentle to avoid damaging the impeller.
- Soak in vinegar solution: Fill a container with a mixture of equal parts water and white vinegar. Submerge the impeller in this solution and let it soak for about 30 minutes. The vinegar will help dissolve any mineral deposits or stubborn buildup on the impeller.
- Gently scrub the impeller: After soaking, use a soft brush or an old toothbrush to gently scrub the impeller, removing any remaining debris or residue. Be careful not to apply excessive force or scrub too vigorously, as this could damage the impeller.
- Rinse the impeller: Once you have scrubbed the impeller, rinse it thoroughly with clean water to remove any leftover vinegar solution or loosened debris.
- Dry the impeller: Use a microfiber cloth or a soft towel to pat dry the impeller. Ensure it is completely dry before reassembling the pump.
Cleaning the pump impeller is an important step in maintaining the functionality of your water pump. In the next section, we will discuss how to clean the pump filter, another crucial component that can become clogged and affect the pump’s performance.
To clean a small water pump, start by disconnecting the power source and removing any debris from the intake screen. Then, use a brush and mild detergent to clean the pump housing and impeller. Rinse thoroughly before reassembling.
Cleaning the Pump Filter
The pump filter plays a vital role in trapping debris and preventing it from entering the pump. Over time, the filter can become clogged and restrict water flow, reducing the pump’s efficiency. Cleaning the pump filter is essential to maintain optimal performance. Follow these steps to clean the pump filter:
- Locate the pump filter: The filter is typically located near the pump intake or attached to the pump housing. Consult the owner’s manual if needed to locate the filter.
- Remove the filter: Depending on the type of filter, you may need to unscrew it, unclip it, or simply lift it out of its position. Follow the manufacturer’s instructions for proper filter removal.
- Inspect the filter: Examine the filter for any visible debris, such as leaves, small rocks, or algae. If the filter is washable, proceed to the next step. If it is damaged or disposable, replace it with a new filter.
- Rinse the filter: If the filter is washable, rinse it under running water to remove any loose debris. You can also use a soft-bristled brush to gently scrub the filter and dislodge any stubborn particles.
- Soak the filter: Prepare a container with a mixture of warm water and mild cleaning solution. Submerge the filter in this solution and let it soak for about 15-30 minutes. This helps to dissolve any built-up dirt or residue in the filter.
- Rinse and dry the filter: After soaking, rinse the filter thoroughly with clean water to remove any cleaning solution or loosened dirt. Gently squeeze or shake out any excess water, then set the filter aside to air dry completely.
- Reinstall the filter: Once the filter is dry, place it back in its original position. Ensure that it is securely attached or properly sealed.
Regularly cleaning the pump filter will help maintain optimal water flow and prolong the life of your water pump. In the next section, we will discuss how to flush the pump to remove any remaining debris and ensure thorough cleaning.
Flushing the Pump
Flushing the pump is an important step in the cleaning process as it helps to remove any remaining debris or cleaning solution residue. This step ensures a thorough cleaning and helps maintain the pump’s performance. Follow these steps to flush the pump:
- Submerge the pump in clean water: Fill a bucket or basin with clean water and submerge the pump in it. Make sure the water level is sufficient to cover the pump completely.
- Turn on the pump: Plug in the pump or turn on the power source to activate the pump. Let it run for a few minutes so that the clean water circulates through the pump and flushes out any remaining debris or cleaning residue.
- Monitor the water: During the flushing process, observe the water for any signs of debris or discoloration. If you notice any, continue running the pump until the water appears clean and clear.
- Empty and refill the water: Once the water appears clean, empty the bucket or basin and refill it with clean water. Submerge the pump in the fresh water again.
- Run the pump again: Repeat the process of turning on the pump and letting it run in the clean water for a few minutes. This will further rinse out any remaining debris or residue.
Flushing the pump ensures that any remaining dirt, cleaning solution, or debris is thoroughly removed, leaving the pump clean and ready for reassembly. In the next section, we will discuss how to reassemble the pump after cleaning.
Reassembling the Pump
After completing the cleaning process, it’s time to reassemble the water pump so that it can be put back into operation. Follow these steps to reassemble the pump:
- Refer to the owner’s manual: If you have the owner’s manual for your water pump, consult it for specific instructions on how to reassemble the pump. It may provide detailed guidance on the correct order and alignment of the components.
- Reattach the pump housing: Carefully position the pump housing back in place. Make sure all the gaskets or seals are properly aligned. Use the appropriate tools to secure the housing, such as screws or clips, following the manufacturer’s instructions.
- Reinstall the pump impeller: Place the cleaned impeller back into the pump, ensuring it fits properly and aligns with the impeller shaft. Gently push or screw it into place, depending on the design of your pump.
- Place the pump filter: If you removed the pump filter during the cleaning process, reinsert it back into its designated spot. Ensure that it fits securely and is properly seated.
- Double-check the connections: Ensure that all electrical connections are secure and well-insulated. Verify that any screws or clips used to secure the housing are tightened properly.
- Reconnect the power source: Once you have reassembled the pump, you can reconnect it to the power source. Plug it back into the power outlet or turn on the circuit breaker to supply power to the pump. If using batteries, insert them back into the pump.
- Test the pump: Finally, turn on the pump and observe its performance. Check for any leaks, abnormal sounds, or issues with water flow. If everything appears normal, you have successfully reassembled the pump.
By following these steps, you can ensure that the pump is properly reassembled and ready to resume its operation. In the next section, we will discuss the importance of testing the pump after cleaning and reassembling it.
Testing the Pump
After cleaning and reassembling the water pump, it is crucial to test its functionality before fully relying on it. Testing the pump ensures that it is working properly and can effectively circulate water without any issues. Follow these steps to test the pump:
- Ensure proper water level: Make sure the water level in your fountain, aquarium, or water-based system is sufficient to cover the pump. This will prevent the pump from running dry and potentially causing damage.
- Turn on the pump: Connect the pump to the power source and turn it on. Observe and listen carefully for any unusual sounds, vibrations, or leaks. Pay attention to the water flow rate and whether it is consistent with normal operation.
- Check for leaks: Inspect the pump and its connections for any signs of leakage. Look for water seepage or drips around the housing, inlet, outlet, or any other joints. If you spot a leak, immediately turn off the pump and address the issue before proceeding.
- Monitor performance: Observe the pump’s performance over a period of time. Ensure that it is maintaining proper water circulation and flow. Check if any water is being displaced or splashing out of the system. Adjust the pump settings if necessary to achieve the desired water flow and effect.
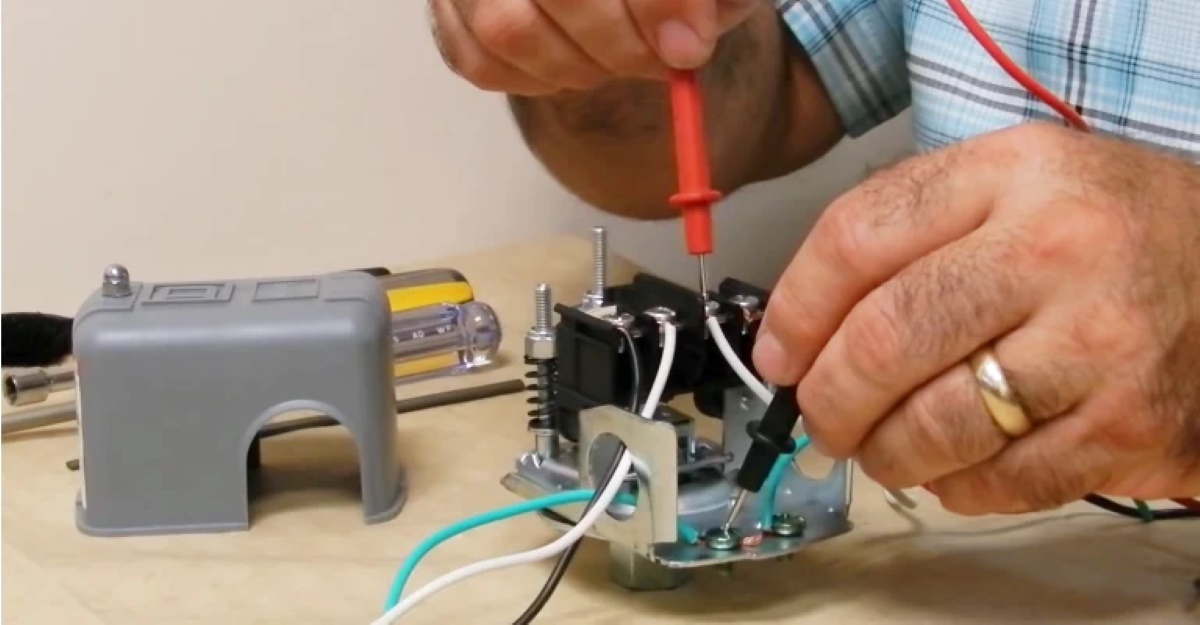
- Recheck electrical connections: Double-check that all electrical connections are secure and properly insulated. Make sure there are no exposed wires or loose connections that could pose a safety hazard.
- Monitor for the next few days: After initial testing, continue to monitor the pump’s performance over the next few days. Look for any recurring issues, unusual noises, or changes in water flow. Address any problems promptly to ensure the pump’s long-term functionality.
Testing the pump after cleaning and reassembling is essential to ensure that it is functioning correctly and ready for regular operation. By following these steps and addressing any issues that arise, you can have peace of mind knowing that your water pump is in optimal condition. In the concluding section, we will summarize the importance of regular pump cleaning and maintenance.
Conclusion
Cleaning a small water pump is an important maintenance task to ensure its optimal performance and longevity. Regular cleaning helps remove debris, algae, and other impurities that can accumulate over time and affect the pump’s efficiency. By following the step-by-step instructions outlined in this guide, you can effectively clean your water pump and maintain a clean and healthy environment for your aquatic or decorative setup.
Throughout the cleaning process, it is crucial to prioritize safety. Disconnecting the power source, wearing protective gear, and working in a well-ventilated area are essential precautions to prevent accidents and injuries.
Gathering the necessary supplies, including gloves, safety glasses, cleaning solutions, and brushes, is crucial to facilitate the cleaning process and achieve thorough results. Taking the time to gather all the supplies beforehand will make the cleaning process more efficient.
During the cleaning process, it is important to follow the manufacturer’s instructions and guidelines, especially when removing the pump housing, cleaning the impeller, and handling the pump filter. This will ensure that the components are properly cleaned and reassembled, without causing damage to the pump.
Flushing the pump with clean water and testing it after reassembly are vital steps to remove any remaining debris or cleaning solution residue and ensure that the pump is functioning correctly. Testing allows you to identify any leaks, abnormal sounds, or issues with water flow, giving you an opportunity to address them promptly.
By incorporating regular cleaning and maintenance of your small water pump into your routine, you can extend its lifespan, maintain its efficiency, and enjoy a clean and healthy water-based system.
Remember, always refer to the owner’s manual provided by the manufacturer for specific instructions and guidelines specific to your water pump model. Regular cleaning and proper maintenance will ensure that your small water pump continues to perform at its best and brings enjoyment to your aquatic or decorative setup for years to come.
Frequently Asked Questions about How To Clean A Small Water Pump
Was this page helpful?
At Storables.com, we guarantee accurate and reliable information. Our content, validated by Expert Board Contributors, is crafted following stringent Editorial Policies. We're committed to providing you with well-researched, expert-backed insights for all your informational needs.


0 thoughts on “How To Clean A Small Water Pump”