Articles
How To Clean Corrosion Off Light Socket
Modified: August 25, 2024
Learn effective techniques for removing corrosion from light sockets with these informative articles. Say goodbye to faulty connections and ensure optimal lighting performance.
(Many of the links in this article redirect to a specific reviewed product. Your purchase of these products through affiliate links helps to generate commission for Storables.com, at no extra cost. Learn more)
Introduction
Have you noticed that your light socket is not functioning properly? Are you experiencing dim or flickering lights? The culprit could be corrosion on the light socket. Corrosion can occur due to moisture, age, or poor maintenance, and it can prevent your light bulb from making a proper electrical connection, resulting in poor performance or even a complete failure of the light fixture. Fortunately, cleaning corrosion off a light socket is a relatively simple process that you can do yourself with just a few basic materials and a little bit of time.
In this article, we will guide you through the step-by-step process of cleaning corrosion off a light socket. We will also provide you with essential safety precautions to follow before beginning the cleaning process to ensure your well-being. By following our instructions, you can restore your light socket to its optimal functionality and enjoy bright and consistent lighting once again.
Please remember that working with electricity can be dangerous, and it is important to exercise caution and turn off the power before attempting any repairs or maintenance. If you are unsure or uncomfortable with the process, it is always best to consult a qualified electrician to avoid any potential hazards.
Now, let’s dive into the safety precautions you need to take before cleaning the corrosion off your light socket.
Key Takeaways:
- Safety first! Before tackling light socket corrosion, always turn off the power, wear protective gear, and inspect for damage. Following these precautions ensures a safe and effective cleaning process.
- With simple materials and careful steps, you can clean corrosion off light sockets, restoring optimal functionality and ensuring a bright, reliable, and safe lighting system in your home or office.
Read more: How To Clean Corroded Light Bulb Sockets
Safety Precautions
Before starting the process of cleaning corrosion off a light socket, it is crucial to prioritize safety. Working with electricity can be hazardous, so following these safety precautions is essential:
- Turn off the power: The first step is to turn off the electricity supply to the light fixture. Locate the breaker in your electrical panel that controls the specific circuit and switch it off.
- Use protective gear: To protect yourself from any potential harm, wear safety goggles and rubber gloves. This will prevent any accidental contact with electrical components or cleaning solutions.
- Allow the socket to cool down: If the light has been recently in use, let the light bulb and the socket cool down completely to avoid getting burned during the cleaning process.
- Inspect the socket for damage: Before starting the cleaning process, carefully examine the sockets for any visible signs of damage, such as cracks or frayed wires. If you notice any significant damage, it is best to consult a professional electrician for repair or replacement.
- Work in a well-ventilated area: Cleaning solutions emit fumes that can be harmful when inhaled. Ensure that you perform the cleaning in a well-ventilated area or open a window to allow fresh air circulation.
By following these safety precautions, you can minimize the risk of accidents or injuries while cleaning the corrosion off your light socket. Now that you are aware of the safety measures, let’s move on to the materials needed for the cleaning process.
Materials Needed
Before you begin the process of cleaning corrosion off a light socket, gather the following materials:
- Clean cloth or sponge
- Mild detergent or dish soap
- Baking soda
- Water
- Toothbrush or small brush
- Cotton swabs
- Rubber gloves
- Safety goggles
These materials will help you remove the corrosion effectively and safely. Be sure to have these items ready before proceeding with the cleaning process. Once you have gathered the necessary materials, you are ready to start cleaning. In the next steps, we will guide you through the process of cleaning corrosion off your light socket.
Remember to follow the safety precautions we mentioned earlier and take your time to complete each step. With a little effort, you can restore your light socket to its optimal condition and ensure that your lights shine brightly once again.
Now that you have all the materials you need, let’s move on to the first step: turning off the power.
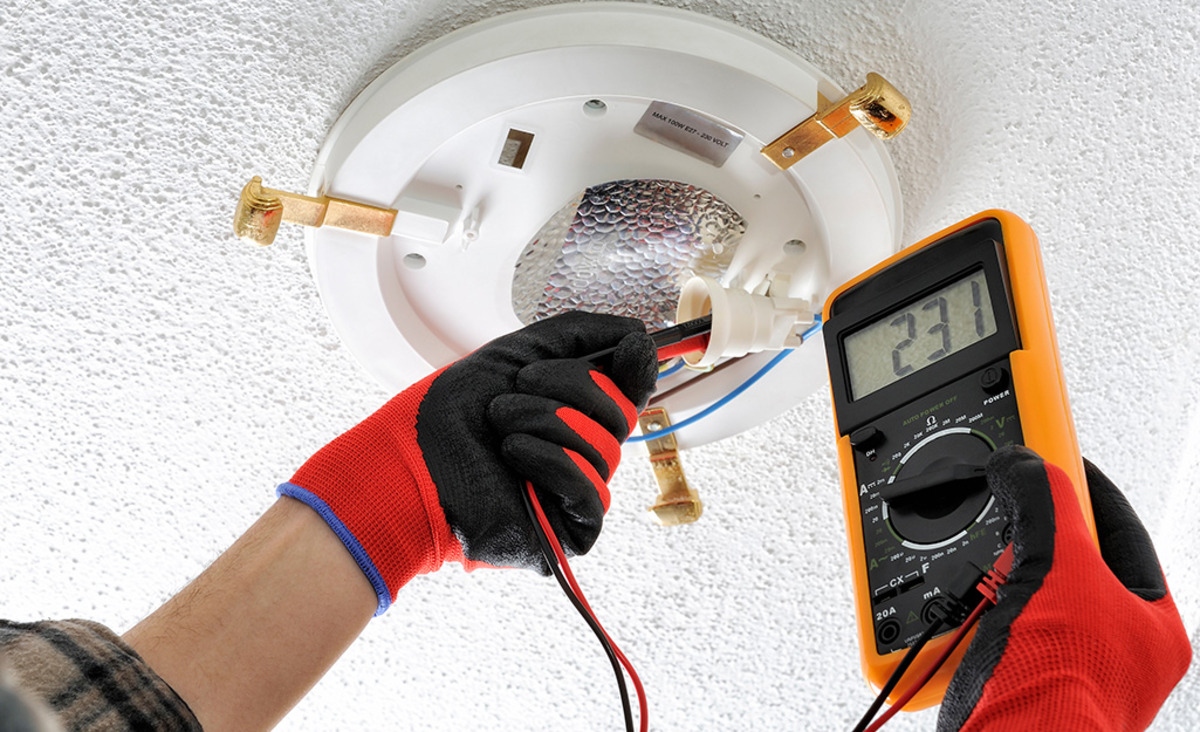
Step 1: Turn Off the Power
The first and most crucial step before cleaning corrosion off a light socket is to turn off the power to the fixture. Follow these steps to ensure your safety:
- Locate the breaker: Identify the correct breaker in your electrical panel that controls the circuit of the light fixture you will be working on. Usually, breakers are labeled, indicating which circuit they control. If you are uncertain, you can turn off the main power switch to ensure all electricity is cut off.
- Switch off the breaker: Once you have located the breaker, switch it to the “off” position to cut off the power supply to the light fixture. This will prevent any accidental electrical shocks while cleaning the socket.
- Verify power outage: To double-check that the power is off, try turning on the light switch connected to the fixture. If the light does not turn on, you can be confident that the power has been successfully disconnected.
It is crucial to ensure that the power is turned off before starting any work on the light socket. This step will protect you from any potential electrical hazards during the cleaning process.
With the power now safely turned off, you can proceed to the next step: removing the light bulb from the socket.
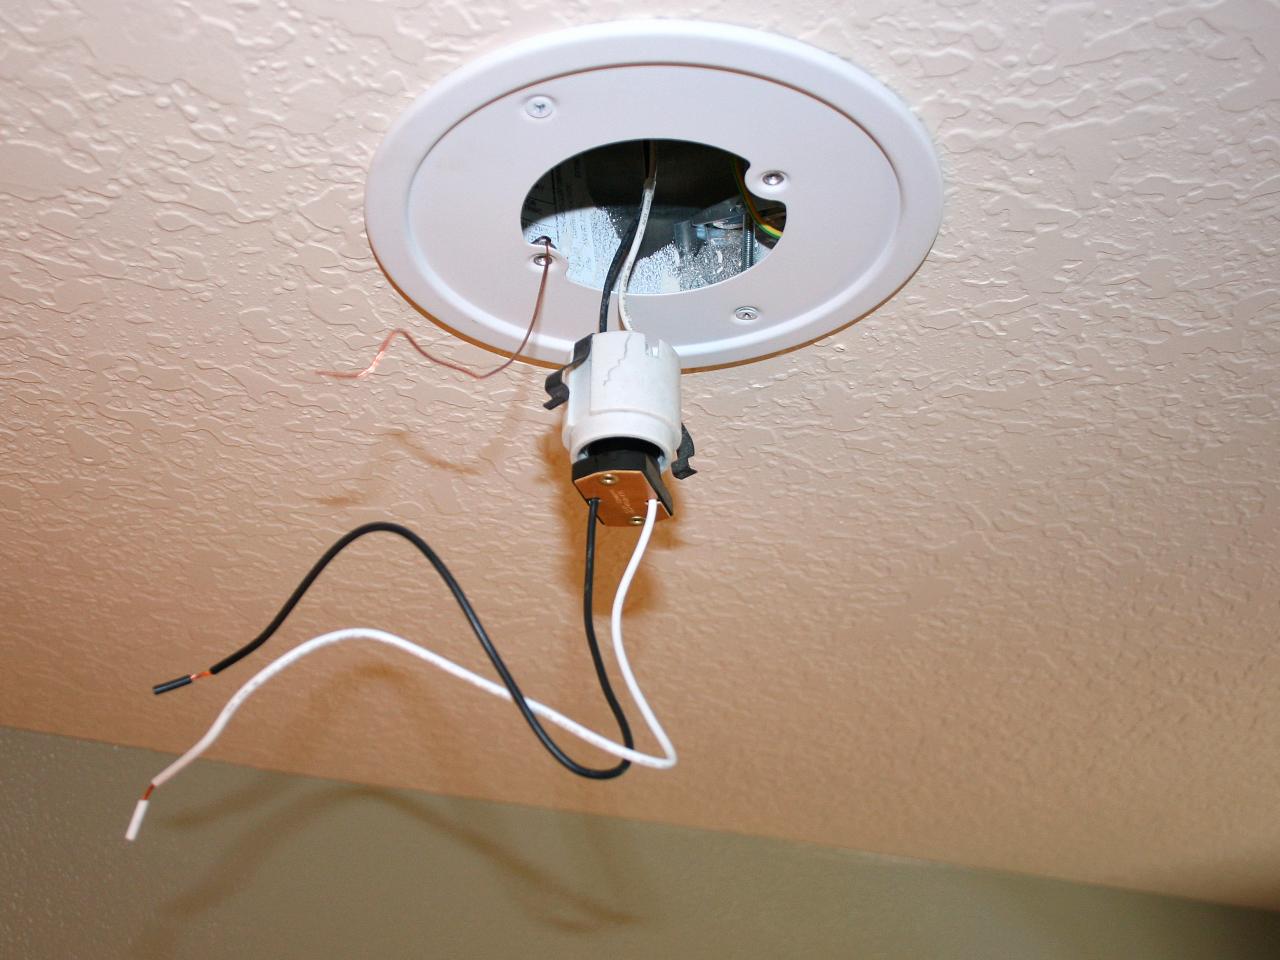
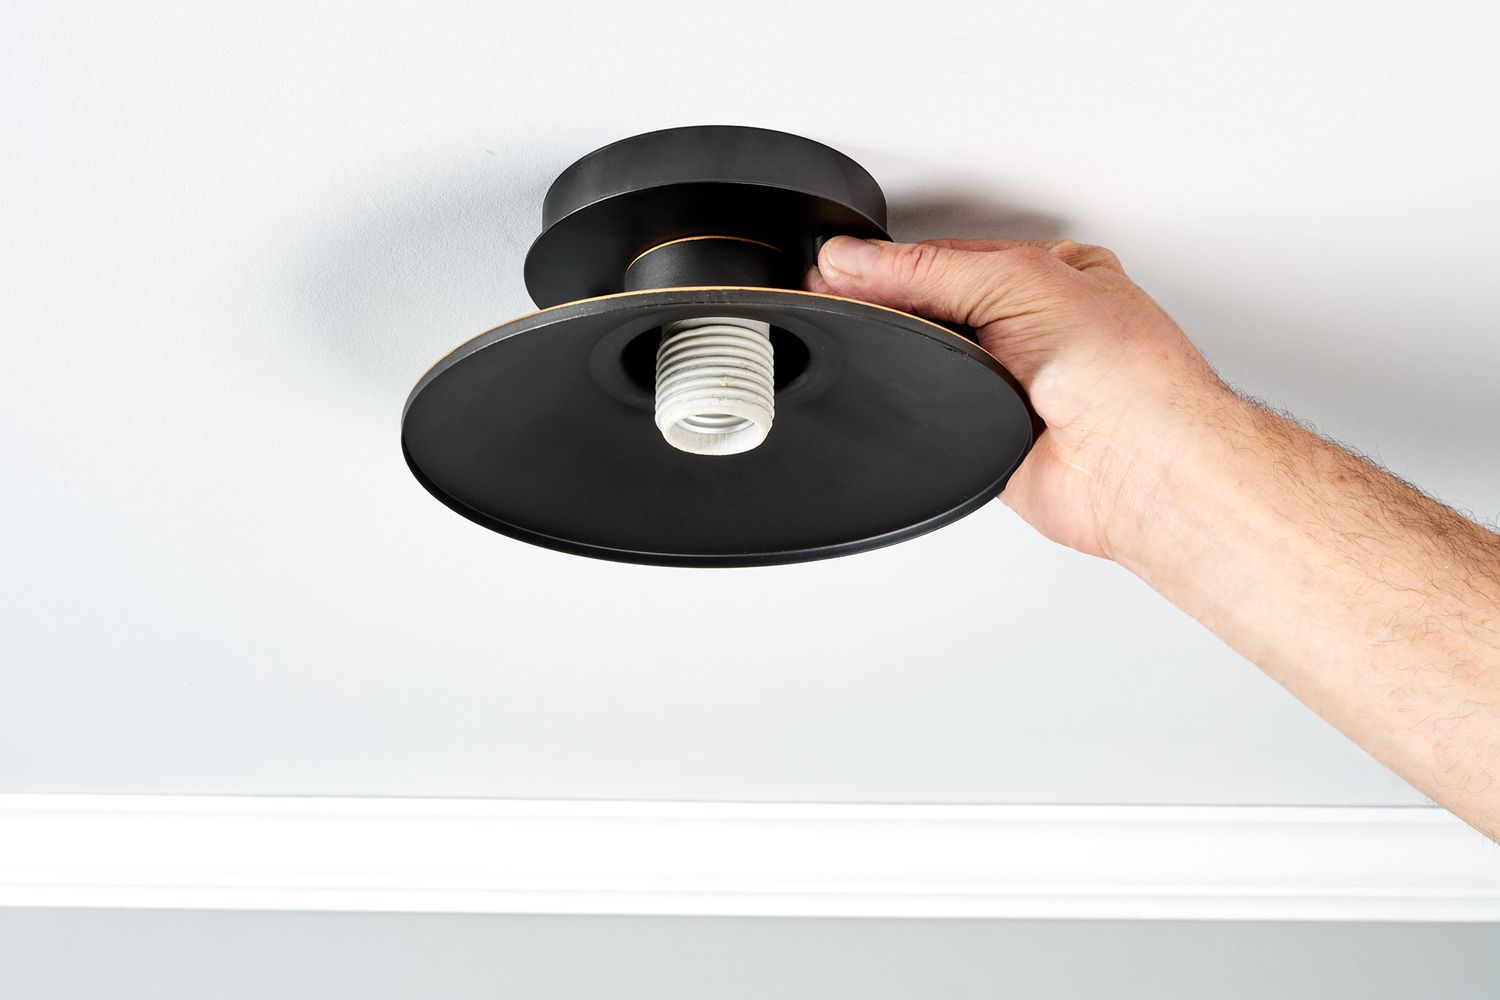
Step 2: Remove the Light Bulb
After turning off the power to the light fixture, the next step is to remove the light bulb from the socket. Follow these instructions to ensure a safe and successful removal:
- Ensure the light bulb is cool: Before attempting to remove the light bulb, make sure it has had sufficient time to cool down. Touch the bulb gently to check if it is no longer hot to the touch.
- Switch off any additional switches: If there are multiple switches controlling the same light fixture, make sure to turn them all off to prevent any accidental power supply while removing the bulb.
- Wear rubber gloves: To avoid any accidental cuts or burns, put on a pair of rubber gloves. This will provide protection and a secure grip while handling the light bulb.
- Unscrew the light bulb: Using a gentle counterclockwise motion, slowly turn the light bulb in the socket to loosen and remove it. Be careful not to apply excessive force that could cause the bulb to break or damage the socket.
- Set the bulb aside: Once the bulb is removed, set it aside in a safe place, away from the cleaning area. Take care not to drop or bump the bulb, as it can break and cause injury.
By following these steps, you can safely remove the light bulb from the socket without risking injury or damage. With the bulb safely set aside, you can now move on to inspect the socket for any visible signs of damage or corrosion in the next step.
Read more: How To Change Out A Light Socket
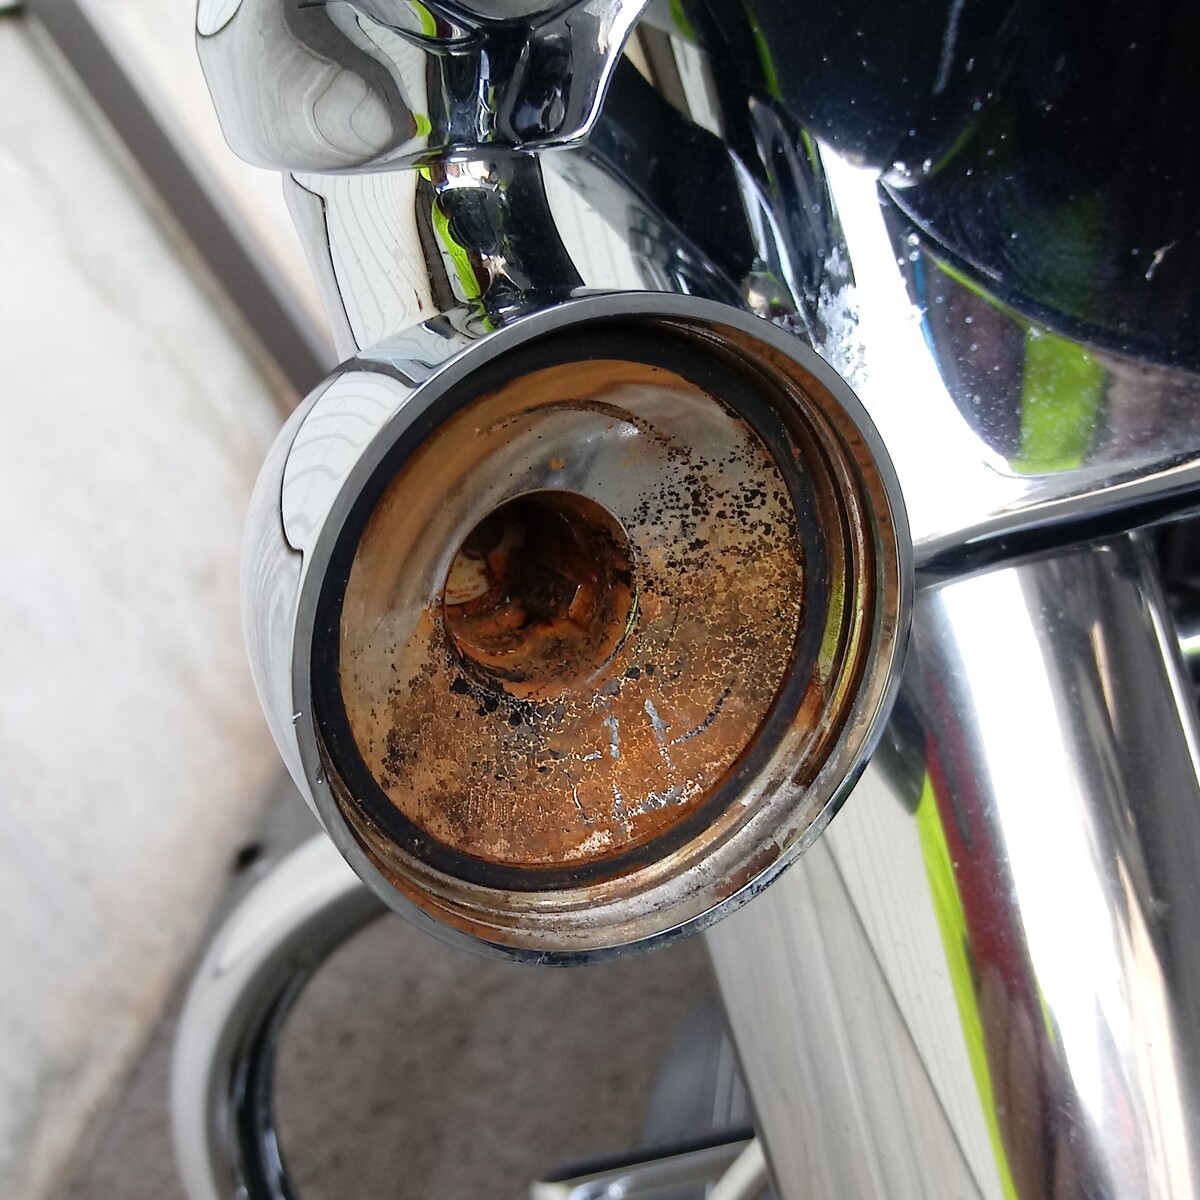
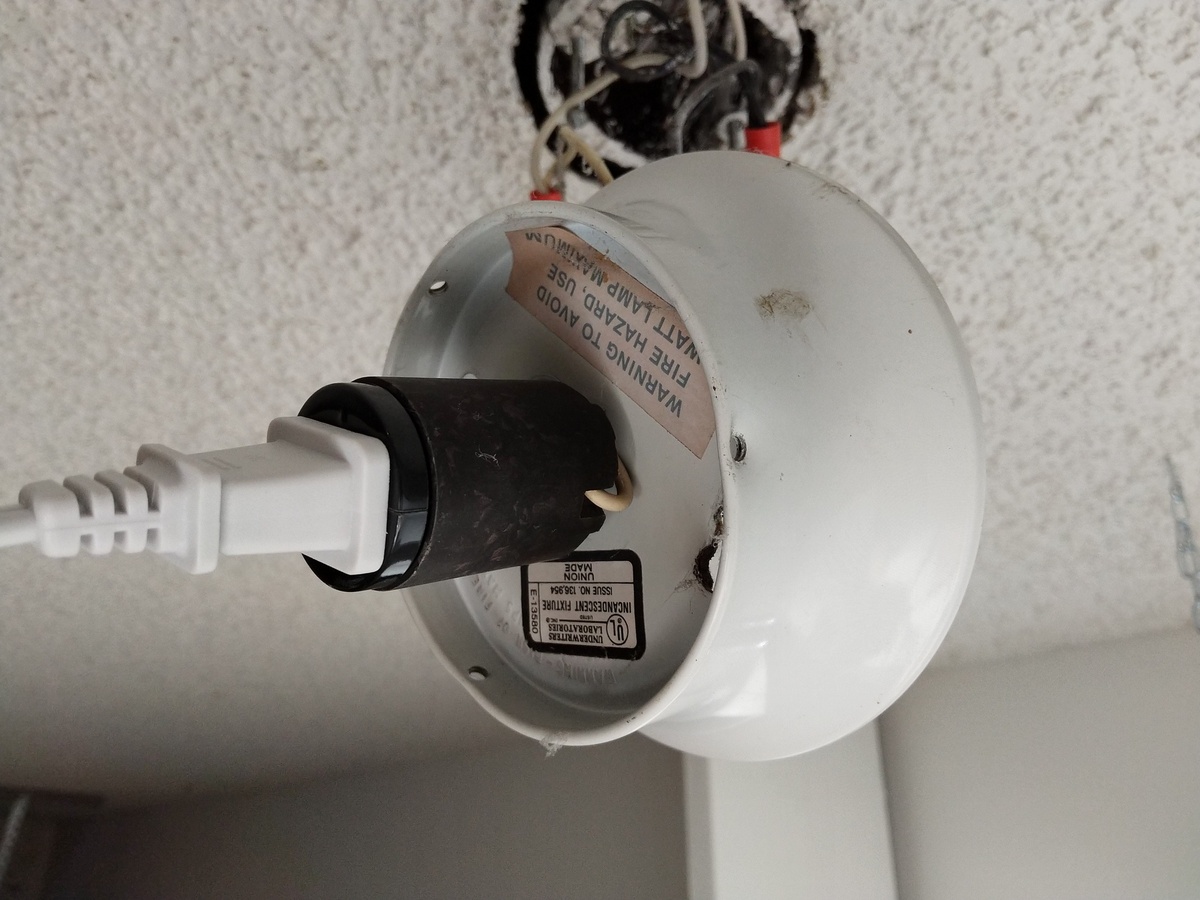
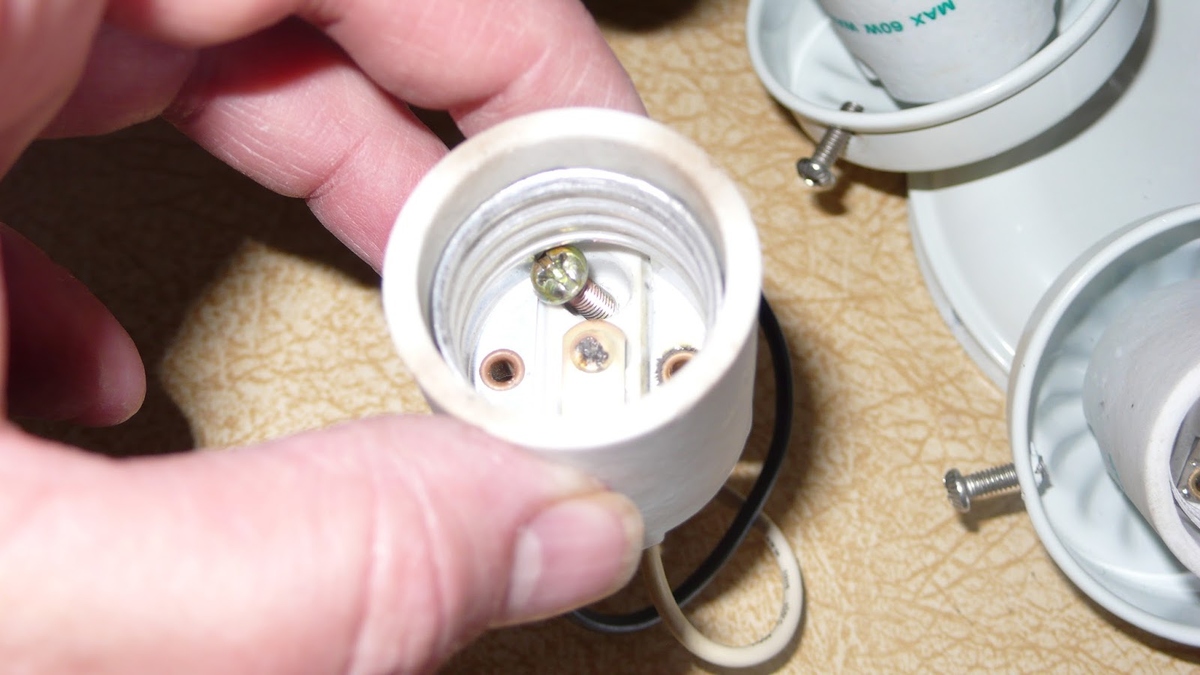
Step 3: Inspect the Socket for Damage
Once you have successfully removed the light bulb, it’s time to inspect the socket for any signs of damage or corrosion. This step is essential to assess the condition of the socket and determine the extent of the cleaning required. Follow these guidelines to inspect the socket:
- Examine the socket carefully: Inspect the socket for any visible signs of damage, such as cracks, charring, or frayed wires. If you notice any significant damage, it is best to consult a qualified electrician for repairs or replacement. Do not attempt to clean or use a damaged socket as it can be dangerous.
- Look for corrosion: Check for any corrosion or buildup on the metal contacts inside the socket. Corrosion usually appears as a greenish-brown or white powdery substance. If you notice a significant amount of corrosion, it will require thorough cleaning to restore the socket’s functionality.
- Test the socket: If there is no visible damage or significant corrosion, you can perform a quick test by inserting a different light bulb into the socket. Turn on the power briefly to see if the bulb operates properly. If it does, there may be only mild corrosion present, which can be easily addressed with cleaning.
By carefully inspecting the socket, you can identify any potential issues and determine the appropriate course of action. If you discover any significant damage or are unsure about the socket’s condition, it is recommended to seek professional assistance. Assuming there are no major issues, you can proceed to the next step, which involves preparing a cleaning solution.
Step 4: Prepare the Cleaning Solution
With the socket inspected and ready for cleaning, the next step is to prepare a cleaning solution that will effectively remove the corrosion. Follow these steps to create a simple yet effective cleaning solution:
- Gather the materials: To prepare the cleaning solution, you will need a clean container or bowl, mild detergent or dish soap, baking soda, and water.
- Fill the container: Fill the container or bowl with warm water. Ensure that there is enough water to submerge the socket fully.
- Add detergent or dish soap: Add a few drops of mild detergent or dish soap to the water. This will help loosen grease and grime from the socket.
- Add baking soda: Sprinkle a teaspoon of baking soda into the water and mix it thoroughly. Baking soda is known for its abrasive and cleansing properties, which will aid in removing the corrosion.
- Mix the solution: Stir the mixture well until the soap, baking soda, and water are thoroughly combined.
Once the cleaning solution is prepared, you are ready to move on to the next step: applying the solution to the corroded socket. Remember to wear rubber gloves and protective eyewear throughout the cleaning process for safety.
Use a mixture of equal parts water and vinegar to clean corrosion off a light socket. Soak a cotton swab in the solution and gently scrub the affected area. Be sure to let the socket dry completely before reattaching the bulb.
Step 5: Apply the Cleaning Solution
With the cleaning solution ready, it’s time to apply it to the corroded socket. Follow these steps to effectively clean the socket:
- Wet a clean cloth or sponge: Dip a clean cloth or sponge into the prepared cleaning solution. Make sure the cloth or sponge is damp but not dripping with excess liquid.
- Gently apply the solution: Carefully rub the damp cloth or sponge onto the corroded areas of the socket. Use gentle pressure and circular motions to effectively remove the corrosion buildup.
- Pay attention to hard-to-reach areas: Use a toothbrush or a small brush to reach any crevices or tight spots that the cloth or sponge cannot access. This will ensure thorough cleaning of the socket.
- Continue cleaning until the corrosion is removed: Keep applying the cleaning solution and scrubbing the socket until the corrosion is completely removed. Be patient and persistent, especially if the corrosion is extensive.
Remember to be careful and avoid using excessive force while cleaning the socket. The goal is to remove the corrosion, not cause damage to the socket. Take your time to ensure a thorough cleaning.
Once you are satisfied with the removal of corrosion from the socket, it’s time to move on to the next step: rinsing the socket to remove any residue from the cleaning solution.
Step 6: Scrub the Corrosion
Now that you have applied the cleaning solution to the corroded socket, it’s time to scrub away the remaining corrosion. This step will ensure that the socket is thoroughly cleaned and ready for use. Follow these steps to scrub the corrosion effectively:
- Select an appropriate tool: Choose a small brush, such as a toothbrush or a small cleaning brush, that can easily reach the crevices and corners of the socket.
- Dampen the brush: Wet the brush with a small amount of the cleaning solution for better scrubbing action.
- Scrub the corroded areas: Gently scrub the corroded areas of the socket using small circular motions. Apply moderate pressure to remove the remaining corrosion. Take your time and be thorough, ensuring you cover the entire socket surface.
- Pay attention to hard-to-reach spots: Focus on the areas where corrosion is more likely to accumulate, such as the metal contacts or the interior of the socket. Use the brush to reach these hard-to-reach areas and scrub away any stubborn corrosion.
- Rinse the brush frequently: Rinse the brush in clean water regularly to remove any loosened corrosion and prevent spreading it back onto the socket.
Continue scrubbing until the socket appears clean and free of corrosion. Take care not to damage the socket or its components while scrubbing. Once you are satisfied with the results, you can proceed to the next step: rinsing the socket to remove any residue from the cleaning process.
Read more: How To Replace Tail Light Socket
Step 7: Rinse the Socket
After thoroughly scrubbing the corroded areas of the socket, it’s important to rinse it to remove any residue from the cleaning solution and remaining corrosion. This step will ensure that the socket is clean and ready for further use. Follow these steps to rinse the socket effectively:
- Prepare clean water: Fill a clean container or bowl with warm water. Ensure that there is enough water to submerge the socket completely.
- Dip a clean cloth or sponge: Take a fresh clean cloth or sponge and dip it into the container of clean water. Make sure the cloth or sponge is damp and not overly wet.
- Gently wipe the socket: Use the damp cloth or sponge to gently wipe the socket, ensuring that you cover all areas. The water will help remove any remaining residue and traces of the cleaning solution.
- Pay attention to hard-to-reach spots: If there are any areas that are difficult to access with the cloth or sponge, use a cotton swab dampened with clean water to carefully clean these spots.
- Repeat if necessary: If the socket still feels sticky or shows signs of residue, repeat the rinsing process with a fresh cloth or sponge. This will ensure a thorough removal of any remaining residue.
Once you have rinsed the socket, it’s important to dry it thoroughly before proceeding to the next step. Moisture can lead to further corrosion if not properly dried.
Now that the socket is clean and rinsed, let’s move on to the next step: drying the socket.
Step 8: Dry the Socket
After rinsing the socket, it’s crucial to dry it thoroughly to prevent any moisture buildup that can lead to future corrosion. Follow these steps to ensure the socket is completely dry:
- Use a clean cloth: Take a clean, dry cloth or paper towel and gently pat the socket dry. Absorb any excess moisture, paying attention to all areas of the socket.
- Air-dry the socket: Allow the socket to air-dry for a few minutes to ensure all moisture evaporates. This step will help to prevent any residual moisture from lingering.
- Inspect for moisture: Make sure the socket is completely dry before moving on to the next step. Check for any signs of residual moisture, such as dampness or water droplets. If necessary, use a hairdryer on a low setting to blow warm air into the socket to aid in the drying process.
- Avoid reinstallation until dry: Do not reinstall the light bulb or restore power until you are confident that the socket is completely dry. This will ensure the safety and proper functioning of the light fixture.
By taking the time to thoroughly dry the socket, you can prevent any moisture-related issues and ensure the longevity of the repaired socket. Once you are confident that the socket is dry, you can proceed to the next step: reinstalling the light bulb.
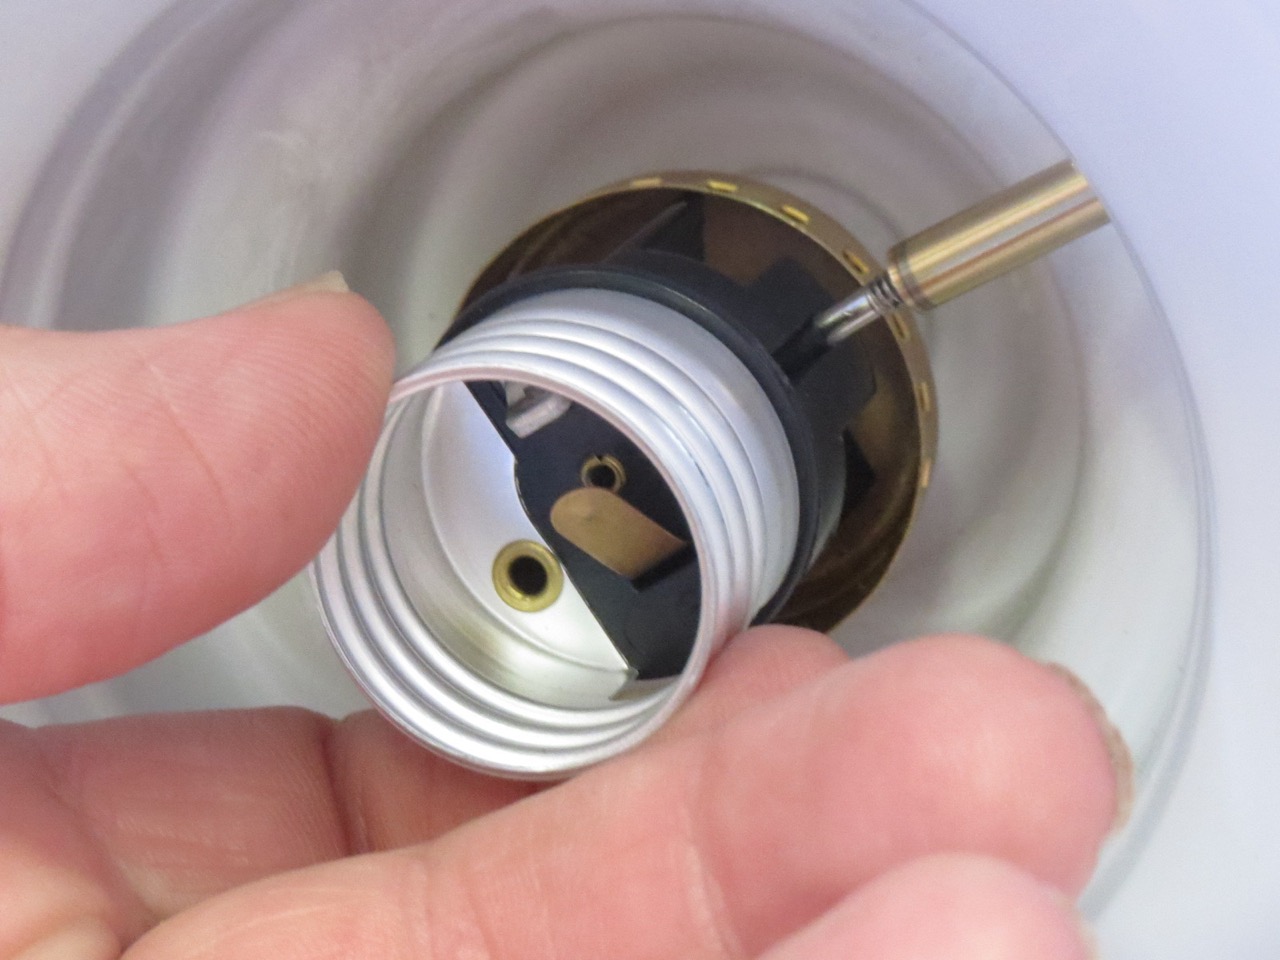
Step 9: Reinstall the Light Bulb
Now that the socket is clean and dry, it’s time to reinstall the light bulb. Follow these steps to ensure a proper reinstallation:
- Ensure the socket is still turned off: Before proceeding, double-check that the power to the light fixture is still switched off to avoid any potential electrical hazards.
- Remove any debris: Check the socket for any remaining debris or cleaning solution residue. If necessary, use a clean cloth or cotton swab to gently remove any particles.
- Line up the light bulb: Take the light bulb and align it with the socket. Make sure the bulb’s base is properly positioned within the socket.
- Insert and twist the light bulb: Press the light bulb into the socket and twist it in a clockwise direction. Apply gentle pressure until the bulb is securely seated in the socket.
- Ensure a snug fit: Confirm that the light bulb is securely fastened in the socket. Give it a slight twist to ensure it is properly tightened, but be cautious not to overtighten and risk damaging the socket or bulb.
After reinstalling the light bulb, the socket should be ready for use. However, before restoring power to the light fixture, there is one final step to ensure a safe and successful outcome: restoring the power.
Keep in mind that if you notice any issues, such as the bulb not turning on or flickering, it could indicate a separate problem that may require further investigation or the assistance of a professional electrician.
Now that the light bulb is back in the socket, let’s move on to the final step: restoring the power to the light fixture.
Step 10: Restore the Power
After successfully reinstalling the light bulb, it’s time to restore the power to the light fixture. Follow these steps to safely restore the power:
- Confirm everything is in place: Before restoring power, double-check that the light bulb is securely installed in the socket and that there are no loose or exposed wires or connections.
- Switch on the breaker: Return to the electrical panel and locate the breaker that corresponds to the light fixture. Switch it to the “on” position to restore power to the fixture.
- Test the light bulb: Flip the light switch connected to the fixture to test whether the bulb illuminates properly. If the light turns on without any issues, congratulations! You have successfully cleaned the corrosion off the light socket.
- Monitor the light fixture: Keep an eye on the light fixture for any unusual behavior, such as flickering or dimming. If you notice any persistent issues, it may indicate a separate electrical problem that requires further attention.
By following these steps, you can safely restore power to the light fixture and assess the effectiveness of your cleaning efforts. Remember to exercise caution when working with electricity and always prioritize your safety.
If you encounter any difficulties during the restoration process or experience ongoing issues with the light functionality, it is advisable to seek professional assistance from a certified electrician.
Congratulations on successfully cleaning the corrosion off your light socket and restoring it to proper working condition. Your efforts have not only improved the performance of your light fixture but also ensured a safer electrical environment in your home. Well done!
Now you can enjoy bright and reliable lighting once again. Remember to perform regular maintenance and inspections to prevent corrosion from recurring in the future.
Thank you for following this step-by-step guide. We hope it has been helpful in cleaning the corrosion off your light socket. If you have any further questions or need additional assistance, feel free to seek professional guidance or contact a trusted electrician.
Happy lighting!
Read more: How To Check If A Light Socket Is Working
Conclusion
Cleaning corrosion off a light socket is a simple yet critical task that can help restore optimal functionality to your light fixtures. By following the step-by-step guide outlined in this article, you can successfully remove corrosion and maintain a safe and reliable lighting system in your home or office.
We began by emphasizing the importance of safety precautions, highlighting the need to turn off the power and use protective gear during the cleaning process. We then identified the materials needed, including a clean cloth, mild detergent, baking soda, and water.
The step-by-step instructions guided you through turning off the power, removing the light bulb, inspecting the socket for damage, preparing the cleaning solution, applying it to the corroded areas, scrubbing the corrosion, rinsing the socket, and ensuring a thorough drying process. Finally, we discussed the significance of reinstalling the light bulb correctly and restoring the power after completing the cleaning process.
Remember, if you encounter any difficulties or don’t feel comfortable performing the cleaning yourself, it is always advisable to consult a qualified electrician. Electrical systems can be complicated and potentially dangerous, so it’s important to prioritize your safety and seek professional assistance when needed.
By regularly maintaining and cleaning your light sockets, you can prevent corrosion from affecting their performance and prolong their lifespan. This ensures that you can enjoy bright and reliable lighting, creating a comfortable and well-lit environment in your space.
We hope this comprehensive guide has equipped you with the knowledge and confidence to clean the corrosion off your light sockets effectively. Don’t hesitate to refer back to this article as a reference whenever needed.
Thank you for taking the time to read this article, and we wish you the best of luck in your endeavors to maintain pristine light sockets. Here’s to a brighter and corrosion-free future!
Frequently Asked Questions about How To Clean Corrosion Off Light Socket
Was this page helpful?
At Storables.com, we guarantee accurate and reliable information. Our content, validated by Expert Board Contributors, is crafted following stringent Editorial Policies. We're committed to providing you with well-researched, expert-backed insights for all your informational needs.


0 thoughts on “How To Clean Corrosion Off Light Socket”