Articles
How To Repair A Wood Floor
Modified: December 7, 2023
Learn how to repair a wood floor with our informative articles. Find step-by-step guides and expert tips to fix any damage and restore your floor's beauty.
(Many of the links in this article redirect to a specific reviewed product. Your purchase of these products through affiliate links helps to generate commission for Storables.com, at no extra cost. Learn more)
Introduction
A wood floor can bring warmth, beauty, and timeless appeal to any space. However, over time, wear and tear may take a toll on the floor’s appearance and functionality. Scratches, dents, gaps, and loose boards can detract from the overall aesthetic of the room and create hazards. The good news is that many common wood floor issues can be repaired without the need for a complete replacement.
In this article, we will guide you through the process of repairing a wood floor, step by step. Whether you are dealing with small scratches or major damage, this comprehensive guide will help you restore your wood floor to its former glory.
Before diving into the repair process, it’s important to assess the extent of the damage. This will allow you to plan accordingly and determine the best course of action. Let’s explore how to assess the damage in the next section.
Key Takeaways:
- Assess the extent of damage, gather the right materials, and follow the step-by-step repair process to restore your wood floor’s beauty and functionality. Proper maintenance ensures its longevity.
- From filling gaps to sanding and finishing, each repair step is crucial. Follow the guide and maintenance tips to enjoy a beautifully restored wood floor for years to come.
Read more: How To Lay Tile On Wood Floor
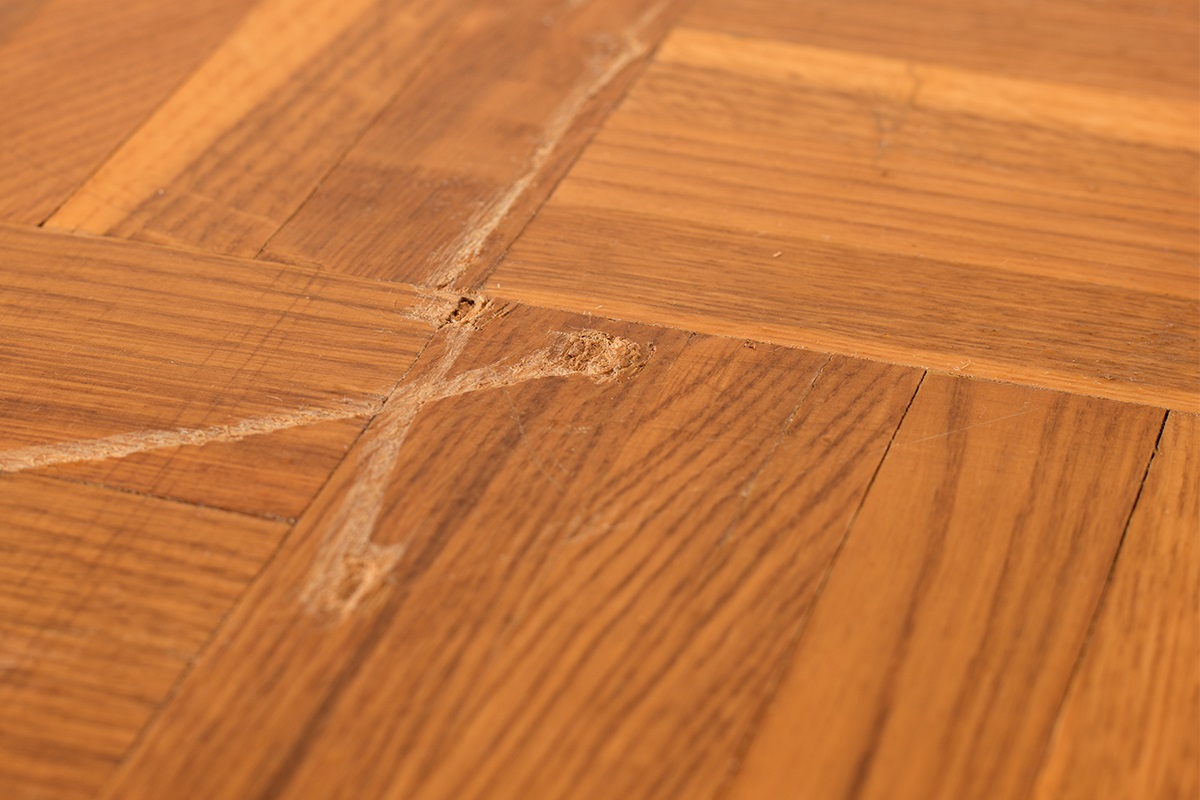
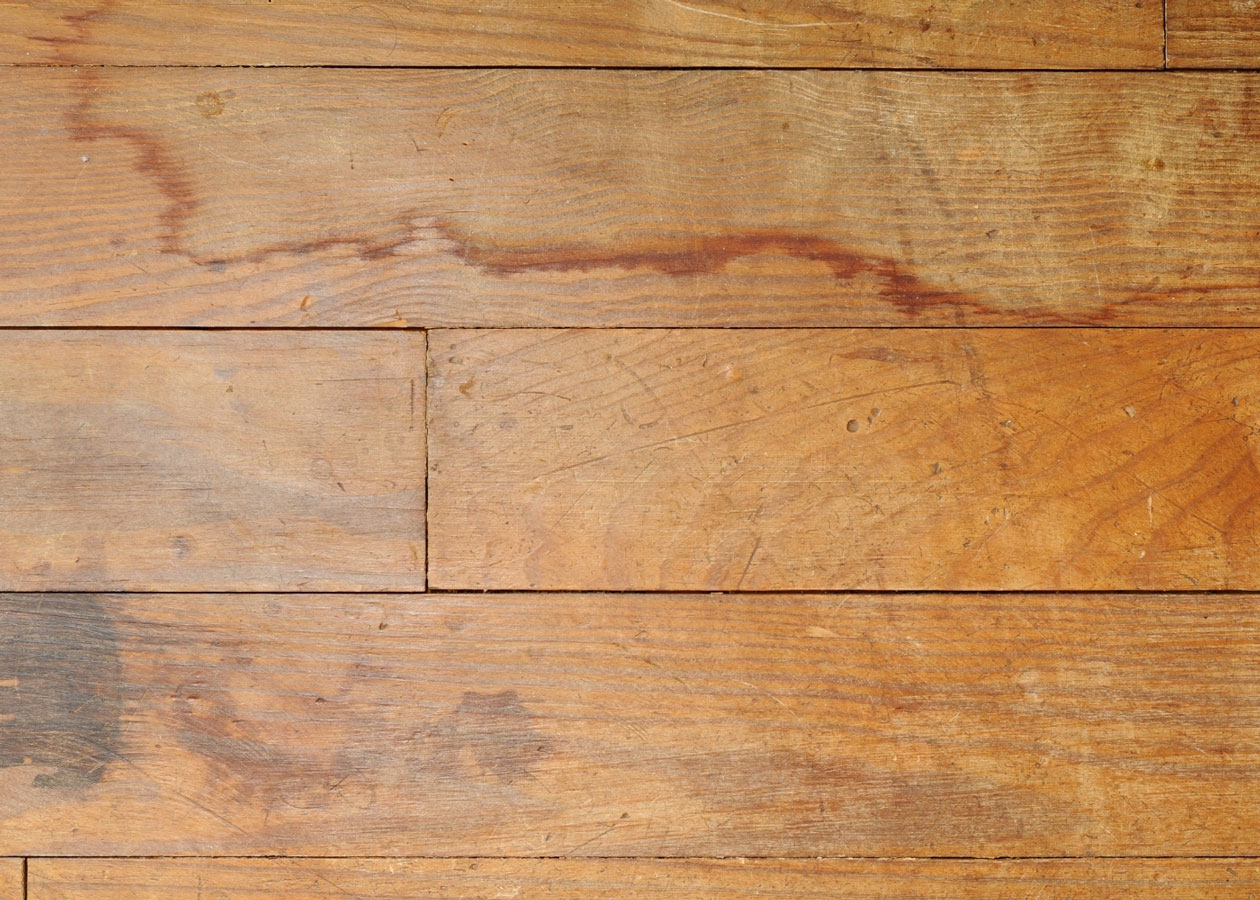
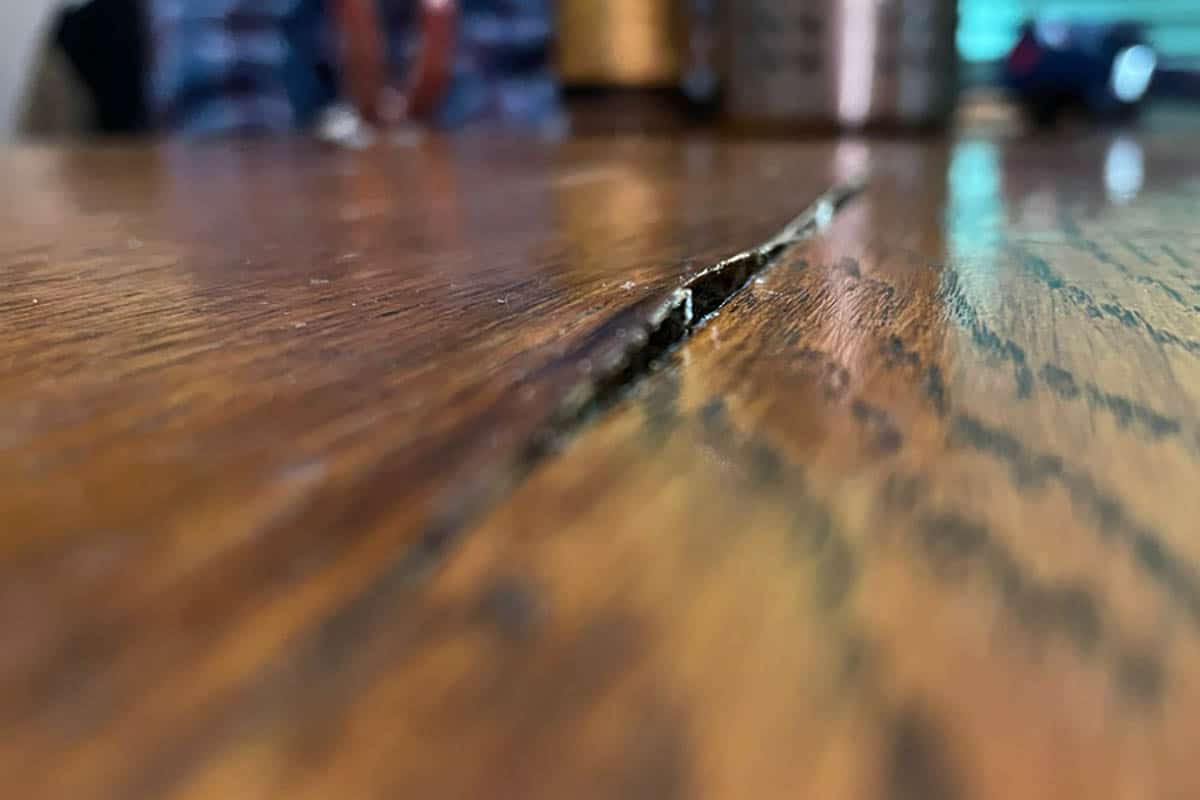
Assessing the Damage
Before you can start repairing your wood floor, it’s essential to evaluate the extent of the damage. This will help you prioritize the areas that require immediate attention and plan your repair strategy accordingly.
Begin by thoroughly inspecting the surface of the floor. Look for scratches, dents, cracks, gaps, or any other signs of damage. Take note of the size and location of each issue.
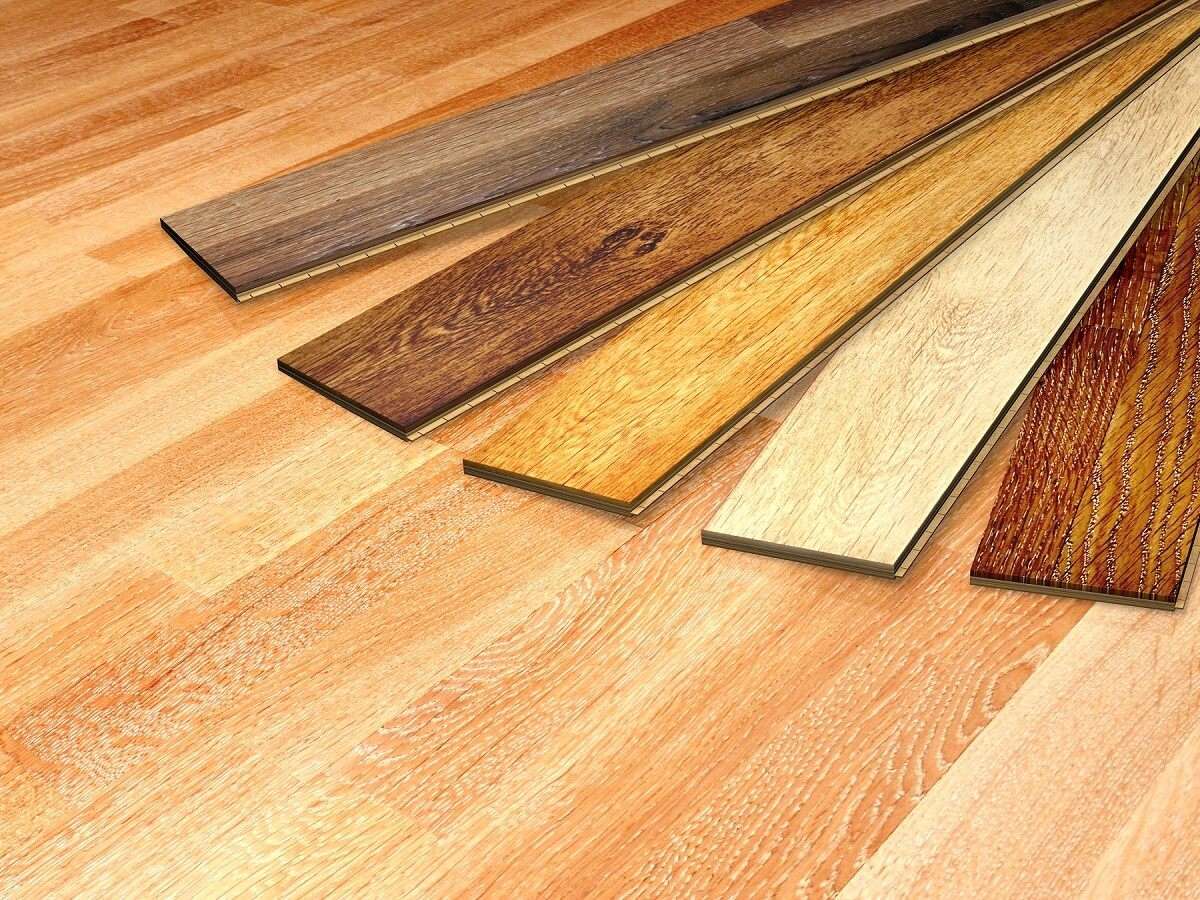
Next, determine the type of wood and finish used on your floor. Different types of wood and finishes may require different repair techniques and materials. If you’re unsure about the specifics, consult with a professional or research the manufacturer’s recommendations.
Consider the overall condition of the floor. Is the damage confined to a few specific areas, or is it spread out across the entire floor? Assessing the extent of the damage will help you decide whether a simple repair will suffice or if a more extensive renovation is necessary.
Furthermore, identify the cause of the damage. Is it due to heavy furniture, pets, water damage, or general wear and tear? Understanding the root cause will allow you to take preventative measures to avoid similar issues in the future.
Once you have thoroughly assessed the damage and gathered all the necessary information, you can move on to gathering the materials and tools needed for the repair process.
Gathering Materials and Tools
Before starting the wood floor repair process, it’s important to gather all the necessary materials and tools. Having everything prepared in advance will save you time and ensure a smooth repair process.
Here’s a list of materials and tools you might need:
- Wood filler: Choose a filler that matches the color of your wood floor.
- Wood putty: Used for filling small nail holes or minor imperfections.
- Sanding paper: Select different grits based on the needs of your repair project.
- Sanding block or electric sander: Depending on the size of the repair area, choose the appropriate tool.
- Stain: If necessary, select a stain that matches the color of your wood floor.
- Finish: Decide on the appropriate finish for your wood floor, such as varnish or polyurethane.
- Paintbrushes: Use different sizes for applying wood filler, stain, and finish.
- Putty knife: Essential for applying wood filler or putty.
- Hammer: Needed for fixing loose boards or removing damaged ones.
- Wood glue: Use it to secure loose boards or fill gaps between them.
- Safety goggles and dust mask: Protect your eyes and lungs during sanding and other tasks.
- Clean cloth: Use it for wiping down the repaired area.
- Vacuum cleaner: To clean up dust and debris during and after the repair process.
Make sure to double-check the manufacturer’s instructions and recommendations for any specific materials or tools required for your particular wood floor type.
Once you have gathered all the necessary materials and tools, you’re ready to start the repair process. In the next section, we will walk you through the step-by-step procedures for repairing your wood floor.
Procedural Steps
Repairing a wood floor involves several steps, each with its own specific procedure. Follow these steps to ensure a successful and effective repair:
- Clean the area: Start by thoroughly cleaning the damaged area. Remove any debris, dust, or dirt using a broom, vacuum cleaner, or damp cloth. This will ensure better adhesion of the repair materials.
- Filling gaps and cracks: If there are any noticeable gaps or cracks between the floorboards, use a wood filler or putty to fill them. Apply the filler to the gaps and smooth it out using a putty knife. Allow it to dry as per the manufacturer’s instructions.
- Repairing loose or damaged boards: If you have any loose or damaged boards, fix them by applying wood glue to the underside and then gently hammering them back into place. If a board is damaged beyond repair, carefully remove it using a chisel or a circular saw and replace it with a new one of the same size.
- Sanding the floor: Use sandpaper or a sander to smooth out the repaired areas and remove any existing finish. Start with a coarse-grit sandpaper to remove the imperfections and gradually work your way up to finer grits for a smooth and even finish. Be sure to sand along the direction of the wood grain.
- Staining and finishing: If you wish to change the color of your floor or restore its original shade, apply a wood stain evenly using a brush or rag. Allow the stain to dry completely before applying the finish. Once the stain is dry, apply a clear finish coat following the manufacturer’s instructions. Ensure each coat is dry before applying additional coats.
- Final touches and maintenance tips: Once the repair process is complete, give the floor a final wipe-down to remove any remaining dust or debris. Place furniture pads or felt protectors on the legs of your furniture to prevent scratches in the future. Regularly sweep or vacuum the floor to keep it free from dirt and grit. Avoid excessive exposure to water and clean up spills immediately to prevent water damage.
Remember, each wood floor repair project is unique and may require variations in the above procedure based on the type of damage and the specific requirements of your floor. It’s always recommended to consult with a professional or follow the manufacturer’s instructions when in doubt.
Now that you’re familiar with the procedural steps involved, let’s delve into more specific repair techniques, such as filling gaps and cracks, or repairing loose and damaged boards.
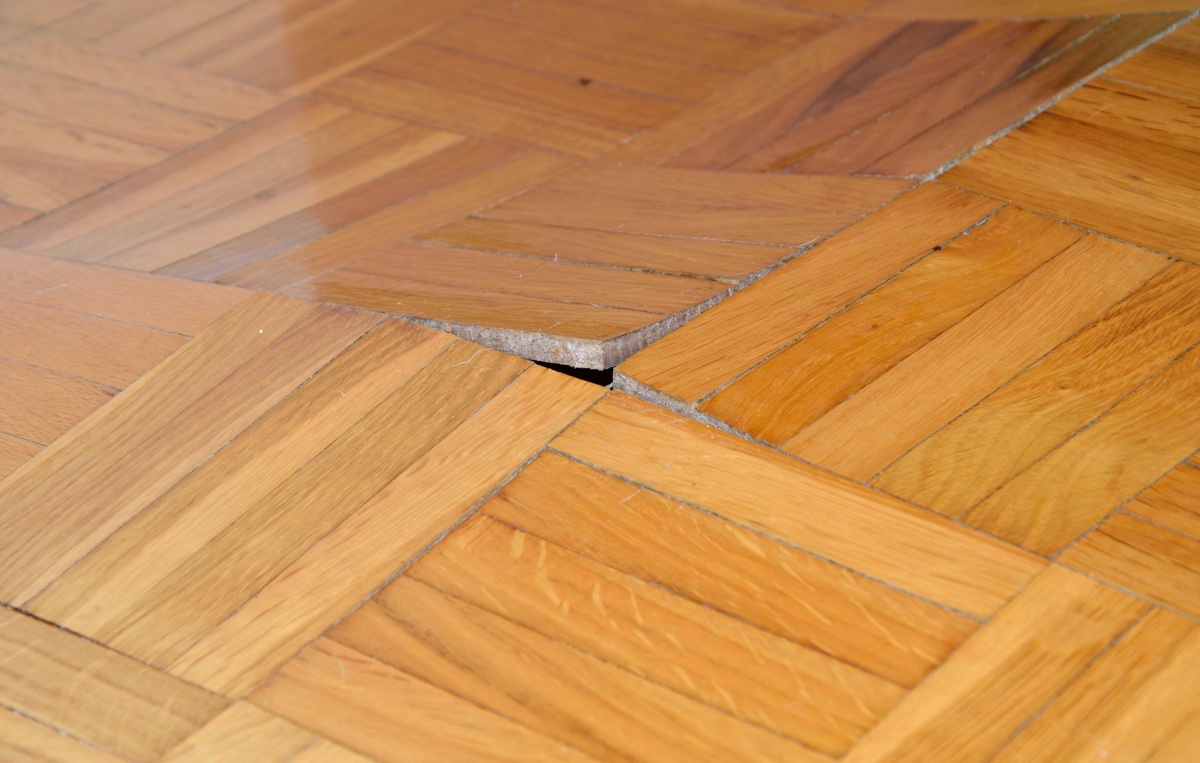
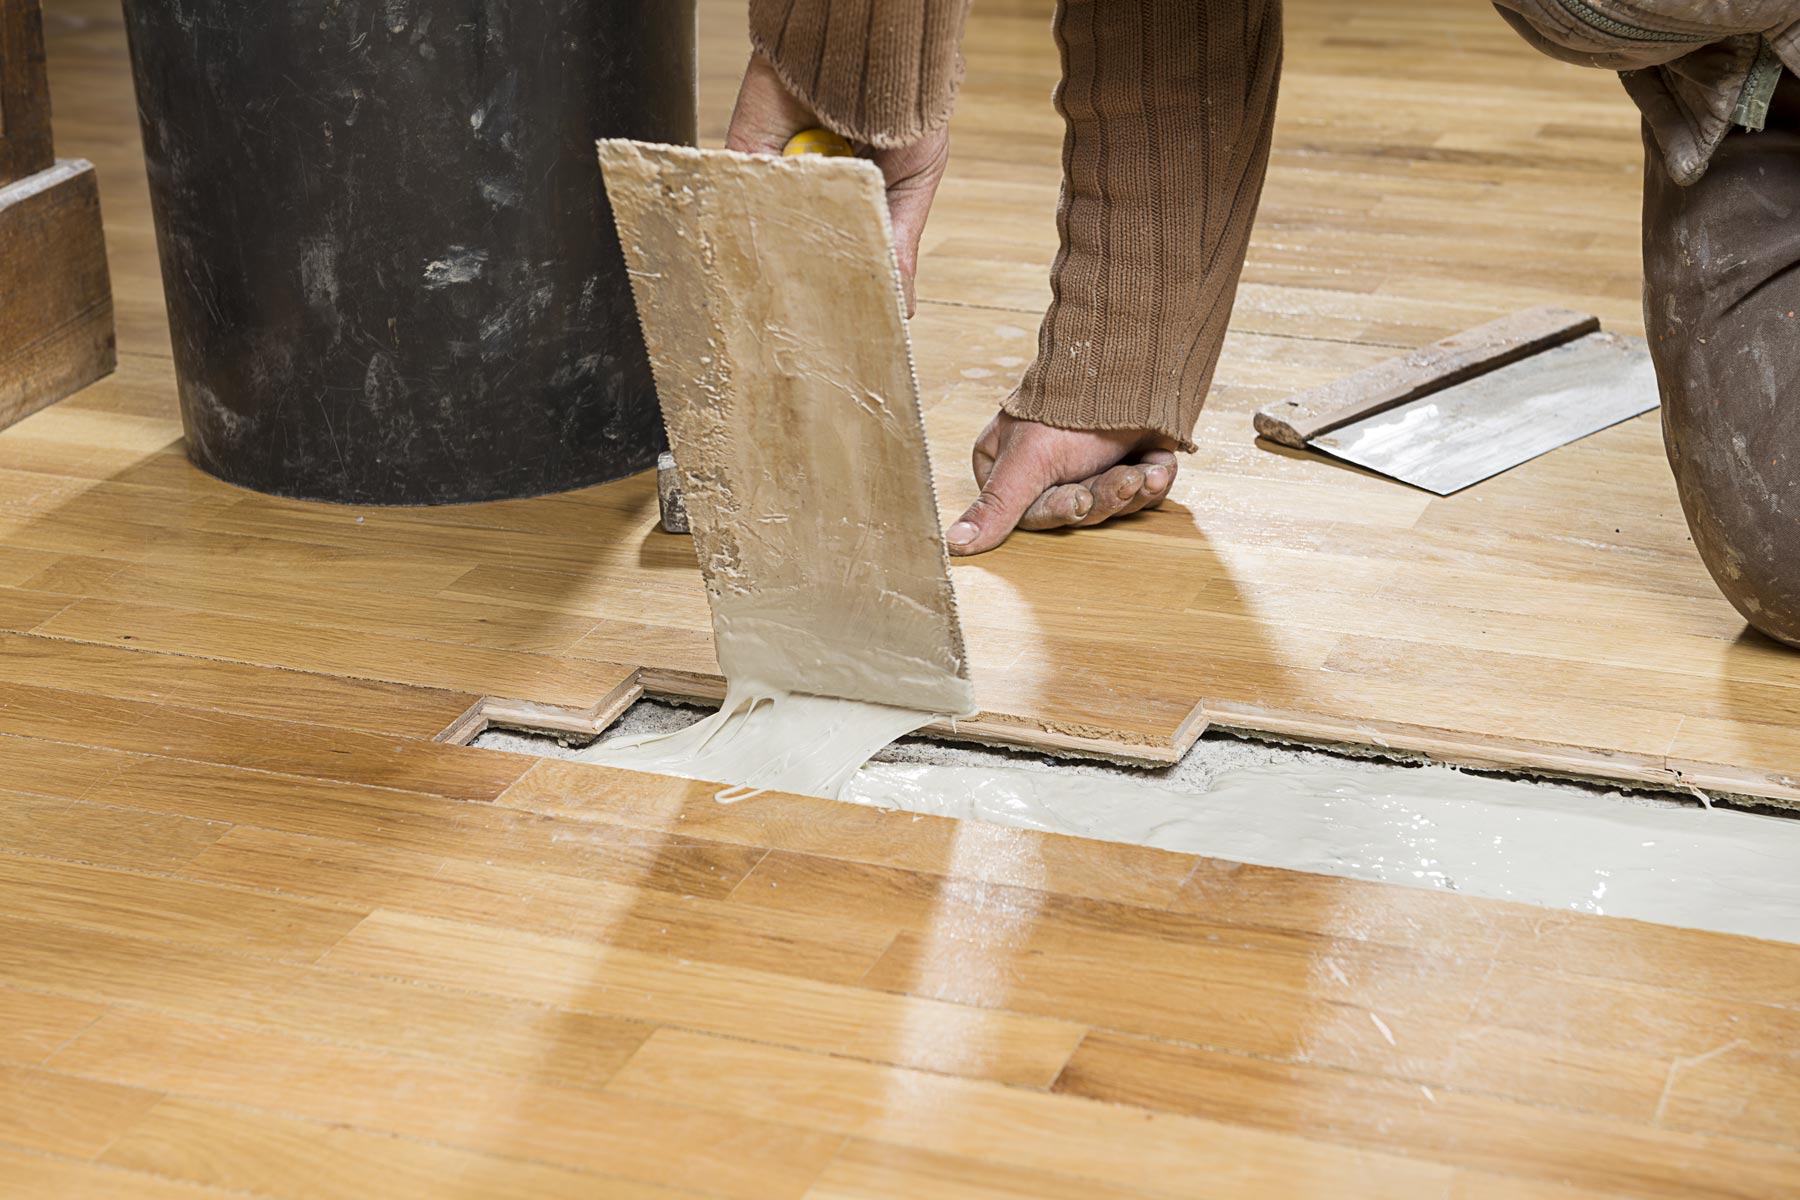
Filling Gaps and Cracks
Gaps and cracks between floorboards are common issues that can occur over time due to natural expansion and contraction of the wood. These gaps not only affect the appearance of the floor but can also lead to drafts and allow dust and debris to accumulate. Fortunately, filling gaps and cracks is a relatively straightforward process. Here’s how to do it:
- Clean the area: Start by cleaning the gaps and cracks using a vacuum or a brush to remove any dirt, dust, or debris.
- Select a suitable filler: Choose a wood filler that matches the color of your floor or opt for a clear filler if you prefer a natural look. Make sure the filler is specifically designed for wood floors.
- Apply the filler: Using a putty knife or a small spatula, apply the filler to the gaps and cracks. Press down firmly to ensure the filler fills the void completely.
- Smooth out the filler: Use the putty knife or a wet cloth to remove any excess filler and smooth it out. This will ensure a flush finish with the surrounding floor surface.
- Allow the filler to dry: Follow the manufacturer’s instructions for the drying time of the filler. It typically takes a few hours to dry completely.
- Sand the filled areas: Once the filler is dry, use sandpaper or a sanding block to smooth the filled areas. Start with a coarse-grit sandpaper and gradually work your way up to finer grits for a polished finish. Sand in the direction of the wood grain.
- Clean the floor: After sanding, clean the floor using a vacuum or a damp cloth to remove any sanding residue.
Keep in mind that larger gaps or cracks may require multiple applications of the filler. If the gaps are too wide to be filled with a filler alone, consider using wooden shims or slivers to bridge the gap before applying the filler.
Filling gaps and cracks in your wood floor not only improves its appearance but also helps to prevent further damage and maintain the integrity of the floor. Once this step is complete, you can move on to repairing loose or damaged boards if necessary.
Use wood filler to repair small cracks and holes in the wood floor. Apply the filler, let it dry, and then sand it smooth for a seamless finish.
Read more: How To Repair Scratches On Wood Floor
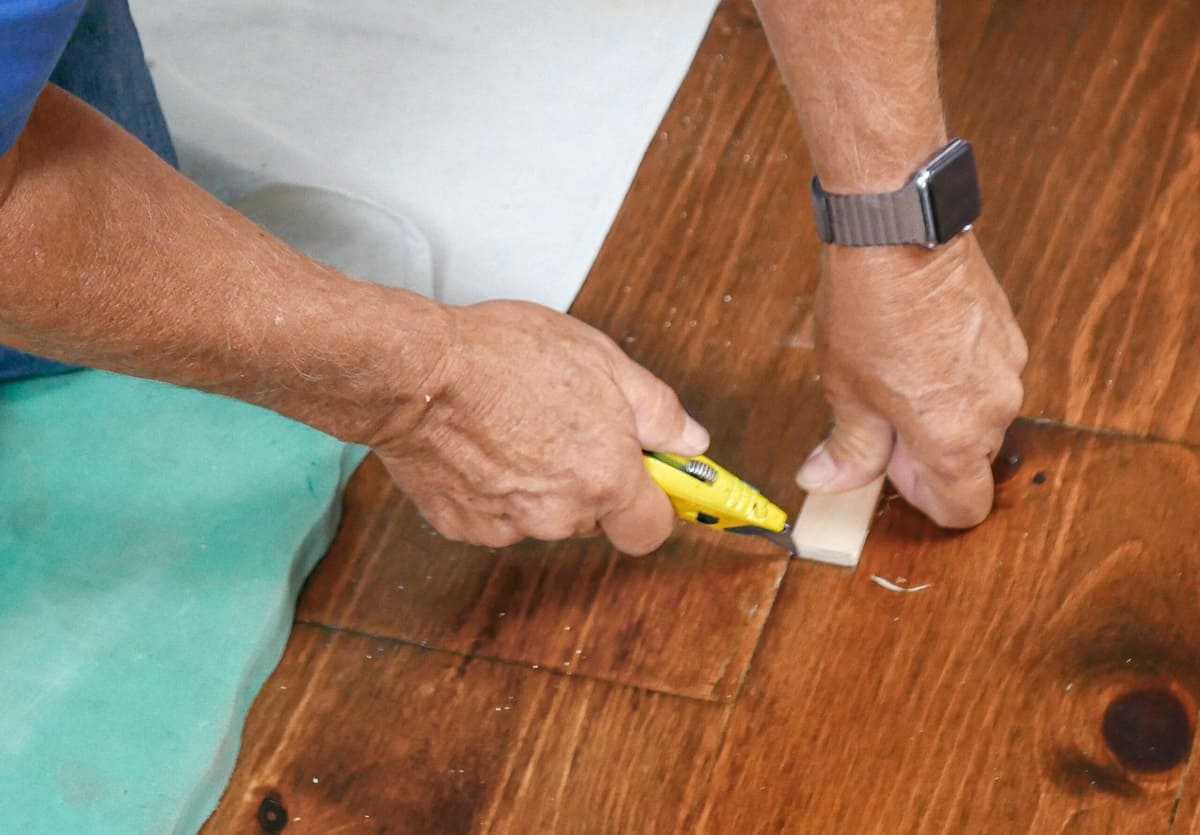
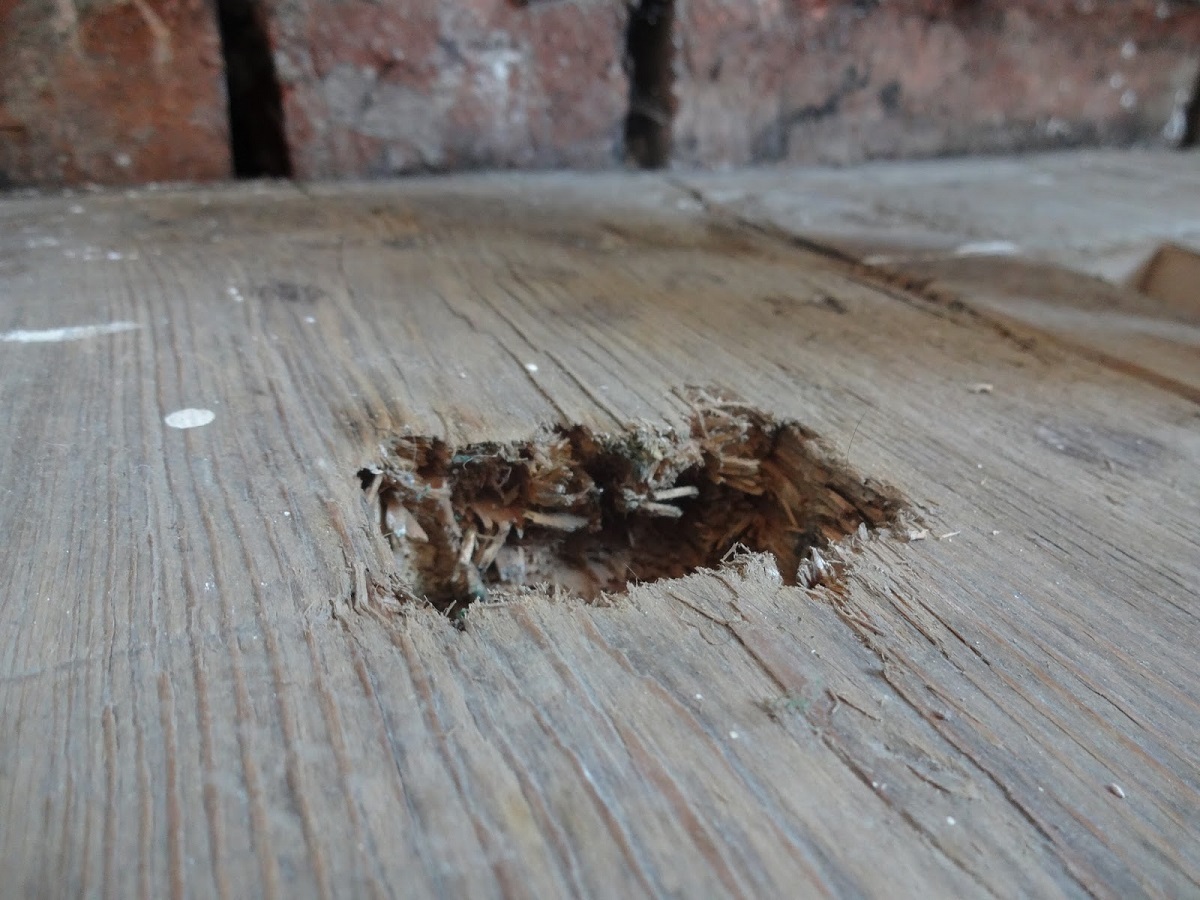
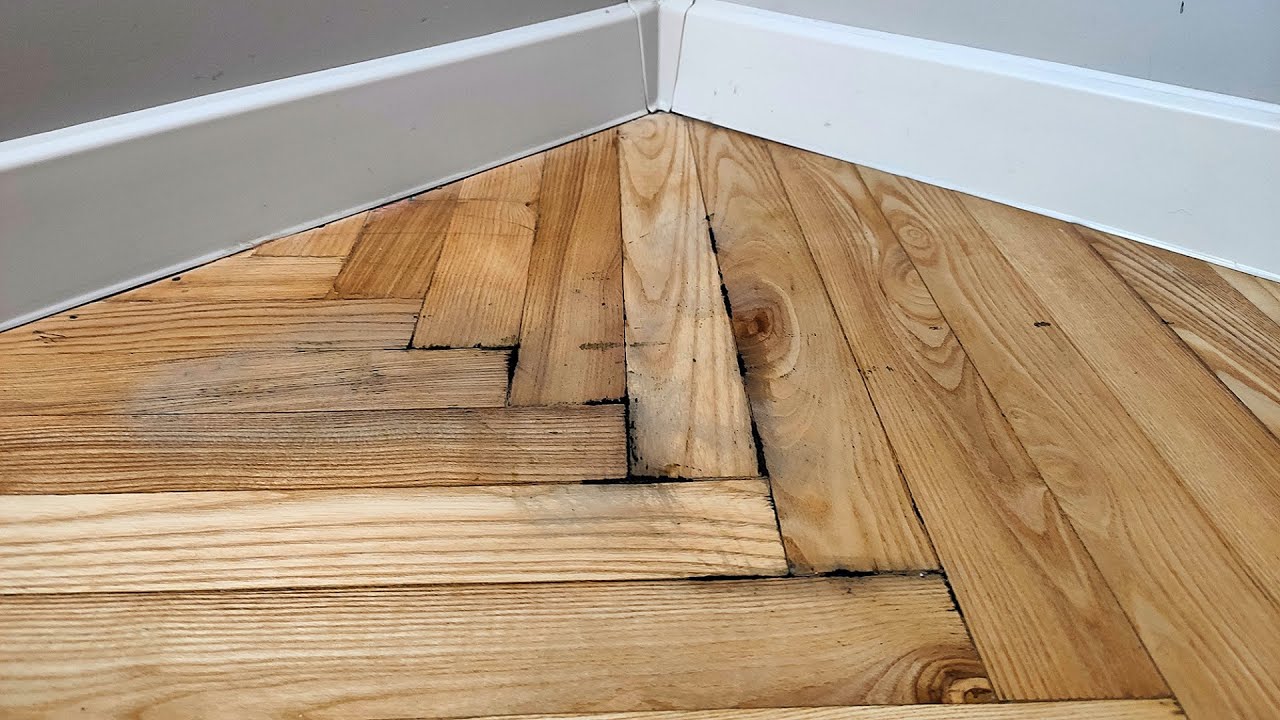
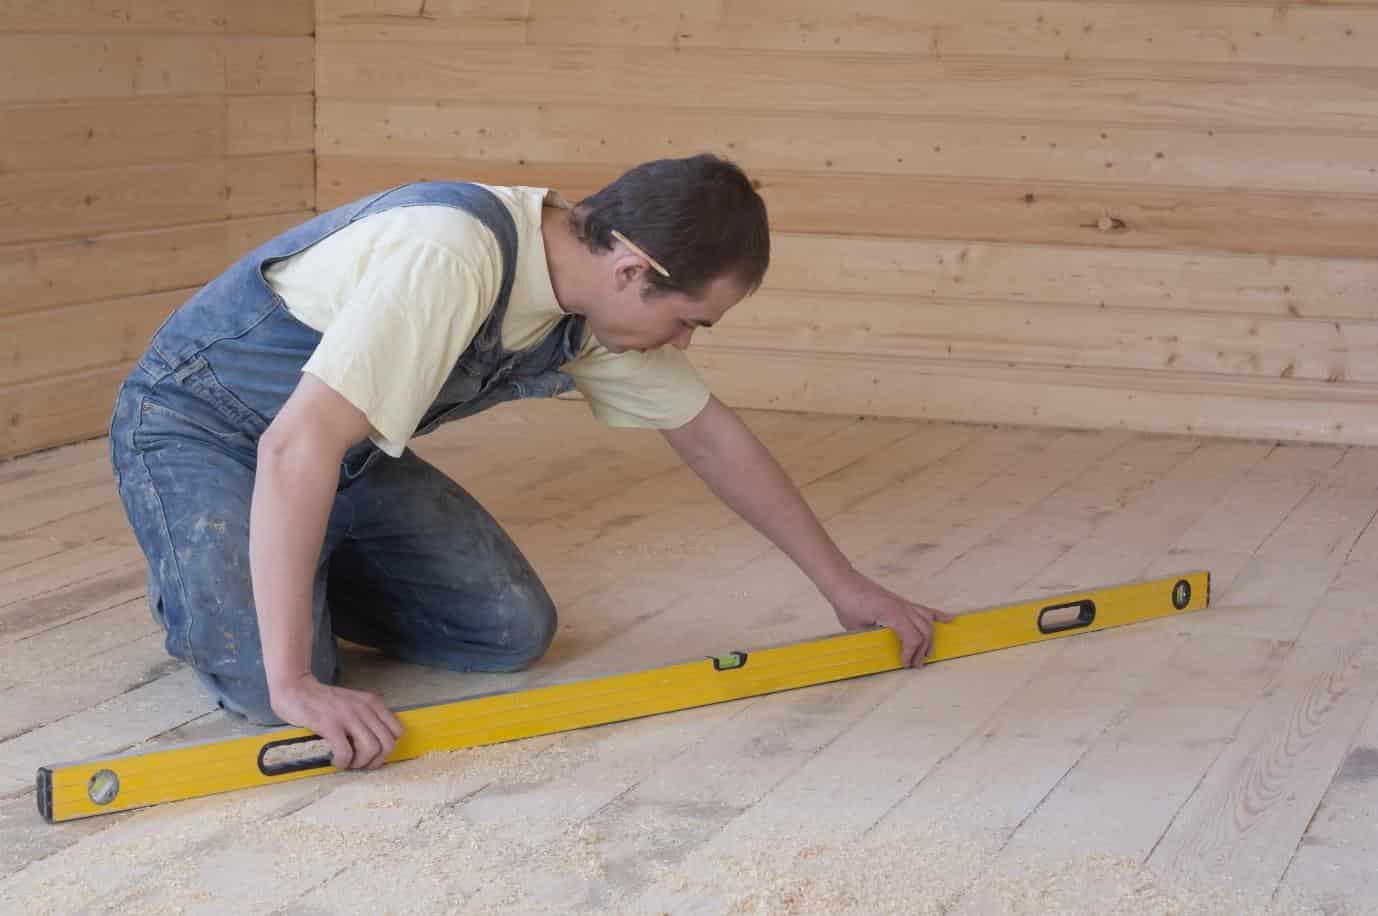
Repairing Loose or Damaged Boards
Loose or damaged boards can pose a tripping hazard and compromise the overall stability and appearance of your wood floor. Repairing these issues promptly is crucial to maintain the integrity of the floor. Here’s a step-by-step guide on how to repair loose or damaged boards:
- Identify the loose or damaged boards: Inspect your floor and identify any boards that are loose, squeaky, or visibly damaged.
- Secure loose boards: Apply a small amount of wood glue to the underside of the loose board. Gently press the board back into place and use a hammer and a scrap piece of wood to tap it lightly until it is firmly secured.
- Allow the glue to dry: Follow the manufacturer’s instructions for the drying time of the wood glue. It usually takes a few hours for the glue to set completely.
- Repair damaged boards: If a board is damaged and cannot be repaired, carefully remove it using a chisel or a circular saw. Be cautious when removing the damaged board to avoid damaging the surrounding boards.
- Replace the damaged board: Measure the dimensions of the removed board and use these measurements to cut a replacement board of the same size from a matching piece of wood. Ensure the replacement board fits snugly in the empty space.
- Apply wood glue: Apply wood glue along the edges of the replacement board and place it into position, aligning it with the adjacent boards.
- Secure the replacement board: Use a hammer and a scrap piece of wood to gently tap the replacement board until it is level with the surrounding boards. Wipe off any excess glue with a damp cloth.
- Allow the glue to dry: Leave the repaired section undisturbed for the recommended drying time specified by the wood glue manufacturer.
It’s important to note that when replacing a board, try to find a close match in terms of wood species, color, and grain pattern to maintain the overall aesthetic of your wood floor.
After repairing the loose or damaged boards, it’s time to move on to the next step: sanding the floor to even out the repaired areas and prepare it for staining and finishing.
Sanding the Floor
Sanding the floor is a crucial step in the wood floor repair process. It helps to even out the surface, remove imperfections, and prepare the floor for staining and finishing. Here’s how to properly sand your wood floor:
- Prepare the area: Clear the room of furniture, rugs, and any other obstacles that may obstruct the sanding process. Cover any nearby surfaces, vents, and electrical outlets to protect them from dust.
- Choose the right sandpaper: Select the appropriate grit of sandpaper based on the condition of your floor and the level of smoothing required. Start with a coarse-grit sandpaper (around 40 or 60 grit) to remove any rough areas or imperfections, then progress to finer grits (80 to 120) for a smoother finish.
- Sand the floorboards: Begin sanding with a drum sander or orbital sander, working one section of the floor at a time. Move the sander in the direction of the wood grain, applying even pressure. Overlap each pass slightly for consistent results. Be mindful not to stay in one area for too long to avoid uneven sanding.
- Edge sanding: Use an edge sander or a handheld sanding block to sand the edges and corners of the floor where the larger sander cannot reach. Take care to blend the edge-sanded areas with the rest of the floor for a seamless finish.
- Fine sanding: Switch to a finer-grit sandpaper (around 120 grit) and repeat the sanding process to achieve a smoother surface. This step helps to remove any remaining scratches or marks from the previous sanding.
- Hand sanding: For tight or intricate areas, use a sanding block or sandpaper to sand them by hand. This allows for better control and precision.
- Inspect the floor: After sanding, closely inspect the floor to ensure that all imperfections, scratches, and stains have been removed. If needed, perform additional sanding on specific areas until you achieve the desired result.
- Remove dust: Thoroughly clean the sanded area using a vacuum cleaner or a soft brush to remove all the sanding dust. It’s essential to have a clean surface before proceeding with staining and finishing.
Remember to wear protective goggles, a dust mask, and ear protection while sanding to safeguard yourself from dust particles and loud noise.
Once the sanding process is complete, you can move on to the next step: staining and finishing your wood floor.
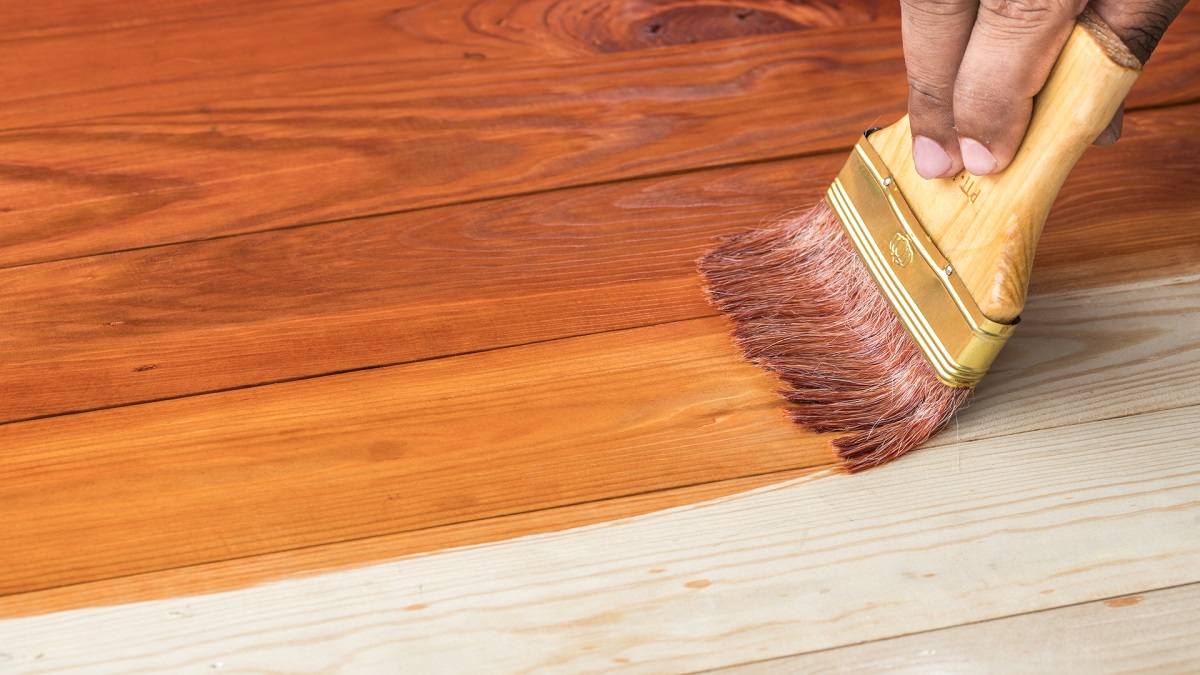
Staining and Finishing
Staining and finishing your wood floor is the final touch that enhances its appearance, protects the wood, and gives it a polished look. Here’s a step-by-step guide on how to stain and finish your wood floor:
- Choose the right stain: Select a wood stain that complements the color and grain of your wood. Test the stain on a small, inconspicuous area of the floor or a spare piece of wood to ensure it achieves the desired color. Follow the manufacturer’s instructions for application.
- Prepare the floor: Clean the sanded floor thoroughly using a vacuum cleaner or a damp cloth to remove any remaining dust or debris. Ensure the floor is completely dry before proceeding.
- Apply the stain: Use a clean brush or a rag to apply the wood stain evenly across the surface of the floor, working in small sections. Follow the direction of the wood grain for uniform coverage. Allow the stain to penetrate and dry as per the manufacturer’s instructions. It may take several hours or even overnight.
- Inspect and touch up: Once the stain has dried, inspect the floor for any uneven or missed spots. Use a brush or rag to touch up these areas and ensure a consistent color throughout the floor.
- Apply the finish: Choose a suitable finish for your wood floor, such as varnish, polyurethane, or wax. Apply the finish according to the manufacturer’s instructions, using a clean brush or applicator pad. Work in small sections and maintain a consistent and thin application to avoid drips or streaks.
- Allow the finish to dry: Give the floor adequate drying time between coats as specified by the finish manufacturer. This may range from a few hours to a day or more. Apply additional coats if desired for added protection and durability, allowing sufficient drying time between each coat.
- Buff the floor: Once the final coat has dried, use a fine-grit sandpaper or a buffing machine to lightly sand the floor’s surface. This smoothens any imperfections and promotes a smoother, satin-like finish.
- Remove dust and clean: Thoroughly clean the floor with a vacuum cleaner or a soft brush to remove any sanding dust or debris. Wipe the floor with a clean, damp cloth to remove any remaining residue.
Following these steps ensures that your wood floor is beautifully stained and finished, providing a protective layer that enhances its longevity. After completing these steps, it’s time for the final touches and maintenance tips.
Final Touches and Maintenance TipsAfter repairing, sanding, staining, and finishing your wood floor, there are a few final touches and maintenance tips to consider to ensure the longevity and beauty of your newly restored floor.
Here are some final touches and maintenance tips to keep in mind:
- Allow ample drying time: It’s essential to allow the stain and finish to properly dry and cure before placing furniture or rugs back onto the floor. Follow the manufacturer’s instructions for the recommended drying time.
- Use furniture pads or felt protectors: To protect your floor from scratches and marks, place furniture pads or felt protectors on the legs of your furniture. This will prevent direct contact between the furniture and the floor.
- Regularly sweep or vacuum: To maintain the cleanliness of your wood floor, sweep or vacuum it regularly to remove dirt, dust, and debris. Avoid using abrasive brushes or vacuums with rotating brushes, as they may scratch the surface.
- Wipe up spills immediately: Wood and excessive moisture do not mix well. It’s crucial to wipe up any spills or accidents immediately to prevent water damage or staining. Use a slightly damp cloth to clean up spills promptly.
- Avoid excessive exposure to sunlight: Prolonged exposure to direct sunlight can cause fading and discoloration of your wood floor. Use curtains or blinds to protect the floor from excessive UV rays.
- Consider area rugs or mats: Place area rugs or mats in high-traffic areas or near entryways to provide an extra layer of protection for your wood floor.
- Regularly inspect for signs of damage: Periodically check your wood floor for any signs of damage, such as scratches or dents. Address these issues promptly to prevent further deterioration and maintain the floor’s appearance.
- Routine maintenance: Depending on the type of finish applied to your wood floor, periodic maintenance may be required. This can include reapplying a topcoat or waxing the floor. Refer to the manufacturer’s recommendations for specific maintenance guidelines.
By following these final touches and maintenance tips, you can ensure that your repaired and restored wood floor remains beautiful and in excellent condition for years to come.
Congratulations on successfully repairing and restoring your wood floor! Enjoy the beauty and warmth it adds to your space.
Read more: How To Seal A Wood Floor
Conclusion
Repairing a wood floor can be a rewarding and cost-effective way to restore its beauty and functionality. Whether you’re dealing with scratches, gaps, loose boards, or other damage, following the right process ensures a successful repair.
In this comprehensive guide, we provided step-by-step instructions for assessing the damage, gathering materials and tools, filling gaps and cracks, repairing loose or damaged boards, sanding the floor, and staining and finishing the wood. Each step plays a crucial role in bringing your wood floor back to life.
Remember that proper maintenance is essential for preserving the condition of your repaired wood floor. Regular cleaning, using furniture pads, wiping up spills, and protecting the floor from excessive sunlight are all key factors in prolonging its lifespan.
If you ever feel unsure about tackling a wood floor repair project on your own, it’s always advisable to seek professional assistance. They can provide guidance, expertise, and ensure that the repair is handled correctly.
By following the steps outlined in this guide and maintaining your wood floor properly, you can enjoy the beauty, warmth, and longevity of your repaired and restored wood floor for years to come.
Now that you’re armed with the knowledge to repair a wood floor, it’s time to roll up your sleeves and restore your floor to its former glory. Good luck with your repair project!
Frequently Asked Questions about How To Repair A Wood Floor
Was this page helpful?
At Storables.com, we guarantee accurate and reliable information. Our content, validated by Expert Board Contributors, is crafted following stringent Editorial Policies. We're committed to providing you with well-researched, expert-backed insights for all your informational needs.


0 thoughts on “How To Repair A Wood Floor”