Articles
How To Level A Wood Floor
Modified: January 9, 2024
Learn how to level a wood floor with our helpful articles. Find step-by-step guides and expert tips to ensure a smooth and even surface.
(Many of the links in this article redirect to a specific reviewed product. Your purchase of these products through affiliate links helps to generate commission for Storables.com, at no extra cost. Learn more)
Introduction
Having a level wood floor is essential for both aesthetic and functional reasons. Whether you’re planning to install new flooring or addressing an existing problem, leveling a wood floor can help ensure a smooth and even surface. Uneven floors can not only be visually unappealing, but they can also be a tripping hazard and cause damage to furniture and other items in your home. Fortunately, with the right tools and materials, you can easily level a wood floor on your own.
In this guide, we will walk you through the step-by-step process of leveling a wood floor. From inspecting the floor to applying self-leveling compound, we will cover each stage in detail. So, gather your tools and get ready to transform your uneven wood floor into a perfectly level surface.
Before you begin the leveling process, it’s important to familiarize yourself with the tools and materials you’ll need. Let’s take a look at what you’ll need to get started.
Key Takeaways:
- Achieving a level wood floor involves thorough inspection, proper surface preparation, and strategic leveling methods. Using shims, fillers, sanding, and self-leveling compound can create a smooth and even surface for various types of flooring.
- Applying a finish or sealant is optional but recommended for enhancing the appearance and protection of the leveled wood floor. Regular maintenance and care will preserve its integrity and ensure long-lasting results.
Read more: How To Level A Floor
Tools and Materials Needed
Before you start leveling your wood floor, gather the following tools and materials:
- Measuring Tape: To accurately measure the floor for leveling.
- Safety Gear: Gloves, safety goggles, and a dust mask to protect yourself during the process.
- Hammer: To remove any nails or protrusions on the floor surface.
- Pry Bar: Useful for removing baseboards, if necessary.
- Screwdriver: To tighten or remove loose screws on the subfloor.
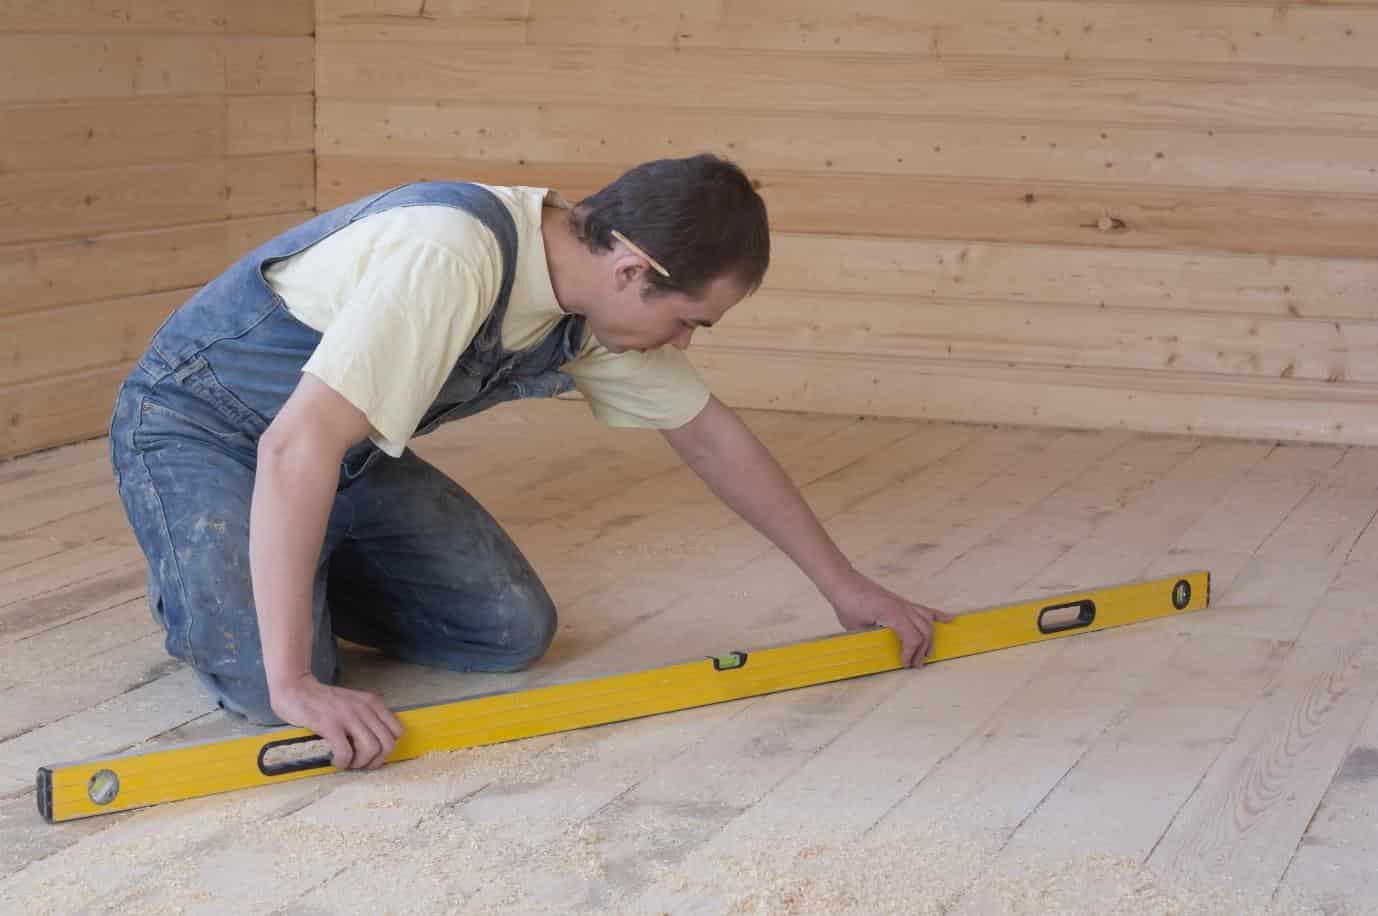
- Level: A long, straight level to identify uneven areas on the floor.
- Chalk Line: For marking reference lines on the floor.
- Electric Sander: To smooth out high spots on the wood surface.
- Self-Leveling Compound: A specialized product used to level uneven surfaces.
- Trowel: To spread and smooth the self-leveling compound.
- Shims: Small wooden wedges or spacers for minor low spots.
- Wood Filler: For filling larger gaps or holes in the wood floor.
- Vacuum Cleaner: To clean the floor before and after leveling.
- Mop and Bucket: For preparing the floor surface before applying the leveling compound.
- Paintbrush or Roller (optional): If you plan to apply a finish or sealant after leveling the floor.
It’s important to ensure you have all the necessary tools and materials on hand before you begin the leveling process. This will save you time and allow for a smoother workflow. Now that you’re ready and equipped, let’s move on to the first step: inspecting the floor.
Step 1: Inspect the Floor
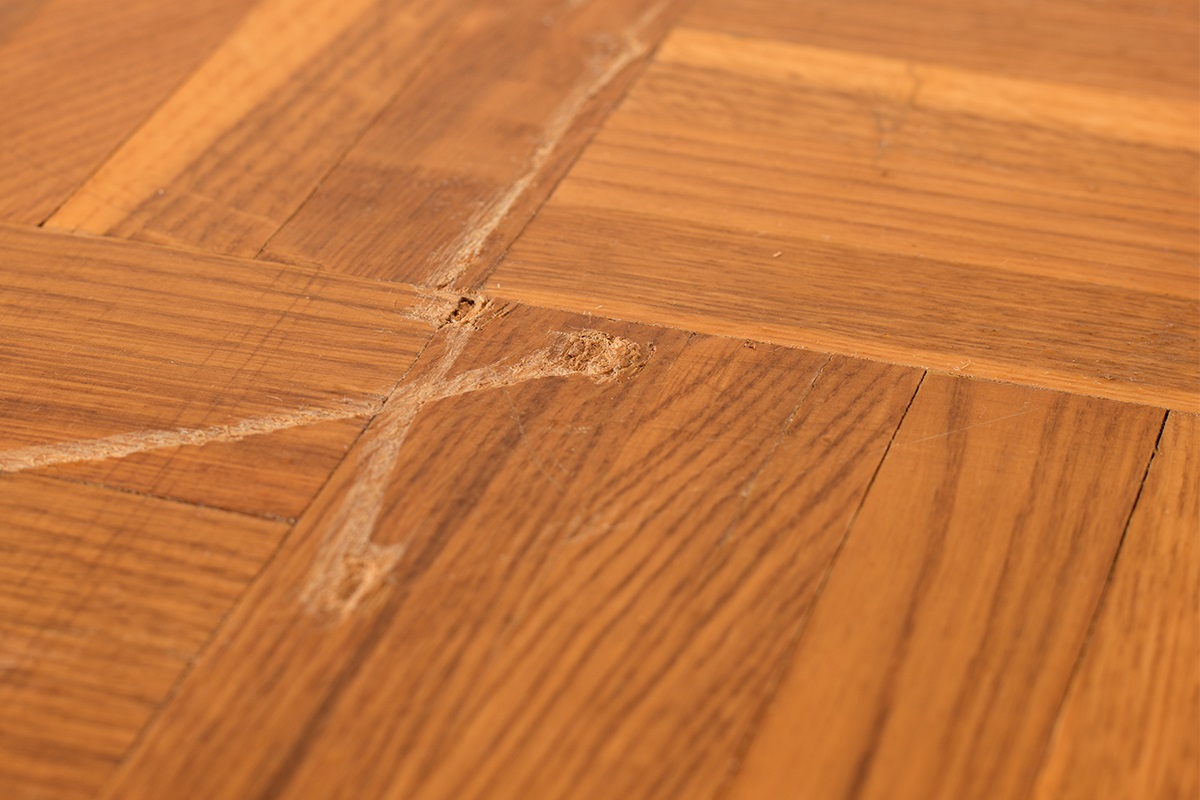
The first step in leveling a wood floor is to thoroughly inspect the surface for any signs of damage or unevenness. Walk around the room and pay close attention to areas where you notice sagging, dips, or raised spots. Look out for any loose boards, nails, or cracks as well.
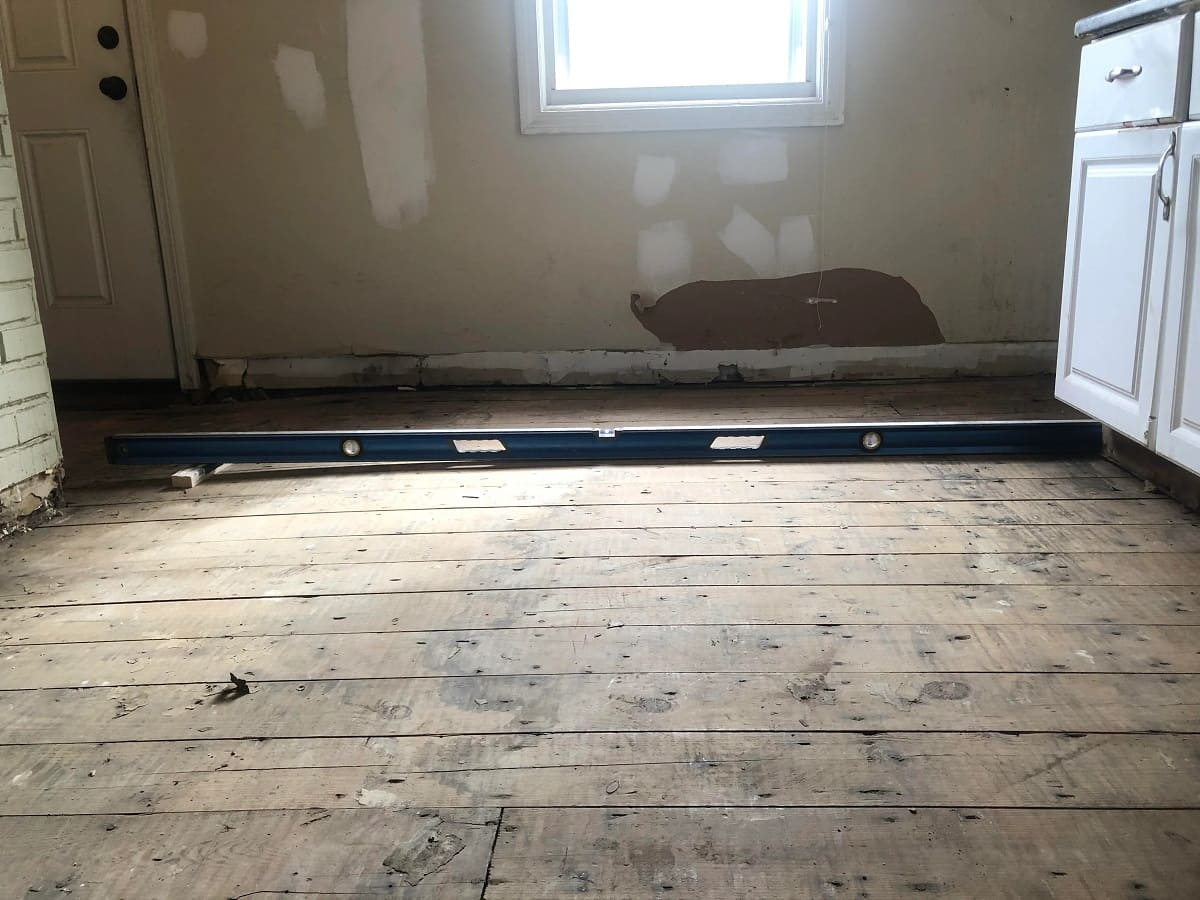
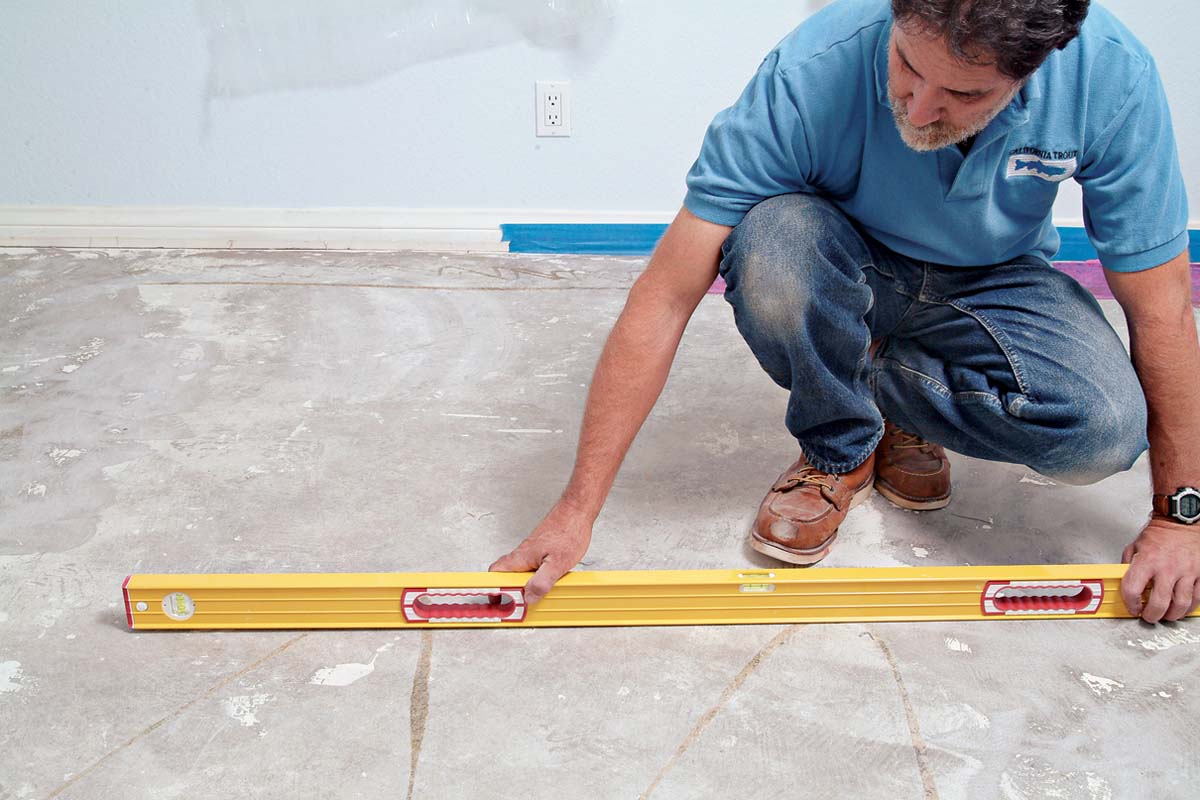
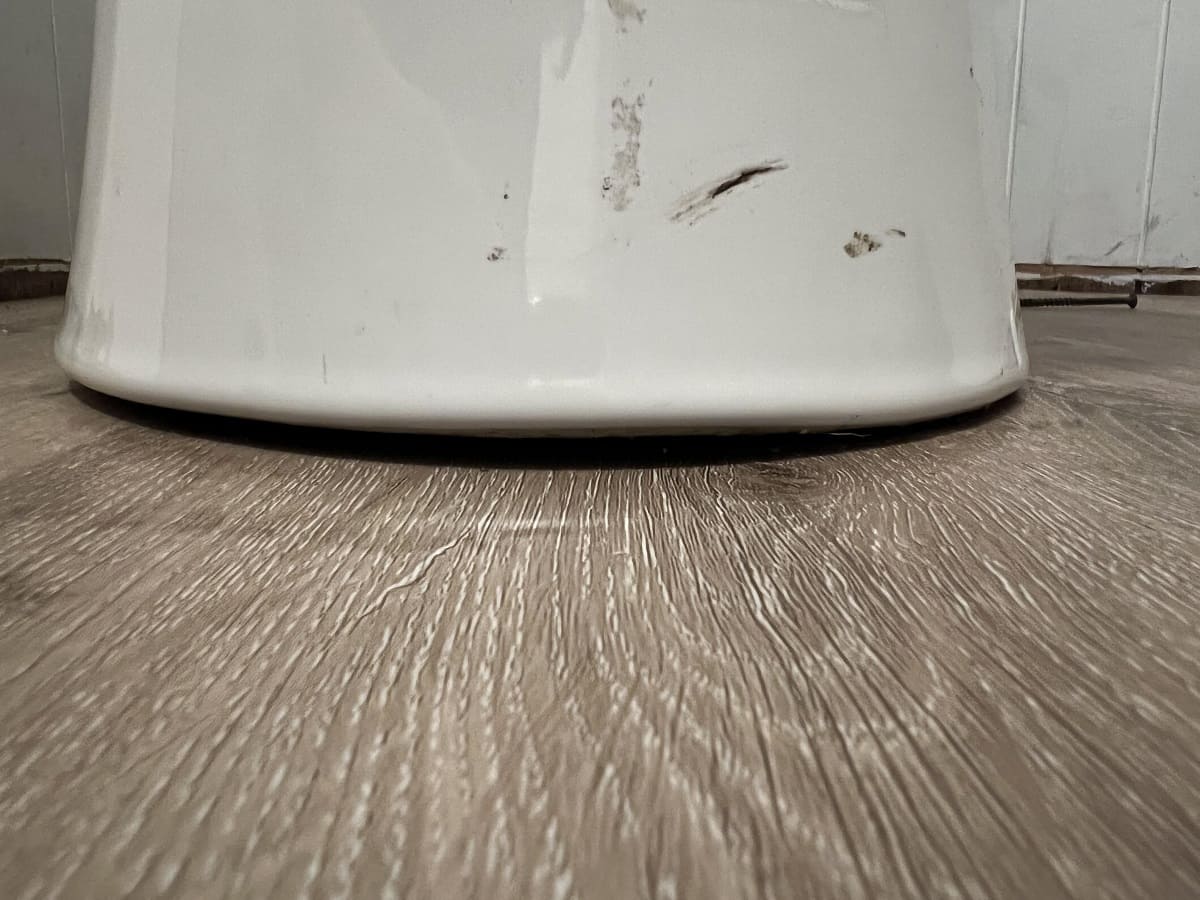
Use a level to determine the extent of the unevenness. Place the level on different areas of the floor, both parallel and perpendicular to the floorboards, to get an accurate assessment. This will help you identify the low and high spots.
If you notice any protruding nails, use a hammer and nail set to drive them back into the floorboards or remove them if necessary. Inspect the baseboards and trim to ensure they are securely attached. If needed, use a pry bar to carefully remove them.
Additionally, closely examine the subfloor. Look for any signs of water damage, rot, or structural issues. It’s important to address any underlying problems before proceeding to level the wood floor. If you find any major issues, it may be necessary to consult a professional.
Once you have thoroughly inspected the floor and addressed any immediate concerns, you can proceed to the next step: removing any obstacles or furniture.
Step 2: Remove any Obstacles or Furniture
Before you can begin the leveling process, it’s important to clear the area of any obstacles or furniture. This will give you ample space to work and prevent any potential damage to your belongings.
Start by removing any large furniture pieces, such as tables, chairs, or cabinets, from the room. If the furniture is too heavy to move, you can place sliders or furniture pads underneath to protect the floor and facilitate easy relocation later. Remember to empty the furniture of any items before moving them.
Once the larger furniture has been removed, clear the room of any smaller items such as rugs, decor, or accessories. Sweep or vacuum the floor to remove any dust or debris that may interfere with the leveling process.
If there are built-in features, such as cabinets or shelving, that cannot be removed, cover them securely with plastic sheeting or drop cloths to protect them from dust and debris.
By clearing the room of obstacles and furniture, you’ll have a clean and open space to work in. This will allow for easier access to the floor and help ensure a smooth leveling process. With the area cleared, you’re ready to move on to the next step: preparing the surface.
Step 3: Prepare the Surface
Preparing the surface is an important step in leveling a wood floor. Proper surface preparation will ensure that the leveling materials adhere well and provide a stable and even foundation for your new flooring.
Start by thoroughly cleaning the floor to remove any dirt, dust, or debris. Sweep or vacuum the entire area, paying special attention to the corners and edges. Use a damp mop or cloth to wipe away any remaining residue.
If there are any adhesive residues or stubborn stains, you may need to use a floor cleaner specifically designed for wood floors. Follow the manufacturer’s instructions and make sure to rinse the floor thoroughly after cleaning.
Once the floor is clean, inspect the wood surface for any loose boards or damaged areas. If you find any, secure loose boards with screws or nails. Fill any cracks or gaps with wood filler or a similar product, following the manufacturer’s instructions. Allow the filler to dry completely before proceeding.
With the floor clean and repaired, it’s time to assess the moisture level. Moisture can affect the performance of leveling materials, so it’s crucial to ensure the floor is dry before proceeding. Use a moisture meter to check the moisture content of the wood. Ideally, the moisture level should be within the manufacturer’s recommended range for the leveling compound.
If the moisture level is too high, you’ll need to address the issue before proceeding. This may involve improving ventilation in the room, using dehumidifiers, or allowing the floor to dry naturally over time. Consult with a professional if you’re unsure about how to handle high moisture levels.
By properly preparing the surface, you’re setting the stage for a successful leveling process. Now that the surface is clean and dry, you can move on to the next step: identifying the low spots on the floor.
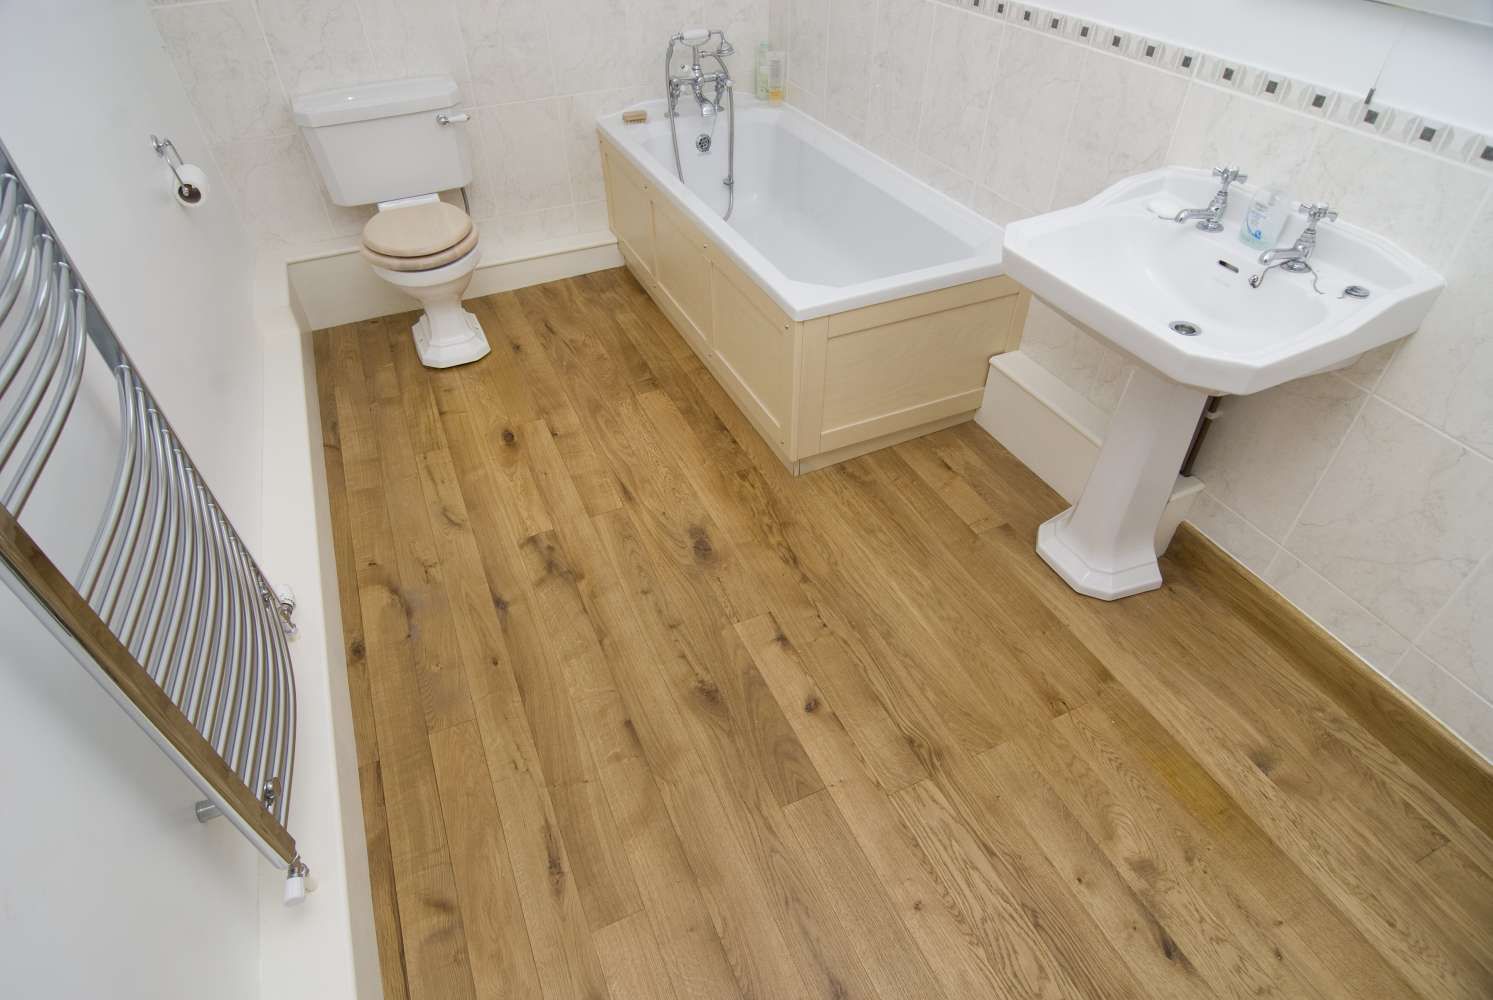
Read more: How To Level Bathroom Floor
Step 4: Identify the Low Spots
Identifying the low spots on the wood floor is crucial for effectively leveling the surface. These low areas can be responsible for the unevenness in the floor and need to be addressed to achieve a level result.
Start by using a long, straight level and place it across different areas of the floor. Look for gaps between the level and the floor; these indicate low spots. Note the locations of these low areas, as you will focus on leveling them later in the process.
In addition to using a level, you can also use a string or chalk line to mark reference lines on the floor. This will help you visually identify the areas that require leveling. Extend the string or snap a chalk line across the room, following the contours of the floor. This will give you a clear visual indication of the low spots.
Take your time to accurately identify the low spots as they will be your focus for the leveling process. Make sure to mark these areas clearly for easy reference once you start leveling the floor.
Keep in mind that not all low spots require the same level of attention. Minor low spots can be addressed using shims or fillers, while larger or more significant dips may require the use of self-leveling compound. Understanding the extent of the unevenness will help you determine the appropriate method to use for each low spot.
With the low spots identified, you’re ready to move on to the next step: determining the leveling method for each area.
Step 5: Determine the Leveling Method
Once you have identified the low spots on the wood floor, it’s time to determine the best method for leveling each area. The method you choose will depend on the severity of the unevenness and the type of flooring you plan to install.
For minor low spots, you can use shims or fillers to level the area. Shims are small wooden wedges that can be inserted underneath the floorboards to raise them to the desired level. Fillers, such as wood filler or epoxy, can be used to fill in small gaps or depressions in the floor surface. Make sure to follow the manufacturer’s instructions when using either method.
If the low spots are more significant or cover a larger area, you may need to use self-leveling compound. This specialized product is designed to create a smooth and level surface. Self-leveling compound is typically mixed with water and poured onto the low areas of the floor. It then settles and levels itself out, creating a flat surface. Follow the manufacturer’s instructions carefully when working with self-leveling compound.
Consider the type of flooring you plan to install as well. Some types, such as laminate or vinyl, may tolerate slight unevenness and may not require extensive leveling. However, other types, such as hardwood or tile, require a more precise and level surface. Take into account the recommendations from the flooring manufacturer to ensure a successful installation.
Remember to take your time during this step and carefully determine the appropriate method for each area. Keep in mind that a combination of methods may be needed to achieve an overall level floor. Once you have determined the leveling method for each low spot, you can proceed to the relevant steps in the leveling process.
Now that you have a clear understanding of how to determine the leveling method, you’re ready to move on to the next step: using shims or fillers for minor low spots.
Step 6: Use Shims or Fillers for Minor Low Spots
If you have identified minor low spots on your wood floor, you can correct them using shims or fillers. This method is ideal for small areas that require a slight adjustment to achieve a level surface.
Start by determining the thickness of the shims or fillers needed to raise the low spots to the desired level. Place the level across the low area and measure the gap between the level and the floor. This will give you an indication of how much shimming or filling is required.
If you are using shims, cut small wooden wedges to the appropriate thickness. Place the shim under the floorboard in the low spot, gradually inserting it until the board is level. Use a hammer or mallet to tap the shim gently if needed. Repeat this process for each low spot, ensuring that the boards are level with the surrounding surface.
If you opt for fillers, select a wood filler or epoxy that matches the color of your floor. Apply the filler to the low spots, following the manufacturer’s instructions. Use a putty knife or a similar tool to spread the filler evenly and smooth out the surface. Allow the filler to dry completely before proceeding to the next step.
After shimming or filling the minor low spots, check the levelness of the floor using a level. If necessary, make any adjustments by adding or removing shims or applying additional filler as needed. It’s important to ensure that the surface is as level as possible before moving on to the next steps.
With the minor low spots addressed using shims or fillers, you’re ready to tackle the high spots on the wood floor. The next step will guide you through the process of sanding the high spots to achieve a level surface.
Before leveling a wood floor, make sure to thoroughly clean the surface and remove any debris. Use a self-leveling compound to fill in any low spots and create a smooth, even surface. Follow the manufacturer’s instructions for best results.
Step 7: Sand the High Spots
After addressing the minor low spots on your wood floor, the next step is to sand down the high spots. Sanding will help you achieve a level surface by smoothing out any raised areas or bumps.
Start by identifying the high spots on the floor. These are areas where the floor surface is raised above the level of the surrounding boards. Use a level or feel the floor with your hand to locate these uneven areas.
For sanding, you’ll need an electric sander equipped with a fine-grit sandpaper. Start with a lower grit if the high spots are particularly pronounced and gradually work your way up to a higher grit for a smoother finish. Make sure to follow the manufacturer’s instructions for operating the sander.
Using the electric sander, move it back and forth over the high spots, applying even pressure. Keep the sander moving in a slow and steady motion to avoid creating divots or uneven patches. Pay extra attention to the high spots, but also sand the surrounding area slightly to achieve a seamless, blended surface.
Periodically check the levelness of the floor with a level or by feel. Continue sanding until the high spots are brought down to the level of the surrounding floorboards, resulting in a smooth and even surface.
Be cautious not to oversand the floor or remove too much material, as this can create new low spots. It’s better to take your time and make incremental adjustments until you achieve the desired levelness.
After sanding, use a vacuum or a broom to thoroughly clean up the dust and debris from the floor. This will prepare the surface for the next step in the leveling process.
With the high spots addressed by sanding, you’re now ready to move on to the next step: applying self-leveling compound to further level the floor.
Read more: How To Level A Concrete Floor
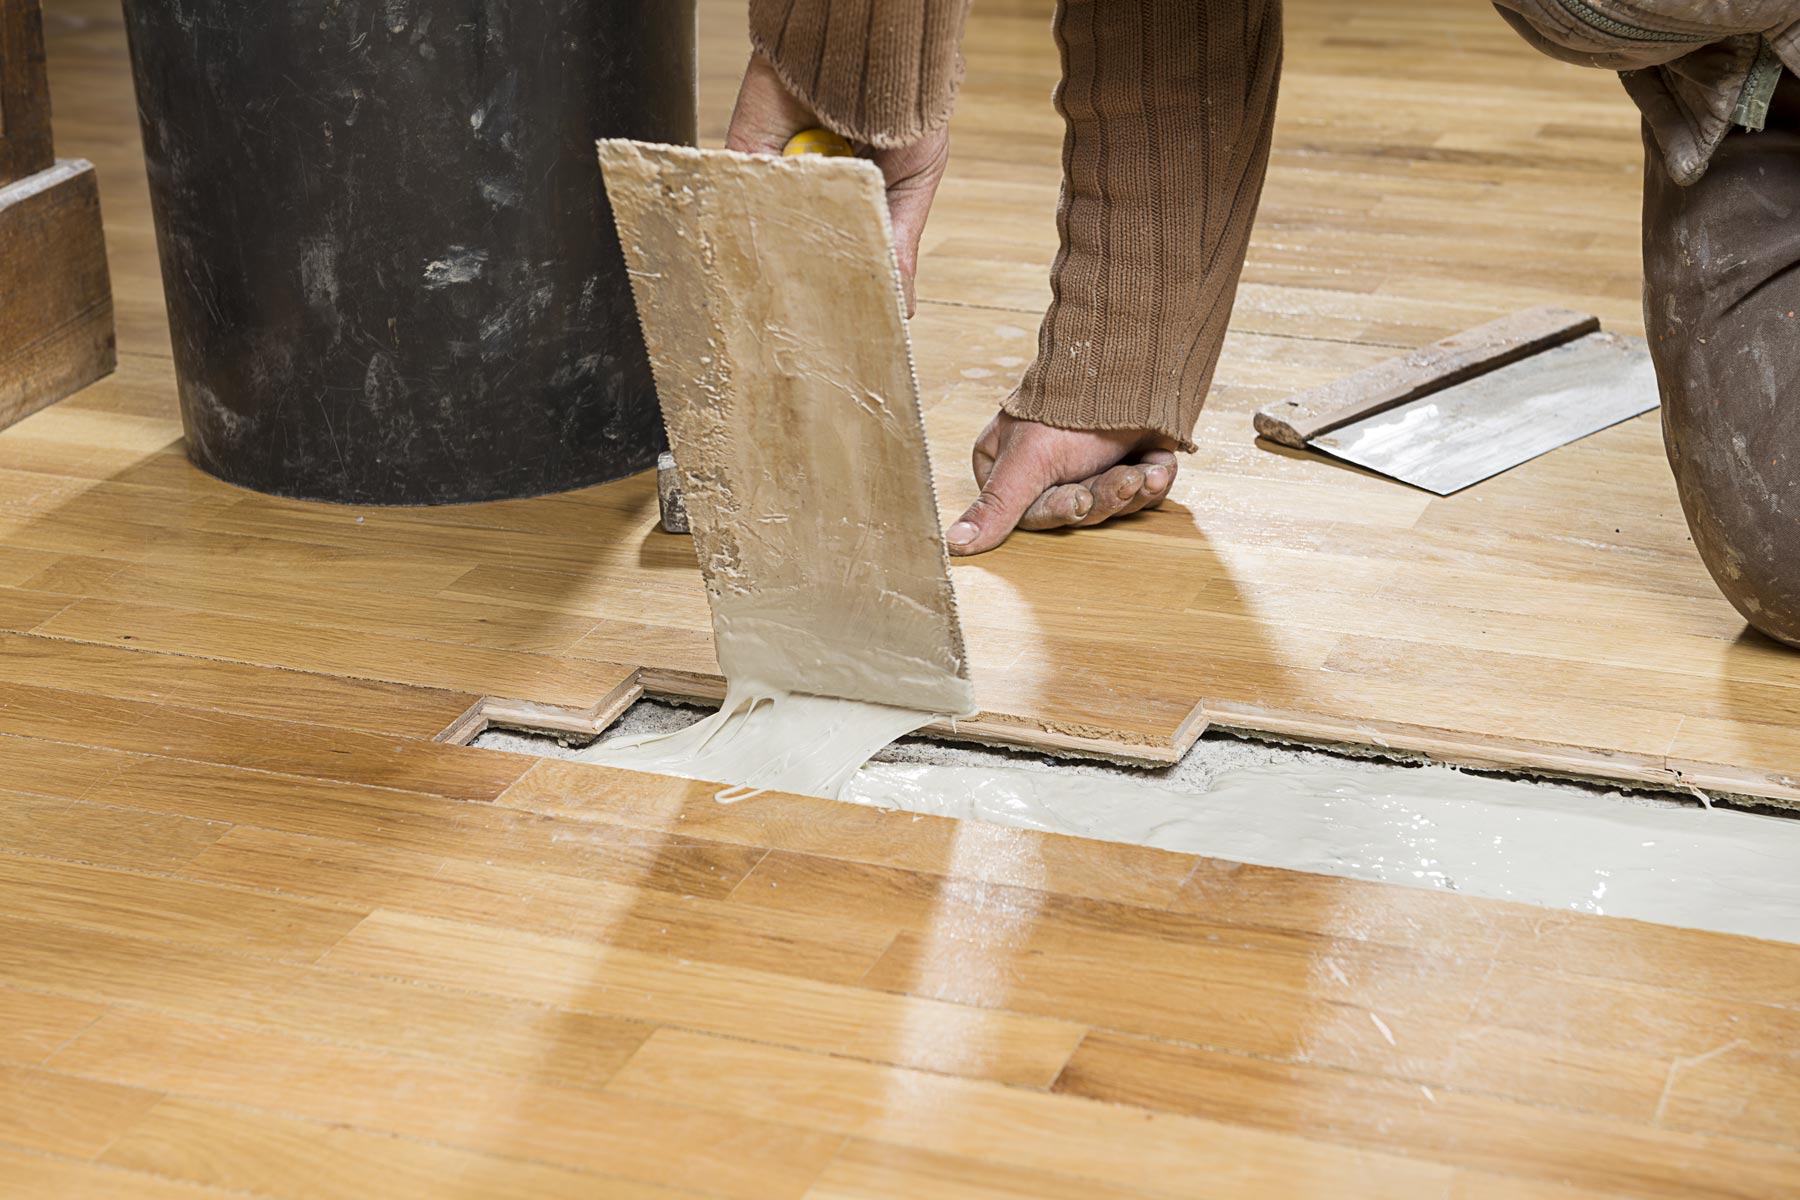
Step 8: Apply Self-Leveling Compound
Applying self-leveling compound is a crucial step in achieving a fully level wood floor. This specialized product is designed to flow and settle into any remaining low spots, creating a smooth and even surface.
Before you begin, carefully read and follow the manufacturer’s instructions for the specific self-leveling compound you have chosen. Some compounds may require mixing with water, while others come pre-mixed and ready to use.
Start by thoroughly cleaning the floor to remove any dust, debris, or residue from the sanding process. This will help ensure proper adhesion of the self-leveling compound. Use a vacuum or broom followed by a damp mop to clean the surface effectively.
Next, mix the self-leveling compound according to the manufacturer’s instructions. Pour the compound into a clean bucket and slowly add the specified amount of water, if required. Use a drill with a mixing attachment to mix the compound until it reaches a smooth and pourable consistency.
Working quickly, pour the self-leveling compound onto the floor, starting from one corner of the room. Use a trowel or a screed tool to spread and smooth out the compound, ensuring that it fills in the low spots and creates a level surface.
As you work, gently tap the floor with a mallet to help settle the compound and release any trapped air bubbles. Continue spreading the compound until you have covered the entire low area, feathering the edges to blend with the surrounding floor.
Allow the self-leveling compound to dry according to the manufacturer’s instructions. This can typically take several hours or even a day, depending on the product and environmental conditions. Avoid walking on the floor during the drying process to prevent any disturbances or unevenness.
After the compound has dried, check the levelness of the floor using a level. If necessary, make any additional adjustments or fill in any remaining low spots with additional compound. Allow the new application to dry thoroughly.
With the self-leveling compound applied and dried, you’re now ready to move on to the next steps in the leveling process. These steps will involve sanding the floor surface and preparing it for the final finish or sealant, if desired.
Step 9: Allow the Compound to Dry
After applying the self-leveling compound to your wood floor, it’s crucial to allow it sufficient time to dry and cure properly. This drying period is essential for the compound to set and harden, ensuring a stable and level surface.
The drying time for self-leveling compound will vary depending on the brand, product, and environmental conditions. It’s important to follow the manufacturer’s instructions for the specific compound you’re using. Typically, the drying process can take anywhere from a few hours to a day or longer.
While the compound is drying, it’s essential to avoid walking on the floor or placing any heavy objects on it. These actions can disrupt the leveling process and lead to unevenness or damage to the newly applied compound. If necessary, block off the area or use caution tape to prevent accidental disturbances.
Proper ventilation is also crucial during the drying period. Open windows and use fans to promote air circulation and expel any fumes or odors associated with the compound. Ensure that the room remains at a moderate temperature, as extreme temperatures can impact the drying process and the final result.
Keep in mind that the drying time may be extended in high humidity or cold weather conditions. The compound may take longer to fully cure and harden, so exercise patience and allow for adequate drying time to ensure the best outcome.
To determine if the compound is fully dry, you can conduct a touch test. Gently press your finger against a small section of the compound. If it feels firm and no indentations are left, it is likely dry. However, it’s always best to err on the side of caution and wait the recommended drying time provided by the manufacturer.
Once the self-leveling compound is completely dry and hardened, you can proceed to the next steps in the leveling process. These steps typically involve sanding the floor surface to achieve a smooth finish before cleaning and preparing for the final finish or sealant, if desired.
Step 10: Sand the Floor Surface
After allowing the self-leveling compound to dry and cure, the next step in leveling a wood floor is to sand the surface. Sanding will help achieve a smooth and even finish, removing any imperfections or roughness left by the leveling compound.
Start by preparing the sanding equipment. You will need an electric sander with a fine-grit sandpaper attachment. The sandpaper grit level will depend on the condition of the surface and the desired smoothness. Begin with a medium or fine grit and gradually move to a finer grit for a smoother finish.
Prior to sanding, ensure the area is clean and free of any debris or dust. Use a vacuum or broom to remove any loose particles that may interfere with the sanding process. It’s crucial to have a clean surface to achieve the best results.
When using the electric sander, move it gently in the direction of the wood grain. Avoid applying excessive pressure, as this can result in uneven sanding or dips in the surface. Keep the sander moving steadily and evenly across the floor, covering the entire area that was leveled.
Pay close attention to the areas where the leveling compound was applied. Focus on creating a seamless transition between the leveled spots and the surrounding floor. Blend the sanded surface with the rest of the floor for a uniform appearance.
Periodically check the levelness of the floor using a level or by feel. Continue sanding until the entire surface feels smooth and even to the touch. Be mindful not to oversand, as this can create low spots or remove too much material from the floor.
After sanding, use a vacuum or a broom to thoroughly clean up the dust and debris from the floor. It’s important to remove all sanding residue to prepare the surface for the final steps of the leveling process.
With the floor surface sanded and smooth, you are now ready to proceed to the next step: cleaning and prepping the floor for the final finish or sealant.
Step 11: Clean and Prep the Floor
Once you have sanded the surface of your wood floor, it’s important to thoroughly clean and prepare the area before applying any final finish or sealant. Proper cleaning and prepping will ensure optimal adhesion and a smooth, professional-looking result.
Start by using a vacuum or broom to remove any dust and debris left from the sanding process. Pay attention to the corners, edges, and any hard-to-reach areas. You may also use a damp cloth or tack cloth to wipe down the floor and collect any remaining dust particles.
Next, use a wood floor cleaner that is suitable for the type of flooring you have. Follow the manufacturer’s instructions and dilute the cleaner if necessary. Use a mop or a microfiber cloth to thoroughly clean the entire surface of the floor. Ensure that you remove any residue or cleaning solution to avoid interfering with the final finish or sealant.
If there are any stubborn stains or marks on the floor, you can use a gentle abrasive cleaner or a floor buffer with a light abrasive pad. Be cautious not to scrub too vigorously, as this can damage the wood surface or remove the leveling compound in the areas you’ve worked on.
After cleaning, allow the floor to dry completely. This drying process may take a few hours, depending on the environmental conditions. Ensure that the room is well-ventilated during this time to facilitate the drying process.
If you plan to apply a final finish or sealant to the wood floor, ensure that the surface is smooth and free of any imperfections. If needed, you can lightly sand any rough areas or transitions between the leveled spots and the rest of the floor.
Once the floor is clean, dry, and smooth, you’re ready for the final step in the leveling process: applying a finish or sealant, which is optional but recommended for protection and enhanced aesthetics.
Take your time during this step to ensure that the floor is properly cleaned and prepped. This will contribute to a successful and long-lasting outcome.
Read more: How To Level Floor For Tile
Step 12: Apply a Finish or Sealant (optional)
Applying a finish or sealant to your leveled wood floor is an optional but highly recommended step. A finish or sealant can enhance the appearance of the floor, protect it from wear and tear, and prolong its lifespan. Depending on your preferences and the type of wood flooring you have, you can choose from a variety of finishes, such as polyurethane, lacquer, or wax.
Before applying a finish or sealant, ensure that the floor is clean, dry, and free from any dust or debris. If necessary, lightly sand the surface to remove any rough areas or imperfections. This will help ensure a smooth and even application of the finish.
If you’re applying a polyurethane or other liquid-based finish, it’s essential to follow the manufacturer’s instructions. Use a brush, roller, or sprayer to evenly apply the finish, working in small sections at a time. Be mindful of any drying times and recommendations for applying multiple coats.
If you’re using a wax finish, apply the wax according to the instructions on the product. Use a clean cloth or mop to spread a thin, even layer of wax over the surface of the floor. Allow the wax to dry and then buff it with a clean, soft cloth to achieve a lustrous shine.
Remember to work in a well-ventilated area and follow any safety precautions specified by the finish or sealant manufacturer. Use appropriate protective gear, such as gloves and a mask, to ensure your safety during the application process.
Once the finish or sealant has been applied, allow sufficient drying time as recommended by the manufacturer. This will ensure that the finish properly sets and cures, providing the desired level of protection and aesthetic appeal.
Care for the finished floor according to the maintenance instructions provided by the manufacturer of the finish or sealant. Regular cleaning and maintenance will help maintain the beauty and integrity of your leveled wood floor for years to come.
Congratulations! You’ve successfully completed the process of leveling your wood floor and, if desired, applied a finish or sealant to enhance its appearance and protection. Now you can enjoy the benefits of a smooth, level surface in your home.
Remember to regularly inspect your wood floor for any signs of unevenness or new issues that may arise. Promptly address any problems to maintain the integrity and longevity of your leveled floor.
Thank you for following this step-by-step guide, and we hope it has been helpful in achieving a level wood floor that meets your expectations.
Happy flooring!
Conclusion
Leveling a wood floor is a task that can greatly improve the aesthetic appeal and functionality of your living space. By following the step-by-step process outlined in this guide, you can successfully level your wood floor and create a smooth and even surface.
Throughout the process, it’s important to be thorough in inspecting the floor, identifying low and high spots, and determining the appropriate methods for leveling. Taking the time to properly prepare the surface, apply self-leveling compound when necessary, and sand the floor will yield optimal results.
Remember to prioritize safety by using appropriate protective gear and following the instructions provided by manufacturers of tools, materials, and finishes. Keep in mind that drying and curing times for self-leveling compound and finishes may vary, so exercise patience and allow for adequate time to achieve the desired outcome.
Once your wood floor is leveled, you can choose to apply a finish or sealant to enhance its appearance and protection. This step is optional, but it can greatly enhance the beauty and longevity of your newly leveled floor.
Maintaining your leveled wood floor is also crucial. Regular cleaning and proper care will help preserve its integrity and ensure that it continues to provide a level and inviting surface for years to come.
We hope this comprehensive guide has provided you with the knowledge and guidance necessary to successfully level your wood floor. Remember to adapt the process as needed to suit your specific situation and consult with professionals if you encounter any complex issues or feel unsure about any aspect.
Enjoy your beautifully leveled wood floor and the transformed ambiance it brings to your home!
Frequently Asked Questions about How To Level A Wood Floor
Was this page helpful?
At Storables.com, we guarantee accurate and reliable information. Our content, validated by Expert Board Contributors, is crafted following stringent Editorial Policies. We're committed to providing you with well-researched, expert-backed insights for all your informational needs.


0 thoughts on “How To Level A Wood Floor”