Articles
How To Fill Hole In Driveway
Modified: December 7, 2023
Learn effective techniques for filling holes in your driveway with our comprehensive articles. Get expert tips and advice to restore your driveway's smooth surface.
(Many of the links in this article redirect to a specific reviewed product. Your purchase of these products through affiliate links helps to generate commission for Storables.com, at no extra cost. Learn more)
Introduction
Having a hole in your driveway can not only be unsightly, but it can also be a safety hazard. Whether the hole was caused by erosion, wear and tear, or other factors, it’s important to fill it in to prevent further damage and ensure the longevity of your driveway. While hiring a professional to fix the hole may seem like the easiest option, it can also be quite costly. Thankfully, with the right tools and materials, you can easily fill the hole in your driveway yourself.
In this article, we will walk you through a step-by-step guide on how to fill a hole in your driveway. We will cover everything from assessing the hole and cleaning it, to preparing the patching material and efficiently filling the hole. So, grab your tools and let’s get started!
Before we dive into the process, it’s important to note that the method outlined in this article is suitable for filling small to medium-sized holes in driveways made of materials such as asphalt or concrete. Larger holes or holes in other materials may require different approaches or professional assistance. It’s also crucial to ensure your safety while working on your driveway, so be sure to wear protective gear such as gloves and safety glasses.
Now that we have covered the basics, let’s move on to the tools and materials you’ll need for this project.
Key Takeaways:
- Easily fill small to medium-sized driveway holes with the right tools and materials, following a step-by-step guide. Ensure safety, proper assessment, cleaning, and professional finishing for a long-lasting repair.
- Save money and restore your driveway’s integrity by DIY hole filling. Thoroughly assess, clean, prepare, fill, compact, and smooth the patch, then allow for proper curing and regular maintenance to prevent future damage.
Read more: How To Patch Holes In Driveway
Tools and Materials Needed
Before you begin filling the hole in your driveway, it’s important to gather all the necessary tools and materials. Here’s a list of what you’ll need:
- Shovel: A sturdy shovel will be used for cleaning and digging out the hole.
- Broom: This will be used to sweep away debris and ensure a clean working area.
- Pressure washer: If your driveway is dirty or has loose debris, a pressure washer can help clean the surface before filling the hole.
- Cold patch or asphalt repair mix: This is the material that will be used to fill the hole. Cold patch is readily available at most home improvement stores and is suitable for small to medium-sized holes.
- Tamping tool: A tamping tool or a tamper will be used to compact the patching material and ensure a sturdy fill.
- Gloves and safety glasses: It’s important to protect your hands and eyes while working, so make sure to wear gloves and safety glasses.
- Bucket or wheelbarrow: You’ll need a container to mix the patching material in.
- Water: Water will be needed to mix the patching material and aid in the curing process.
- Level or straight edge: A level or straight edge will help you ensure that the patch is even and level with the surrounding driveway.
Once you have all the necessary tools and materials, you’re ready to move on to the next step: assessing the hole in your driveway.
Step 1: Assessing the Hole
Before you start filling the hole in your driveway, it’s important to assess the extent of the damage. This will help you determine the appropriate size and depth of the hole you’ll need to fill. Here are the steps to assess the hole:
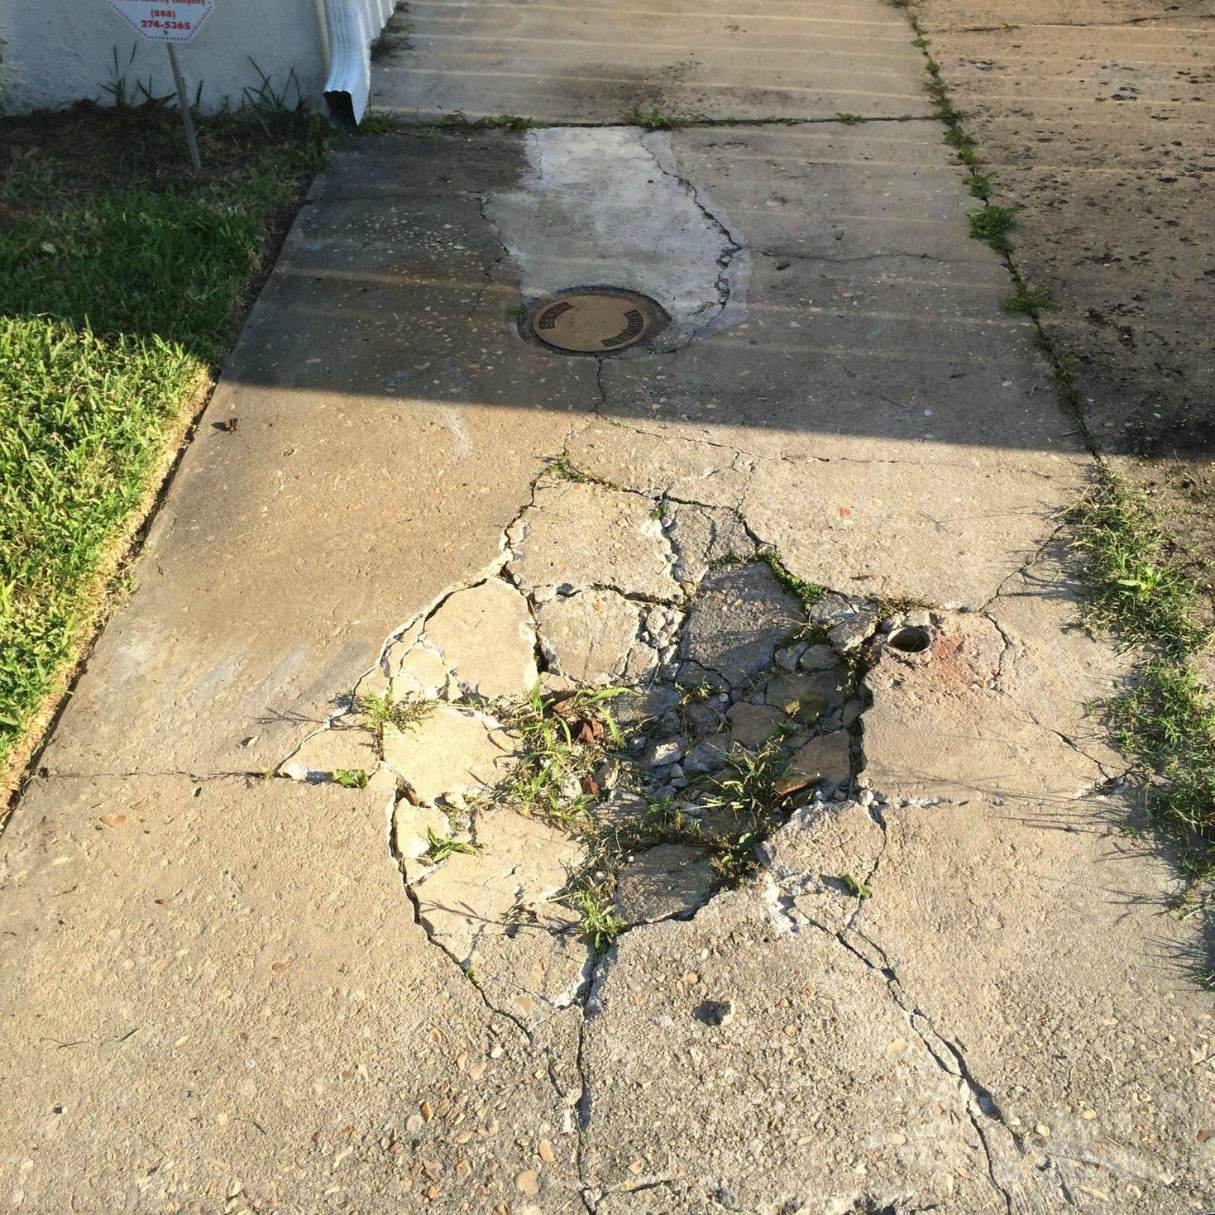
- Inspect the hole: Take a close look at the hole in your driveway and examine its shape and size. Assess whether it is a simple pothole or if there are any underlying issues causing the hole.
- Measure the hole: Use a measuring tape or ruler to measure the diameter and depth of the hole. Write down the measurements for reference.
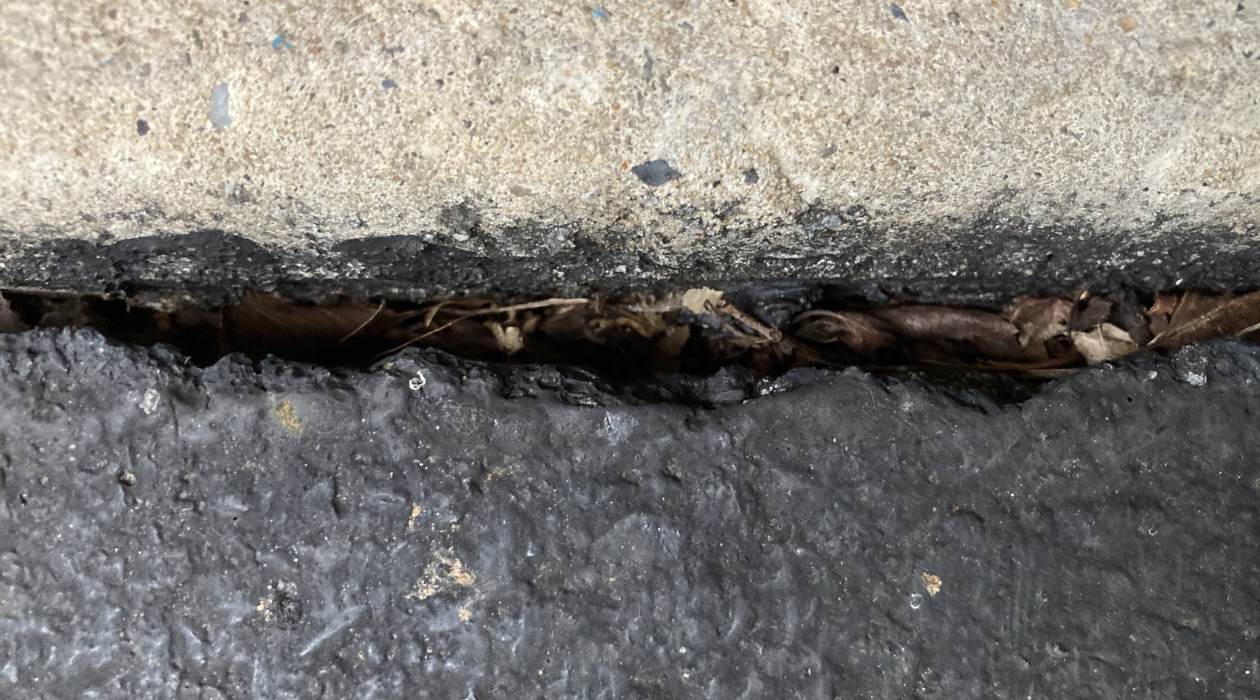
- Check for debris: Remove any loose debris or vegetation from the hole. This will ensure that the patch adheres properly and creates a solid fill.
- Assess the surrounding area: Take a look at the surrounding area to see if there are any cracks or damage that may need to be addressed before filling the hole. Cracks can indicate underlying issues that may affect the longevity of the patch.
By thoroughly assessing the hole, you’ll have a clear understanding of its size and condition. This information will guide you in selecting the right materials and techniques for filling the hole effectively. Now that you’ve assessed the hole, it’s time to move on to the next step: cleaning the hole.
Step 2: Cleaning the Hole
Now that you have assessed the hole in your driveway, it’s time to clean it thoroughly. Cleaning the hole ensures that the patching material adheres properly and creates a strong bond with the existing surface. Follow these steps to clean the hole:
- Remove any loose debris: Use a shovel or broom to remove any loose gravel, dirt, or debris from the hole. Clearing away loose materials will allow for better adhesion and a more solid fill.
- Use a pressure washer (if necessary): If your driveway is particularly dirty or has stubborn debris, such as oil or grease stains, you may want to use a pressure washer to clean the surface. Follow the manufacturer’s instructions for safe and effective use.
- Sweep the hole: After removing the loose debris, use a broom to sweep the hole clean. Ensure that there are no remaining particles or dirt that could hinder the adhesion of the patching material.
- Dry the hole: If you used a pressure washer or if the hole is damp, allow it to dry completely before proceeding. A dry surface will help the patching material adhere properly.
By cleaning the hole thoroughly, you’re creating the ideal environment for the patching material to bond with the existing surface. This step is crucial for ensuring a long-lasting and sturdy repair. With the hole clean and ready, it’s time to move on to the next step: preparing the patching material.
Step 3: Preparing the Patching Material
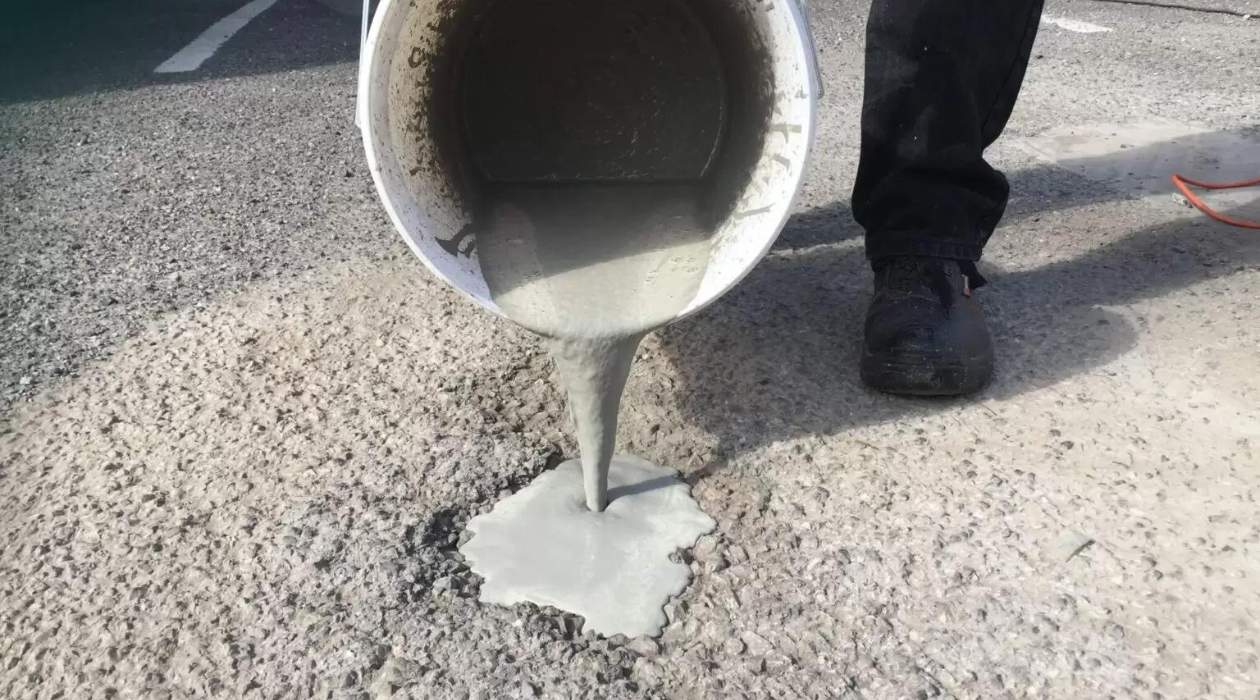
With the hole in your driveway clean and dry, it’s time to prepare the patching material. The patching material, such as cold patch or asphalt repair mix, will fill the hole, creating a smooth and even surface. Follow these steps to prepare the patching material:
- Read the instructions: Read the packaging instructions of your chosen patching material. Different products may have specific mixing ratios or curing times. It’s important to follow the manufacturer’s instructions for the best results.
- Get a bucket or wheelbarrow: Gather a bucket or wheelbarrow to mix the patching material in. Make sure it’s clean and free of debris.
- Pour the patching material: Pour the appropriate amount of patching material into the bucket or wheelbarrow, based on the size of the hole you need to fill. Be mindful of the mixing ratios indicated on the packaging.
- Add water (if required): Some patching materials may require the addition of water for proper mixing. Gradually add water according to the instructions, stirring the mix until it reaches the desired consistency. Avoid adding too much water, as it can weaken the patch.
- Mix thoroughly: Use a shovel or mixing tool to thoroughly mix the patching material and water (if necessary). Ensure that there are no lumps or dry patches in the mix.
By properly preparing the patching material, you ensure its effectiveness and ease of application. It’s important to follow the manufacturer’s instructions to achieve the desired consistency and strength. With the patching material ready, let’s move on to the next step: filling the hole.
Clean the hole thoroughly and fill it with a cold patch asphalt mix. Compact the mix with a tamper and add more as needed. Finally, seal the edges with a layer of asphalt sealer.
Read more: How To Fill Hole In Cabinet
Step 4: Filling the Hole
Now that you have prepared the patching material, it’s time to fill the hole in your driveway. Follow these steps to ensure a proper and effective fill:
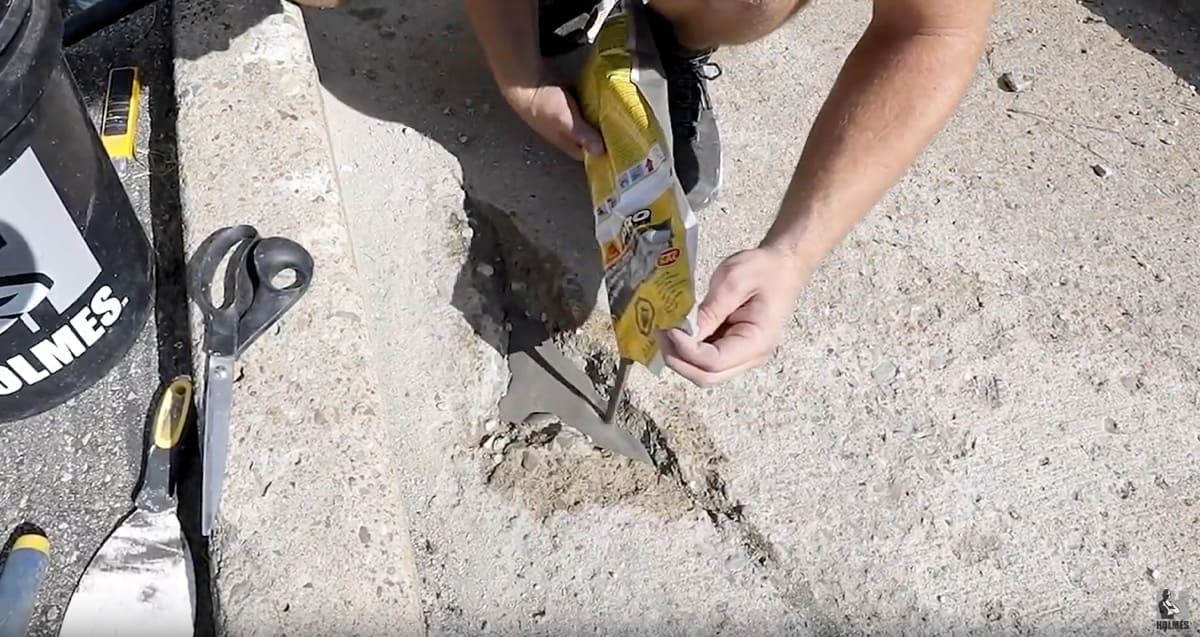
- Apply the patching material: Using a shovel or trowel, carefully apply the patching material into the hole. Start from the edges and work your way towards the center, ensuring that the material is evenly distributed.
- Overfill the hole: It’s recommended to slightly overfill the hole to compensate for any settling that may occur. This will help ensure a level and even surface once the patch is fully cured.
- Compact the patch: Use a tamping tool or tamper to firmly compact the patching material. Apply pressure evenly across the entire patch, working from the outer edges towards the center. This will eliminate air pockets and provide a solid and sturdy fill.
- Check the level: Use a level or straight edge to check if the patch is level with the surrounding driveway. Make any adjustments by adding or removing patching material as needed.
During the filling process, make sure to work efficiently and avoid prolonged breaks. Patching materials can begin to set quickly, so it’s important to complete the filling process without unnecessary delays. Once the hole is filled and compacted, it’s time to move on to the next step: compacting and smoothing the patch.
Step 5: Compacting and Smoothing the Patch
After filling the hole in your driveway, it’s important to compact and smooth the patch to ensure a seamless and professional finish. Follow these steps to achieve a compact and smooth patch:
- Compact the patch again: Once the patching material is in place and leveled, use a tamping tool or tamper to compact it further. This will help eliminate any remaining air pockets and ensure a solid fill.
- Smooth the surface: Use a trowel or the back of a shovel to smooth the surface of the patch. Work carefully to create an even and flat finish. Pay attention to the edges to ensure they blend seamlessly with the surrounding driveway.
- Use a straight edge: Run a straight edge, such as a board or a level, over the patch to check for any uneven areas. Make any necessary adjustments by adding or removing patching material accordingly.
- Blend with the existing driveway: To achieve a cohesive look, blend the patch with the existing driveway. Use the trowel or shovel to feather the edges of the patch, gradually tapering it into the surrounding surface.
By compacting and smoothing the patch, you not only improve its durability but also enhance the overall appearance of your driveway. Take the time to ensure a neat and seamless finish. Once you’re satisfied with the compacting and smoothing process, it’s time to move on to the final step: curing and finishing.
Step 6: Curing and Finishing
After completing the patching and smoothing process, it’s essential to allow the fill to cure and properly finish the repair. Follow these steps to ensure the curing and finishing process:
- Read the curing time: Refer to the instructions provided with your patching material to determine the recommended curing time. Curing times can vary depending on the product and environmental conditions.
- Keep the area closed off: To prevent any disturbance or damage to the freshly applied patch, it’s recommended to cordon off the area. Use barriers or caution tape to indicate that the area is under repair and should not be accessed.
- Allow for proper curing: During the curing period, avoid parking or driving on the patched area to allow it to fully set and harden. Follow the recommended curing time given by the manufacturer.
- Apply a sealant (optional): If desired, once the patch has cured, you can apply a sealant to further protect the repaired area. A sealant can help prolong the life of the patch and enhance its appearance. Follow the instructions provided with the sealant for proper application.
- Regular maintenance: To ensure the longevity of the patch and your entire driveway, regularly inspect and maintain the surface. Keep an eye out for any new cracks or holes and address them promptly to prevent further damage.
By allowing the patch to properly cure and taking care of regular maintenance, you can ensure that your driveway stays in good condition for years to come. Keeping up with maintenance will help prevent future holes and prolong the lifespan of your driveway.
Following these steps, you can successfully fill a hole in your driveway yourself. Remember to take the necessary safety precautions, gather the required tools and materials, and follow the instructions provided by the manufacturer of your patching material. By taking the time to properly assess, clean, prepare, fill, compact, smooth, cure, and finish the hole, you can achieve a professional and long-lasting repair.
With your driveway now hole-free, you can enjoy the improved aesthetics and safety of your property. So, roll up your sleeves, get your tools ready, and transform your driveway into a smooth and inviting surface once again.
Conclusion
Filling a hole in your driveway doesn’t have to be a daunting task. With the right tools, materials, and techniques, you can easily repair the damage and restore the integrity of your driveway. By following the step-by-step guide outlined in this article, you can successfully fill a hole in your driveway and achieve a seamless and professional finish.
Remember to start by assessing the hole and cleaning it thoroughly. Prepare the patching material according to the manufacturer’s instructions and carefully fill the hole, compacting the material to ensure a solid and sturdy fill. Smooth the surface, blend it with the existing driveway, and allow the patch to properly cure before applying a sealant, if desired.
Regular maintenance and inspections of your driveway will help prevent future damage and prolong its lifespan. Keep an eye out for any new cracks or holes, and address them promptly to maintain the integrity of your driveway.
By taking the DIY approach to fill a hole in your driveway, you can save money and ensure a high-quality repair. However, it’s important to note that larger or more complex repairs may require professional assistance. If you’re unsure about the severity of the damage or your ability to complete the repair, don’t hesitate to consult with a qualified contractor or specialist.
Now that you have the knowledge and know-how, go ahead and tackle that hole in your driveway. Enjoy the satisfaction of a job well done and appreciate the improved aesthetics and functionality of your driveway. A well-maintained driveway not only enhances the curb appeal of your property but also provides a safer and more enjoyable experience for you and your guests.
Frequently Asked Questions about How To Fill Hole In Driveway
Was this page helpful?
At Storables.com, we guarantee accurate and reliable information. Our content, validated by Expert Board Contributors, is crafted following stringent Editorial Policies. We're committed to providing you with well-researched, expert-backed insights for all your informational needs.


0 thoughts on “How To Fill Hole In Driveway”