Articles
How To Fix Car Ceiling Fabric
Modified: October 19, 2024
Learn how to fix car ceiling fabric with our informative articles. Get tips, step-by-step guides, and expert advice to restore your car's interior.
(Many of the links in this article redirect to a specific reviewed product. Your purchase of these products through affiliate links helps to generate commission for Storables.com, at no extra cost. Learn more)
Introduction
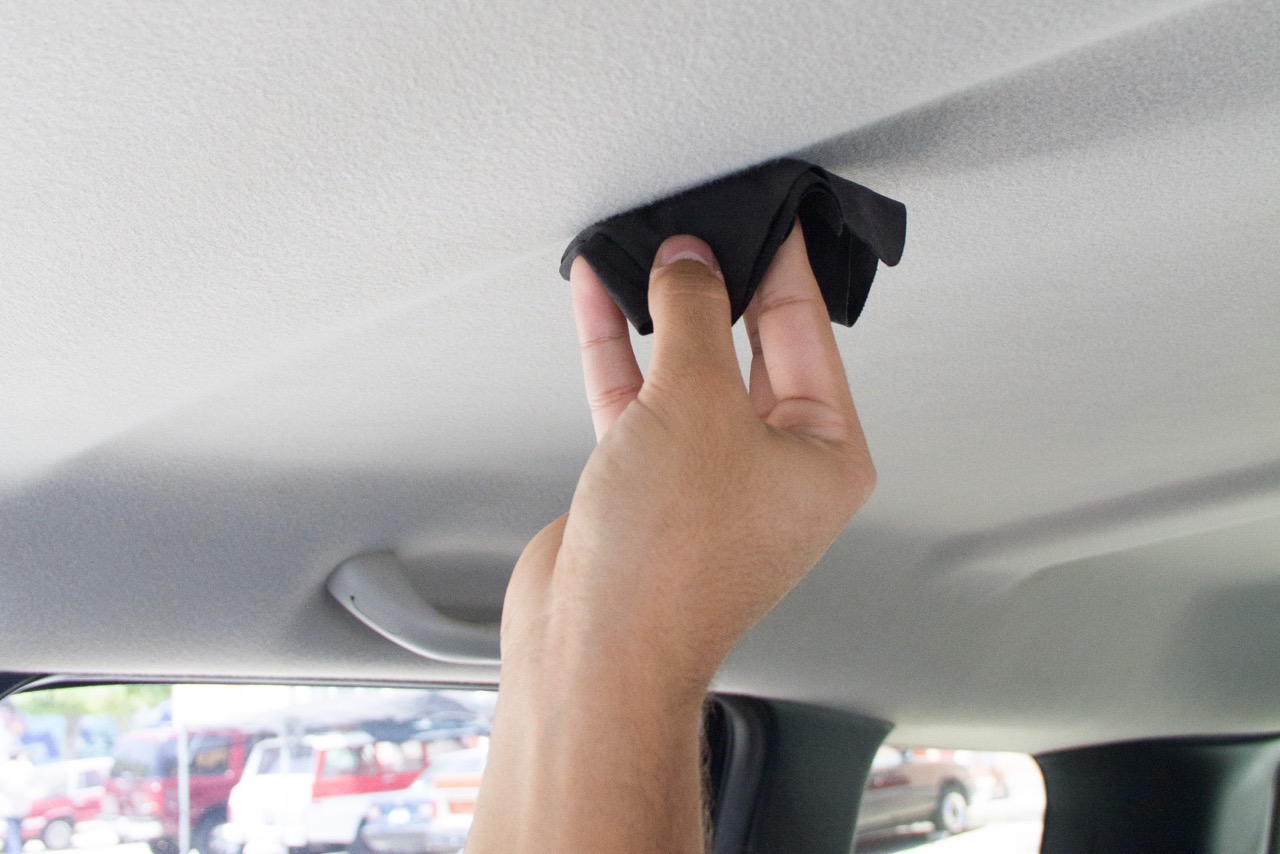
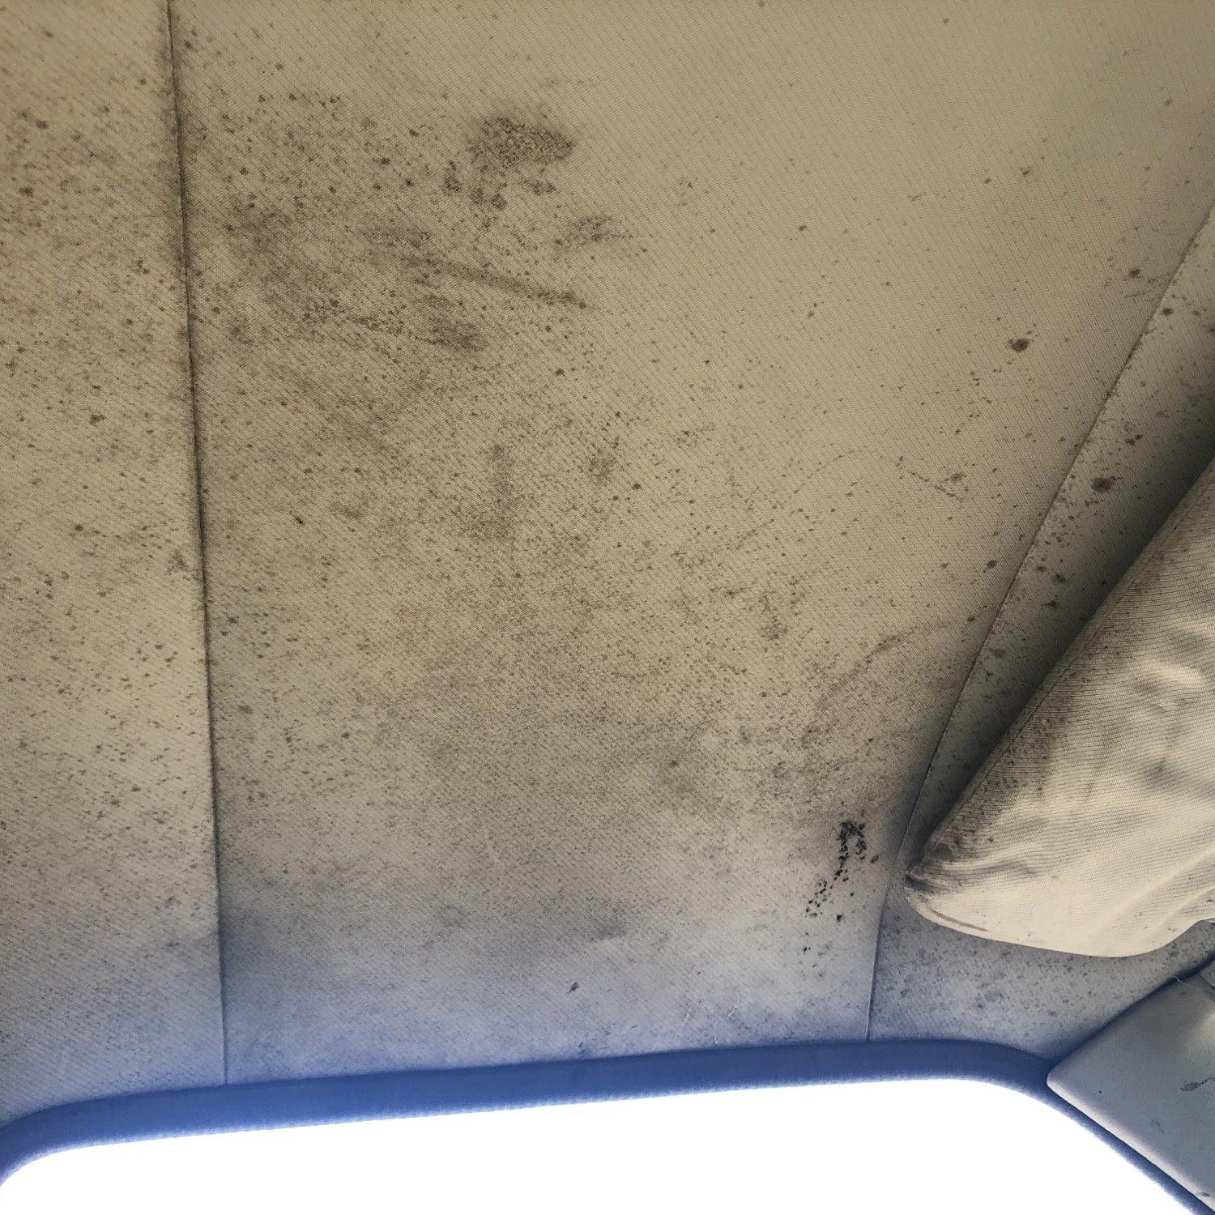
Having a damaged or sagging car ceiling fabric can be an eyesore and a source of frustration for any car owner. Whether it’s due to age, wear and tear, or an unfortunate accident, a damaged car ceiling can detract from the overall appearance and comfort of your vehicle. However, fear not! With the right tools and a little bit of know-how, you can easily fix your car ceiling fabric and restore it to its former glory.
In this article, we will guide you through the step-by-step process of fixing your car ceiling fabric. We will cover everything from preparing the necessary tools and materials, to removing the old fabric, cleaning the surface, applying adhesive, and reattaching the new fabric. By following these instructions, you can save yourself the time and expense of taking your car to a professional and achieve professional-looking results right at home.
Before we get started, it’s important to note that the specific steps and techniques may vary depending on the make and model of your car. It’s always a good idea to consult your car’s owner manual or seek professional advice if you have any doubts or concerns. With that said, let’s dive in and get started on fixing your car ceiling fabric!
Key Takeaways:
- Revitalize your car’s interior by following our step-by-step guide to fix the car ceiling fabric. Save time and money by achieving professional results right at home.
- Proper preparation, patience, and attention to detail are key to successfully repairing your car’s ceiling fabric. With the right tools and techniques, you can restore your car’s interior to its former glory.
Read more: How To Drape A Ceiling With Fabric
Step 1: Prepare the Necessary Tools and Materials
Before you begin the process of fixing your car ceiling fabric, it’s crucial to gather all the necessary tools and materials. This will ensure a smooth and efficient repair process. Here is a list of items you will need:
- Protective gear: Wear gloves and safety goggles to protect your hands and eyes from any potential hazards.
- Trim removal tools: These tools, such as a trim panel removal tool or a set of plastic pry tools, will help you safely remove the car’s trim pieces without causing any damage.
- Fabric adhesive: Choose a high-quality adhesive specifically designed for fabric-to-surface applications. Make sure it is strong and durable to ensure a long-lasting repair.
- Fabric: Purchase a new piece of fabric that matches the color and texture of your car’s original ceiling fabric. Measure the dimensions of the damaged area to ensure you have enough fabric for the repair.
- Scissors or utility knife: You will need these tools to cut the new fabric to the appropriate size.
- Cleaner: Use a mild cleaner or upholstery cleaner to clean the ceiling surface before applying the new fabric.
- Soft cloth or sponge: These tools will be used to apply the cleaner and remove any dirt or residue from the ceiling surface.
- Heat gun or blow dryer: A heat gun or blow dryer will help you soften the adhesive and remove the old fabric from the ceiling.
- Clamps or heavy objects: You may need clamps or heavy objects to hold the new fabric in place while the adhesive dries.
Once you have gathered all the necessary tools and materials, you’ll be ready to move on to the next step of the repair process.
Step 2: Remove the Car Ceiling Fabric
Now that you have all the necessary tools and materials, it’s time to start removing the old car ceiling fabric. Follow these steps to ensure a successful removal:
- Preparation: Begin by ensuring that the car’s interior is clean and free from any clutter. This will give you ample space to work and prevent any damage to other parts of the car.
- Locate the clips and screws: Most car ceiling fabrics are held in place by clips or screws that attach the fabric to the ceiling structure. Look for these clips or screws and carefully remove them using the appropriate trim removal tools.
- Start from the edges: Begin pulling down the fabric from the edges, working your way towards the center. Be gentle to avoid tearing the fabric. If necessary, use a heat gun or blow dryer to soften the adhesive and make it easier to remove the fabric.
- Remove any foam backing: In some cases, the fabric may be attached to a foam backing. If this is the case, carefully peel away the foam backing along with the fabric. Take your time to avoid tearing or damaging the foam.
- Clean the ceiling surface: Once the fabric is completely removed, you will be left with a bare ceiling surface. Use a soft cloth or sponge and a mild cleaner or upholstery cleaner to clean the surface thoroughly. Remove any dirt, grime, or adhesive residue to ensure a smooth and clean surface for the new fabric.
Remember to be patient and take your time during this step. Rushing or using excessive force can lead to further damage and make the repair process more challenging. Once the old fabric is removed and the ceiling surface is cleaned, you’re ready to move on to the next step of the repair process.
Step 3: Clean the Ceiling Surface
After removing the old car ceiling fabric, it’s essential to thoroughly clean the ceiling surface before applying the new fabric. This step will ensure proper adhesion and a seamless repair. Follow these steps to clean the ceiling surface:
- Gather the necessary materials: You will need a soft cloth or sponge, a mild cleaner or upholstery cleaner, and water.
- Dampen the cloth or sponge: Dip the cloth or sponge into water and wring out any excess moisture. You want it to be slightly damp, not soaking wet.
- Apply the cleaner: Spray a small amount of the mild cleaner or upholstery cleaner onto the damp cloth or sponge. Make sure to use a cleaner that is safe for your car’s interior materials.
- Clean the ceiling surface: Gently wipe the damp cloth or sponge over the entire ceiling surface. Pay attention to any areas that may have adhesive residue or stains. Use light pressure and circular motions to effectively remove dirt, grime, and residue.
- Rinse and dry: Once the surface is clean, rinse the cloth or sponge with clean water and wring out any excess moisture. Go over the ceiling surface once more to remove any remaining cleaner. Lastly, use a dry cloth to dry the surface thoroughly.
By cleaning the ceiling surface, you are creating the ideal foundation for the new fabric to adhere to. This step will remove any dirt, grease, or residue that could hinder the adhesive’s effectiveness. Take your time and ensure that the surface is completely clean and dry before moving on to the next step.
Step 4: Apply Adhesive to the Fabric
Now that the ceiling surface is clean and ready, it’s time to apply adhesive to the new fabric that will be attached to the car’s ceiling. Follow these steps to ensure proper application:
- Prepare the adhesive: Read the instructions provided with the fabric adhesive to understand the recommended application method. Some adhesives may require mixing or shaking before use. Ensure that you are working in a well-ventilated area to avoid inhaling any fumes.
- Cut the fabric: Using scissors or a utility knife, cut the new fabric to the appropriate size and shape. Make sure it is slightly larger than the area you are repairing to allow for adjustments.
- Apply adhesive to the fabric: Following the instructions provided with the adhesive, apply a thin and even layer of adhesive to the backside of the fabric. Be careful not to apply too much adhesive as it could seep through the fabric or create lumps.
- Spread the adhesive: Once the adhesive is applied, use a spatula or a clean, flat tool to spread it evenly across the fabric. Make sure the adhesive covers the entire surface area, including the edges.
- Allow the adhesive to set: Depending on the adhesive you are using, you may need to wait for a specific period for the adhesive to become tacky. Follow the instructions provided to determine the appropriate waiting time.
It’s important to note that different adhesives may have varying application techniques and drying times. Always refer to the manufacturer’s instructions to ensure you are using the adhesive correctly. Following these steps will help ensure that the adhesive is evenly applied to the fabric and provide a strong bond when attaching it to the car’s ceiling.
To fix car ceiling fabric, use a fabric adhesive spray to reattach loose fabric. Smooth out any wrinkles and allow it to dry completely before reattaching any trim pieces.
Read more: How To Cover A Ceiling With Fabric
Step 5: Reattach the Car Ceiling Fabric
With the adhesive applied to the fabric, it’s time to reattach the new fabric to the car’s ceiling. The following steps will guide you through the reattachment process:
- Position the fabric: Carefully place the adhesive-coated side of the fabric onto the cleaned ceiling surface. Start from one edge and work your way across, ensuring that the fabric is aligned properly and centered within the repair area.
- Smooth out the fabric: Gently press down on the fabric, starting from the center and working towards the edges. Use your hands or a clean, soft cloth to smooth out any wrinkles or bubbles. Ensure that the fabric lays flat against the ceiling surface.
- Secure the fabric: If necessary, use clamps or heavy objects to hold the fabric in place while the adhesive sets. Be careful not to place too much pressure on the fabric, as it may cause distortions or misalignments.
- Trim any excess fabric: Once the fabric is securely attached, use scissors or a utility knife to trim away any excess fabric around the edges. Take your time and make precise cuts to achieve a neat and professional finish.
During the reattachment process, be cautious not to stretch or pull the fabric too tightly, as this may cause it to warp or distort over time. Take your time to ensure that the fabric is properly aligned and smooth before proceeding.
Reattaching the car ceiling fabric requires precision and attention to detail. By following these steps, you can achieve a seamless and professional-looking result.
Step 6: Smooth Out Any Wrinkles or Bubbles
After reattaching the new fabric to the car’s ceiling, it’s important to eliminate any wrinkles or bubbles that may have formed during the process. This step will ensure that the fabric looks smooth and professional. Follow these steps to smooth out any wrinkles or bubbles:
- Inspect the fabric: Carefully examine the fabric on the ceiling surface to identify any wrinkles or bubbles. Pay close attention to the edges and corners, as they are common areas for wrinkles to appear.
- Apply heat if necessary: If you notice any wrinkles or bubbles, you can use a heat gun or blow dryer to soften the adhesive and make the fabric more pliable. Hold the heat source a few inches away from the fabric and move it in a circular motion to evenly distribute the heat.
- Smooth the fabric: Using your hands or a clean, soft cloth, gently press down on the fabric and smooth it towards the edges. Start from the center of the wrinkle or bubble and work your way outwards. Apply even pressure to ensure that the fabric adheres properly to the surface.
- Avoid excess heat or pressure: Be cautious not to overheat or apply excessive pressure to the fabric, as this can cause damage. Use a gentle touch and be patient while smoothing out wrinkles and bubbles.
It’s important to note that not all wrinkles or bubbles may be completely eliminated, particularly if the fabric has been stretched or excessively wrinkled during the repair process. However, by following these steps and taking your time, you can significantly improve the appearance of the fabric and achieve a smoother finish.
Remember, it’s normal to encounter some minor imperfections, especially if this is your first time repairing a car ceiling fabric. With practice and patience, you will become more adept at achieving a professional result.
Step 7: Allow the Adhesive to Dry
After smoothing out any wrinkles or bubbles, it’s crucial to allow the adhesive to dry completely. This step ensures that the fabric is securely attached to the car’s ceiling and prevents any premature lifting or shifting. Follow these guidelines to allow the adhesive to dry effectively:
- Refer to the adhesive instructions: Different adhesives have varying drying times. Review the instructions provided with the adhesive to determine the recommended drying duration.
- Avoid touching or disturbing the fabric: While the adhesive is drying, it’s important to refrain from touching or putting any pressure on the fabric. This could disrupt the bonding process and may result in uneven adhesion or fabric displacement.
- Keep the environment clean and dry: Ensure that the area where the car is parked is clean and free from excessive humidity or moisture. This will facilitate a faster and more secure drying process.
- Use clamps or weights if necessary: If the fabric requires additional support to stay in place, you can use clamps or heavy objects to hold it down gently. Be cautious not to apply excessive pressure, as this could cause distortions or damage to the fabric.
- Follow the recommended drying duration: The adhesive typically takes several hours to fully cure. Refer to the adhesive instructions to determine the best course of action and adhere to the recommended drying duration.
Allowing the adhesive to dry completely is crucial in ensuring a long-lasting and durable repair. Rushing this step could compromise the integrity of the repair and may result in fabric detachment or wrinkling.
Once the adhesive is fully dry, you can proceed to the final step, testing and inspecting the repaired car ceiling fabric.
Step 8: Test and Inspect the Repaired Car Ceiling Fabric
After the adhesive has dried, it’s time to test and inspect the repaired car ceiling fabric. This step ensures that the repair is successful and that the fabric is securely attached. Follow these steps to thoroughly test and inspect the repaired area:
- Gently touch the fabric: Using clean hands, lightly press on different areas of the fabric to ensure that it feels firmly attached to the ceiling surface. If you notice any areas that feel loose or shift, you may need to reapply adhesive or seek professional assistance.
- Check for wrinkles or bubbles: Inspect the fabric closely, both from afar and up close, to identify any remaining wrinkles, bubbles, or distortions. If you notice any imperfections, you can try using a heat gun or blow dryer to further smooth out the fabric.
- Monitor the fabric over time: Keep an eye on the repaired area in the following days and weeks. Check for any signs of the fabric detaching or wrinkling again. If you notice any issues, address them promptly to prevent further damage.
- Clean the fabric with care: Once the repair is complete, avoid using harsh chemicals or abrasive cleaning tools on the fabric. Instead, use a gentle upholstery cleaner or a damp cloth to keep the fabric clean without compromising its integrity.
- Seek professional help if necessary: If despite your best efforts, the repaired fabric does not meet your expectations or shows signs of ongoing damage, it may be beneficial to consult a professional. They can provide further guidance and potentially recommend alternative repair methods.
By thoroughly testing and inspecting the repaired car ceiling fabric, you can ensure that the repair is successful and that the fabric will remain securely in place for the long term. Taking the time to assess the repaired area will give you confidence in the durability and appearance of your car’s ceiling.
Congratulations! You have successfully repaired your car ceiling fabric. With proper care and maintenance, the fabric should continue to enhance the interior of your vehicle for years to come.
Remember, if at any point you feel uncertain about performing these repairs yourself, it’s always a good idea to seek professional assistance to ensure the best results.
Read more: How To Clean Car Ceiling
Conclusion
Repairing your car ceiling fabric can be a daunting task, but with the right information and guidance, you can achieve professional-looking results right at home. By following the step-by-step process outlined in this article, you have learned how to fix your car ceiling fabric effectively.
Throughout the process, we emphasized the importance of proper preparation, using the right tools and materials, and taking your time to ensure a seamless repair. From preparing the necessary tools and materials to removing the old fabric, cleaning the surface, applying adhesive, reattaching the new fabric, smoothing out wrinkles or bubbles, allowing the adhesive to dry, and testing and inspecting the repaired fabric, each step is crucial in achieving a successful repair.
Remember that the specific steps and techniques may vary depending on the make and model of your car, so it’s always important to consult your car’s owner manual or seek professional advice if needed. Additionally, keeping in mind the recommended drying times and following the manufacturer’s instructions for the adhesive you choose will ensure a long-lasting and secure repair.
By investing some time and effort, you can revitalize your car’s interior and restore the beauty and comfort of its ceiling. Not only will a repaired car ceiling fabric enhance the overall appearance of your vehicle, but it will also contribute to a more enjoyable driving experience.
Congratulations on completing the repair! Keep in mind that regular maintenance and care will help preserve the integrity of the repaired fabric. Avoid using harsh chemicals or abrasive materials when cleaning, and be mindful of any signs of wear and tear over time. With proper attention, your car’s ceiling fabric will continue to look great for years to come.
Thank you for choosing our guide as your resource for fixing your car ceiling fabric. We hope this article has been informative and helpful in your repair journey. Safe travels!
Frequently Asked Questions about How To Fix Car Ceiling Fabric
Was this page helpful?
At Storables.com, we guarantee accurate and reliable information. Our content, validated by Expert Board Contributors, is crafted following stringent Editorial Policies. We're committed to providing you with well-researched, expert-backed insights for all your informational needs.
0 thoughts on “How To Fix Car Ceiling Fabric”