
Articles
How To Install Vinyl Floor
Modified: August 24, 2024
Discover step-by-step articles on how to install vinyl flooring in your home. Get useful tips and guidance for a hassle-free installation process.
(Many of the links in this article redirect to a specific reviewed product. Your purchase of these products through affiliate links helps to generate commission for Storables.com, at no extra cost. Learn more)
Introduction
Installing vinyl flooring is an excellent way to enhance the look and functionality of your space. Whether you are renovating your home or planning a commercial project, vinyl flooring offers a versatile and durable solution. It is a popular choice due to its affordability, easy maintenance, and wide range of styles and designs.
In this comprehensive guide, we will take you through the step-by-step process of installing vinyl flooring. From preparing the subfloor to the final finishing touches, we will cover all the necessary steps to ensure a successful installation. So let’s get started!
Before we dive into the installation process, it is important to note that there are two types of vinyl flooring: sheet vinyl and luxury vinyl planks/tiles (LVP/LVT). Sheet vinyl comes in large rolls and is a seamless option ideal for high-moisture areas. LVP/LVT, on the other hand, mimics the look of hardwood or tile and comes in individual planks or tiles for a more realistic aesthetic.
Now that we have a basic understanding of the types of vinyl flooring, let’s move on to the first step: preparing the subfloor.
Key Takeaways:
- Ensure a successful vinyl flooring installation by meticulously preparing the subfloor, measuring accurately, and acclimating the flooring to the room temperature. Attention to detail leads to a durable and visually appealing outcome.
- Achieve a professional and polished vinyl flooring installation by carefully cutting and fitting the flooring, applying the right adhesive, and completing the finishing touches. Take pride in your resilient and low-maintenance vinyl floor.
Read more: How To Install Vinyl Plank Flooring
Step 1: Preparing the Subfloor
Before installing vinyl flooring, it is crucial to ensure that the subfloor is in good condition. Properly preparing the subfloor will provide a stable foundation for your new flooring and prevent any future issues. Let’s look at the key steps involved in preparing the subfloor:
- Checking for moisture: Begin by checking the moisture levels in the subfloor. Excess moisture can lead to mold, mildew, and damage to the vinyl flooring. Use a moisture meter to measure the moisture content. If the readings are above the manufacturer’s recommendations, take appropriate measures to address the moisture issue before proceeding with the installation.
- Repairing any damages: Next, inspect the subfloor for any damages such as cracks, holes, or uneven surfaces. Repair any significant damages using appropriate materials like floor patching compound or plywood. Ensure that the subfloor is level and free from any protrusions that may affect the installation process or the final appearance of the vinyl flooring.
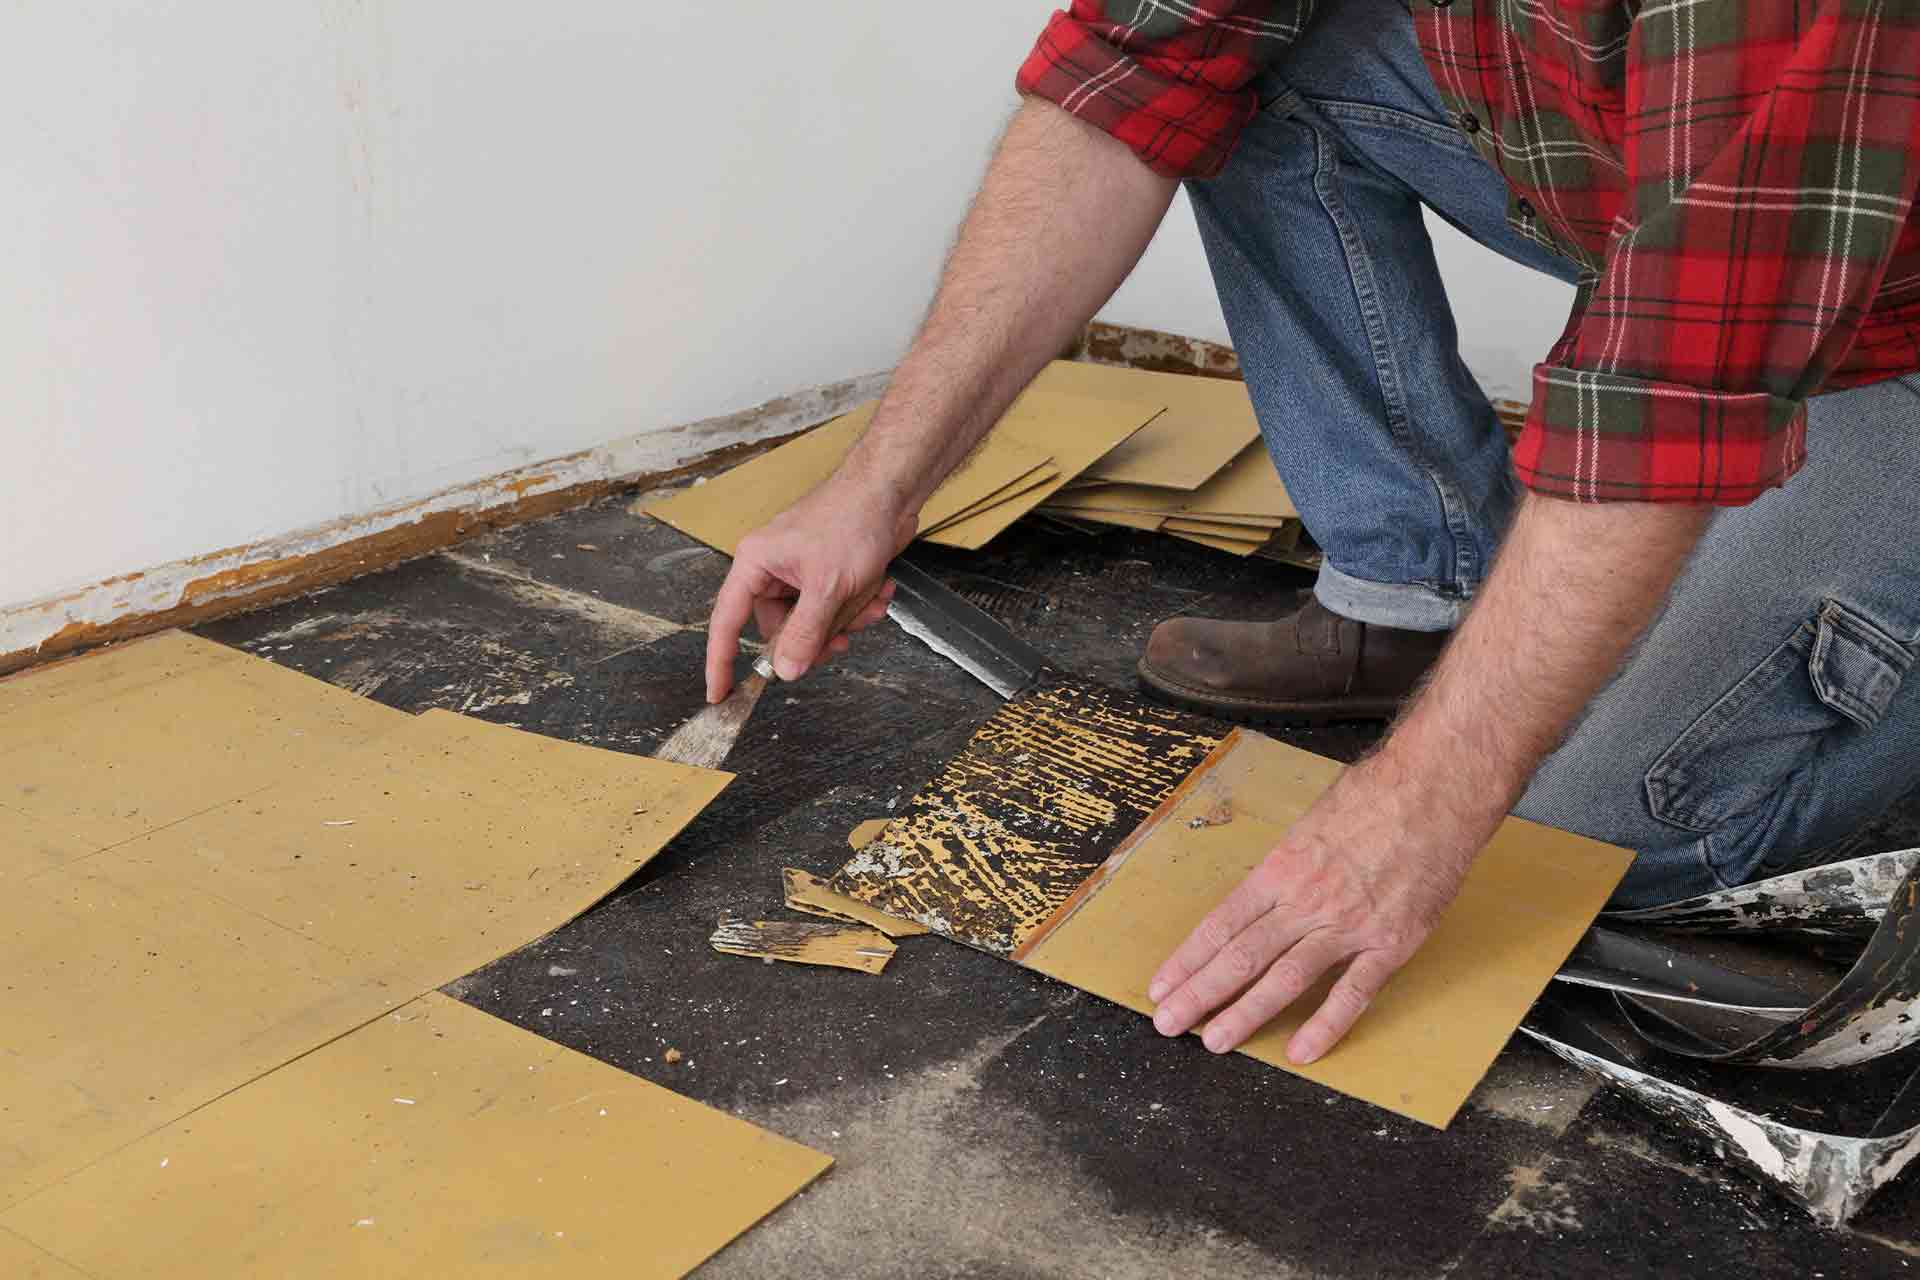
- Removing old flooring: If you have existing flooring, you may need to remove it before installing vinyl. Carpet, laminate, or hardwood flooring should be completely removed. Use a pry bar, utility knife, and other necessary tools to carefully remove the old flooring. Be cautious while removing adhesives, as excessive force may damage the subfloor.
- Cleaning the subfloor: Once the old flooring is removed, thoroughly clean the subfloor to remove any debris, dust, or adhesive residue. Sweeping or vacuuming the subfloor will help ensure a clean surface for the vinyl flooring. If there are stubborn adhesive residues, you may need to use a solvent recommended by the manufacturer to remove them completely.
By following these steps, you will guarantee a well-prepared subfloor ready for the installation of your vinyl flooring. Let’s move on to the next step: measuring and planning.
Step 2: Measuring and Planning
To ensure a seamless and efficient installation of vinyl flooring, it is vital to take accurate measurements and carefully plan the layout. Proper measurement and planning will help you determine the amount of vinyl flooring required and allow for a more streamlined installation process. Let’s dive into the key steps of this stage:
- Taking accurate measurements: Using a tape measure, measure the length and width of the room where you’ll be installing the vinyl flooring. It’s essential to account for any irregularities, such as nooks or alcoves. Record these measurements accurately, as they will serve as the basis for calculating the amount of flooring needed.
- Calculating the amount of vinyl flooring needed: With the room dimensions in hand, you can determine the square footage of the area. To calculate this, multiply the length and width measurements. If the room has odd shapes or is divided into sections, measure and calculate each section separately. Additionally, consider adding about 5-10% extra to account for any mistakes during the installation process or future repairs.
- Planning the layout: Before installing the vinyl flooring, plan the layout to ensure a cohesive and visually appealing result. Start by deciding which direction you want the flooring to run, such as parallel to the longest wall or along the natural light source. Consider the placement of transitions between rooms and any patterns or designs you want to incorporate.
By accurately measuring the room and carefully planning the layout, you’ll have a clear understanding of the amount of vinyl flooring you need and how it will be laid out in the space. This preparation will save you time and minimize waste during the installation process. Let’s proceed to the next step: acclimating the vinyl flooring.
Step 3: Acclimating the Vinyl Flooring
Acclimating the vinyl flooring is an essential step to ensure optimal performance and prevent any issues during installation. Vinyl flooring, especially luxury vinyl planks/tiles (LVP/LVT), needs time to adjust to the temperature and humidity of the room where it will be installed. Let’s explore the two key aspects of acclimating the vinyl flooring:
- Unpackaging the vinyl flooring: Start by unpackaging the vinyl flooring and carefully inspecting each plank or tile for any visible defects or damage. It’s crucial to address any issues before proceeding with the installation. Keep in mind that vinyl flooring should be stored in a dry and controlled environment to prevent damage or warping.
- Allowing the flooring to acclimate to the room temperature: After unpackaging, allow the vinyl flooring to acclimate to the room temperature for at least 24-48 hours. This step is important because temperature variations can cause the vinyl to expand or contract, affecting its fit and stability during installation. Place the flooring boxes in the room where it will be installed, keeping them stacked off the floor and away from direct sunlight.
During the acclimation period, ensure that the room’s temperature and humidity levels are within the manufacturer’s specified range. This will help the vinyl flooring adjust to the environment and perform optimally in the long run. With the vinyl flooring properly acclimated, we are ready to move on to the next step: installing the underlayment.
Step 4: Installing the Underlayment
The underlayment serves as an additional layer between the subfloor and the vinyl flooring. It provides several benefits, including added insulation, sound absorption, and a smooth surface for the vinyl to adhere to. Properly installing the underlayment is crucial for ensuring a durable and comfortable vinyl flooring installation. Let’s explore the key steps involved in this process:
- Choosing the appropriate underlayment: Selecting the right underlayment for your vinyl flooring depends on the type of subfloor and the specific needs of your project. Common underlayment materials include foam, cork, and rubber. Consider factors such as moisture resistance, sound absorption, and any specific requirements outlined by the vinyl flooring manufacturer.
- Cutting and placing the underlayment: Measure the dimensions of the room and cut the underlayment accordingly. Leave a small gap of about 1/8 inch around the edges, allowing for expansion of the underlayment material. Lay the underlayment panels or rolls parallel to the length of the room, ensuring that the edges are tightly butted together, without overlapping. Trim excess underlayment as necessary.
- Securing the underlayment to the subfloor: Depending on the type of underlayment chosen, there are different methods for securing it to the subfloor. Some underlayment materials come with adhesive strips or overlapping edges that interlock. Others may require the use of staples, nails, or specialized adhesive. Follow the manufacturer’s instructions to properly secure the underlayment, ensuring its stability and minimizing any movement.
Installing the underlayment provides a cushioning layer and helps create a smooth surface for the vinyl flooring. This step improves the overall feel and performance of the floor while also enhancing sound insulation. With the underlayment in place, we can now move on to the next step: cutting and fitting the vinyl flooring.
Before installing vinyl flooring, make sure the subfloor is clean, dry, and level. Use a self-leveling compound if needed to ensure a smooth surface for the vinyl to adhere to.
Step 5: Cutting and Fitting the Vinyl Flooring
Now that the underlayment is installed, it’s time to cut and fit the vinyl flooring to create a perfectly aligned and visually appealing result. This step requires precision and careful execution to ensure a seamless installation. Let’s delve into the key steps involved:
- Measuring and marking the vinyl flooring: Begin by measuring the dimensions of the room and marking the vinyl flooring accordingly. Use a straightedge or measuring tape to ensure accurate measurements. Take into consideration any features of the room such as doorways, corners, or irregular angles. Mark the vinyl flooring with a pencil or chalk, indicating where you need to make cuts to fit the shape of the room.
- Cutting the vinyl planks or tiles: Using the appropriate tools such as a utility knife or vinyl cutter, carefully cut the vinyl planks or tiles according to the marked measurements. Take your time to make precise and clean cuts. Ensure that the cuts are straight and match the shape of the room. Use a straightedge if needed to guide your cuts and create clean edges.
- Fitting the vinyl flooring to the layout plan: Once the vinyl planks or tiles are cut, begin fitting them into place according to your layout plan. Start in one corner of the room and work your way out. Gently push the vinyl planks or tiles into the adhesive or interlocking mechanisms, ensuring they fit snugly together. Use a rubber mallet or a tapping block to gently tap the planks or tiles into place for a secure fit.
By accurately measuring, marking, and cutting the vinyl flooring, you will achieve a seamless and precise fit. Take your time during this step to ensure the best results. With the vinyl flooring fitted to the layout plan, we can now proceed to the next step: applying adhesive.
Step 6: Applying Adhesive
Applying adhesive is a crucial step in the installation process, as it ensures that the vinyl flooring adheres properly to the subfloor. Choosing the right adhesive and applying it correctly will guarantee a strong and long-lasting bond. Let’s explore the key steps involved:
- Choosing the right adhesive for vinyl flooring: Selecting the appropriate adhesive is essential to ensure the best performance and durability. There are different types of adhesives available, such as pressure-sensitive adhesive (PSA) and permanent adhesive. Consider the type of vinyl flooring you are installing and follow the manufacturer’s recommendations regarding the specific adhesive to use.
- Applying the adhesive to the subfloor: Begin by preparing the adhesive according to the manufacturer’s instructions. Use a trowel or a recommended applicator to spread the adhesive evenly on the subfloor, starting from one corner of the room. Work in small sections to prevent the adhesive from drying too quickly. Ensure that the adhesive layer is smooth and consistent, avoiding globs or excess adhesive that may affect the flooring installation.
- Spreading the adhesive evenly: Once the adhesive is applied, use the notched side of the trowel to create ridges or grooves in the adhesive. This helps create a stronger bond between the subfloor and the vinyl flooring. Ensure that the ridges are evenly spaced and consistent throughout the installation area. Avoid overworking the adhesive, as this may result in uneven distribution or reduced bond strength.
By choosing the right adhesive and applying it properly, you can ensure that the vinyl flooring adheres securely to the subfloor, creating a stable and durable surface. Take care to follow the manufacturer’s instructions and guidelines to achieve the best results. With the adhesive applied, we’re ready to move on to the next step: installing the vinyl flooring.
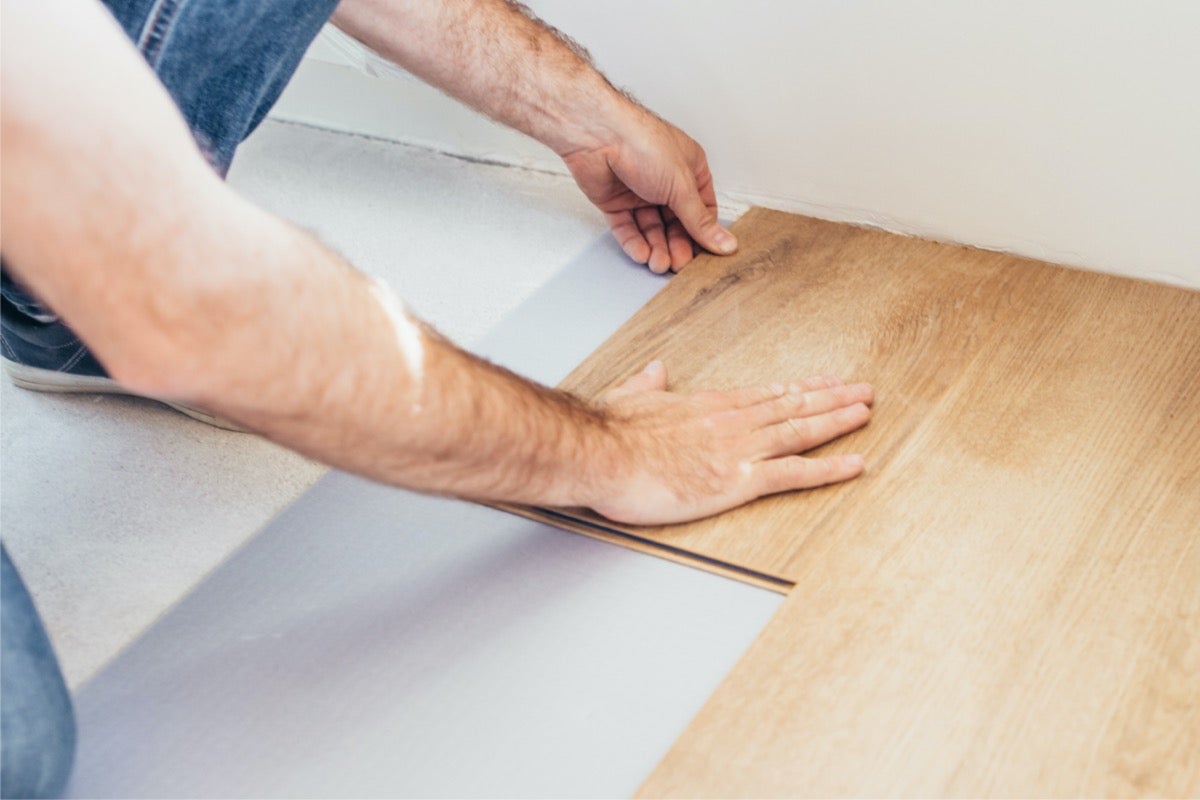
Step 7: Installing the Vinyl Flooring
With the adhesive applied and ready, it’s time to move forward with the installation of the vinyl flooring. This step involves carefully positioning and securing the vinyl planks or tiles to create a finished surface. Let’s explore the key steps involved:
- Starting the installation process: Begin by aligning the first plank or tile in a corner of the room, leaving a small gap around the perimeter for expansion. Ensure that the plank or tile is snug against the wall or baseboard. This will serve as the starting point for the rest of the installation process.
- Aligning the vinyl planks or tiles: As you continue the installation, align each subsequent plank or tile with the previous one, creating a seamless and even pattern. Ensure that the planks or tiles are tightly fitted together, without any gaps or overlapping. Use a slight angle to connect the tongue and groove or interlocking system, then press the piece down firmly to secure it in place.
- Pressing down firmly to secure the flooring: As you install each plank or tile, press down firmly on the surface to ensure proper adhesion with the adhesive. Use a roller or a weighted object to go over the installed vinyl flooring, applying even pressure throughout the floor’s surface. This step helps ensure a strong bond between the flooring and the subfloor.
Take your time during the installation process to ensure precise alignment and a smooth finish. Pay attention to the interlocking system or adhesive type used, following the manufacturer’s guidelines to achieve the best results. With the vinyl flooring securely installed, we can now move on to the final step: trimming and finishing.
Step 8: Trimming and Finishing
As we near the completion of the vinyl flooring installation, it’s time to focus on trimming any excess material, installing transition strips, and giving your new floor a final touch of cleanliness. These final steps will ensure a polished and professional finish. Let’s explore the key tasks involved in this stage:
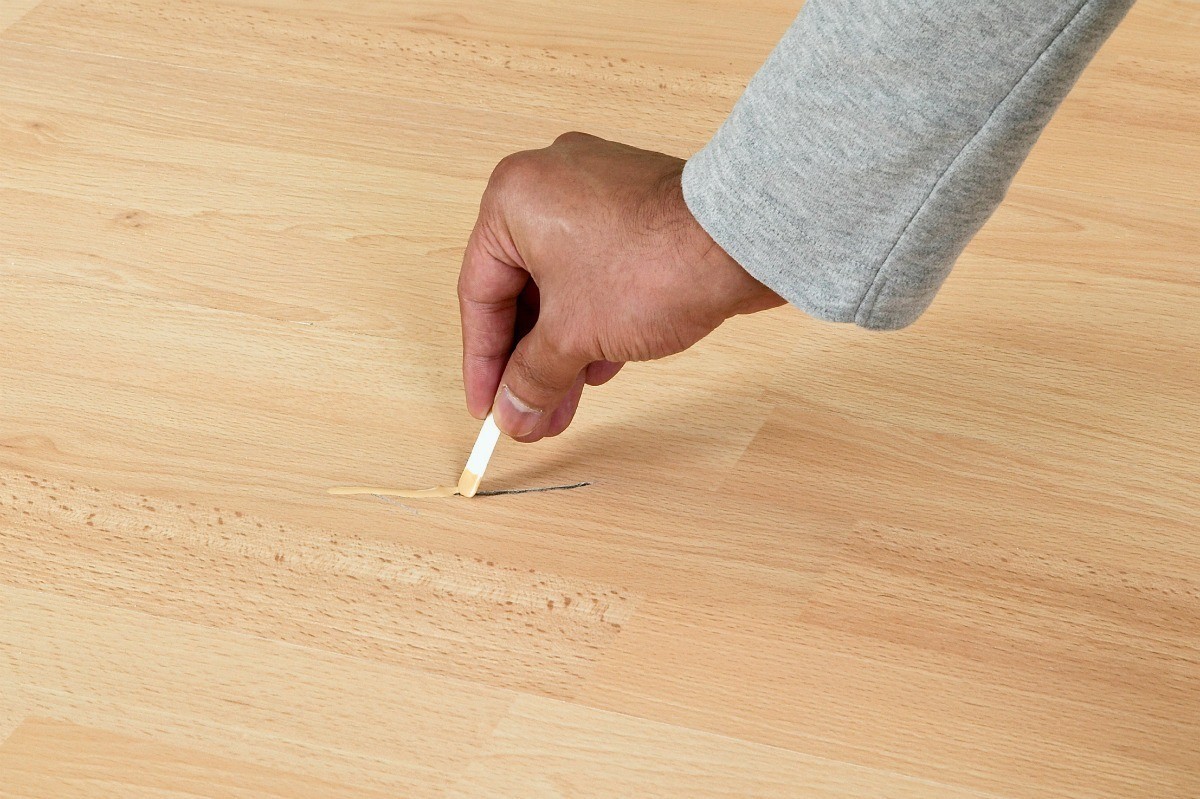
- Trimming excess vinyl flooring: After the vinyl flooring is installed, carefully trim any excess material around the edges of the room. Use a utility knife or a flooring trimmer to make precise cuts, ensuring a clean and neat appearance. Take care not to cut into the baseboards or walls while trimming.
- Installing transition strips: Transition strips are used to create a smooth and seamless transition between different types of flooring or between rooms. Depending on the specific requirements of your project, you may need transition strips for doorways, thresholds, or between different flooring materials. Follow the manufacturer’s instructions to install the appropriate transition strips, ensuring they are securely in place.
- Cleaning the installed vinyl flooring: Once the flooring is installed and trimmed, take the time to clean the surface. Remove any adhesive residue or dirt using a recommended vinyl floor cleaner or mild soap diluted in water. Avoid using abrasive cleaners or excessive moisture. Carefully follow the cleaning instructions provided by the vinyl flooring manufacturer to maintain its appearance and longevity.
By completing these final tasks of trimming excess vinyl flooring, installing transition strips, and cleaning the surface, you are giving your newly installed vinyl flooring a polished and finished look. Take pride in your work and enjoy your beautiful, resilient, and low-maintenance vinyl flooring!
Congratulations on successfully completing the installation process. Your vinyl flooring is now ready for you to enjoy for years to come.
Read more: How To Polish Vinyl Floor
Conclusion
Installing vinyl flooring is a rewarding project that can transform the look and feel of any space. By following the step-by-step process outlined in this guide, you can achieve a successful and professional installation. Let’s recap the key steps involved:
- Prepare the subfloor by checking for moisture, repairing damages, removing old flooring, and cleaning the surface.
- Measure and plan the layout carefully, ensuring accurate measurements and calculating the amount of vinyl flooring needed.
- Allow the vinyl flooring to acclimate to the room temperature, unpackaging it and giving it time to adjust.
- Install the appropriate underlayment by choosing the right material, cutting and placing it correctly, and securing it to the subfloor.
- Cut and fit the vinyl flooring by measuring, marking, cutting accurately, and aligning the planks or tiles according to the layout plan.
- Apply the recommended adhesive to the subfloor, spreading it evenly and creating ridges or grooves for a strong bond.
- Begin installing the vinyl flooring, starting from a corner, aligning the planks or tiles, and pressing down firmly to secure them.
- Trim any excess vinyl flooring, install transition strips for a seamless transition, and clean the installed floor to achieve a finished look.
By following these steps with care and attention to detail, you can create a beautiful and long-lasting vinyl floor that enhances your space’s aesthetics and functionality.
Remember to consult the manufacturer’s instructions and guidelines specific to your vinyl flooring product throughout the installation process. Taking the time to properly prepare the subfloor, measure accurately, and follow the recommended installation techniques will result in a successful and visually appealing outcome.
Enjoy the benefits of your new vinyl flooring—its durability, easy maintenance, and versatility. Whether it’s in your home, office, or any other space, the installation of vinyl flooring is a smart choice that combines practicality with aesthetics.
Thank you for reading our comprehensive guide on how to install vinyl flooring. We hope it has provided you with the knowledge and confidence to embark on your vinyl flooring installation journey.
Frequently Asked Questions about How To Install Vinyl Floor
Was this page helpful?
At Storables.com, we guarantee accurate and reliable information. Our content, validated by Expert Board Contributors, is crafted following stringent Editorial Policies. We're committed to providing you with well-researched, expert-backed insights for all your informational needs.


0 thoughts on “How To Install Vinyl Floor”