Articles
How To Install Flooring
Modified: October 20, 2024
Looking for articles on installing flooring? Find informative and helpful articles on how to install different types of flooring for your home or office.
(Many of the links in this article redirect to a specific reviewed product. Your purchase of these products through affiliate links helps to generate commission for Storables.com, at no extra cost. Learn more)
Introduction
When it comes to home renovations, installing new flooring can completely transform the look and feel of a space. Whether you’re looking to upgrade your floors for aesthetic purposes or for practical reasons, such as durability and ease of maintenance, choosing the right flooring material and installing it correctly are crucial steps in the process.
In this article, we will guide you through the steps involved in installing various types of flooring. From preparing the subfloor to selecting the right tools and materials, we’ll cover everything you need to know to ensure a successful installation.
Installing flooring is a project that requires careful planning and attention to detail. It’s important to have a clear understanding of the process before you begin, as each type of flooring has its own specific installation requirements. By following the proper techniques and using the appropriate tools, you can achieve professional-looking results that will enhance the beauty and functionality of your home.
Before diving into the specific installation instructions for each type of flooring, let’s first discuss the importance of preparing the subfloor and choosing the right flooring material.
Key Takeaways:
- Properly preparing the subfloor is crucial for successful flooring installation, including addressing damage, moisture issues, and installing the appropriate underlayment. Skipping this step can lead to uneven floors and poor adhesion.
- Choosing the right flooring material is essential, considering factors such as durability, maintenance, and budget. Research, visit showrooms, and consult professionals to make an informed decision that aligns with your specific needs and lifestyle.
Read more: How To Install Hardwood Floors
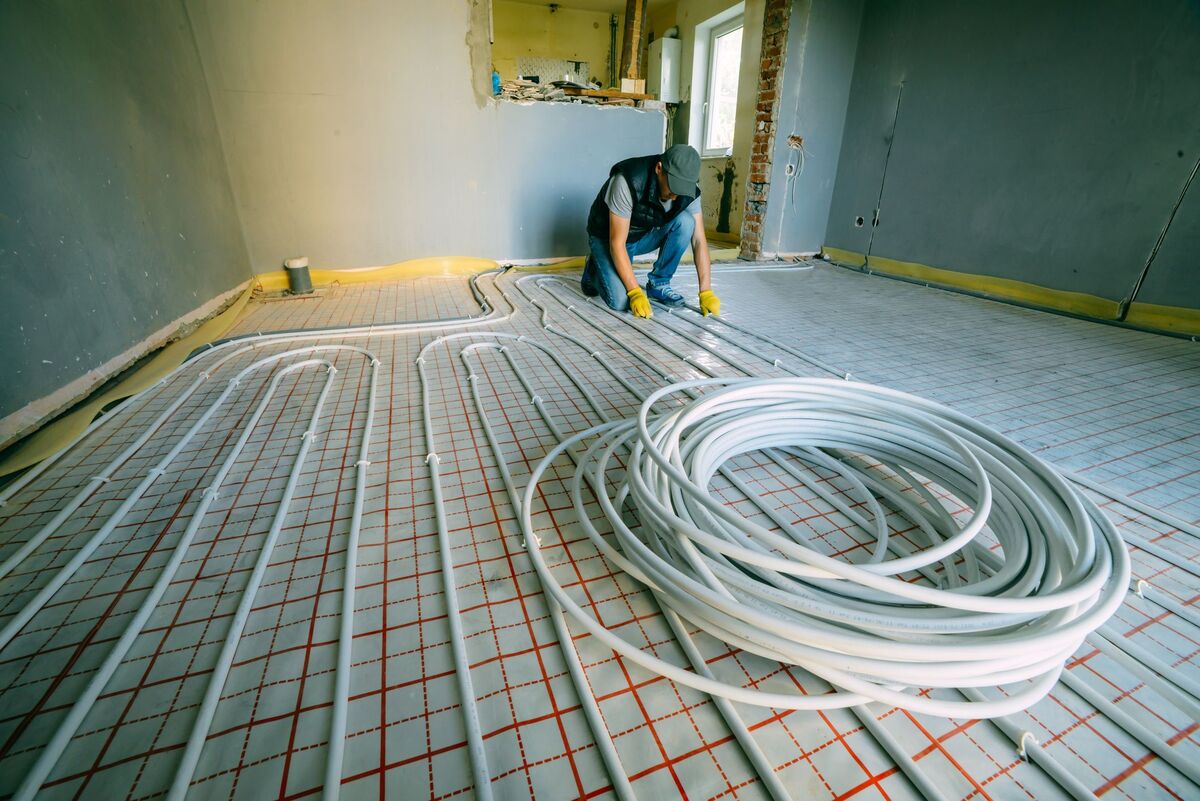
Preparing the Subfloor
Before you begin installing any type of flooring, it’s crucial to properly prepare the subfloor. The subfloor is the underlying surface that provides stability and support for your flooring. It’s essential to ensure that the subfloor is clean, level, and free from any damage or moisture issues.
The first step is to remove any existing flooring, such as carpet, tile, or laminate. Use a pry bar and a hammer to carefully remove the old flooring materials. Be cautious not to damage the subfloor during this process. Once the old flooring is removed, thoroughly clean the subfloor to remove any dirt, debris, or adhesive residue.
Next, inspect the subfloor for any signs of damage, such as cracks, holes, or uneven sections. If you come across any damage, it’s important to repair and reinforce the subfloor before proceeding with the installation. Fill in cracks and holes with a suitable filler and use a leveling compound to even out any uneven areas.
In addition to repairing any damage, it’s also crucial to address any moisture issues. Moisture can cause warping, mold, and other damage to your flooring. Use a moisture meter to test the subfloor for excessive moisture levels. If the readings are high, you may need to address the moisture issue before proceeding with the installation. This could involve installing a vapor barrier or using a moisture-resistant underlayment.
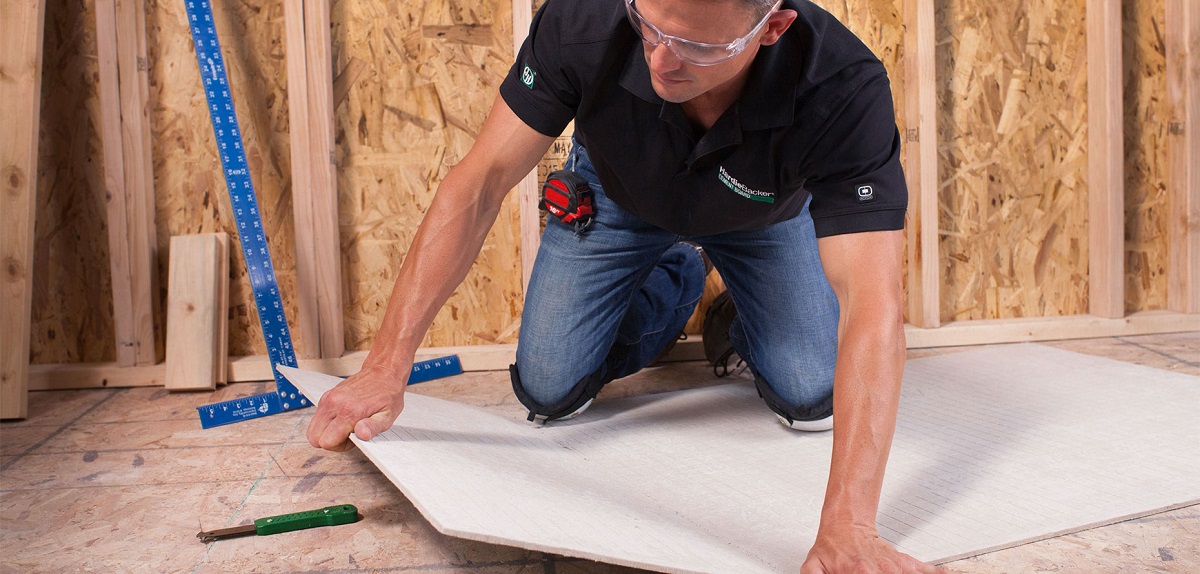
Once the subfloor is clean, level, and free from any damage or moisture issues, it’s time to install an underlayment. The underlayment provides a smooth and stable surface for your flooring and helps to reduce noise and moisture. There are various types of underlayment available, depending on the type of flooring you’re installing. Follow the manufacturer’s instructions to properly install the underlayment.
Preparing the subfloor is an essential step in the flooring installation process. Skipping or rushing through this step can result in uneven floors, poor adhesion, and other issues down the line. Taking the time to properly prepare the subfloor will ensure a solid foundation for your new flooring and contribute to its longevity and performance.
Choosing the Right Flooring Material
With so many flooring options available, choosing the right material for your space can be overwhelming. Each type of flooring has its own advantages and considerations, depending on factors such as durability, style, maintenance, and budget.
Here are some popular flooring materials to consider:
- Hardwood Flooring: Hardwood floors are timeless and add warmth and elegance to any room. They’re durable, long-lasting, and can be refinished multiple times. However, hardwood flooring can be pricier compared to other options, and it requires regular maintenance to preserve its beauty.
- Laminate Flooring: Laminate flooring mimics the look of hardwood or stone but at a more affordable price point. It’s durable, scratch-resistant, and easy to install, making it a popular choice for DIYers. However, laminate may not be as long-lasting as hardwood, and it can be susceptible to water damage if not properly maintained.
- Vinyl Flooring: Vinyl flooring is available in a wide range of styles, from luxury vinyl planks to vinyl tiles. It’s resistant to moisture, stains, and scratches, making it ideal for high-traffic areas and spaces prone to spills. Vinyl is also more affordable compared to hardwood or laminate. However, it may not have the same visual appeal or resale value as natural materials.
- Tile Flooring: Tile flooring, such as ceramic or porcelain tiles, is durable, water-resistant, and easy to clean. It’s an excellent choice for bathrooms, kitchens, and other areas that are exposed to moisture. Tile comes in various sizes, shapes, and patterns, allowing for endless design possibilities. However, tile installation can be time-consuming and requires professional expertise to ensure a proper installation.
- Carpet Flooring: Carpet adds warmth and comfort to any space, particularly bedrooms and living areas. It comes in a variety of styles, colors, and textures, allowing for customization. Carpet is soft underfoot and can help with noise reduction. However, it can be more challenging to clean and maintain compared to hard surface flooring. It’s also important to consider factors such as carpet fiber and pile height when choosing carpet flooring.
When selecting a flooring material, consider the specific needs and requirements of your space. Think about factors such as the amount of foot traffic, presence of pets or children, level of maintenance you’re willing to commit to, and your budget. Research different options, visit showrooms, and consult with professionals to make an informed decision.
By carefully considering the pros and cons of each flooring material and aligning it with your specific needs, you can choose the right flooring material that will not only enhance the aesthetic appeal of your space but also withstand the demands of your lifestyle.
Tools and Materials Needed
Before starting the installation process, it’s important to gather all the necessary tools and materials to ensure a smooth and efficient workflow. The exact tools and materials needed may vary depending on the type of flooring you’re installing, but here are some common items you’ll likely need:
- Tape Measure: A tape measure is essential for accurately measuring the dimensions of the room and determining how much flooring material you’ll need.
- Utility Knife: A utility knife with sharp blades will come in handy for cutting the flooring materials and making precise, clean cuts.
- Pry Bar: A pry bar is useful for removing existing flooring or any baseboards and trim that need to be taken off before installation.
- Hammer: A hammer is needed for various tasks, such as nailing down nails or gently tapping flooring into place.
- Saw: Depending on the type of flooring you’re installing, you may need a circular saw, jigsaw, or handsaw to cut the materials to the desired size and shape.
- Underlayment: The type of underlayment needed will depend on the flooring material. For example, hardwood flooring may require a moisture barrier or foam underlayment, while laminate or vinyl flooring may require an underlayment with soundproofing properties.
- Adhesive or Glue: Certain types of flooring, such as vinyl or carpet tiles, may require adhesive or glue for proper installation. Be sure to choose the appropriate adhesive recommended by the manufacturer.
- Nails, Screws, or Fasteners: Depending on the type of flooring, you may need nails, screws, or other fasteners to secure the flooring to the subfloor or underlayment.
- Level: A level is necessary for ensuring that the flooring is installed evenly and properly aligned. It helps prevent any unevenness or sloping, which can result in an unprofessional and uncomfortable installation.
- Safety Gear: Don’t forget to prioritize safety by wearing appropriate gear such as gloves, safety glasses, and knee pads to protect yourself during the installation process.
Along with these tools and materials, always refer to the specific instructions provided by the flooring manufacturer for any additional or specialized items required for installation.
Having all the necessary tools and materials on hand before you begin the installation process will save you time and frustration. Additionally, it ensures that you have everything you need to complete the project efficiently and achieve high-quality results.
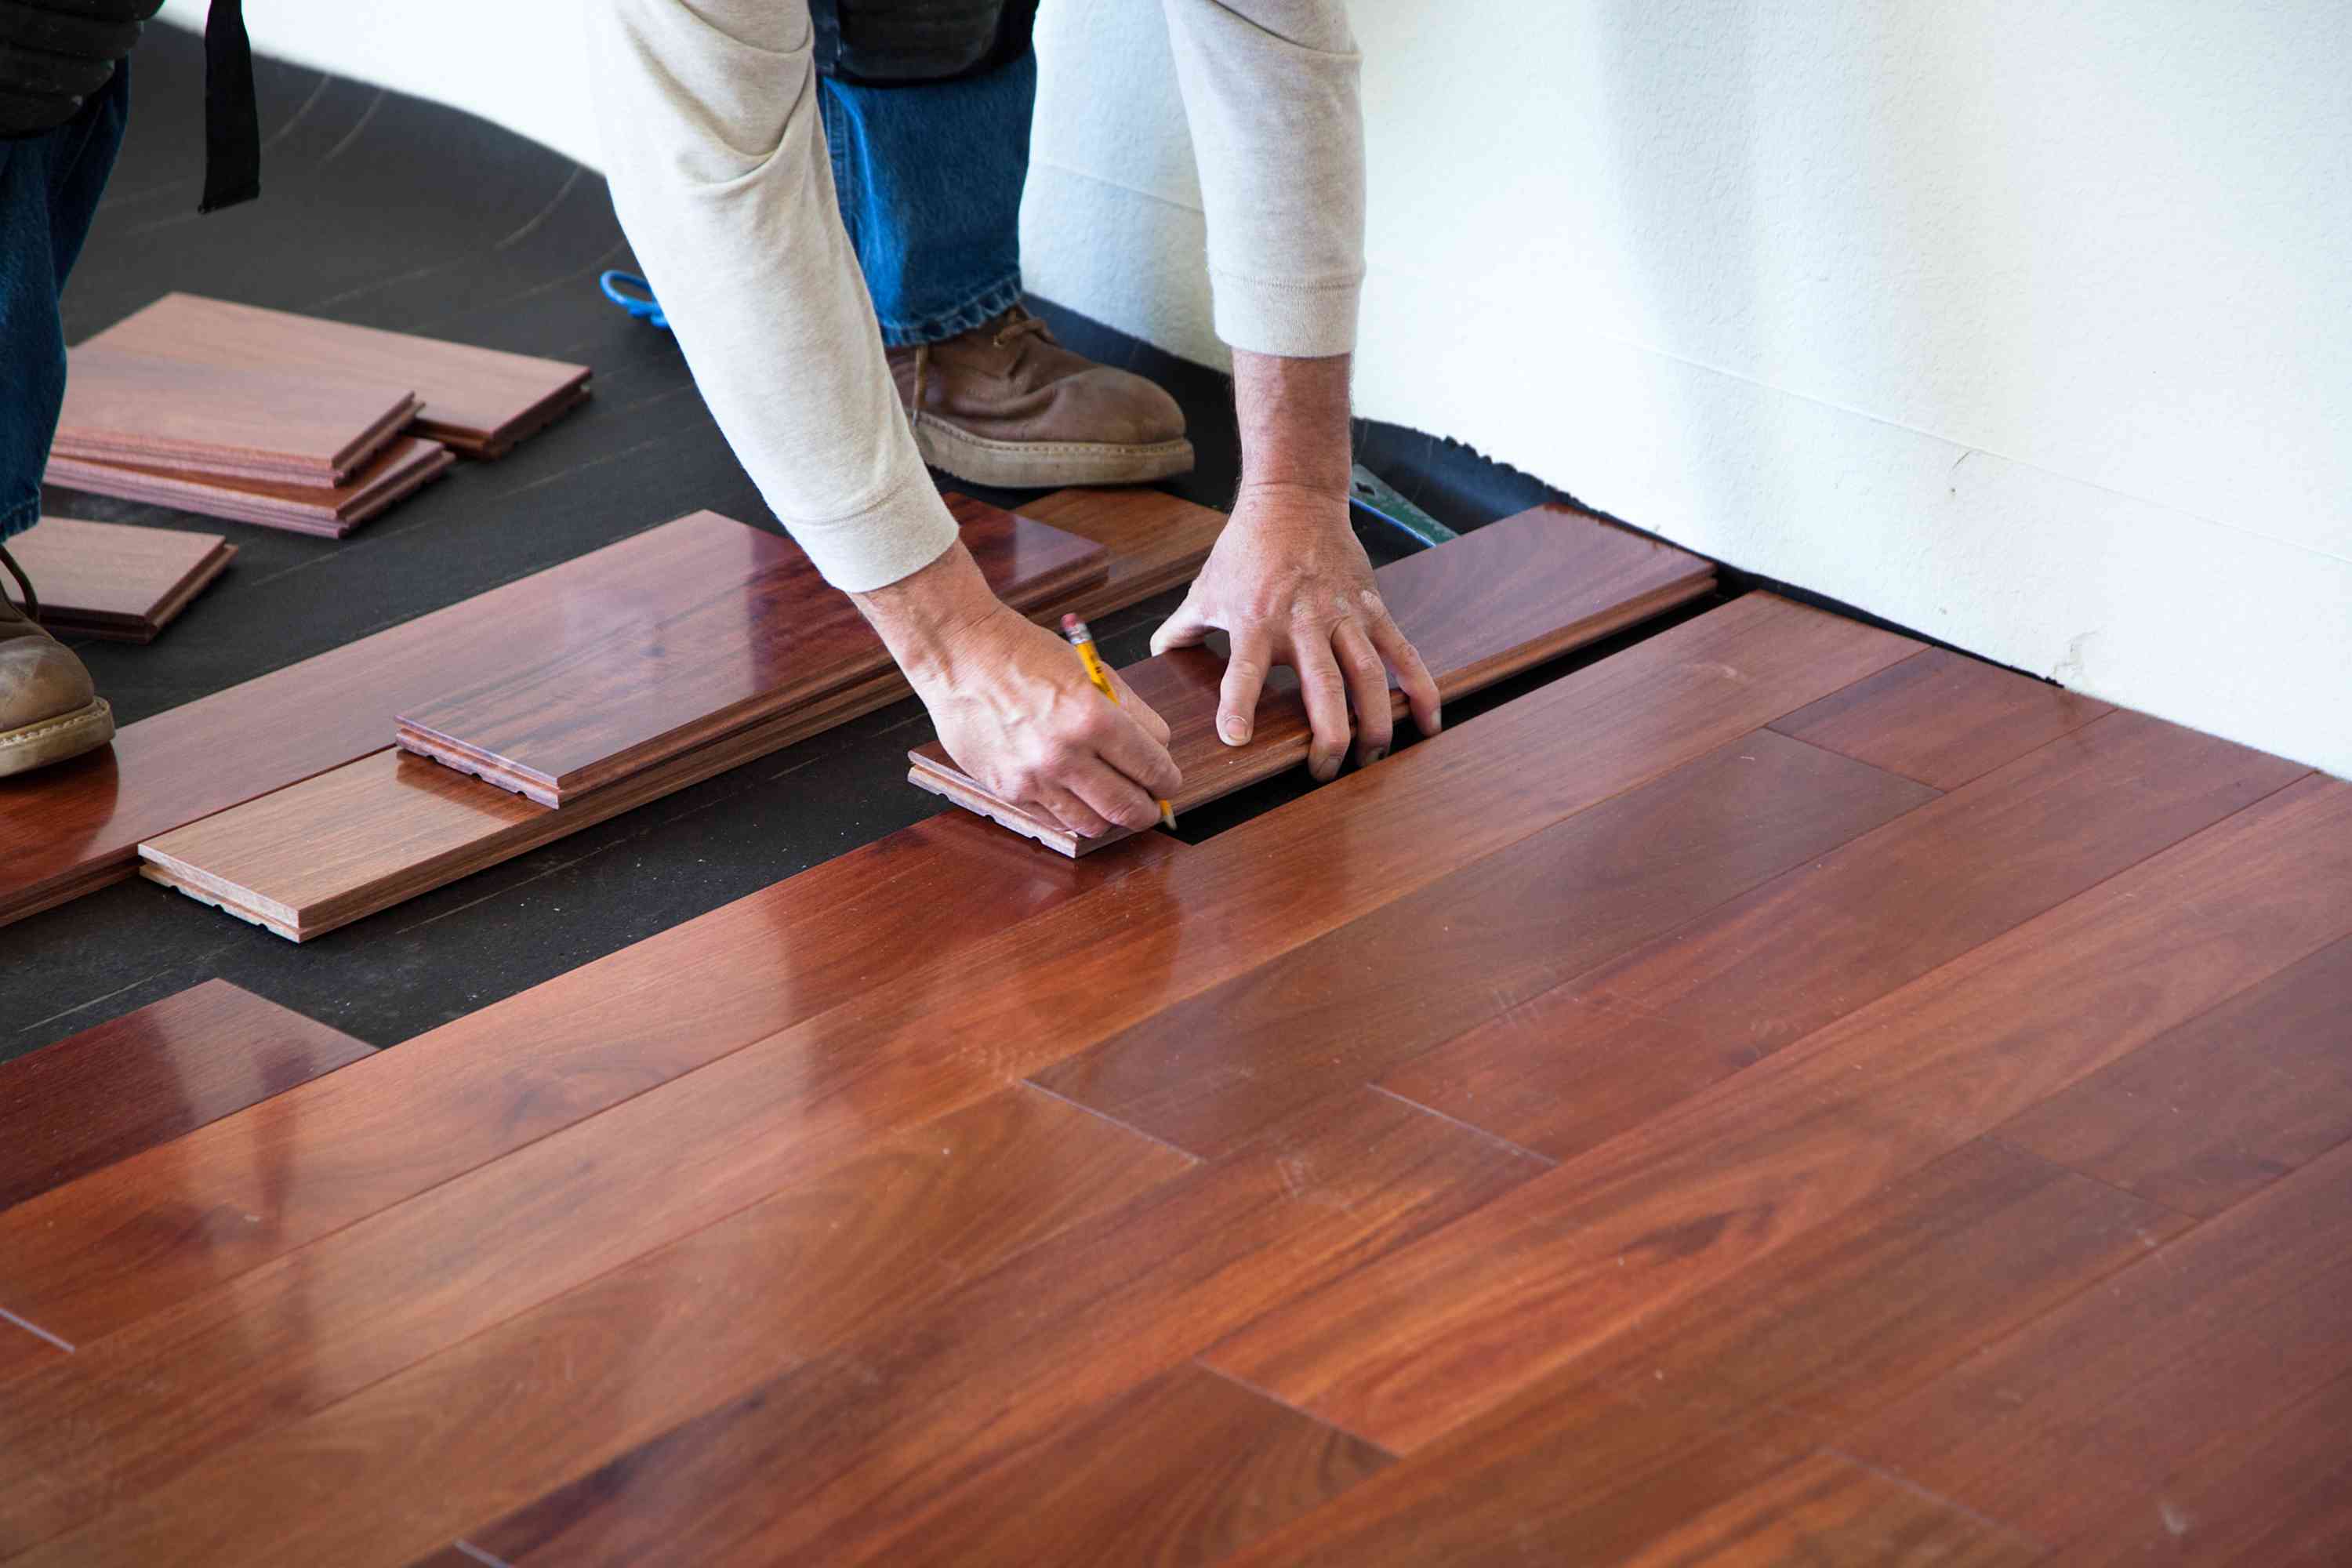
Installing Hardwood Flooring
Installing hardwood flooring is a popular choice for homeowners due to its timeless aesthetic and durability. Here are the general steps involved in installing hardwood flooring:
- Acclimate the Flooring: Before installation, it’s important to acclimate the hardwood flooring to the environment where it will be installed. Leave the flooring planks in the room for a few days to allow them to adjust to the humidity and temperature of the space.
- Prepare the Subfloor: Ensure that the subfloor is clean, level, and free from any damage or moisture issues, as we discussed in the previous section on preparing the subfloor.
- Lay the Underlayment: Depending on the type of hardwood flooring you’re installing, you may need to lay down a vapor barrier or underlayment. Follow the manufacturer’s instructions for the specific type of underlayment required.
- Begin Installation: Start from one corner of the room and lay the first hardwood plank against the wall, leaving a 1/2-inch gap between the plank and the wall for expansion. Use a pneumatic flooring nailer or the appropriate fasteners for the type of installation (staples or cleats) to attach the plank securely to the subfloor.
- Continue with the Pattern: Install the subsequent planks by fitting the tongue of each plank into the groove of the previous one. Use a mallet and a tapping block to ensure a tight fit. Use a proper saw to cut the last plank in each row to fit if necessary.
- Stagger the Joints: To create a more visually appealing and structurally sound installation, stagger the joints of the hardwood planks. This helps distribute the weight evenly and minimizes the risk of the floor developing gaps or unevenness over time.
- Trim and Transition Pieces: Once the majority of the floor is installed, trim the planks accordingly to fit the edges of the room. Install transition pieces, such as thresholds or baseboards, to create a finished look and cover any gaps around doorways or between different flooring materials.
- Finishing Touches: Lastly, sand the surface of the hardwood flooring to create a smooth and even finish. Apply a coat of wood finish or sealer to protect the wood and enhance its natural beauty. Follow the manufacturer’s instructions for proper application and drying time.
It’s important to note that hardwood floor installation can be a challenging task, especially for beginners. If you’re not confident in your DIY skills, it’s recommended to hire a professional installer to ensure a high-quality and long-lasting result.
Remember to follow the specific installation guidelines provided by the manufacturer of your hardwood flooring, as different products may have slightly different installation requirements. By carefully following the steps and using the correct tools and techniques, you can achieve a beautiful hardwood floor that adds value and elegance to your home.
Read more: How To Install Molding On Floor
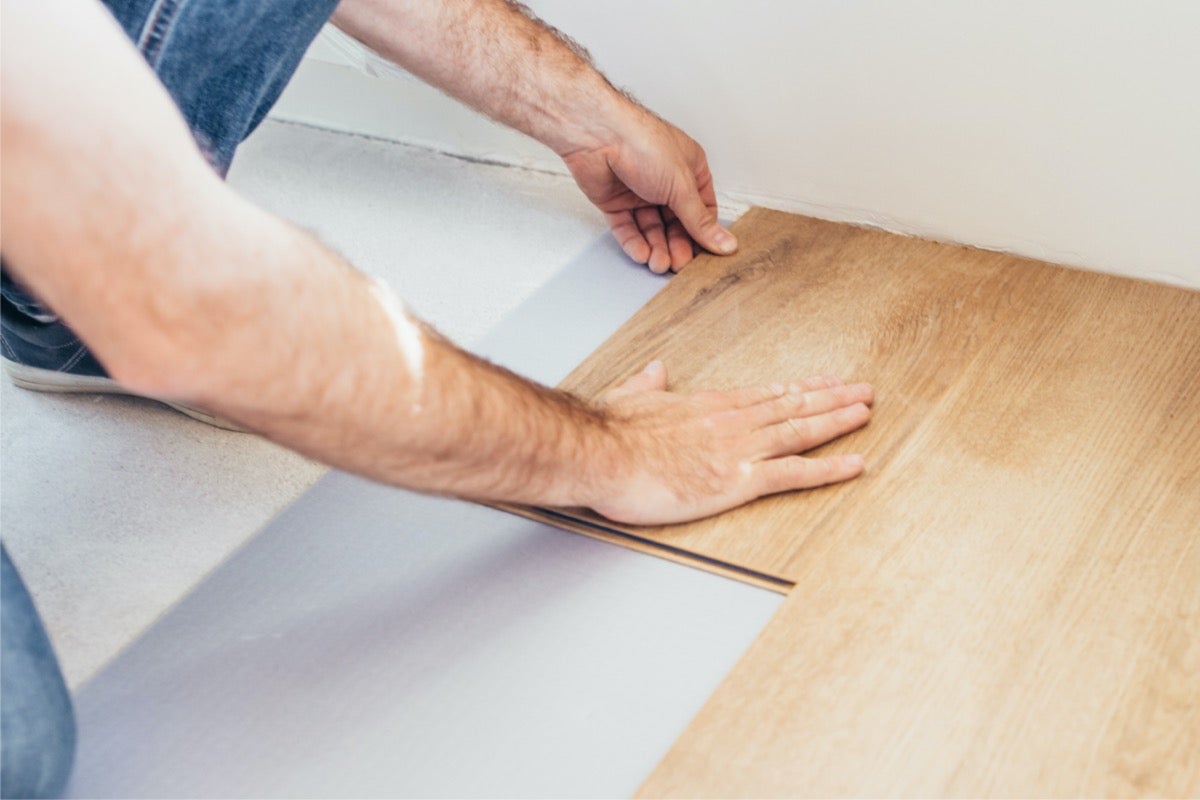
Installing Laminate Flooring
Laminate flooring is a popular choice for homeowners due to its affordability, easy installation, and durability. Here are the general steps involved in installing laminate flooring:
- Prepare the Subfloor: Ensure that the subfloor is clean, level, and free from any damage or moisture issues, as we discussed in the previous section on preparing the subfloor.
- Lay the Underlayment: Lay down the appropriate underlayment for laminate flooring, such as foam or cork underlayment. This helps provide a cushioned and soundproofing layer between the laminate planks and the subfloor and helps to prevent moisture from reaching the laminate.
- Measure and Cut: Measure the dimensions of the room and determine the layout for the laminate planks. Use a saw, such as a circular saw or a jigsaw, to cut the planks to the desired size. It’s important to leave a small gap around the edges of the room to allow for expansion. Be sure to follow the manufacturer’s guidelines for cutting and laying out the planks.
- Start Installing: Begin installation at one corner of the room and lay the first plank, ensuring that it is snug against the wall. Use spacers to maintain the expansion gap between the wall and the planks. Fit the tongue of the next plank into the groove of the previous one and gently tap it into place using a tapping block and a mallet.
- Continue the Installation: Repeat the process of connecting the planks end to end, making sure they are properly interlocked. Use a pull bar to fit the last piece in each row if needed. Stagger the planks to create an aesthetically pleasing and structurally sound pattern, similar to installing hardwood flooring.
- Trimming and Transition pieces: Once the majority of the floor is installed, carefully measure and cut the laminate planks to fit the edges of the room. Trim any excess underlayment as needed. Install transition pieces, such as T-moldings or baseboards, to cover expansion gaps and create a finished look.
- Finishing Touches: After installation, remove the spacers and install the appropriate trim or baseboards to cover the expansion gap along the walls. Clean the floor to remove any installation residue and enjoy your newly installed laminate flooring.
It’s important to follow the specific instructions provided by the laminate flooring manufacturer, as installation methods can vary. Additionally, be gentle when tapping the planks together to avoid damaging the edges.
Laminate flooring can be an excellent option for DIY enthusiasts due to its straightforward installation process. However, if you find the process challenging or if you have an intricate layout, it may be beneficial to seek the assistance of a professional installer.
With proper installation and regular maintenance, laminate flooring can provide a beautiful and durable floor that will enhance the look of your home for years to come.
When installing flooring, make sure to acclimate the flooring material to the room’s temperature and humidity for at least 48 hours before installation to prevent warping or buckling.
Installing Vinyl Flooring
Vinyl flooring is a versatile and cost-effective option that is known for its durability, water resistance, and ease of maintenance. Here are the general steps involved in installing vinyl flooring:
- Prepare the Subfloor: Just like with other types of flooring, ensure that the subfloor is clean, level, and free from any damage or moisture issues.
- Lay Down the Underlayment: Depending on the type of vinyl flooring you’re installing, you may need to lay down an underlayment. Some vinyl flooring options come with an attached underlayment, while others may require a separate underlayment for added support and soundproofing.
- Measure and Cut: Measure the dimensions of the room and determine the layout for the vinyl planks or sheets. Use a utility knife or vinyl cutter to cut the vinyl to fit the room, making sure to leave a small gap around the edges of the room for expansion.
- Begin Installation: Start in one corner of the room and lay the first vinyl plank or sheet, ensuring that it is snug against the wall. For adhesive-backed vinyl, peel off the protective backing and press the vinyl into place. For click-lock vinyl planks, fit the tongue of one plank into the groove of the previous plank and carefully tap them together using a tapping block and mallet.
- Continue the Installation: Repeat the process of connecting the vinyl planks or sheets, making sure they are properly aligned and interlocked. Stagger the ends of the planks or sheets for a more professional and visually appealing look.
- Trimming and Finishing: Once the majority of the floor is installed, trim the vinyl planks or sheets to fit the edges of the room. Use a utility knife and a straight edge to make clean and accurate cuts. Install transition pieces, such as T-moldings or baseboards, to cover expansion gaps and create a finished look.
- Care and Maintenance: After installation, it’s important to follow the manufacturer’s recommendations for care and maintenance. Regularly sweep or vacuum the floor to remove dirt and debris, and use a damp mop with a mild cleaner to keep it clean and shiny. Avoid using abrasive cleaners or harsh chemicals that may damage the vinyl surface.
Always refer to the specific installation instructions provided by the manufacturer of your vinyl flooring, as different products may have slightly different installation methods. Additionally, taking extra care during installation, especially when cutting and fitting the vinyl planks or sheets, will help you achieve a professional-looking result.
Vinyl flooring is often considered a DIY-friendly option due to its ease of installation. However, if you’re uncertain about any step or have a complex layout, it’s advisable to seek the help of a professional installer to ensure a smooth and successful installation.
With its water resistance and durability, vinyl flooring can be an excellent choice for high-traffic areas, kitchens, and bathrooms. Enjoy the beauty and functionality of your newly installed vinyl floor for years to come with proper installation and maintenance.
Installing Tile Flooring
Tile flooring is a popular choice for bathrooms, kitchens, and other areas that require a durable and water-resistant surface. Here are the general steps involved in installing tile flooring:
- Prepare the Subfloor: Ensure that the subfloor is clean, level, and free from any damage or moisture issues, as we discussed in the previous section on preparing the subfloor.
- Layout and Measure: Plan the layout of the tiles, ensuring that they fit the space appropriately. Measure the dimensions of the room and use tile spacers to determine the placement of the tiles.
- Apply Thinset Adhesive: Mix the thinset adhesive according to the manufacturer’s instructions. Spread a layer of thinset onto a small section of the subfloor, using a trowel. Use the notched side of the trowel to create grooves in the thinset, ensuring proper adhesion.
- Place the Tiles: Begin placing the tiles, starting from a corner of the room. Press each tile firmly into the thinset adhesive, using slight twisting motions to ensure good contact. Insert tile spacers between each tile to create even spacing and grout lines.
- Continue Installation: Repeat the process by applying thinset adhesive and placing the tiles in small sections at a time. Check periodically with a level to ensure the tiles are level and aligned properly.
- Cutting Tiles: When you reach areas that require smaller tiles or odd-shaped pieces, measure and mark the tiles accordingly. Use a tile cutter or wet saw to make precise cuts. Take proper safety precautions by wearing protective eyewear and gloves when using cutting tools.
- Grouting: After the tiles have been laid and the adhesive has dried, remove the tile spacers and mix the grout according to the manufacturer’s instructions. Apply the grout using a grout float, ensuring that the grout fills in the gaps between the tiles. Wipe off any excess grout with a damp sponge before it sets.
- Cleaning and Sealing: Once the grout has cured, use a grout haze remover or a vinegar and water solution to clean any leftover grout residue from the tiles. Allow the floor to dry completely, and consider sealing the grout to protect it from stains and moisture.
Installing tile flooring can be a labor-intensive process and may require specialized tools such as tile cutters or wet saws. If you’re unsure about any step or have a complex pattern or layout, it may be beneficial to consult a professional tile installer.
Proper installation and maintenance will ensure that your tile floor remains durable and visually appealing for years to come. Regularly clean the tiles and grout to prevent dirt buildup, and address any cracks or damaged tiles promptly to maintain the beauty and functionality of your tile flooring.
Installing Carpet Flooring
Carpet flooring provides comfort, warmth, and a cozy atmosphere to any space. Here are the general steps involved in installing carpet flooring:
- Prepare the Subfloor: Ensure that the subfloor is clean, level, and free from any damage or moisture issues, as we discussed in the previous section on preparing the subfloor.
- Measure and Plan: Measure the dimensions of the room and determine the amount of carpet and padding needed. Consider any additional carpeting required for seams or pattern matching.
- Lay Down the Carpet Padding: Install the carpet padding by rolling it out across the entire area. Use adhesive or staples to secure the padding to the subfloor, making sure there are no wrinkles or gaps.
- Trim and Fit the Carpet: Roll out the carpet on top of the padding, making sure it aligns properly with the edges and walls of the room. Trim any excess carpet using a carpet knife, being careful to make clean and straight cuts.
- Secure the Carpet: Use a knee kicker to stretch the carpet along one wall, pushing it into the edge and creating tension. Secure the stretched area with a carpet stretcher and attach it to the tack strips along the walls. Repeat this process for each wall, ensuring the carpet is smooth and wrinkle-free.
- Trim and Tuck: Use a carpet edge trimmer to trim the excess carpet along the edges of the room. Tuck the trimmed carpet edges between the baseboard and the tack strip using a dull chisel or a putty knife.
- Seam and Finish: If needed, join multiple pieces of carpet together using a carpet seaming iron and adhesive tape. Trim any excess seam tape and carefully blend the seams to make them less noticeable. Finish the installation by using a carpet trimmer to cut away any protruding fibers and vacuum the carpet to remove any loose fibers or debris.
Installing carpet flooring can be a complex process and may require specialized tools. If you’re unsure about any step or have a complex layout or pattern, it’s advised to seek the assistance of a professional carpet installer.
Proper installation and regular maintenance will help your carpet flooring last longer and maintain its appearance. Regularly vacuum the carpet to remove dirt and debris, address any stains promptly, and consider professional carpet cleaning every 12 to 18 months to keep your carpet looking its best.
Read more: How To Install Laminate Flooring
Finishing Touches and Maintenance
Once you have installed your new flooring, there are some finishing touches and maintenance practices to keep in mind to ensure its longevity and beauty:
1. Trim and Transition Pieces: Install baseboards, trim, or transition pieces along the edges of the room to create a finished look and cover any gaps between the flooring and walls or different types of flooring materials.
2. Clean and Maintain: Regularly clean your floors using appropriate methods and products recommended by the flooring manufacturer. Avoid using harsh chemicals or abrasive materials that could damage the surface. Each type of flooring may require specific cleaning techniques, so be sure to follow the manufacturer’s guidelines.
3. Protect Against Furniture Damage: Use furniture pads or felt protectors under your furniture legs to prevent scratches and dents on your flooring. Lift heavy furniture when moving it, rather than dragging it across the floor.
4. Prevent Moisture Damage: Immediately clean up any spills or water accidents on your flooring to prevent damage, especially for wood and laminate flooring. Use mats or rugs in high-moisture areas, such as entryways or kitchens, to minimize the risk of water damage.
5. Address Repairs Promptly: If you notice any damaged or loose flooring, address it promptly to prevent further deterioration. Consult with a professional if needed, especially for more complex repairs.
6. Groom Pets’ Nails: If you have pets at home, regularly groom their nails to prevent scratches on hardwood or laminate flooring.
7. Schedule Regular Maintenance: Depending on the type of flooring, consider scheduling professional maintenance, such as refinishing or resealing for hardwood floors or steam cleaning for carpets, to keep them in optimal condition.
8. Follow Manufacturer’s Instructions: Always refer to the manufacturer’s recommendations and warranty guidelines for your specific type of flooring to ensure you’re following the appropriate care and maintenance procedures.
By taking these finishing touches and maintenance practices into consideration, you can extend the lifespan of your flooring and keep it looking beautiful for years to come. Regular care and attention will not only protect your investment but also contribute to a clean, healthy, and inviting living space.
Conclusion
Installing new flooring can completely transform the look and feel of your home. Whether you choose hardwood, laminate, vinyl, tile, or carpet flooring, the installation process requires careful planning, attention to detail, and the right tools and materials. By following the proper techniques and guidelines, you can achieve professional-looking results that will enhance the beauty and functionality of your space.
Before starting any flooring installation project, it’s crucial to prepare the subfloor properly. This involves removing existing flooring, repairing any damage, and addressing moisture issues. Additionally, choosing the right flooring material for your needs is essential. Consider factors such as durability, style, maintenance, and budget when selecting the flooring that best suits your space.
Throughout the installation process, be sure to follow the manufacturer’s instructions and guidelines specific to your chosen flooring material. Pay attention to details such as trimming, staggering joints, and using the appropriate adhesives or fasteners. By doing so, you’ll ensure a sturdy and aesthetically pleasing installation.
After the flooring is installed, don’t forget the finishing touches that provide a polished look, such as trim, baseboards, or transition pieces. Regular maintenance and proper cleaning techniques are necessary to keep your flooring looking its best. Follow the manufacturer’s recommendations for maintenance, address repairs promptly, and take precautions to protect your floors from furniture damage and moisture.
In conclusion, installing flooring is a rewarding project that can significantly enhance your home’s appearance and functionality. Whether you decide to take on the installation yourself or hire a professional, remember to be patient, attentive to detail, and follow the proper techniques for a successful installation. With the right flooring and proper installation, you’ll create a beautiful and inviting space that you can enjoy for years to come.
Frequently Asked Questions about How To Install Flooring
Was this page helpful?
At Storables.com, we guarantee accurate and reliable information. Our content, validated by Expert Board Contributors, is crafted following stringent Editorial Policies. We're committed to providing you with well-researched, expert-backed insights for all your informational needs.


0 thoughts on “How To Install Flooring”