Home>Articles>How To Install Corner Beads For Smooth Drywall Edges
Articles
How To Install Corner Beads For Smooth Drywall Edges
Modified: October 18, 2024
Learn how to install corner beads for achieving smooth and flawless drywall edges with our informative articles. Enhance your DIY skills now!
(Many of the links in this article redirect to a specific reviewed product. Your purchase of these products through affiliate links helps to generate commission for Storables.com, at no extra cost. Learn more)
Introduction
Installing corner beads is an essential step in achieving smooth and professional-looking drywall edges. These metal or vinyl strips are used to reinforce and protect the corners of your walls, preventing them from getting damaged or chipped over time. Whether you are a DIY enthusiast or a professional contractor, learning how to install corner beads can help you achieve a seamless finish in your drywall project.
In this article, we will guide you through the step-by-step process of installing corner beads. From gathering the necessary tools and materials to applying the final coat of paint, you’ll gain the knowledge and confidence to tackle this task with ease. So, let’s get started!
Key Takeaways:
- Proper preparation is key to successful corner bead installation. From gathering the right tools to cleaning, repairing, and priming the corners, attention to detail ensures a seamless and professional finish for your drywall project.
- Attention to alignment, finishing, and painting is crucial for achieving polished and durable drywall edges. Following the step-by-step process with precision and care will result in professional-looking walls that enhance the overall appearance of your space.
Read more: How To Smooth Glass Edges
Step 1: Gather the necessary tools and materials
Before you begin installing corner beads, it’s crucial to have all the required tools and materials at hand. Here’s a list of what you’ll need:
- Corner beads (metal or vinyl)
- Measuring tape
- Hacksaw or aviation snips
- Adhesive (such as construction adhesive or drywall compound)
- Trowel or putty knife
- Sandpaper or sanding block
- Primer
- Paint
- Paintbrush or roller
Ensure that you have the correct type and length of corner bead for your project. Metal corner beads are more common and provide greater durability, while vinyl corner beads are a good choice for areas prone to moisture. Measure the dimensions of the corners you’ll be working on to determine the required length of the corner beads.
Having the right tools and materials will make the installation process smoother and more efficient, ensuring a professional result. Take the time to gather everything you need before you begin, as it will save you from unnecessary interruptions during the installation.
In the next step, we’ll prepare the corners for the installation of the corner beads.
Step 2: Prepare the corner for installation
Before installing the corner bead, it’s important to properly prepare the corners of your walls. Follow these steps to ensure a clean and smooth installation:
- Clean the corners: Start by removing any dust, dirt, or debris from the corners using a broom or a vacuum cleaner with a brush attachment. This will provide a clean surface for the adhesive and ensure better adhesion.
- Repair any damages: Inspect the corners for any cracks, chips, or uneven areas. Use a putty knife to apply a thin layer of joint compound to fill in any imperfections. Smooth it out with the putty knife and let it dry according to the manufacturer’s instructions. Sand the repaired areas lightly to create a level surface.
- Remove protruding nails or screws: If there are any nails or screws sticking out from the corners, use pliers or a screwdriver to remove them. Make sure the surface is free from any obstructions that may hinder the installation process.
- Apply a primer: Applying a coat of primer to the corners will help the corner bead adhere better to the wall surface. Use a paintbrush or roller to evenly apply the primer and let it dry completely before proceeding.
Preparing the corners properly will ensure a solid and secure installation of the corner bead. It will also help create a smooth and seamless finish for your drywall project. Once you’ve prepared the corners, you’re ready to move on to the next step – measuring and cutting the corner bead.
Step 3: Measure and cut the corner bead
To ensure a precise fit, it’s important to measure and cut the corner bead accurately. Follow these steps to get the right dimensions:
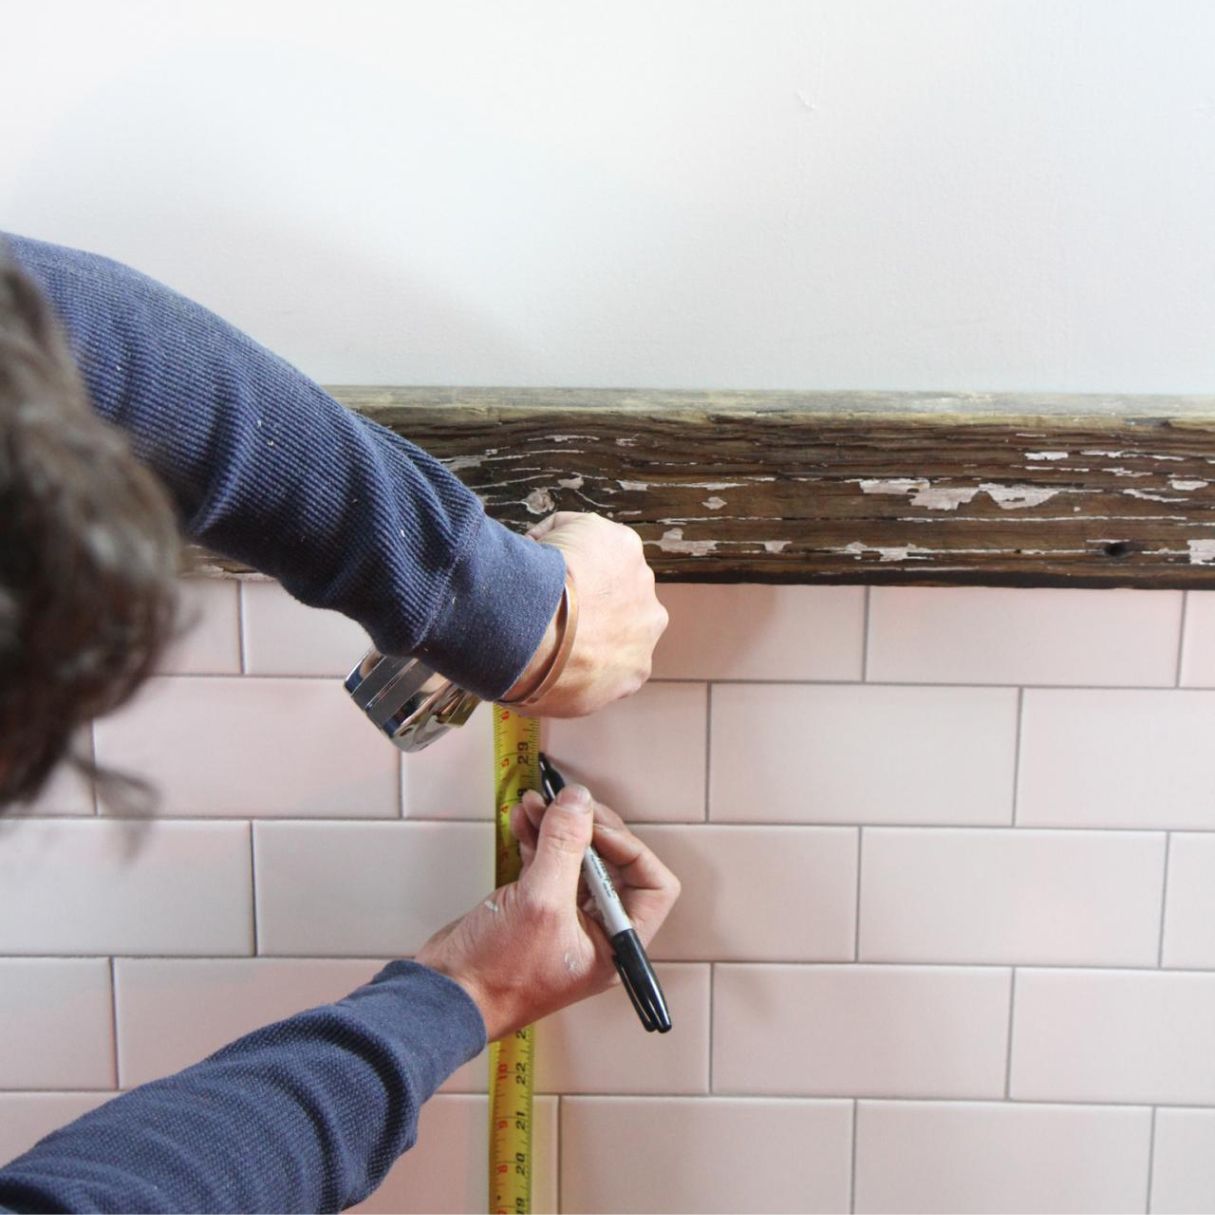
- Measure the corners: Use a measuring tape to determine the length of each corner where you will be installing the corner bead. Add a couple of inches to the measurement to allow for overlapping at the ends.
- Transfer the measurements: Transfer the measurements onto the corner bead, marking the appropriate length with a pencil or marker. Ensure that the markings are clear and visible.
- Cut the corner bead: Depending on the type of corner bead you’re using, you can cut it using a hacksaw or aviation snips. Place the corner bead securely on a stable surface and carefully cut along the marked line. Use smooth and even strokes to get a clean cut.
- Smooth the edges: After cutting the corner bead, use sandpaper or a sanding block to smooth any rough edges. This step will ensure a seamless and professional finish.
Remember to take accurate measurements and be precise when cutting the corner bead. Proper measurement and cutting will ensure a perfect fit for a neat and polished appearance. Once the corner bead is cut to size, you’re ready to move on to the next step – applying adhesive to the corner.
Step 4: Apply adhesive to the corner
Now that you have your corner bead cut to size, it’s time to apply adhesive to the corner. This adhesive will help secure the corner bead in place and provide a strong bond. Here’s how to apply the adhesive:
- Choose your adhesive: There are different types of adhesives that you can use for this step. Construction adhesive or drywall compound are commonly used options. Follow the manufacturer’s instructions for the specific adhesive you’ve chosen.
- Apply the adhesive: Using a trowel or putty knife, scoop a small amount of adhesive onto the inside of the corner bead. Start at one end and spread the adhesive evenly along the length of the corner bead. Ensure that the adhesive is applied along both edges of the corner bead.
- Smooth out the adhesive: After applying the adhesive, use the trowel or putty knife to smooth out any excess and create an even layer. This step will ensure a solid bond and prevent any bumps or lumps from forming under the corner bead.
- Work in sections: It’s best to work in small sections when applying the adhesive. Apply the adhesive to one section of the corner at a time, ensuring that it is evenly distributed and covers the entire length.
Take your time when applying the adhesive, ensuring that it is spread evenly and covers the area where the corner bead will be installed. This will ensure a secure and long-lasting bond. Once the adhesive is applied, you’re ready to move on to the next step – securing the corner bead.
Read more: How To Install Landscaping Edging
Step 5: Secure the corner bead
With the adhesive applied, it’s time to secure the corner bead in place. This step will ensure that the corner bead stays in position while the adhesive sets. Follow these steps to properly secure the corner bead:
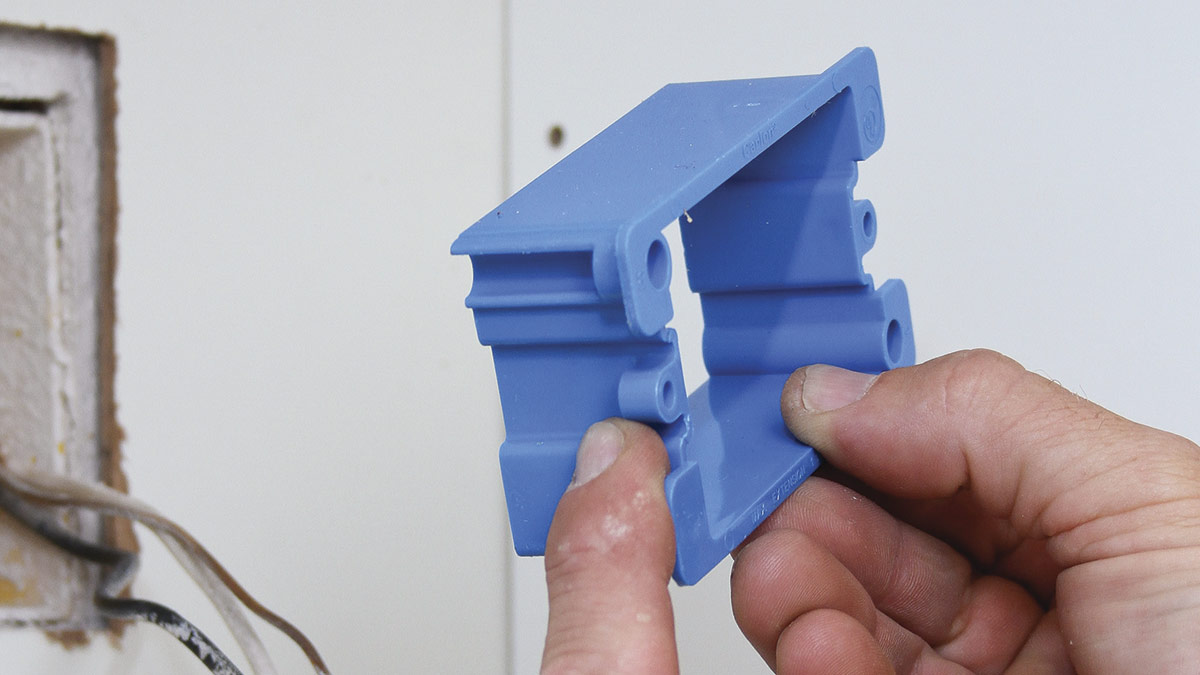
- Position the corner bead: Carefully place the corner bead onto the corner where you want it to be installed. Make sure it is aligned properly and fits snugly against the wall. The adhesive should hold the corner bead in place, but you can use a few nails or screws as temporary support if needed.
- Attach the corner bead: If you choose to use nails or screws for added support, insert them through the pre-drilled holes in the corner bead and into the wall. Be careful not to apply too much pressure that could damage the corner bead or the drywall behind it.
- Check for straightness: Use a level or a straight edge to ensure that the corner bead is perfectly straight. Adjust as necessary, pushing or tapping it gently to align it correctly.
- Remove any excess adhesive: Once the corner bead is secured, take a damp cloth or sponge and carefully wipe away any excess adhesive that may have squeezed out from under the corner bead. This step will ensure a clean and professional finish.
Take your time to position and secure the corner bead accurately. A properly secured corner bead will provide a solid base for the finishing coats and contribute to a seamless and professional look. With the corner bead secured, you’re ready to move on to the next step – checking for proper alignment.
When installing corner beads for smooth drywall edges, make sure to use a level to ensure they are straight and plumb. This will help to create a professional and polished finish.
Step 6: Check for proper alignment
After securing the corner bead, it’s essential to ensure that it is properly aligned before the adhesive fully sets. Checking for proper alignment will help you achieve a straight and seamless finish. Here’s how to do it:
- Use a level or straight edge: Place a level or straight edge against the corner bead to check for any discrepancies or unevenness. The corner bead should be perfectly straight and flush against the wall surface.
- Make adjustments if necessary: If you notice any misalignment, you can gently tap the corner bead with a rubber mallet to reposition it. Take care not to apply too much force to avoid damaging the corner bead or the drywall.
- Check the vertical alignment: In addition to checking for horizontal alignment, ensure that the corner bead is vertical and not leaning to one side. Use the level to ensure that it is plumb.
- Double-check the corners: Pay close attention to the corners of the corner bead. They should be crisp and sharp, without any gaps or overlapping. Adjust the position if needed to achieve clean and tight corners.
Taking the time to check for proper alignment will guarantee a professional-looking result. It is much easier to make any necessary adjustments at this stage than after the adhesive has fully dried. Once you are satisfied with the alignment, you can proceed to the next step – finishing and smoothing the corner bead.
Step 7: Finish and smooth the corner bead
Once the corner bead is aligned correctly, it’s time to finish and smooth the surface. This step will ensure that the corner is seamless and blends seamlessly with the surrounding drywall. Here’s how to do it:
- Apply joint compound: Using a trowel or putty knife, apply a thin layer of joint compound over the corner bead. Start at one end and work your way to the other, making sure to cover the entire surface of the corner bead. Smooth the joint compound with the putty knife for an even application.
- Feather the edges: To create a smooth transition between the corner bead and the wall, feather the edges of the joint compound. Gradually taper the compound towards the wall, blending it in seamlessly. This technique will help avoid visible lines or ridges.
- Remove any excess compound: Use the putty knife to remove any excess joint compound that has accumulated on the surface. Scrape away any bumps or lumps to achieve a smooth and even finish.
- Allow the compound to dry: Follow the manufacturer’s instructions regarding the drying time of the joint compound. It is important to let it dry completely before moving on to the next steps.
Finishing and smoothing the corner bead is a critical step in achieving a professional-looking drywall finish. The joint compound will create a seamless transition between the corner bead and the wall, giving your project a polished appearance. Once the compound is dry, you can proceed to the next step – sanding and priming the corner bead.
Step 8: Allow the corner bead to dry
After applying the joint compound to the corner bead, it is crucial to allow it to dry completely. Drying time can vary depending on the type and brand of joint compound used, as well as the humidity and temperature of the room. Here’s what you need to know about drying the corner bead:
- Follow the instructions: Refer to the manufacturer’s instructions on the joint compound packaging for the recommended drying time. Typically, it can take anywhere from a few hours to overnight for the joint compound to dry thoroughly.
- Avoid touching or disturbing the corner bead: While the joint compound is drying, it’s important to avoid touching or disturbing the corner bead. Any pressure or movement can cause the joint compound to crack or become uneven.
- Check for dryness: To ensure that the joint compound has dried completely, gently touch it with your finger. If it feels firm and dry to the touch, it is ready for the next steps. If it feels soft or spongy, give it more time to dry.
Allowing the corner bead to dry completely is crucial for a smooth and professional finish. Rushing this step can result in flaws or damage to the joint compound. Once the corner bead is dry, you can proceed to the next step – sanding and priming the corner bead.
Read more: How To Install Sawtooth Brick Edging
Step 9: Sand and prime the corner bead
After the joint compound has dried, it’s time to sand and prime the corner bead. This step will help smoothen any imperfections and create a proper surface for the final paint coat. Here’s how to sand and prime the corner bead:
- Sand the corner bead: Use fine-grit sandpaper or a sanding block to gently sand the surface of the joint compound. Use light pressure and make long, even strokes along the length of the corner bead. Sand in one direction to avoid creating uneven patches or scratches.
- Remove dust: After sanding, use a dry cloth or vacuum cleaner attachment to remove any dust or debris from the surface. It’s crucial to have a clean surface before applying the primer.
- Apply primer: Using a paintbrush or roller, apply a coat of primer to the corner bead and the surrounding area. Priming helps create a smooth base for the paint and improves its adhesion. Follow the manufacturer’s instructions for the recommended drying time.
- Sand the primer (optional): If desired, you can lightly sand the primer coat once it is dry. This step helps to ensure an extra-smooth surface for the final paint application.
Sanding and priming the corner bead will give it a clean and polished appearance. By following these steps, you’ll create a surface that is ready for the final painting step. Once the primer has dried, you can move on to the last step – painting and finishing the drywall edges.
Step 10: Paint and finish the drywall edges
The final step in installing corner beads is to paint and finish the drywall edges. This step will give your project a completed and professional look. Follow these steps to paint and finish the drywall edges effectively:
- Choose your paint: Select a high-quality paint that is suitable for the type of drywall and the desired finish you want to achieve. Consider factors such as color, sheen, and durability.
- Prepare the paint: Stir the paint thoroughly to ensure it is well mixed. If necessary, thin the paint according to the manufacturer’s instructions.
- Protect the surrounding area: Use painter’s tape and drop cloths to protect the surrounding surfaces from accidental paint drips or splatters.
- Apply the paint: Using a paintbrush or roller, apply an even coat of paint to the corner bead and the adjacent wall area. Work from top to bottom and from one end to the other, ensuring complete coverage. Follow the recommended drying time between coats if you plan to apply multiple layers.
- Apply additional coats (if needed): Depending on the desired color and finish, you may need to apply additional coats of paint. Allow each coat to dry before applying the next one, following the manufacturer’s instructions.
- Remove painter’s tape: Once the paint has fully dried, carefully remove the painter’s tape to reveal clean, crisp edges.
Painting and finishing the drywall edges will give your project a polished and professional appearance. Take your time during this step to ensure a smooth and even finish. Once the paint is dry and the tape is removed, step back and admire your beautifully installed, painted, and finished corner beads.
Congratulations! You have successfully completed the installation of corner beads and achieved smooth and professional-looking drywall edges. By following these steps, you have created a seamless and durable finish for your walls. Now you can enjoy the results of your hard work and admire the transformed look of your space.
Conclusion
Installing corner beads for smooth drywall edges is a crucial step in achieving a professional finish for your walls. By following the step-by-step process outlined in this article, you have learned how to properly install, align, and finish corner beads. This knowledge will enable you to tackle this task with confidence, whether you are a DIY enthusiast or a seasoned contractor.
Starting with gathering the necessary tools and materials, you have learned how to prepare the corner, measure and cut the corner bead, apply adhesive, and secure the corner bead in place. You have also learned the importance of checking for proper alignment, finishing and smoothing the corner bead, allowing it to dry, and sanding and priming before applying the final paint coats.
By following these steps diligently, you can achieve smooth, seamless, and durable drywall edges that enhance the overall appearance of your space. Whether you are working on a renovation project or finishing new construction, the installation of corner beads will contribute to the longevity and stability of your walls.
Remember to take your time, pay attention to detail, and consistently follow the instructions and safety guidelines. Make sure to choose high-quality materials and use the proper techniques along the way. By doing so, you will be rewarded with professional-looking drywall edges and a finished product that you can be proud of.
Now that you have a comprehensive understanding of how to install corner beads for smooth drywall edges, it’s time to put your knowledge into action. Start planning your next project, gather your tools, and confidently embark on creating beautifully finished walls with straight, seamless corners. Happy installing!
Frequently Asked Questions about How To Install Corner Beads For Smooth Drywall Edges
Was this page helpful?
At Storables.com, we guarantee accurate and reliable information. Our content, validated by Expert Board Contributors, is crafted following stringent Editorial Policies. We're committed to providing you with well-researched, expert-backed insights for all your informational needs.


0 thoughts on “How To Install Corner Beads For Smooth Drywall Edges”