Articles
How To Install Bypass Doors In Only Two Steps
Modified: March 21, 2024
Learn how to install bypass doors easily in just two simple steps with our step-by-step guide. Our articles provide detailed instructions and expert tips for a hassle-free installation.
(Many of the links in this article redirect to a specific reviewed product. Your purchase of these products through affiliate links helps to generate commission for Storables.com, at no extra cost. Learn more)
Introduction
Are you looking to transform your living space and create a stylish and functional entryway? Installing bypass doors can be the perfect solution. Bypass doors offer a sleek and space-saving alternative to traditional swinging doors, allowing you to maximize your floor space while adding a touch of elegance to your home.
In this article, we will guide you through the process of installing bypass doors in just two simple steps. Whether you are a seasoned DIY enthusiast or a novice handyman, you’ll find that with a little bit of time and effort, you can achieve professional-looking results.
Before we dive into the installation process, let’s first understand what bypass doors are and why they are a popular choice for many homeowners.
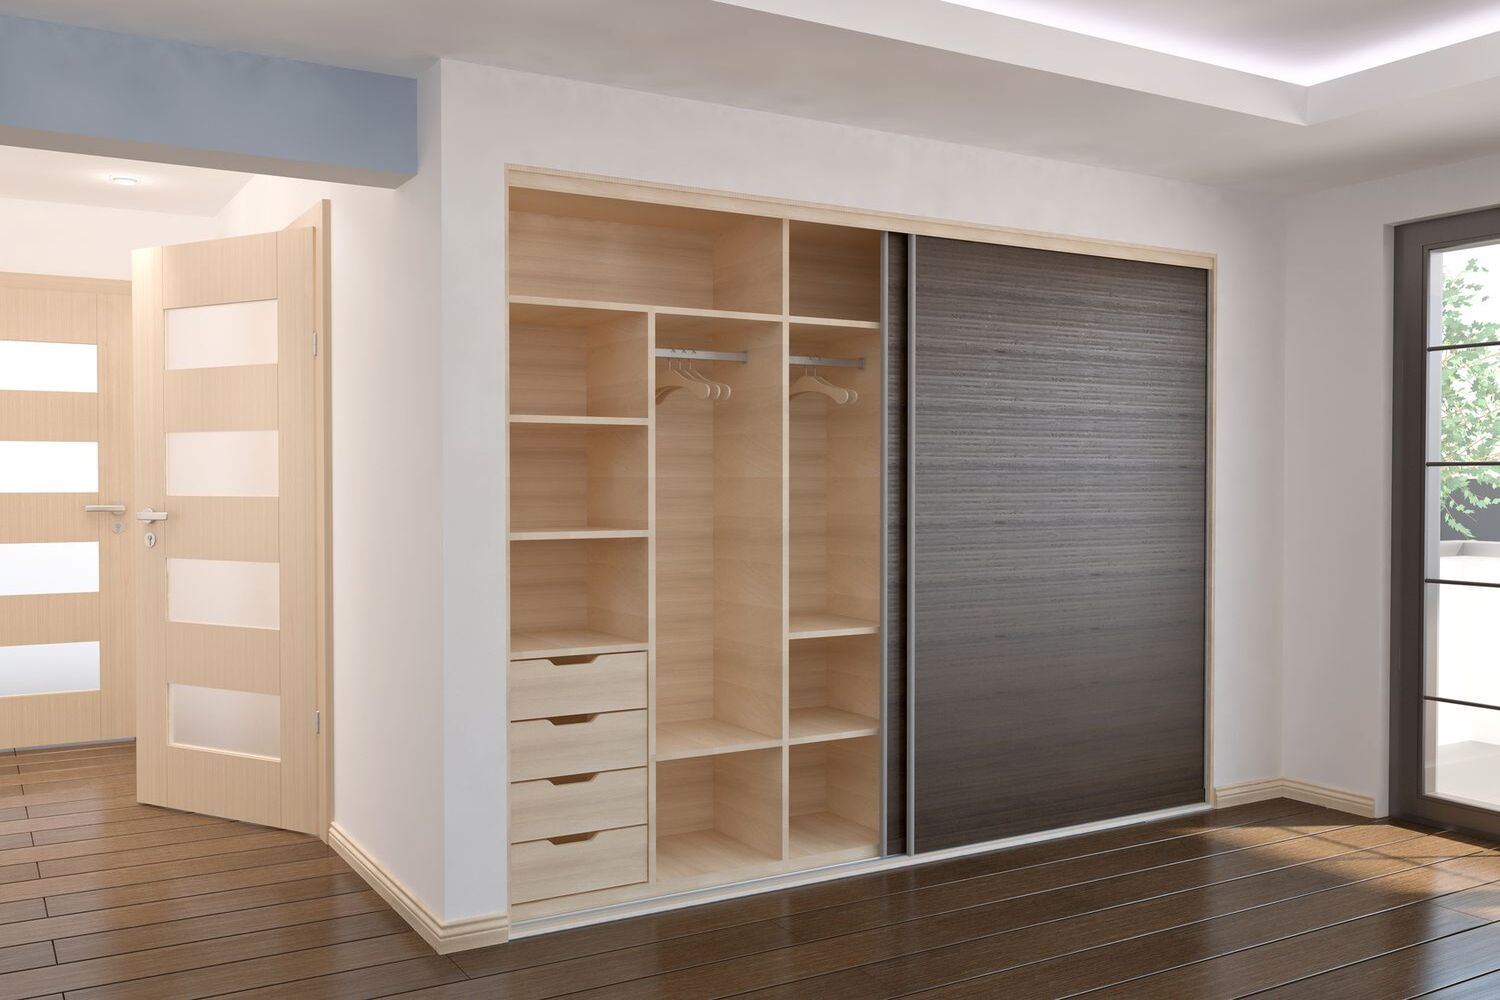
Bypass doors, also known as sliding doors or sliding closet doors, consist of two or more panels that slide on tracks installed above and below the door opening. These doors are designed to slide past each other, allowing you to access the entire width of the door opening. Bypass doors are commonly used for closets, pantries, and room dividers, as they provide easy access without taking up valuable floor space.
Now that we have a basic understanding of bypass doors, let’s move on to the first step of the installation process – preparing the door opening.
Key Takeaways:
- Transform your living space with stylish and functional bypass doors, maximizing floor space and adding elegance to your home in just two simple steps.
- Achieve professional-looking results by preparing the door opening and installing bypass doors, creating convenient and stylish entryways for closets, pantries, and room dividers.
Read more: How To Bypass RFID Door Lock
Step 1: Preparing the Door Opening
Before you start installing the bypass doors, it’s essential to prepare the door opening properly. This step will ensure that the doors fit correctly and operate smoothly. Follow these simple steps to prepare the door opening:
- Measure the Opening: Begin by measuring the width and height of the door opening. Use a tape measure to get accurate measurements. It’s crucial to have precise measurements to ensure the doors fit properly. If you have a standard-sized door opening, you can easily find pre-made bypass door kits that fit your dimensions.
- Remove Existing Door: If you have a traditional swinging door, remove it by unscrewing the hinges from the door frame. Carefully lift the door off the hinges and set it aside. Make sure to keep any hardware that was used to secure the old door, as some of it may be reused for the bypass doors.
- Prepare the Door Opening: Clean the door opening thoroughly, removing any dust, dirt, or debris. Ensure that the opening is in good condition, without any loose or damaged drywall or trim. If necessary, repair any defects before proceeding with the installation.
- Install Doorway Track: The next step is to install the doorway track. This track serves as the base for the bypass doors to slide on. Measure and mark the desired height of the track, usually around 1 inch above the finished floor. Use a level to ensure that the track is installed straight. Secure the track to the door frame using screws provided with the bypass door kit.
- Attach Door Jamb Brackets: Depending on the bypass door kit you have, you may need to attach door jamb brackets to the top and bottom of the door frame. These brackets provide additional support for the doors and help guide them along the track. Follow the manufacturer’s instructions to properly attach the brackets.
By following these steps, you have successfully prepared the door opening for the installation of bypass doors. Now, let’s move on to the next step – actually installing the bypass doors.
When installing bypass doors, make sure to measure the opening accurately and choose the right size doors. This will ensure a smooth and easy installation process.
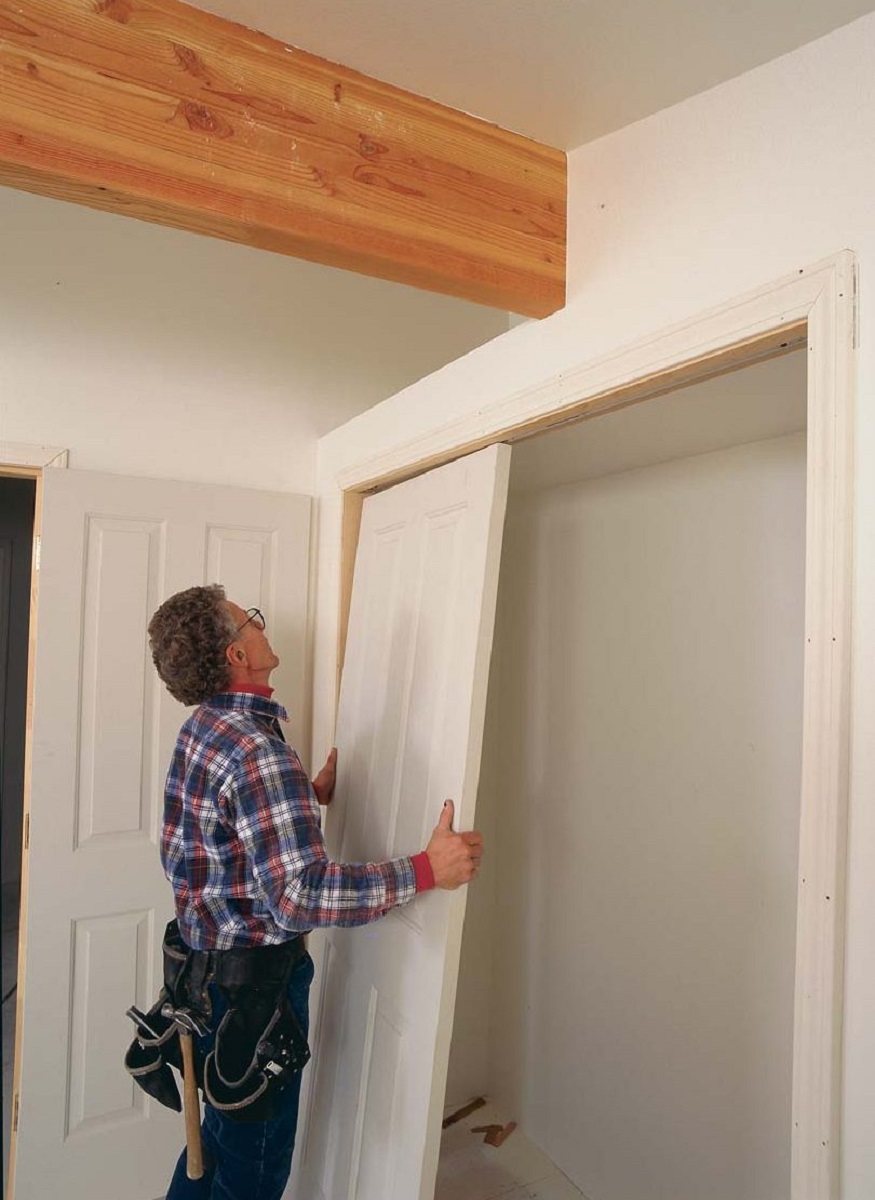
Step 2: Installing the Bypass Doors
Now that you have prepared the door opening, it’s time to install the bypass doors. This step will guide you through the process of installing the doors and ensuring they operate smoothly. Follow these steps to install the bypass doors:
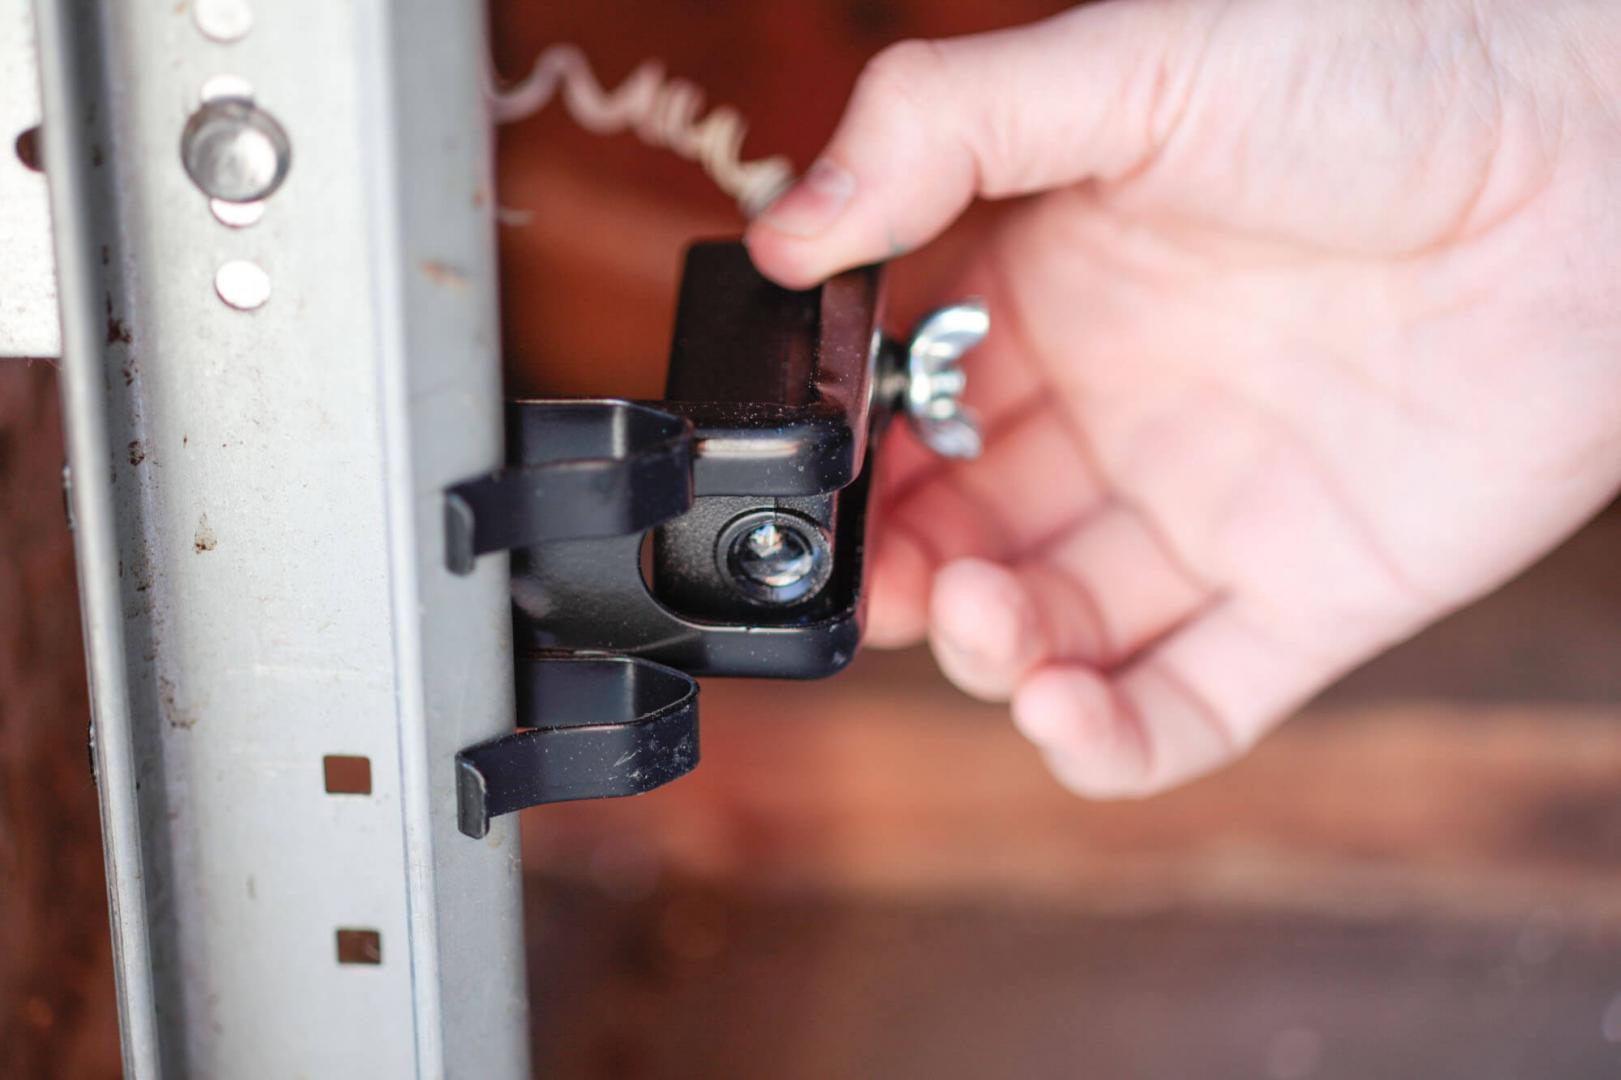
- Attach Rollers: Begin by attaching the rollers to the top edge of each bypass door panel. Typically, the rollers are attached using screws or clips. Refer to the manufacturer’s instructions to determine the correct placement and installation method for your specific bypass door kit.
- Hang the Doors: With the rollers attached, lift the first door panel and carefully position it onto the track. Make sure the rollers are securely seated on the track. Repeat this step for the remaining panels, sliding them onto the track and ensuring they are aligned properly.
- Adjust the Doors: Once all the panels are on the track, check if they slide smoothly. If the doors are not sliding as desired, use the adjustment screws on the rollers to fine-tune the alignment. Make slight adjustments until the doors glide effortlessly.
- Install Door Guides: To prevent the doors from swinging or coming off the track, install door guides at the bottom of the opening. These guides help keep the doors aligned and ensure they stay on the track. Again, consult the manufacturer’s instructions for the specific installation method of the door guides.
- Test the Doors: After installing the door guides, test the bypass doors by sliding them back and forth. Make sure they operate smoothly and without any obstructions. If you encounter any issues, such as doors getting stuck or uneven sliding, double-check the alignment and make additional adjustments if necessary.
- Secure the Doors: Once you are satisfied with the functionality of the bypass doors, secure them in place. Use any provided hardware, such as screws or clips, to secure the doors to the track or door jamb brackets. This step will ensure that the doors stay in place during use.
Congratulations! You have successfully installed the bypass doors. Take a step back and admire the newly transformed space. Bypass doors not only offer convenience but also add a touch of elegance and style to any room.
Now that you have completed the installation process, it’s important to maintain your bypass doors to ensure their longevity and smooth operation. Regularly clean the track and rollers to prevent dirt or debris from interfering with the sliding mechanism. Additionally, check for any loose screws or hardware and tighten them if necessary.
With these simple steps, you can enjoy the benefits of bypass doors and enhance the functionality and aesthetics of your home. So go ahead and tackle that closet or room project with confidence, knowing that you have the knowledge and skills to install bypass doors like a pro.
Conclusion
Installing bypass doors in your home can be a game-changer when it comes to optimizing space and adding a touch of elegance. With just two simple steps, you can transform your door opening into a functional and stylish entryway. By properly preparing the door opening and then installing the bypass doors, you can achieve professional-looking results.
We started by understanding what bypass doors are and why they are a popular choice among homeowners. Their space-saving design and easy accessibility make them ideal for closets, pantries, and room dividers. From there, we walked through the necessary steps to prepare the door opening, including measuring the opening, removing the existing door, cleaning and repairing the opening, and installing the doorway track and door jamb brackets.
In the second step, we covered the installation process of the bypass doors, which involved attaching rollers to the door panels, hanging the doors onto the track, adjusting the doors for smooth sliding, installing door guides, testing the doors for functionality, and securing them in place. Following these steps ensures that your bypass doors slide effortlessly and remain secure.
Once the installation is complete, it’s essential to maintain your bypass doors regularly. Keep the track and rollers clean to prevent any obstructions that could hinder smooth operation. Additionally, check for any loose screws or hardware and tighten them as needed.
By following this comprehensive guide, you now have the knowledge and skills to install bypass doors in your home. Enjoy the benefits of maximizing your floor space while adding functionality and style to your living areas.
So go ahead, embark on your DIY project with confidence and create a beautiful and practical entryway with bypass doors.
Frequently Asked Questions about How To Install Bypass Doors In Only Two Steps
Was this page helpful?
At Storables.com, we guarantee accurate and reliable information. Our content, validated by Expert Board Contributors, is crafted following stringent Editorial Policies. We're committed to providing you with well-researched, expert-backed insights for all your informational needs.


0 thoughts on “How To Install Bypass Doors In Only Two Steps”