Articles
How To Install Drain Tile In Basement
Modified: December 7, 2023
Learn the step-by-step process of installing drain tile in your basement with our comprehensive articles. Ensure a dry and secure basement to protect your home from water damage.
(Many of the links in this article redirect to a specific reviewed product. Your purchase of these products through affiliate links helps to generate commission for Storables.com, at no extra cost. Learn more)
Introduction
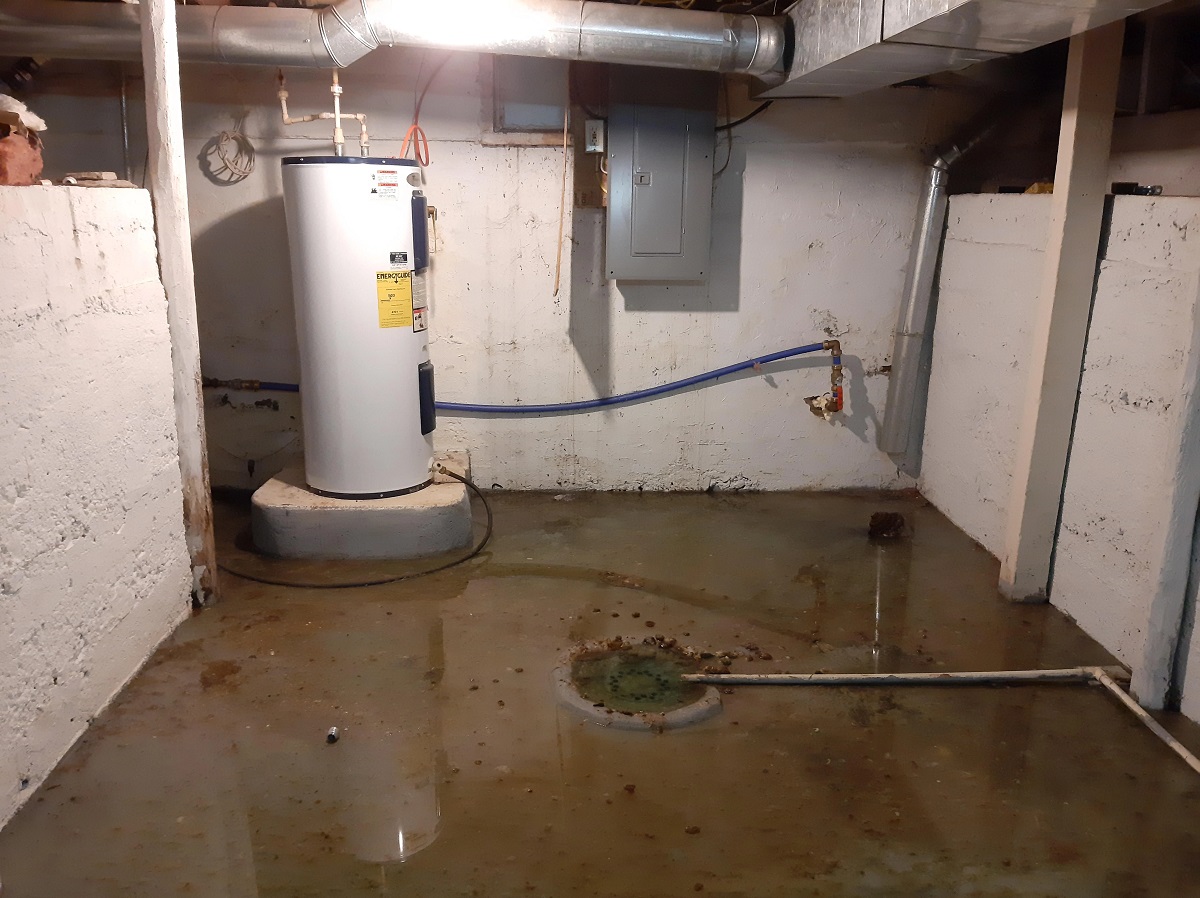
When it comes to keeping your basement dry, installing a drain tile system can be an effective solution. Drain tile, also known as a French drain or perimeter drain, is a system designed to redirect water away from your basement and foundation. By properly installing drain tile in your basement, you can prevent water damage, mold, and moisture-related issues.
In this article, we will guide you through the process of installing drain tile in your basement. From assessing the space to testing the system, we will cover each step in detail to ensure a successful installation. So, grab your tools and let’s get started on creating a dry and functional basement.
Key Takeaways:
- Proper assessment, preparation, and installation of a drain tile system in your basement can effectively prevent water damage and create a dry, functional living space for your family.
- Regular testing and maintenance of the drain tile system will ensure ongoing functionality, providing peace of mind and long-term protection against basement water issues.
Step 1: Assessing the Basement
Before you begin the drain tile installation process, it is crucial to assess the condition of your basement. This will help you determine the extent of water infiltration and identify any potential problem areas.
Start by inspecting the walls and floors for signs of water damage, such as dampness, stains, or efflorescence. Look for cracks or gaps in the foundation that may be allowing water to seep in. Additionally, check if there are any existing drainage systems in place, such as a sump pump.
If you notice significant moisture or water accumulation, it may be necessary to consult a professional to address any underlying issues. They can help identify the source of the water infiltration and provide appropriate solutions before proceeding with the drain tile installation.
Consider the layout and size of your basement as well. Take note of any obstacles, such as plumbing lines or utility connections, that could impact the installation process. It is important to plan the drain tile placement accordingly, ensuring it effectively channels water away from the foundation.
By thoroughly assessing your basement, you will have a better understanding of what needs to be done and can plan your drain tile installation accordingly. This initial evaluation will save you time and ensure a successful outcome for the rest of the process.
Step 2: Gathering the Necessary Tools and Materials
Before you start the drain tile installation, it is essential to gather all the tools and materials required for the project. Having everything prepared beforehand will make the process smoother and more efficient. Here is a list of the essential items you will need:
- Shovel or excavator: To dig the trench for the drain tile.
- Tape measure: To measure the length of the trench and ensure accuracy.
- Level: To ensure the trench is dug evenly and at the proper slope.
- Drain tile: PVC or flexible drainage pipe that will redirect the water away from the foundation.
- Perforated drain tile: Used for areas with excessive groundwater to allow water to enter the system.
- Geotextile fabric: Placed around the drain tile to prevent the entry of sediment and soil particles.
- Gravel: Used for backfilling the trench and providing drainage for the system.
- Sump pump: If your basement does not have an existing sump pump, you may need to install one to remove collected water from the drain tile system.
- Waterproof sealant: To seal any cracks or gaps in the foundation walls before installation.
Ensure that you have all the necessary tools and materials readily available before you begin the installation process. This will help prevent any delays or interruptions during the project. It is also advisable to have personal protective equipment such as gloves and safety glasses to ensure your safety throughout the process.
By being well-prepared with the right tools and materials, you can complete the drain tile installation efficiently and effectively.
Step 3: Preparing the Basement for Drain Tile Installation
Before you can install the drain tile in your basement, it is essential to properly prepare the space. This will ensure a smooth and successful installation process. Here are the steps to follow:
- Clean the basement: Clear out any clutter, debris, or furniture from the area where the drain tile will be installed. This will provide you with ample space to work and prevent any obstructions during the installation.
- Address any existing water or moisture issues: If you notice any signs of water infiltration or moisture problems in your basement, take the necessary steps to address them. This may include sealing any cracks or gaps in the foundation walls, applying waterproofing sealant, or fixing plumbing leaks.
- Locate the perimeter of the basement: Determine the boundaries of the area where the drain tile will be installed. Mark the perimeter using chalk or tape to have a clear visual reference during the process.
- Identify the starting point: Choose a starting point for the installation, typically near a low-lying area or an existing sump pump if you have one. This will ensure proper water drainage throughout the system.
- Remove baseboard or trim: If necessary, remove any baseboard or trim along the walls to create a clean and unobstructed surface for the drain tile installation.
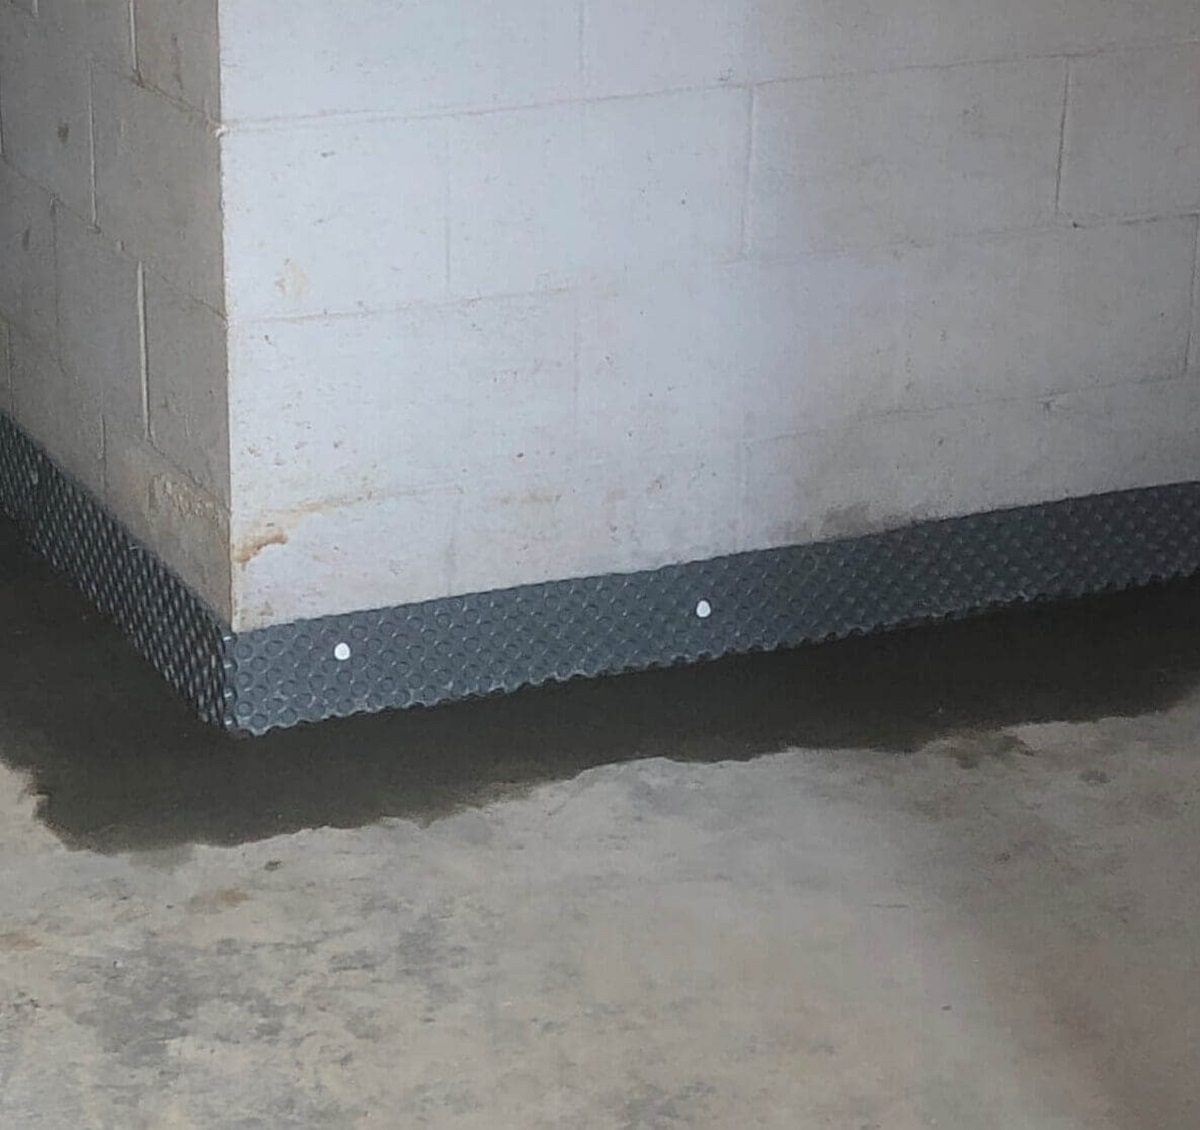
- Protect the basement walls: Before installing the drain tile, consider applying a layer of waterproofing membrane or a moisture barrier to the basement walls. This extra precaution will provide an added layer of protection against water infiltration.
By following the above steps, you will have a well-prepared basement that is ready for the drain tile installation. Taking the time to prepare the space properly will help ensure the long-term effectiveness of the system and reduce the risk of future water damage.
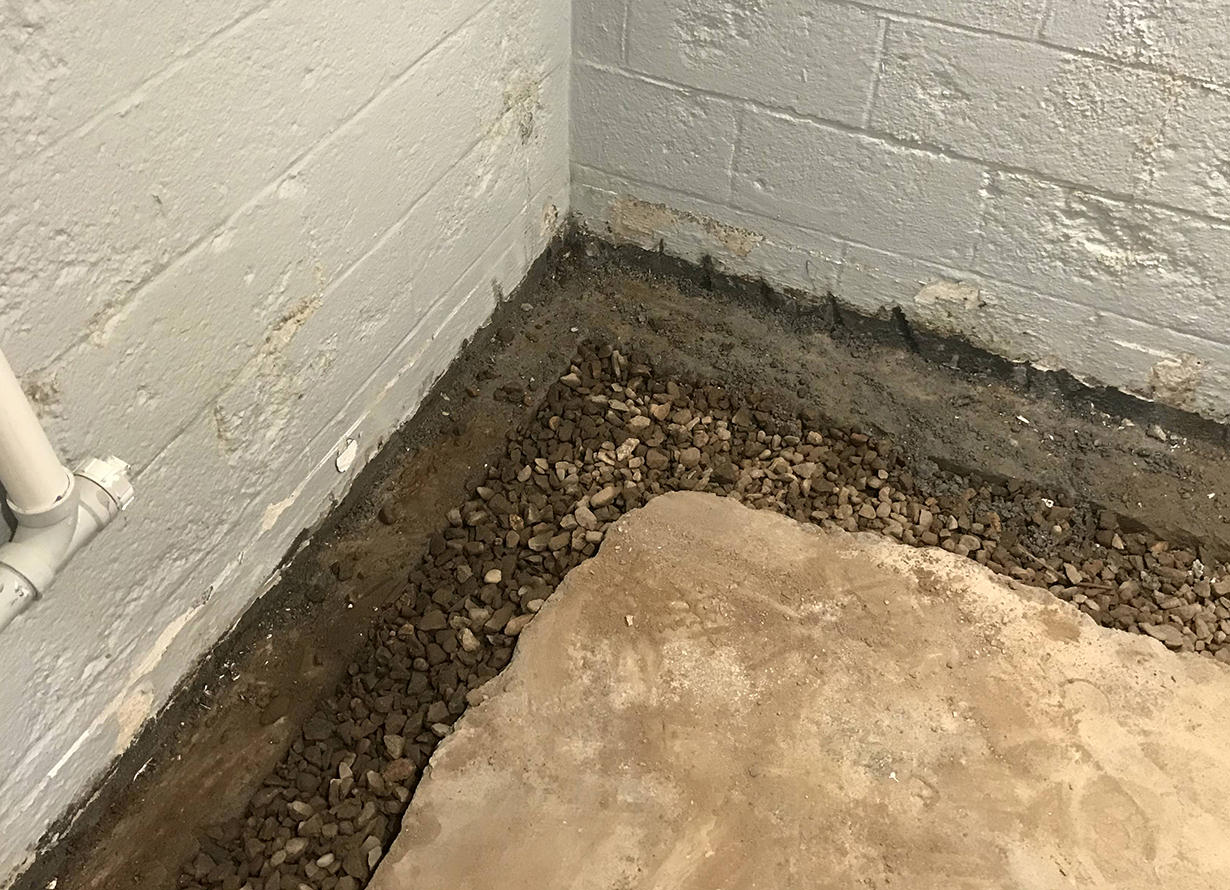
Step 4: Digging the Trench for the Drain Tile
The next step in installing drain tile in your basement is to dig the trench where the drain tile will be placed. The trench will allow the water to be redirected away from the foundation. Follow these steps to dig the trench:
- Mark the trench: Use a tape measure and spray paint to mark the path of the trench along the perimeter of the basement. Ensure you maintain a consistent width and depth for the trench.
- Start the digging: Begin digging the trench using a shovel or an excavator. The width of the trench should be wide enough to accommodate the drain tile and allow for proper drainage. The depth of the trench should extend below the frost line or below the lowest point of the basement floor if applicable.
- Create a slope: As you dig the trench, create a slight slope towards the sump pump or the designated drainage area. This slope will ensure that water flows away from the foundation and towards the drain tile system.
- Smooth the bottom of the trench: Once the trench is dug, use a shovel or a level to smooth the bottom, ensuring it is even and free from any debris that may obstruct the drain tile.
It is important to note that the depth and width of the trench may vary depending on the specific requirements of your particular situation. If you are unsure about the proper dimensions, consult with a professional or refer to local building codes for guidance.
Take caution while digging the trench, avoiding any utility lines or pipes that may be buried underground. If in doubt, contact your local utility company to mark the locations of any underground utilities before proceeding.
By carefully digging the trench for the drain tile, you will create the foundation for an effective drainage system that will help keep your basement dry and free from water damage.
When installing drain tile in a basement, make sure to properly slope the tile towards the sump pump to ensure efficient water drainage. This will help prevent water buildup and potential flooding in the basement.
Read more: How To Unclog A Basement Drain
Step 5: Installing the Drain Tile System
With the trench dug, it’s time to start installing the drain tile system in your basement. Follow these steps for a successful installation:
- Prepare the drain tile: Cut the drain tile to the desired length using a saw or utility knife. Measure carefully to ensure a proper fit within the trench.
- Place geotextile fabric: Lay a layer of geotextile fabric along the bottom and sides of the trench. This fabric will act as a filter, preventing sediment and soil from entering the drain tile and causing blockages.
- Position the drain tile: Place the drain tile on top of the geotextile fabric, ensuring that the perforated side faces down. The holes in the drain tile should be situated to allow water to enter and flow through the system.
- Connect the sections: Use couplers and connectors to join the sections of the drain tile together. Ensure a snug fit and securely connect the pieces to prevent water leakage along the system.
- Add gravel: Pour a layer of clean gravel over the drain tile. The gravel acts as additional drainage and helps to distribute water more evenly throughout the system.
- Cover with geotextile fabric: Place another layer of geotextile fabric over the gravel to prevent soil and debris from entering the drain tile.
- Backfill the trench: Carefully backfill the trench with soil, ensuring it is evenly distributed and does not disrupt the drain tile system. Tamp the soil gently as you go to provide stability.
Throughout the installation process, double-check that the drain tile remains sloped towards the designated drainage area or sump pump. This will ensure that water flows effectively through the system and away from the foundation.
It is important to note that if your basement has multiple areas with excessive groundwater, you may need to install additional perforated drain tile sections to address these specific areas.
By following these steps and installing the drain tile system correctly, you will create a reliable drainage solution that helps keep your basement dry and protected against water damage.
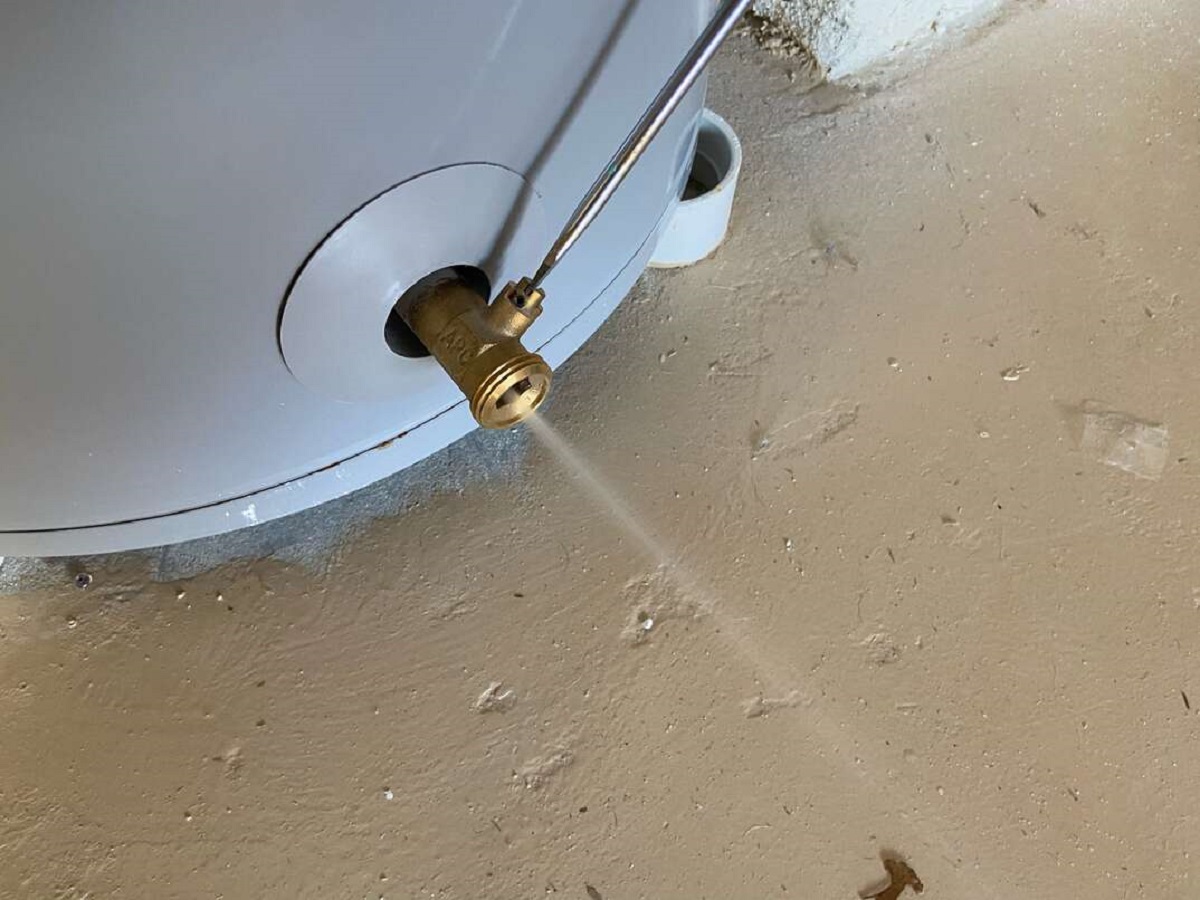
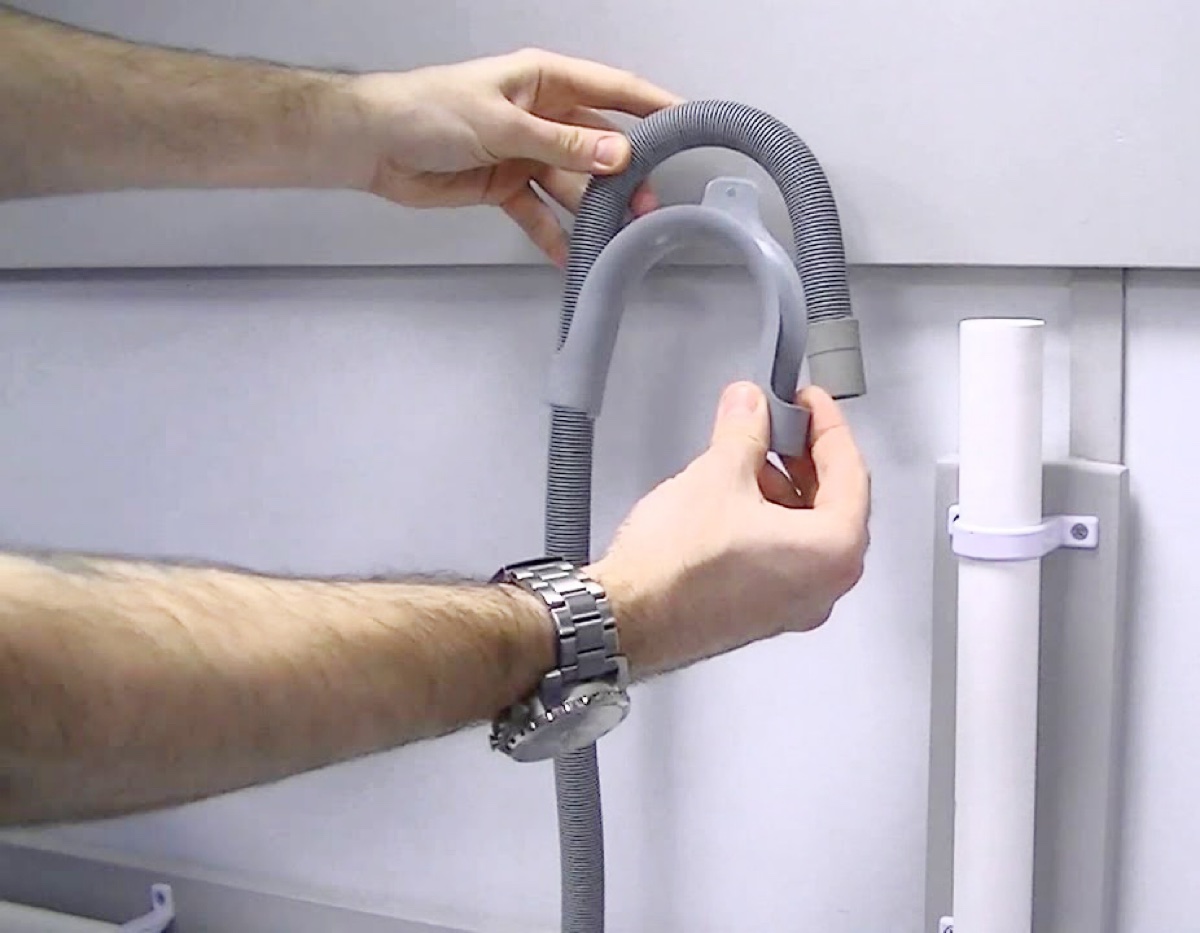
Step 6: Properly Connecting the Drain Tile to the Sump Pump
Connecting the drain tile system to the sump pump is a vital step in ensuring proper drainage in your basement. Follow these steps to connect the drain tile to the sump pump:
- Locate the sump pump pit: Identify the location of the sump pump pit in your basement. This is typically found in the lowest part of the basement where water naturally collects.
- Prepare the sump pump pit: Clean out any debris or sediment from the sump pump pit to ensure proper functionality.
- Position the sump pump: Place the sump pump inside the pit, ensuring that it is securely positioned and level. Follow the manufacturer’s instructions for proper installation.
- Connect the drain tile: Locate the end of the drain tile that is nearest to the sump pump pit. Connect this end to the sump pump using a PVC pipe or a suitable connector. Secure the connection tightly to prevent water leakage.
- Ensure proper alignment: Make sure that the drain tile slopes downward towards the sump pump to allow for proper water flow and drainage.
- Test the connection: Fill the drain tile system with water to check if it drains properly into the sump pump pit. Observe how effectively the water is being pumped out by the sump pump.
- Make necessary adjustments: If you notice any issues with drainage or water flow, make adjustments to the drain tile or sump pump as needed. This may involve repositioning the drain tile or ensuring that the sump pump is functioning correctly.
It is important to test the drain tile system and sump pump regularly to ensure proper operation and prevent any potential issues. This will help maintain a dry and functional basement environment.
By properly connecting the drain tile to the sump pump, you will create a reliable system that effectively removes water from your basement and protects it against water damage.
Step 7: Backfilling the Trench and Finishing the Installation
After installing the drain tile system and connecting it to the sump pump, the next step is to backfill the trench and complete the installation. Follow these steps to finish the project:
- Check for proper slope: Verify that the drain tile has the appropriate slope towards the sump pump or designated drainage area. This will ensure optimal water flow through the system.
- Remove excess soil: Remove any excess soil or debris from the trench to create a clean working area.
- Backfill the trench: Begin backfilling the trench with the remaining soil, ensuring that it is evenly distributed and tightly packed around the drain tile. Use a shovel or tamper to compact the soil as you go along.
- Leave a gap: Remember to leave a small gap between the top of the soil and the basement floor. This will allow for proper drainage of any excess water that may collect near the foundation.
- Reinstall baseboard or trim: Once the trench is backfilled, reinstall any baseboard or trim that was removed in the preparation stage. This will give your basement a finished and polished look.
- Clean up: Dispose of any remaining materials, tools, or debris from the installation process. Give the area a final clean to remove any dirt or dust.
It is important to note that the backfilling process may need to be done gradually, especially if the soil is prone to settle or shift. Monitor the area over time and add additional soil if needed to ensure a stable and level surface.
Remember to keep the drain tile system well-maintained by regularly inspecting it, removing any blockages, and testing the sump pump to ensure it is functioning properly.
By properly backfilling the trench and completing the installation, you will finalize the drain tile system and have a functional and efficient drainage solution in your basement.
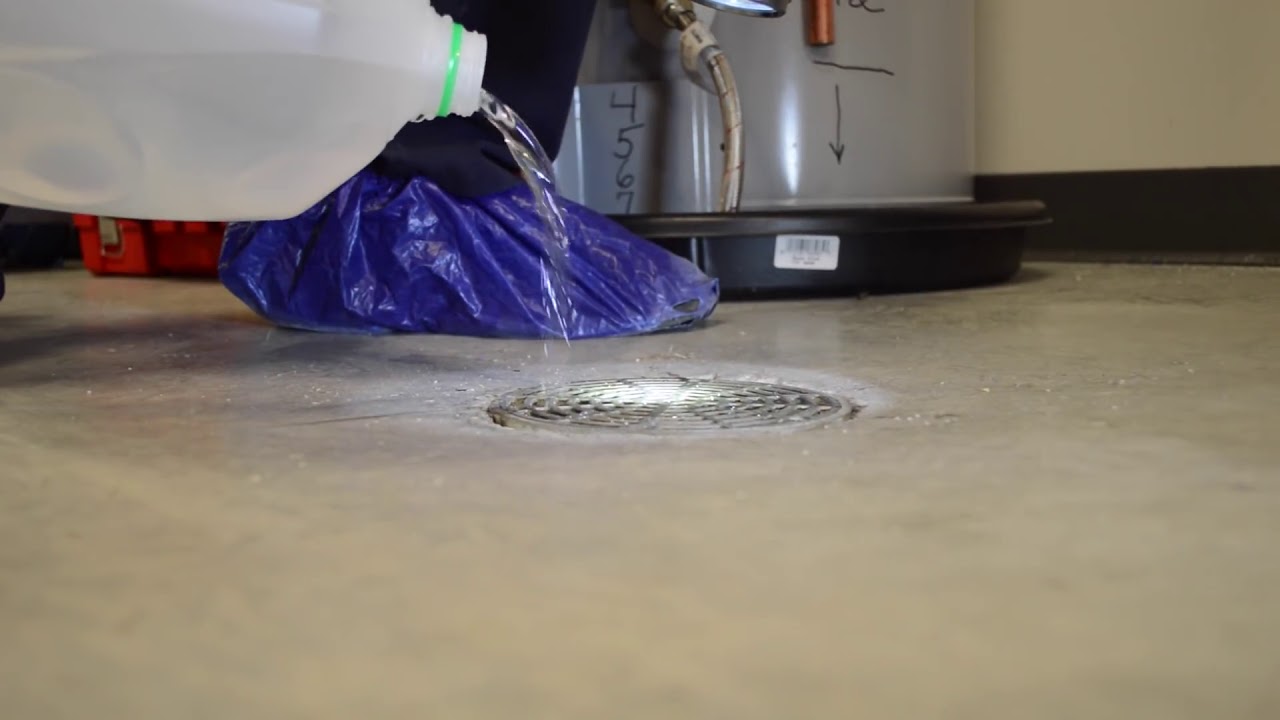
Step 8: Testing the Drain Tile System
Once the drain tile system installation is complete, it is crucial to test its functionality to ensure that it is working effectively. Testing the system will give you peace of mind knowing that your basement is protected from water damage. Here are the steps to test the drain tile system:
- Add water to the system: Pour a significant amount of water into the drain tile system. You can use a garden hose or buckets of water to simulate heavy rainfall or groundwater.
- Observe water flow: Watch how the water flows through the drain tile system. Ensure that it is effectively channeled away from the foundation and moves towards the designated drainage point or sump pump.
- Check for leaks or blockages: Inspect the entire system for any signs of leaks or blockages. Look for water pooling, damp spots, or unusual sounds coming from the drain tile system.
- Monitor sump pump operation: Pay attention to the performance of the sump pump. Ensure that it activates and pumps out water efficiently from the drain tile system.
- Inspect the basement: Check the interior of the basement to ensure that it remains dry during the testing process. Look for any signs of water infiltration or moist spots.
- Repeat the testing: Repeat the testing process periodically, especially after heavy rainfall or extreme weather conditions, to ensure the ongoing functionality of the drain tile system.
If you encounter any issues during the testing phase, such as inadequate water flow or leaks, it is essential to address them promptly. Check the connections, remove any blockages, or consult with a professional if necessary.
Regular maintenance and inspection of the drain tile system will help ensure its longevity and effectiveness in preventing basement water damage.
By thoroughly testing the drain tile system, you can have confidence in its ability to keep your basement dry and protected from water-related issues.
Read more: How To Tile A Basement Floor
Conclusion
Installing a drain tile system in your basement is a proactive and effective way to protect your home from water damage and maintain a dry and functional living space. By following the step-by-step process outlined in this article, you can successfully install a drain tile system and enjoy the benefits of a dry basement.
Throughout the installation process, it is important to assess your basement, gather the necessary tools and materials, and properly prepare the space. By digging the trench correctly and installing the drain tile system with precision, you can ensure optimal water flow and drainage.
Connecting the drain tile to a sump pump, backfilling the trench, and testing the system are crucial steps in completing the installation. Regular maintenance and testing will help to identify any issues and ensure the ongoing functionality of the drain tile system.
Remember to consult with professionals or refer to local building codes if you are unsure about any aspect of the installation process. They can provide guidance and expertise to ensure a successful outcome.
By installing a drain tile system in your basement, you are taking proactive measures to protect your home investment and provide a safe and comfortable living environment for you and your family. Enjoy the peace of mind that comes with a dry and well-protected basement.
So, roll up your sleeves, gather your tools, and get ready to embark on the journey of installing a drain tile system in your basement. Your efforts will pay off as you enjoy the benefits of a dry and functional space that can withstand any water challenges that come your way.
Frequently Asked Questions about How To Install Drain Tile In Basement
Was this page helpful?
At Storables.com, we guarantee accurate and reliable information. Our content, validated by Expert Board Contributors, is crafted following stringent Editorial Policies. We're committed to providing you with well-researched, expert-backed insights for all your informational needs.


0 thoughts on “How To Install Drain Tile In Basement”