Articles
How To Install Pellet Stove In Basement
Modified: August 20, 2024
Looking for articles on how to install a pellet stove in your basement? Check out our comprehensive guide for step-by-step instructions and expert tips.
(Many of the links in this article redirect to a specific reviewed product. Your purchase of these products through affiliate links helps to generate commission for Storables.com, at no extra cost. Learn more)
Introduction
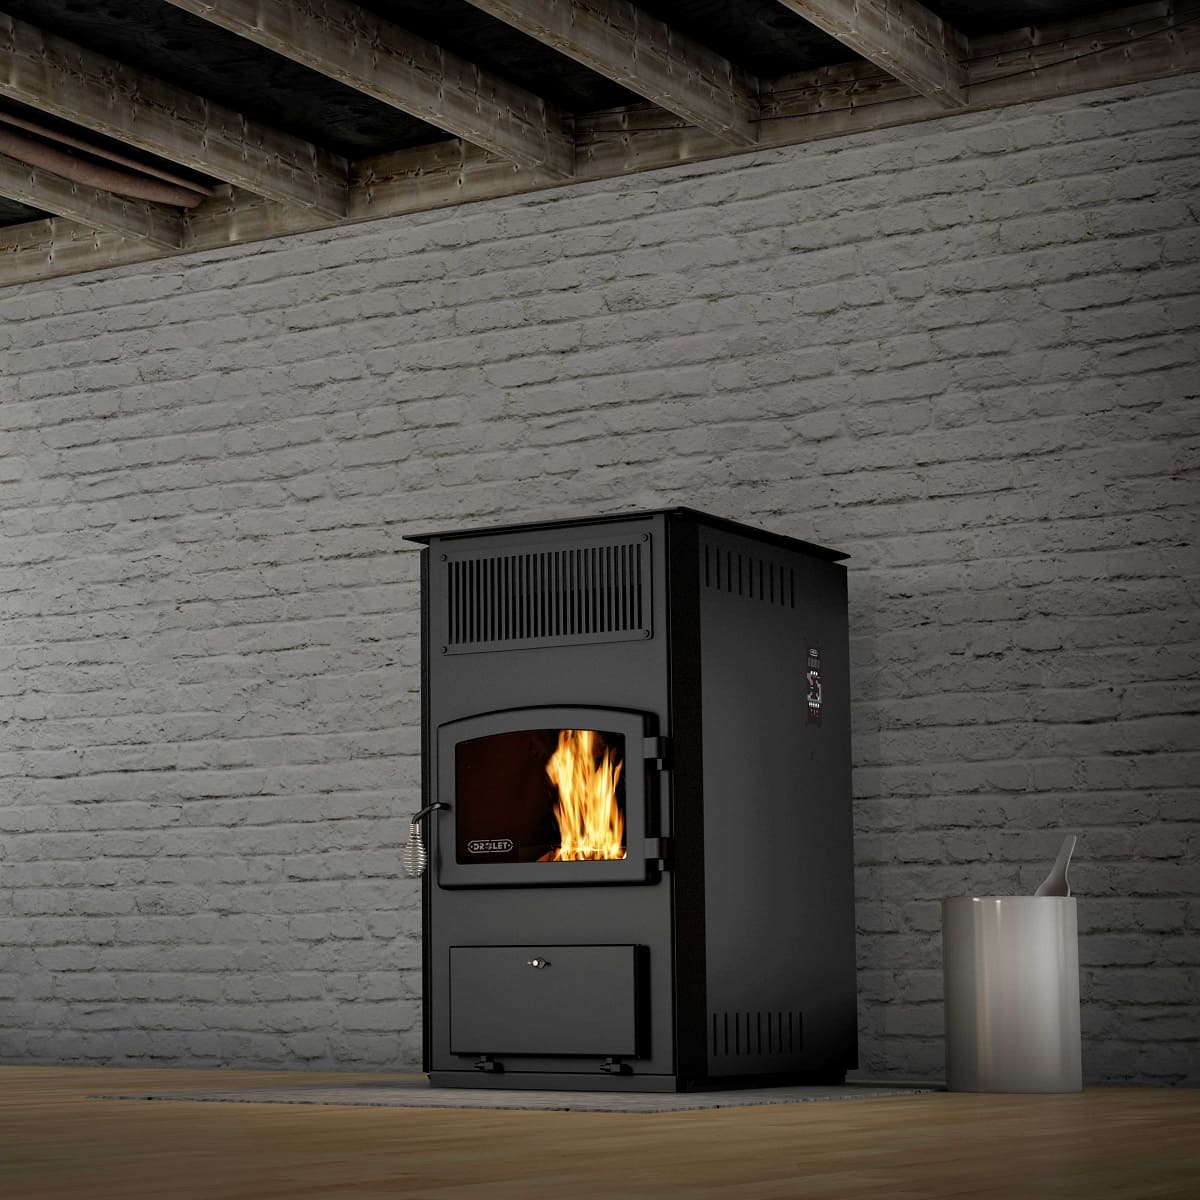
Welcome to our comprehensive guide on how to install a pellet stove in your basement. Pellet stoves are a popular alternative to traditional wood-burning stoves, offering efficient and environmentally-friendly heating options for your home. By installing a pellet stove in your basement, you can benefit from the warmth it provides and potentially save on heating costs.
Before diving into the installation process, it’s important to note that installing a pellet stove requires careful planning, preparation, and adherence to local building codes and regulations. Hiring a professional installer is always recommended, but if you have the necessary skills and knowledge, you can tackle this project on your own.
In this guide, we will walk you through the step-by-step process of installing a pellet stove in your basement. We will cover everything from planning and preparation to the final testing and maintenance. So, let’s get started!
Key Takeaways:
- Proper planning, preparation, and adherence to local building codes are essential for a successful pellet stove installation in the basement. Research, assess, gather tools, and ensure safety for a smooth process.
- Regular maintenance and cleaning are crucial for ensuring the efficient and safe operation of your pellet stove. Follow manufacturer’s instructions, inspect components, and schedule professional maintenance for optimal performance.
Read more: How To Store Pellet Grill Pellets
Step 1: Plan and Prepare
Before you begin the installation process, it’s essential to develop a well-thought-out plan and gather all the necessary information and materials. Here are the key steps to follow:
- Research and Assess: Start by researching local building codes and regulations regarding pellet stove installations in basements. Ensure that your basement is suitable for this type of heating appliance, considering factors such as ventilation and clearance requirements. Assess the available space and determine the best location for your pellet stove.
- Select the Right Pellet Stove: Choose a pellet stove that is appropriately sized for your basement and meets your heating requirements. Consider its heating capacity, efficiency rating, and any additional features you desire.
- Check for Permits: Determine if you need any permits or permissions from your local building authority before proceeding with the installation. This step is crucial to ensure compliance with safety regulations.
- Measure and Prep the Area: Take accurate measurements of the selected installation area in your basement. Clear the space of any obstructions, ensuring that there is ample distance from walls, furniture, and other combustible materials.
- Gather the Necessary Tools and Materials: Make a list of the tools and materials required for the installation process. Some common items include a drill, screwdriver, tape measure, venting pipes, chimney brushes, silicone sealant, and fireproof caulking.
Taking these preliminary steps will help you approach the installation process with clarity and confidence. Proper planning and preparation are vital for a successful pellet stove installation in your basement.
Step 2: Determine Placement and Venting
Proper placement and venting of your pellet stove are critical factors to consider when installing in your basement. Follow these steps to ensure optimal performance and safety:
- Identify the Ideal Location: Assess the layout of your basement and identify a suitable location for the pellet stove. Consider factors such as proximity to a power source, clearance from combustible materials, and ease of access for cleaning and maintenance.
- Ensure Proper Ventilation: Pellet stoves require adequate ventilation to expel combustion gases. Determine the best venting option for your basement, whether it’s through an existing chimney, an exterior wall, or a dedicated venting system. Consult local regulations to ensure compliance with venting requirements.
- Measure and Plan Venting Route: Measure the distance from the pellet stove to the exit point for the venting system. Plan the route for the venting pipes, ensuring they have sufficient clearance and avoiding any obstacles along the way.
- Select Venting Material: Choose the appropriate venting material for your pellet stove. Options include stainless steel, galvanized steel, or flexible aluminum piping. Ensure that the selected material is compatible with your pellet stove and meets local building code specifications.
- Install Venting System: Begin by installing the venting pipes according to the manufacturer’s instructions. Use proper fittings, connectors, and supports as necessary. Ensure that the venting system is secure, airtight, and provides adequate clearance from combustible materials.
- Consider Fresh Air Intake: If your basement is tightly sealed, you might need to install a fresh air intake system alongside the venting system. This helps provide combustion air to the pellet stove and maintains efficient operation.
Proper placement and venting are crucial for the safe and efficient operation of your pellet stove. Take the time to plan and execute these steps carefully to ensure optimal performance and compliance with all relevant regulations.
Step 3: Gather Tools and Materials
Before you begin the installation of your pellet stove in the basement, it’s important to gather all the necessary tools and materials. Having everything you need at hand will help streamline the installation process. Here are the essential tools and materials you’ll need:
Tools:
- Measuring tape
- Pencil or marker
- Level
- Screwdriver
- Drill
- Hole saw
- Adjustable wrench
- Tin snips
- Utility knife
- Chimney brushes
Materials:
- Pellet stove
- Venting pipes
- Venting elbows and connectors
- Silicone sealant
- Fireproof caulking
- Venting termination cap
- Wall thimble
- Chimney liner (if applicable)
- Insulation (if required)
- Fasteners (screws, brackets, etc.)
These tools and materials will help you complete the installation process smoothly and efficiently. It’s important to ensure that you have everything on hand before you start, as it can be frustrating and time-consuming to pause the installation to acquire missing tools or materials.
Remember to always wear appropriate safety gear, such as gloves and safety goggles, when handling tools and working with the materials. Safety should be a top priority throughout the installation process.
Once you have gathered all the necessary tools and materials, you’ll be ready to move on to the next steps of installing your pellet stove in the basement.
Step 4: Clear the Area and Ensure Safety
Prior to installing your pellet stove in the basement, it’s crucial to clear the area and take necessary safety precautions. This step sets the foundation for a safe and efficient installation process. Here’s what you need to do:
- Remove Obstacles: Clear the installation area of any furniture, objects, or debris that could obstruct the installation process. Ensure there is ample space around the selected location for the stove.
- Provide Adequate Clearance: Ensure that the chosen location for the pellet stove meets the required clearance guidelines from walls, combustible materials, and furniture. Refer to the manufacturer’s instructions for specific clearance requirements.
- Check Electrical Connections: Ensure there is a convenient power source near the installation area. If an electrical outlet is not available, consider hiring a professional electrician to install one before proceeding with the installation.
- Create a Non-Combustible Base: Place a non-combustible base under the pellet stove to protect the floor. This can be a fireproof floor mat or a suitable material recommended by the manufacturer.
- Install Heat Shields: If the stove is located near combustible materials such as walls or wood beams, install heat shields to provide additional protection. These shields should be made of non-combustible materials, such as sheet metal, and should have proper clearances.
- Keep Fire Safety Equipment Handy: Have fire safety equipment nearby, including a fire extinguisher and a smoke detector. Ensure that the smoke detector is working properly and has sufficient battery power.
- Review Safety Precautions: Familiarize yourself with the safety precautions outlined in the pellet stove’s instruction manual. This includes guidelines for proper operation, maintenance, and dealing with potential emergencies.
Clearing the area and ensuring safety precautions are vital to protect yourself, your home, and your loved ones during and after the installation process. Taking these steps will help reduce the risk of accidents and ensure a smooth and worry-free experience. Now that you’ve prepared the area, you’re ready to proceed with the installation of your pellet stove in the basement.
Read more: How To Store Pellets For Pellet Stove
Step 5: Install the Base and Support Structure
Now that you have prepared the area and ensured safety, it’s time to install the base and support structure for your pellet stove. Follow these steps to ensure a stable and secure installation:
- Check Manufacturer’s Instructions: Refer to the manufacturer’s instructions for specific guidelines on installing the base and support structure. Follow their recommendations carefully to ensure proper installation.
- Position the Base: Place the non-combustible base that you prepared earlier in the chosen location for the pellet stove. Ensure that it is level and provides adequate support for the stove.
- Secure the Base: Screw the base securely into the floor to prevent any movement or wobbling during operation. Use appropriate fasteners that are recommended by the manufacturer or specified in the installation instructions.
- Assemble and Install the Support Structure: If your pellet stove requires a support structure, follow the instructions provided by the manufacturer for its assembly and installation. This may involve attaching brackets, legs, or other components to ensure stability.
- Level the Support Structure: Use a level to ensure that the support structure is perfectly level on the base. This step is crucial to prevent any tilting or uneven distribution of the stove’s weight.
- Secure the Support Structure: Once the support structure is level, secure it in place according to the manufacturer’s recommendations. This may involve using screws or other fasteners provided with the stove.
- Verify Stability: Double-check that the base and support structure are secure and stable. Gently shake the stove to ensure there is no movement or looseness that could potentially compromise the installation.
By following these steps, you will ensure a solid and stable foundation for your pellet stove. A properly installed base and support structure will provide a safe and secure platform for the stove to operate on. Once you have completed the installation of the base and support structure, you can move on to the next step of connecting the venting system.
Make sure to properly vent the pellet stove to the outside to prevent carbon monoxide buildup. Follow the manufacturer’s instructions for installation to ensure safety and efficiency.
Step 6: Connect the Venting System
Connecting the venting system is a crucial step in the installation process of your pellet stove. Proper installation and alignment of the venting pipes ensure efficient operation and safe exhaust of combustion gases. Follow these steps to connect the venting system:
- Refer to the Manufacturer’s Instructions: Read the manufacturer’s instructions carefully for guidance specific to your pellet stove model. Follow their recommended venting guidelines, including pipe types, sizes, and clearances.
- Prepare the Venting Pipes: Cut and assemble the venting pipes according to the manufacturer’s instructions, ensuring proper lengths and angles. Use a hole saw or appropriate tools to create openings in walls or ceilings, if required.
- Install the Wall Thimble: If the venting system passes through a wall, install a wall thimble to provide a secure and fire-safe passage. Follow the manufacturer’s instructions for correct installation.
- Connect the Venting Pipes: Connect the venting pipes and elbows, ensuring a tight and secure fit. Use proper connectors and clamps as recommended by the manufacturer. Pay attention to pipe orientation and ensure the seams are properly aligned.
- Seal the Joints: Apply silicone sealant or fireproof caulking to the joints and connections. This helps create an airtight seal and prevents any leaks or drafts.
- Install the Venting Termination Cap: Attach the venting termination cap to the exterior of your home or the designated exit point. Ensure that it is securely fastened, weather-resistant, and properly aligned with the venting pipes.
- Insulate (if required): Depending on your local building codes and regulations, you may need to insulate the venting pipes to prevent heat loss, condensation, or to comply with safety requirements. Consult local guidelines or the manufacturer’s instructions for specific insulation recommendations.
During the installation process, regularly check the venting system for proper alignment, secure connections, and adequate clearances from combustible materials. It’s also essential to follow any local building codes or regulations related to venting installation.
Connecting the venting system properly is crucial for the safe and efficient operation of your pellet stove. Once the venting system is securely installed, you can move on to the next step of actually installing the pellet stove.
Step 7: Install the Pellet Stove
Now that you have prepared the area, installed the base and support structure, and connected the venting system, it’s time to install the pellet stove itself. Follow these steps to ensure a proper and secure installation:
- Refer to the Manufacturer’s Instructions: Read the manufacturer’s instructions thoroughly before proceeding with the installation. They will provide specific guidelines and recommendations for your particular pellet stove model.
- Prepare the Pellet Stove: Unpack the pellet stove and remove any packaging materials or protective coverings. Make sure all the components, including the hopper, ash pan, and control panel, are intact and functioning properly.
- Position the Pellet Stove: Carefully position the pellet stove on the installed base and align it with the venting system. Ensure that there is sufficient clearance from walls, furniture, and other combustible materials, as specified in the manufacturer’s instructions.
- Level the Pellet Stove: Use a level to ensure that the pellet stove is perfectly level on the base. Adjust the stove as needed until it is balanced and level in all directions. This helps with proper combustion and prevents any potential issues during operation.
- Secure the Pellet Stove: Fasten the pellet stove to the support structure or base using the recommended screws or brackets. Ensure that the stove is securely attached and does not wobble or move during operation.
- Connect the Electrical Wiring: Follow the manufacturer’s instructions to connect the pellet stove to the electrical supply. This typically involves connecting the power cord to an appropriate outlet or hardwiring it to a dedicated circuit, if required.
- Test the Pellet Stove: Before fully completing the installation, perform a test run of the pellet stove. Follow the manufacturer’s instructions for the initial setup and ignition process. Pay attention to any error codes or unusual sounds and consult the manual for troubleshooting, if necessary.
Once you have successfully installed the pellet stove and ensured it is functioning correctly, you can proceed to the next step of testing and adjusting for proper operation. It’s important to thoroughly understand the manufacturer’s instructions and adhere to all safety guidelines during the installation process.
Installing the pellet stove is an exciting step as it brings you closer to enjoying the warmth and comfort it provides in your basement. Take your time, double-check your work, and always prioritize safety.
Step 8: Test and Adjust for Proper Operation
After installing the pellet stove in your basement, it’s crucial to thoroughly test it and make any necessary adjustments to ensure proper operation. Follow these steps to ensure your pellet stove is functioning correctly:
- Read the Manufacturer’s Instructions: Familiarize yourself with the manufacturer’s instructions for testing and troubleshooting the pellet stove. They will provide specific guidelines tailored to your stove’s model.
- Prime the Auger and Ignite the Pellets: Follow the manufacturer’s instructions to prime the auger and ignite the pellets. This may involve adjusting the combustion settings, setting the desired temperature, and allowing the stove to run for a while.
- Monitor the Flame and Combustion: Observe the flame and combustion process inside the pellet stove. The flame should be steady, clean, and evenly distributed. If you notice any abnormal flame patterns or excessive smoke, consult the manufacturer’s instructions for troubleshooting.
- Check for Adequate Ventilation: Ensure that the venting system is functioning properly and efficiently. Check for proper air intake and exhaust flow, ensuring that no obstructions are present. Monitor the stove’s performance to ensure consistent heat output and minimal smoke or odors.
- Adjust Air Controls and Feed Rate: Use the manufacturer’s instructions to adjust the air controls and feed rate to optimize the stove’s performance. This process may involve fine-tuning the combustion settings to achieve the desired heat output and fuel consumption.
- Monitor Temperature and Safety Features: Keep an eye on the stove’s temperature readings and ensure that safety features, such as overheat shutdown and carbon monoxide detectors, are functioning properly. Address any abnormal readings or safety issues promptly.
- Perform Regular Maintenance: Note the recommended maintenance tasks outlined in the manufacturer’s instructions. This may include cleaning the stove’s components, emptying and cleaning the ash pan, and inspecting the venting system regularly.
Testing and adjusting the pellet stove for proper operation is crucial to ensure optimal performance, efficiency, and safety. Regular monitoring and maintenance will help you address any issues before they become major problems. Always consult the manufacturer’s instructions for specific testing and adjustment procedures for your pellet stove model.
Once you are satisfied with the stove’s performance and have made any necessary adjustments, you can move on to the final step of maintaining and cleaning the pellet stove.
Read more: How To Install Carpet In A Basement
Step 9: Maintain and Clean the Pellet Stove
To ensure the continued efficiency and longevity of your pellet stove in the basement, regular maintenance and cleaning are essential. Follow these steps to properly maintain and clean your pellet stove:
- Consult the Manufacturer’s Instructions: Refer to the manufacturer’s instructions for the recommended maintenance schedule and specific cleaning procedures for your pellet stove model.
- Empty and Clean the Ash Pan: Regularly empty the ash pan to prevent excessive build-up. Allow the stove to cool down before removing the pan, then dispose of the ashes in a safe manner. Clean the ash pan and replace it securely.
- Clean the Burn Pot and Heat Exchanger: Inspect the burn pot and heat exchanger for any debris or ash accumulation. Use a soft brush or vacuum to remove any residue and ensure proper airflow and combustion efficiency.
- Clean the Glass Window: The glass window on the pellet stove can become sooty or dirty over time. Use a non-abrasive glass cleaner specifically designed for stove use to clean the window. Avoid using harsh chemicals or abrasive materials that may damage the glass.
- Inspect and Clean the Venting System: Regularly inspect the venting system for any obstructions, debris, or signs of damage. Clean the venting pipes, chimney brushes, and termination cap to maintain proper airflow and prevent blockages.
- Check and Replace Gaskets: Over time, gaskets on the pellet stove may wear out or become damaged. Regularly inspect the gaskets and replace them as needed to ensure proper sealing and prevent air leaks.
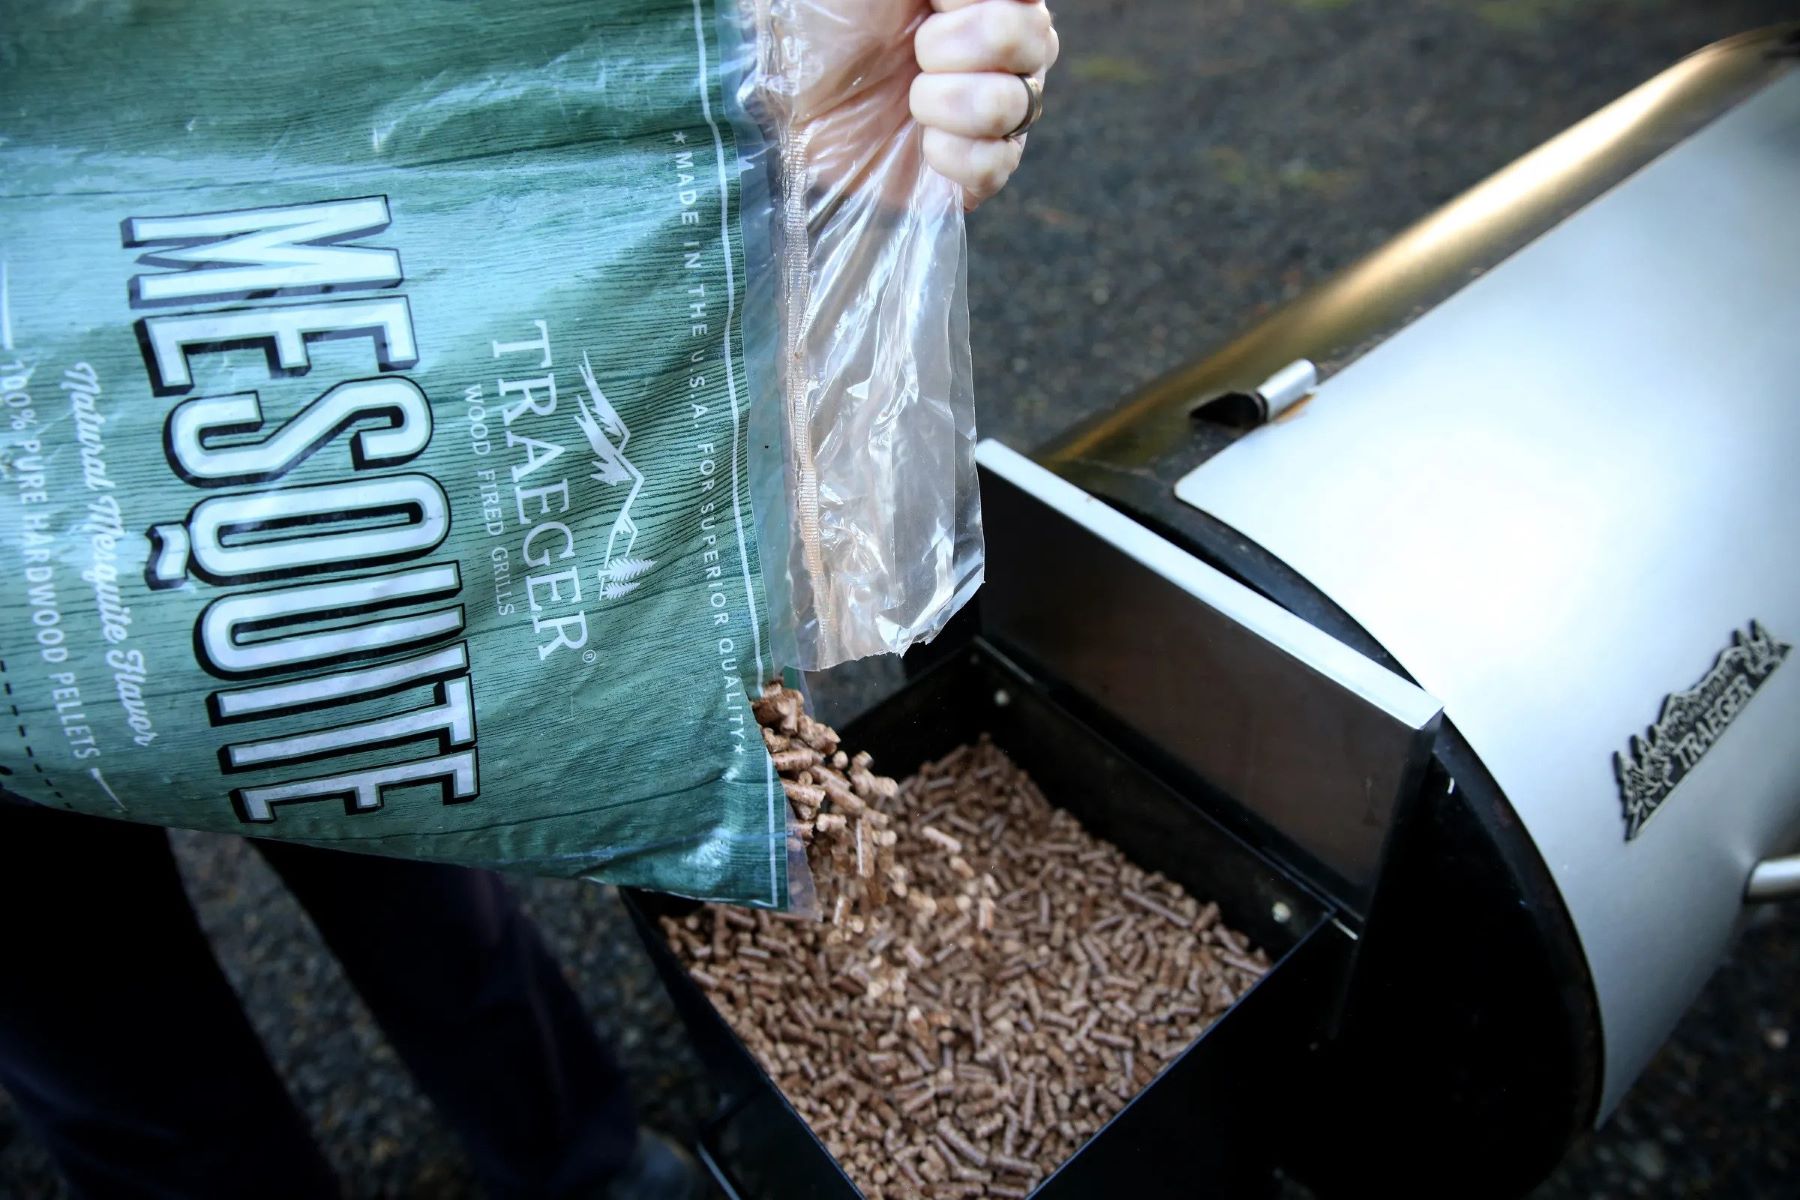
- Keep the Pellet Storage Area Clean: If you have a pellet storage area connected to the stove, ensure that it is clean and free from moisture or contaminants that may affect pellet quality and performance.
- Inspect and Replace Auger Components: The auger is a critical component responsible for feeding pellets into the combustion chamber. Regularly inspect the auger and its components, such as the motor and drive mechanisms, and replace any worn or damaged parts.
- Schedule Professional Maintenance: It’s advisable to schedule annual or periodic professional maintenance for your pellet stove. A technician can perform a thorough cleaning, inspect the internal components, and address any potential issues.
By following these maintenance and cleaning practices, you can ensure that your pellet stove operates efficiently, safely, and continues to provide reliable heating in your basement. A well-maintained pellet stove will also have a longer lifespan, reducing the need for costly repairs or replacement.
Remember to always wear appropriate protective gear, use recommended cleaning products, and follow safety precautions while maintaining and cleaning your pellet stove. Regular maintenance and cleaning will help keep your pellet stove in peak condition and provide you with years of cozy warmth and energy efficiency.
Conclusion
Congratulations! You have successfully learned how to install a pellet stove in your basement. By following each step carefully, you have created a warm and efficient heating solution for your home. Here’s a recap of the installation process:
- Plan and Prepare: Research and assess the requirements, select the right stove, check permits, measure and prep the area, and gather the necessary tools and materials.
- Determine Placement and Venting: Identify the ideal location, ensure proper ventilation, measure and plan the venting route, select venting material, and install the venting system.
- Gather Tools and Materials: Collect all the tools and materials required for the installation process, ensuring you have everything necessary for a smooth installation.
- Clear the Area and Ensure Safety: Remove obstacles, provide adequate clearance, check electrical connections, create a non-combustible base, install heat shields, and have fire safety equipment handy.
- Install the Base and Support Structure: Secure the non-combustible base to the floor, assemble and install the support structure, level it, and ensure it is secure.
- Connect the Venting System: Cut and assemble the venting pipes, install a wall thimble if required, connect the venting pipes securely, seal the joints, and install the venting termination cap.
- Install the Pellet Stove: Follow the manufacturer’s instructions, position the stove, secure it to the support structure, connect the electrical wiring, and perform initial testing.
- Test and Adjust for Proper Operation: Prime the auger, monitor the flame and combustion, ensure proper ventilation, adjust air controls and feed rate, monitor temperature and safety features, and perform regular maintenance.
- Maintain and Clean the Pellet Stove: Empty and clean the ash pan, clean the burn pot and heat exchanger, clean the glass window, inspect and clean the venting system, check and replace gaskets, keep the pellet storage area clean, inspect and replace auger components, and schedule professional maintenance.
Installing and maintaining a pellet stove in your basement not only provides efficient, cost-effective warmth but also adds value and comfort to your home. However, always prioritize safety, follow local regulations, and consult professional help when needed.
Remember to regularly maintain and clean your pellet stove to ensure its optimal performance. With proper care, your pellet stove will continue to provide reliable heat for years to come.
Thank you for using our comprehensive guide. Enjoy the cozy warmth of your newly installed pellet stove in your basement!
Now that you've mastered installing a pellet stove, why not tackle more home projects? Our guide on DIY Home Improvement offers practical steps and creative ideas to transform your living space without breaking the bank. Whether you're looking to update your kitchen, redesign your backyard, or simply add some personal touches throughout your home, our tips will help you get started. Don't miss out on turning your house into a dream home with your own hands!
Frequently Asked Questions about How To Install Pellet Stove In Basement
Was this page helpful?
At Storables.com, we guarantee accurate and reliable information. Our content, validated by Expert Board Contributors, is crafted following stringent Editorial Policies. We're committed to providing you with well-researched, expert-backed insights for all your informational needs.


0 thoughts on “How To Install Pellet Stove In Basement”