Articles
How To Knockdown Texture A Ceiling
Modified: October 20, 2024
Learn how to create a beautiful knockdown texture on your ceiling with our step-by-step articles, providing easy-to-follow instructions for a flawless finish.
(Many of the links in this article redirect to a specific reviewed product. Your purchase of these products through affiliate links helps to generate commission for Storables.com, at no extra cost. Learn more)
Introduction
Are you tired of the plain and boring look of your ceiling? Do you want to add some texture and personality to your living space? One popular and cost-effective way to achieve this is by applying a knockdown texture to your ceiling. The knockdown texture creates a visually appealing, textured surface that can transform the entire look and feel of a room. In this article, we will take you through the step-by-step process of how to knockdown texture a ceiling, ensuring that you achieve professional results.
Before we begin, it’s important to note that knocking down a ceiling texture requires some level of skill and expertise. If you are unfamiliar with home improvement projects or don’t feel confident in your abilities, it may be best to consult a professional or seek guidance from experienced individuals.
That being said, if you are up for the challenge and eager to unleash your creativity, let’s dive into the exciting world of knockdown texture!
Key Takeaways:
- Transform your living space with a stunning knockdown texture on your ceiling, creating depth and character. Follow the step-by-step process for professional results and unleash your creativity with endless possibilities.
- Achieve a visually appealing and cost-effective textured ceiling with proper preparation, the right tools, and expert techniques. Infuse your personal style and unleash your creativity for a unique and impressive home improvement project.
Read more: How To Repair A Knockdown Ceiling
Step 1: Prepare the room
Before diving into the process of applying knockdown texture to your ceiling, it is crucial to properly prepare the room. This step will ensure a smooth and hassle-free experience while minimizing any potential damage to your furniture and belongings. Here’s what you need to do:
- Clear the room: Remove all furniture, decorations, and other items from the room. This will provide you with a spacious and clutter-free area to work in. Cover any larger items that cannot be moved with plastic sheets or drop cloths to protect them from dust and debris.
- Protect the walls: Cover the walls with plastic sheets or painter’s tape and plastic film to safeguard them from any accidental splatters or drips of joint compound or paint. This will save you the trouble of having to clean or repair any unwanted marks later on.
- Cover the flooring: Lay down durable drop cloths or plastic sheets on the floor to protect it from any spills, drips, or accidental footprints. It’s crucial to ensure that the entire floor area is adequately covered before proceeding with the next steps.
- Turn off the power: If there are any ceiling-mounted light fixtures or fans, ensure that the power supply to these fixtures is turned off. This will prevent any potential accidents or electrical hazards during the texturing process.
- Clean the ceiling: Use a broom or vacuum cleaner to remove any dust, dirt, or cobwebs from the ceiling. Ensuring that the surface is clean and free from any debris will help the joint compound adhere better and result in a more professional-looking finish.
Once you have completed these steps, you can proceed with gathering the necessary tools and materials for the knockdown texture application process. Proper preparation is key to achieving excellent results, so take your time and ensure that the room is ready for the next steps.
Step 2: Gather the necessary tools and materials
Before you can begin applying the knockdown texture to your ceiling, it’s essential to gather all the required tools and materials. Having everything prepared and within reach will save you time and ensure a smooth workflow throughout the project. Here’s a list of the tools and materials you will need:
Tools:
- Knockdown knife or trowel: This specialized tool is used to create the knockdown texture on the ceiling. It typically has a flat, wide blade that allows you to spread the joint compound smoothly.
- Hawk: A hawk is a rectangular, handheld tool with a handle on one side and a flat surface on the other. It is used to hold the joint compound while you work with the knockdown knife.
- Mixing paddle or drill: This tool is necessary for mixing the joint compound to the desired consistency. You can use a mixing paddle attached to a drill or a mixer specifically designed for this purpose.
- Sanding pole or sandpaper: If your ceiling requires any sanding before applying the texture, you will need either a sanding pole with sanding screens or sandpaper to smooth the surface.
- Paint roller and tray: These are used to apply primer and paint to the ceiling once the knockdown texture has dried.
- Drop cloths or plastic sheets: These are essential for protecting the floor and furniture from any spills or drips.
- Broom or vacuum cleaner: Use these tools to clean the ceiling and remove any dust or debris before starting the texture application process.
- Painter’s tape and plastic film: These are used to cover the walls and protect them from any accidental splatters or drips of joint compound or paint.
Materials:
- Joint compound: This is the main material used to create the knockdown texture on the ceiling. You can purchase premixed joint compound or opt for a powdered compound that you mix with water.
- Primer: It is recommended to apply a coat of primer to the ceiling before painting to ensure better adhesion and a more even finish.
- Paint: Choose a color that complements your overall room aesthetics and personal preferences. Select a paint specifically designed for ceilings, as it typically has a flat or matte finish.
- Plastic film or painter’s tape: These are necessary for covering any ceiling-mounted light fixtures or fans to protect them from the joint compound and paint.
Make sure to have all these tools and materials ready before proceeding to the next steps. Having everything prepared in advance will streamline the process and allow you to focus on achieving that beautiful knockdown texture on your ceiling.
Read more: How To Remove A Textured Ceiling
Step 3: Protect the floor and furniture
Before you begin applying the knockdown texture to your ceiling, it’s crucial to take the necessary precautions to protect your floor and furniture from any potential damage or mess. Here’s what you need to do:
- Cover the floor: Use drop cloths or plastic sheets to cover the entire floor area underneath the ceiling. Make sure to overlap the edges and secure them in place with tape or weights to prevent any accidental slippage or exposure.
- Move furniture and belongings: Remove any furniture, decorations, or other belongings from the room if possible. For larger pieces that cannot be moved, cover them with plastic sheets or drop cloths to shield them from dust and debris.
- Protect surfaces: Use additional plastic sheets or painter’s tape and plastic film to cover any surfaces or items that cannot be removed from the room, such as cabinets, countertops, or built-in furniture. This will help safeguard them against accidental splatters or drips.
- Seal doorways: If you are concerned about dust or debris spreading to other parts of your home, consider sealing the room’s doorway with plastic sheets or a plastic zipper door. This will create a barrier and help contain any mess within the designated area.
- Take extra precautions: If you are working on a higher ceiling or using a ladder, ensure that it is stable and secure. Consider using a drop cloth underneath the ladder as an additional precautionary measure to protect the floor beneath it.
By taking the time to properly protect your floor and furniture, you can minimize the risk of damage or mess during the knockdown texture application process. This step will also make the cleanup process easier once the project is completed, allowing you to enjoy your newly textured ceiling without any extra hassle.
Step 4: Mix the joint compound
Before you can apply the knockdown texture to your ceiling, you need to mix the joint compound to the right consistency. The joint compound serves as the base material for creating the texture. Here’s how to mix it:
- Choose the right mixing container: Use a clean bucket or a large mixing container that can comfortably hold the amount of joint compound you need. Make sure it has enough space for you to mix the compound without it overflowing.
- Add the joint compound: Start by pouring the premixed joint compound or adding the desired amount of powdered compound into the container. Follow the manufacturer’s instructions for the correct ratios if you are using a powdered compound.
- Add water gradually: Slowly pour water into the container, using a mixing paddle or a drill with a mixing attachment to stir the mixture. Add water gradually while continuously mixing until you achieve a smooth, creamy consistency.
- Check the consistency: The ideal consistency of the joint compound for knockdown texturing is similar to that of thick pancake batter. It should be easy to spread and adhere to the ceiling without being too runny or too stiff.
- Adjust as needed: If the mixture is too thick, gradually add small amounts of water and continue mixing until the desired consistency is achieved. If it becomes too thin, add more joint compound and mix until you reach the right texture.
- Test the texture: To ensure that the mixture is suitable for knockdown texturing, take a small amount on your knockdown knife or trowel and apply it to a test area on the ceiling. Practice creating the desired texture and adjust the mixture if needed before moving on to the full application.
Remember, achieving the right consistency for the joint compound is crucial in producing professional-looking knockdown texture. It’s always better to start with a slightly thicker mixture and gradually add water as needed, rather than starting with a thin mixture that may lead to drips or a loss of texture definition.
Once you have mixed the joint compound to the proper consistency, you are ready to move on to the next step: applying the compound to the ceiling to create the knockdown texture.
Step 5: Apply the joint compound to the ceiling
Now that you have mixed the joint compound to the desired consistency, it’s time to apply it to the ceiling to create the knockdown texture. Follow these steps to ensure a smooth and successful application:
- Divide the ceiling into sections: Divide the ceiling into manageable sections using painter’s tape or a chalk line. This will help you work on one area at a time without the compound drying too quickly.
- Load the knockdown knife or trowel: Dip the flat side of the knockdown knife or trowel into the container of mixed joint compound. Scoop up a generous amount of compound, making sure it covers the width of the blade.
- Apply the compound to the ceiling: Hold the loaded knockdown knife at a slight angle against the ceiling and begin applying the compound in a thin, even layer. Use gentle pressure to spread the compound across the designated section, working from one side to the other.
- Create texture: After smoothing the compound over the section, use the knockdown knife to create the desired texture by gently pressing and dragging the blade across the compound. You can create patterns like half-moon arcs, random swirls, or a subtle stippled effect. The texture should be consistent throughout the section.
- Blend the edges: As you move from one section to another, pay attention to blending the edges between each area. Feather the edges by using less pressure on the knockdown knife and gradually fading the texture to create a seamless transition between sections.
- Continue the process: Repeat steps 2 to 5 for each section of the ceiling until the entire surface is covered with the knockdown texture. Take breaks as needed to avoid overexertion or fatigue.
It’s important to work efficiently and avoid going back over areas that have started to dry. The compound should still be wet enough to create the desired texture. If you find the compound becoming too dry or difficult to work with, consider adding a small amount of water to the mixture and remixing before continuing.
Once you have applied the joint compound to the entire ceiling and created the knockdown texture, allow the texture to dry fully before proceeding to the next steps. The drying time can vary depending on factors such as humidity and temperature, so be patient and give the compound enough time to set and harden.
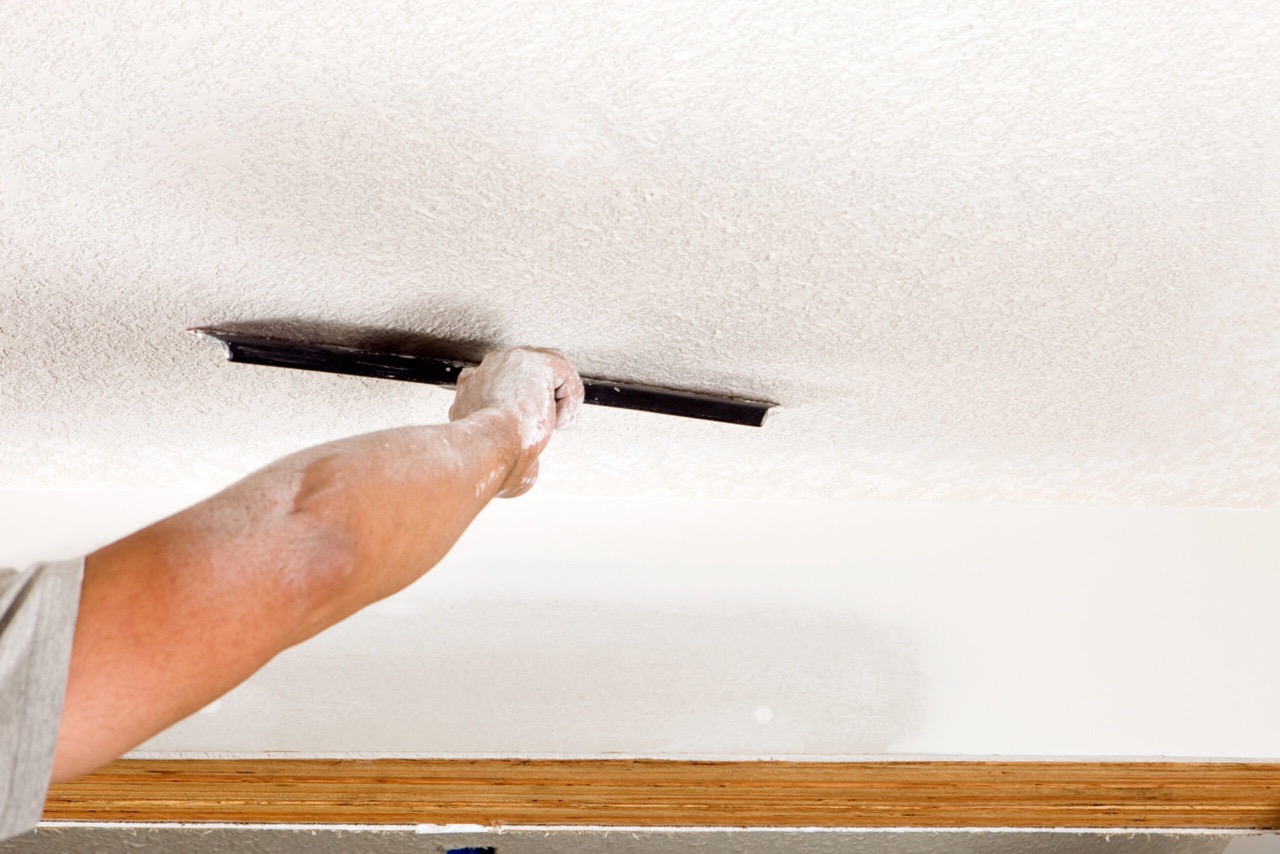
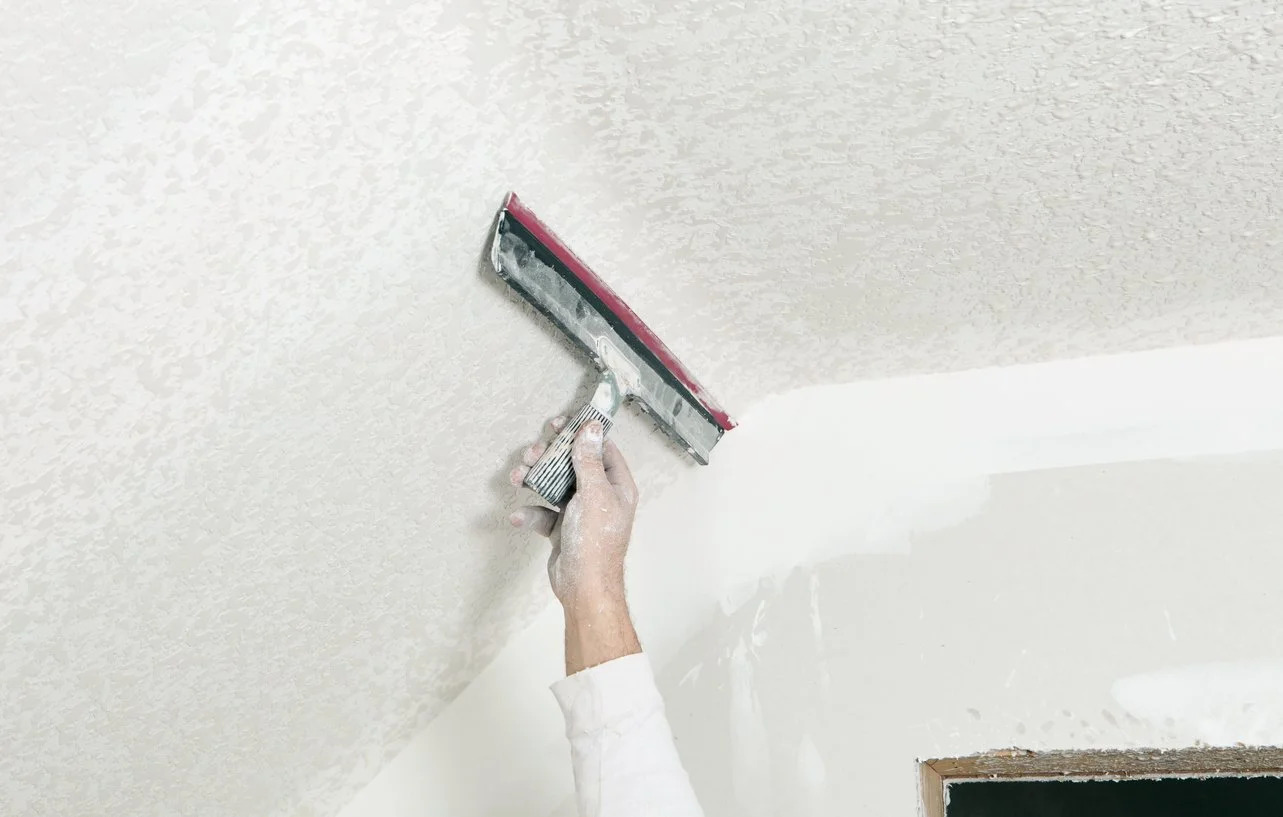
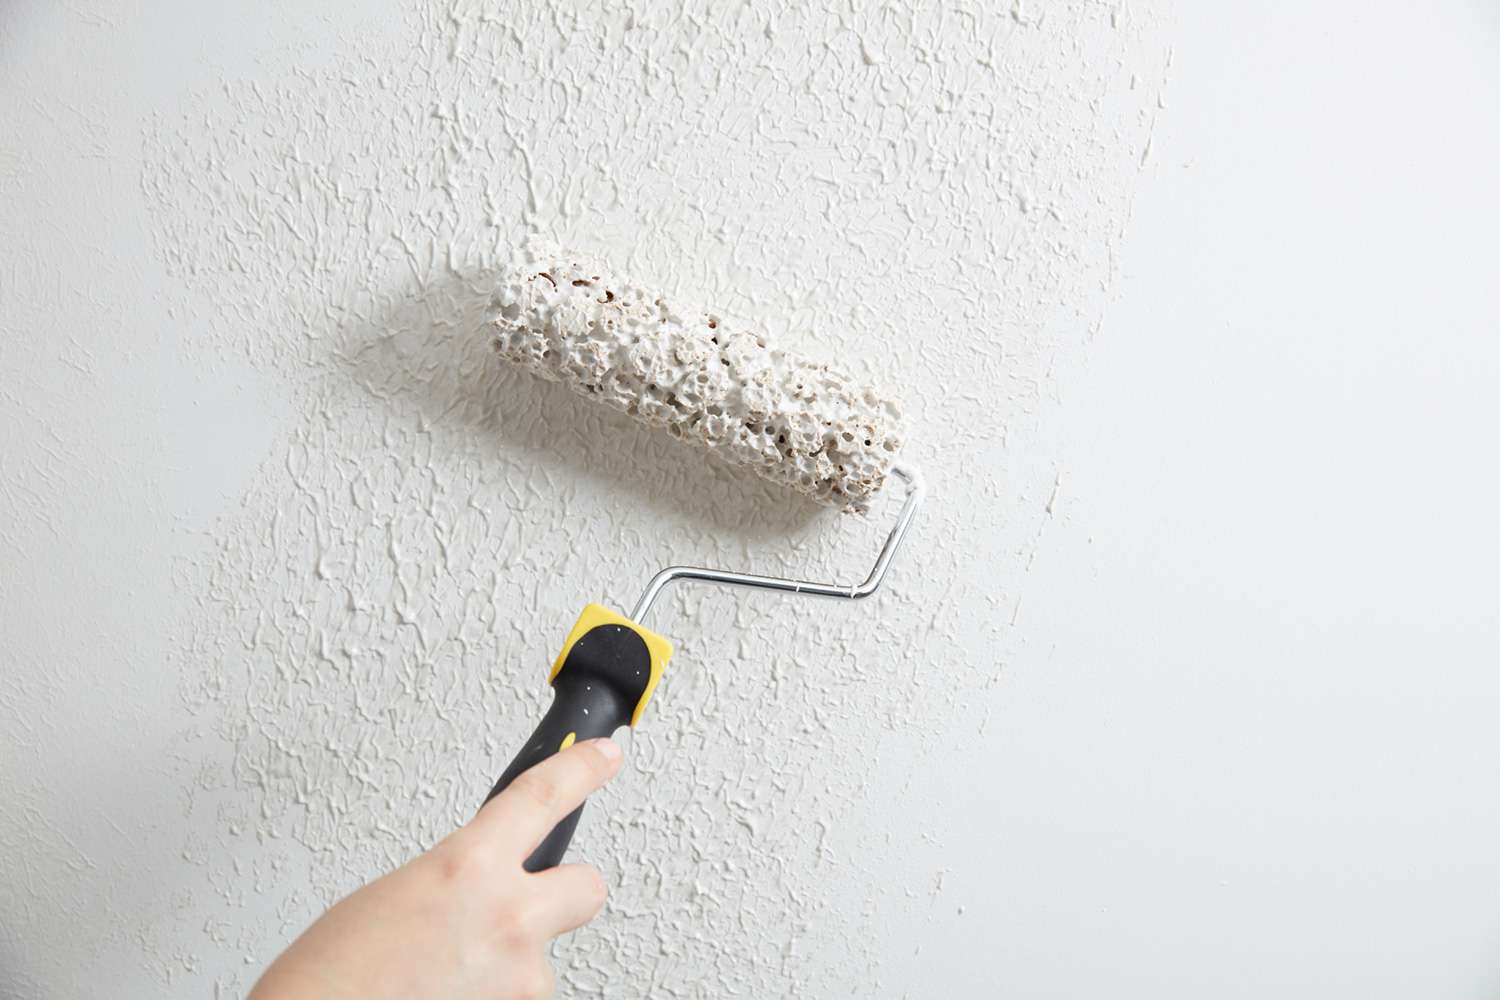
Step 6: Create texture using a knockdown knife
With the joint compound applied to the ceiling, it’s time to create the desired texture using a knockdown knife. This step will give your ceiling the unique and appealing look of a knockdown texture. Follow these steps for a successful texture creation:
- Wait for the right drying time: Before you begin texturing, make sure that the joint compound has dried to the right consistency. You want it to be firm enough that it doesn’t stick to your finger when lightly touched, but still soft enough that you can create texture without it cracking or flaking.
- Hold the knockdown knife: Hold the knockdown knife at a slight angle against the textured surface. You want to hold it almost parallel to the ceiling, with the blade perpendicular to the direction you want to drag it.
- Drag the knife across the texture: Starting at one side of the textured section, apply light and even pressure as you drag the knockdown knife across the surface. The goal is to flatten and “knock down” the high points of the texture, creating a more subtle and blended appearance.
- Smooth out any imperfections: If you notice any areas with too much texture or uneven spots, you can gently smooth them out using the knockdown knife. Simply drag the knife over those areas with light pressure to even out the texture.
- Continue knocking down the texture: Work your way across the entire ceiling, section by section, knocking down the texture until you are satisfied with the overall appearance. Take your time and be mindful of consistency as you go along.
- Clean the knockdown knife: Periodically clean the knockdown knife with a damp cloth or sponge to remove any dried joint compound. This will ensure that you maintain a smooth and effective texture creation throughout the process.
When using the knockdown knife, it’s important to find the right balance between applying enough pressure to flatten the texture but not too much pressure that it removes too much compound. Practice on a small test area before working on the full ceiling to get a sense of how the knockdown knife responds to different levels of pressure.
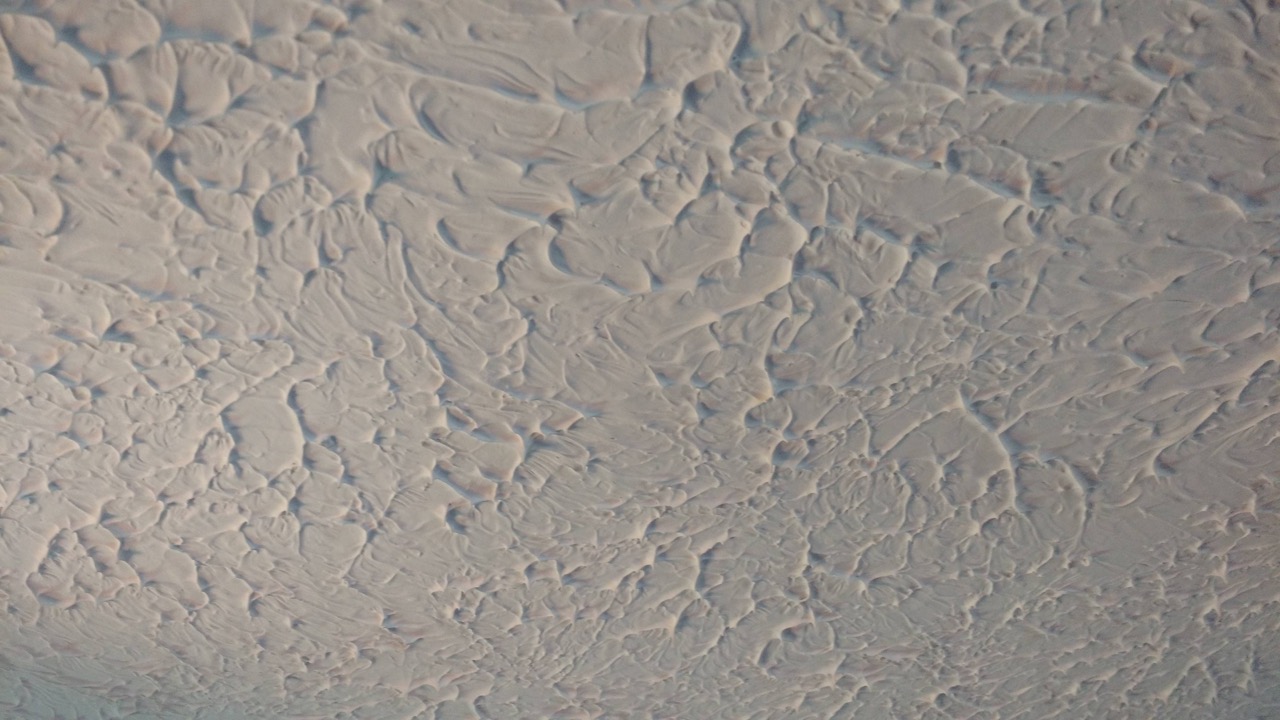
Remember, the beauty of a knockdown texture lies in its variation and subtle appearance. Don’t worry if the texture is not perfectly uniform or if there are slight variations in the pattern. These imperfections often add character and visual interest to the ceiling.
Once you have created the knockdown texture to your liking, allow the ceiling to dry completely before moving on to the next steps. This will ensure that the texture is fully set and ready for any necessary finishing touches.
When applying knockdown texture to a ceiling, use a thick-nap roller to apply the texture in a random pattern. Then, use a trowel to lightly flatten the texture for the desired knockdown effect.
Read more: How To Swirl Texture A Ceiling
Step 7: Allow the texture to dry
After applying the knockdown texture using the knockdown knife, it’s important to allow the textured surface to dry thoroughly. This step is crucial as it allows the joint compound to harden and set, ensuring a durable and long-lasting finish. Here’s what you need to do:
- Be patient: Give the textured ceiling ample time to dry based on the manufacturer’s instructions or the specific type of joint compound you used. The drying time can vary depending on factors such as humidity, temperature, and the thickness of the applied joint compound.
- Avoid touching the surface: While the texture is drying, it’s essential to avoid touching or disturbing the surface. Any pressure or contact during the drying process could potentially ruin the texture or leave unwanted marks.
- Provide proper ventilation: Ensure that the room is well-ventilated to allow air circulation and encourage faster drying. Open windows or use fans to promote airflow, but avoid excessive airflow that may cause the texture to dry too quickly and potentially crack.
- Monitor the drying process: Regularly check the texture for any signs of remaining moisture or wet spots. If you notice any areas that still appear damp, allow more time for those sections to dry completely before proceeding.
- Consider using a moisture meter: If you want to be more precise in determining if the texture is dry, you can use a moisture meter specifically designed for construction and renovation projects. This tool will give you an accurate reading of the moisture content in the joint compound.
It’s important to note that the drying time can range from a few hours to several days, depending on the conditions in the room and the type of joint compound used. Be patient and allow sufficient time for the texture to dry completely before moving on to the next steps of the process.
Once the texture is fully dry, you can proceed to inspect the ceiling for any imperfections or areas that may require additional sanding or touch-ups. This will ensure that your ceiling has a smooth and flawless finish before moving on to priming and painting.
Step 8: Sand the texture if needed
After allowing the knockdown texture to dry, it’s important to assess the surface and determine if any sanding is required. Sanding helps to smooth out any uneven areas, remove any imperfections, and create a uniform finish on the textured ceiling. Here’s what you need to do:
- Inspect the texture: Carefully examine the textured ceiling surface to identify any areas that may need sanding. Look for rough spots, high points, or any other inconsistencies that may affect the overall appearance of the ceiling.
- Gather the necessary sanding tools: Depending on the size of the area and the level of imperfections, you may choose to use either a sanding pole with sanding screens or sandpaper. Select a fine to medium grit for the best results.
- Sand the uneven areas: Using light pressure, gently sand the uneven spots or rough areas on the textured surface. Move the sandpaper or sanding pole in a circular or back-and-forth motion, covering the entire area of concern. Be careful not to oversand or remove too much of the texture.
- Blend the sanded areas: After sanding the uneven areas, use a feathering technique to blend the sanded spots with the rest of the textured ceiling. This helps to create a seamless transition and ensures that the sanded areas are not noticeable once the ceiling is primed and painted.
- Remove dust: After sanding, use a soft brush or a vacuum cleaner with a soft brush attachment to remove any dust or debris left behind. It’s important to have a clean surface before proceeding to the next steps.
- Reassess and repeat if necessary: Step back and evaluate the sanded areas to determine if any further sanding or touch-ups are needed. If you notice any remaining rough spots or imperfections, repeat the sanding process until you achieve the desired smoothness.
It’s crucial to approach sanding with caution and take it slow. The goal is to create a smooth and even surface without removing too much of the knockdown texture. Remember, a light touch is key to achieving the desired results.
Once you have completed the sanding process and are satisfied with the smoothness of the textured ceiling, you can proceed to the next steps, which involve priming and painting the ceiling to enhance its appearance and durability.
Step 9: Prime and paint the ceiling
After preparing, applying, and drying the knockdown texture, it’s time to move on to the final steps of priming and painting the ceiling. Priming ensures better adhesion of the paint and provides a base for an even finish. Here’s how to prime and paint your newly textured ceiling:
- Prepare the area: Remove any furniture, cover the floor and walls with drop cloths or plastic sheets, and ensure proper ventilation in the room.
- Choose the right primer: Select a high-quality primer specifically designed for ceilings. Consider purchasing a primer with stain-blocking properties, especially if you have applied joint compound over any stains or discoloration.
- Apply the primer: Using a paint roller, apply the primer evenly to the entire textured ceiling, working in small sections. Start at one corner of the room and work your way across, overlapping each pass slightly to ensure comprehensive coverage.
- Allow the primer to dry: Follow the manufacturer’s instructions for the recommended drying time. It’s essential to allow the primer to dry completely before proceeding with the paint application.
- Select the paint color: Choose a high-quality paint specifically formulated for ceilings. Consider the overall color scheme and aesthetic of your space, and select a color that enhances the ambiance. Opt for a flat or matte finish to minimize the reflection of light on the textured surface.
- Apply the paint: Using a clean paint roller, apply the paint evenly to the primed ceiling. Again, work in small sections, starting from one corner and working your way across. Apply two coats if needed, allowing each coat to dry completely before applying the next one.
- Clean up the area: Once you have finished painting, remove any plastic sheets or drop cloths from the floor and furniture. Clean your tools and dispose of any waste materials properly.
- Inspect the final result: Once the paint has dried completely, step back and inspect the final result. Admire the beautifully textured and painted ceiling that you have created.
Remember to follow proper safety precautions during the priming and painting process, such as using drop cloths to protect your floors and wearing appropriate protective gear, including goggles and a mask.
Priming and painting the ceiling will not only enhance its appearance but also protect the texture and prolong its lifespan. It adds the final touch to your knockdown texture project, leaving you with a stunning and professionally finished ceiling.
Congratulations on completing the process of applying knockdown texture and transforming your ceiling into a focal point of your living space. Enjoy the fruits of your hard work and creativity!
Conclusion
Adding a knockdown texture to your ceiling is a fantastic way to give your living space a fresh and unique look. With the right tools, materials, and techniques, you can achieve professional results that will leave your guests impressed. Throughout this article, we have outlined the step-by-step process of how to knockdown texture a ceiling, from room preparation to priming and painting. We hope that you feel empowered and confident to take on this exciting home improvement project.
Remember, proper preparation is key to a successful outcome. Clearing the room, protecting the floor and furniture, and gathering the necessary tools and materials will set you up for a smooth and hassle-free experience. Mixing the joint compound to the right consistency and applying it with a knockdown knife will create the desired texture, adding depth and character to your ceiling.
Allowing the knockdown texture to dry fully and assessing if any sanding is needed will ensure a smooth and flawless finish. Finally, priming and painting the ceiling will give it a beautiful and customized appearance.
As with any home improvement project, take your time, practice patience, and pay attention to detail. Don’t be afraid to unleash your creativity and add your personal touch to the process. Whether you are going for a subtle and sophisticated texture or a more bold and unconventional look, the possibilities are endless.
By following the steps outlined in this article and infusing your own style and creativity, you can achieve a stunning knockdown textured ceiling that will become a focal point of your living space. So roll up your sleeves, gather your tools, and let your creative vision take flight as you embark on the journey of transforming your ceiling with a knockdown texture.
Ready to elevate your ceiling game further? If you've mastered knockdown textures, why not dive into other styles? Our detailed guide on textured ceiling will show you varied techniques to add character and dimension to your spaces. For those interested in both aesthetics and function, our comprehensive coverage on acoustic ceiling options might shed some light on how best to reduce noise while keeping style intact. Lastly, don't forget about the final touches; our article on ceiling finishes offers insights into choosing the right paint finish to complement your new ceiling texture beautifully.
Frequently Asked Questions about How To Knockdown Texture A Ceiling
Was this page helpful?
At Storables.com, we guarantee accurate and reliable information. Our content, validated by Expert Board Contributors, is crafted following stringent Editorial Policies. We're committed to providing you with well-researched, expert-backed insights for all your informational needs.


0 thoughts on “How To Knockdown Texture A Ceiling”