Home>Renovation & DIY>Tools & Equipment>How To Spackle A Textured Wall

Tools & Equipment
How To Spackle A Textured Wall
Modified: October 20, 2024
Learn how to spackle a textured wall with our step-by-step guide. Find out which tools and equipment you'll need for a smooth and seamless finish.
(Many of the links in this article redirect to a specific reviewed product. Your purchase of these products through affiliate links helps to generate commission for Storables.com, at no extra cost. Learn more)
Introduction
Welcome to your guide on how to spackle a textured wall! Whether you’ve recently moved into a new home or are looking to refresh your existing space, knowing how to spackle can help you achieve a smooth and flawless surface. Spackling is a technique used to repair small holes, cracks, and imperfections in walls before painting or wallpapering. It’s a task that may seem daunting at first, but with the right tools and a little bit of practice, you’ll be able to tackle it like a pro.
In this article, we’ll take you through the step-by-step process of spackling a textured wall, ensuring that you’re well-prepared and equipped with the necessary knowledge. From prepping the wall surface to filling in the imperfections and achieving a seamless finish, we’ll cover it all. So, let’s get started!
Key Takeaways:
- Master the art of spackling textured walls with the right tools and step-by-step process, ensuring seamless repairs and a flawless finish for your home makeover.
- Prioritize preparation, patience, and attention to detail when spackling textured walls. From cleaning and filling to smoothing and touching up, achieve professional results with practice and confidence.
Read more: How To Spackle Walls
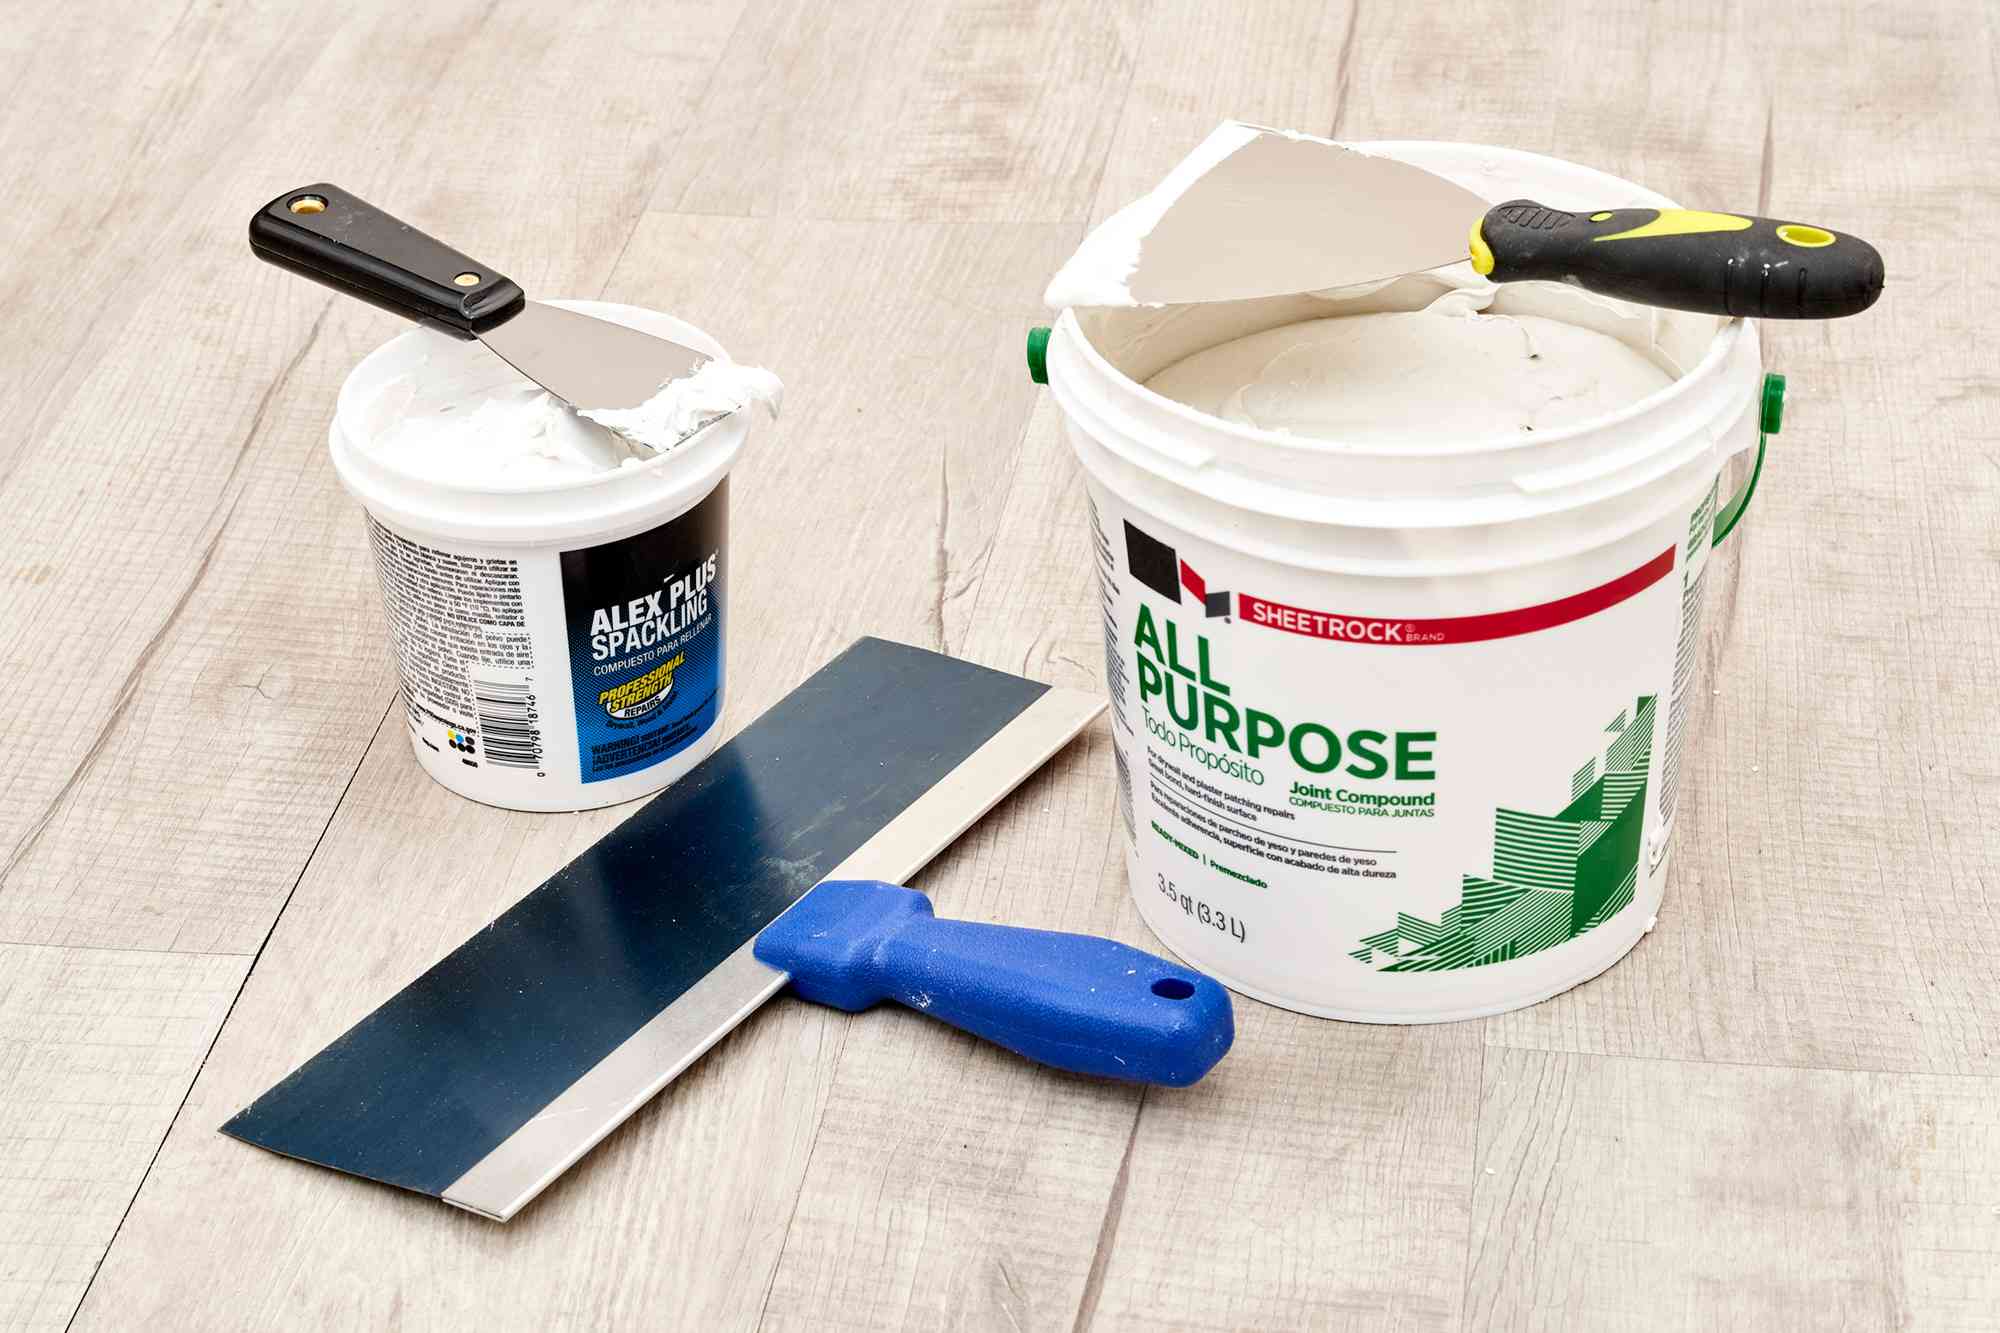
Tools and Materials Needed
Before you begin spackling your textured wall, make sure you have the following tools and materials handy:
- Putty Knife: A putty knife with a flexible blade will be your best friend when it comes to applying and smoothing out the spackle. Look for one with a width of around 4-6 inches to cover a larger area efficiently.
- Spackle: Choose a high-quality spackle compound that is specifically formulated for wall repairs. This will help ensure a durable and long-lasting finish. You can find spackle in powder or pre-mixed form, depending on your preference.
- Sanding Block or Sandpaper: To achieve a smooth surface, you’ll need a sanding block or sandpaper with different grits. Start with a coarse grit (around 80-120) to smooth out the spackle and gradually move to a finer grit (around 200-400) for a polished finish.
- Dust Mask: Sanding can create a lot of dust, so it’s important to protect yourself by wearing a dust mask to avoid inhaling any particles.
- Drop Cloth or Plastic Sheet: To protect your floor or furniture from any accidental spills or splatters, lay down a drop cloth or plastic sheet underneath the area you’ll be working on.
- Primer and Paint: Once the spackled areas are dry and sanded, you’ll need primer and paint to match the existing wall color or create a new look. Choose a high-quality primer and paint that are suitable for your textured wall.
These essential tools and materials will ensure that you have everything you need to successfully spackle your textured wall. Now that you’re all set, let’s move on to the step-by-step process of spackling.
Step 1: Prepare the Wall Surface
Before you begin spackling, it’s important to prepare the wall surface to ensure proper adhesion and a smooth finish. Follow these steps to prepare your textured wall:
- Remove Loose Paint or Debris: Use a scraper or putty knife to gently scrape off any loose paint, debris, or texture bumps from the wall. Be careful not to apply too much pressure to avoid damaging the wall surface.
- Clean the Wall: Use a damp cloth or sponge to clean the wall surface. Remove any dust, dirt, or grease that may interfere with the spackling process. Allow the wall to dry completely before proceeding.
- Protect Adjacent Surfaces: Cover any adjacent surfaces, such as trim, baseboards, or windows, with painter’s tape to prevent them from getting spackled or damaged during the process.
By properly preparing the wall surface, you’ll ensure that the spackle adheres smoothly and creates a seamless repair. Once you’ve completed these preparations, you’re ready to move on to the next step: filling in any holes or cracks in the wall.
Step 2: Clean the Wall
Cleaning the wall is an essential step in the spackling process. By removing dirt, dust, and grease from the surface, you’ll ensure that the spackle adheres properly and creates a seamless finish. Follow these steps to clean your textured wall:
- Start by filling a bucket with warm water and add a small amount of mild detergent.
- Dip a sponge or soft cloth into the soapy water and wring out any excess liquid.
- Gently scrub the wall surface in circular motions, paying extra attention to areas with visible dirt or grime.
- Rinse the sponge or cloth with clean water and wipe away the soap residue from the wall.
- Use a clean, dry cloth to pat the wall dry. Make sure the surface is completely dry before proceeding to the next step.
By thoroughly cleaning your textured wall, you’ll create an optimal surface for the spackle to adhere to. This will result in a smooth and flawless finish once the spackling is complete. With a clean wall, you’re now ready to move on to the next step: filling in any holes or cracks.
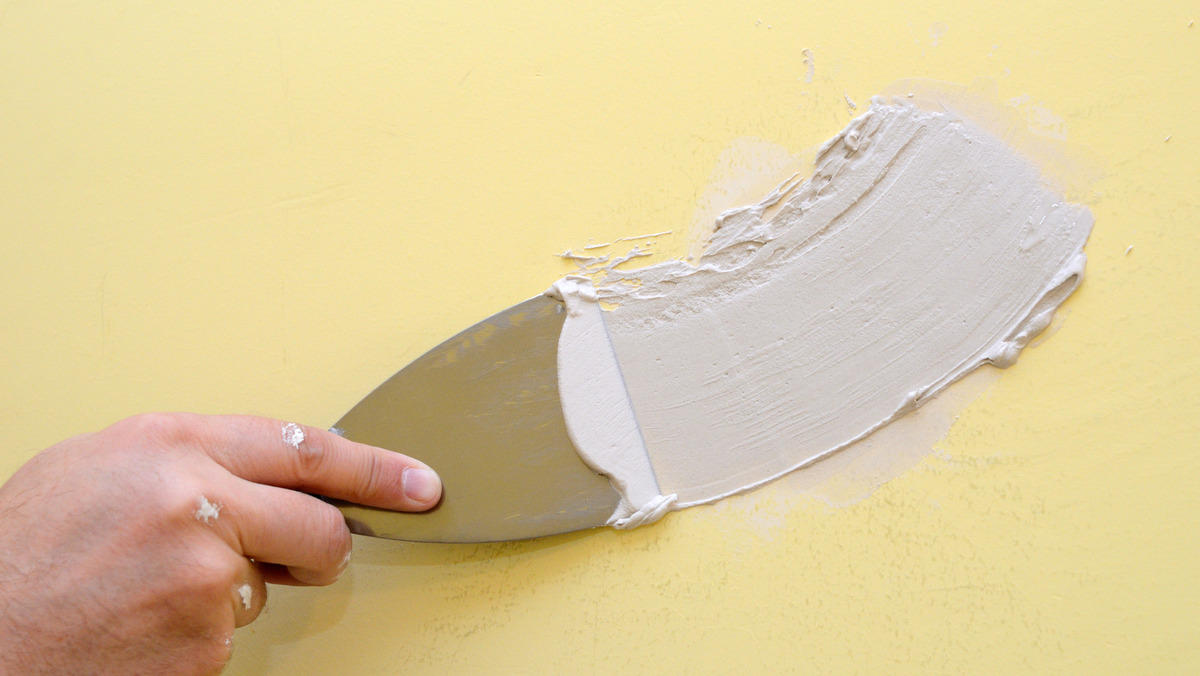
Step 3: Fill in any Holes or Cracks
Now that your wall is clean and prepared, it’s time to fill in any holes or cracks. Whether it’s from nails, screws, or previous damage, these imperfections need to be repaired before applying the spackle. Follow these steps to fill in the holes or cracks on your textured wall:
- Inspect the wall for any visible holes or cracks that need to be repaired. Use a flashlight if necessary to ensure you don’t miss any small imperfections.
- If the hole or crack is deep, consider using a patching compound or joint compound to first fill in the void. Apply the compound with a putty knife and smooth it out, ensuring it is slightly below the surface of the wall. Allow the compound to dry according to the manufacturer’s instructions.
- Once the compound is dry, use your putty knife to apply spackle over the hole or crack. Use a small amount of spackle at a time, gradually building it up until it is slightly higher than the wall’s surface. Smooth it out with the putty knife for an even finish.
- For larger holes, you may need to apply multiple layers of spackle, allowing each layer to dry before adding the next. This will ensure a sturdy and durable repair.
- As you work, periodically step back and inspect the filled holes or cracks from different angles to ensure they are properly filled and level with the surrounding wall texture. Make any necessary adjustments if needed.
By filling in any holes or cracks before applying the spackle, you’ll create a solid foundation for a seamless and professional-looking repair. Once you’ve completed this step, it’s time to move on to applying the spackle to the textured wall.
Read more: How To Spackle Cracks In Wall
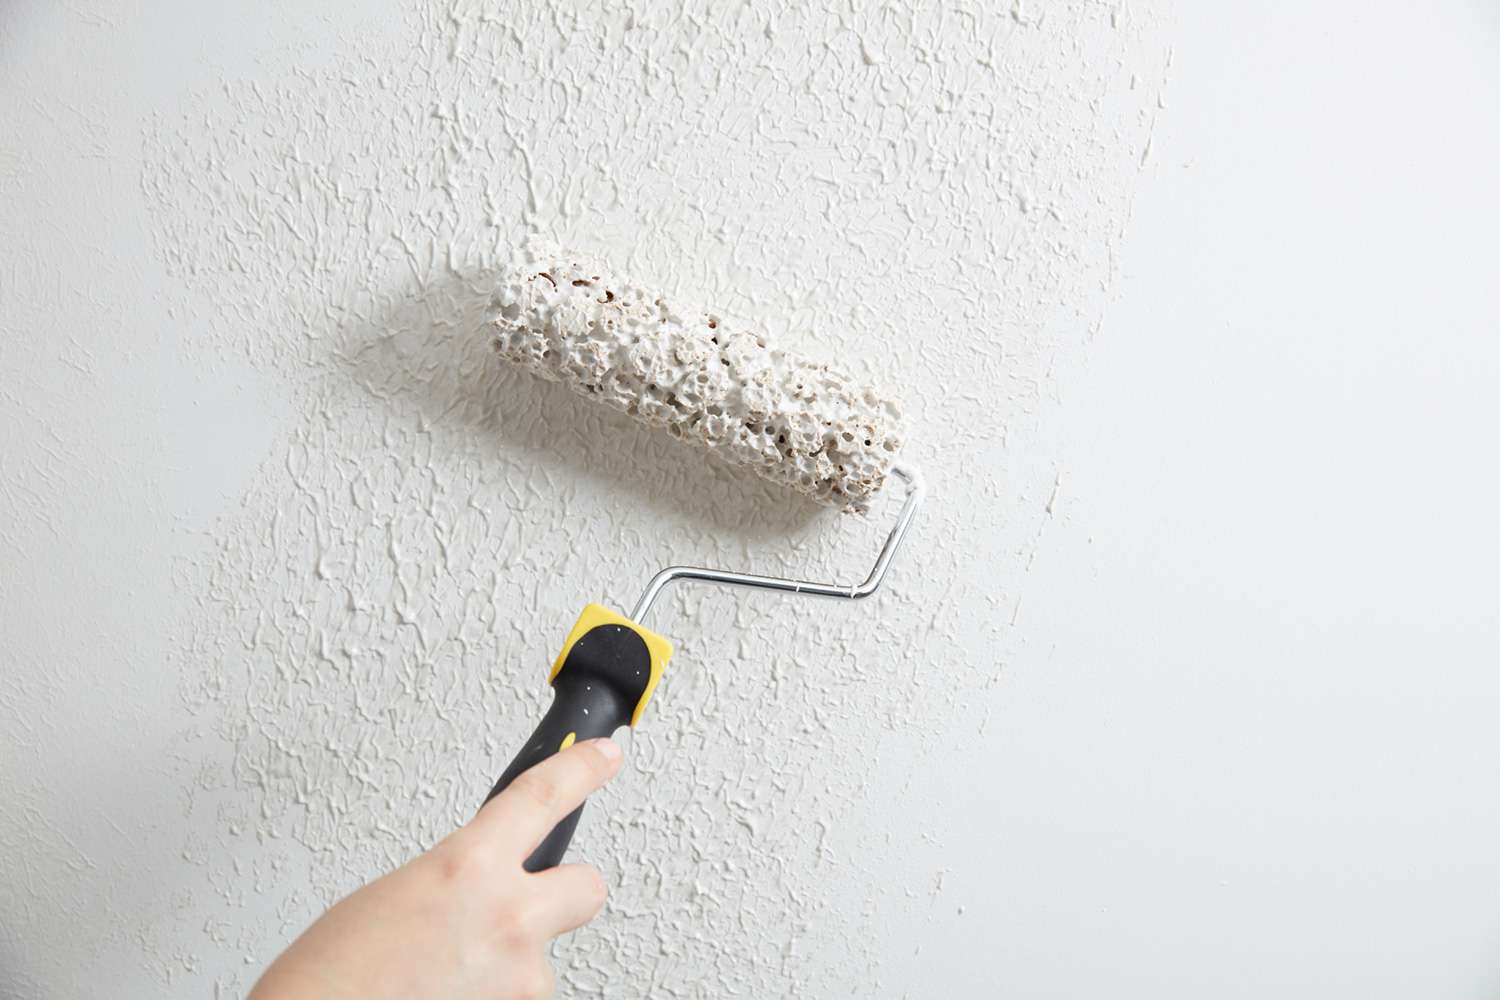
Step 4: Apply Spackle to the Textured Wall
Now that the holes and cracks on your textured wall have been filled, it’s time to apply the spackle. This step involves covering the repaired areas and blending them with the existing texture of the wall. Follow these steps to apply the spackle:
- Using your putty knife, scoop a small amount of spackle onto the blade.
- Starting from the edge of the repaired area, gently press the spackle onto the wall. Use light pressure and spread it evenly over the repaired area, extending the layer slightly past the edges.
- Work in a thin layer, as excessive spackle can be difficult to blend with the existing texture. You can always apply additional layers if needed.
- Continue applying spackle to each repaired area, overlapping slightly with adjacent areas to blend them together seamlessly.
- As you work, be mindful of the texture of your wall and try to match the pattern as closely as possible. This will help the repaired areas blend in naturally.
- Avoid overworking the spackle. Once you’ve spread it evenly, let it dry before moving on to the next step.
By applying the spackle to the textured wall in a careful and deliberate manner, you’ll be able to seamlessly integrate the repaired areas with the rest of the wall’s surface. Once you’ve completed this step, it’s time to move on to smoothing out the spackled areas.
When spackling a textured wall, use a thicker spackle to fill in the texture and blend it with the surrounding area using a wide putty knife for a smooth finish. Sand lightly once dry.
Step 5: Smooth out the Spackled Areas
Now that you’ve applied the spackle to the textured wall, it’s time to smooth out the spackled areas. This step will help create a seamless and even surface, ensuring that the repairs blend in seamlessly with the rest of the wall. Follow these steps to smooth out the spackled areas:
- Once the spackle is dry to the touch, take a sanding block or sandpaper with a coarse grit (around 80-120) and gently sand the dried spackled areas. Use light, circular motions to avoid creating any noticeable lines or textures.
- Focus on smoothing out the edges of the spackled areas, feathering them into the surrounding texture of the wall. This will help create a seamless transition between the repaired areas and the rest of the wall.
- As you sand, periodically brush your hand against the spackled areas to check for smoothness. If there are any noticeable bumps or unevenness, continue sanding until the surface feels smooth to the touch.
- Once you’ve achieved a smooth surface, wipe away any dust created during the sanding process with a clean, damp cloth. Allow the wall to dry completely before proceeding to the next step.
Smoothly sanding the spackled areas will ensure a seamless repair that seamlessly blends with the rest of the textured wall. Once you’ve completed this step, it’s important to let the spackled areas fully dry before proceeding to the next step: sanding the dried spackled areas.
Step 6: Allow the Spackled Areas to Dry
After smoothing out the spackled areas, it’s important to allow them to dry completely before proceeding. This step is crucial to ensure the spackle sets and adheres properly, resulting in a durable and long-lasting repair. Follow these steps to allow the spackled areas to dry:
- Check the spackle container or manufacturer’s instructions for the recommended drying time. This can vary depending on the type and brand of spackle used.
- Avoid touching or disturbing the spackled areas during the drying process, as this can cause indentations or imperfections.
- Open windows or use fans to improve air circulation in the room. This will help speed up the drying process.
- Be patient and allow the spackled areas ample time to dry. Rushing this step can compromise the quality of the repair.
- You can perform a touch test to check if the spackle is fully dry. Lightly press your finger against a small, inconspicuous area of the spackled surface. If it feels firm and doesn’t leave any smudges or indentations, it’s likely dry.
By allowing the spackled areas to dry fully, you ensure that the repairs are solid and ready for the next step: sanding the dried spackled areas.
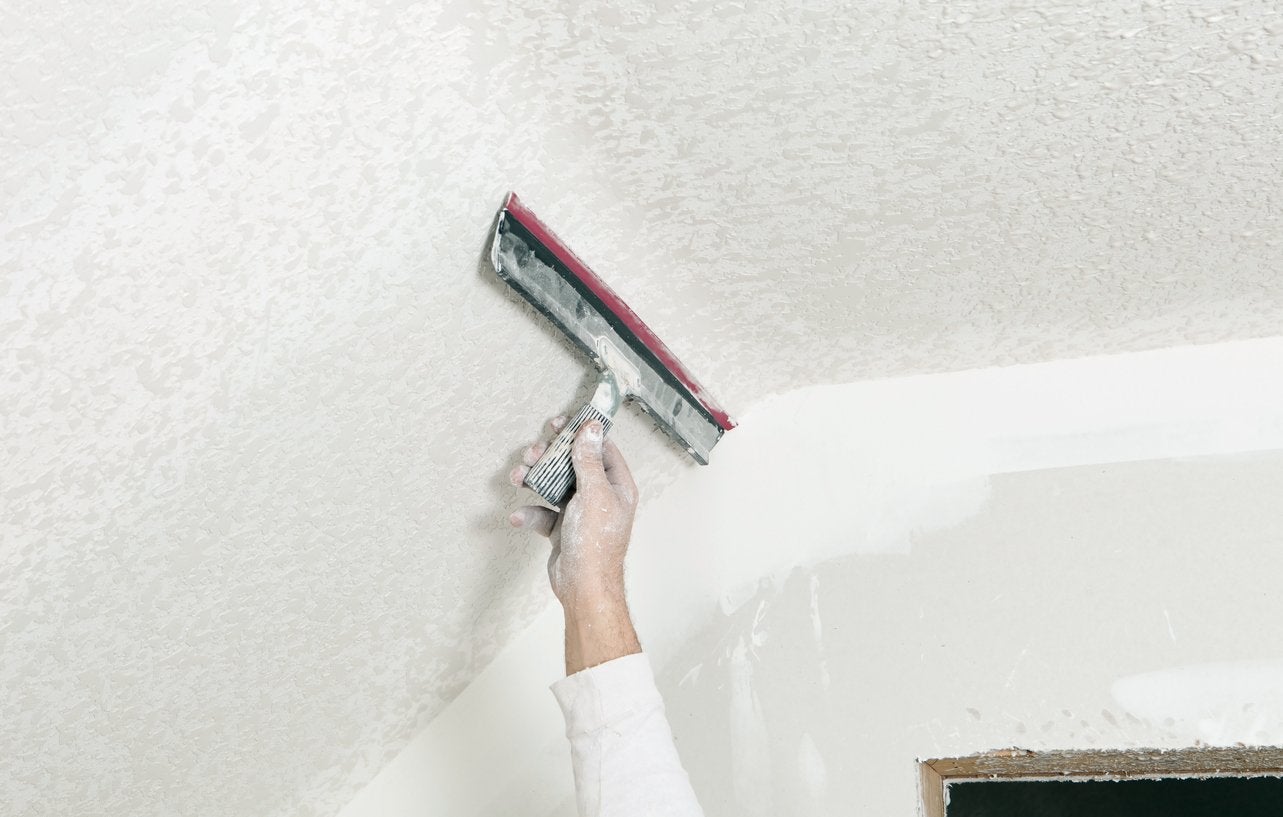
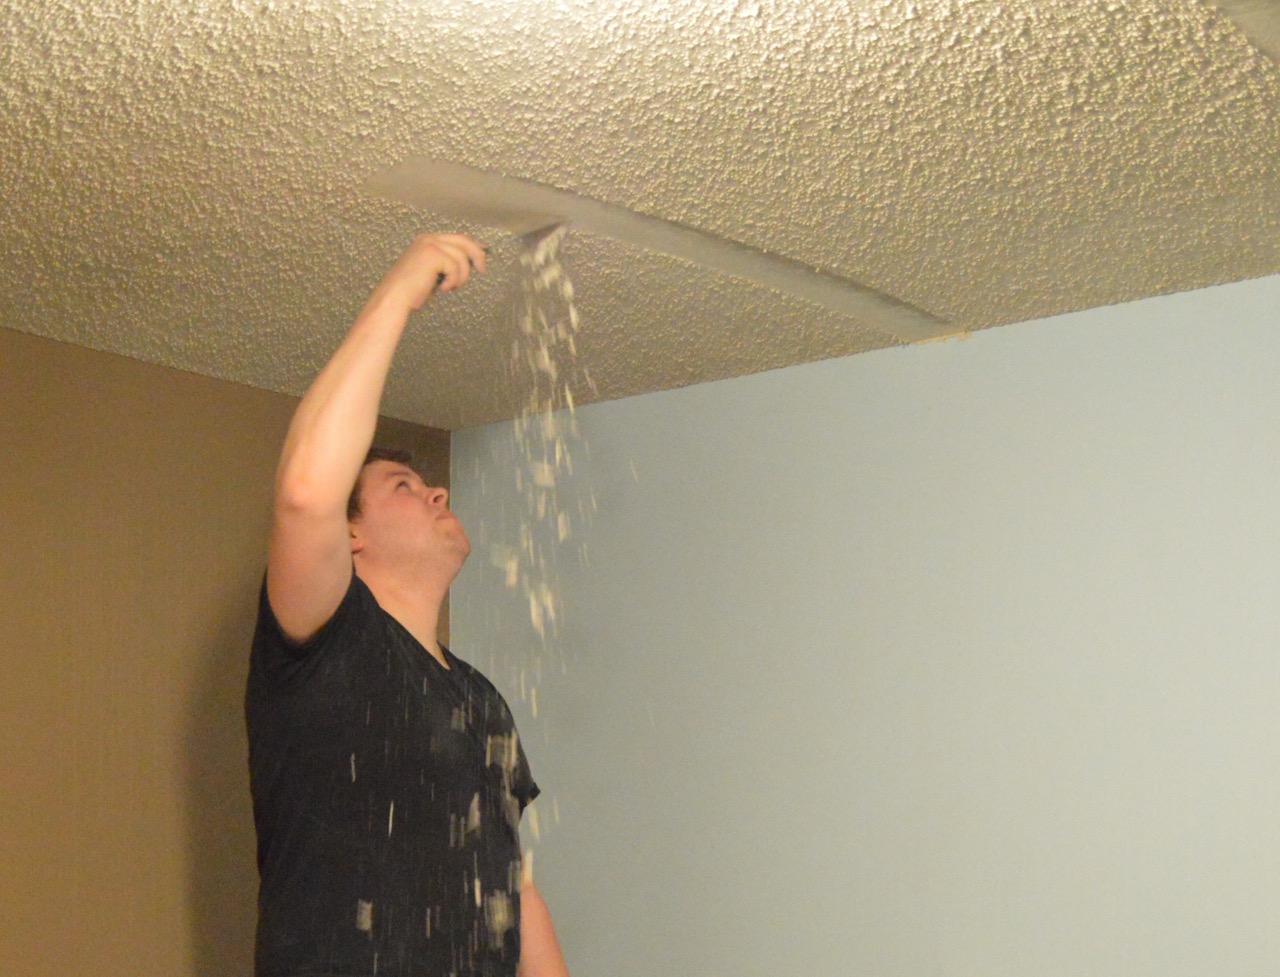
Step 7: Sand the Dried Spackled Areas
Once the spackled areas are completely dry, it’s time to sand them to achieve a smooth and seamless finish. Sanding helps to blend the repaired areas with the surrounding texture of the wall, creating a cohesive surface. Follow these steps to sand the dried spackled areas:
- Begin by selecting a sanding block or sandpaper with a finer grit, around 200-400, to avoid damaging the wall. You want to achieve a polished finish without removing too much material.
- Gently sand the dried spackled areas in a circular motion. Apply light pressure and keep the sanding block or sandpaper flat against the surface to ensure an even sanding.
- Be cautious not to over-sand or apply too much pressure, as this can result in creating noticeable depressions or unevenness on the wall surface.
- Sand in a controlled manner, focusing on the repaired areas but also blending them with the surrounding texture to create a seamless transition.
- Periodically wipe away the dust with a clean, damp cloth to assess your progress. This will help you identify any areas that might need further sanding.
- Continue sanding and assessing until the spackled areas feel smooth to the touch and blend harmoniously with the rest of the wall.
Sanding the dried spackled areas is a crucial step for achieving a flawless finish. Take your time and be mindful of not sanding too aggressively, ensuring that the repairs seamlessly integrate with the surrounding texture. With the sanding complete, it’s time to move on to the next step: inspecting and touching up as needed.
Read more: How To Make Textured Wall Art
Step 8: Inspect and Touch Up as Needed
Once you have finished sanding the dried spackled areas, it’s important to thoroughly inspect the wall and make any necessary touch-ups. This step ensures that the repairs are seamless and that any imperfections are addressed before moving on to the final steps of painting or wallpapering. Follow these steps to inspect and touch up as needed:
- Examine the repaired areas under different lighting conditions to identify any remaining imperfections, such as uneven textures, slight depressions, or visible lines.
- If you notice any imperfections, use your putty knife to gently apply a thin layer of spackle directly to the problem area. Smooth it out and blend it with the surrounding texture, feathering the edges for a seamless finish.
- Allow the touch-up spackle to dry completely before lightly sanding the area with a fine-grit sandpaper. This will ensure that the touch-up blends smoothly with the rest of the spackled surface.
- Wipe away any dust from the touch-up process with a clean, damp cloth to ensure a clean surface.
- Perform a final visual inspection to ensure that the repaired areas are now indistinguishable from the rest of the textured wall.
By thoroughly inspecting and touching up the spackled areas, you ensure a seamless and professional-looking finish. With the touch-ups complete, you’re now ready to move on to the final steps of painting or wallpapering to complete your textured wall makeover.
Conclusion
Congratulations! You’ve successfully learned how to spackle a textured wall. By following the step-by-step process outlined in this guide, you’ve gained the skills and knowledge to repair holes, cracks, and imperfections, creating a smooth and flawless surface.
Remember, preparation is key, so make sure to properly clean the wall and prepare the surface before beginning the spackling process. Take your time to fill in the holes and cracks, applying the spackle in thin layers and blending it seamlessly with the surrounding texture. After allowing the spackled areas to dry, carefully sand them down to achieve a smooth finish.
Inspect the wall and make any necessary touch-ups to address any remaining imperfections. Once you’re satisfied with the result, you can proceed to the final steps of painting or wallpapering to complete your wall transformation.
Keep in mind that practice makes perfect, so don’t be discouraged if you don’t achieve a flawless result on your first attempt. The more you practice, the more confident you’ll become in your spackling skills.
Now that you have the tools and knowledge to spackle a textured wall, you can confidently tackle any wall repairs in your home. Enjoy the satisfaction of seeing your walls transformed and knowing that you accomplished it yourself!
Remember to always prioritize safety by wearing proper protective gear and following the manufacturer’s instructions for any products used during the spackling process.
Frequently Asked Questions about How To Spackle A Textured Wall
Was this page helpful?
At Storables.com, we guarantee accurate and reliable information. Our content, validated by Expert Board Contributors, is crafted following stringent Editorial Policies. We're committed to providing you with well-researched, expert-backed insights for all your informational needs.


0 thoughts on “How To Spackle A Textured Wall”