Articles
How To Lay A Ceramic Tile Floor
Modified: August 26, 2024
Learn the step-by-step process of laying a ceramic tile floor with these informative articles. Simplify your DIY project and achieve professional results.
(Many of the links in this article redirect to a specific reviewed product. Your purchase of these products through affiliate links helps to generate commission for Storables.com, at no extra cost. Learn more)
Introduction
Welcome to our comprehensive guide on how to lay a ceramic tile floor. Ceramic tiles are a popular choice for flooring due to their durability, versatility, and aesthetic appeal. Whether you are renovating your bathroom, kitchen, or any other room in your home, laying ceramic tiles can elevate the look and functionality of the space.
This step-by-step guide will walk you through the entire process, from planning and preparation to the final finishing touches. By following these instructions, even if you have little to no experience with tile installation, you’ll be able to achieve professional-looking results.
Before we dive into the details, it’s important to emphasize the significance of proper planning and preparation. Taking the time to measure, calculate, and gather the necessary tools and materials will save you time, effort, and potential headaches down the line.
So let’s get started on your journey to a stunning ceramic tile floor!
Key Takeaways:
- Proper planning and preparation are essential for laying a ceramic tile floor. From measuring and choosing the right tiles to gathering tools and materials, attention to detail ensures a successful and professional-looking installation.
- The process of laying a ceramic tile floor involves meticulous steps, from surface preparation and tile layout to grouting and sealing. Following this comprehensive guide will result in a stunning and durable flooring solution for your space.
Read more: How To Lay Out Floor Tile
Planning and Preparation
Before you begin laying a ceramic tile floor, it’s crucial to plan and prepare adequately. This involves measuring and calculating the tile area, choosing the right type and size of ceramic tiles, and gathering the necessary tools and materials.
Measuring and calculating the tile area
The first step in planning your ceramic tile floor is to measure the area you want to tile. Start by measuring the length and width of the room or space. Multiply these two numbers together to determine the total square footage. It’s always a good idea to add an additional 5-10% to account for any waste or mistakes during the installation process.
Once you have the total square footage, you can then determine the number of tiles you’ll need. This will depend on the size of the tiles you choose. Divide the total square footage by the square footage of each individual tile to get the number of tiles required.
Choosing the right type and size of ceramic tiles
Choosing the right type and size of ceramic tiles is essential to achieve the desired look and functionality for your floor. Ceramic tiles come in various styles, finishes, and sizes, so take your time to browse through different options and consider the overall aesthetic of the space.
If you’re working on a high-traffic area, such as a kitchen or entryway, opt for ceramic tiles with a high durability rating. Also, consider the slip resistance of the tiles, especially for areas prone to moisture, such as bathrooms or laundry rooms.
When it comes to size, larger tiles can create an illusion of spaciousness and can be easier to install as they cover a larger area. However, smaller tiles can offer more design flexibility and intricate patterns. Choose a size that suits your style and the dimensions of your space.
Gathering necessary tools and materials
Before you can start laying ceramic tiles, you’ll need to ensure you have all the necessary tools and materials. Some common tools include a tape measure, tile cutter, trowel, notched trowel, grout float, spacers, sponge, and a rubber mallet.
In terms of materials, you’ll need ceramic tiles, tile adhesive or mortar, grout, and sealant. It’s important to select high-quality materials to ensure a durable and long-lasting tile floor. Consult with a knowledgeable salesperson or contractor to ensure you’re choosing the right products for your specific project.
Once you have measured, calculated, chosen the tiles, and gathered all the necessary tools and materials, you will be well-prepared to begin the installation process. The next step is to prepare the surface for the tile installation, which we will discuss in the following section.
Read more: How To Lay Tile On Concrete Floor
Surface Preparation
Before you can begin laying ceramic tiles, proper surface preparation is crucial. This involves clearing the existing flooring, repairing any damages, and cleaning and leveling the subfloor.
Clearing the existing flooring
The first step in surface preparation is to remove any existing flooring. This could include carpet, vinyl, laminate, or even old tiles. Carefully remove the flooring, ensuring no debris or remnants are left behind. It’s essential to have a clean and level surface to work with for optimal tile adhesion.
Repairing any damages
Inspect the subfloor for any damages, cracks, or uneven spots. It’s crucial to address these issues before proceeding with the tile installation. Repair any cracks or damages in the subfloor using a suitable filler or patching compound. Ensure that all repairs are dry and cured before proceeding to the next step.
Cleaning and leveling the subfloor
Once the subfloor is clear of any existing flooring and repaired of any damages, it’s time to clean and level the surface. Remove any dust, dirt, or debris using a broom and vacuum. Next, check for any high or low spots on the subfloor. Use a leveling compound to fill in any low spots, and a floor grinder or sander to smooth out any high spots.
Be meticulous in this step, as a level and clean subfloor is crucial for a successful tile installation. It will prevent any tiles from cracking or coming loose due to an uneven surface.
After cleaning and leveling the subfloor, it’s important to allow it to dry completely before moving forward. Moisture can affect the adhesion of the tiles, so ensure that the subfloor is dry and ready for tile installation.
Once the surface preparation is complete, you can move on to the next step – tile layout and design. This is where you’ll plan the placement of the tiles and create a visually appealing pattern or layout. We will explore this in more detail in the following section.
Read more: How To Seal Ceramic Tile Floor
Tile Layout and Design
When it comes to laying a ceramic tile floor, the tile layout and design play a significant role in the overall aesthetic appeal of the space. In this section, we will discuss how to decide on the tile pattern and layout, as well as marking guidelines on the subfloor.
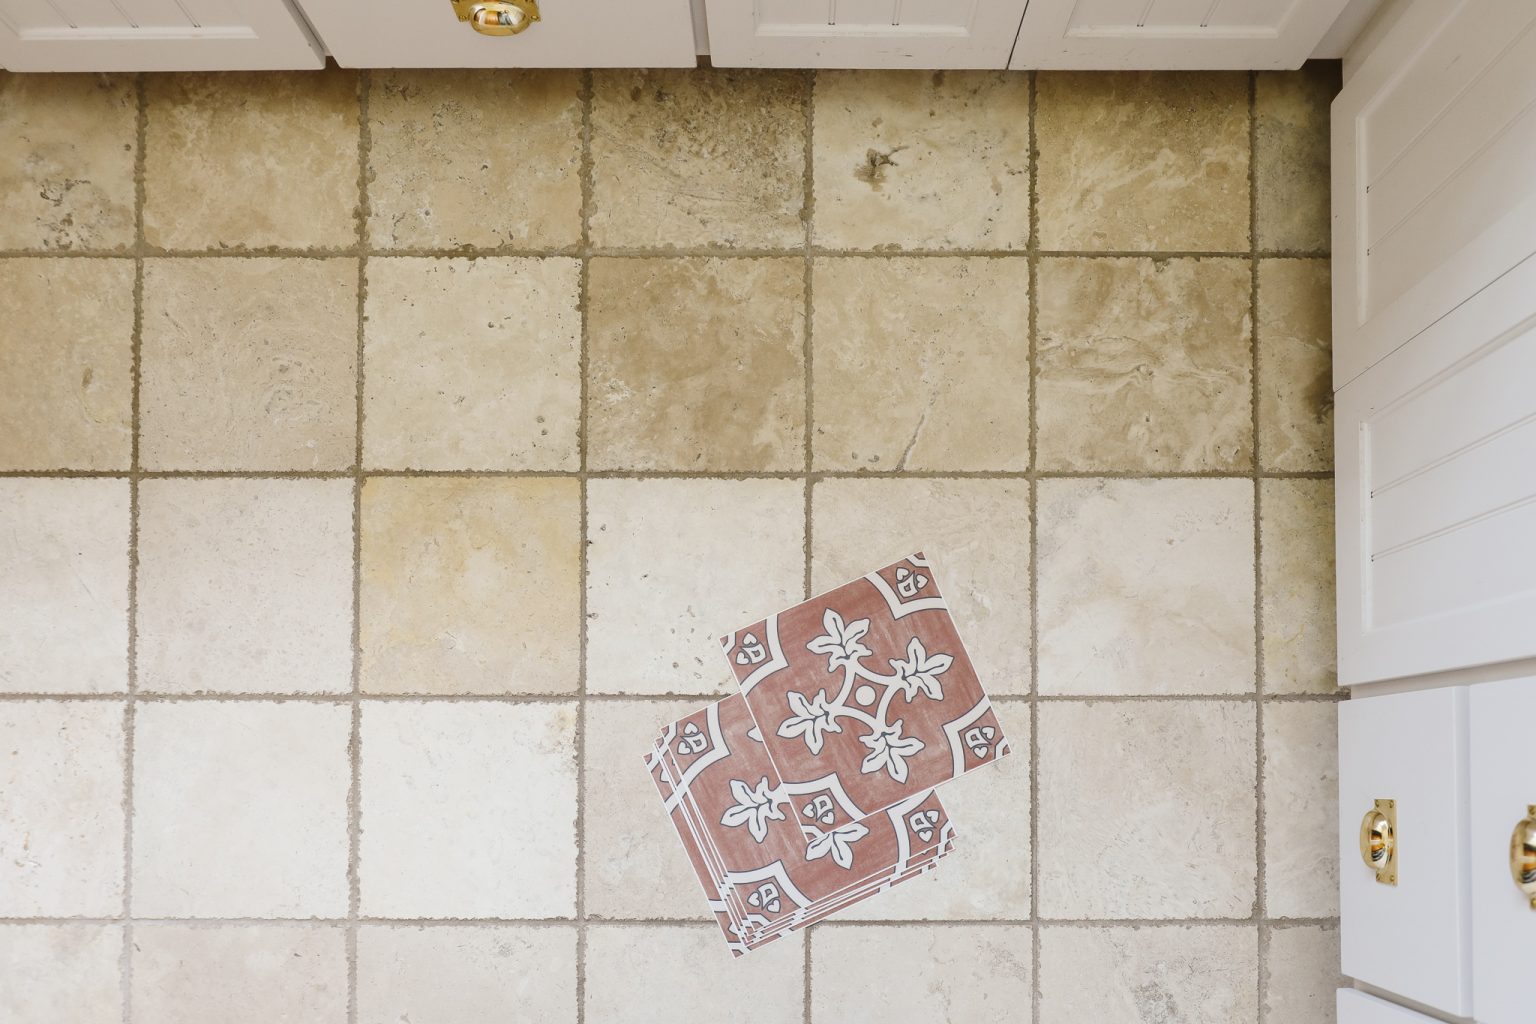
Deciding on the tile pattern and layout
Before you start installing the tiles, take some time to decide on the tile pattern and layout that best suits your space. There are several popular tile patterns to choose from, including the classic straight, diagonal, herringbone, or even more intricate options like basketweave or chevron.
Consider the size and shape of your tiles when deciding on a pattern. Some patterns may work better with certain tile sizes, while others may require specific cutting and installation techniques. Visualize how the pattern will look in your space and choose one that complements your overall design aesthetic.
Once you’ve decided on the pattern, plan the layout of the tiles. Start by finding the center of the room or the focal point and work your way outwards. Depending on the size and shape of your tiles, you may need to make some adjustments to ensure a balanced and visually pleasing layout.
Marking guidelines on the subfloor
With the tile pattern and layout decided, it’s time to mark guidelines on the subfloor. This step ensures accurate and precise tile installation and helps maintain straight lines throughout the process. To mark the guidelines, follow these steps:
- Find the center of the room and mark a straight, horizontal line running across the midpoint of the floor using a chalk line or a straightedge.
- From the centerline, measure and mark perpendicular guidelines at regular intervals using a square and a level. This will help you keep the tiles aligned and spaced properly.
- Use the guidelines to lay out a small section of tiles without adhesive to double-check the design and make any necessary adjustments before proceeding with the installation.
By marking guidelines on the subfloor, you can ensure that your tile installation is precise, consistent, and visually appealing.
With the tile layout and design planned and the guidelines marked on the subfloor, you are now ready to move on to the next step – setting the tiles. This is where you will begin the actual installation process and bring your vision to life. We will explore this in more detail in the following section.
Setting the Tiles
Setting the tiles is the exciting part of laying a ceramic tile floor. In this section, we’ll discuss how to apply adhesive or mortar on the subfloor, place the tiles accurately, ensure proper spacing between tiles, and cut and shape tiles as needed.
Read more: How To Clean Ceramic Floor Tile
Applying adhesive or mortar on the subfloor
Start by preparing the adhesive or mortar according to the manufacturer’s instructions. If you’re using adhesive, spread it evenly on the subfloor using a trowel with a notched edge. If you’re using mortar, mix it to the correct consistency and apply it in small sections.
Work in manageable areas to prevent the adhesive or mortar from drying out before you can lay the tiles. It’s essential to work efficiently but at a comfortable pace to ensure proper adhesion.
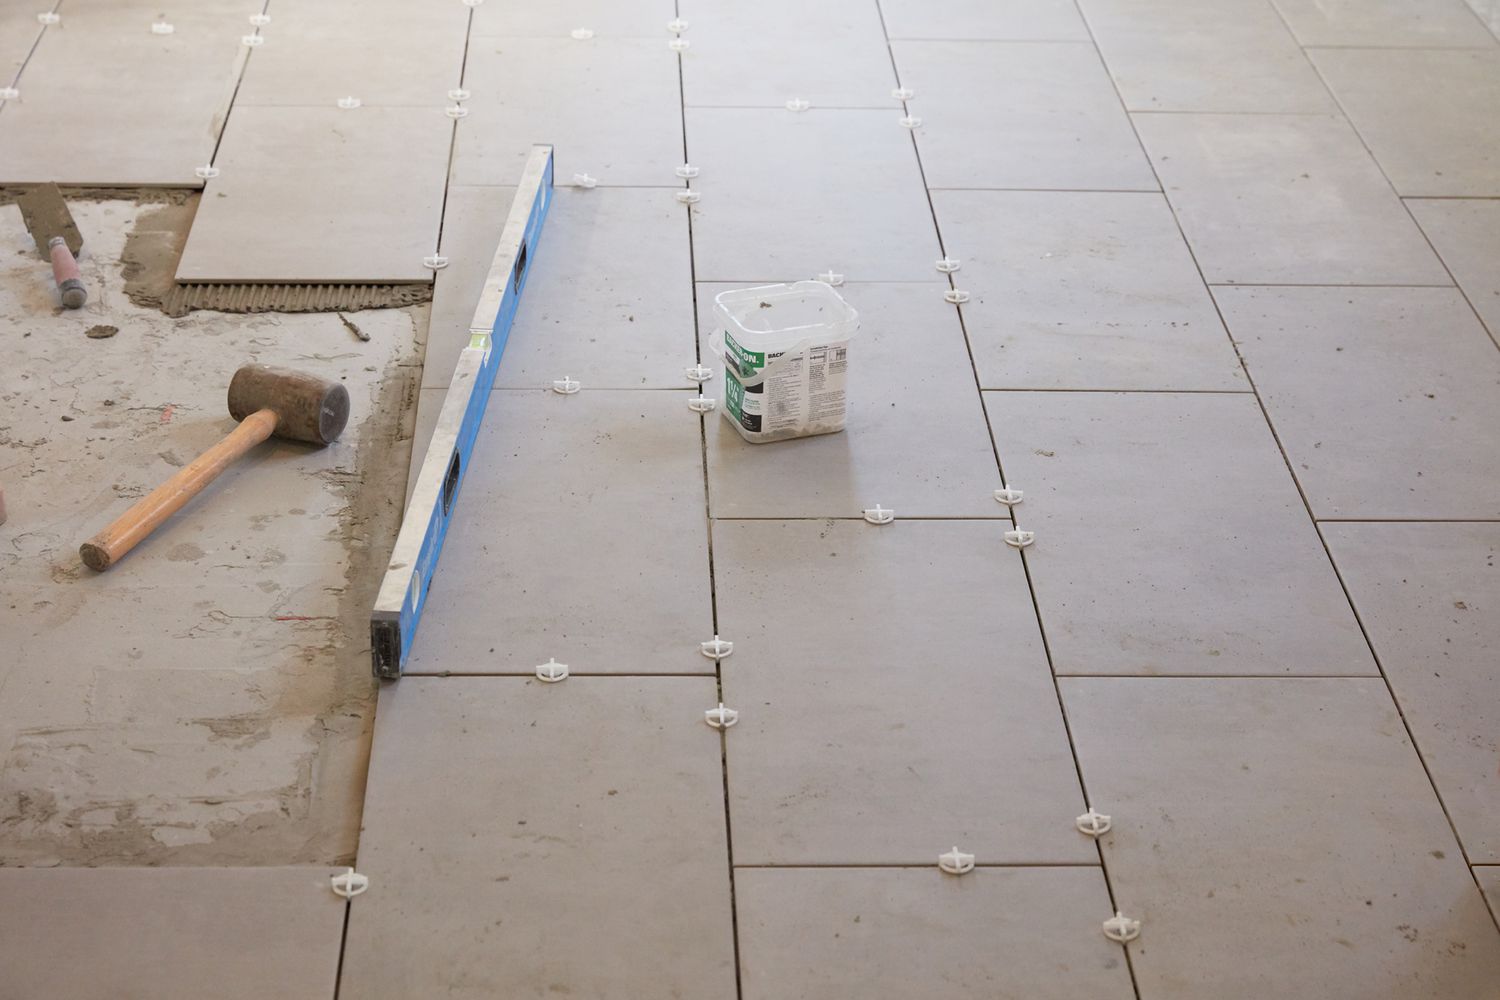
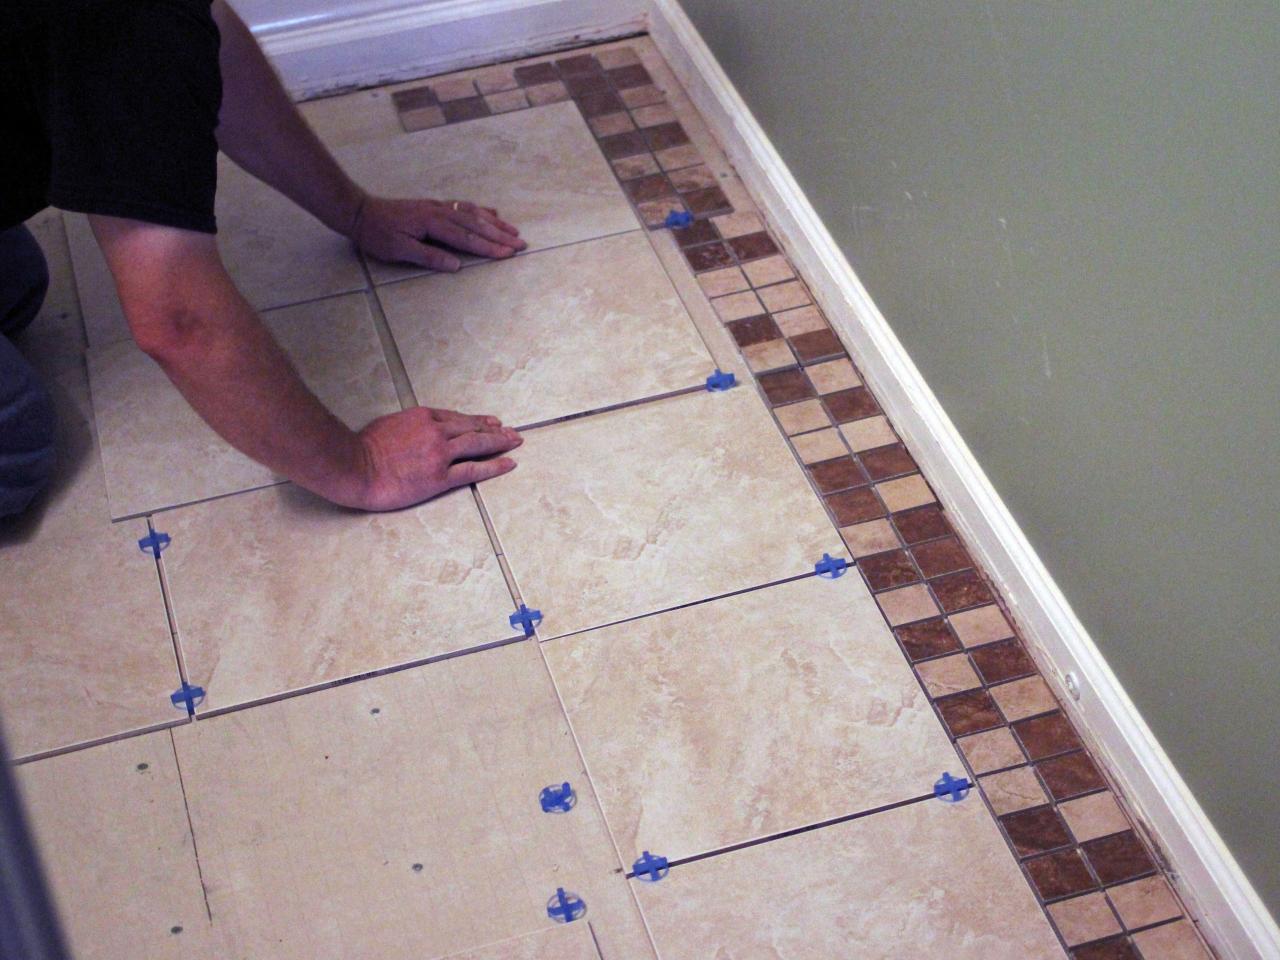
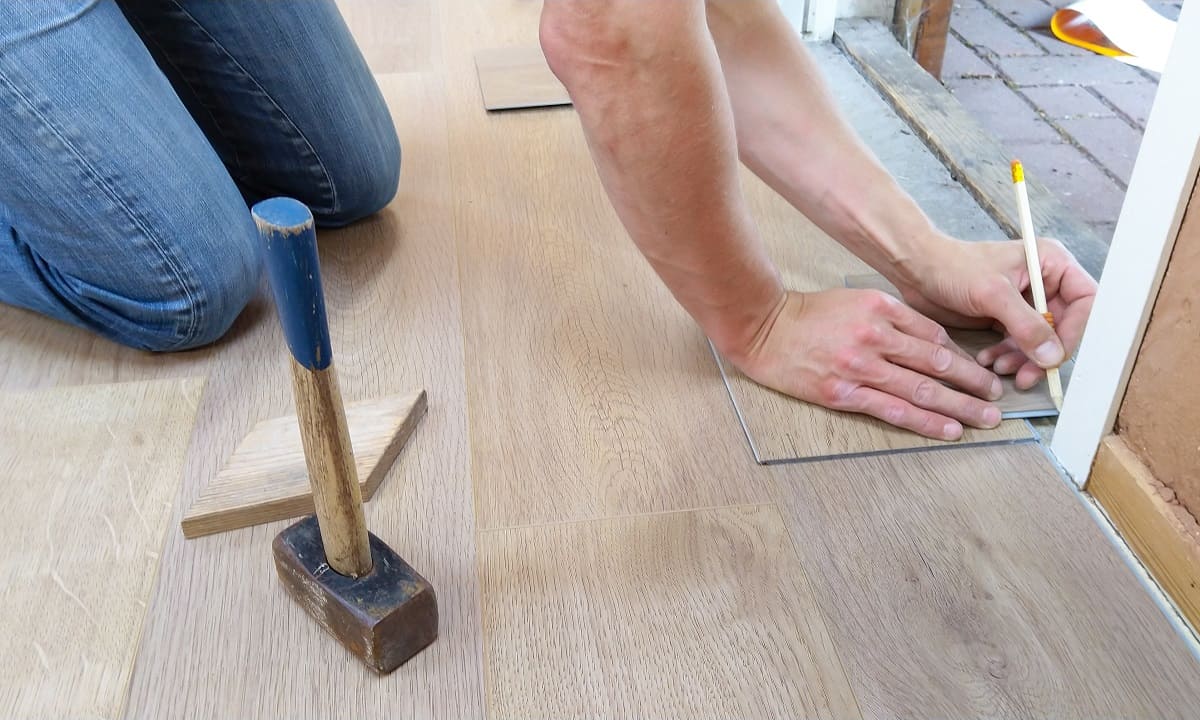
Placing the tiles accurately
Begin by placing the first tile in the corner of the starting point, aligning it with the marked guidelines on the subfloor. Gently press the tile into the adhesive or mortar, ensuring it is firmly attached and level with the surrounding tiles.
Continue placing tiles along the guideline, following the pattern and layout you have planned. Use spacers to ensure consistent spacing between the tiles, creating even grout lines. Adjust the position of the tiles as needed to maintain straight lines and keep the design aligned.
Ensuring proper spacing between tiles
The spacing between tiles, known as grout lines, is crucial for both aesthetics and functionality. Use tile spacers to maintain consistent spacing between each tile. The size of the spacers will depend on the desired grout line width, typically ranging from 1/8 inch to 1/4 inch.
Periodically check and adjust the tiles and spacers as you work your way across the floor. This will ensure that the spacing remains consistent, resulting in a clean and professional-looking tile installation.
Cutting and shaping tiles as needed
As you reach the edges of the room or encounter obstacles such as pipes or outlets, you will likely need to cut and shape tiles to fit. Measure and mark the tiles that require cutting, using a tile cutter or a wet saw to make precise cuts.
Take your time and double-check measurements before cutting the tiles to avoid unnecessary waste or mistakes. Use sandpaper or a tile file to smooth any rough edges or uneven cuts.
Remember that safety is paramount when cutting tiles, so always wear safety goggles and gloves and follow the manufacturer’s guidelines for the cutting tools.
By applying adhesive or mortar, placing the tiles accurately, ensuring proper spacing, and cutting and shaping tiles as needed, you will achieve a beautifully laid ceramic tile floor. The next step in the process is grouting, which will bring the tiles together and complete the installation. We will explore this in more detail in the following section.
Read more: How To Lay Mosaic Floor Tile
Grouting
Grouting is a crucial step in laying a ceramic tile floor as it provides stability, durability, and a finished look to the installation. In this section, we’ll discuss how to mix the grout, apply it between the tiles, and remove excess grout while cleaning the surface.
Mixing the grout
Start by reading and following the manufacturer’s instructions for mixing the grout. Wear gloves and eye protection for safety. Mix the grout powder with water in a clean bucket until it reaches a smooth and lump-free consistency. Let the grout mixture sit for a few minutes before proceeding.
It’s important to mix only the amount of grout that you can work with in a reasonable time frame, as it can harden quickly. Keep in mind that different grout types and colors may have specific mixing requirements, so consult the manufacturer’s instructions for the best results.
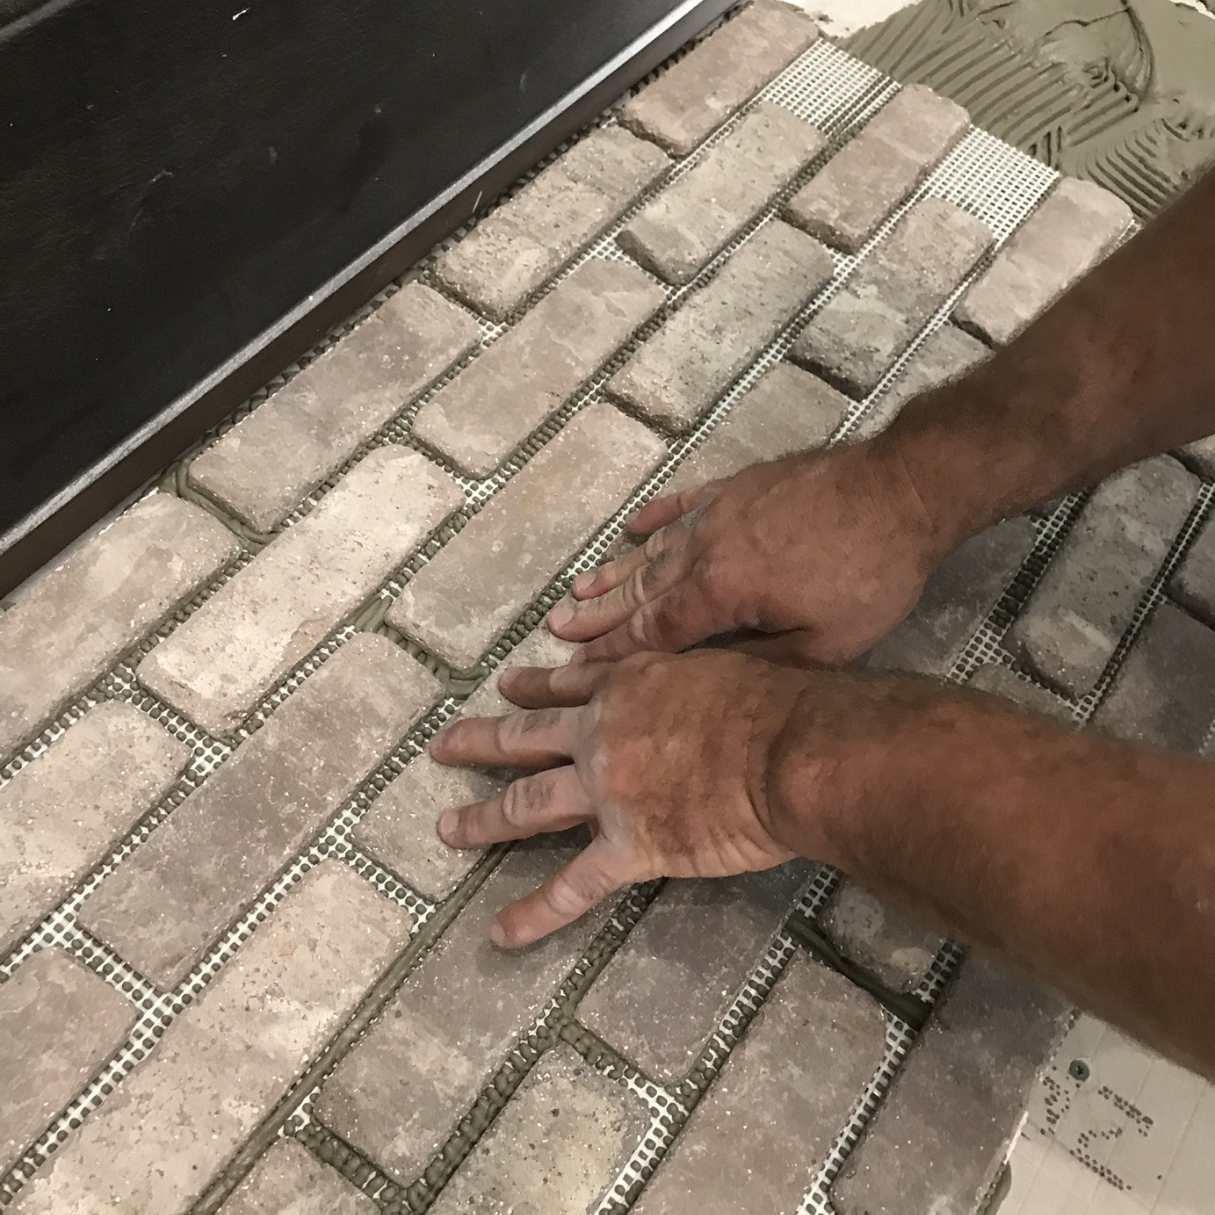
Applying grout between the tiles
Using a grout float, scoop a generous amount of grout and apply it to the tile surface. Hold the float at a 45-degree angle and press the grout into the joints, working diagonally to ensure complete coverage and elimination of air pockets.
Hold the float at a 90-degree angle as you move across the surface to remove excess grout. Be careful not to remove too much grout from the joints. Work in small sections to prevent the grout from drying out before you can clean it off the tiles.
Removing excess grout and cleaning the surface
After applying the grout, allow it to set according to the manufacturer’s instructions. Avoid walking on the newly grouted tiles during this time to prevent any shifting or dislodging of the grout.
Once the grout has set, use a damp sponge or grout-cleaning tool to gently wipe away the excess grout from the tile surface. Rinse the sponge frequently and change the water as needed. Be careful when cleaning the grout lines to avoid removing too much grout.
As you clean, take care to shape the grout lines, ensuring they are smooth and evenly filled. Pay extra attention to any areas where the grout lines meet corners or edges to create neat and seamless transitions.
Once you have removed the excess grout and cleaned the surface, allow the grout to dry completely before moving on to the final step of sealing and finishing the tile floor.
By properly mixing the grout, applying it between the tiles, and removing excess grout while cleaning the surface, you will achieve a professionally grouted ceramic tile floor. The next step in the process is sealing and finishing, which will protect the tiles and enhance their longevity. We will explore this in more detail in the following section.
Read more: How To Lay Tile On Wood Floor
Sealing and Finishing
Sealing and finishing the ceramic tile floor is the final step in the installation process. This step is essential for protecting the tiles and enhancing their durability and longevity. In this section, we’ll discuss allowing the tiles to set and dry, applying sealant to protect the tiles, and installing baseboards or trim, if desired.
Allowing the tiles to set and dry
After grouting, it’s important to allow the tiles to set and dry before proceeding with sealing. Follow the manufacturer’s instructions for the recommended drying time. This can range from a few hours to several days, depending on the type of grout and environmental conditions.
Resist the temptation to walk on the newly grouted tiles or place any furniture or heavy items on them until they are fully set. This will ensure that the grout cures properly and avoids any damage or shifting.
Applying sealant to protect the tiles
Once the tiles have fully set and dried, it’s time to apply a suitable sealant to protect the ceramic surface. Sealant acts as a barrier, shielding the tiles from stains, water damage, and daily wear and tear.
Before applying the sealant, carefully clean the tiles to remove any dust, dirt, or grout residue. Follow the sealant manufacturer’s instructions for application methods and drying times. Apply the sealant evenly across the entire surface of the tiles using a clean cloth or a sealant applicator.
It’s important to choose the appropriate sealant for your specific type of ceramic tiles. Consult with a professional or the product manufacturer for guidance on the best sealant for your particular needs.
Installing baseboards or trim, if desired
As a finishing touch, you may choose to install baseboards or trim around the room to complement your newly installed ceramic tile floor. This can enhance the aesthetic appeal of the space and provide a polished look.
Measure and cut the baseboards or trim to fit around the edges of the room. Use a saw or a miter box to create clean and precise cuts. Attach the baseboards or trim to the walls using nails or adhesive, ensuring a secure and level installation.
Baseboards or trim can help hide any gaps or uneven edges between the tiles and the walls, adding a professional and finished appearance to your ceramic tile floor.
With the tiles set and dried, the sealant applied, and the baseboards or trim installed, your ceramic tile floor is complete. Take a moment to admire your hard work and enjoy the beauty and functionality that ceramic tiles bring to your space.
Congratulations on successfully laying a ceramic tile floor! By following this comprehensive guide, you have achieved a professional-looking installation that will provide years of enjoyment. Remember to refer back to this guide if you ever need to repair or replace tiles in the future.
Read more: How To Lay Peel And Stick Tile Floors
Conclusion
Congratulations on completing the process of laying a ceramic tile floor! You have taken the necessary steps to transform your space into a beautiful and functional area. From planning and preparation to surface preparation, tile layout, setting the tiles, grouting, sealing, and finishing, you have followed a comprehensive guide to achieve a professional installation.
By laying ceramic tiles, you have not only enhanced the aesthetic appeal of your space but also increased the durability and longevity of your flooring. Ceramic tiles are known for their durability, resistance to wear and tear, and ease of maintenance.
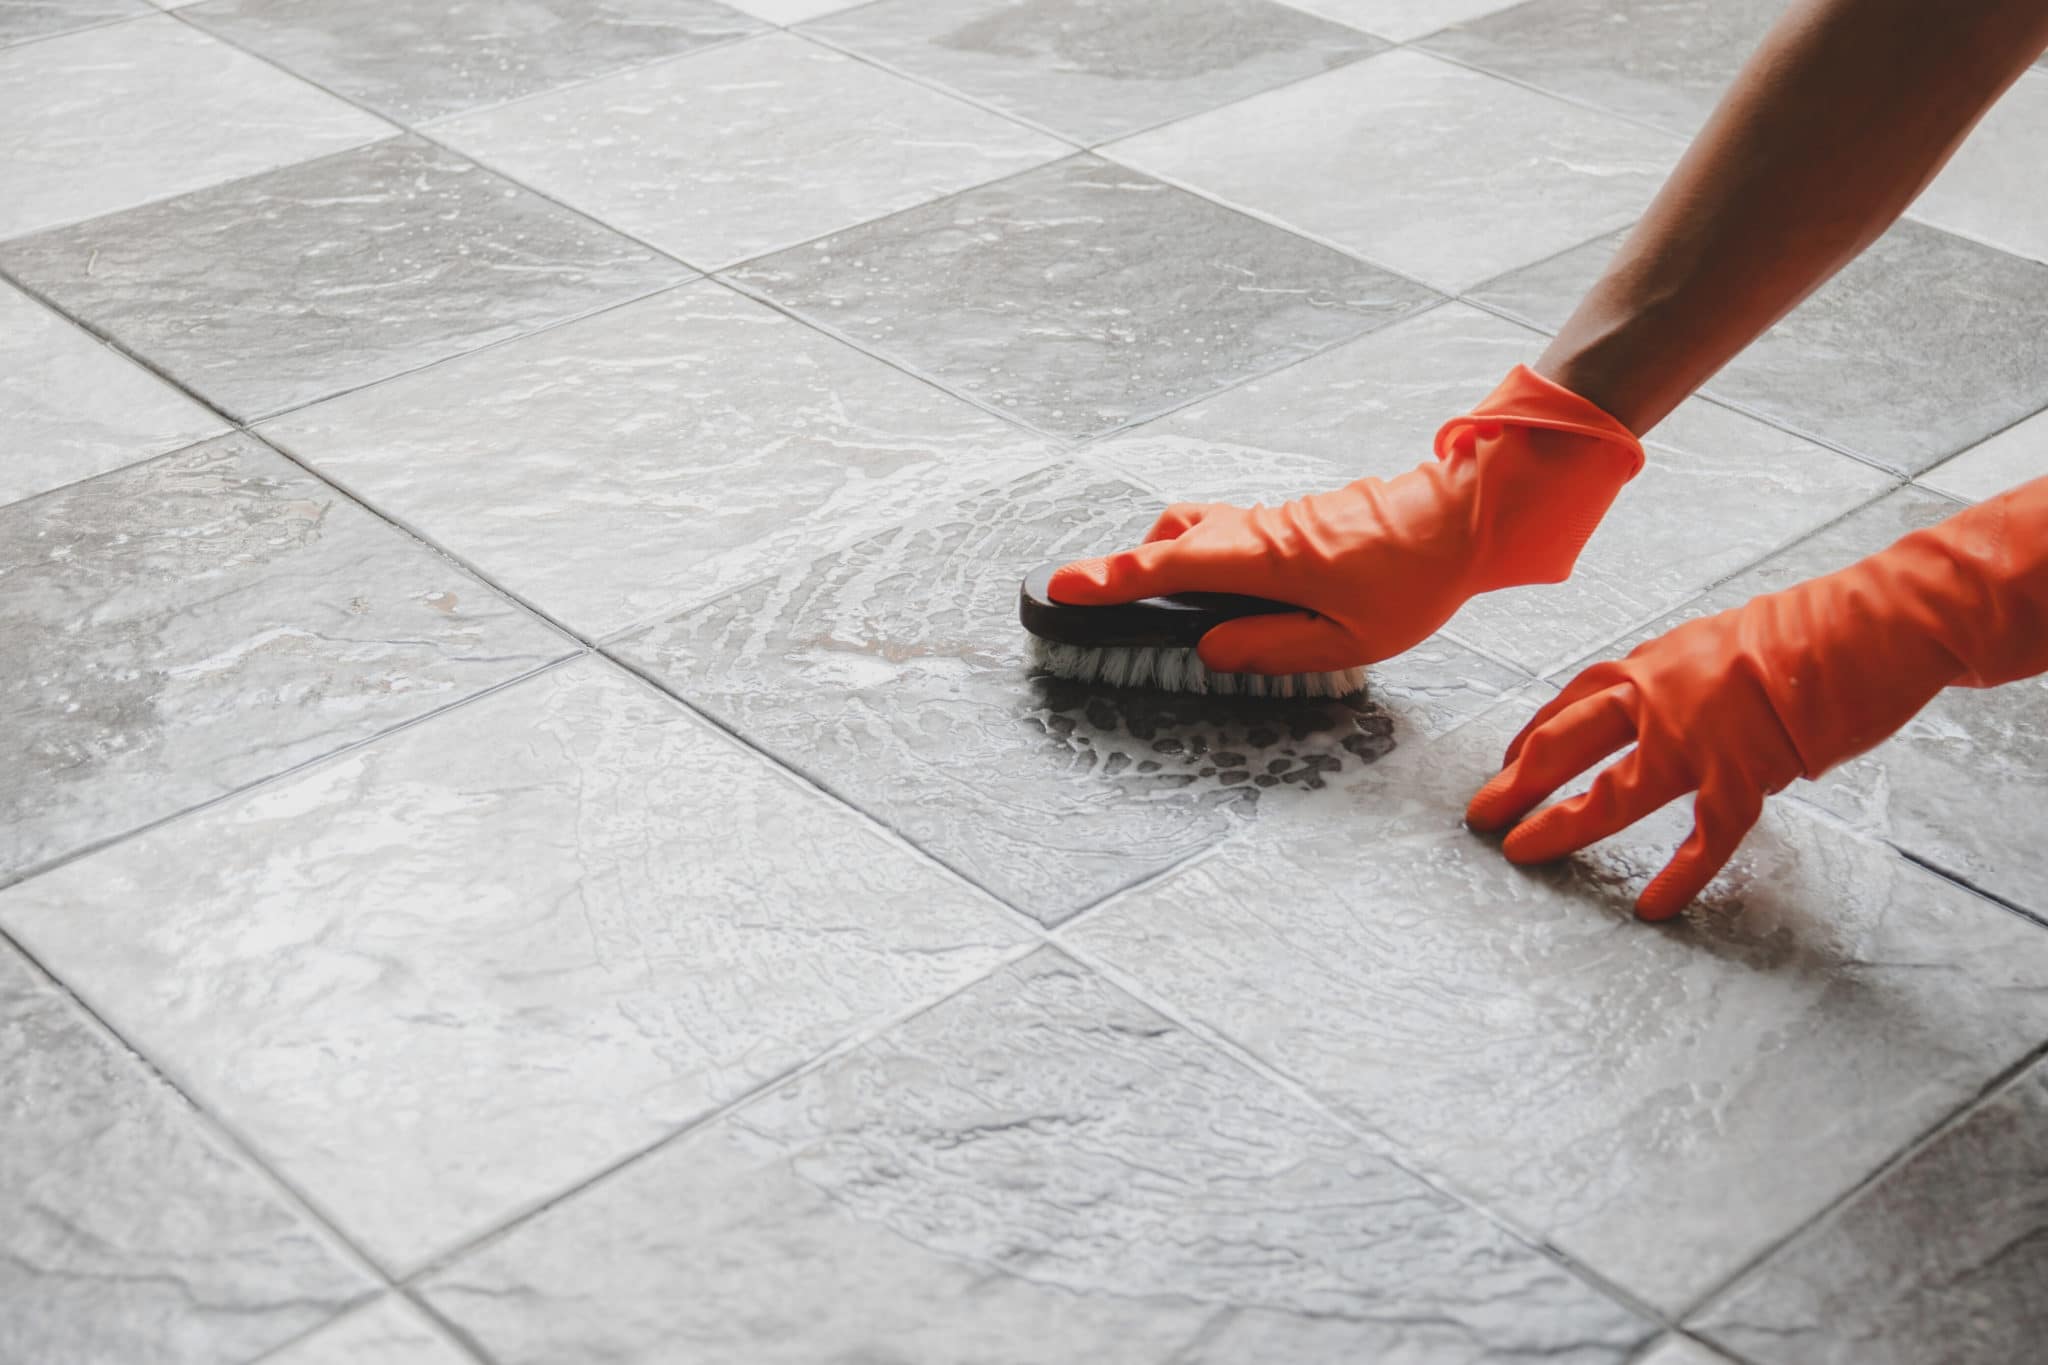
Remember to always practice proper maintenance to keep your ceramic tile floor looking its best. Regularly sweep or vacuum the floor to remove dust and debris. If needed, mop the floor using a mild cleaner suitable for ceramic tiles. Avoid using abrasive cleaning tools or harsh chemicals that can damage the tiles and grout.
If you ever encounter any issues, such as cracked or damaged tiles, it’s important to address them promptly. Replace the damaged tiles following the same steps outlined in this guide to maintain the integrity and appearance of your ceramic tile floor.
Thank you for taking the time to follow this comprehensive guide on how to lay a ceramic tile floor. We hope that this information has been valuable in helping you achieve the stunning and functional flooring you desire.
Remember, if you ever need further assistance or have any questions, consult with a professional or reach out to a tile installation expert. With proper care and maintenance, your ceramic tile floor will continue to bring beauty and function to your space for many years to come.
Frequently Asked Questions about How To Lay A Ceramic Tile Floor
Was this page helpful?
At Storables.com, we guarantee accurate and reliable information. Our content, validated by Expert Board Contributors, is crafted following stringent Editorial Policies. We're committed to providing you with well-researched, expert-backed insights for all your informational needs.

0 thoughts on “How To Lay A Ceramic Tile Floor”