Articles
How To Lay Mosaic Floor Tile
Modified: March 1, 2024
Learn how to lay mosaic floor tile easily with our comprehensive articles. Discover tips, techniques, and step-by-step guides for a successful tile installation.
(Many of the links in this article redirect to a specific reviewed product. Your purchase of these products through affiliate links helps to generate commission for Storables.com, at no extra cost. Learn more)
Introduction
If you’re looking to give your space a unique and stylish touch, installing mosaic floor tiles can be a fantastic option. Mosaic tiles are small, versatile pieces that can be arranged in various patterns and colors to create a stunning visual effect. Whether you’re renovating your kitchen, bathroom, or any other room, mosaic tiles can instantly elevate the overall aesthetic.
However, before you embark on this exciting home improvement project, it’s essential to understand the required tools and materials, as well as the steps involved in laying mosaic floor tiles. This comprehensive guide will walk you through the entire process, from surface preparation to final sealing.
Key Takeaways:
- Transform your space with stunning mosaic floor tiles by carefully planning, precise execution, and attention to detail throughout the installation process.
- Enjoy the beauty and functionality of mosaic tiles, and let them serve as a testament to your creativity and craftsmanship.
Read more: How To Lay Out Floor Tile
Tools and Materials Needed
To successfully install mosaic floor tiles, gather the following tools and materials:
- Tile adhesive: This is a specialized adhesive for securing tiles to the subfloor.
- Notched trowel: Used to spread the tile adhesive in a consistent manner.
- Mosaic tiles: Available in various materials, colors, and patterns. Choose the ones that suit your design preferences.
- Tile spacers: These small plastic pieces help maintain consistent spacing between the tiles.
- Grout: A mixture of cement, sand, and water used to fill the gaps between tiles.
- Grout float: A tool with a rubber pad used to push the grout into the tile joints.
- Tile cutter or wet saw: Depending on the complexity of your design, you may need to make precise cuts on the mosaic tiles.
- Sponge: Used for cleaning excess grout from the tiles and smoothing the grout lines.
- Bucket: For mixing the adhesive and grout.
- Clean cloth: Used to wipe away excess grout.
Once you’ve gathered all the necessary tools and materials, you’re ready to begin the process of laying mosaic floor tiles. The key to a successful installation is careful planning and meticulous execution, so let’s dive into the steps involved in this transformative project.
Key Takeaways:
- Transform your space with stunning mosaic floor tiles by carefully planning, precise execution, and attention to detail throughout the installation process.
- Enjoy the beauty and functionality of mosaic tiles, and let them serve as a testament to your creativity and craftsmanship.
Read more: How To Lay Out Floor Tile
Tools and Materials Needed
When it comes to laying mosaic floor tiles, having the right tools and materials is crucial for a successful installation. Here’s a rundown of what you’ll need:
- Tile adhesive: Tile adhesive is specifically formulated to securely bond tiles to the subfloor. It’s important to choose an adhesive that is suitable for mosaic tiles and the specific subfloor material you’re working with. Ensure that the adhesive is appropriate for your project needs, such as water resistance for bathroom installations.
- Notched trowel: This tool is used for spreading the tile adhesive evenly and creating ridges that promote better adhesion. The size of the notches on the trowel will depend on the size of the mosaic tiles being used.
- Mosaic tiles: The star of the show! Mosaic tiles come in a variety of materials, such as glass, ceramic, porcelain, or natural stone. They also come in different colors, shapes, and sizes, allowing you to create intricate patterns and designs. Choose mosaic tiles that complement your overall aesthetic and suit the specific area you’re tiling.
- Tile spacers: These small plastic pieces are placed between the tiles to ensure consistent spacing and alignment. The size of the spacers will depend on the desired grout line width. Using spacers helps maintain uniformity and allows for easier grout application.
- Grout: Grout is a mixture of cement, sand, and water that fills the gaps between tiles, providing stability and preventing moisture penetration. Choose a grout color that complements your mosaic tiles and enhances the overall design. It’s important to select a grout type suitable for the specific tile material and project requirements.
- Grout float: This tool is essential for applying grout to the tile joints. The float’s rubber pad aids in pushing the grout into the gaps, ensuring full coverage and a smooth finish.
- Tile cutter or wet saw: Depending on the intricacy of your mosaic tile design and any necessary tile cuts, you may need either a tile cutter or a wet saw. These tools allow you to make precise cuts, ensuring that the tiles fit seamlessly in the designated areas.
- Sponge: A sponge is used to clean excess grout from the tiles during the grouting process. It helps smooth the grout lines and remove any residue for a polished appearance.
- Bucket: You’ll need a bucket for mixing the tile adhesive and grout. Make sure it’s clean and large enough to hold the required amount of material.
- Clean cloth: A clean cloth is handy for wiping away excess grout and ensuring a tidy finish. It helps remove any grout haze that may remain on the tiles after the installation is complete.
By ensuring that you have all the necessary tools and materials at your disposal, you’ll be well-prepared to tackle the challenging yet rewarding process of laying mosaic floor tiles.
Preparing the Surface
Before you begin laying mosaic floor tiles, it’s crucial to properly prepare the surface to ensure a smooth and long-lasting installation. Here are the essential steps involved in surface preparation:
- Cleaning the subfloor: Start by thoroughly cleaning the subfloor to remove any dirt, dust, or debris. Sweep or vacuum the area to ensure a clean and even surface. This step is essential for proper tile adhesion.
- Repairing any cracks or uneven areas: Inspect the subfloor for any cracks, holes, or uneven areas. If you come across any issues, repair them before proceeding with the tile installation. Fill any cracks or holes with a suitable filler and level any uneven spots using a self-leveling compound. Allow ample time for the repairs to dry and cure properly.
- Applying a primer (if necessary): In some cases, you may need to apply a primer to the subfloor before installing the mosaic tiles. This is particularly important if you’re tiling over a porous surface or working in a high-moisture area like a bathroom. The primer helps improve adhesion and prevents moisture-related issues. Follow the manufacturer’s instructions for proper application and drying time.
Properly preparing the subfloor ensures a strong and stable base for your mosaic floor tiles. It helps prevent future issues such as tile movement, cracking, or adhesive failure.
Once the surface is meticulously prepped, you can move on to the exciting part of planning the layout and getting ready to install your beautiful mosaic tiles.
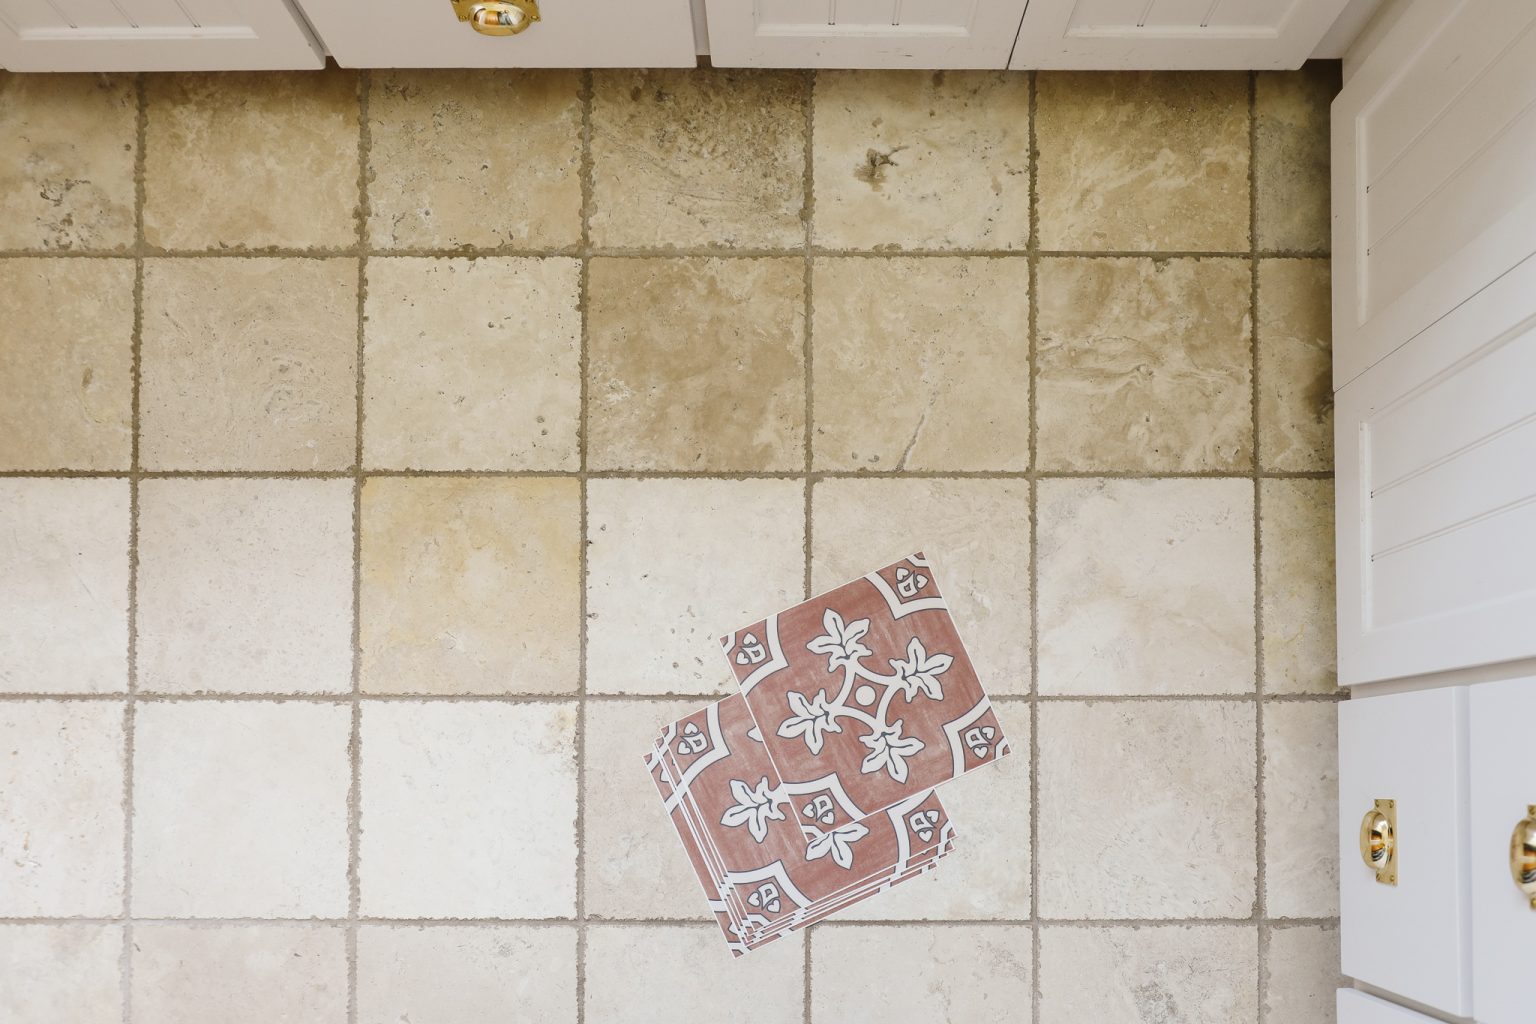
Planning the Layout
When it comes to laying mosaic floor tiles, careful planning is key to achieving a visually pleasing and well-proportioned design. Here are the steps involved in planning the layout of your mosaic tiles:
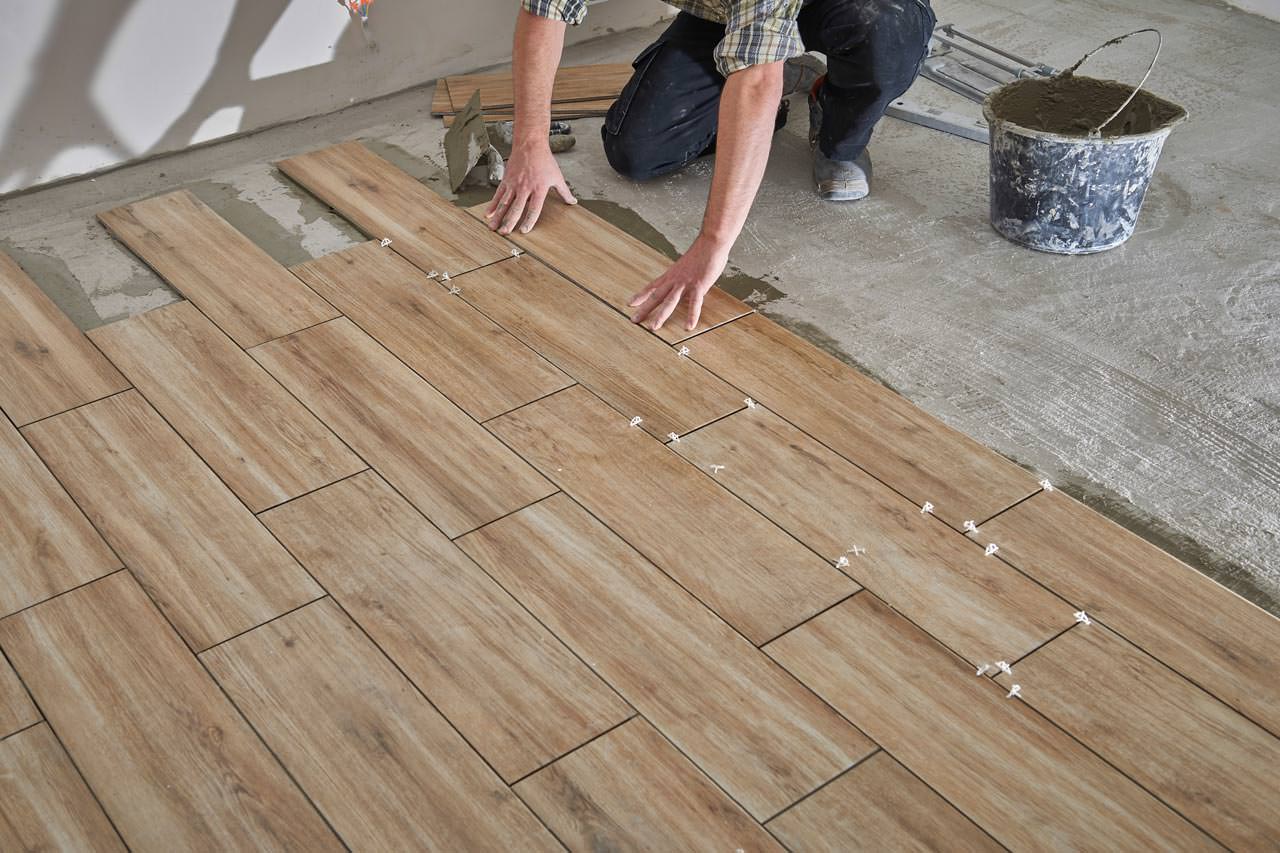
- Measuring the room and determining tile placement: Start by measuring the dimensions of the room to calculate the amount of mosaic tiles you’ll need. This ensures you have enough tiles to cover the entire area and helps you estimate any additional materials, such as adhesive and grout. Consider the overall pattern or design you want to achieve with your mosaic tiles. Determine the starting point of the installation and decide on the direction in which the tiles will be laid.
- Dry laying the mosaic tiles: Before applying adhesive, it’s essential to perform a dry lay of the mosaic tiles. Lay out a section of tiles in the planned pattern without any adhesive to get a visual preview of how the design will look on the floor. This step allows you to make necessary adjustments before permanently setting the tiles. Pay attention to the positioning, spacing, and alignment during this trial run.
- Making any necessary adjustments or cuts: While dry laying, you may need to make adjustments to the tile placement or cut certain tiles to fit around obstacles like cabinets or fixtures. Use a tile cutter or wet saw to make precise cuts as needed. Take your time to ensure a neat finish and proper fit. Remember to account for the necessary spacing between tiles when making cuts.
By taking the time to plan your layout and dry lay the mosaic tiles, you can visualize the final result and make any necessary adjustments before committing to adhesive. This step helps ensure a balanced, aesthetically pleasing layout and minimizes hassles during the actual installation process.
With your layout plan in mind and any necessary adjustments made, you’re now ready to move on to the next step: applying the adhesive and setting the mosaic tiles in place.
Read more: How To Lay Tile On Concrete Floor
Applying the Adhesive
Once you have planned the layout of your mosaic floor tiles, it’s time to apply the adhesive and start setting the tiles in place. Follow these steps for a successful adhesive application:
- Mixing the tile adhesive according to the instructions: Start by preparing the tile adhesive according to the manufacturer’s instructions. Different types of adhesive may have varying mixing ratios or curing times, so it’s important to follow the specific guidelines provided. Use a clean bucket and mix the adhesive thoroughly to ensure a consistent texture.
- Spreading the adhesive using a notched trowel: With the adhesive mixed, use a notched trowel to spread it evenly on the subfloor. Hold the trowel at a 45-degree angle and apply pressure to create ridges in the adhesive. This is important as it helps promote better adhesion between the tiles and the subfloor.
- Working in small sections to prevent the adhesive from drying too quickly: It’s essential to work in manageable sections to prevent the adhesive from drying before you have a chance to set the tiles. Start with a small area and gradually move across the room. This allows you to maintain control over the adhesive and ensure that it remains tacky when placing the mosaic tiles.
While applying the adhesive, it’s important to keep a few factors in mind. Firstly, apply only as much adhesive as you can comfortably cover with tiles within a reasonable amount of time. If the adhesive begins to dry before you can set the tiles, it may not bond properly. Secondly, avoid fully covering the areas where you plan to start the installation. This gives you some flexibility in adjusting tile placement as you work.
By following these steps and being mindful of the adhesive application process, you can ensure a strong bond between the tiles and the subfloor. Once the adhesive is applied, you can move on to the exciting part of setting the mosaic tiles in place.
When laying mosaic floor tile, make sure to use a high-quality adhesive and grout specifically designed for small tiles. This will ensure a strong and durable bond, and prevent the tiles from shifting or cracking over time.
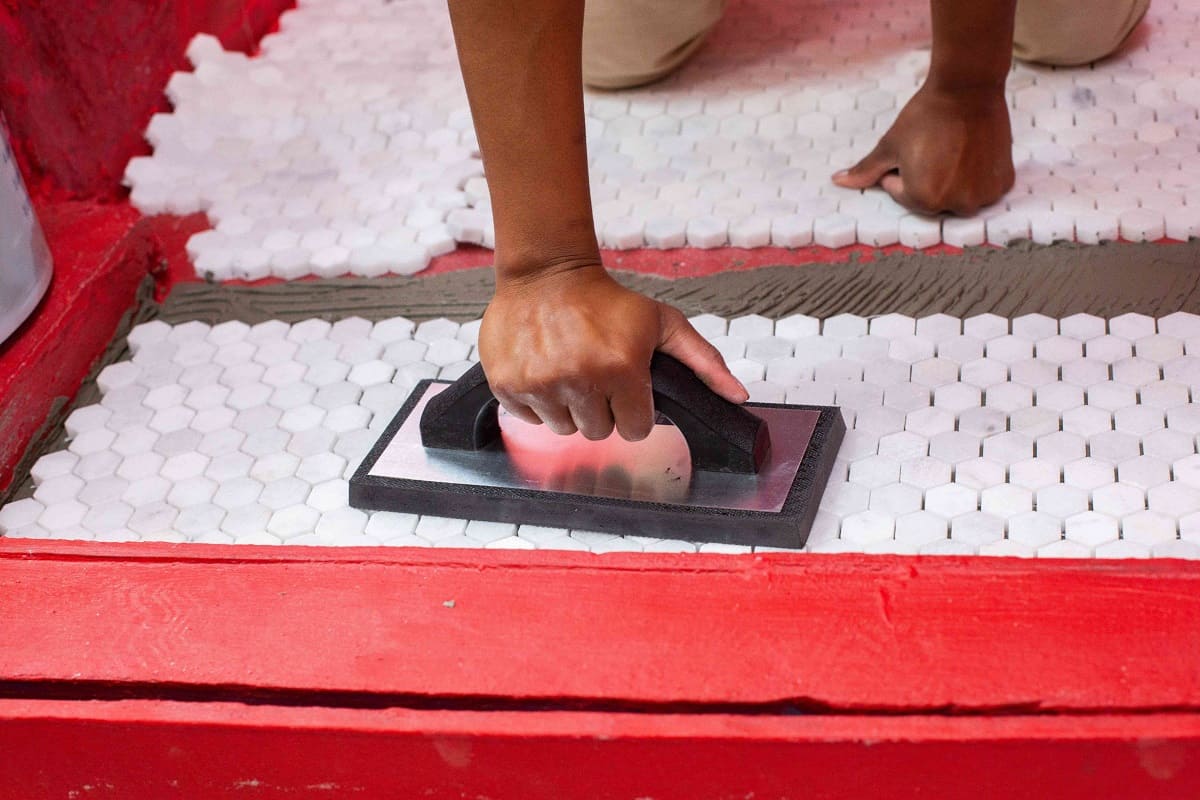
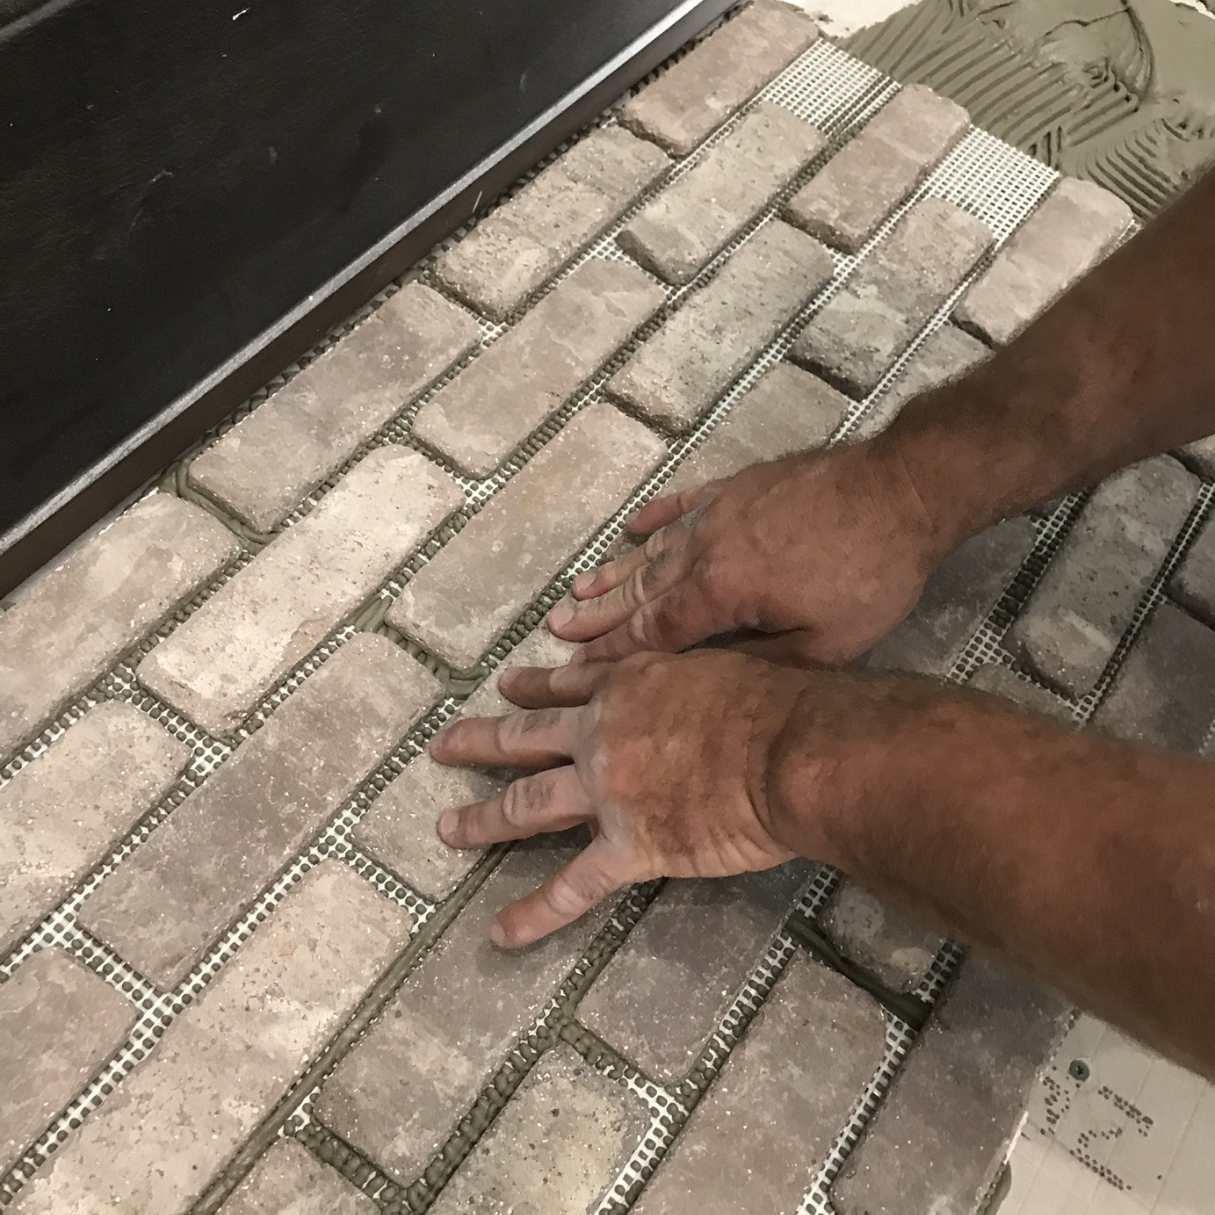
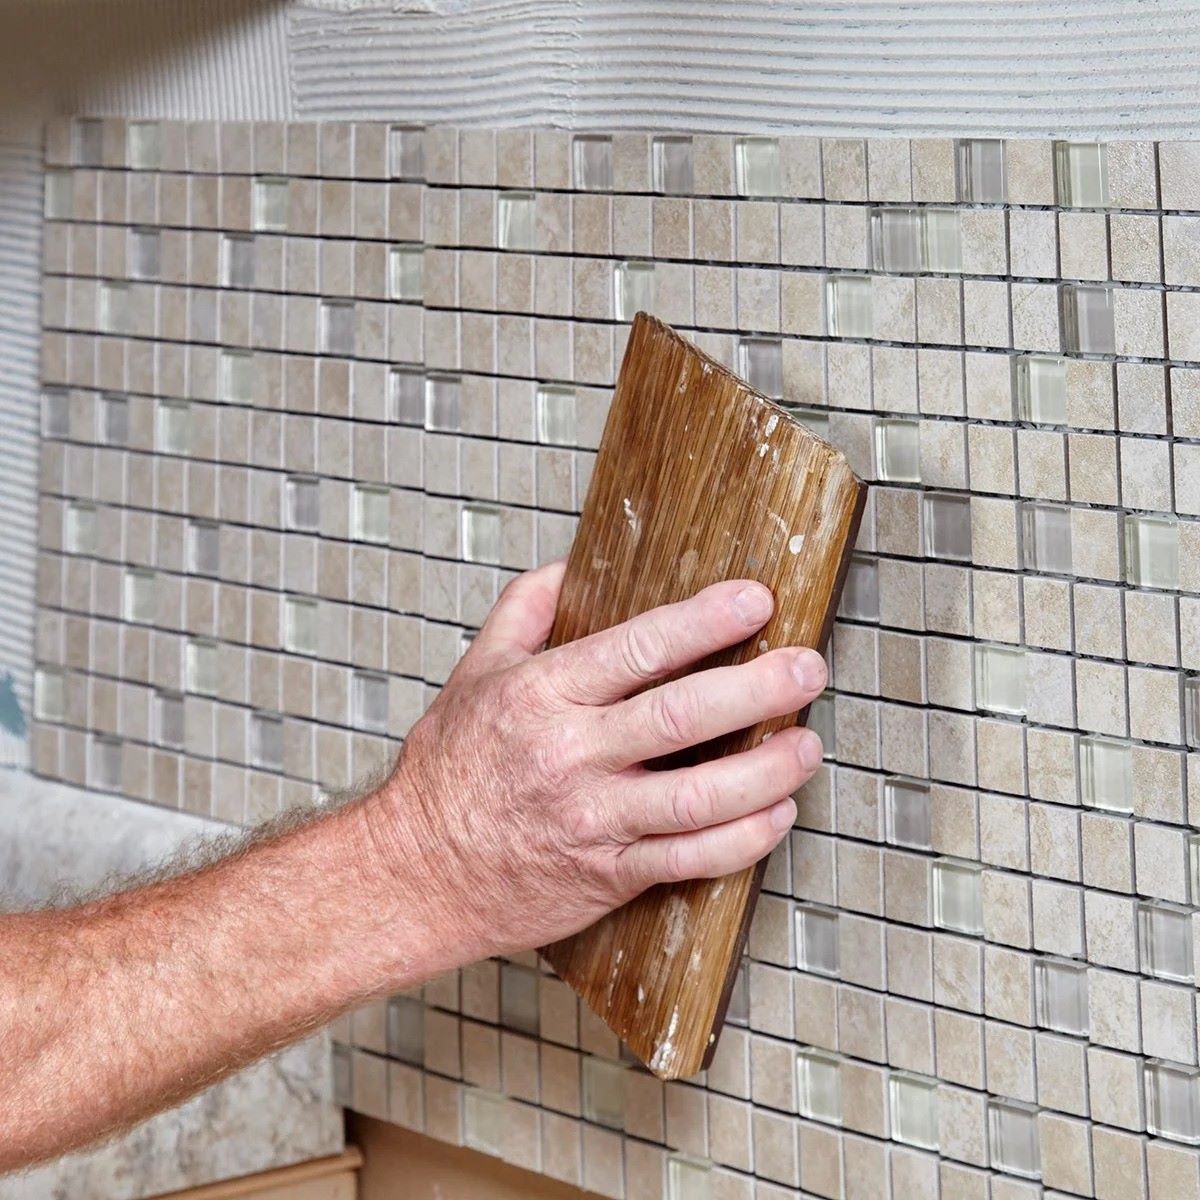
Setting the Mosaic Tiles
With the adhesive applied, it’s time to set the mosaic tiles in place. Follow these steps to ensure a neat and precise installation:
- Pressing the tiles into the adhesive, using tile spacers for even spacing: Take a mosaic tile and firmly press it into the adhesive, starting from your predetermined starting point. Use a slight twisting motion to ensure a secure bond. Insert tile spacers between the tiles to maintain consistent spacing and alignment.
- Checking the pattern and alignment as you go: As you set each tile, periodically step back and visually check the pattern and alignment. Ensure that the tiles are following your intended layout and that they are level and properly aligned with one another. Adjust the tiles as needed before the adhesive dries.
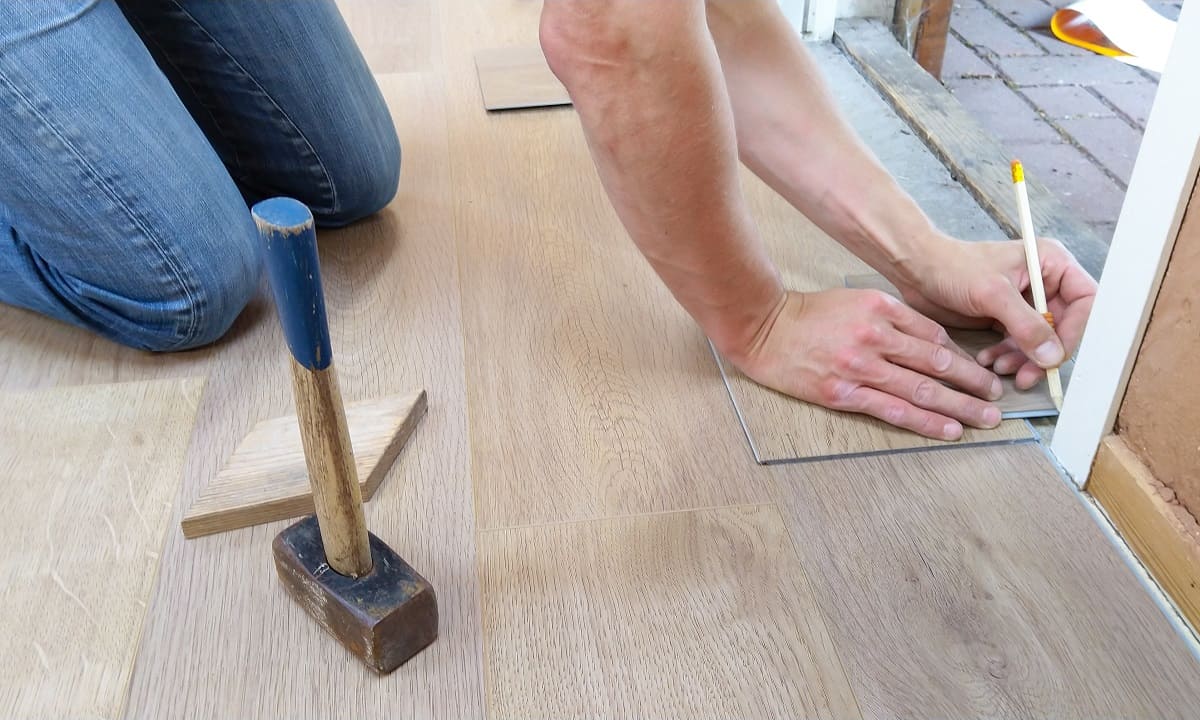
- Making any adjustments or cuts as needed: During the installation process, you may encounter situations where adjustments or tile cuts are required. Use a tile cutter or wet saw to make precise cuts and ensure that the tiles fit around edges, corners, or obstacles. Take your time and measure twice before making any cuts to avoid mistakes.
Throughout the installation, it’s important to work methodically and steadily, setting one tile at a time and checking the pattern and alignment as you go. This attention to detail ensures that the mosaic tiles are properly installed and create a visually pleasing composition.
When it comes to making adjustments or cuts, take the time to double-check measurements and ensure accuracy. A well-executed cut can make all the difference in achieving a seamless installation.
By following these steps and maintaining careful attention to detail, you’ll be well on your way to completing the installation of your stunning mosaic floor tiles.
Allowing the Tiles to Set
After setting the mosaic tiles in place, it’s crucial to give them time to properly set and bond with the adhesive. Here are the next steps to ensure a strong and durable installation:
- Letting the adhesive dry for the recommended time: Check the manufacturer’s instructions to determine the recommended drying time for the adhesive you used. This can vary depending on factors such as humidity and temperature. It’s important to resist the temptation to walk on or disturb the tiles until the adhesive has fully dried. This will ensure that they are securely bonded to the subfloor.
- Removing any tile spacers: Once the adhesive has dried, it’s time to remove the tile spacers. Gently lift them out using your fingers or a pair of pliers. Be careful not to disturb or dislodge any of the tiles during this process. Removing the spacers allows for the next step in the installation process—grouting.
It’s important to note that the drying time can vary depending on the type of adhesive used and the specific conditions of your environment. Be patient and give the adhesive ample time to set before moving on to the next steps.
By allowing the tiles to set properly, you ensure that they are firmly attached to the subfloor and won’t shift or move during the grouting process.
Once the tiles are securely set, it’s time to move on to the next phase of the installation: grouting those beautiful mosaic tiles.
Grouting the Tiles
With the mosaic tiles securely set, it’s time to fill the gaps between them with grout. Grouting not only enhances the overall appearance of the floor but also helps stabilize the tiles. Follow these steps for a successful grouting process:
- Mixing the grout following the instructions: Begin by preparing the grout mixture according to the manufacturer’s instructions. Use a clean bucket and mix the grout until you achieve a smooth and consistent texture. It’s important to follow the recommended water-to-grout ratio to ensure the correct consistency.
- Using a grout float to push the grout into the tile joints: Take a generous amount of grout onto the grout float and apply it diagonally over the mosaic tiles, pressing it into the joints. Ensure that the grout completely fills the gaps between the tiles. Hold the float at a 45-degree angle and work in a sweeping motion to push the grout into the joints while smoothing the surface.
- Wiping away excess grout with a sponge: Once you have applied the grout, allow it to slightly set for a few minutes. Then, use a damp sponge to carefully wipe away any excess grout from the tile surfaces. Be gentle to avoid dislodging the grout from the joints. Rinse the sponge frequently to keep it clean and prevent smearing excess grout on the tiles. Repeat this process until the tiles are clean and the grout lines are smooth.
During the grouting process, it’s essential to work in small sections to prevent the grout from drying too quickly. This ensures that you have enough time to clean and smooth the grout lines.
After wiping away the excess grout, allow the grout to cure according to the manufacturer’s instructions. This curing period allows the grout to harden and achieve its full strength. Be mindful of not walking on the freshly grouted area or subjecting it to moisture during this time.
With the grout applied and excess cleaned, the mosaic tiles will start to reveal their true beauty. The next steps will involve cleaning and sealing the tiles to complete the installation process.
Read more: How To Lay A Ceramic Tile Floor
Cleaning and Sealing the Tiles
After grouting the mosaic tiles, it’s important to clean them thoroughly to remove any grout residue and ensure a pristine finish. Additionally, applying a sealer will protect the tiles and enhance their longevity. Here are the final steps to complete the installation:
- Cleaning the tiles to remove any grout residue: Once the grout has cured for the recommended time specified by the manufacturer, use a clean, damp sponge to carefully wipe away any remaining grout haze or residue on the tile surfaces. Rinse the sponge frequently and keep wiping until the tiles are clean and polished. Avoid using excessive water or applying too much pressure, as it may dislodge the grout from the joints.
- Allowing the grout to cure for the recommended time: Once the grout residue has been cleaned, allow the grout to cure fully as instructed by the manufacturer. This curing period is necessary to ensure that the grout achieves optimal strength and stability. Avoid walking on the tiles or subjecting them to moisture until the grout has fully cured.
- Applying a sealer to protect the mosaic tiles: After the grout has cured, it’s advisable to apply a sealer to the mosaic tiles to protect them from stains, moisture, and everyday wear. Choose a sealer that is specifically formulated for your tile material. Follow the manufacturer’s instructions for applying the sealer, ensuring complete coverage of the tiles and grout lines. Wipe away any excess sealer to avoid a hazy or sticky residue.
Properly cleaning the tiles and applying a sealer adds the finishing touch to your mosaic floor installation. It not only enhances the visual appeal but also extends the lifespan of the tiles by providing an extra layer of protection.
Once the sealer has dried, follow any additional care and maintenance instructions provided by the sealer manufacturer to ensure the longevity and beauty of your mosaic floor tiles. Regular cleaning and maintenance will help preserve their appearance for years to come.
By diligently following these steps, you can enjoy the beauty and durability of your newly installed mosaic floor tiles for a long time.
Conclusion
Congratulations on successfully completing the installation of your mosaic floor tiles! By following the steps outlined in this comprehensive guide, you have transformed your space with a stunning and unique design element. The process may have required attention to detail and patience, but the end result is well worth it.
From preparing the surface to planning the layout, from applying the adhesive to setting the tiles, and from grouting to cleaning and sealing, each step plays a crucial role in achieving a professional and visually pleasing installation. By utilizing the right tools, materials, and techniques, you have created a beautiful mosaic floor that enhances the overall aesthetic of your space.
Keep in mind that maintaining your mosaic floor is essential to preserve its beauty and longevity. Regular cleaning and proper maintenance will ensure that the tiles continue to shine and withstand the test of time. Be mindful of using appropriate cleaning products and following the manufacturer’s recommendations for your specific tile material.
Whether you have transformed your kitchen, bathroom, or any other room, the addition of mosaic tiles has given it a touch of elegance and sophistication. The intricate patterns and vibrant colors have created a focal point that will surely impress anyone who enters your space.
Remember, the key to a successful mosaic floor tile installation is careful planning, precise execution, and attention to detail throughout the process. Enjoy the beauty and functionality of your mosaic tiles, and let them serve as a testament to your creativity and craftsmanship.
Now, sit back, relax, and admire the stunning mosaic floor you have accomplished. Be proud of your achievement, and revel in the joy of a space that truly reflects your personal style.
Frequently Asked Questions about How To Lay Mosaic Floor Tile
Was this page helpful?
At Storables.com, we guarantee accurate and reliable information. Our content, validated by Expert Board Contributors, is crafted following stringent Editorial Policies. We're committed to providing you with well-researched, expert-backed insights for all your informational needs.


0 thoughts on “How To Lay Mosaic Floor Tile”