Articles
How To Make A Fleece Blanket
Modified: January 19, 2024
Learn how to make a cozy and stylish fleece blanket with our step-by-step articles. Perfect for beginners and seasoned crafters alike.
(Many of the links in this article redirect to a specific reviewed product. Your purchase of these products through affiliate links helps to generate commission for Storables.com, at no extra cost. Learn more)
Introduction
Introduction
Nothing beats the feeling of snuggling up in a cozy fleece blanket, especially when it’s made by your own hands. Making a fleece blanket is a fun and rewarding DIY project that anyone can do, whether you’re a seasoned crafter or a complete novice. Not only is it a great way to showcase your creativity, but it also makes for a thoughtful and personalized gift.
In this article, we will guide you through the step-by-step process of making a fleece blanket. We will cover everything from choosing the right fabric to tying the fringe, ensuring that you have all the information you need to create a beautiful and warm blanket.
So, grab your scissors and let’s get started on this delightful craft adventure!
Materials Needed
Key Takeaways:
- Create a personalized and cozy fleece blanket by following simple steps, from choosing the perfect fabric to tying the fringe, and add finishing touches for a heartwarming DIY project.
- Enjoy the satisfaction of crafting a beautiful fleece blanket from scratch, whether for yourself or as a thoughtful gift, and embrace the warmth and comfort it brings to cozy moments.
Read more: What Is A Fleece Blanket
Materials Needed
Before you begin making your fleece blanket, gather the following materials:
- 1. Fleece fabric: Choose a fabric with a soft and plush texture. It’s best to get at least 2 yards of fabric for an adult-sized blanket. You can opt for a single solid color or mix and match different patterns.
- 2. Scissors: A sharp pair of fabric scissors is essential for cutting the fleece fabric with precision.
- 3. Measuring tape: Use a measuring tape to determine the desired dimensions of your blanket.
- 4. Ruler or straight edge: This will help you create straight and even cuts.
- 5. Masking tape or fabric markers: These will come in handy for marking measurement lines on the fabric.
- 6. Pins: You can use pins to secure the fabric layers together before tying the fringe.
That’s it! With these basic materials, you’re all set to start making your fleece blanket. Now, let’s move on to the next step: choosing the perfect fleece fabric.
Step 1: Choosing the Fleece Fabric
Step 1: Choosing the Fleece Fabric
The first step in making a fleece blanket is selecting the perfect fabric. When choosing the fleece fabric, consider the following factors:
- 1. Texture: Look for a fabric that is soft and cozy to the touch. Fleece comes in a variety of textures, from fluffy to smooth, so choose one that feels comfortable against the skin.
- 2. Thickness: Consider the level of warmth you want in your blanket. Thicker fleece will provide more insulation, making it suitable for colder climates, while thinner fleece is great for lighter blankets or warmer seasons.
- 3. Design: Fleece fabric comes in a wide range of patterns and colors. Choose a design that reflects your personal style or matches the décor of the intended recipient’s room.
When purchasing fleece fabric, make sure to buy enough to create the desired size of the blanket. If you’re unsure of the exact measurements, it’s better to have extra fabric than to end up with too little.
Once you’ve selected your fleece fabric, it’s time to move on to the next step: measuring and cutting the fabric.
Step 2: Measuring and Cutting the Fabric
Step 2: Measuring and Cutting the Fabric
Now that you have your fleece fabric, it’s time to measure and cut it to the desired size for your blanket. Follow these steps:
- 1. Lay out the fleece fabric on a clean and flat surface. Smooth out any wrinkles or creases.
- 2. Use a measuring tape to determine the dimensions of your blanket. If you’re making a standard-sized adult blanket, a size of 60 inches by 72 inches is a good starting point. Adjust the measurements based on your preferences.
- 3. Mark the measurements on the fabric using masking tape or fabric markers. Make sure to leave a small border around the edges for the fringe.
- 4. Align a ruler or straight edge along the marked lines. This will ensure that your cuts are straight and even.
- 5. Using sharp fabric scissors, carefully cut along the marked lines. Take your time to ensure clean and precise cuts. If the fabric is too thick, you may need to make multiple cuts.
Once you have cut the fabric to the desired dimensions, you’re ready to move on to the next step: preparing the edges of the blanket.
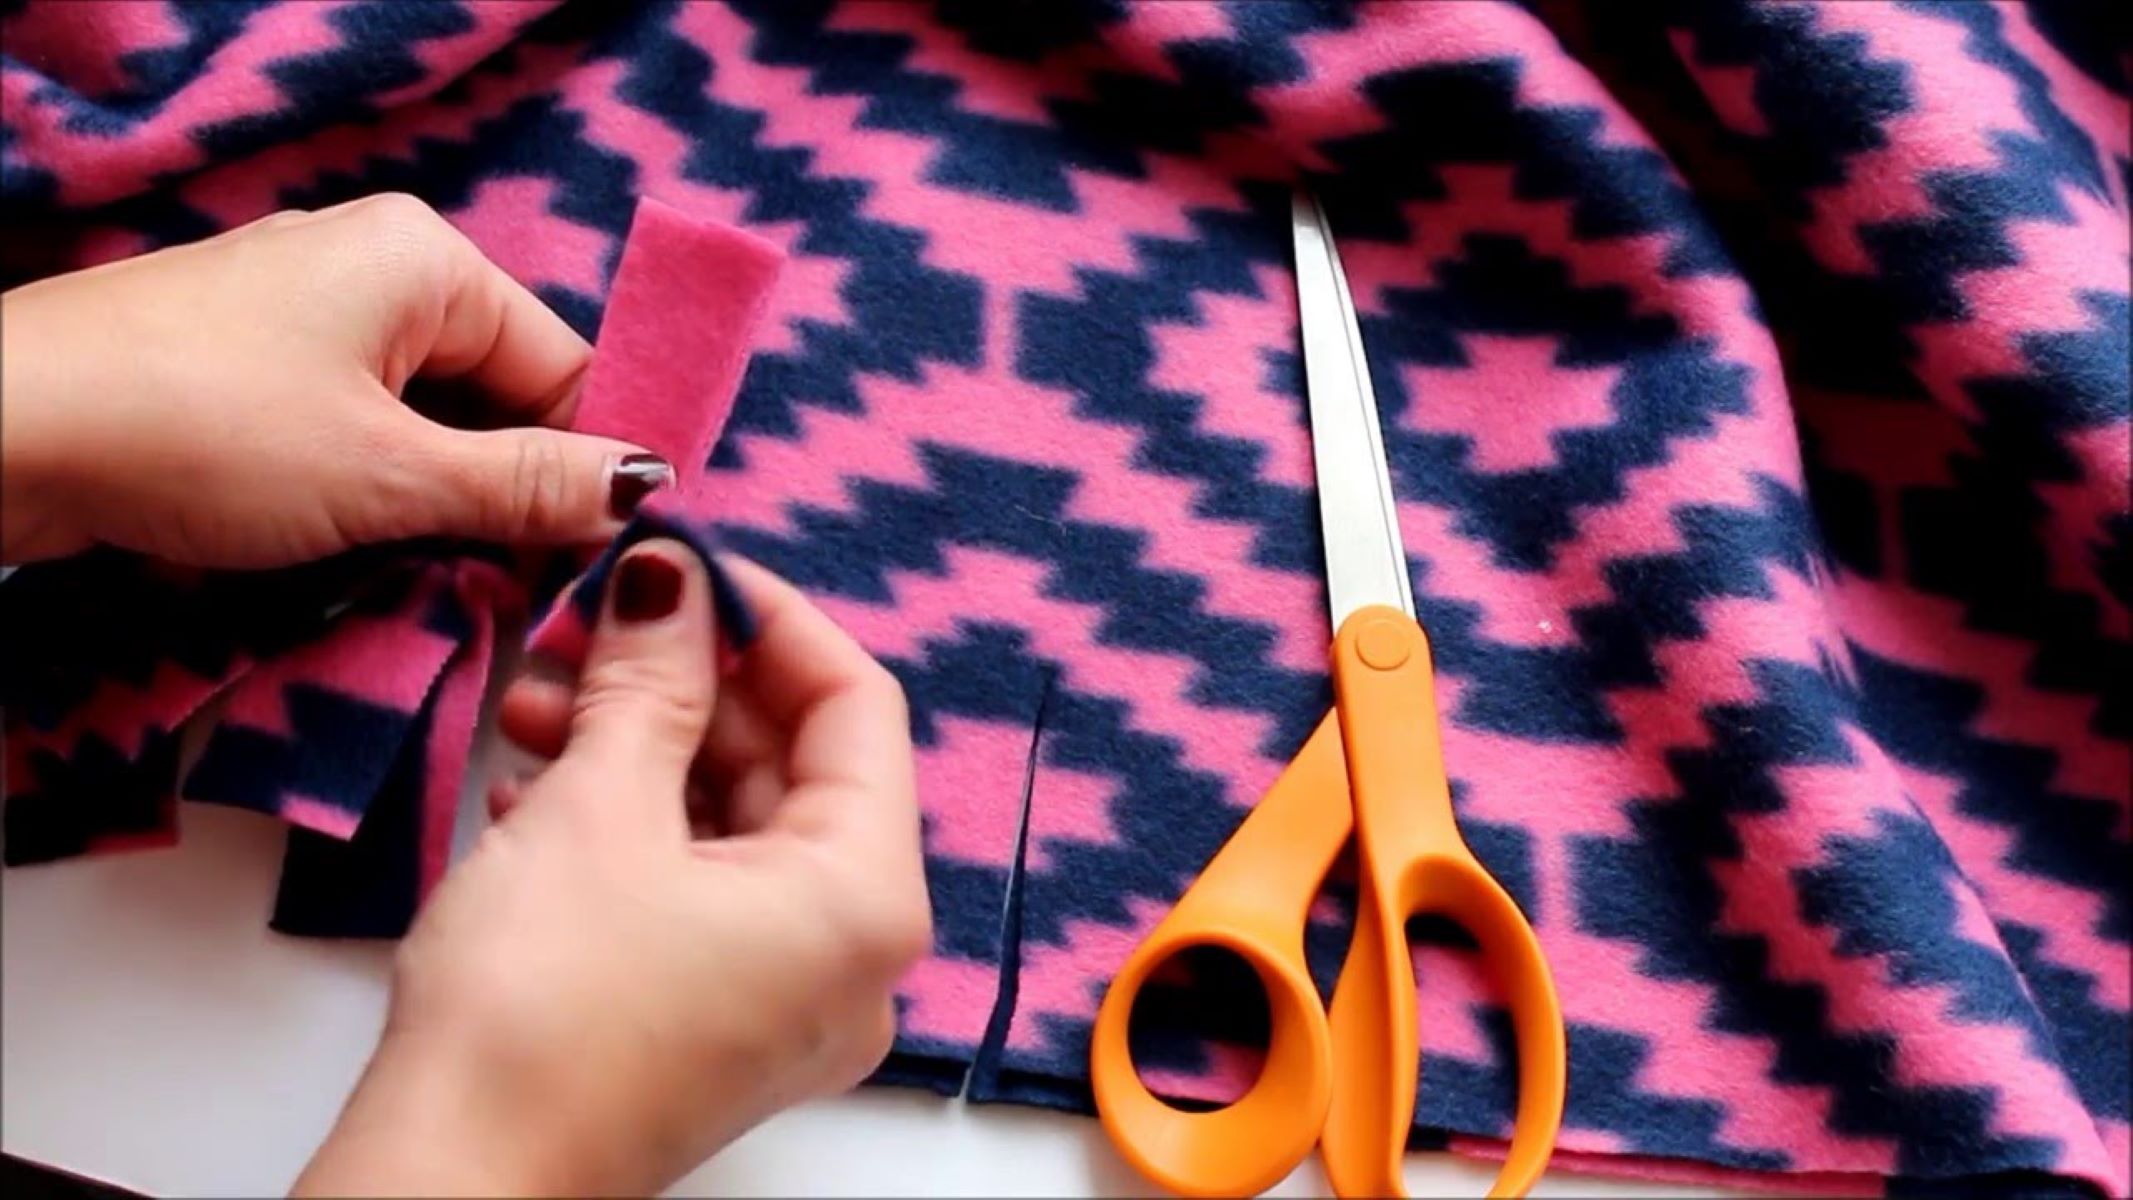
Step 3: Preparing the Edges
When making a fleece blanket, be sure to use sharp fabric scissors to ensure clean, straight cuts. This will make the assembly process much easier and give your blanket a professional finish.
Step 3: Preparing the Edges
After cutting the fabric to the desired size, it’s important to prepare the edges of the blanket to prevent fraying. Follow these steps:
- 1. Inspect the edges of the fabric. If you notice any frayed threads, trim them with your fabric scissors to create clean edges.
- 2. Decide on the type of edge finish you want for your blanket. There are several options to choose from:
- – Simple folded edge: Fold the edges of the fabric over by about half an inch and press them down with an iron. This will create a neat and finished look.
- – Rolled edge: Roll the edges of the fabric inward towards the wrong side and sew them in place. This method provides a more polished and durable edge.
- – Decorative edge: If you want to add a decorative touch to your blanket, you can create a scalloped or zigzag edge using pinking shears or a decorative stitch on your sewing machine.
- 3. Once you’ve chosen your preferred edge finish, carefully execute the chosen method along all four edges of the fabric. Make sure to maintain uniformity and neatness throughout.
Preparing the edges of the blanket not only adds a professional touch but also helps the blanket last longer. Once you’ve finished preparing the edges, it’s time to move on to the next step: tying the fringe.
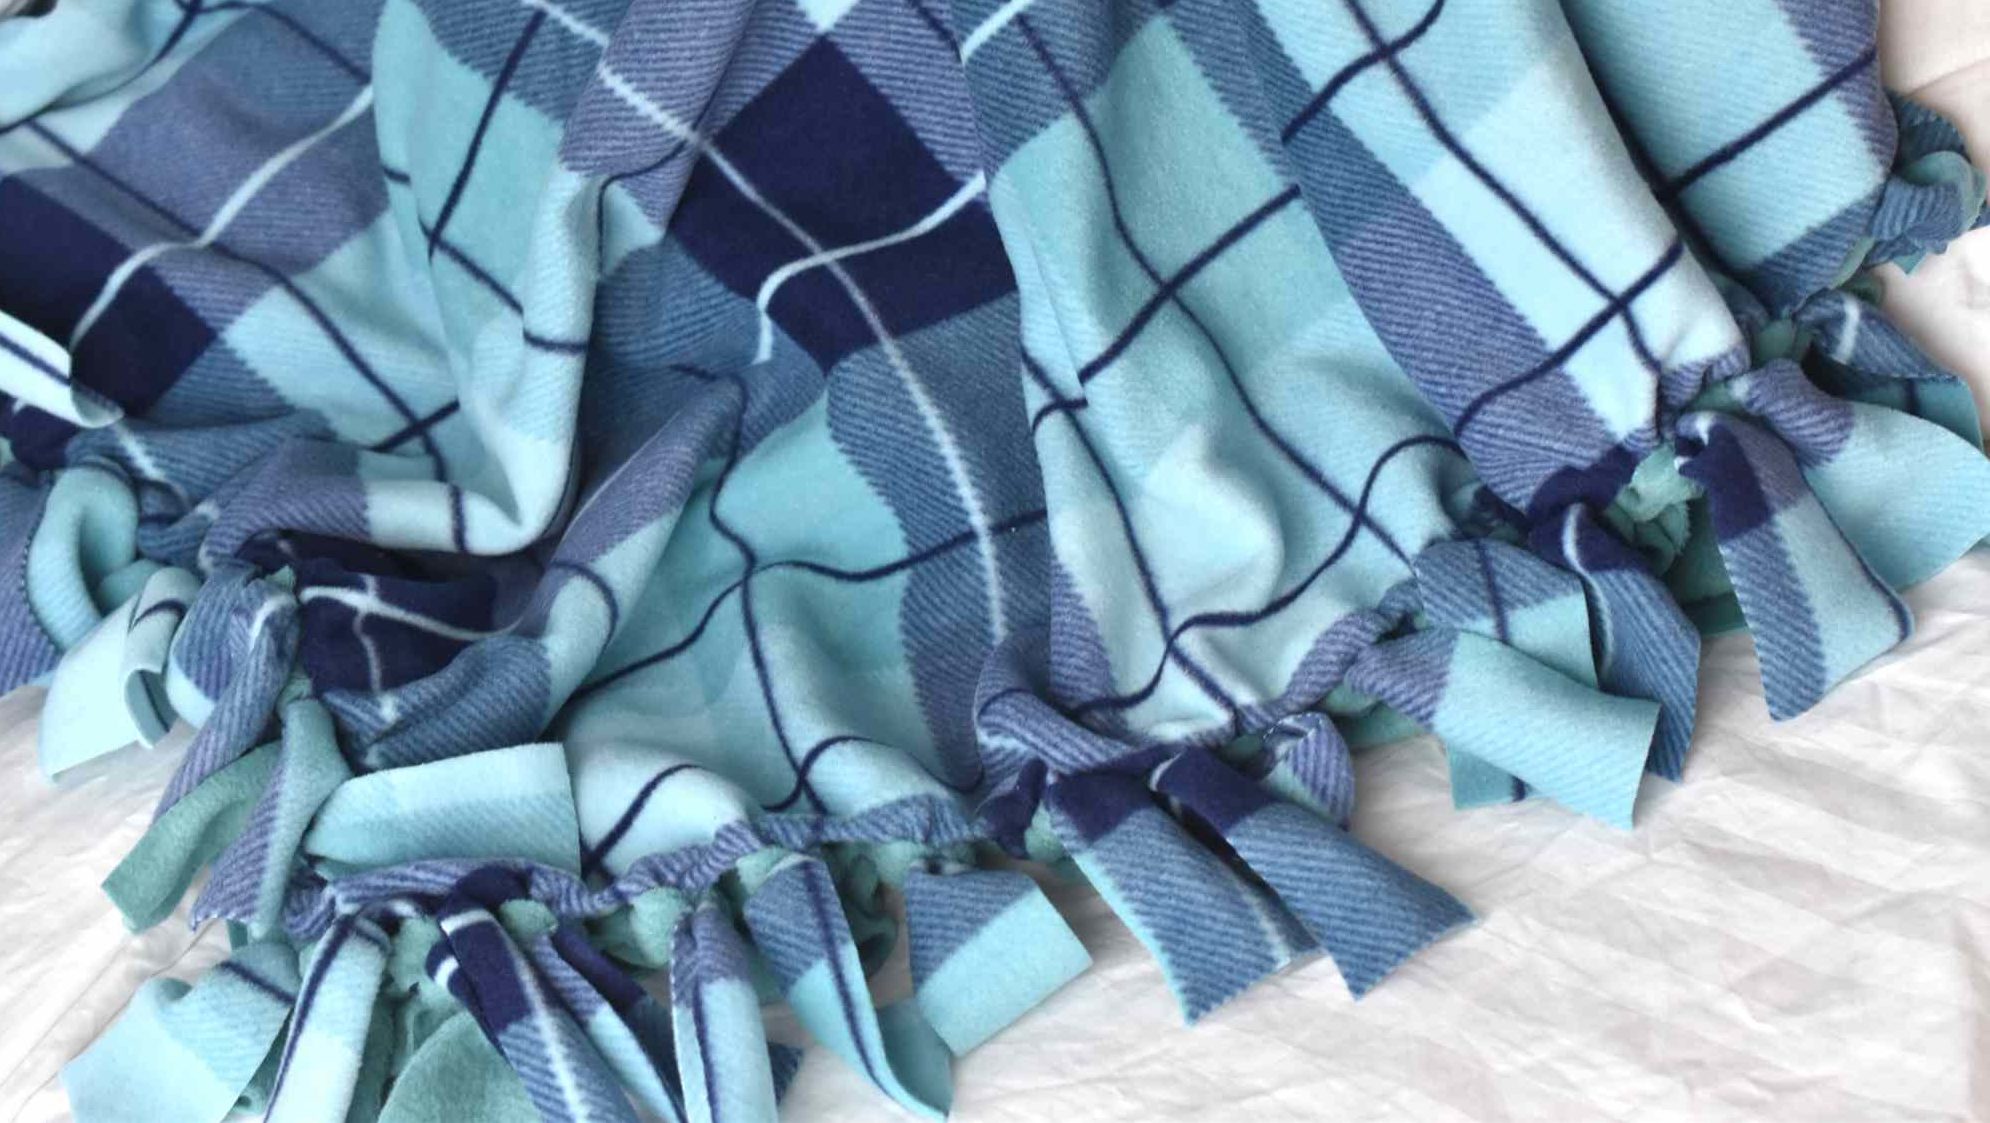
Step 4: Tying the Fringe
Read more: How To Hem A Fleece Blanket
Step 4: Tying the Fringe
Tying the fringe is the fun and creative part of making a fleece blanket. Follow these steps to add the finishing touch:
- 1. Start by folding the fabric in half lengthwise, aligning the edges.
- 2. Along the folded edge, make small marks with a fabric marker or pins at regular intervals. These marks will serve as a guide for tying the fringe.
- 3. Begin at one end of the folded edge and cut a small slit about 1-2 inches deep through both layers of fabric at each marked point. Make sure to cut through both layers at the same time.
- 4. Once you’ve cut the slits along the entire folded edge, unfold the fabric.
- 5. Take one strip of fringe from the front layer and one strip from the back layer. Tie them together with a double knot, using a firm but not overly tight grip.
- 6. Continue tying the fringe together along the entire length of the blanket, alternating between the front and back layers.
- 7. As you tie the fringe, gently tug on each knot to ensure they are secure.
- 8. Once you’ve tied all the fringe, go back and trim the excess length to create an even and tidy appearance.
Tying the fringe not only adds a decorative element to the blanket but also helps secure the layers together. When finished, give the blanket a gentle shake to loosen any loose fibers or threads.
Now that you’ve completed tying the fringe, it’s time for the final step: adding the finishing touches.
Step 5: Finishing Touches
Step 5: Finishing Touches
You’re almost done! The final step involves adding some finishing touches to complete your fleece blanket. Follow these steps to give your blanket a polished and professional look:
- 1. Inspect the blanket for any loose threads or imperfections. Trim any stray threads or uneven edges with fabric scissors.
- 2. If you want to add an extra touch of style, consider adding decorative elements such as fabric appliques, embroidery, or fabric paint. These embellishments can be placed strategically on the blanket to enhance its overall design.
- 3. Give your blanket a good shake to remove any loose fibers or lint.
- 4. Finally, wash and dry your fleece blanket according to the fabric’s care instructions. This will ensure that it is clean, fresh, and ready to be enjoyed.
Once you have completed these finishing touches, your fleece blanket is ready to be used or gifted. Curl up with it on a chilly evening, or present it to a loved one as a heartwarming and handmade gift.
Congratulations on creating a beautiful fleece blanket from scratch! Enjoy the warmth and comfort it provides for many cozy moments to come.
As a reminder, you can always refer back to this article whenever you want to make another fleece blanket or share your newfound knowledge with others.
Now go ahead and embrace the joy and satisfaction of creating something wonderful with your own hands!
Conclusion
Conclusion
Making a fleece blanket is a delightful and rewarding DIY project that allows you to showcase your creativity while providing warmth and comfort. With just a few simple steps, you can create a beautiful and personalized blanket that will be cherished for years to come.
In this article, we covered the essential steps of making a fleece blanket, from choosing the right fabric to tying the fringe and adding finishing touches. Remember to select a fleece fabric that is soft and cozy, and consider the thickness and design that best suits your preferences.
Measuring and cutting the fabric accurately is crucial to ensure the blanket’s desired size. Preparing the edges prevents fraying and adds a professional touch to the final product.
Tying the fringe is not only a fun and creative step but also ensures that the layers of the blanket are securely held together. Take your time to tie each knot and trim the excess to create a neat and uniform appearance.
Finally, adding the finishing touches, such as trimming loose threads and considering decorative elements, enhances the overall look of your blanket and gives it a personalized touch.
Now that you have the knowledge and confidence to make your own fleece blanket, grab your materials and embark on this lovely craft adventure. Whether you’re making a blanket for yourself or as a heartfelt gift, enjoy the process and the satisfaction of creating something truly special.
So, let your creativity shine and embrace the cozy comfort of a homemade fleece blanket!
Frequently Asked Questions about How To Make A Fleece Blanket
Was this page helpful?
At Storables.com, we guarantee accurate and reliable information. Our content, validated by Expert Board Contributors, is crafted following stringent Editorial Policies. We're committed to providing you with well-researched, expert-backed insights for all your informational needs.