
Articles
How To Make A Whole Cloth Quilt
Modified: February 24, 2024
Learn how to make a stunning whole cloth quilt with our comprehensive articles. Get step-by-step instructions and expert tips to create your own masterpiece.
(Many of the links in this article redirect to a specific reviewed product. Your purchase of these products through affiliate links helps to generate commission for Storables.com, at no extra cost. Learn more)
Introduction
Welcome to the wonderful world of quilting! Making a whole cloth quilt is a beautiful and fulfilling endeavor that allows you to unleash your creativity and create a one-of-a-kind masterpiece. Whether you’re a seasoned quilter or just starting out, this article will guide you through the process of making a whole cloth quilt step by step.
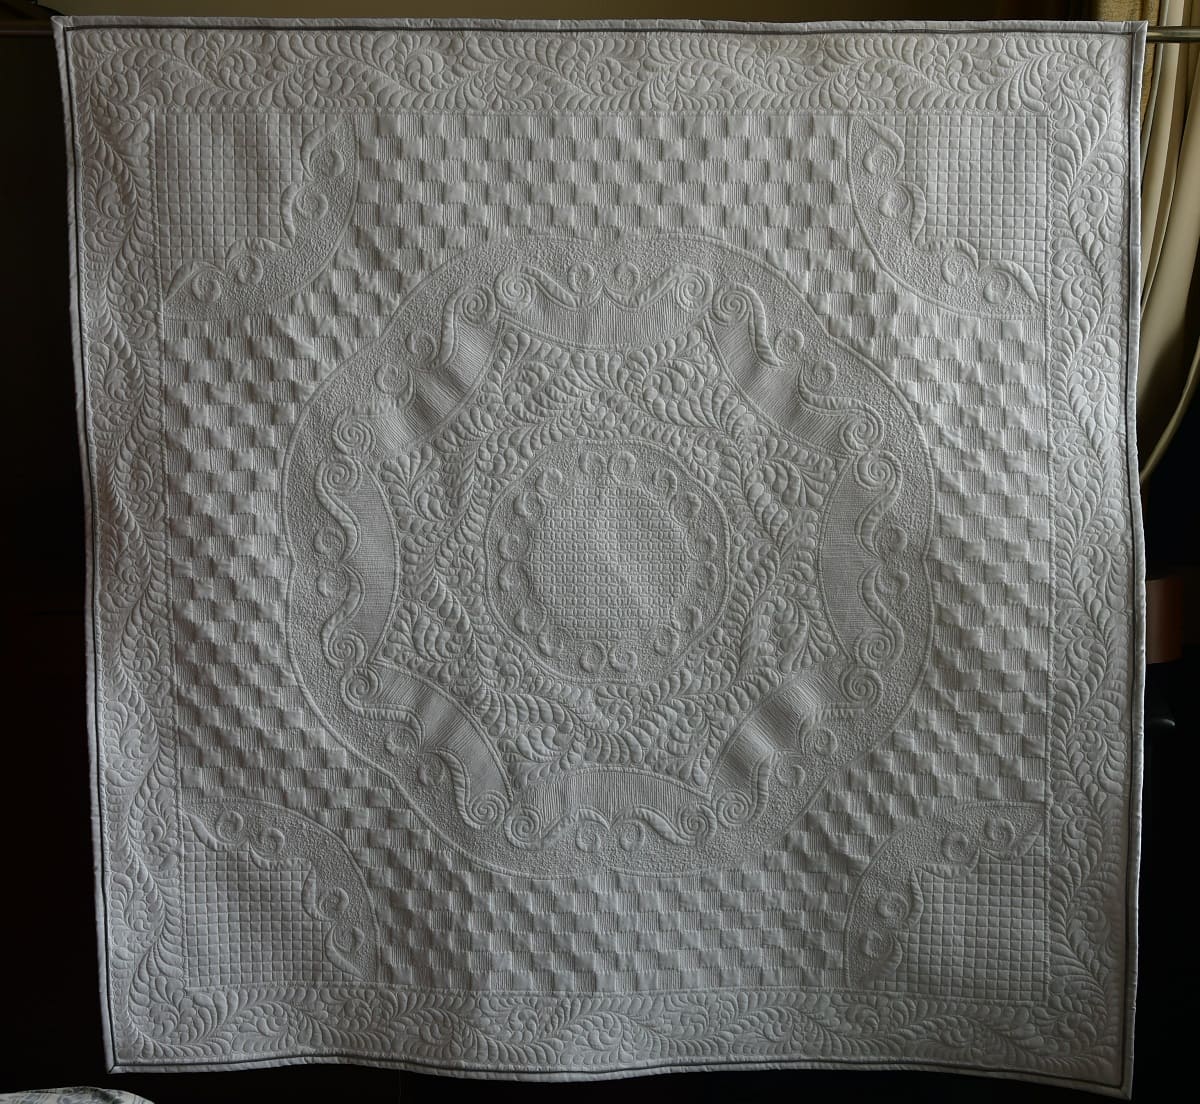
A whole cloth quilt is a type of quilt made from a single piece of fabric, rather than piecing together multiple fabric patches. This simple yet elegant design allows the fabric itself to take center stage, showcasing its color, pattern, and texture. By utilizing different quilting techniques and decorative stitches, you can transform a plain piece of fabric into a stunning work of art.
Before we dive into the process of making a whole cloth quilt, let’s gather the necessary supplies to ensure a successful quilting journey.
Key Takeaways:
- Unleash Your Creativity
Making a whole cloth quilt is a fulfilling journey that allows you to showcase the beauty of a single fabric piece. From gathering supplies to adding decorative stitches, embrace the opportunity to express your unique style and creativity. - Craftsmanship and Patience
Quilting is a timeless art form that requires patience and attention to detail. Whether you’re a seasoned quilter or just starting out, take your time at each stage, practice new techniques, and enjoy the process of creating a one-of-a-kind whole cloth quilt.
Read more: How To Make A Quilt
Gathering Supplies
Before embarking on your whole cloth quilt-making adventure, it’s important to gather all the necessary supplies. Here’s a list of items you’ll need:
- Fabric: Choose a high-quality fabric that suits your design and personal preferences. Consider factors such as color, pattern, and texture. Cotton is a popular choice for quilting due to its durability and ease of handling.
- Batting: This is the layer of material that provides insulation and loftiness to your quilt. Select a batting that complements the weight and drape of your fabric.
- Thread: Opt for a thread that blends well with your fabric and provides sufficient strength for quilting. Polyester or cotton threads are commonly used.
- Quilting Needles: Use needles specifically designed for quilting. They have a sharp point and a larger eye to accommodate the thickness of the thread.
- Scissors or Rotary Cutter: Depending on your preference, use either fabric scissors or a rotary cutter to cut your fabric and batting.
- Quilting Ruler: A transparent ruler with measurement markings helps ensure accurate cutting and piecing.
- Pins or Quilting Clips: Use pins or quilting clips to hold your layers of fabric and batting together during the quilting process.
- Quilting Marking Tools: These tools are used to transfer your quilting design onto the fabric. Options include washable fabric markers, quilting stencils, or even tailor’s chalk.
- Thimble: Protect your fingers while hand quilting with a thimble that fits comfortably on your finger.
- Quilting Frame or Hoop: If you plan to hand quilt, you may find using a quilting frame or hoop helpful for holding your fabric taut and preventing puckering.
Having all of these supplies ready will streamline the quilt-making process and ensure a smooth and enjoyable experience. Once you have your supplies in order, it’s time to choose the perfect fabric and prepare it for quilting.
Choosing and Preparing Fabric
The fabric you choose for your whole cloth quilt is crucial as it sets the foundation for your design. Here are some tips for selecting and preparing your fabric:
1. Fabric Selection: When choosing your fabric, consider the overall look and feel you want to achieve. Think about the color palette, pattern, and texture that resonates with your design aesthetic. Remember that simplicity often works best with whole cloth quilts, allowing the fabric to shine.
2. Fabric Quantity: Determine the amount of fabric you’ll need based on the desired size of your quilt and any additional borders or bindings you plan to add. It’s always a good idea to purchase extra fabric to account for shrinkage or mistakes during the quilt-making process.
3. Pre-Washing: Before starting your project, pre-wash your fabric to remove any residue and prevent shrinkage. Follow the manufacturer’s instructions for washing and drying. If you’re using multiple fabrics, pre-wash them together to ensure they shrink uniformly.
4. Ironing: Once your fabric is washed and dried, press it with an iron to remove any wrinkles or creases. Be sure to use an appropriate heat setting for your fabric type.
5. Straightening the Grain: To ensure your fabric lies flat and square, align the selvages (the finished edges) and straighten the grain. Trim any uneven edges using a ruler and rotary cutter or scissors.
6. Cutting: Measure and cut your fabric according to the dimensions of your quilt, leaving a few inches of extra fabric on all sides to account for quilting and potential shrinkage.
7. Pressing Seams: If you plan to create a multilayered design or incorporate borders, press the seams flat as you go to ensure a neat and professional finish.
By carefully choosing and preparing your fabric, you’ll set the stage for a successful whole cloth quilt. Now that your fabric is ready, it’s time to move on to the next step: creating the quilt design.
Creating the Quilt Design
Designing your whole cloth quilt is an exhilarating process that allows you to unleash your creativity. Here are some steps to help you create a captivating quilt design:
1. Research and Inspiration: Look for inspiration in books, magazines, online galleries, or even nature. Study different quilting designs, motifs, and patterns that resonate with you and align with your desired aesthetic.
2. Sketching: Start by sketching out your design ideas on paper or using graphic design software. Pay attention to the overall composition, focal points, and the flow of the design. Consider how different elements of the design will work together and complement the fabric.
3. Scale and Proportion: Decide on the scale of your design and how it will fit within the dimensions of your quilt. Experiment with different proportions and sizes to achieve the desired visual impact.
4. Practice and Experimentation: Before diving into the final quilt, it’s a good idea to practice your design on a small piece of fabric or create a sample quilt. This will allow you to test different quilting techniques, stitches, and thread choices to ensure they work well together.
5. Transfer the Design: Once you’re satisfied with your design, it’s time to transfer it onto your fabric. You can use quilting stencils, washable fabric markers, or even tailor’s chalk to mark your design. Ensure that the markings are visible but easily removable.
6. Adapt and Explore: Be open to making adjustments and changes as you work on your quilt. Sometimes, ideas may evolve or new inspiration may strike. Embrace the process and allow yourself to explore different possibilities.
7. Seek Feedback: If you’re unsure about your design or would like a fresh perspective, seek feedback from other quilters or enthusiasts. Their insights and suggestions can help refine your design and take it to the next level.
Remember, the design process is a personal journey, and there’s no right or wrong way to create your quilt design. Trust your instincts, have fun, and let your creativity flow. In the next step, we’ll layer the quilt to prepare it for the quilting process.
Layering the Quilt
Layering the quilt is a crucial step in the whole cloth quilt-making process. Proper layering ensures that the fabric, batting, and backing come together smoothly and securely. Here’s how to layer your quilt:
1. Prepare the Backing: Start by preparing the backing fabric, which will be the bottom layer of your quilt. Measure and cut the backing fabric slightly larger than the desired size of your quilt to allow for any shifting during the quilting process. Press the fabric to remove any wrinkles.
2. Mark the Center: Fold the backing fabric in half lengthwise and widthwise, making sure the corners align. Lightly press or mark the center points of the fabric. These markings will help you align the other layers of the quilt.
3. Place the Batting: Lay the batting on a flat surface and smooth out any wrinkles or folds. Center the batting on top of the backing fabric, aligning it with the marked center points.
4. Position the Quilt Top: Carefully place the quilt top, right side up, on top of the batting and backing layers. Ensure that it is centered and aligns with the marked center points.
5. Smooth and Tauten: Gently smooth out any wrinkles or folds in the layers, working from the center towards the edges. Tauten the layers by pulling the backing fabric slightly while maintaining tension on the quilt top and batting.
6. Pin or Baste: Secure the layers together to prevent shifting during the quilting process. You can either use quilting pins or hand baste the layers using large stitches. Start at the center and work your way outward, ensuring that the layers remain taut.
7. Check Alignment: Regularly check the alignment of the layers as you pin or baste. Adjust as needed to maintain a straight and evenly layered quilt.
Layering the quilt requires patience and attention to detail. Taking the time to properly layer the quilt will result in a professional-looking finish and make the quilting process much smoother. With the layers in place, it’s time to move on to the next step: basting the quilt layers together.
When making a whole cloth quilt, pre-wash your fabric to prevent shrinkage after quilting. This will ensure that your quilt maintains its shape and size over time.
Read more: How To Make A Star Quilt
Basting the Layers Together
Once you have successfully layered your whole cloth quilt, it’s time to baste the layers together. Basting ensures that the fabric, batting, and backing remain securely in place during the quilting process. Here’s a step-by-step guide on how to baste your quilt:
1. Choose a Basting Method: There are several methods you can use to baste your quilt. The most common options include using safety pins, a temporary spray adhesive, or hand basting with thread.
2. Safety Pin Basting: If you choose to use safety pins, start by pinning the quilt layers together at regular intervals. Place the safety pins through all three layers – the quilt top, batting, and backing – to hold them securely. Space the pins approximately 4-6 inches apart, or as needed to prevent shifting.
3. Spray Basting: For a convenient and temporary option, consider using a temporary adhesive spray designed specifically for quilting. Lay the quilt top on a flat surface and spray a light layer of adhesive onto the batting. Smooth the batting and carefully place the backing fabric on top, aligning the edges. Smooth out any wrinkles or bubbles, ensuring the layers adhere together.
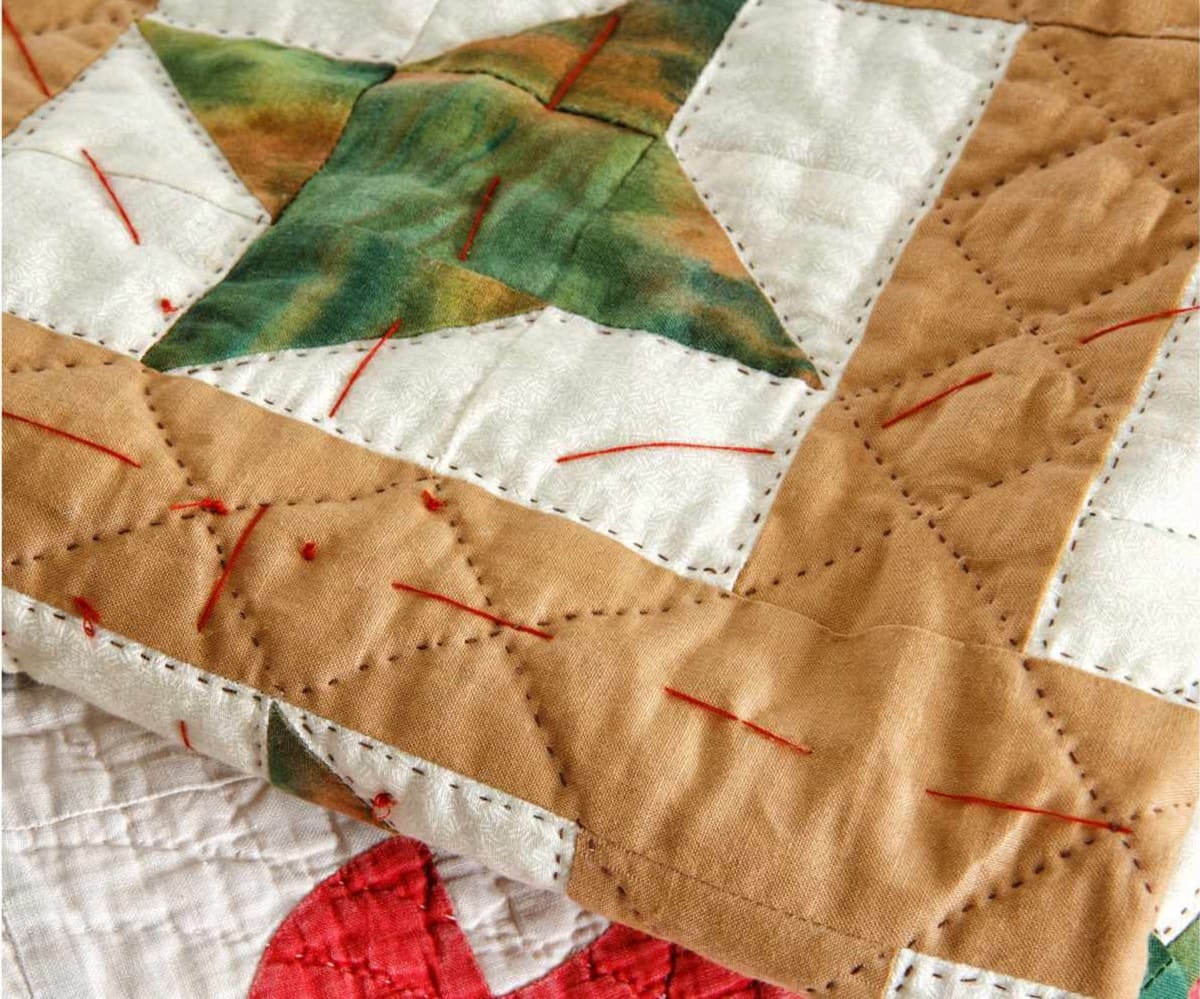
4. Hand Basting: Hand basting involves stitching temporary, large stitches through all layers of the quilt. Start from the center and work your way outward, using a contrasting color thread. This method allows for greater control and the ability to easily remove the basting stitches later.
5. Check for Smoothness: As you baste, regularly check for any wrinkles or bunching in the layers. Smooth out any imperfections, making sure the layers lay flat and evenly across the entire quilt.
6. Secure Loose Threads: As you baste, be mindful of any loose threads that may get caught in the layers. Trim them as needed to prevent them from interfering with the final quilting stitches.
7. Test Mobility: Once basted, test the mobility of the quilt layers. Gently tug on the layers in different directions to ensure they are securely held together. Make any necessary adjustments before proceeding to the quilting stage.
Basting is an essential step in quilting, as it ensures that the layers remain in place and prevents shifting during the quilting process. With the layers securely basted together, you’re now ready to select the thread and begin quilting your whole cloth quilt.
Selecting Thread and Sewing the Quilt
Choosing the right thread and sewing techniques are crucial for quilting your whole cloth quilt. The thread you select should complement the fabric and enhance the overall design. Here’s a guide to help you select thread and sew your quilt:
1. Thread Selection: Consider the color, weight, and fiber content of the thread. Opt for a high-quality thread that is strong enough to withstand the quilting process. Cotton or polyester threads are commonly used in quilting.
2. Color Matching: Look for a thread color that blends well with your fabric. Consider whether you want the thread to blend in seamlessly or stand out as an accent. Matching the thread color to the fabric is a safe choice, while contrasting colors can create visual interest.
3. Thread Weight: Thread weight refers to the thickness of the thread. Choose a weight that is appropriate for your quilting technique. Thicker threads, such as 40 or 50 weight, are often used for visible decorative stitches, while finer threads, such as 60 or 80 weight, are suitable for more delicate quilting.
4. Quilting Techniques: Decide on the quilting techniques you’ll employ to sew your quilt. Options include hand quilting, machine quilting, or a combination of both. Each technique has its own advantages and can result in beautiful quilting designs.
5. Hand Quilting: If you choose to hand quilt, use a quilting needle and thimble for ease of stitching. Select a thread that glides smoothly through the fabric and is strong enough to endure the wear and tear of hand quilting.
6. Machine Quilting: When machine quilting, adjust your machine’s settings for quilting. Experiment with different stitch lengths and tension to achieve the desired result. Ensure your machine needle is suitable for quilting and can accommodate the thread you’ve chosen.
7. Quilting Techniques: Explore various quilting techniques such as straight line quilting, free-motion quilting, or stippling to add texture and dimension to your quilt. Experiment with different patterns and designs that enhance the fabric and overall aesthetic.
8. Sewing Progression: Begin quilting from the center of your quilt and work outward. This helps distribute any potential puckering or gathers evenly. Take your time and quilt in controlled, consistent movements to achieve even stitches.
Remember to practice on scrap fabric before quilting on your whole cloth quilt to get a feel for the chosen thread and technique. Enjoy the quilting process and celebrate the transformation of your fabric into a stunning quilted masterpiece! Once you’ve completed the quilting, it’s time to add any decorative stitches or embellishments to further enhance your whole cloth quilt.
Adding Decorative Stitches or Embellishments
Adding decorative stitches or embellishments to your whole cloth quilt is a wonderful way to take your design to the next level. These extra details can enhance the overall aesthetic and create interest and texture. Here’s a guide to help you add decorative stitches or embellishments:
1. Quilting Designs: Consider incorporating decorative quilting designs such as feathers, swirls, loops, or geometric patterns to enhance the visual appeal of your quilt. These designs can be stitched along the quilt’s surface or within specific areas of the design.
2. Free-motion Quilting: Free-motion quilting allows you to move the fabric under the needle in any direction, giving you the freedom to create unique and intricate designs. Experiment with different motifs and patterns to add personality to your quilt.
3. Embroidery Stitches: Embroidery stitches can be used to add embellishments and details to your quilt. Explore different embroidery techniques, such as satin stitch, French knots, or chain stitch, to create beautiful accents or highlights on certain areas of the design.
4. Appliqué: Appliqué involves sewing fabric shapes or motifs onto the quilt top. This technique allows you to add dimension and interest to your quilt. You can appliqué by hand or with a sewing machine, using various stitching methods such as raw-edge or turned-edge appliqué.
5. Beads and Sequins: Consider adding beads, sequins, or other small embellishments to your quilt to create a touch of sparkle and texture. These embellishments can be sewn on by hand using a fine needle and thread, or you can use a sewing machine with appropriate settings and a special foot attachment.
6. Thread Painting: Thread painting involves using your sewing machine to create realistic or artistic designs by layering threads in different colors and densities. This technique can bring your quilt design to life and add depth and dimension to your fabric.
7. Experiment and Practice: As you add decorative stitches or embellishments, don’t be afraid to experiment and try new techniques. Practice on scrap fabric before working on your quilt to ensure you achieve the desired outcome.
Adding decorative stitches or embellishments is an opportunity to infuse your personal style and creativity into your whole cloth quilt. Take your time, enjoy the process, and let your imagination guide you. Finally, we’ll explore the steps to finish the edges of your quilt.
Finishing the Quilt Edges
Finishing the edges of your whole cloth quilt not only provides a polished look but also ensures the longevity and durability of your quilt. Here are some steps to help you finish the quilt edges:
1. Trim the Excess: Before finishing the edges, trim the excess backing fabric and batting, leaving about 1 inch of overhang beyond the quilt top on all sides.
2. Binding: Binding is a common method used to finish quilt edges. It involves attaching a strip of fabric to the raw edges of the quilt. You can use double-fold binding, which is folded in half and then sewn to the quilt, or single-fold binding, which is folded once and then sewn to the quilt.
3. Prepare the Binding Fabric: Cut your binding fabric into strips, making sure they are long enough to cover all four sides of the quilt. The width of the strips can vary depending on the desired finished width of the binding.
4. Join the Binding Strips: If necessary, join multiple strips of binding fabric together to create one continuous strip. Trim the excess fabric and press the seams open.
5. Sew the Binding to the Quilt: Starting in the middle of one side, align the raw edges of the binding strip with the raw edges of the quilt. Leave a few inches of binding free at the beginning. Sew the binding strip to the quilt using a ¼ inch seam allowance, stopping a few inches before reaching the corner.
6. Miter the Corners: To miter the corners, fold the binding strip at a 45-degree angle away from the quilt, creating a neat diagonal fold. Then, fold the binding strip back down along the next side, aligning the raw edges. Continue sewing, starting at the fold, to secure the binding and create a mitered corner. Repeat this process for all four corners.
7. Finish Sewing the Binding: Continue sewing the binding strip to the remaining sides of the quilt, mitering each corner as you go. Stop sewing a few inches before you reach the starting point.
8. Join the Ends: Trim the excess binding, leaving a few inches of overlap. Open up the binding ends, fold one end under, and tuck the other end inside. Pin in place and sew the ends together to create a neat and seamless finish.
9. Secure the Binding: Fold the binding towards the back of the quilt and hand stitch it in place using a blind stitch or whip stitch. Ensure that the stitching is discreet and secure.
With the edges finished, your whole cloth quilt is complete and ready to be enjoyed or gifted to someone special. Take pride in your creation and marvel at the beauty that you’ve brought to life through quilting.
Congratulations on completing your whole cloth quilt! Enjoy its beauty and the warmth it will bring for years to come.
Read more: How To Make A Crumb Quilt
Conclusion
Congratulations! You’ve reached the end of this comprehensive guide on how to make a whole cloth quilt. By following the step-by-step process, gathering the necessary supplies, choosing and preparing fabric, creating the quilt design, layering the quilt, basting the layers together, selecting thread, sewing the quilt, adding decorative stitches or embellishments, and finishing the quilt edges, you’ve embarked on a journey of creativity and craftsmanship.
Quilting is a timeless art form that allows you to combine your passion for sewing with your artistic vision. Making a whole cloth quilt enables you to showcase the beauty of a single fabric piece and express your creativity through quilting designs and decorative stitches.
Remember, quilting is a labor of love and patience. Take your time at each stage, practice new techniques, and don’t be afraid to experiment. Your whole cloth quilt will be a reflection of your unique style and creativity.
Whether you’re gifting the quilt to a loved one or keeping it as a cherished heirloom, your quilt is sure to bring warmth and joy for generations to come. So wrap yourself in the cozy comfort of your newly created whole cloth quilt and take pride in your quilting accomplishment.
Happy quilting!
Frequently Asked Questions about How To Make A Whole Cloth Quilt
Was this page helpful?
At Storables.com, we guarantee accurate and reliable information. Our content, validated by Expert Board Contributors, is crafted following stringent Editorial Policies. We're committed to providing you with well-researched, expert-backed insights for all your informational needs.



0 thoughts on “How To Make A Whole Cloth Quilt”