Articles
How To Repair Veneer Furniture
Modified: September 1, 2024
Learn how to easily repair veneer furniture and restore its original beauty with our step-by-step guide. Improve the durability and lifespan of your beloved furniture.
(Many of the links in this article redirect to a specific reviewed product. Your purchase of these products through affiliate links helps to generate commission for Storables.com, at no extra cost. Learn more)
Introduction
Veneer furniture is a popular choice for many homeowners due to its elegant appearance and affordability. With its thin layer of real wood applied to a solid core, veneer furniture mimics the natural beauty of solid wood without the hefty price tag. However, over time, veneer furniture can encounter various issues, such as chips, cracks, and peeling veneer, which can diminish its aesthetic appeal.
In this article, we will explore the common issues faced by veneer furniture and provide you with a comprehensive guide on how to repair and restore it. By following the steps outlined here, you can revive your veneer furniture, prolong its lifespan, and maintain its captivating charm.
Key Takeaways:
- Revive and prolong the lifespan of your veneer furniture by following simple repair techniques for chips, peeling veneer, and scratches. Maintain its captivating charm with proper care and maintenance.
- Transform the look of your veneer furniture with refinishing and staining. Follow expert tips to ensure longevity and preserve its beauty for years to come.
Read more: How To Paint Veneer Furniture
What is Veneer Furniture?
Veneer furniture is constructed using a thin layer of real wood, known as veneer, which is bonded to a solid core made of particleboard, MDF (medium-density fiberboard), or plywood. This construction method allows manufacturers to utilize expensive or exotic wood species on the visible surfaces, while using a more affordable material for the core. As a result, veneer furniture offers the natural beauty and grain patterns of hardwood, but at a lower cost.
Veneer furniture comes in various styles and finishes, including oak, cherry, walnut, mahogany, and more. Its versatility and wide range of design options make it a popular choice for everything from dining tables and chairs to dressers and cabinets.
Common Issues with Veneer Furniture
While veneer furniture provides an affordable and visually appealing option, it can encounter several common issues:
- Veneer chips and cracks: Over time, the thin layer of veneer can become damaged, resulting in chips or cracks in the surface.
- Peeling veneer: Moisture, heat, or improper handling can cause the veneer to loosen and peel away from the underlying substrate.
- Surface scratches: Veneer can be susceptible to scratches and abrasions, which can detract from its visual appeal.
- Stains and discoloration: Spills and exposure to sunlight can cause stains and discoloration on the veneer surface.
Understanding these common issues will help you identify the necessary repairs and restoration techniques required to maintain the beauty and integrity of your veneer furniture.
Key Takeaways:
- Revive and prolong the lifespan of your veneer furniture by following simple repair techniques for chips, peeling veneer, and scratches. Maintain its captivating charm with proper care and maintenance.
- Transform the look of your veneer furniture with refinishing and staining. Follow expert tips to ensure longevity and preserve its beauty for years to come.
Read more: How To Paint Veneer Furniture
What is Veneer Furniture?
Veneer furniture is a versatile and cost-effective option for achieving the look of solid wood furniture without the hefty price tag. It is constructed using a thin layer of real wood veneer, typically around 1/32 to 1/16 of an inch thick, which is bonded to a solid core made of particleboard, MDF (medium-density fiberboard), or plywood.
The veneer itself is obtained by slicing or peeling logs into thin sheets. It can be made from a variety of wood species, including oak, cherry, walnut, mahogany, maple, and more. The chosen veneer is then applied to the core material using adhesives, creating the visual appearance of solid wood on the exterior surfaces of the furniture piece.
Veneer furniture offers several advantages over solid wood furniture. First and foremost, it is more affordable, making it a budget-friendly option for individuals who appreciate the beauty of natural wood but have a limited budget. Additionally, veneer furniture is more stable and less prone to warping and splitting compared to solid wood, as the underlying core material provides added strength and durability.
Another advantage of veneer furniture is the wide range of design options it offers. Through the process of bookmatching or slipmatching, where consecutive veneer leaves are placed side by side to create a mirrored or continuous pattern, furniture designers can achieve stunning visual effects on the surfaces of the furniture. This allows for unique and intricate designs that may not be possible with solid wood alone.
It is important to note that veneer furniture is not inferior to solid wood furniture. While solid wood furniture boasts the natural beauty of the entire piece being made from one solid block of wood, veneer furniture provides a more affordable and versatile alternative without compromising on visual appeal.
With proper care and maintenance, veneer furniture can last for many years. It is crucial to avoid exposing the furniture to excessive moisture or heat, which can cause the veneer to warp or peel. Regular dusting and cleaning, using non-abrasive and furniture-friendly products, will help preserve its appearance and prevent buildup of dirt and grime.
In the next sections, we will dive into the common issues that can arise with veneer furniture and provide you with effective repair and restoration techniques to bring your furniture back to its original beauty.
Common Issues with Veneer Furniture
Veneer furniture is known for its beauty and affordability, but it can face several common issues over time. Understanding these issues will help you identify the necessary repairs and restoration techniques to keep your veneer furniture looking its best. Here are some of the most common problems you may encounter:
- Veneer chips and cracks: Chips and cracks in the veneer surface can occur due to accidental impacts or general wear and tear. These can be unsightly and compromise the integrity of the furniture.
- Peeling veneer: Moisture, heat, or improper handling can cause the veneer to loosen and peel away from the underlying substrate. This can result in uneven surfaces or exposed core material.
- Surface scratches: Veneer furniture can be susceptible to scratches and abrasions, especially from pets, children, or rough handling. These superficial damages can detract from the overall appearance.
- Stains and discoloration: Spills, exposure to sunlight, or improper cleaning methods can lead to stains and discoloration on the veneer surface. This can make the furniture look dull or uneven in color.
Repairing these issues can help extend the lifespan and visual appeal of your veneer furniture. By following the steps outlined in this article, you can restore the beauty of your furniture and enjoy it for many more years to come.
It’s important to note that the severity of these issues may vary. Minor chips, scratches, and stains can often be addressed with simple DIY techniques, while more extensive damages may require professional help or complete veneer replacement. Assess the condition of your furniture and choose the appropriate repair approach accordingly.
Now that we have identified the common issues faced by veneer furniture, let’s move on to discussing the tools and materials you will need for the repair process.
Tools and Materials Needed for Veneer Furniture Repair
Before you begin repairing your veneer furniture, it’s essential to gather the necessary tools and materials to ensure a successful restoration. While the specific items you’ll need may vary depending on the extent of the damage and the repair technique you choose, here is a general list of tools and materials to have on hand:
Tools:
- Utility knife or craft knife: Used for cutting, trimming, and removing damaged veneer.
- Sandpaper or sanding block: Helps smooth rough edges and prepare the surface for repair.
- Wood glue or contact cement: Used to secure loose veneer or attach new veneer pieces.
- Putty knife or scraper: Helps scrape away old glue or fillers from the furniture.
- Clamps: Used to hold veneer in place while the adhesive dries.
- Iron or heat gun: Optional, for reactivating adhesive when reattaching loose veneer.
- Veneer saw or coping saw: Used for cutting new veneer pieces to the desired shape.
- Touch-up markers or stains: For color-matching and filling in small scratches or chips.
- Finishing materials: Such as clear varnish, lacquer, or wax to seal and protect the repaired area.
Materials:
- New veneer: If you need to replace damaged sections, ensure you have enough veneer in the same species and grain pattern as your existing furniture.
- Veneer patches or filler: Used to repair small chips or holes in the veneer surface.
- Wood putty or filler: For larger gaps or cracks in the furniture surface.
- Clean cloth or sponge: To wipe away excess glue, clean the furniture, or apply finishes.
- Disposable gloves: Protect your hands from chemicals and adhesives.
- Protective eyewear: Ensure your eyes are shielded during the repair process.
Having these tools and materials readily available will make the repair process smoother and more efficient. It’s a good idea to assess the specific needs of your veneer furniture and gather any additional items that may be required based on its condition and the repairs you plan to undertake.
Now that you have your tools and materials prepared, let’s delve into the step-by-step guide for repairing veneer furniture and restoring its original beauty.
Step-by-Step Guide to Repairing Veneer Furniture
Repairing veneer furniture doesn’t have to be a daunting task. With the right tools, materials, and technique, you can successfully restore the beauty and functionality of your furniture. Follow this step-by-step guide to effectively repair your veneer furniture:
Read more: How To Refurbish Furniture
Step 1: Assess the Damage
Thoroughly examine your furniture to identify the areas that require repair. Take note of any chips, cracks, peeling veneer, scratches, or stains.
Step 2: Clean the Surface
Before starting the repair process, clean the surface of the furniture using a mild cleaner or a mix of warm water and a gentle detergent. Remove any dirt, grime, or residues that may interfere with the repair.
Step 3: Address Chips and Cracks
For small chips and cracks in the veneer, apply a veneer patch or filler to fill the damaged area. Smooth it out using a putty knife or scraper, and allow it to dry as per the manufacturer’s instructions. Sand the repaired area until it is flush with the surrounding veneer.
Step 4: Fix Loose or Peeling Veneer
If you have loose or peeling veneer, apply wood glue or contact cement to the back of the veneer and the furniture surface. Press the veneer firmly in place, and use clamps or weights to hold it in position until the adhesive dries. If needed, reactivate the adhesive using an iron or heat gun, following the manufacturer’s instructions.
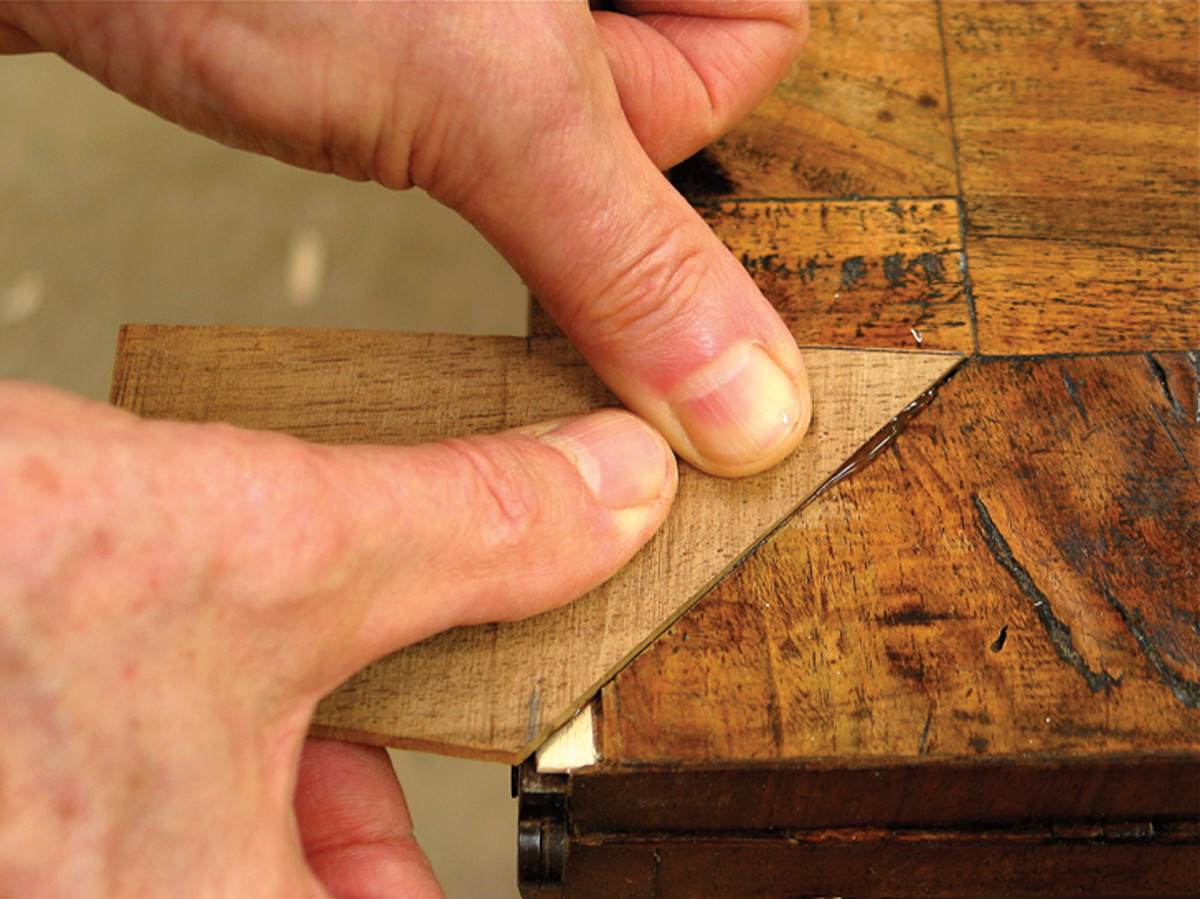
Step 5: Replace Damaged Veneer Pieces
When dealing with larger areas of damage, it may be necessary to replace the damaged veneer entirely. Carefully cut out the damaged section using a utility knife or craft knife, ensuring smooth and straight edges. Trace the shape onto a new piece of veneer, cut it out, apply adhesive to the back, and press it firmly onto the furniture surface. Use clamps to hold it in place until the adhesive sets.
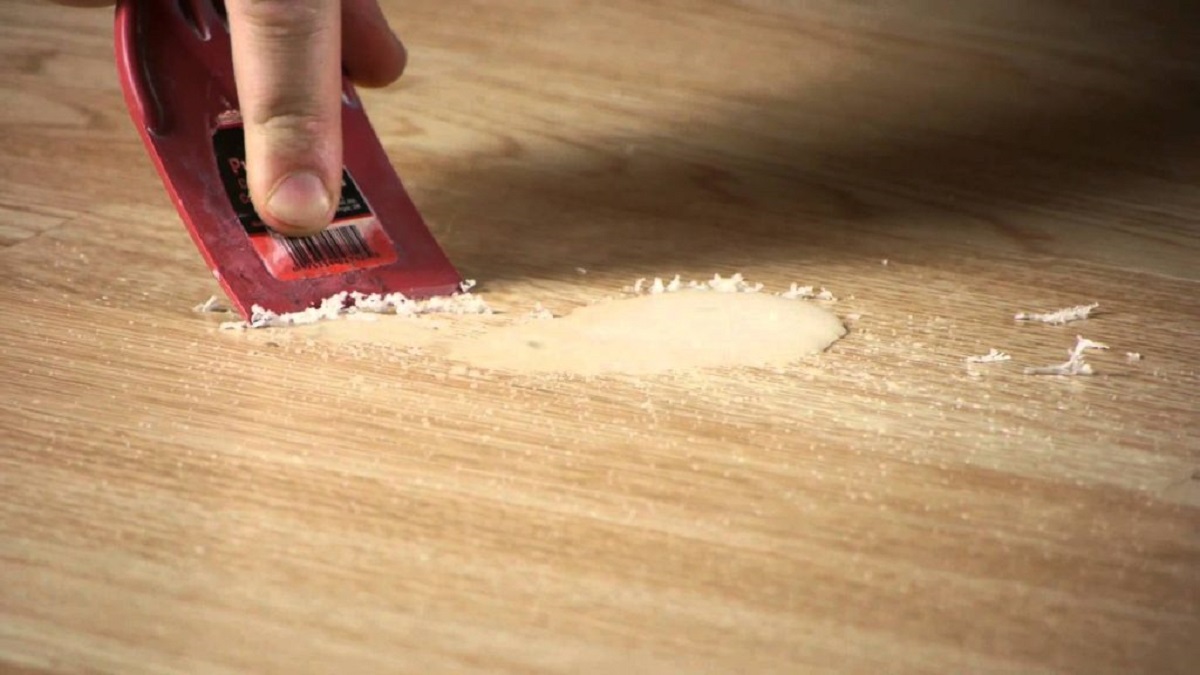
Step 6: Sand and Smooth the Surface
After the repairs have dried and set, sand the repaired area lightly with fine-grit sandpaper or a sanding block to achieve a smooth and even surface. Be cautious not to sand through the veneer or damage adjoining areas.
Step 7: Apply Finish
If necessary, apply a suitable finish to blend the repaired area with the rest of the furniture. This could be a clear varnish, lacquer, or wax, depending on the original finish. Apply the finish according to the manufacturer’s instructions, using a clean cloth or a foam brush. Allow it to dry completely before using or applying additional coats, if needed.
Following these step-by-step instructions will help you restore your veneer furniture to its former glory. With patience and attention to detail, you can enjoy your beautifully repaired furniture for many years to come.
Next, let’s learn how to address specific issues such as filling and patching veneer chips and cracks.
Filling and Patching Veneer Chips and Cracks
Chips and cracks in the veneer surface of your furniture can be unsightly and compromise the overall aesthetics. Fortunately, with the right techniques and materials, you can easily fill and patch these damaged areas. Follow these steps to effectively repair veneer chips and cracks:
Read more: How Thick Is Stone Veneer
Step 1: Clean the Area
Start by cleaning the damaged area using a mild cleaner or a mixture of warm water and gentle detergent. This will ensure that the surface is free from dirt, dust, and any loose veneer particles that may interfere with the repair process.
Step 2: Prepare the Filler
Choose a wood filler or veneer patching product that matches the color and grain pattern of your furniture. Mix the filler according to the manufacturer’s instructions until you achieve a smooth consistency.
Step 3: Apply the Filler
Using a putty knife or a spatula, apply the filler to the damaged area, ensuring that it completely fills the chip or crack. Press the filler firmly into the damaged area and smooth it out to create a level surface. Remove any excess filler to achieve a seamless transition between the filled area and the surrounding veneer.
Step 4: Allow the Filler to Dry
Allow the filler to dry according to the manufacturer’s instructions. This usually takes several hours or overnight. Avoid touching or disturbing the filled area during this time to ensure the best results.
Read more: How To Refinish A Veneer Dresser
Step 5: Sand the Repaired Area
Once the filler is completely dry, use fine-grit sandpaper or a sanding block to gently sand the repaired area. This will help smooth out any unevenness and blend the filled area with the surrounding veneer. Be careful not to sand too aggressively, as this may damage the nearby veneer.
Step 6: Finish the Surface
If necessary, apply a suitable finish to the repaired area to match the existing finish of the furniture. This could be a clear varnish, lacquer, or wax. Apply the finish according to the manufacturer’s instructions, using a clean cloth or a foam brush. Allow it to dry completely before using or applying additional coats.
By following these steps, you can effectively fill and patch veneer chips and cracks, restoring the beauty and integrity of your furniture. Remember to take your time and work with precision to achieve the best possible results.
Next, let’s learn how to address the issue of loose or peeling veneer and how to fix it properly.
Fixing Loose or Peeling Veneer
Loose or peeling veneer can be a common issue with veneer furniture, but it can be addressed effectively with the right techniques. Follow these steps to fix loose or peeling veneer and ensure a secure and long-lasting repair:
Read more: How To Refurbish Furniture
Step 1: Assess the Damage
First, carefully examine the loose or peeling veneer to determine the extent of the damage. Assess whether it is a small section or if it spans a larger area.
Read more: How To Fix Chipped Wood On Furniture
Step 2: Prepare the Surface
Clean both the back of the veneer and the underlying furniture surface with a mild cleaner to remove any dirt, dust, or old adhesive. Ensure that both surfaces are dry and free from any residues.
Step 3: Apply Adhesive
Apply wood glue or contact cement to the back of the veneer and the furniture surface. Spread the adhesive evenly using a brush or foam applicator, ensuring that it covers the entire area where the veneer will be attached.
Step 4: Press and Secure the Veneer
Press the veneer firmly onto the furniture surface, aligning it with the surrounding veneer if applicable. Use a clean cloth or a roller to press down on the veneer and ensure good adhesion. If needed, use clamps or weights to hold the veneer in place while the adhesive dries. Follow the manufacturer’s instructions regarding clamping time and pressure.
Step 5: Reactivate the Adhesive (optional)
If the veneer starts to lift or cannot be secured with just glue or contact cement, you may need to reactivate the adhesive using a heat source. Place a cloth over the veneer to protect it and gently apply heat with an iron or a heat gun. The heat will reactivate the adhesive, allowing the veneer to bond securely to the furniture surface. Be cautious not to apply excessive heat that may damage the veneer.
Read more: How To Repair A Veneer Dresser
Step 6: Let the Repair Dry
Allow the adhesive to dry completely according to the manufacturer’s instructions. This typically takes a few hours or overnight. Avoid moving or placing stress on the repaired area during this time to ensure a successful and durable repair.
By following these steps, you can effectively fix loose or peeling veneer and restore the structural integrity of your furniture. Remember to work carefully and take your time to achieve the best results.
Next, let’s learn how to replace damaged veneer pieces when necessary.
Replacing Damaged Veneer Pieces
In some cases, the damage to your veneer furniture may be significant enough to require the replacement of an entire veneer piece. Although it may seem like a daunting task, with the right approach and tools, you can successfully replace damaged veneer pieces. Follow these steps to effectively replace veneer on your furniture:
Read more: How To Refurbish Furniture
Step 1: Assess the Damage
Thoroughly examine the damaged veneer area to determine the size and shape of the section that needs to be replaced. Take measurements and make note of any intricate patterns or grain direction to ensure a proper replacement.
Step 2: Remove the Damaged Veneer
Carefully cut along the edges of the damaged veneer using a utility knife or a craft knife. Create straight and clean cuts to ensure a seamless fit for the replacement piece. Gently remove the damaged veneer, making sure not to damage or gouge the underlying substrate.
Read more: How To Attach Stone Veneer
Step 3: Trace and Cut the Replacement Piece
Trace the shape of the removed veneer onto a new piece of veneer of the same species and grain pattern. Use a veneer saw or a coping saw to cut along the traced lines. Take your time and work patiently to achieve accurate and precise cuts.
Step 4: Apply Adhesive
Apply wood glue or contact cement to the back of the replacement veneer piece and the substrate surface where it will be placed. Spread the adhesive evenly using a brush or a foam applicator, ensuring complete coverage of both surfaces.
Step 5: Attach the Replacement Veneer Piece
Position the replacement veneer piece onto the substrate, aligning it with the surrounding veneer. Press down firmly to ensure good adhesion. Use clamps or weights to hold the veneer in place while the adhesive dries. Follow the manufacturer’s instructions regarding clamping time and pressure.
Step 6: Let the Repair Dry and Sand
Allow the adhesive to dry completely according to the manufacturer’s instructions. This typically takes a few hours or overnight. Once dry, use fine-grit sandpaper or a sanding block to gently sand the repaired area, blending the edges of the replacement veneer with the surrounding veneer. Be careful not to sand through the veneer or damage adjacent areas.
Step 7: Apply Finish
If necessary, apply a suitable finish to the repaired area to match the existing finish of the furniture. This could be a clear varnish, lacquer, or wax. Apply the finish according to the manufacturer’s instructions, using a clean cloth or a foam brush. Allow it to dry completely before using or applying additional coats.
By following these steps, you can successfully replace damaged veneer pieces and restore the beauty and functionality of your furniture. Take your time, work with precision, and ensure proper alignment to achieve the best results.
Next, let’s explore how to refinish and stain veneer furniture for a complete restoration.
Refinishing and Staining Veneer Furniture
Refinishing and staining veneer furniture can breathe new life into your pieces and provide a fresh, updated look. Whether you want to change the color or enhance the natural beauty of the wood, refinishing and staining can help achieve your desired results. Here is a step-by-step guide to refinishing and staining veneer furniture:
Step 1: Prepare the Surface
Start by thoroughly cleaning the furniture surface to remove any dirt, grime, or residues. Use a mild cleaner or a mixture of warm water and gentle detergent. Allow the surface to dry completely before proceeding.
Step 2: Remove the Old Finish
If your veneer furniture has an existing finish that is worn or damaged, you may need to remove it before staining. Use a chemical stripper or sandpaper to strip the old finish. Follow the manufacturer’s instructions for the specific product you are using and work in a well-ventilated area.
Read more: How To Build A Brick Veneer Wall
Step 3: Sand the Surface
Once you have removed the old finish, use fine-grit sandpaper or a sanding block to smooth the surface of the furniture. Sand with the grain of the wood, applying even pressure. This step helps to remove any imperfections and creates a smooth and even surface for the new finish.
Step 4: Apply Stain
If you wish to change the color of your veneer furniture, apply wood stain using a brush or a clean cloth. Work in small sections, applying the stain evenly and following the direction of the wood grain. Allow the stain to penetrate the wood for the recommended time specified by the manufacturer.
Step 5: Wipe Off Excess Stain
After the desired color is achieved, use a clean cloth to wipe off any excess stain. This helps to prevent streaks or uneven patches. Take care to gently wipe in the direction of the grain, ensuring a smooth and consistent finish.
Step 6: Apply Protective Finish
Once the stain is dry, apply a protective finish to seal and protect the veneer furniture. Choose an appropriate finish such as clear varnish, lacquer, or furniture wax. Follow the manufacturer’s instructions for application and drying times. Apply thin, even coats, allowing each coat to dry before applying the next. This will ensure a durable and long-lasting finish.
Read more: How To Restore A Veneer Dining Table
Step 7: Buff and Polish
After the final coat of protective finish has dried, gently buff the surface with a clean, soft cloth to achieve a smooth and polished appearance. This step enhances the sheen of the finish and gives your veneer furniture a professional and polished look.
Remember to work in a well-ventilated area, follow the manufacturer’s instructions for all products used, and test the stain and finish on a small, inconspicuous area before applying it to the entire piece of furniture.
By following these steps, you can successfully refinish and stain your veneer furniture, transforming it into a beautiful, customized piece that complements your style and decor.
Lastly, let’s explore some tips for maintaining veneer furniture to ensure its longevity and beauty.
Tips for Maintaining Veneer Furniture
Veneer furniture, like any other type of furniture, requires regular maintenance to keep it in good condition and preserve its beauty over time. By following these tips, you can ensure the longevity and durability of your veneer furniture:
1. Clean Regularly
Dust your veneer furniture regularly using a soft, lint-free cloth or a feather duster. This helps prevent the buildup of dirt and grime, which can dull the surface. Avoid using abrasive cleaners or harsh chemicals that can damage the veneer. Instead, opt for gentle, furniture-friendly cleaning products or a damp cloth with mild soap and water.
2. Protect from Sunlight
Keep your veneer furniture away from direct sunlight or sources of extreme heat, as prolonged exposure can cause fading or discoloration of the veneer. Use curtains, blinds, or UV-protective film on windows to protect your furniture from harmful UV rays.
Read more: How To Install Exterior Brick Veneer
3. Be Mindful of Moisture and Humidity
Excessive moisture or fluctuations in humidity levels can cause the veneer to warp or peel. Avoid placing veneer furniture near sources of moisture, such as bathrooms or kitchens. Use dehumidifiers or humidifiers to maintain optimal humidity levels in your home, especially during dry or humid seasons.
4. Use Coasters and Placemats
Protect the surface of your veneer furniture by using coasters, placemats, or tablecloths. These provide a barrier against spills, heat, and scratches caused by glasses, plates, or hot dishes. Wipe up any spills immediately to prevent staining or damage to the veneer.
5. Avoid Sharp Objects
Avoid placing sharp or abrasive objects directly on the veneer surface. Use felt or padded protectors under items like vases, lamps, or decorative objects to prevent scratching or gouging the veneer.
6. Handle with Care
When moving or rearranging your veneer furniture, lift it instead of dragging or sliding it across the floor. This helps prevent damage to the veneer or the underlying structure. Enlist the help of others if needed to ensure safe and careful handling.
Read more: How To Get Furniture Dents Out Of Carpet
7. Routine Inspections
Regularly inspect your veneer furniture for any signs of damage, such as chips, cracks, or loose veneer. Address minor issues promptly to prevent further damage and costly repairs in the future.
8. Professional Maintenance
Consider seeking professional assistance for deep cleaning, refinishing, or more extensive repairs. Furniture experts can provide specialized care and expertise to ensure your veneer furniture remains in excellent condition for years to come.
By applying these maintenance tips, you can keep your veneer furniture looking beautiful and well-preserved. With proper care, your furniture will continue to enhance your space and provide enjoyment for many years.
Finally, let’s summarize the key aspects covered in this article.
Conclusion
Veneer furniture offers a stylish and affordable option for adding the beauty of wood to your home. However, over time, it may encounter issues such as chips, cracks, peeling veneer, scratches, and stains. Fortunately, with the right knowledge, tools, and techniques, you can repair and restore your veneer furniture, prolonging its lifespan and retaining its captivating charm.
In this comprehensive guide, we explored the common issues faced by veneer furniture and provided step-by-step instructions for repairing chips, fixing loose or peeling veneer, and replacing damaged veneer pieces. We also discussed refinishing and staining veneer furniture to give it a fresh and updated look.
Remember to take your time, work with precision, and follow proper safety precautions when undertaking any repairs or refinishing projects. Always test any products or techniques on a small, inconspicuous area before applying them to the entire furniture piece.
In addition, we provided tips for maintaining your veneer furniture, including regular cleaning, protection from sunlight and moisture, using coasters and placemats, being mindful of sharp objects, handling with care, and seeking professional assistance when needed. By following these maintenance practices, you can keep your veneer furniture in excellent condition for years to come.
Whether you have a cherished family heirloom or a newly acquired veneer piece, taking care of it will ensure its longevity and preserve its beauty. With the right repairs, refinishing, and ongoing maintenance, your veneer furniture can continue to bring warmth and elegance to your home.
So, roll up your sleeves, gather your tools, and embark on the journey to restore and maintain your veneer furniture. Through your efforts and attention to detail, you can enjoy the beauty and functionality of your veneer furniture for many more years.
Now that you've got the hang of fixing veneer furniture, why not broaden your skills with more woodworking projects? Our upcoming guide on the best woodworking practices offers endless inspiration and practical advice for creating stunning pieces in 2024. Whether you're refining old skills or picking up new techniques, this article is a must-read for any craft enthusiast eager to enhance their woodworking prowess.
Frequently Asked Questions about How To Repair Veneer Furniture
Was this page helpful?
At Storables.com, we guarantee accurate and reliable information. Our content, validated by Expert Board Contributors, is crafted following stringent Editorial Policies. We're committed to providing you with well-researched, expert-backed insights for all your informational needs.
0 thoughts on “How To Repair Veneer Furniture”