Articles
How To Install Peel And Stick Tile On Plywood
Modified: January 24, 2024
Learn how to easily install peel and stick tile on plywood with our informative articles. Get step-by-step instructions and expert tips for a flawless DIY project.
(Many of the links in this article redirect to a specific reviewed product. Your purchase of these products through affiliate links helps to generate commission for Storables.com, at no extra cost. Learn more)
Introduction
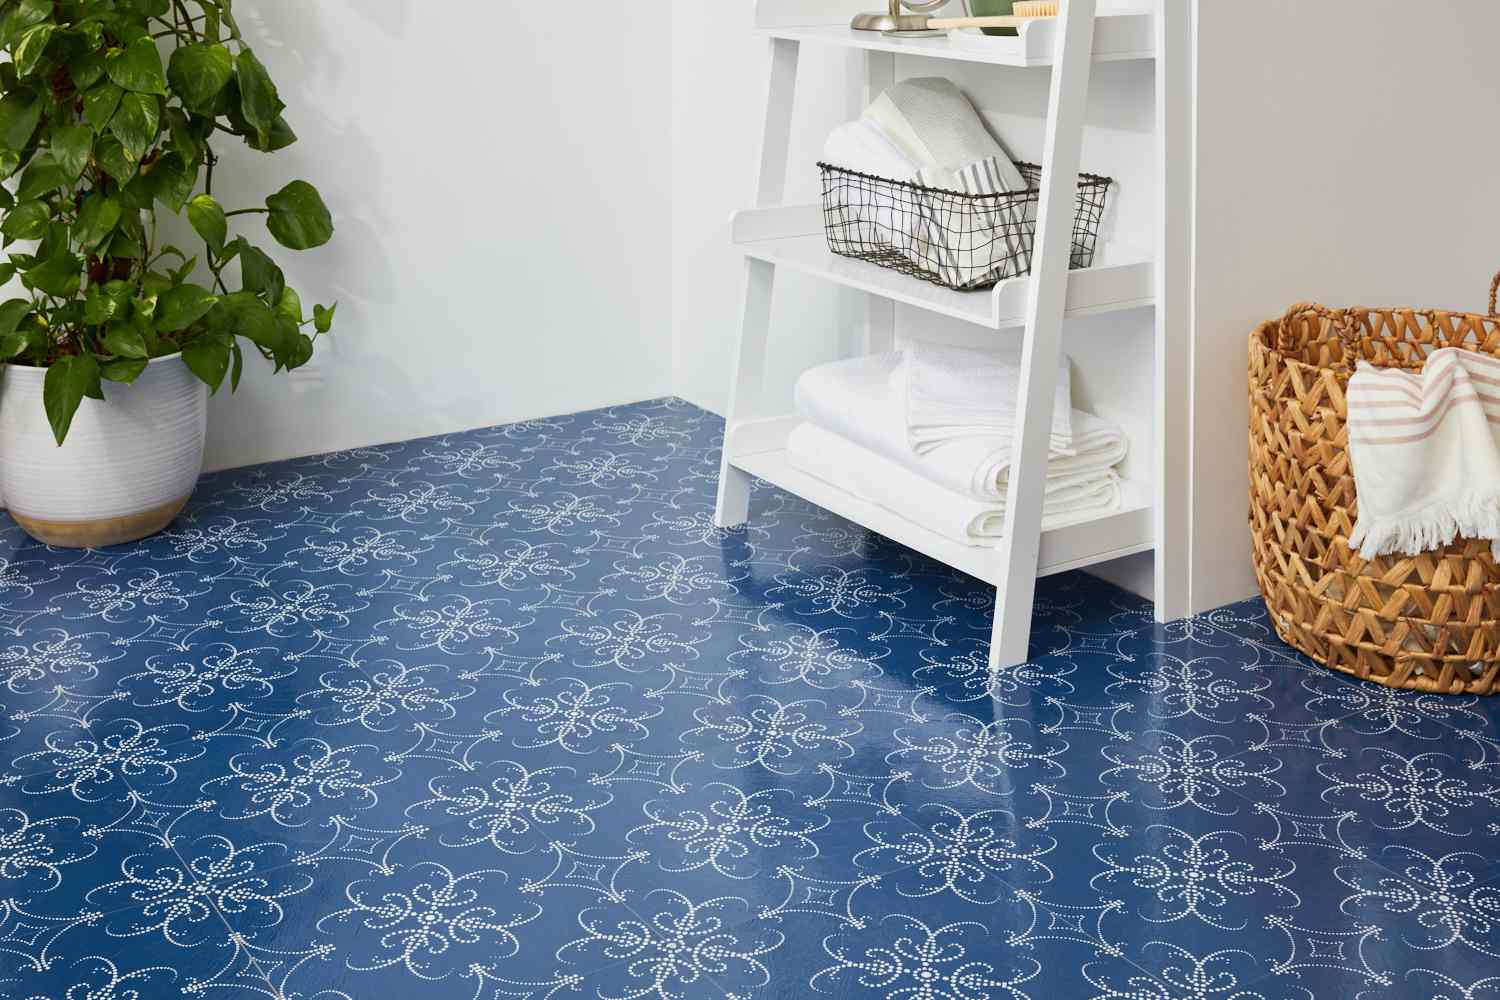
Peel and stick tiles are a convenient and cost-effective way to update your flooring without the need for professional installation. Whether you’re looking to revamp your kitchen, bathroom, or any other area in your home, installing peel and stick tiles on plywood can be a great DIY project.
With the right materials and proper techniques, you can achieve a high-quality and durable flooring surface that will transform the look and feel of your space. In this article, we’ll guide you through the step-by-step process of installing peel and stick tiles on plywood, ensuring a successful and stylish result.
Before we get started, it’s important to note that proper preparation is crucial for a successful installation. Ensure that your plywood surface is clean, smooth, and free of any dust or debris. Additionally, make sure you have all the necessary materials on hand, so you can work efficiently and effectively.
Now, let’s dive into the materials needed for this project.
Key Takeaways:
- Transform your space with peel and stick tiles on plywood. Follow step-by-step instructions for a cost-effective and stylish DIY flooring update. Prioritize safety and proper preparation for a professional result.
- Achieve a durable and beautiful flooring surface with peel and stick tiles. From preparation to sealing, follow guidelines for a successful installation and enjoy the transformed look of your space.
Read more: How To Install Peel And Stick Tile
Materials Needed
Before you begin installing peel and stick tiles on plywood, gather the following materials:
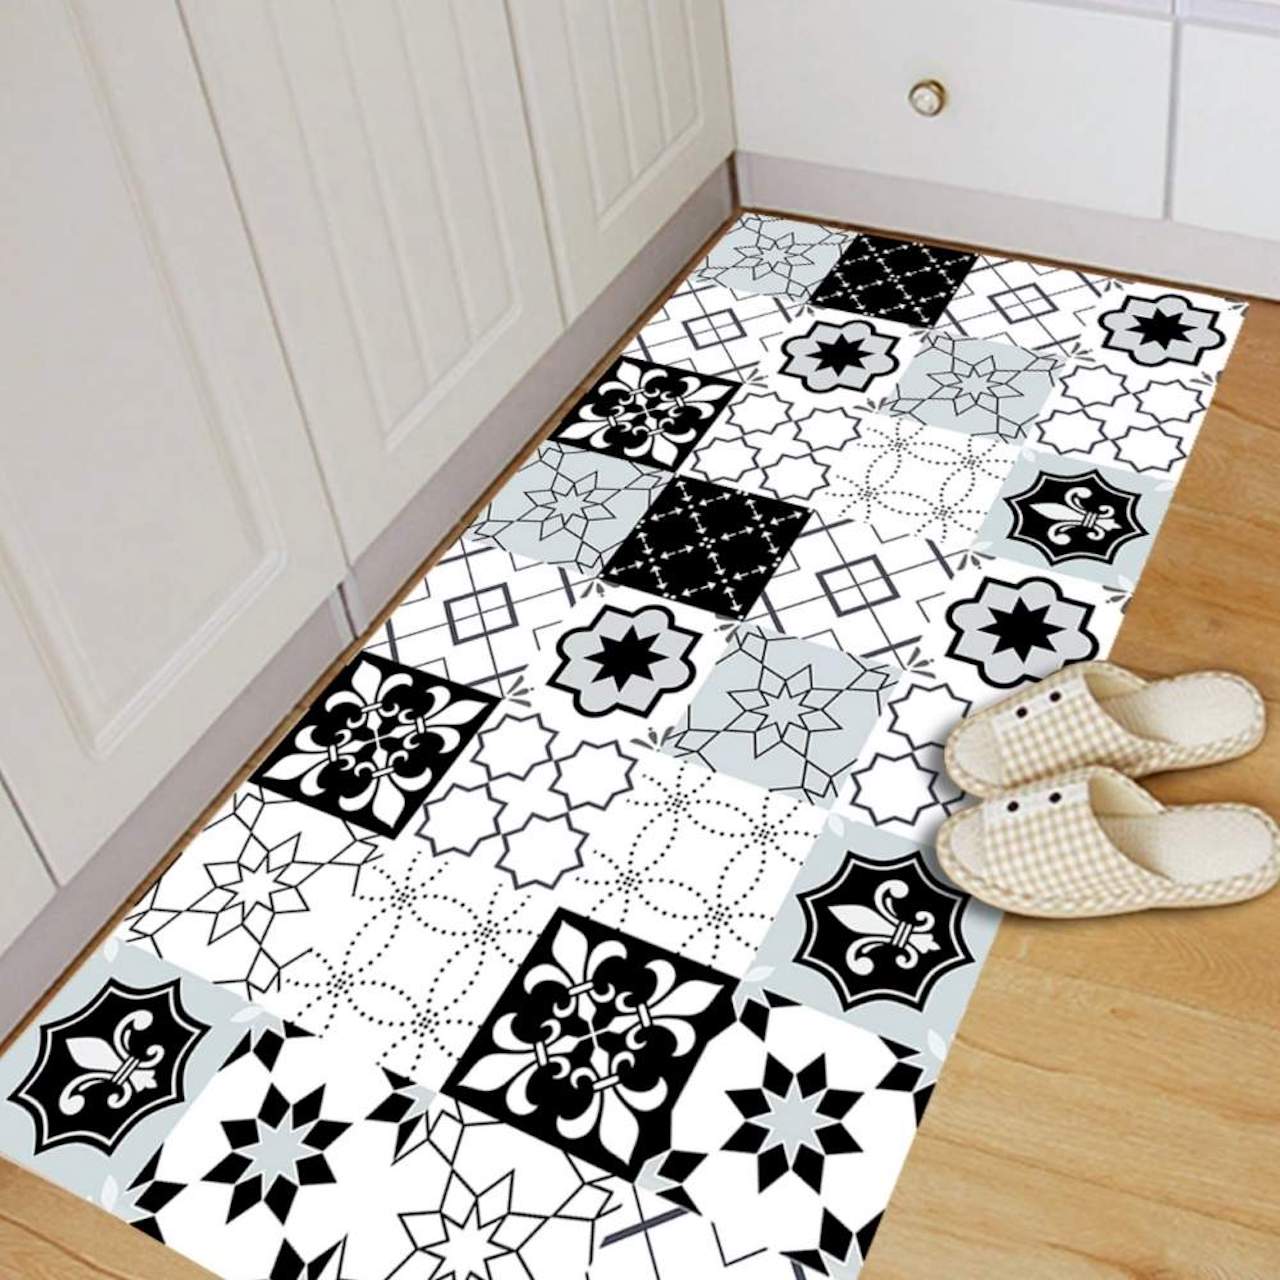
- Peel and stick tiles: Choose tiles that are suitable for your desired application and style preferences. There are various options available, including vinyl, cork, and carpet tiles.
- Plywood: Select high-quality plywood with a smooth surface. Ensure that it is clean, dry, and free of any imperfections or damage.
- Measuring tape: This will be used to accurately measure the area and the tiles.
- Straight edge or ruler: To ensure precise and straight cuts on the tiles.
- Utility knife or tile cutter: These tools are essential for cutting the tiles to fit your desired dimensions.
- Adhesive primer (optional): If your plywood surface is porous or rough, applying an adhesive primer can help ensure proper adhesion of the tiles.
- Adhesive remover (if needed): If there is existing adhesive or residue on the plywood surface, an adhesive remover can help clean and prepare the area.
- Roller or hand roller: A roller will be used to apply pressure to the tiles, ensuring proper adhesion to the plywood.
- Safety goggles and gloves: These protective gears will keep you safe while handling the tiles and tools.
- Level: This tool will ensure that your tiles are installed evenly and prevent any uneven surfaces.
- Sealer (optional): Depending on the type of tiles you choose, you may need a sealer to protect the surface and enhance its longevity.
- Clean cloth or mop: To clean the plywood surface before installation and maintain its cleanliness throughout the process.
By having these materials ready, you’ll be well-prepared to start the installation process. Now, let’s move on to the next step – preparing the plywood surface.
Preparing the Plywood Surface
Properly preparing the plywood surface is essential for a successful installation of peel and stick tiles. Follow these steps to ensure that your plywood is clean, smooth, and ready to receive the tiles:
- Start by cleaning the surface: Use a clean cloth or mop to remove any dirt, dust, or debris from the plywood. Ensure that the surface is completely free of any loose particles that could affect the adhesion of the tiles.
- Inspect the plywood: Thoroughly examine the plywood for any imperfections or damage. If you notice any uneven areas, bumps, or protrusions, use sandpaper or a sander to smooth them out.
- Fill in any gaps or holes: If there are any gaps or holes in the plywood, fill them in with wood filler and allow it to dry completely. Sand the filled areas until they are smooth and level with the rest of the surface.
- If your plywood surface is rough or porous, apply an adhesive primer: An adhesive primer helps create a smooth and even surface for better tile adhesion. Follow the manufacturer’s instructions to apply the primer evenly and allow it to dry fully.
- Remove any existing adhesive or residue: If there is any previous adhesive or residue on the plywood, use an adhesive remover to clean and prepare the surface. Follow the instructions on the remover product and use a scraper to gently remove the adhesive.
- Ensure the plywood is dry: Before proceeding with the installation, make sure the plywood is completely dry. Moisture can affect the adhesion of the tiles, so check the moisture levels and allow the plywood to dry if necessary.
By taking the time to properly prepare the plywood surface, you’ll create an ideal foundation for the peel and stick tiles. This ensures a long-lasting and professional-looking installation. With the preparation complete, it’s time to move on to measuring and cutting the peel and stick tiles.
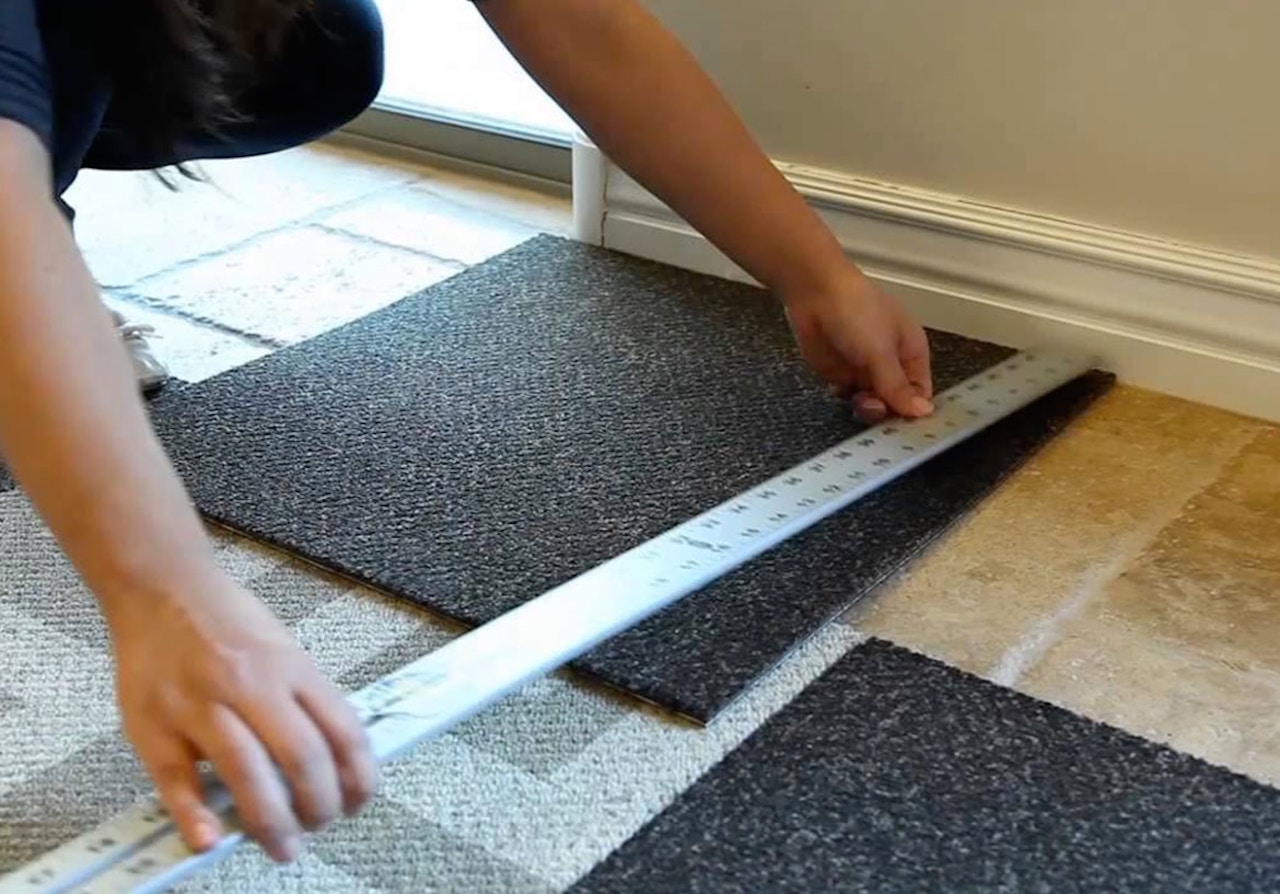
Measuring and Cutting the Peel and Stick Tiles
Accurate measurements and precise cuts are crucial when installing peel and stick tiles on plywood. Follow these steps to ensure that your tiles fit perfectly into your desired space:
- Start by measuring the area: Use a measuring tape to determine the dimensions of the space where you’ll be installing the tiles. Measure both the length and width and make note of these measurements.
- Account for any obstructions: If there are any obstacles in the area, such as cabinets or fixtures, be sure to measure around them and take these dimensions into consideration.
- Calculate the number of tiles needed: Based on your measurements, calculate the number of tiles you’ll require to cover the entire area. It’s always a good idea to purchase a few extra tiles to account for any mistakes or future repairs.
- Plan the tile layout: Before cutting any tiles, plan the layout by dry-fitting them on the plywood. This will give you an idea of how the tiles will look and allow you to make any necessary adjustments.
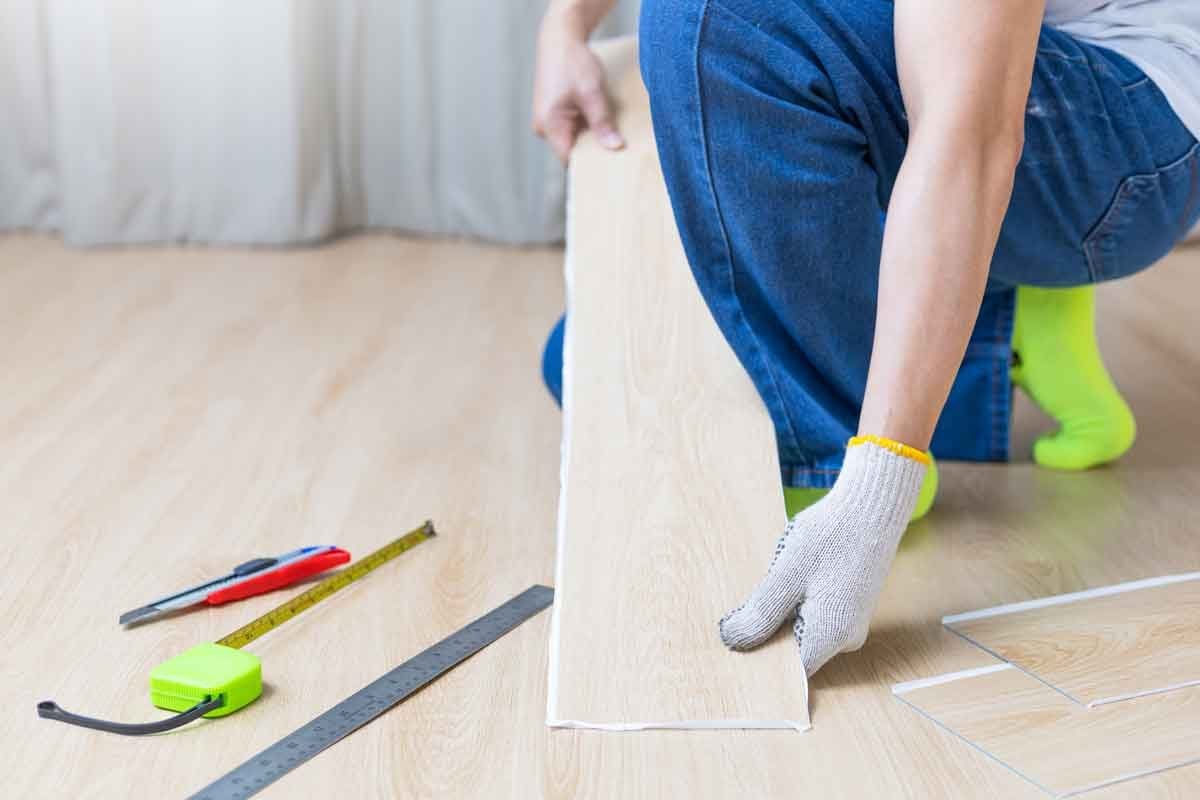
- Cut the tiles: Using a straight edge or ruler and a utility knife, carefully measure and mark the tiles according to the desired dimensions. Make sure to apply firm and even pressure when cutting to ensure clean and precise cuts.
- Repeat the process for all necessary cuts: If you have multiple tiles that require cutting, carefully repeat the cutting process for each tile. Take your time and double-check the measurements to avoid any inaccuracies.
Remember to wear safety goggles and gloves while cutting the tiles to protect yourself from any potential injuries. Once you have successfully measured and cut the peel and stick tiles, you’re ready to move on to the next step – applying adhesive or removing backing.
Applying Adhesive or Removing Backing
Depending on the type of peel and stick tiles you’re using, you’ll either need to apply adhesive or remove the backing before installation. Follow these guidelines to ensure a proper and secure attachment to the plywood:
- If using adhesive:
- Carefully read and follow the manufacturer’s instructions for the adhesive. Different adhesives may have specific application methods and drying times, so be sure to adhere to the guidelines provided.
- Starting in one corner of the plywood, apply a thin and even layer of adhesive. Use a notched trowel or a putty knife to create ridges in the adhesive, which will help promote better adhesion.
- Work in small sections to keep the adhesive from drying out before you lay the tiles. Be mindful of any specific drying times recommended by the adhesive manufacturer.
- Once the adhesive is applied, carefully place the peel and stick tiles onto the plywood, aligning them with the desired layout. Apply firm and even pressure to ensure that the tiles adhere properly to the adhesive.
- Continue this process, working in small sections, until you’ve covered the entire plywood surface. Make sure to leave a small gap between the tiles for expansion, as recommended by the manufacturer.
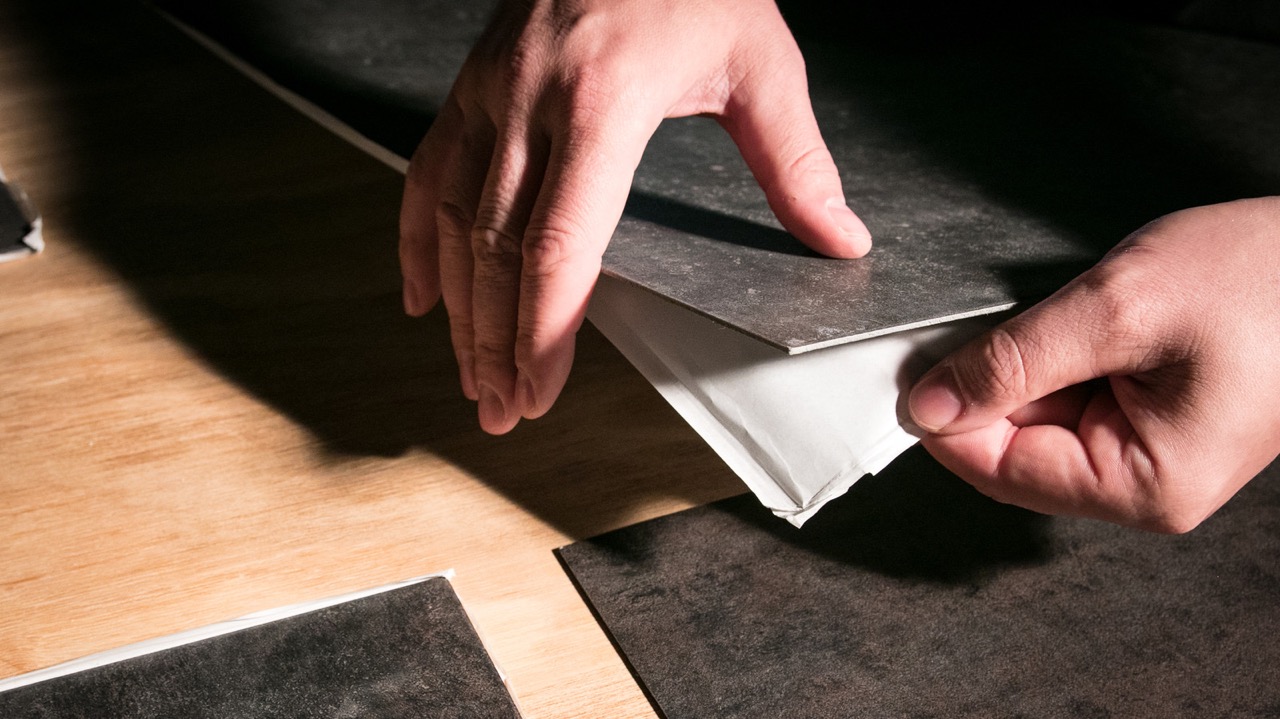
- If using tiles with backing:
- Peel off the backing of each tile to reveal the adhesive side. It’s usually easiest to start from one corner or edge of the tile.
- Starting in one corner of the plywood, carefully place the peeled tile onto the plywood, aligning it with your desired layout. Apply firm pressure to ensure a secure bond between the tile and plywood surface.
- Continue this process, working in small sections, until you’ve covered the entire plywood surface with the peel and stick tiles.
Take your time and ensure that each tile is properly adhered to the plywood. Applying the adhesive or removing the backing correctly is essential for a successful and long-lasting installation. Once all the tiles are in place, it’s time to move on to the next step – placing and pressing the tiles.
Make sure the plywood surface is clean, smooth, and free of any debris before installing the peel and stick tiles. Use a primer to ensure better adhesion and follow the manufacturer’s instructions carefully for the best results.
Read more: How To Install Peel And Stick Floor Tile
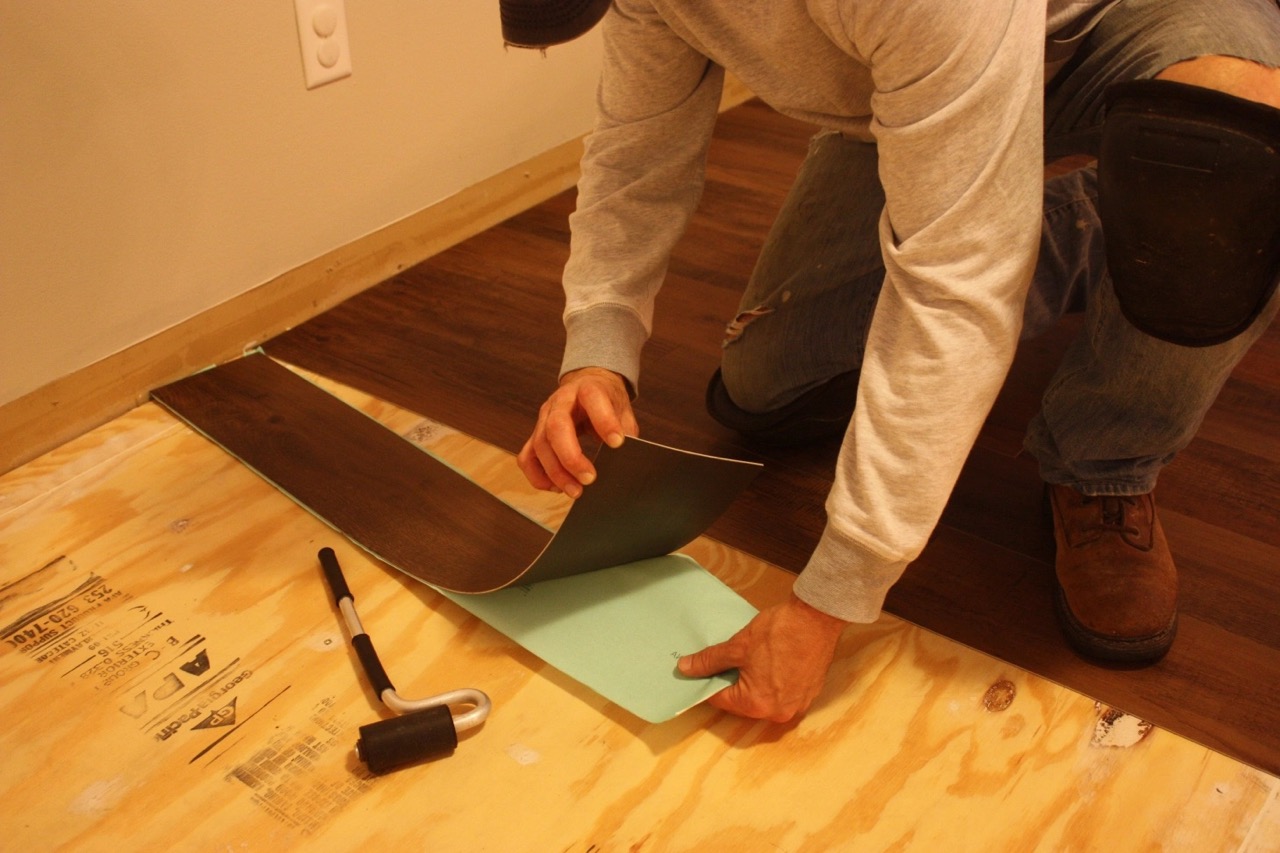
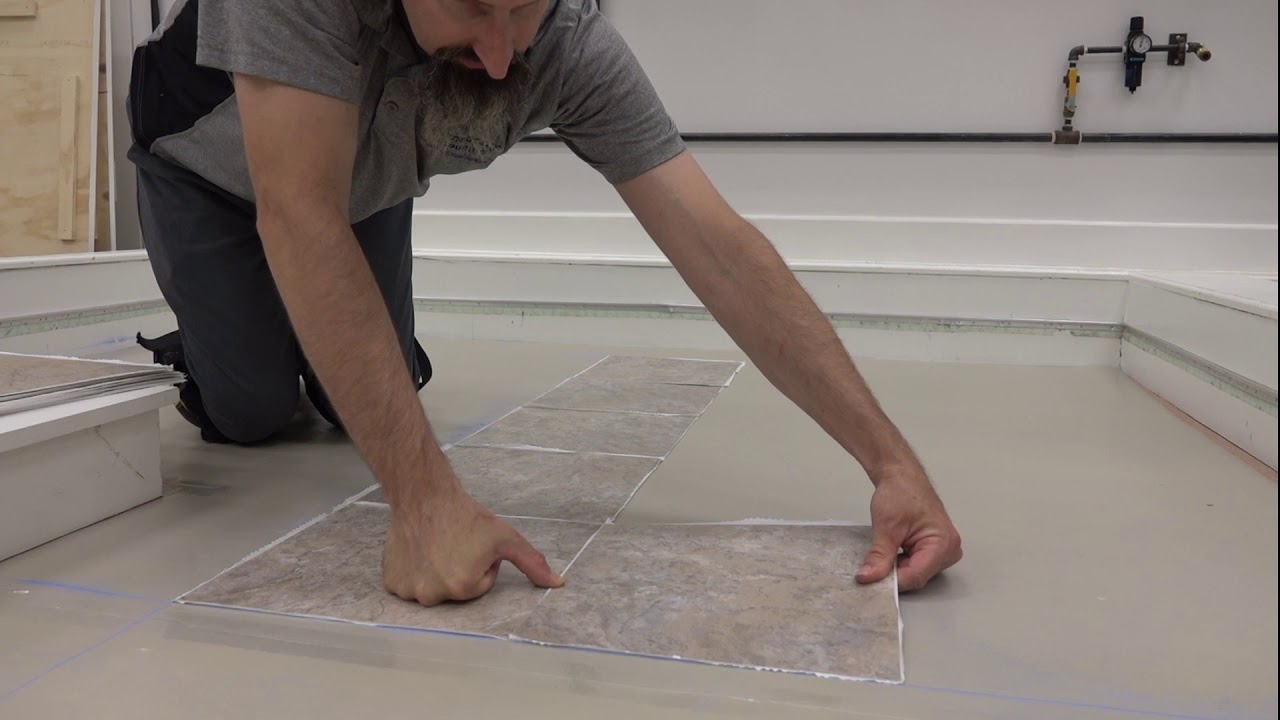
Placing and Pressing the Tiles
With the adhesive applied or the backing removed, it’s time to place and press the peel and stick tiles onto the plywood surface. Follow these steps to ensure proper placement and secure adhesion:
- Start in one corner of the plywood and carefully place the first tile in position. Align it with the desired layout, ensuring that it is straight and properly positioned.
- Press down firmly on the tile, starting from the center and working your way towards the edges. Use a hand roller or a regular roller to apply even pressure and ensure that the tile sticks securely to the plywood. Repeat this process for each tile.
- Check for any air bubbles or wrinkles as you go. If you notice any, gently lift the affected tile and reposition it, smoothing out the surface as you press it back down.
- Continue placing and pressing the tiles in the predetermined layout, working your way across the plywood surface. Take your time and ensure that each tile is properly aligned and adhered.
- If you are installing larger tiles, periodically check the level to ensure that the surface remains even. Adjust and reposition the tiles as necessary.
- Make sure to leave a small gap between the tiles for expansion, as recommended by the manufacturer. This will allow the tiles to adjust to temperature and humidity changes without causing damage or buckling.
Remember to take breaks during the installation process to step back and admire your progress. This will help ensure that the tiles are being placed and pressed evenly and accurately. With all the tiles in place, it’s time to move on to the next step – trimming and finishing the edges.
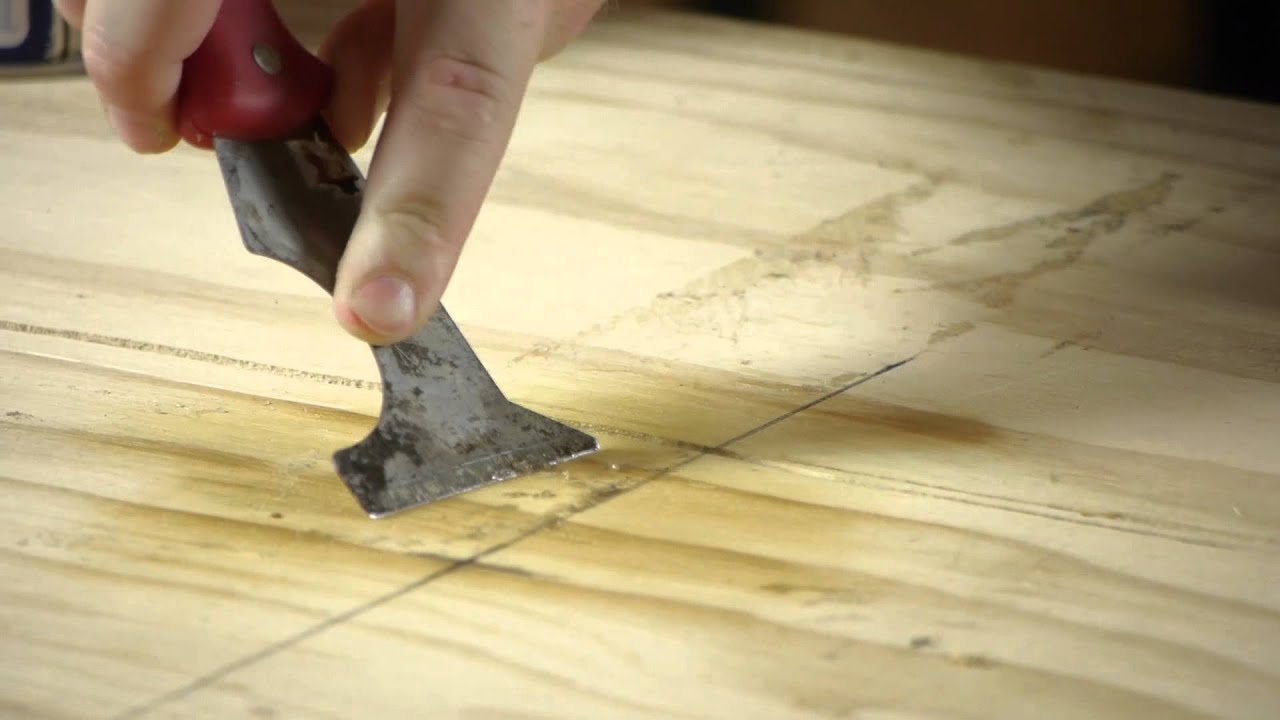
Trimming and Finishing the Edges
Trimming and finishing the edges of the peel and stick tiles will give your installation a polished and professional look. Follow these steps to achieve clean and seamless edge finishes:
- Measure and mark the areas where the tiles need to be trimmed to fit along the edges. Use a straight edge or ruler to ensure accurate measurements.
- Carefully cut the tiles along the marked lines using a utility knife or tile cutter. Apply firm and even pressure to ensure clean and precise cuts.
- For curved or irregular edges, you may need to make multiple cuts or trim the tiles gradually to achieve the desired fit. Take your time and make precise cuts as needed.
- Once the edges are trimmed, press down firmly on the tiles to ensure they are securely adhered to the plywood surface. Use the hand roller or regular roller to apply even pressure along the edges.
- If there are any gaps between the trimmed tiles and the wall or other surfaces, you can use quarter-round molding or caulk to create a finished and seamless transition.
- For a more elegant and refined look, consider adding edge trim or transition strips to cover the exposed edges of the tiles. These accessories will not only provide a finished appearance but also offer protection to the exposed edges.
Take your time during the trimming and finishing process to achieve clean and precise results. It’s better to make small adjustments as needed rather than rushing through and ending up with uneven or ill-fitting edges. With the edges trimmed and finished, it’s now time to move on to the final steps of sealing and cleaning the tiles.
Sealing and Cleaning the Tiles
Sealing and cleaning the peel and stick tiles will help protect their surface and maintain their appearance over time. Follow these steps to ensure your tiles stay in optimal condition:
- Check the manufacturer’s instructions: Some peel and stick tiles may already come with a protective sealant applied. In such cases, sealing may not be necessary. However, if recommended by the manufacturer, proceed with the sealing process.
- If sealing is needed, choose a suitable tile sealer according to the type of tiles you have installed. Apply the sealer following the manufacturer’s instructions, ensuring complete coverage of the tile surface.
- Allow the sealer to dry completely before moving on to the next step. This may take a few hours or longer, depending on the specific sealer product used.
- Once the tiles are sealed, it’s time to clean them. Regularly sweep or vacuum the surface to remove any loose dust or debris.
- For a deeper clean, use a mild cleaning solution or a manufacturer-approved cleaner specifically designed for the type of tiles you have installed. Follow the instructions on the cleaning product and mop or wipe the tiles to remove any dirt or stains.
- Avoid using abrasive cleaners, harsh chemicals, or excessive water, as these can damage the tiles or even cause them to lift from the plywood surface.
- If there are any stubborn stains or spills, gently scrub the affected area with a soft bristle brush or cloth. Rinse the area thoroughly and dry it immediately to prevent any moisture damage.
Regular maintenance and cleaning will help prolong the life of your peel and stick tiles and keep them looking their best. By following these sealing and cleaning guidelines, you can enjoy a beautiful and well-maintained flooring surface for years to come.
With the final steps of sealing and cleaning complete, you have successfully installed peel and stick tiles on your plywood surface. Stand back and admire your handiwork – you’ve transformed the look of your space with a cost-effective and DIY-friendly flooring solution.
Remember, while the installation process of peel and stick tiles on plywood can be relatively straightforward, it’s important to carefully follow all instructions provided by the manufacturer of both the tiles and any adhesive or sealer products used. This will ensure a successful and long-lasting installation.
Conclusion
Installing peel and stick tiles on plywood can be a rewarding and cost-effective way to update the flooring in your home. With the right materials, proper preparation, and careful installation, you can achieve a beautiful and durable flooring surface that enhances the overall look and feel of your space.
Throughout this article, we have discussed the step-by-step process of installing peel and stick tiles on plywood. From gathering the necessary materials to preparing the plywood surface, measuring and cutting the tiles, applying adhesive or removing backing, placing and pressing the tiles, trimming and finishing the edges, and finally sealing and cleaning the tiles – each step is crucial for a successful installation.
By following the guidelines and taking your time during each step, you can ensure a professional-looking result that will stand the test of time. Remember to prioritize safety by wearing protective gear and using the appropriate tools for cutting and installation.
Additionally, it is important to consider the specific instructions and recommendations provided by the manufacturer of your peel and stick tiles, adhesive, and sealant products. Following these instructions will help ensure the best possible outcome and prevent any damage or premature wear of the tiles.
Now that you have completed the installation process, take a moment to appreciate your hard work and the transformed appearance of your space. Whether it’s a kitchen, bathroom, or any other area in your home, the newly installed peel and stick tiles on your plywood floor will add style and durability.
Remember, regular maintenance and cleaning are essential to preserving the beauty and longevity of your new flooring. Take care to follow the cleaning guidelines provided by the manufacturer of the tiles and use suitable cleaning products to ensure their continued appeal.
With the knowledge and skills you’ve acquired through this article, you are now equipped to confidently install peel and stick tiles on plywood. Enjoy the beauty and functionality of your new flooring, and feel proud of your accomplishment as you embrace the positive transformation it brings to your living space.
Frequently Asked Questions about How To Install Peel And Stick Tile On Plywood
Was this page helpful?
At Storables.com, we guarantee accurate and reliable information. Our content, validated by Expert Board Contributors, is crafted following stringent Editorial Policies. We're committed to providing you with well-researched, expert-backed insights for all your informational needs.


0 thoughts on “How To Install Peel And Stick Tile On Plywood”