Articles
How To Put Up Field Fence
Modified: August 27, 2024
Learn how to easily and effectively put up field fence with our informative articles. Perfect for farmers and landowners looking to secure their property and keep animals contained.
(Many of the links in this article redirect to a specific reviewed product. Your purchase of these products through affiliate links helps to generate commission for Storables.com, at no extra cost. Learn more)
Introduction
Putting up a field fence is an essential task for many homeowners and landowners. Whether you need to create a boundary for your livestock, protect your garden from wildlife, or establish a safe and secure play area, installing a field fence is the way to go.
However, the process can seem intimidating to those who are not familiar with it. But fear not! In this article, we will guide you through the step-by-step process of putting up a field fence, from choosing the right materials to securing the fence effectively.
By the end of this article, you will have all the information you need to successfully install a field fence and ensure its longevity. So, let’s dive in and get started!
Key Takeaways:
- Choosing the right materials, accurately measuring and marking the field, and properly preparing the ground are crucial steps in successfully installing a durable and effective field fence.
- Attention to detail, regular maintenance, and proper wire tension are essential for ensuring the longevity and functionality of a field fence, providing peace of mind and protection for your property.
Read more: How To Put Up Garden Fence
Choosing the Right Materials
When it comes to putting up a field fence, choosing the right materials is crucial for the success and durability of your project. There are several factors to consider when selecting your materials, including the type of animals you need to contain or keep out, the terrain of your property, and your budget.
Here are the key components you will need:
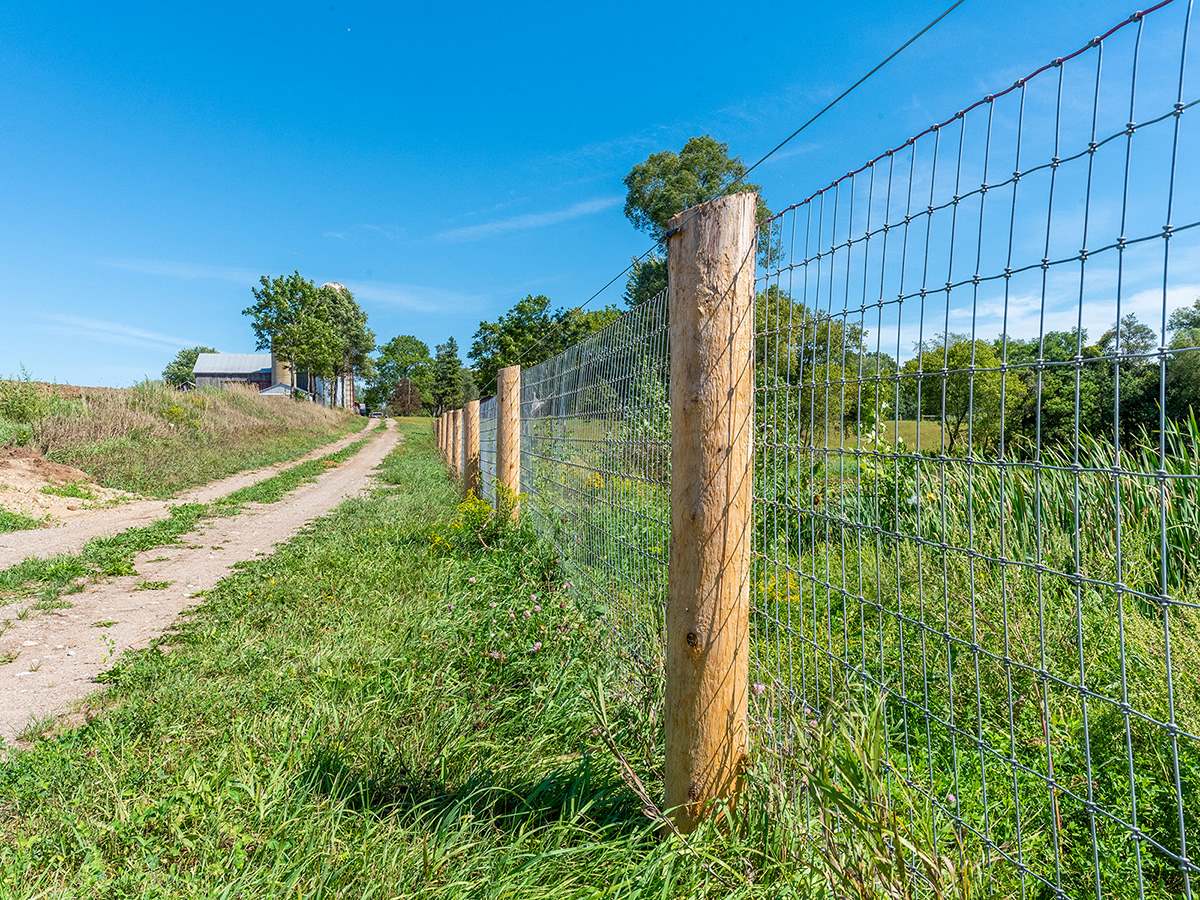
- Fence Posts: Fence posts are the foundation of your field fence. They provide support and stability. Depending on your needs and budget, you can choose between wooden posts, metal T-posts, or pipe posts. Wooden posts are typically more visually appealing and durable, while T-posts are more affordable and easy to install.
- Fence Wire: The type of fence wire you choose will depend on the purpose of your field fence. If you need to contain large livestock, such as horses or cattle, you will need a heavier gauge wire that can withstand their weight. For smaller livestock or to keep out smaller animals, a lighter gauge wire may be sufficient.
- Fence Clips or Staples: These are used to secure the fence wire to the fence posts. Fence clips are typically used for T-posts, while staples are used for wooden posts.
- Gates and Gate Hardware: If you need to have an access point in your field fence, you will need to install a gate. Make sure to choose a gate that is sturdy and secure, and select appropriate gate hardware, such as hinges and latches.
- Tools and Equipment: To complete the installation process, you will need a few essential tools and equipment, including a post hole digger, a level, a wire stretcher, pliers, and a hammer.
When purchasing your materials, make sure to take accurate measurements of the area you need to fence off. This will help you determine the quantity of materials you need, saving you from any last-minute trips to the store.
Remember, investing in high-quality materials may cost more upfront, but it will ensure the longevity and effectiveness of your field fence. Now that you have chosen the right materials, let’s move on to the next step: measuring and marking the field.
Measuring and Marking the Field
Before you start digging holes and setting posts, it’s crucial to accurately measure and mark the field where you will be installing the fence. This step ensures that your fence is properly aligned, level, and meets your specific needs.
Here’s how to measure and mark the field:
- Measure the Perimeter: Use a measuring tape or a measuring wheel to determine the length and width of the area you want to fence off. Make note of any obstacles or irregularities that may affect the placement of your posts.
- Plan the Post Spacing: The spacing between your fence posts will depend on the type of fence wire you are using and the purpose of the fence. Generally, the recommended spacing for wooden posts is 8 to 12 feet apart, while T-posts can be spaced 10 to 16 feet apart.
- Mark the Post Locations: Once you have determined your post spacing, use stakes or spray paint to mark the locations where the posts will be installed. Make sure the markings are visible and easy to follow as you proceed with the installation.
- Determine Gate Placement: If you plan on installing a gate, you need to decide where it will be located. Consider accessibility, convenience, and any other factors that may affect its placement. Mark the gate location accordingly.
- Double-Check and Adjust: Before proceeding further, double-check your measurements and markings to ensure accuracy. Make any necessary adjustments or corrections to ensure a precise installation.
Measuring and marking the field properly will save you time and effort in the long run. It ensures that your fence is installed in the correct position and provides a clear visual guide for the rest of the installation process.
Now that you have measured and marked the field, it’s time to prepare the ground for the fence installation. Keep reading to learn the necessary steps to get your field fence project off the ground.
Preparing the Ground
Properly preparing the ground before installing a field fence is essential for a successful and long-lasting installation. This step ensures that the fence will be level, stable, and able to withstand the elements and potential pressure from animals.
Here are the steps to prepare the ground for your field fence:
- Clear Vegetation: Remove any grass, weeds, or other vegetation from the area where the fence will be installed. This will ensure a clean and even surface for the fence.
- Level the Ground: Use a rake or shovel to level the ground, removing any bumps or uneven areas. A level ground will make the installation process easier and ensure a more secure fence.
- Remove Rocks and Debris: Clear the area of any rocks, stones, or debris that may obstruct the installation or pose a risk to the integrity of the fence. These obstacles can also damage the fence wire over time.
- Treat the Soil (Optional): If the soil in your area is prone to erosion or shifting, you may choose to treat it with stabilizers or compact it with water or a roller. This helps create a stable foundation for the fence posts.
- Consider Digging a Trench (Optional): If you’re concerned about wildlife digging under the fence, you can dig a trench along the perimeter and bury a portion of the fence wire. This deters animals from burrowing under the fence.
By properly preparing the ground, you ensure that the installation process goes smoothly and that your field fence is installed on a solid foundation. Take your time to clear the area and address any potential obstacles or challenges. This will ultimately contribute to the longevity and effectiveness of your fence.
With the ground prepared, it’s time to move on to the next step: setting the posts. This is a critical part of the installation process, so let’s delve into it in the next section.
Setting the Posts
Setting the posts is a crucial step in installing a field fence. The posts provide the foundation and support for the entire fence, so it’s important to ensure they are set securely and at the correct depth.
Here’s how to set the posts for your field fence:
- Prepare the Holes: Using a post hole digger, dig holes along the marked locations where the posts will be installed. The depth of the holes will depend on the height of the fence and the type of soil in your area. As a general rule of thumb, the holes should be one-third the height of the fence.
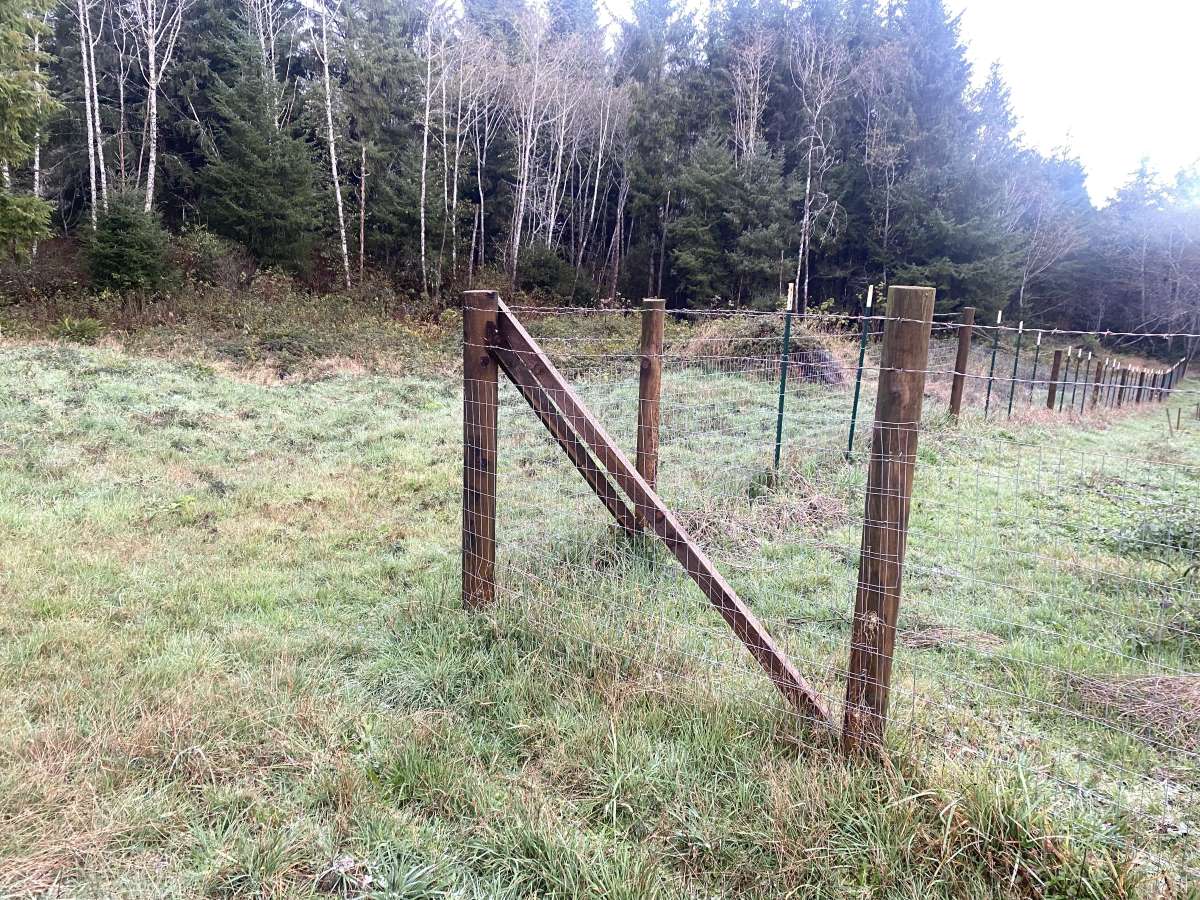
- Secure the Corner Posts: Begin by setting the corner posts first. These should be sturdier and more substantial than the line posts. Place the corner posts in the holes and use a level to ensure they are plumb and straight. Backfill the holes with soil or gravel and tamp it down firmly to secure the posts in place.
- Set the Line Posts: After the corner posts are secure, move on to setting the line posts. Place the line posts in the remaining holes, ensuring they are evenly spaced according to your planned post spacing. Use a level to ensure they are straight and plumb. Backfill the holes and tamp down the soil or gravel.
- Allow for Proper Clearance: If your field fence will be electrified, make sure to leave enough space between the posts and the fence wire for the installation of insulators and electric wires.
- Double-Check the Post Alignment: Before proceeding, double-check that all the posts are aligned properly, in line with each other, and at the correct height. Make any necessary adjustments to ensure a straight and even fence.
Remember to take your time when setting the posts, as this step sets the foundation for your entire fence. Ensure that the posts are securely set in the ground and accurately aligned for a professional and sturdy installation.
Now that you have your fence posts in place, it’s time to move on to the next step: stretching and attaching the fence wire. This is where your field fence starts to take shape. Read on to learn more about this crucial step.
When putting up field fence, make sure to properly stretch the wire to prevent sagging and ensure the fence is securely anchored to sturdy posts to withstand pressure from livestock.
Read more: How To Put Up A Snow Fence
Stretching and Attaching the Fence
With the posts securely set, it’s time to stretch and attach the fence wire to create the physical barrier of your field fence. This step requires careful attention to ensure that the fence is tight, properly aligned, and securely attached to the posts.
Follow these steps to stretch and attach the fence wire:
- Start at the Corner: Begin at one of the corners and unroll the fence wire along the length of the fence. Make sure the fence wire is aligned with the ground and doesn’t have any wrinkles or kinks.
- Attach the Wire to the Corner Post: Use fence clips or staples to attach the fence wire to the corner post at a height that suits your needs. Make sure the wire is snug against the post but not overly tightened.
- Stretch the Wire: Use a wire stretcher tool to pull the fence wire tightly towards the next post. Secure the wire stretcher to the fence wire at the appropriate distance from the corner post and carefully pull the wire until it is taut.
- Attach the Wire to the Next Post: Once the wire is stretched, use fence clips or staples to attach it to the next post at the desired height. Make sure the wire is securely fastened to the post.
- Repeat the Process: Continue stretching and attaching the fence wire to each post until you reach the end of the fence line. Make sure to maintain proper tension and alignment as you work.
- Trim Excess Wire: Once you reach the end of the fence line, cut the fence wire to the desired length, leaving a small allowance for attaching it to the end post.
Throughout the process, regularly check the tension of the fence wire to ensure that it remains taut and properly aligned. Adjust as needed to achieve the desired result.
Remember, a properly stretched and attached fence wire is essential for the overall strength and functionality of your field fence. Taking the time to do it correctly will result in a secure and reliable barrier.
Next, we’ll go over the important step of installing gates. This will provide you with easy access to your fenced area. Keep reading to learn more.
Installing Gates
If you need to have access to the area enclosed by your field fence, installing gates is an essential step. Gates provide a convenient entrance and exit point, allowing you to easily enter your fenced area and keep unauthorized individuals or animals out.
Follow these steps to install gates for your field fence:
- Choose the Right Gate: Select a gate that suits your needs in terms of size, material, and style. Consider factors such as the width of the opening, the primary purpose of the gate, and the overall aesthetic of your fence.
- Prepare the Gate Opening: Clear any obstacles or vegetation from the area where the gate will be installed. Make sure the ground is level and free from rocks or debris that may interfere with the gate’s operation.
- Measure and Mark the Gate Opening: Determine the width and height of the gate opening. Use a measuring tape, level, and stakes to mark the exact location where the gate will be installed.
- Install Gate Posts: Use sturdy gate posts to provide support and stability for the gate. Ensure they are securely set in the ground, aligned with each other, and level. Use a level and a post level to verify their positioning.
- Attach Gate Hardware: Install the gate hardware, including hinges, latches, and any necessary support braces. Make sure each component is properly aligned and securely attached. Use the appropriate hardware for the size and weight of your gate.
- Hang the Gate: With the gate hardware in place, carefully hang the gate onto the hinges. Ensure that it swings freely and smoothly. Adjust the hinges if necessary to achieve the desired movement.
- Test and Adjust: Open and close the gate multiple times to test its functionality and alignment. Make any necessary adjustments to ensure it operates smoothly and securely.
- Secure the Gate: Once you are satisfied with the gate’s installation and operation, securely fasten it to the gate posts. This will provide added stability and prevent the gate from swinging open or being easily tampered with.
By following these steps, you can install gates that seamlessly integrate with your field fence, providing a convenient access point while maintaining the security and integrity of your enclosed area.
Now that the gates are in place, the next step is to ensure proper wire tension for your field fence. This will help maintain the stability and effectiveness of the fence. Continue reading to learn more about this important component.
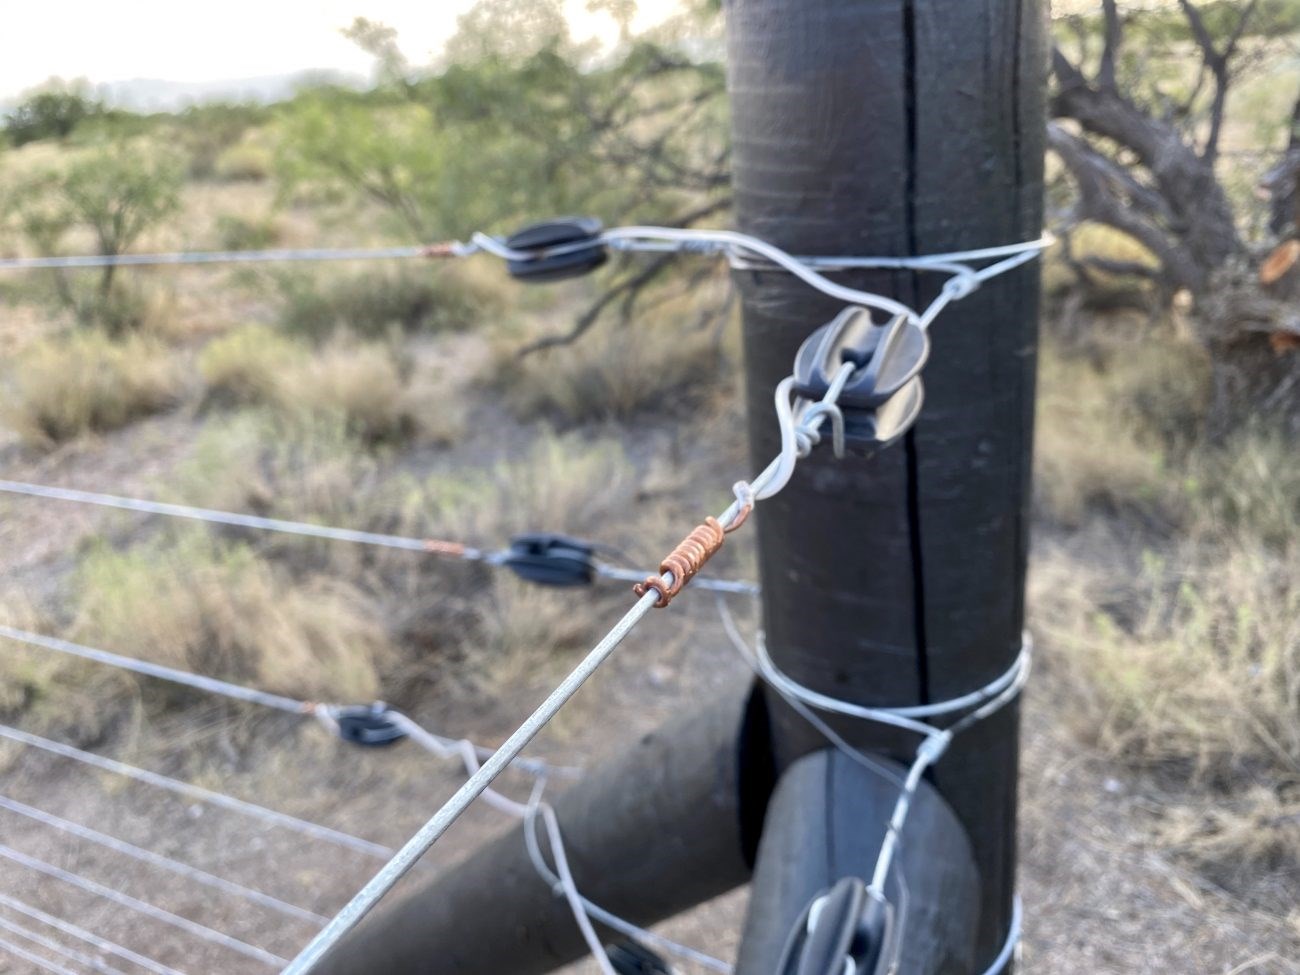
Adding Wire Tension
Adding wire tension to your field fence is a critical step in ensuring its stability, durability, and effectiveness. Proper tension keeps the fence securely in place, preventing sagging and maintaining the integrity of the barrier.
Follow these steps to add wire tension to your field fence:
- Identify the Starting Point: Choose a section of the fence where you will begin adding tension. This is typically the middle of the fence line, between two posts.
- Attach a Tensioning Device: Use a wire strainer or tensioning device designed for field fences. Attach it to the fence wire at the starting point, ensuring it is securely anchored.
- Tighten the Wire: Use the tensioning device to pull the fence wire tight. This may involve using a tensioning tool or a come-along. Gradually tighten the wire until it reaches the desired tension.
- Secure the Wire: Once the wire is sufficiently tensioned, secure it in place using wire clamps or crimps. Make sure the wire is firmly attached to the fence posts and any tensioning devices.
- Move to the Next Section: Repeat the process of adding wire tension for each section of the fence, working in both directions from the starting point. This ensures consistent tension throughout the entire length of the fence.
- Regularly Check and Adjust: Over time, the fence wire may naturally loosen due to weather conditions or animal activity. Regularly inspect your fence and adjust the wire tension as needed to maintain its effectiveness.
Proper wire tension is crucial for the longevity and functionality of your field fence. It helps ensure that the fence remains securely in place and provides a reliable barrier for your desired purpose, whether it’s keeping animals in or out.
With the wire tension added, the next step is to secure the fence in place. This will prevent animals from pushing under or through the fence. Continue reading for more information on securing your field fence.
Securing the Fence
Securing the fence is an important step to prevent animals from pushing under or through your field fence. By properly securing the fence, you can ensure its effectiveness and maintain the integrity of the enclosure.
Follow these steps to secure your field fence:
- Check the Bottom of the Fence: Inspect the bottom of the fence line to ensure there are no gaps or openings where animals could squeeze through. If necessary, use additional fencing materials or wire to close any gaps.
- Bury the Bottom of the Fence: Consider burying a portion of the fence wire or using a wire apron to deter animals from digging under the fence. This can be particularly important if you’re trying to keep small animals from entering or exiting the enclosed area.
- Avoid Ground Contact: Make sure the fence wire does not come into direct contact with the ground, as this can lead to rusting and deterioration. Use fence clips or attachments to secure the wire to the fence posts at a height above the ground level.
- Install Predator Guard: If you’re concerned about predators, such as coyotes or foxes, consider installing predator guards or electrified wires on the outside of the fence. This will help deter predators from attempting to breach the fence.
- Regular Maintenance: Frequently inspect the fence for any damage, loose wires, or weak spots. Repair or replace any compromised sections to maintain the integrity and effectiveness of the fence.
By securing your field fence properly, you can ensure that it serves its intended purpose and provides a reliable barrier. This will give you peace of mind and help protect your property, livestock, or garden from unwanted intruders.
With the fence securely installed, you have successfully completed the process of putting up a field fence. Take pride in your achievement and enjoy the benefits of having a well-protected and defined area. Remember to periodically inspect and maintain the fence to ensure its long-term effectiveness.
Now, it’s time to step back and admire your handiwork. Congratulations on completing your field fence installation!
Read more: How To Put Up A Wood Fence
Conclusion
Putting up a field fence may seem like a daunting task, but with the right knowledge and guidance, it can be a rewarding project that provides long-term benefits. By following the steps outlined in this article, you can successfully install a field fence that meets your specific needs, whether it’s containing livestock, protecting your garden, or establishing a secure play area.
Choosing the right materials, accurately measuring and marking the field, preparing the ground, setting the posts, stretching and attaching the fence wire, and installing gates are all crucial steps in the process. By paying attention to detail and taking the time to do each step correctly, you can ensure the stability, durability, and effectiveness of your field fence.
Remember to regularly inspect and maintain your fence, checking for any damage, loose wires, or weak spots. Addressing any issues promptly will help extend the lifespan of your fence and maintain its functionality over time.
Installing a field fence not only provides a physical barrier but also offers peace of mind and protection for your property, livestock, or crops. It defines boundaries, deters unwanted intruders, and creates a safe space for your specific needs.
So, roll up your sleeves, gather the necessary materials, and take on the challenge of putting up a field fence. With the knowledge and guidance provided in this article, you have the tools to successfully complete the project and enjoy the benefits of a well-protected and defined area.
Remember, accuracy, attention to detail, and regular maintenance are key to a durable and effective field fence. Embrace the process, and enjoy the satisfaction of a job well done!
Frequently Asked Questions about How To Put Up Field Fence
Was this page helpful?
At Storables.com, we guarantee accurate and reliable information. Our content, validated by Expert Board Contributors, is crafted following stringent Editorial Policies. We're committed to providing you with well-researched, expert-backed insights for all your informational needs.


0 thoughts on “How To Put Up Field Fence”