Home>Articles>How To Refinish Hardwood Floors So They Look Brand New
Articles
How To Refinish Hardwood Floors So They Look Brand New
Modified: February 23, 2024
Learn how to refinish your hardwood floors with our helpful articles. Transform your floors and make them look brand new again.
(Many of the links in this article redirect to a specific reviewed product. Your purchase of these products through affiliate links helps to generate commission for Storables.com, at no extra cost. Learn more)
Introduction
Hardwood floors are a timeless and elegant addition to any home. They offer durability, beauty, and warmth, and with proper care and maintenance, they can last for generations. However, over time, hardwood floors can become worn, scratched, and dull, diminishing their natural charm.
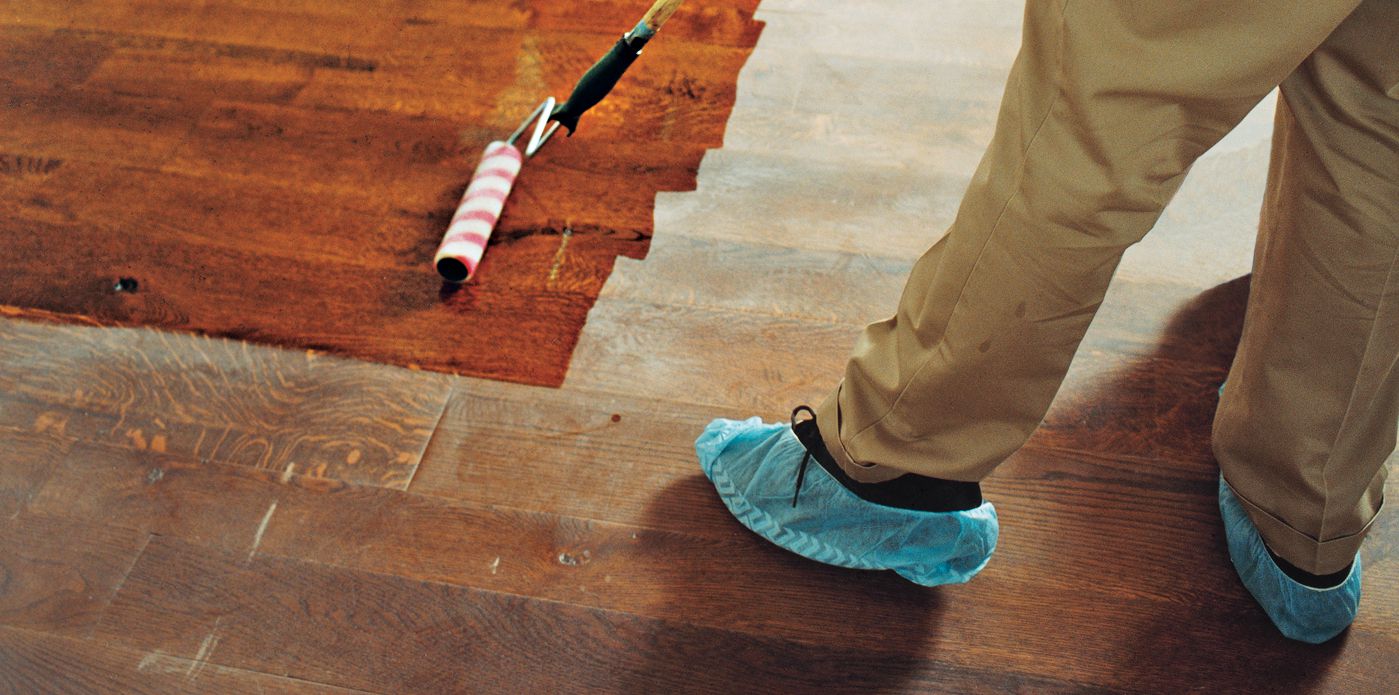
If your hardwood floors are in need of a makeover, refinishing them can breathe new life into your space. Refinishing hardwood floors involves sanding down the existing finish, applying a fresh coat of stain, and sealing it with a protective finish. This process not only enhances the appearance of your floors but also protects them from daily wear and tear.
In this article, we will guide you through the steps of refinishing your hardwood floors so they look brand new. We will explain how to assess the condition of your floors, gather the necessary tools and materials, prepare the area, make any necessary repairs, sand the floors, apply the stain and finish coats, and finally, how to maintain the refinished floors for years to come.
Refinishing hardwood floors is a labor-intensive project that requires attention to detail, patience, and a certain level of skill. However, with the right tools, materials, and knowledge, you can achieve professional-looking results without the need to hire a costly professional.
Before we dive into the process, it’s important to note that refinishing hardwood floors is not suitable for all situations. If your floors are severely damaged, have excessive wear, or if they have been previously refinished multiple times, it may be best to consult a professional to assess the condition and provide recommendations.
Now, let’s get started on transforming your worn-out hardwood floors into a stunning centerpiece for your home.
Key Takeaways:
- Refinishing hardwood floors involves thorough assessment, proper preparation, and meticulous application of stain and finish. By following the detailed steps, you can achieve stunning, long-lasting results without professional assistance.
- After refinishing, maintaining the beauty of your hardwood floors is essential. Regular cleaning, spill prevention, and protective measures will ensure the longevity and luster of your newly refinished floors.
Read more: How To Refinish A Hardwood Floor
Assessing the Condition of Your Hardwood Floors
Before embarking on the refinishing process, it is crucial to assess the condition of your hardwood floors. This step will help you determine if refinishing is the right solution and whether any repairs need to be made before proceeding.
1. Inspect the Surface: Start by examining the surface of your hardwood floors for any visible signs of damage such as scratches, gouges, or stains. Assess the overall condition and note any areas that require special attention during the refinishing process.
2. Check for Structural Issues: Inspect the floorboards for any signs of warping, buckling, or gaps between the boards. These issues can indicate underlying structural problems which may require professional intervention or repair before refinishing.
3. Test the Finish: Determine what type of finish is currently on your hardwood floors. There are two main types of finishes: polyurethane and wax. Polyurethane finishes will have a glossy or satin sheen, while wax finishes will have a matte or dull appearance. Knowing the type of finish will help you choose the appropriate products and techniques for refinishing.
4. Perform a Water Test: To determine if your hardwood floors have a wax finish, conduct a simple water test. Dampen a small area with water and observe if it beads up or is absorbed into the wood. If the water is absorbed, your floors have a wax finish. If it beads up, they likely have a polyurethane finish.
5. Evaluate the Thickness of the Wood: Measure the thickness of your hardwood floors to ensure there is sufficient material to handle the sanding process. Thin or engineered hardwood floors may not be suitable for refinishing multiple times, as it can compromise their structural integrity.
6. Consider the Age and History: Take into account the age of your hardwood floors and their previous refinishing history. Older floors or those with multiple layers of finish may require additional care and caution during the refinishing process.
By thoroughly assessing the condition of your hardwood floors, you can determine if refinishing is the right course of action. It will also allow you to identify any necessary repairs or precautions to take during the refinishing process. Taking the time to properly evaluate your floors will contribute to achieving the best possible results in your hardwood floor refinishing project.
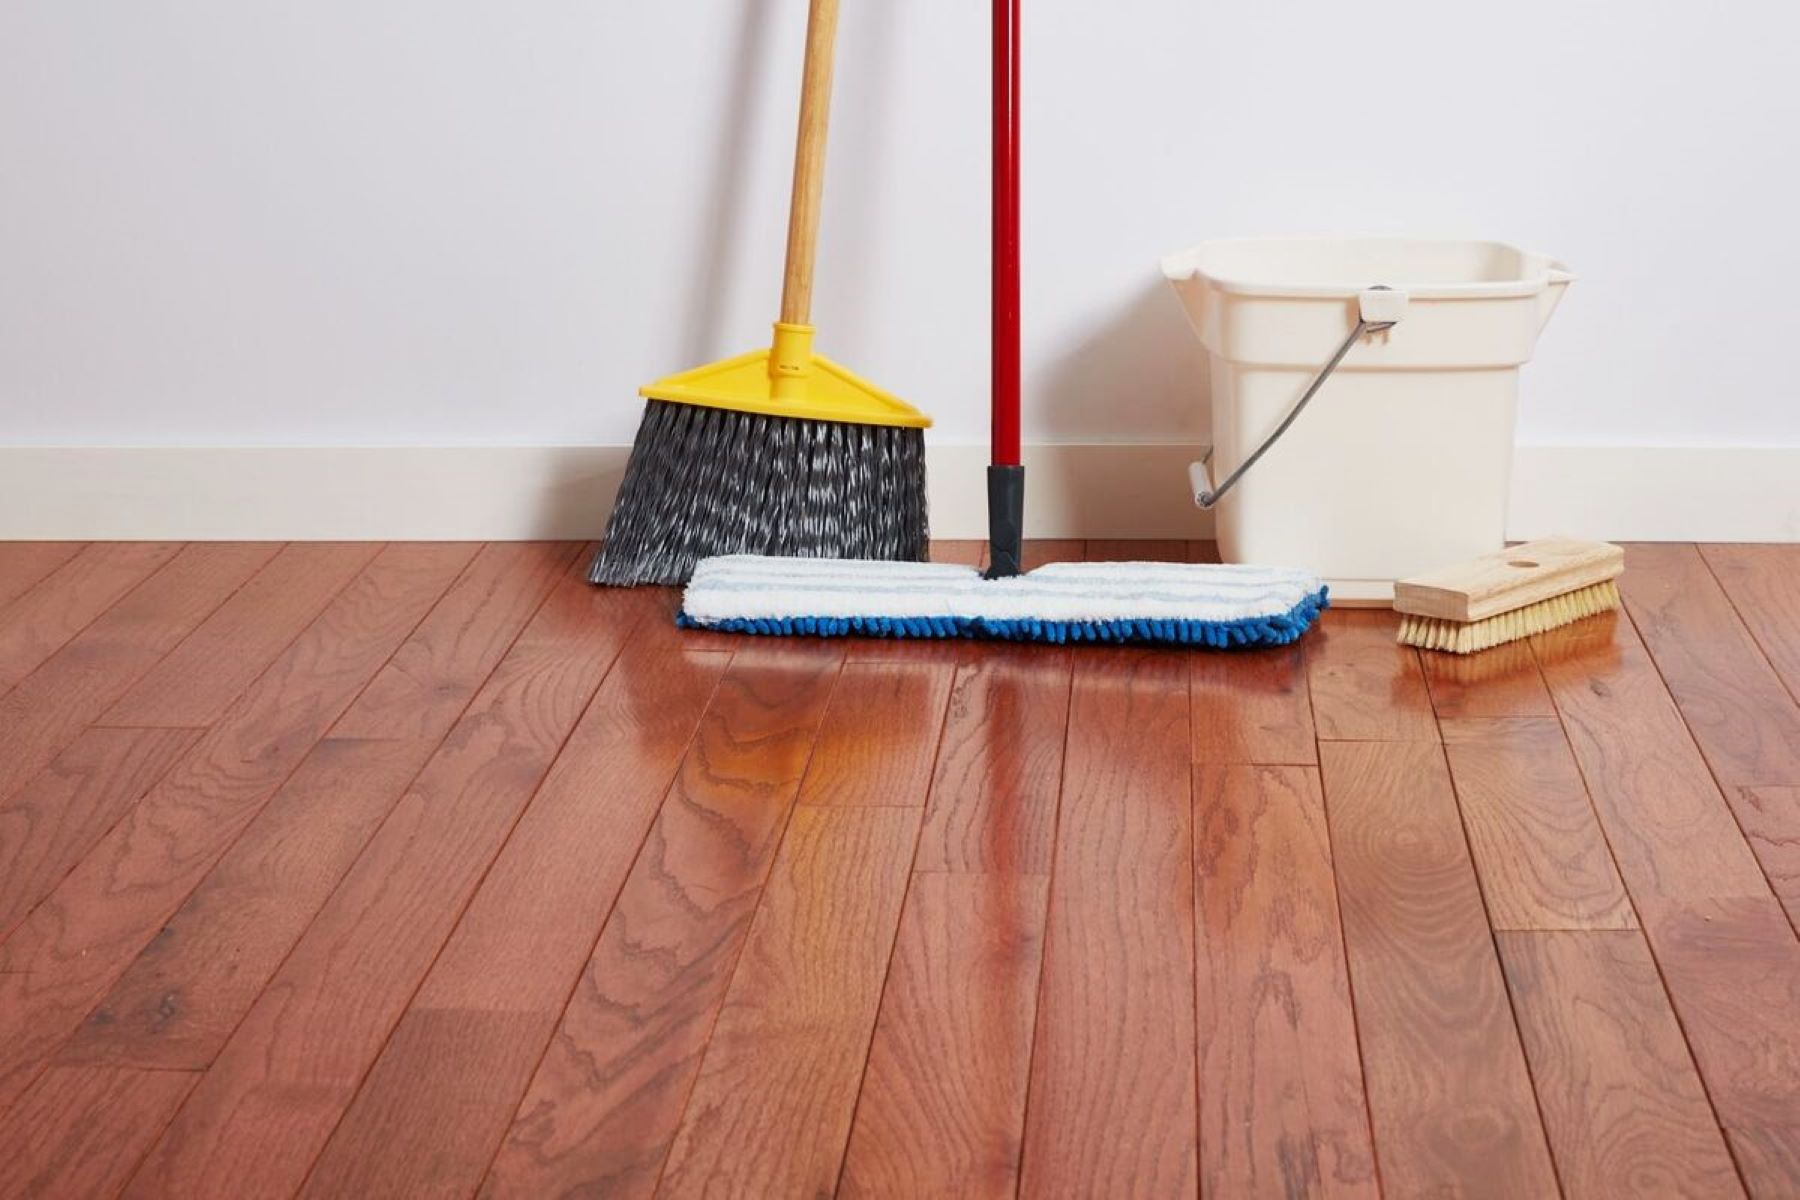
Gathering the Necessary Tools and Materials
Once you have assessed the condition of your hardwood floors and decided to proceed with refinishing, the next step is to gather all the necessary tools and materials. Having everything you need ready before you start the project will ensure a smooth and efficient process.
1. Safety Equipment: Before anything else, prioritize your safety by acquiring the appropriate safety gear. This typically includes safety glasses, a dust mask, and gloves to protect you from flying debris, harmful chemicals, and potential allergens.
2. Sanding Equipment: Since sanding is a crucial step in the refinishing process, you will need to rent or purchase a floor sander. The two main types are drum sanders and orbital sanders. Drum sanders are typically used for larger areas, while orbital sanders are more suitable for smaller, detailed areas. You will also need sandpaper of various grits, including coarse, medium, and fine, to tackle different stages of sanding.
3. Stain and Finish: Choose a stain color that suits your preference and complements your home’s aesthetic. Consider the type of finish you desire—whether it’s a high gloss, satin, or matte finish—and purchase the appropriate product. Opt for a finish specifically designed for hardwood floors, such as polyurethane or a water-based finish, for durability and longevity.
4. Brushes and Applicators: Depending on your chosen finish, you will need brushes or applicators for applying the stain and finish. Foam brushes or lambswool applicators work well for applying the stain, while a high-quality synthetic bristle brush or a T-bar applicator is ideal for applying the finish coats evenly.
5. Cleanup Supplies: Refinishing hardwood floors can be a messy process. Be prepared with drop cloths or plastic sheeting to protect the surrounding areas from dust and debris. You will also need a vacuum cleaner with a brush attachment or a broom, along with a dustpan, to clean up the sanding dust during and after the sanding process.
6. Additional Tools and Materials: Other tools that may come in handy during the refinishing process include a putty knife for filling gaps and cracks, wood filler for repairing any damaged areas, a hammer or nail punch to secure loose floorboards, and a clean cloth or sponge for wiping away excess stain or finish. Additionally, have mineral spirits or another appropriate solvent on hand for cleaning brushes and removing any spills or stains.
Take the time to gather all the necessary tools and materials before beginning the refinishing process. This will save you from unnecessary interruptions and ensure a more efficient workflow. With everything at your disposal, you’ll be ready to transform your worn hardwood floors into beautiful, rejuvenated surfaces.
Clearing the Room and Preparing the Area
Before you can start refinishing your hardwood floors, it’s important to clear the room and prepare the area for the upcoming work. This step will help protect your belongings, ensure a clean workspace, and facilitate a smoother refinishing process.
1. Remove Furniture and Decor: Begin by clearing the room of all furniture, area rugs, and any other decorative items. This includes chairs, tables, sofas, and any other large or heavy pieces. Remove wall hangings, curtains, and blinds as well. The goal is to create an open space, free of obstacles, to allow for easy movement and access to the entire floor area.
2. Seal Off Adjacent Rooms: Close the doors to adjacent rooms to prevent dust and debris from spreading into other areas of your home. If possible, use plastic sheeting or tarps to cover doorways and seal off the room undergoing refinishing. This additional barrier will help contain the dust and protect surrounding spaces.
3. Protect Baseboards and Trim: Apply painter’s tape or masking tape to the baseboards and trim along the walls to protect them from accidental scratches or damage during the refinishing process. Ensure the tape is applied securely and covers the edges of the baseboards to create a tight seal.
4. Cover Vents and Outlets: Use plastic sheeting or painter’s tape to cover air vents and electrical outlets in the room. This will prevent dust and debris from getting inside and potentially causing damage or affecting the functionality of these components.
5. Open Windows and Use Ventilation: Refinishing hardwood floors involves the use of potentially strong-smelling chemicals and odors, such as those found in stains and finishes. To minimize exposure to fumes and aid in ventilation, open windows and use fans to circulate fresh air during the refinishing process.
6. Ensure Proper Lighting: Adequate lighting is essential when refinishing floors, as it helps you see imperfections, apply the stain and finish evenly, and identify any missed or uneven spots. Make sure the room is well-lit by using portable work lights or ensuring that existing lighting fixtures are functioning correctly.
By clearing the room and properly preparing the area, you create a safe and organized workspace for refinishing your hardwood floors. Taking the time to protect your belongings, seal off adjacent rooms, and ensure proper lighting and ventilation will make the overall refinishing process more efficient and enjoyable.
Removing Furniture and Fixtures
Once you have cleared the room and prepared the area for refinishing, the next step is to remove any remaining furniture and fixtures. Removing these items will allow you unrestricted access to the entire floor area, ensuring a thorough and efficient refinishing process.
1. Empty the Room: Remove all remaining furniture, including tables, chairs, shelves, and any other movable items. Take care to empty the contents of cabinets and drawers as well. Clearing the room of these items will provide ample space to work and prevent any potential damage that can occur during the refinishing process.
2. Store Furniture and Fixtures: Find a suitable storage space for your furniture and fixtures while the refinishing process is underway. Consider renting a storage unit if necessary or utilize other areas of your home, such as spare rooms or the garage. Ensure that the storage space is clean, dry, and free from any potential hazards that may impact the condition of your items.
3. Protect Fragile Items: If you have delicate or fragile items, such as glass tabletops or intricate decorations, take extra precautions to protect them during the refinishing process. Wrap them in bubble wrap or cloth and securely store them in a safe location to prevent any accidental damage.
4. Secure Hanging Objects: Remove wall hangings, mirrors, and artwork from the walls. Store them in a safe place or cover them with protective materials to prevent any potential damage from dust or accidental contact during the refinishing process.
5. Disconnect Electronics: If there are any electronics or electrical appliances in the room, such as lamps, televisions, or speakers, unplug them and safely remove them from the area. This will prevent damage to the items and minimize any potential safety hazards during the refinishing process.
6. Remove Light Fixtures: If possible, remove any light fixtures or pendant lamps from the room. This step will make it easier to work on the ceiling and walls and will help protect the fixtures from accidental damage from sanding or finishing materials.
By taking the time to remove furniture and fixtures from the room, you create a clean and unobstructed workspace for refinishing your hardwood floors. This step minimizes the risk of accidental damage and allows you to focus on the task at hand, ensuring a successful and seamless refinishing process.
Making Necessary Repairs
Before proceeding with the refinishing process, it is important to assess your hardwood floors for any damage or issues that need to be repaired. Making necessary repairs ensures that your floors are in optimal condition before applying the stain and finish, resulting in a smooth and flawless finish.
1. Inspect for Scratches and Gouges: Carefully examine your hardwood floors for scratches, gouges, or deep dents. Light scratches can often be minimized or concealed during the sanding and refinishing process. However, deeper scratches or gouges may require additional repair work, such as filling them with wood filler or using putty sticks specifically designed for hardwood floors. Follow the manufacturer’s instructions for proper application and drying time.
2. Repair Cracks and Gaps: Inspect your floorboards for cracks or gaps between the boards. Small gaps that are less than the thickness of a dime can be filled with wood filler or putty sticks. For wider gaps, consider using wood shims or slivers of matching wood to fill the space. Ensure that the repair materials are level with the surface of the floor to maintain a smooth and even finish.
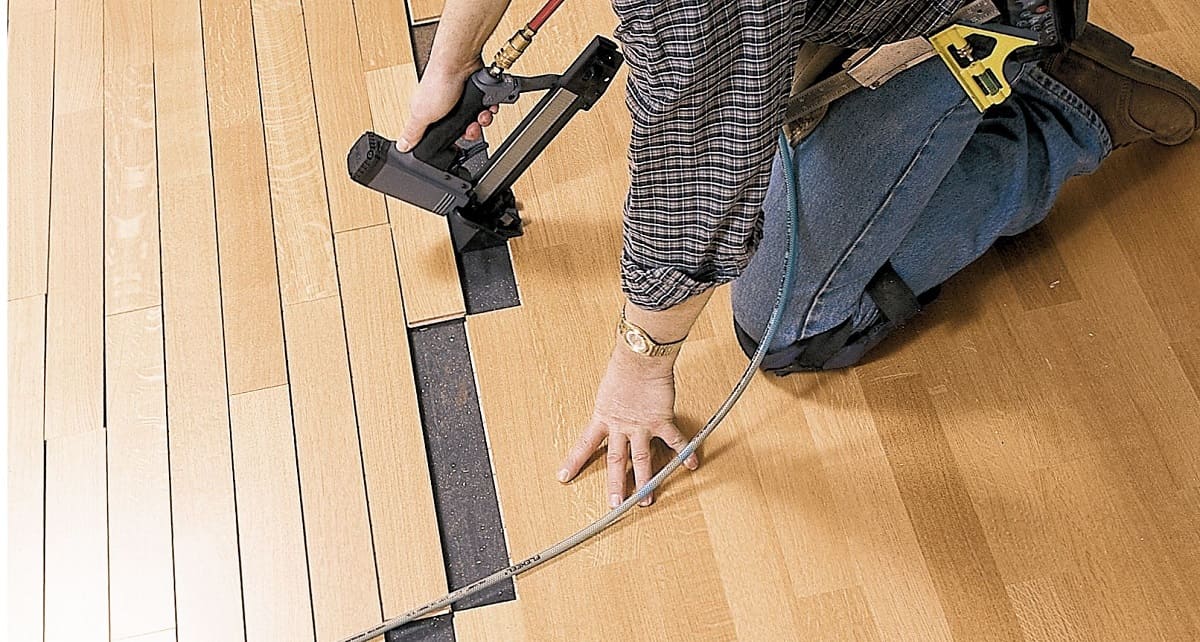
3. Secure Loose Floorboards: If you notice any loose or squeaky floorboards, it is important to secure them before proceeding with refinishing. Use a hammer and nails, or a nail punch, to reattach the loose boards to the subfloor. This will prevent any movement or creaking during the refinishing process and ensure a stable and durable floor surface.
4. Address Water Damage or Stains: If your hardwood floors have water damage or stubborn stains, take appropriate measures to address these issues. For water damage, identify and fix the source of the problem to prevent further damage. Allow the affected area to dry completely before proceeding with refinishing. For stains, use a wood stain remover or a mixture of vinegar and water to gently remove the stain. Follow up with sanding and refinishing as needed.
5. Replace Damaged Floorboards: In some cases, there may be floorboards that are severely damaged beyond repair. If this is the case, it may be necessary to replace those specific boards. Carefully remove the damaged boards using a pry bar or chisel and replace them with new ones that match the existing flooring. This step ensures a uniform and consistent appearance after refinishing.
By making necessary repairs to your hardwood floors, you address any existing damage or issues and create a strong foundation for the refinishing process. Take the time to assess and fix scratches, gouges, cracks, loose boards, and any other problems to achieve a beautifully restored and polished result.
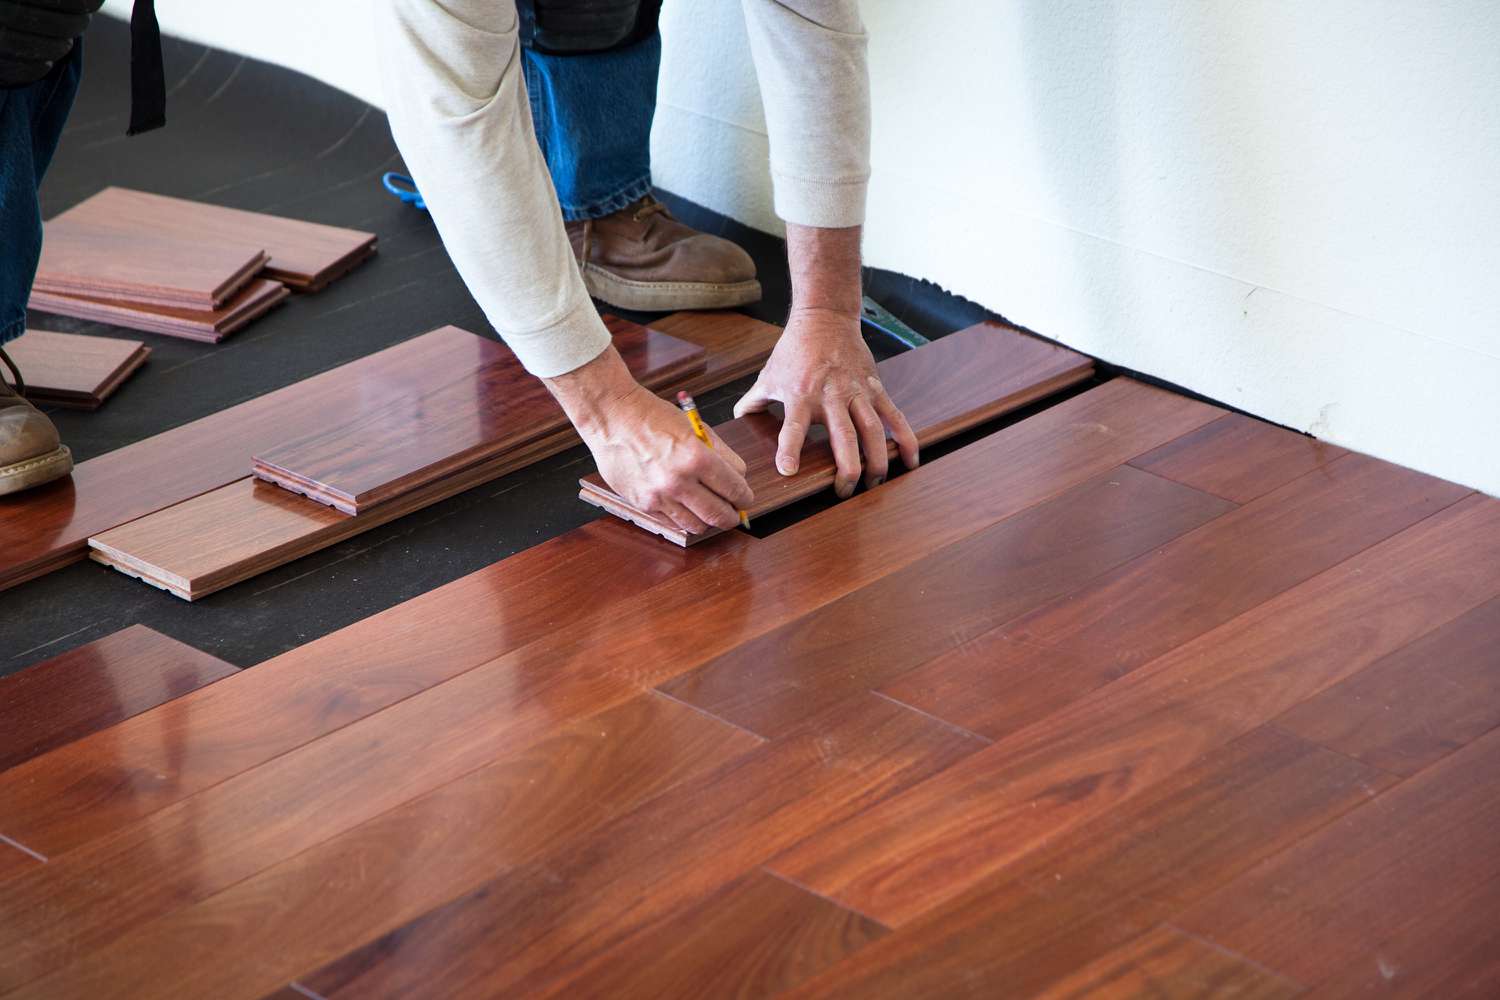
Before refinishing hardwood floors, make sure to thoroughly clean and sand the surface to remove any existing finish and imperfections. This will ensure a smooth and even application of the new finish, resulting in a brand new look.
Sanding the Hardwood Floors
Once you have assessed the condition of your hardwood floors and made any necessary repairs, the next step in refinishing them is sanding. Sanding is a critical process that removes the existing finish, smooths out imperfections, and prepares the surface for the application of stain and finish coats.
1. Choose the Right Grit: Start sanding with a coarse grit sandpaper, such as 36 or 40 grit, to effectively remove the existing finish and any surface imperfections. Gradually progress to finer grits, such as 60 or 80 grit, to refine the surface and achieve a smooth finish. Finish off with a very fine grit, such as 120 or 150, for a final smoothness before applying the stain.
2. Prepare and Use the Floor Sander: Attach the appropriate sandpaper to your rented or purchased floor sander according to the manufacturer’s instructions. Start in one corner of the room and work your way towards the exit, moving in the direction of the wood grain. Keep the sander moving at a steady pace, ensuring even sanding across the entire floor surface. Be careful not to linger too long in one area, as this can result in uneven sanding.
3. Sand the Edges and Corners: For areas that the floor sander cannot reach, such as along the edges and corners of the room, use a handheld edge sander or sanding block. Sand these areas with the same progression of grits as used on the main floor surface. Take your time and exercise caution to achieve a consistent finish without damaging the adjacent walls or baseboards.
4. Sand the Stairs (if applicable): If your hardwood floor extends to a staircase, sanding the stairs requires additional care and attention. Use a hand-held orbital sander or sandpaper and work methodically from top to bottom, sanding each tread and riser. Take extra care on the nosing of the steps, ensuring they are sanded uniformly with the rest of the surface.
5. Clean and Vacuum Thoroughly: During and after sanding, it is essential to keep the work area clean and free from dust and debris. Regularly empty and clean the dust collection bag or canister of the floor sander. Use a vacuum cleaner with a brush attachment to remove any residual dust from the floor and surrounding areas. Wipe down surfaces with a damp cloth to remove any remaining dust particles.
6. Inspect and Prepare for Staining: Once the sanding process is complete, inspect the floor surface for uniformity and smoothness. Look out for any remaining scratches, imperfections, or uneven areas that may require additional sanding or attention. Before proceeding with staining, ensure that the floor surface is completely clean and dry.
Sanding your hardwood floors is a critical step in the refinishing process. By following the proper sanding techniques and using the right grit sandpapers, you will create a smooth and even surface, ready for the application of stain and finish coats. Take your time during this stage to ensure a high-quality result that will enhance the overall appearance of your hardwood floors.
Applying the Stain
After sanding your hardwood floors to achieve a smooth and even surface, the next step in the refinishing process is applying the stain. Staining your hardwood floors enhances their natural beauty, adds depth and color, and allows you to customize the look to match your aesthetic preferences.
1. Choose the Right Stain: Select a high-quality wood stain that suits your desired color and finish. Test the stain on a small inconspicuous area or a spare piece of wood to ensure it achieves the desired shade before proceeding with the entire floor. Consider factors such as the wood species, lighting in the room, and the overall style you want to achieve.
2. Prepare the Floor: Before applying the stain, ensure that the floor is clean and free from any dust or debris. Thoroughly vacuum the entire area and wipe it down with a tack cloth or a slightly dampened cloth to remove any remaining dust particles. Protect adjacent surfaces or areas with plastic sheeting or masking tape to prevent accidental staining.
3. Apply the Stain: Use a high-quality brush or lambswool applicator to apply the stain. Start in one corner of the room and work your way towards the exit, applying the stain evenly along the grain of the wood. Be mindful of overlapping strokes to avoid creating visible lines or streaks. Work in small sections to ensure the stain doesn’t dry out before you can blend it into the next area.
4. Wipe Off Excess Stain: After applying the stain, use clean, lint-free rags or towels to wipe off any excess stain from the surface. This step helps achieve a more uniform color and prevents the stain from pooling or creating uneven patches. Wipe in the direction of the wood grain to maintain a consistent appearance.
5. Allow the Stain to Dry: The drying time for stain depends on the product and the humidity in the environment. Follow the manufacturer’s instructions for the recommended drying time. It is essential to allow the stain to dry completely before proceeding with the application of the finish coats to ensure a proper bond and a durable finish.
6. Assess the Color: Once the stain has dried, assess the color to ensure it meets your expectations. Keep in mind that stain can look different once dried, so it’s crucial to evaluate the final result. If desired, you can apply additional coats of stain to achieve a deeper or more intense color. Allow each coat to dry completely before applying the next.
By carefully applying the stain to your hardwood floors, you can enhance their natural beauty and achieve the desired color and tone. Take your time during this stage, ensuring even application and wiping off any excess stain to achieve a stunning and consistent finish throughout your refinished floors.
Applying the Finish Coats
After the stain has dried and you are satisfied with the color of your hardwood floors, it’s time to apply the finish coats. Applying a protective finish not only enhances the beauty of the wood but also provides durability and longevity to your refinished floors.
1. Choose the Right Finish: There are different types of finishes available, such as polyurethane, water-based finish, or oil-based finish. Consider factors such as the level of durability, ease of application, and the desired look when choosing the right finish for your hardwood floors. Follow the manufacturer’s recommendations for the specific finish you have selected.
2. Prepare the Floor: Ensure that the floor is clean and free from any dust or debris before applying the finish coats. Vacuum the entire area and wipe it down with a tack cloth to remove any remaining particles. Protect adjacent surfaces or areas with plastic sheeting or masking tape to prevent accidental application of the finish.
3. Stir the Finish: Thoroughly stir the finish to ensure any settled particles are mixed back into the solution. Avoid shaking the container, as this can introduce air bubbles that may affect the final finish on your floors.
4. Apply the Finish: Use a high-quality synthetic bristle brush or a T-bar applicator to apply the finish evenly on the floor surface. Start in one corner of the room and work your way towards the exit, following the direction of the wood grain. Apply thin, even coats, being careful not to leave any puddles or drips.
5. Allow the Finish to Dry: The drying time for the finish varies depending on the product and environmental conditions. Follow the manufacturer’s instructions for the recommended drying time. It is essential to ensure the finish is completely dry between coats to prevent any imperfections and ensure a smooth and even finish.
6. Sand between Coats (optional): For some finishes, it may be recommended to lightly sand the surface between coats to achieve optimal adhesion and a smooth finish. Use a fine-grit sandpaper or a sanding screen and gently sand the surface, being careful not to sand through the layers or damage the stain. Wipe away any dust before applying subsequent coats.
7. Apply Multiple Coats: Depending on the type of finish and the desired level of protection, multiple coats may be required. Follow the manufacturer’s instructions for the recommended number of coats. Ensure each coat is dry before applying the next, and lightly sand between coats if necessary.
8. Allow Ample Drying Time: After applying the final coat of finish, allow ample drying time before placing furniture or walking on the floors. Follow the manufacturer’s instructions for the recommended curing time, as this will ensure the finish is fully hardened and ready for use.
By applying the appropriate finish coats to your hardwood floors, you not only protect them from daily wear and tear but also enhance their beauty and longevity. Take your time during this stage, ensuring even and smooth application to achieve a stunning and durable finish on your refinished floors.
Allowing the Floors to Dry
After applying the final coat of finish to your refinished hardwood floors, it is crucial to allow ample drying time. Allowing the floors to properly dry and cure ensures that the finish bonds securely to the wood and provides the desired level of durability and protection.
1. Follow Manufacturer’s Instructions: The drying time for the finish will depend on the specific product and environmental conditions. It is essential to follow the manufacturer’s instructions regarding the recommended drying and curing time. This information can typically be found on the product label or packaging.
2. Provide Adequate Ventilation: Proper air circulation and ventilation help the finish to dry effectively. Open windows and doors, use fans or ventilation systems, and maintain a comfortable temperature and humidity level in the room. Adequate ventilation helps promote faster drying while minimizing the risk of moisture-related issues.
3. Avoid Foot Traffic: While the floors are drying, it is essential to avoid walking on them. Stay off the floors and restrict access to the area to prevent accidental damage or imprints in the finish. Place protective signs or barriers to remind others to avoid the space.
4. Wait for Curing: Drying and curing are not the same. Drying refers to the evaporation of moisture in the finish, while curing refers to the time it takes for the finish to fully harden and become durable. Follow the manufacturer’s instructions for the recommended curing time before placing furniture, rugs, or allowing regular foot traffic on the floors.
5. Monitor the Finish: While the floors are drying, periodically inspect the finish to ensure it is drying evenly and without any issues. Look for any signs of bubbling, discoloration, or other abnormalities. If you notice any problems, consult the manufacturer or seek advice from a professional to address the issue promptly.
6. Exercise Patience: It is important to exercise patience during the drying process. Rushing to use the floors before they are fully dry and cured can result in damage to the finish and compromise the overall durability. Allow sufficient time for the finish to harden, ensuring the best possible outcome for your refinished hardwood floors.
Properly allowing the floors to dry and cure is essential for the success and longevity of your refinished hardwood floors. By following the manufacturer’s instructions, providing adequate ventilation, and exercising patience, you can ensure that the finish properly adheres, resulting in beautiful, durable, and long-lasting floors for years to come.
Reinstalling Furniture and Fixtures
After allowing the refinished hardwood floors to fully dry and cure, it’s time to reassemble the room and reinstall the furniture and fixtures. Careful and strategic placement of these items will help showcase your newly refinished floors and preserve their beauty and integrity.
1. Clean the Furniture: Before placing furniture back onto the refinished floors, take a moment to clean each piece. Dust or wipe off any dirt or debris that may have accumulated during the refinishing process. Use a soft cloth or gentle cleaning solution appropriate for the material of your furniture.
2. Utilize Furniture Pads: To protect your refinished floors from potential scratches or damage caused by furniture, attach felt pads or floor protectors to the bottom of each furniture piece. These pads provide a cushioning barrier and prevent direct contact between the furniture and the floor surface.
3. Strategically Arrange Furniture: Take the opportunity to reconsider the layout and arrangement of your furniture. Experiment with different configurations to optimize the space and highlight the beauty of your refinished floors. Consider the flow of the room, natural light, and functionality when placing your furniture.
4. Avoid Dragging or Sliding Furniture: When moving furniture back into the room, lift each piece rather than dragging or sliding it across the floor. This precaution will prevent unnecessary scratching or damage to the newly refinished surface. Enlist the help of others or use furniture sliders if needed to make the process easier.
5. Secure Area Rugs and Mats: If you plan to use area rugs or mats on your refinished floors, ensure they have a non-slip backing or use rug grippers to prevent them from sliding or shifting. This will reduce the risk of accidents and protect your floors from potential scratches or damage caused by the movement of these items.
6. Reinstall Fixtures and Accessories: Once the furniture is in place, hang back wall hangings, mirrors, curtains, and blinds. Place any decorative accessories or additional fixtures according to your design preferences. Take care not to scratch the floor or damage the newly finished surface during installation.
By reinstalling furniture and fixtures with care and thoughtfulness, you can showcase the beauty of your refinished hardwood floors while preserving their integrity. Take the necessary precautions to protect the floors from potential scratches or damage caused by furniture and ensure a harmonious and visually appealing space in your home.
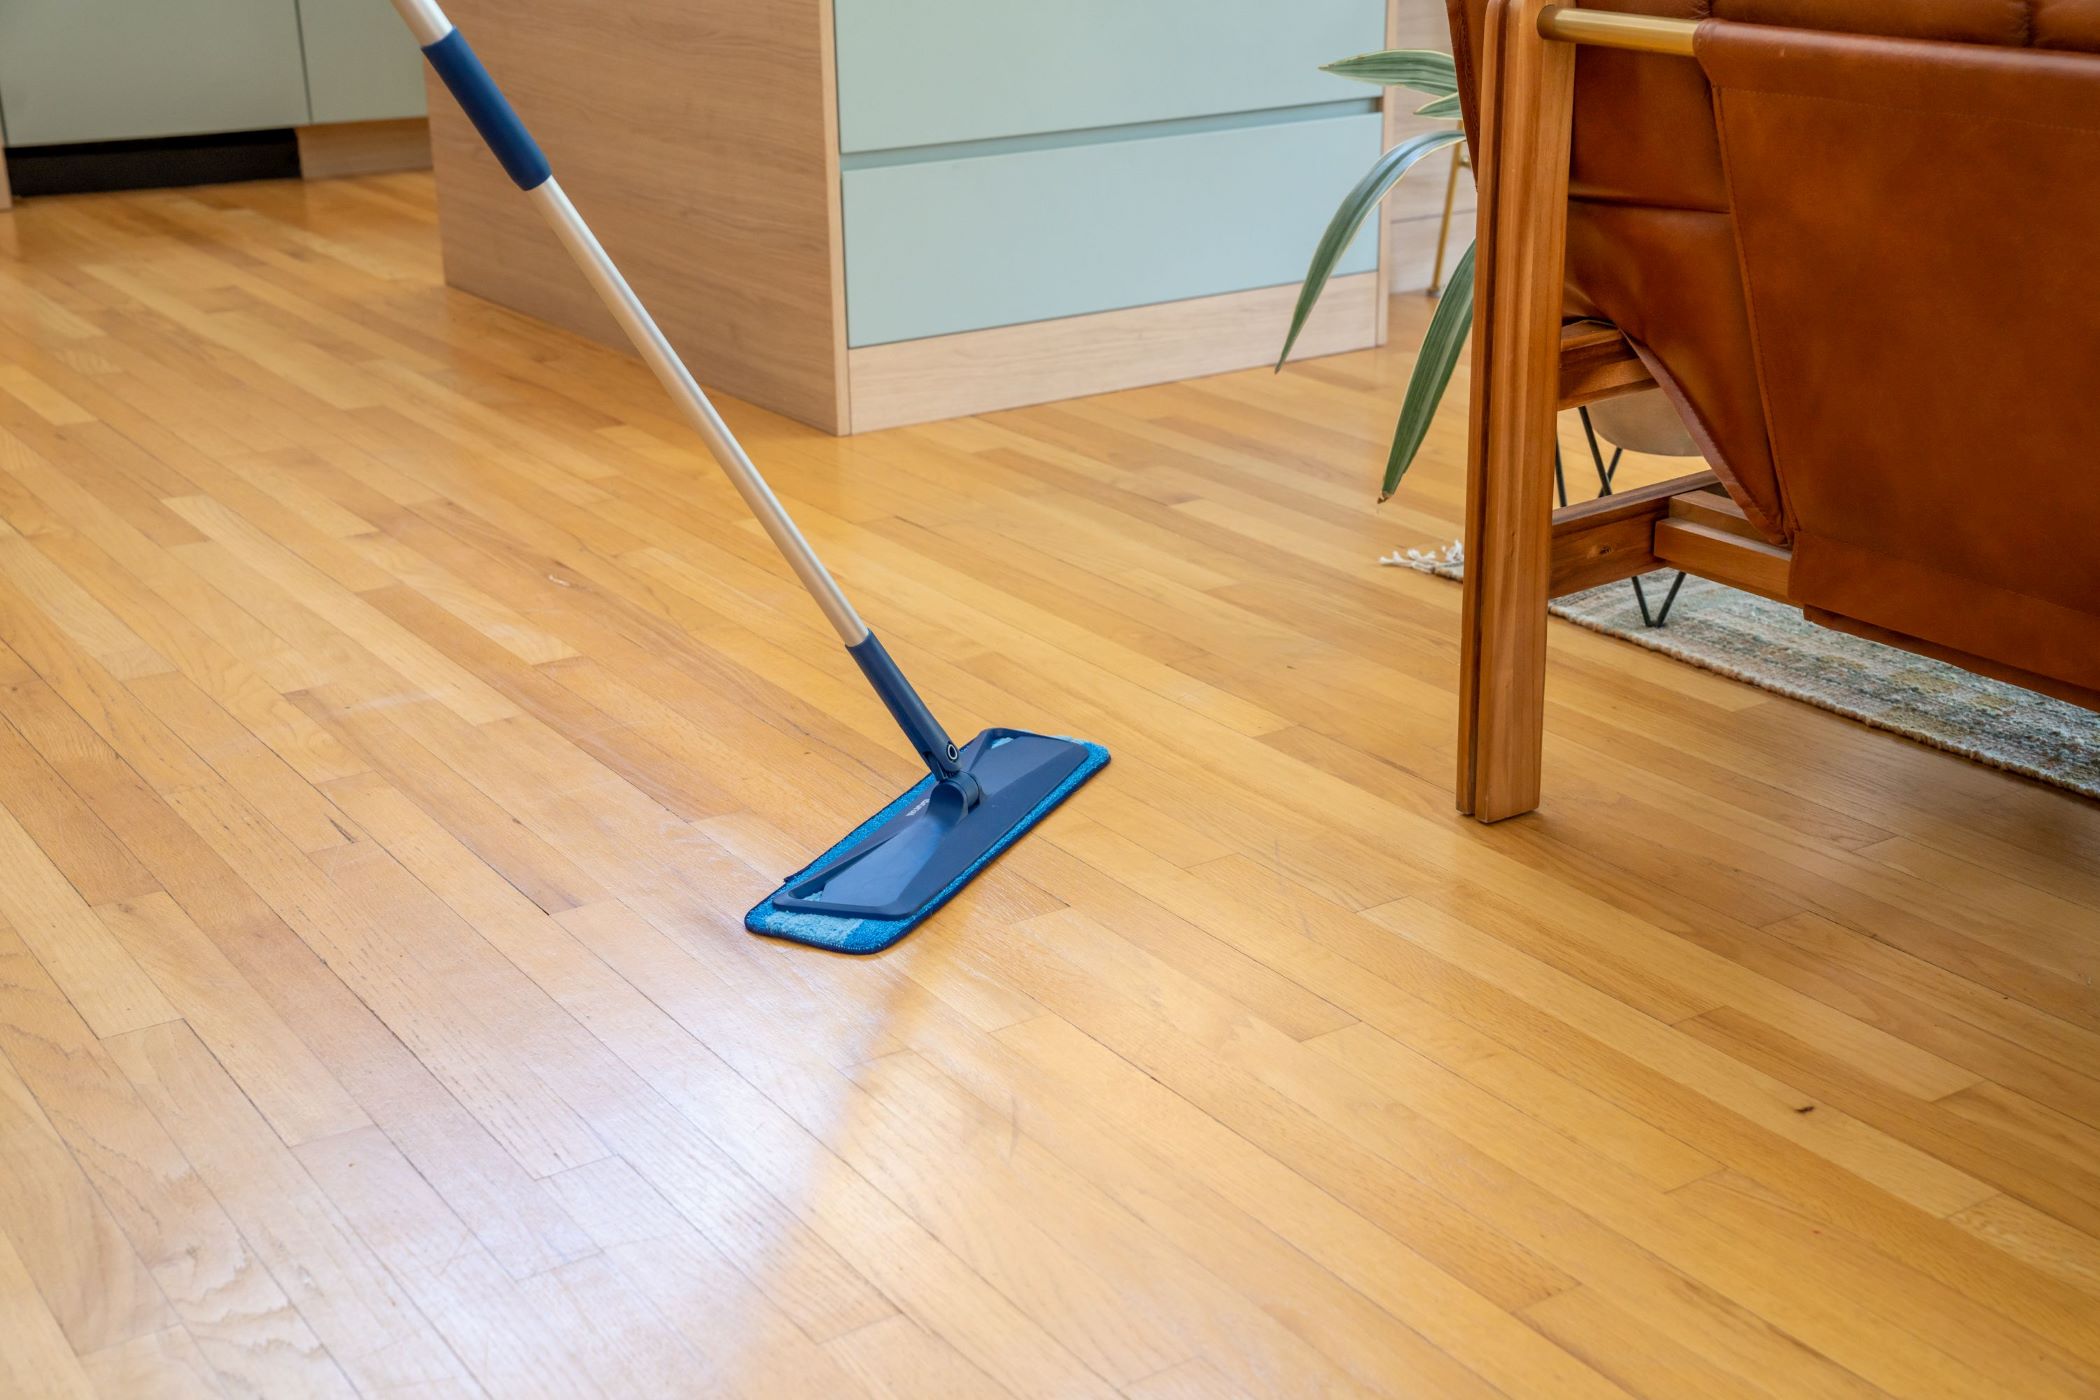
Maintaining the Refinished Hardwood Floors
After investing time and effort into refinishing your hardwood floors, it’s essential to establish a maintenance routine to preserve their beauty and prolong their lifespan. Here are some key steps you can take to maintain the refinished hardwood floors:
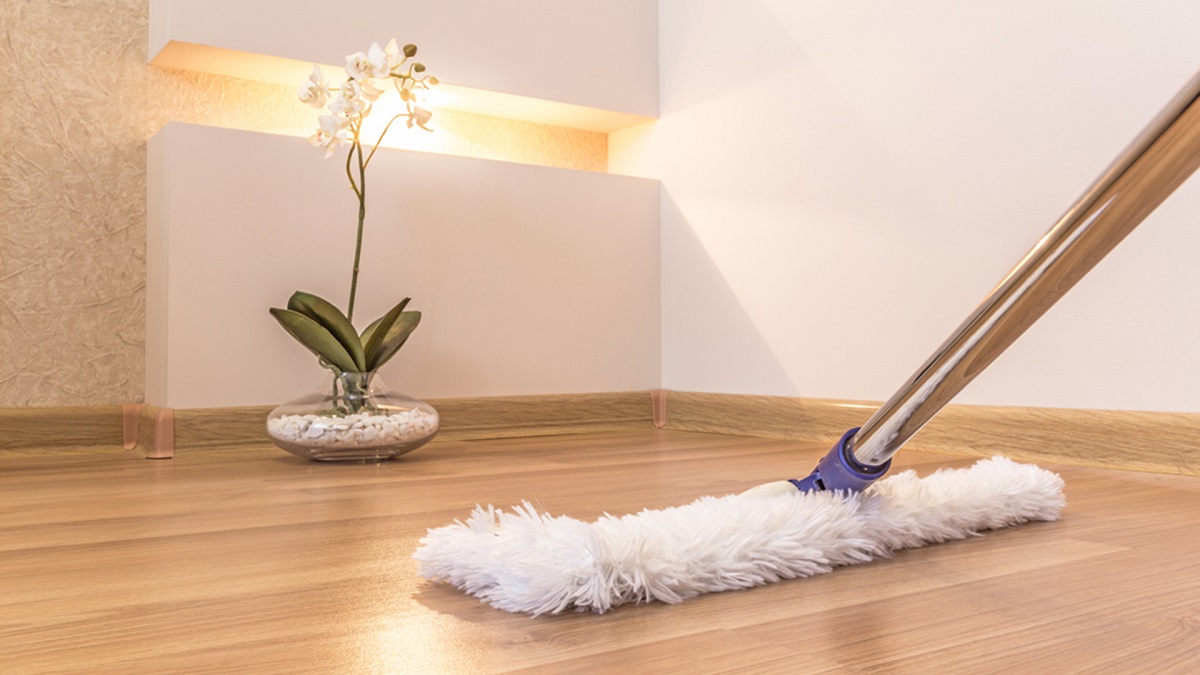
1. Cleaning: Regularly sweep or vacuum the floors to remove dust, dirt, and debris. Use a soft-bristle broom or a vacuum cleaner with a brush attachment to prevent scratching the surface. Avoid using excess water or wet mopping, as this can damage the finish. Instead, use a slightly dampened mop or microfiber cloth for routine cleaning.
2. Wipe up Spills Promptly: Accidental spills should be wiped up immediately to prevent the liquid from penetrating the finish or damaging the wood. Use a soft, absorbent cloth or paper towel to blot the spill gently. Avoid using harsh cleaning products or abrasive materials that can harm the finish.
3. Avoid Heavy Footwear: Limit the use of high heels, cleats, and other heavy footwear that can cause dents or scratches on the refinished floors. Encourage household members and guests to remove their shoes at the entryway or provide mats or shoe covers to minimize potential damage.
4. Use Protective Mats: Place entrance mats or rugs in high-traffic areas and at the entryways to trap dirt and prevent it from being tracked onto the refinished floors. Ensure these mats have non-slip backing or use rug grippers to keep them securely in place.
5. Trim Pet’s Nails: Keep your pet’s nails trimmed to prevent scratching and damaging the refinished floors. Regular grooming helps maintain the integrity of the wood surface and minimizes the risk of deep scratches or gouges caused by sharp claws.
6. Minimize Sun Exposure: Prolonged exposure to sunlight can cause the wood to fade or discolor over time. Use curtains, blinds, or window treatments to limit the amount of direct sunlight coming into the room. Consider applying UV-protective film to windows to further reduce the effects of sun damage.
7. Regular Maintenance: Periodically assess the condition of the refinished floors and perform any necessary maintenance tasks. This may include spot cleaning, touching up small areas with stain or finish, or even scheduling professional maintenance such as a deep clean or recoating as needed.
8. Protect Floors During Renovations: If you are planning any home renovations or construction projects, take precautions to protect your refinished floors. Use drop cloths, plastic coverings, or temporary plywood to shield the floors from debris, tools, and heavy equipment.
By following these maintenance practices, you can ensure the long-lasting beauty and durability of your refinished hardwood floors. Regular cleaning, prompt spill cleanup, and protective measures will help preserve the luster and integrity of the wood, allowing you to enjoy the stunning transformation for years to come.
Frequently Asked Questions about How To Refinish Hardwood Floors So They Look Brand New
Was this page helpful?
At Storables.com, we guarantee accurate and reliable information. Our content, validated by Expert Board Contributors, is crafted following stringent Editorial Policies. We're committed to providing you with well-researched, expert-backed insights for all your informational needs.


0 thoughts on “How To Refinish Hardwood Floors So They Look Brand New”