Home>Gardening & Outdoor>Outdoor Structures>How To Remove An Awning Window
Outdoor Structures
How To Remove An Awning Window
Modified: October 18, 2024
Learn how to remove an awning window and maintain your outdoor structures with our step-by-step guide. Ensure a smooth process with expert tips and techniques.
(Many of the links in this article redirect to a specific reviewed product. Your purchase of these products through affiliate links helps to generate commission for Storables.com, at no extra cost. Learn more)
Introduction
Removing an awning window may seem like a daunting task, but with the right tools and a systematic approach, it can be a manageable DIY project. Whether you're replacing the window, conducting maintenance, or simply need to remove it for cleaning, this guide will walk you through the process step by step.
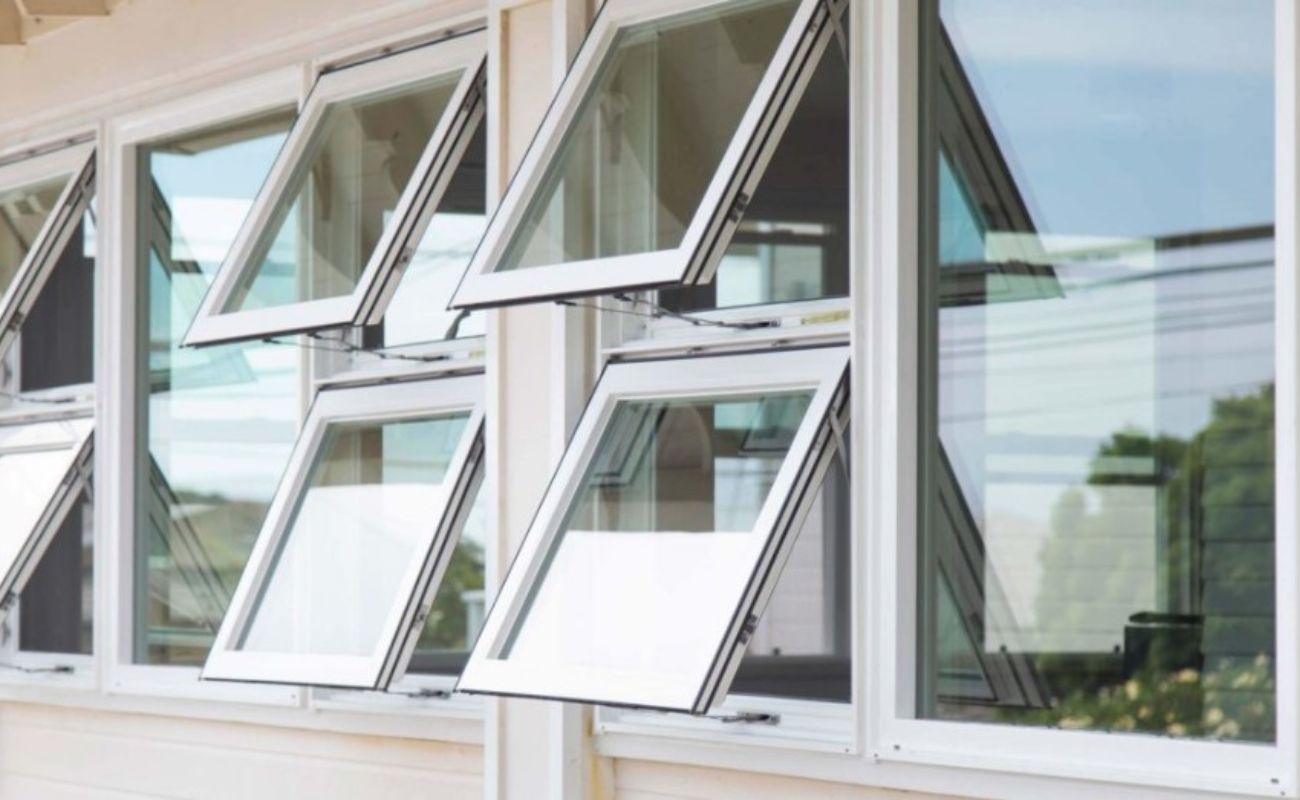
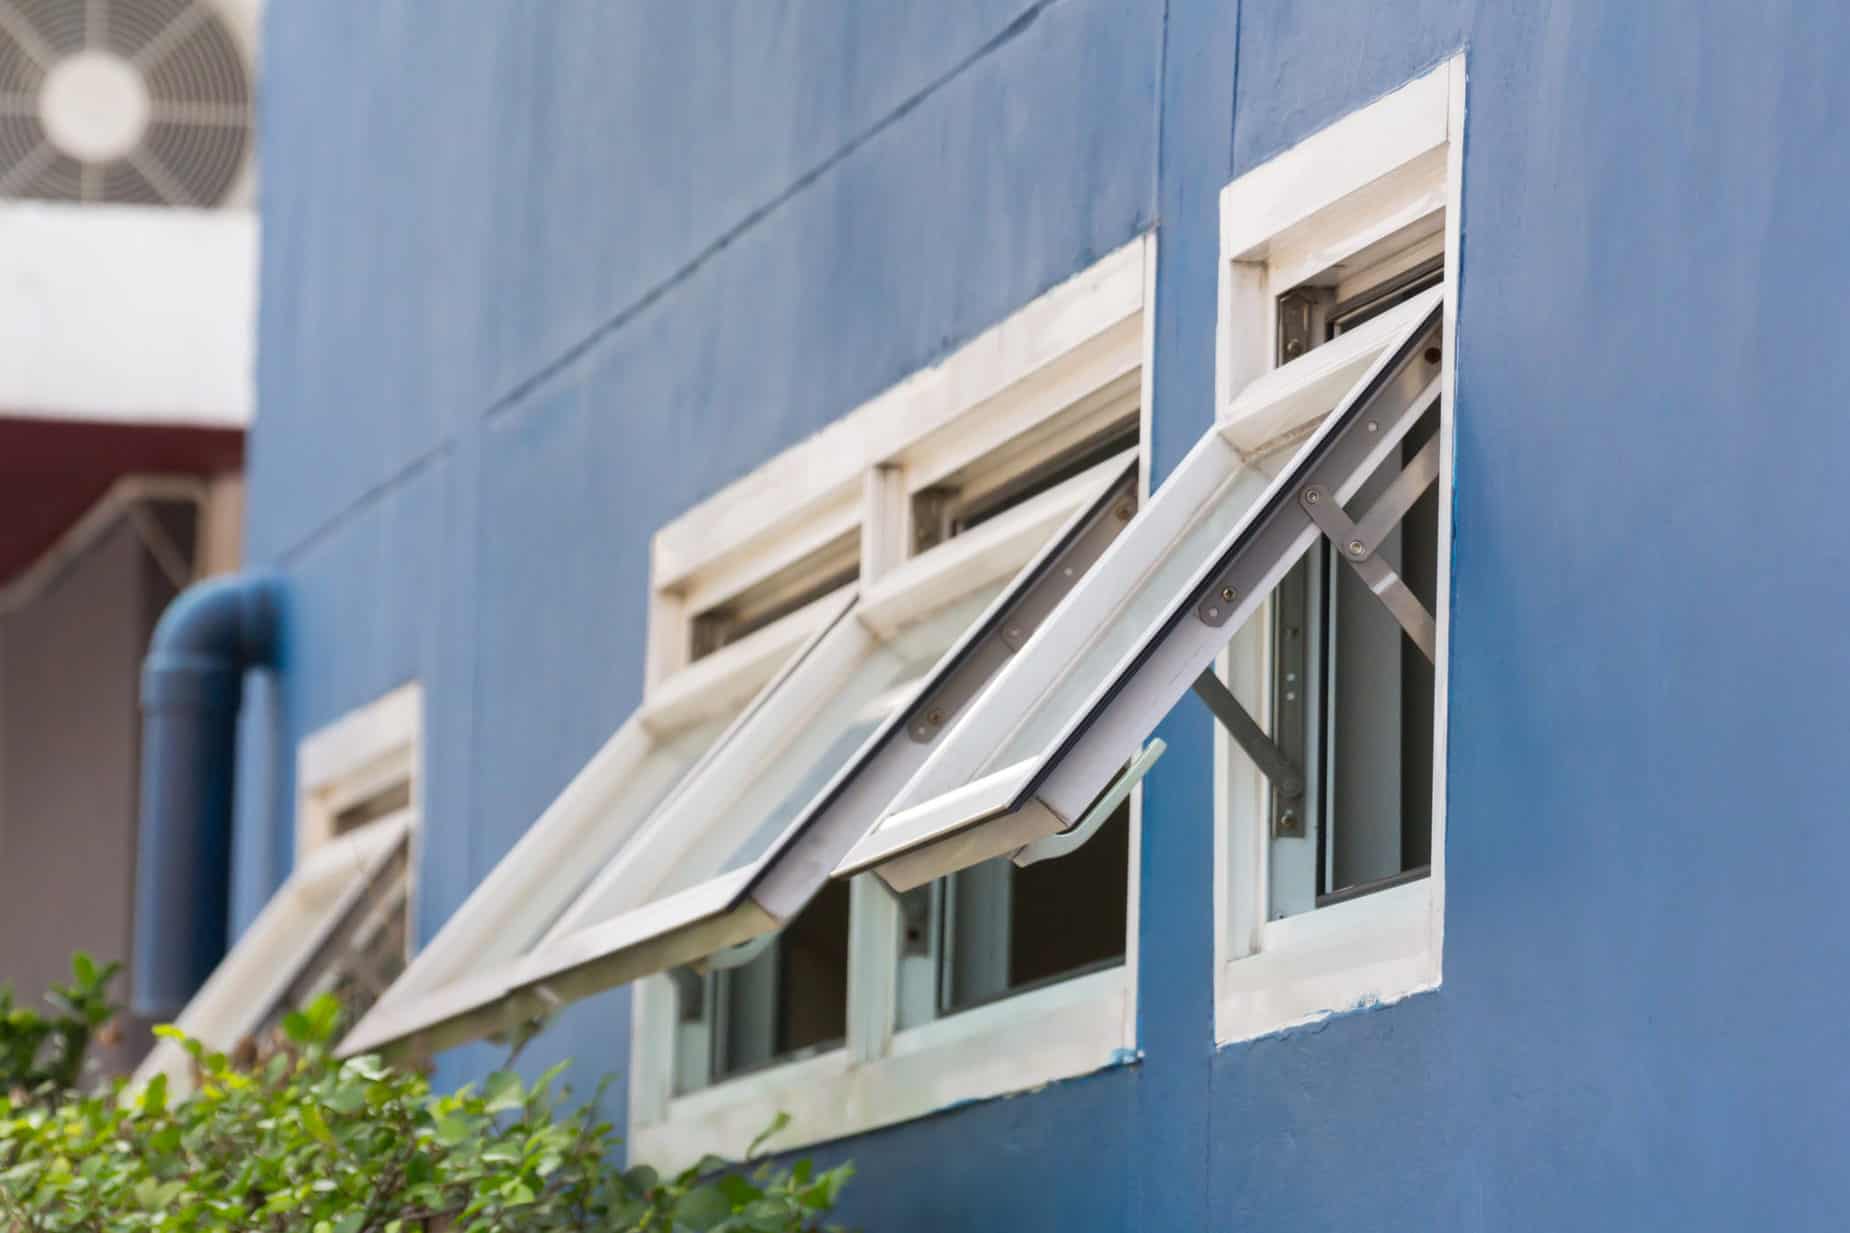
Awning windows are known for their versatility and functionality. They are hinged at the top and open outward, allowing for ventilation even during light rain. However, there are times when you may need to remove an awning window, such as when it requires replacement or when you need to access the surrounding area for repairs or renovations.
Before diving into the removal process, it's essential to gather the necessary tools and materials. Equipping yourself with the right items will streamline the process and ensure that you can tackle each step with confidence and efficiency. Once you have everything you need, you can proceed to remove the window screen and release the window latch, paving the way for the subsequent steps in the removal process.
By following this guide, you'll be able to remove an awning window safely and effectively, creating a clear opening for any necessary maintenance or replacement. Additionally, we'll touch on the subsequent steps of cleaning and preparing the opening for the installation of a new window, ensuring that you have a comprehensive understanding of the entire process from start to finish.
So, let's get started by gathering the necessary tools and materials to begin the process of removing an awning window.
Key Takeaways:
- Removing an awning window is a manageable DIY project with the right tools and approach. From gathering materials to installing the new window, each step is crucial for success.
- Prioritize safety, patience, and attention to detail when removing and installing an awning window. Embrace the process with confidence and gain valuable skills for future projects.
Read more: What Is An Awning Window
Step 1: Gather the Necessary Tools and Materials
Before embarking on the task of removing an awning window, it’s crucial to gather the essential tools and materials. Having the right equipment at your disposal will streamline the process and ensure that you can proceed with confidence. Here’s a comprehensive list of what you’ll need:
- Safety Gear: Start by ensuring that you have the necessary safety gear, including work gloves and protective eyewear. These items will help safeguard you against any potential hazards during the removal process.
- Basic Tools: You’ll require basic hand tools such as a screwdriver, a putty knife, and pliers. These tools will aid in releasing the window latch and removing the window sash and frame.
- Power Drill: A power drill with the appropriate screwdriver bits will be indispensable for unscrewing the hinges and any fasteners securing the window frame in place.
- Assistance: Depending on the size and weight of the awning window, you may need an additional person to assist you during certain stages of the removal process. This is particularly important for larger windows to ensure safety and ease of handling.
- Replacement Materials: If you’re removing the window for replacement, ensure that you have the new window on hand, along with any additional materials required for installation, such as shims, insulation, and exterior trim.
- Caulk and Sealant: Having a high-quality caulk and sealant available will be necessary for sealing the opening after the window has been removed, preventing any drafts or water infiltration.
By gathering these tools and materials, you’ll be well-prepared to commence the removal process with confidence and efficiency. Once you’ve assembled everything on the list, you can proceed to the next step of removing the window screen, which will pave the way for the subsequent stages of the process.
Step 2: Remove the Window Screen
Before delving into the removal of the awning window itself, it’s essential to start by removing the window screen. This step is relatively straightforward and serves as a preliminary task before progressing to the more intricate aspects of window removal.
To remove the window screen, follow these simple steps:
- Locate the Screen Latches: Inspect the bottom or sides of the window frame to locate the screen latches. These latches are typically small handles or levers that secure the screen in place.
- Release the Latches: Once you’ve identified the screen latches, proceed to release them. Depending on the type of latches, you may need to push, pull, or lift them to disengage the screen from the frame.
- Remove the Screen: With the latches disengaged, carefully pull the window screen out of the frame. Be gentle to avoid bending or damaging the screen during removal.
- Set Aside the Screen: Once the screen is removed, set it aside in a safe location, ensuring that it is placed flat to prevent warping or other damage.
After successfully removing the window screen, you’ll have clear access to the interior of the window, setting the stage for the subsequent steps in the removal process. With the screen out of the way, you can proceed to release the window latch, which is the next crucial step in the process of removing an awning window.
By systematically addressing each stage of the removal process, you’ll be well on your way to effectively and safely removing the awning window, creating an open space for any necessary maintenance, repairs, or replacement.
Step 3: Release the Window Latch
Releasing the window latch is a pivotal step in the process of removing an awning window. The window latch secures the window sash in place and must be disengaged before proceeding with the removal process. Here’s how to release the window latch:
- Locate the Window Latch: The window latch is typically situated at the meeting rail of the window, where the two sashes come together. It may be a lever, handle, or locking mechanism that holds the window closed.
- Unlock or Disengage the Latch: Depending on the type of latch, you’ll need to unlock, turn, or lift the mechanism to release the window sash. Follow the manufacturer’s instructions for your specific window design.
- Test the Release: Once you believe the latch is disengaged, gently attempt to open the window to ensure that the sash is no longer secured in place. If the window opens easily, the latch has been successfully released.
It’s important to approach this step with caution and patience, ensuring that the latch is fully disengaged before attempting to proceed with the window removal. If the latch appears to be stuck or difficult to release, refer to the window’s user manual or contact the manufacturer for guidance on releasing the latch safely.
Once the window latch has been successfully released, you’ve cleared a significant hurdle in the removal process. The next step involves removing the window sash, which will require careful attention to detail and precision to ensure a smooth transition to the subsequent stages of the removal process.
By methodically addressing each step in the removal process, you’ll be well-equipped to navigate the intricacies of removing an awning window, setting the stage for any necessary maintenance, repairs, or the installation of a new window.
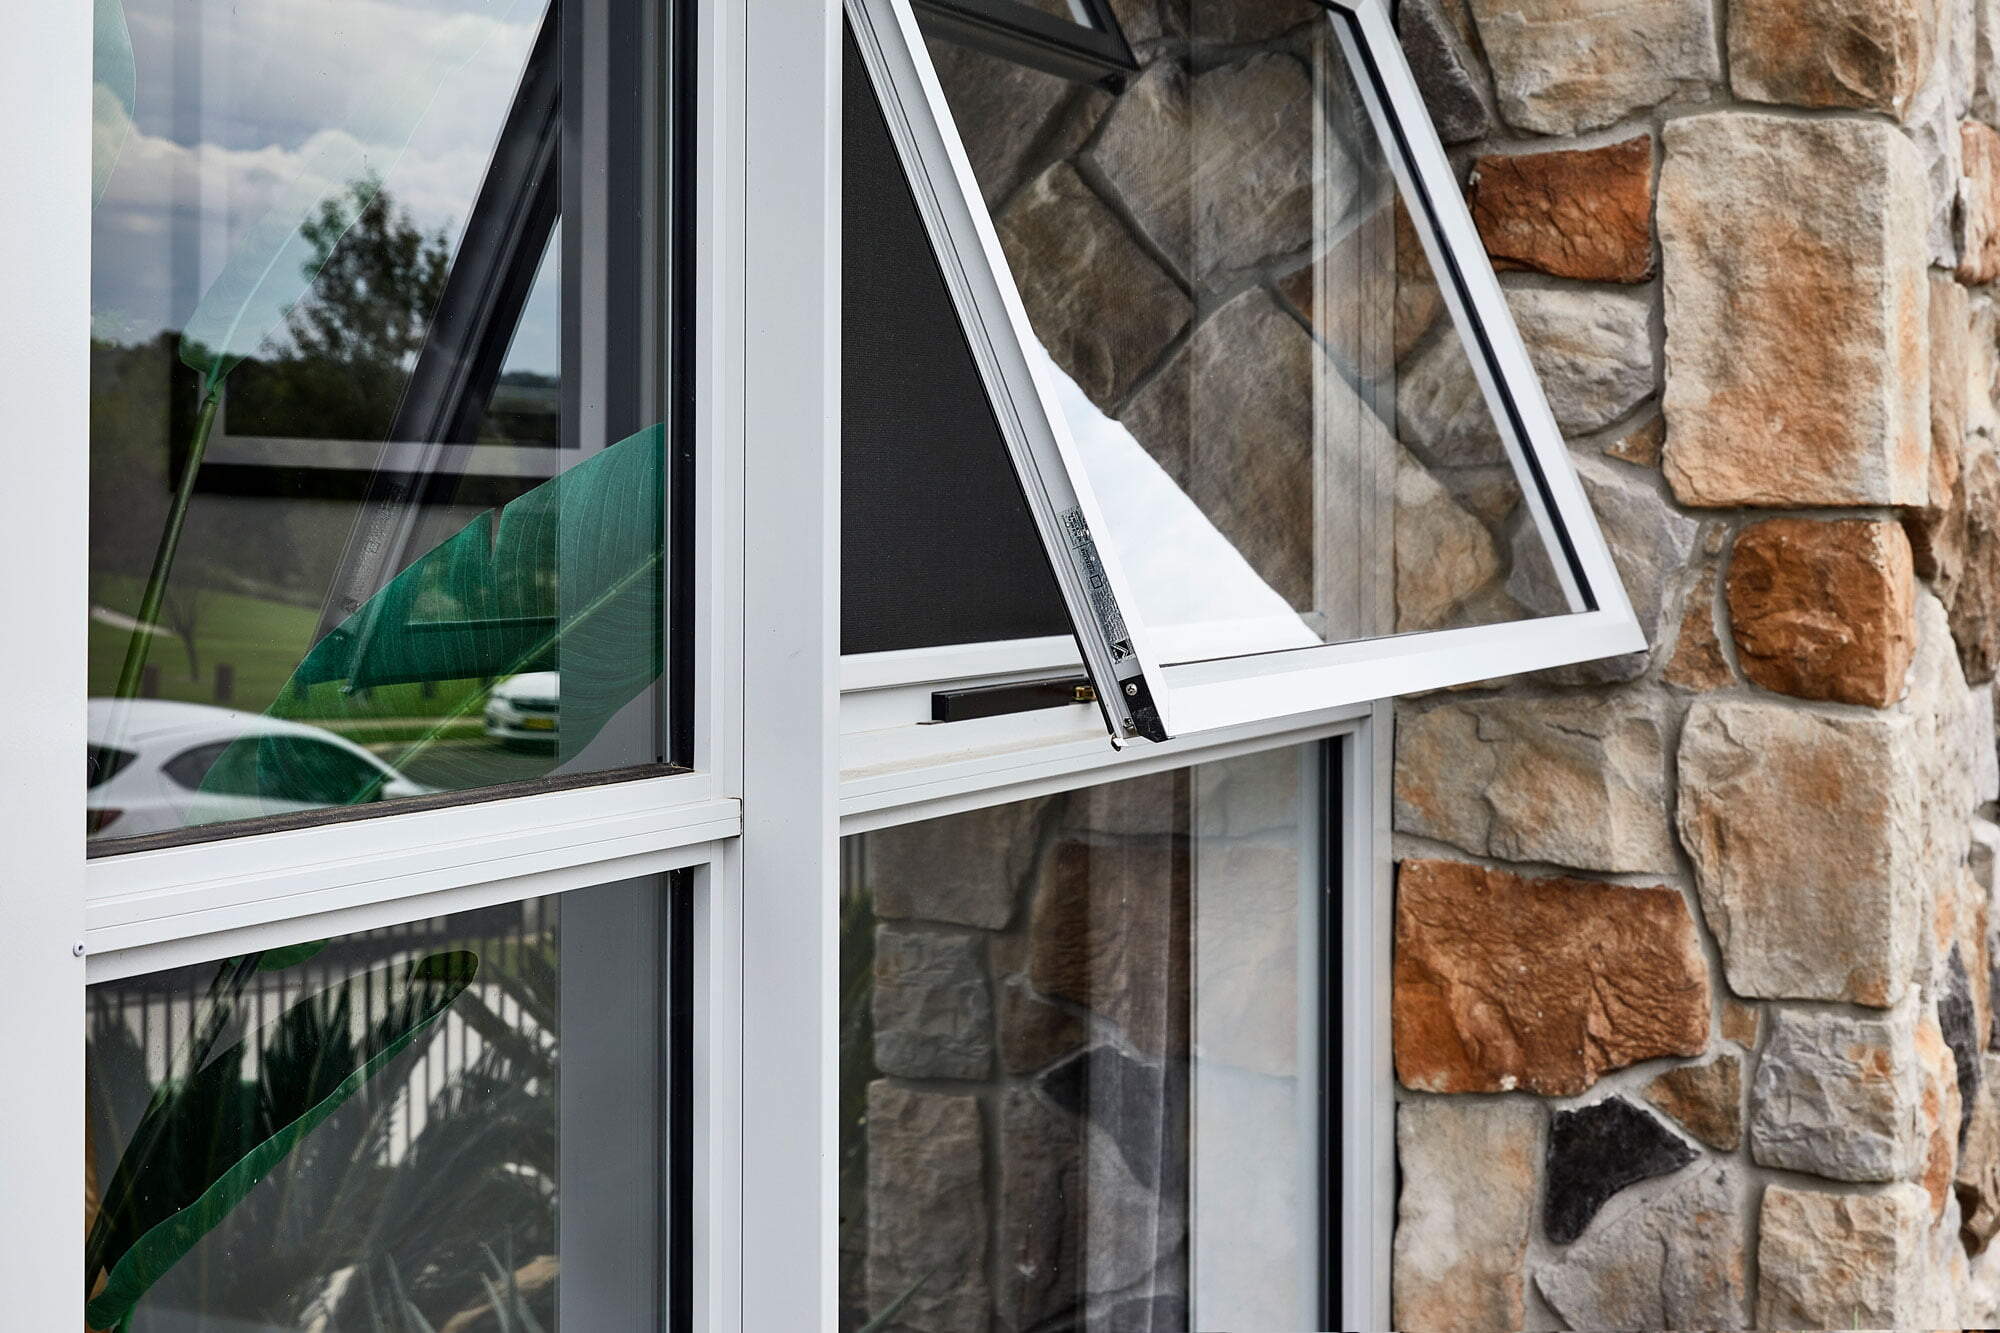
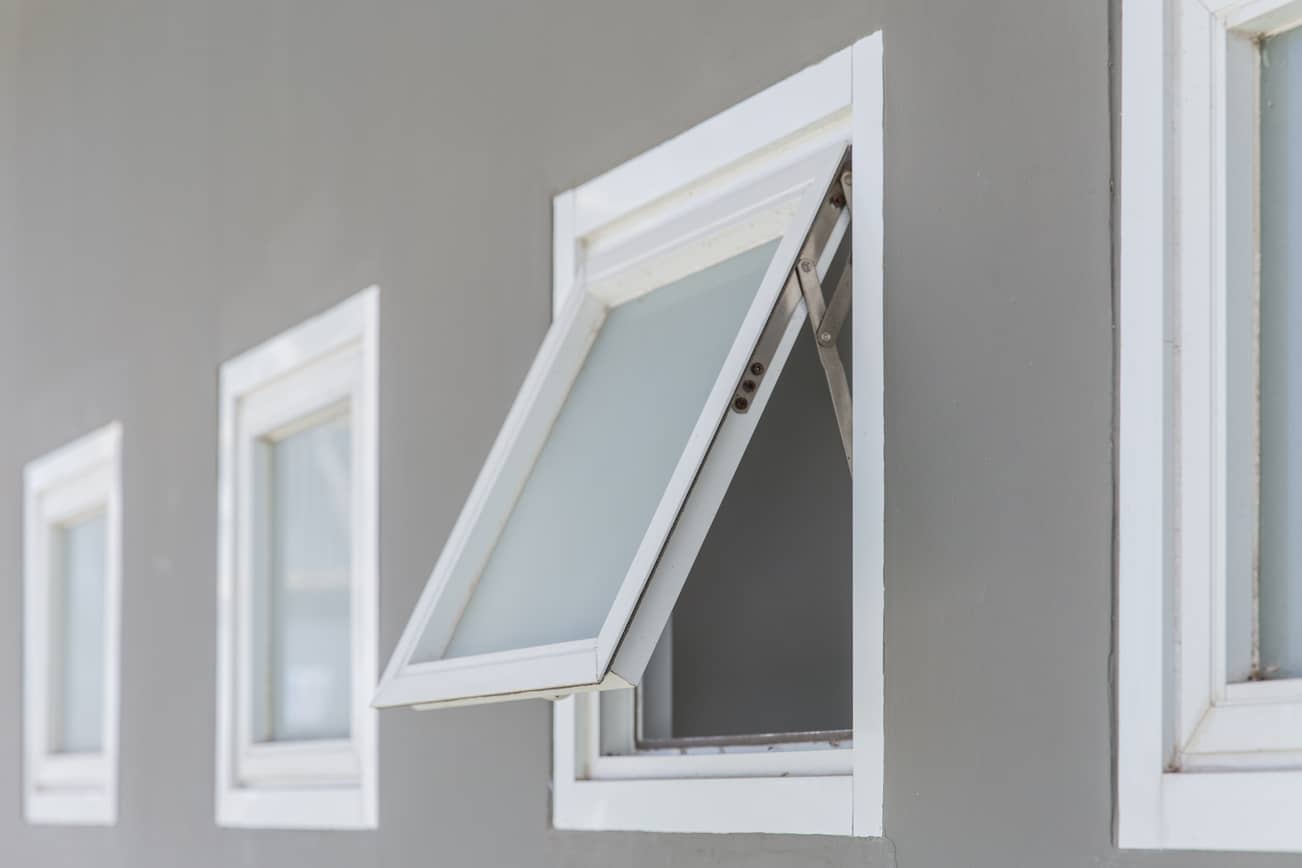
Step 4: Remove the Window Sash
Removing the window sash is a pivotal stage in the process of taking out an awning window. The sash is the framed glass panel that opens and closes within the window frame. Before proceeding with this step, ensure that the window latch has been successfully released, allowing the sash to be removed. Here’s how to remove the window sash:
- Open the Sash: If the window is operational, open the sash fully to access the hinges and release mechanisms. If the window is inoperable, proceed to the next step without opening the sash.
- Identify the Hinges: Inspect the sides of the window frame to locate the hinges that secure the sash in place. Depending on the window design, the hinges may be visible on the interior or exterior of the frame.
- Release the Hinges: Using a screwdriver or the appropriate tool, unscrew and remove the hinge pins or screws that secure the sash to the frame. It’s essential to support the weight of the sash as you release the hinges to prevent it from falling.
- Remove the Sash: With the hinges disengaged, carefully lift the sash out of the window frame. Be mindful of the weight and size of the sash, and consider enlisting the assistance of another person if necessary.
- Set Aside the Sash: Once the sash is removed, place it in a safe location, ensuring that it is supported and protected from damage. Take care to avoid placing it in a precarious position that could lead to breakage or accidents.
Successfully removing the window sash marks a significant milestone in the window removal process, allowing you to proceed to the subsequent stages with a clear opening and access to the window frame. With the sash out of the way, you can now focus on unscrewing the hinges, which is the next critical step in the removal process.
By methodically working through each stage of the removal process, you’ll be well-prepared to tackle the intricacies of removing an awning window, setting the stage for any necessary maintenance, repairs, or the installation of a new window.
Use a screwdriver to remove the screws holding the awning window in place. Carefully lift the window out of the frame and set it aside. Clean the frame and replace the window by reversing the removal process.
Read more: How To Open An Awning Window
Step 5: Unscrew the Hinges
Unscrewing the hinges is a crucial step in the process of removing an awning window. The hinges secure the window frame in place and must be carefully disengaged to facilitate the safe removal of the frame. Here’s how to unscrew the hinges:
- Locate the Hinges: Inspect the sides of the window frame to identify the hinges that secure it in place. Depending on the design of the window, the hinges may be visible on the interior or exterior of the frame.
- Support the Frame: Before unscrewing the hinges, ensure that the window frame is adequately supported to prevent it from falling once the hinges are removed. Enlist the assistance of another person if necessary to provide additional support.
- Use the Appropriate Tool: Depending on the type of screws used to secure the hinges, use a suitable screwdriver or power drill with the corresponding bit to unscrew and remove the hinges from the frame. Exercise caution to avoid stripping the screws or causing damage to the frame.
- Set Aside the Hinges: Once the hinges are removed, set them aside in a safe location, as they may be reused if the same window frame is being reinstalled. Keep the screws and hinges together to prevent any components from getting misplaced.
By successfully unscrewing the hinges, you’ve cleared a significant hurdle in the window removal process, paving the way for the next crucial step of removing the window frame. With the hinges disengaged, the frame can be carefully lifted out, allowing for access to the opening and the subsequent stages of the removal process.
As you progress through each step of the removal process, it’s essential to exercise patience and attention to detail, ensuring that each component is handled with care and precision. By methodically addressing each stage, you’ll be well-equipped to navigate the intricacies of removing an awning window, creating an open space for any necessary maintenance, repairs, or the installation of a new window.
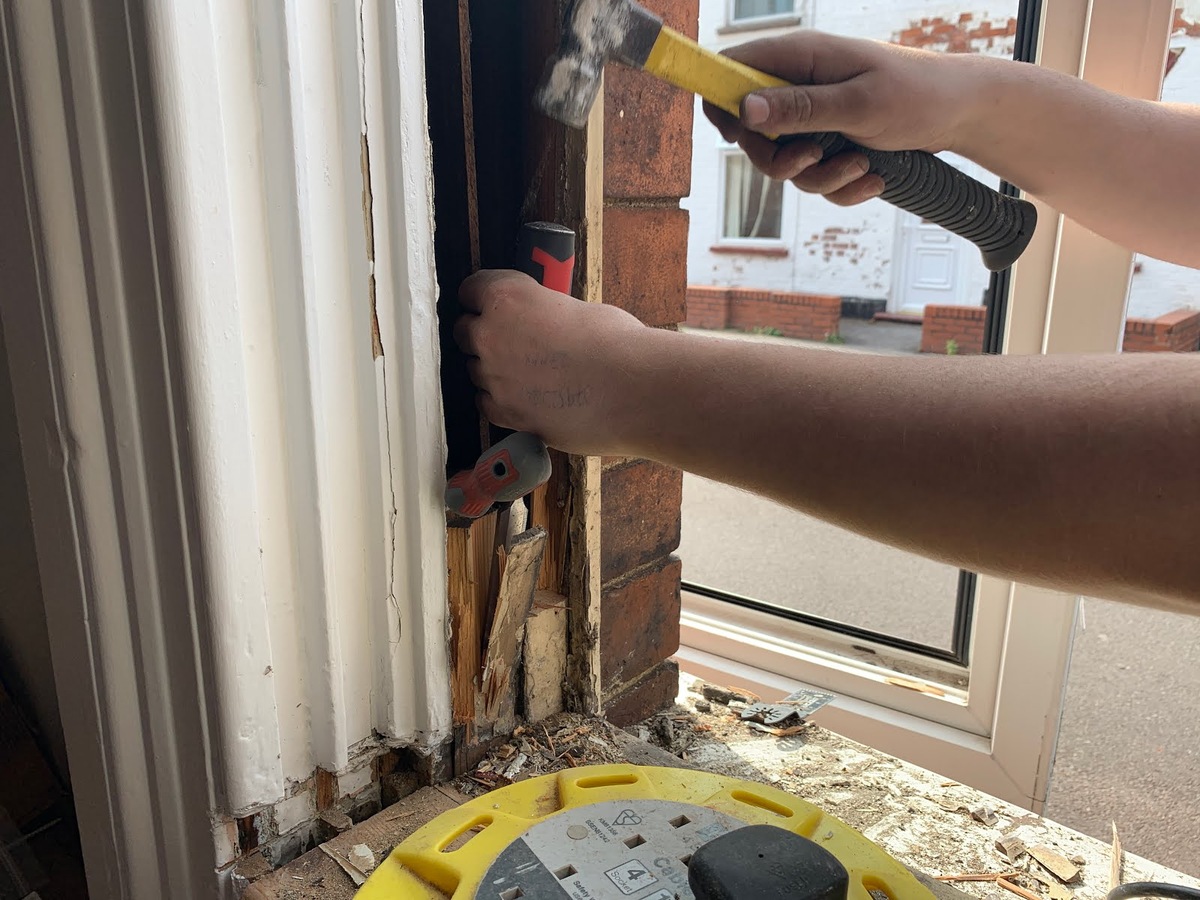
Step 6: Remove the Window Frame
Removing the window frame is a pivotal stage in the process of taking out an awning window. The frame encases the window and is secured in place by hinges and fasteners, which must be carefully disengaged to facilitate its safe removal. Here’s how to remove the window frame:
- Ensure Adequate Support: Before proceeding with the removal, ensure that the area surrounding the window is clear and that the frame is adequately supported. Enlist the assistance of another person if necessary to provide additional support during the removal process.
- Inspect for Fasteners: Inspect the perimeter of the window frame to identify any fasteners or screws that may be securing it to the surrounding structure. Depending on the installation method, there may be fasteners securing the frame to the wall or surrounding framework.
- Unscrew or Disengage Fasteners: Using the appropriate tools, such as a screwdriver or power drill, carefully unscrew or disengage any fasteners securing the window frame in place. Exercise caution to avoid damaging the surrounding structure or the frame itself during this process.
- Carefully Lift and Remove the Frame: With the fasteners disengaged, carefully lift the window frame out of the opening. Take care to ensure that the frame is properly supported and that it is maneuvered out of the opening without causing damage to the surrounding area.
- Set Aside the Frame and Fasteners: Once the frame is removed, set it aside in a safe location, along with any fasteners or screws that were disengaged. Keep these components together to facilitate reinstallation if the same frame is being used.
Successfully removing the window frame marks a significant milestone in the window removal process, allowing for clear access to the opening and the surrounding area. With the frame out of the way, you can proceed to the next crucial steps of cleaning and preparing the opening for the installation of a new window.
As you progress through each stage of the removal process, it’s essential to exercise patience and attention to detail, ensuring that each component is handled with care and precision. By methodically addressing each step, you’ll be well-equipped to navigate the intricacies of removing an awning window, setting the stage for any necessary maintenance, repairs, or the installation of a new window.
Step 7: Clean and Prepare the Opening
After successfully removing the awning window and its frame, it’s crucial to clean and prepare the opening before proceeding with any further installation or maintenance. This step ensures that the surrounding area is primed for the next phase of the process. Here’s how to clean and prepare the opening:
- Remove Debris and Residues: Inspect the opening and remove any debris, dust, or residues that may have accumulated during the removal process. Use a vacuum, brush, or damp cloth to thoroughly clean the area, ensuring that it is free from any obstructions or contaminants.
- Inspect the Surrounding Structure: Take a moment to inspect the surrounding structure for any signs of damage, wear, or deterioration. Address any issues that may compromise the integrity of the opening, ensuring that it is structurally sound and ready for the next steps.
- Check for Proper Insulation and Sealing: Verify that the opening is adequately insulated and sealed to prevent drafts, moisture intrusion, and energy loss. Address any gaps or deficiencies in the insulation and sealing to optimize the energy efficiency and comfort of the space.
- Prepare for the Installation: If you’re planning to install a new window, ensure that the opening is measured and prepared according to the specifications of the new window. This may involve adjusting the size of the opening, installing shims, or applying sealant as necessary.
- Secure the Area: Before proceeding with the installation of a new window or conducting any additional maintenance, secure the area to prevent unauthorized access and ensure a safe working environment for the subsequent stages of the process.
By thoroughly cleaning and preparing the opening, you’ll create an optimal foundation for any necessary maintenance, repairs, or the installation of a new window. This step sets the stage for the final phase of the process, allowing you to proceed with confidence and efficiency.
As you progress through each stage of the removal and preparation process, it’s essential to exercise patience and attention to detail, ensuring that each component is handled with care and precision. By methodically addressing each step, you’ll be well-equipped to navigate the intricacies of removing an awning window and preparing the opening for the next phase of the project.
Step 8: Install the New Window
After successfully removing the old awning window and preparing the opening, the next crucial step is to install the new window. Whether you’re replacing the existing window or installing a new one, this phase of the process requires precision and attention to detail to ensure a secure and functional installation. Here’s how to install the new window:
- Verify Proper Fit: Before proceeding with the installation, verify that the new window is the correct size and design for the opening. Ensure that it aligns with the measurements and specifications of the space, allowing for a proper fit and secure installation.
- Apply Sealant and Insulation: If necessary, apply a high-quality sealant and insulation to the perimeter of the opening to create a weather-tight and energy-efficient seal. This step is essential for preventing drafts, moisture intrusion, and heat loss.
- Position the New Window: Carefully position the new window in the opening, ensuring that it is level, plumb, and square. Enlist the assistance of another person if necessary to support the weight of the window during this process.
- Secure the Window: Once the window is properly positioned, secure it in place according to the manufacturer’s instructions. This may involve fastening it to the surrounding structure, adjusting the shims for a precise fit, and ensuring that it is securely anchored.
- Test the Operation: After the installation is complete, test the operation of the new window to ensure that it opens, closes, and locks smoothly. Make any necessary adjustments to ensure optimal functionality.
- Apply Finishing Touches: Once the window is securely installed, apply any finishing touches such as exterior trim, interior molding, and touch-up paint as needed to complete the installation and enhance the aesthetic appeal of the window.
By meticulously following these steps, you’ll be able to install the new window with confidence, creating a secure and functional addition to the space. Whether you’re upgrading to a more energy-efficient window, enhancing the aesthetic appeal of the area, or addressing specific functional requirements, a well-executed installation is essential for long-term satisfaction and performance.
As you progress through each stage of the installation process, it’s crucial to exercise patience and precision, ensuring that the new window is integrated seamlessly into the space. By methodically addressing each step, you’ll be well-equipped to navigate the intricacies of installing a new awning window, completing the project with confidence and satisfaction.
Read more: How To Clean Awning Windows
Conclusion
Removing and replacing an awning window may initially seem like a daunting task, but with the right tools, knowledge, and a systematic approach, it becomes a manageable and rewarding endeavor. By following the step-by-step guide outlined in this article, you can confidently tackle the process, whether you’re replacing the window, conducting maintenance, or renovating the surrounding area.
From gathering the necessary tools and materials to meticulously installing the new window, each stage of the process is essential for achieving a successful outcome. By approaching the project with patience, attention to detail, and a commitment to precision, you can ensure that the window removal and installation are carried out with efficiency and care.
Throughout the process, it’s important to prioritize safety, especially when handling heavy components or using tools and equipment. Enlisting the assistance of another person, when needed, can enhance safety and efficiency, particularly during the removal and installation of larger windows.
By methodically addressing each step, from removing the window screen and releasing the latch to installing the new window, you’ll be well-equipped to navigate the intricacies of the process. Whether you’re a seasoned DIY enthusiast or embarking on your first home improvement project, this guide provides the knowledge and guidance necessary to achieve a successful outcome.
Upon completing the installation of the new window, take a moment to appreciate the transformation and the enhanced functionality and aesthetic appeal it brings to the space. Whether it’s improved ventilation, energy efficiency, or an updated look, the new window represents a valuable addition to your home.
By following this comprehensive guide and embracing the process with confidence, you’ve not only removed and installed an awning window but also gained valuable skills and experience that can be applied to future projects. With a clear understanding of the process and a commitment to quality workmanship, you can approach future home improvement endeavors with the same level of confidence and expertise.
Remember, each project is an opportunity for growth and learning, and your commitment to achieving a successful outcome is a testament to your dedication to creating a comfortable, functional, and beautiful living space.
Frequently Asked Questions about How To Remove An Awning Window
Was this page helpful?
At Storables.com, we guarantee accurate and reliable information. Our content, validated by Expert Board Contributors, is crafted following stringent Editorial Policies. We're committed to providing you with well-researched, expert-backed insights for all your informational needs.


0 thoughts on “How To Remove An Awning Window”