Articles
How To Install Ceiling Fan Light Kit
Modified: October 20, 2024
Learn how to install a ceiling fan light kit with step-by-step instructions and expert articles. Enhance your space with this useful addition.
(Many of the links in this article redirect to a specific reviewed product. Your purchase of these products through affiliate links helps to generate commission for Storables.com, at no extra cost. Learn more)
Introduction
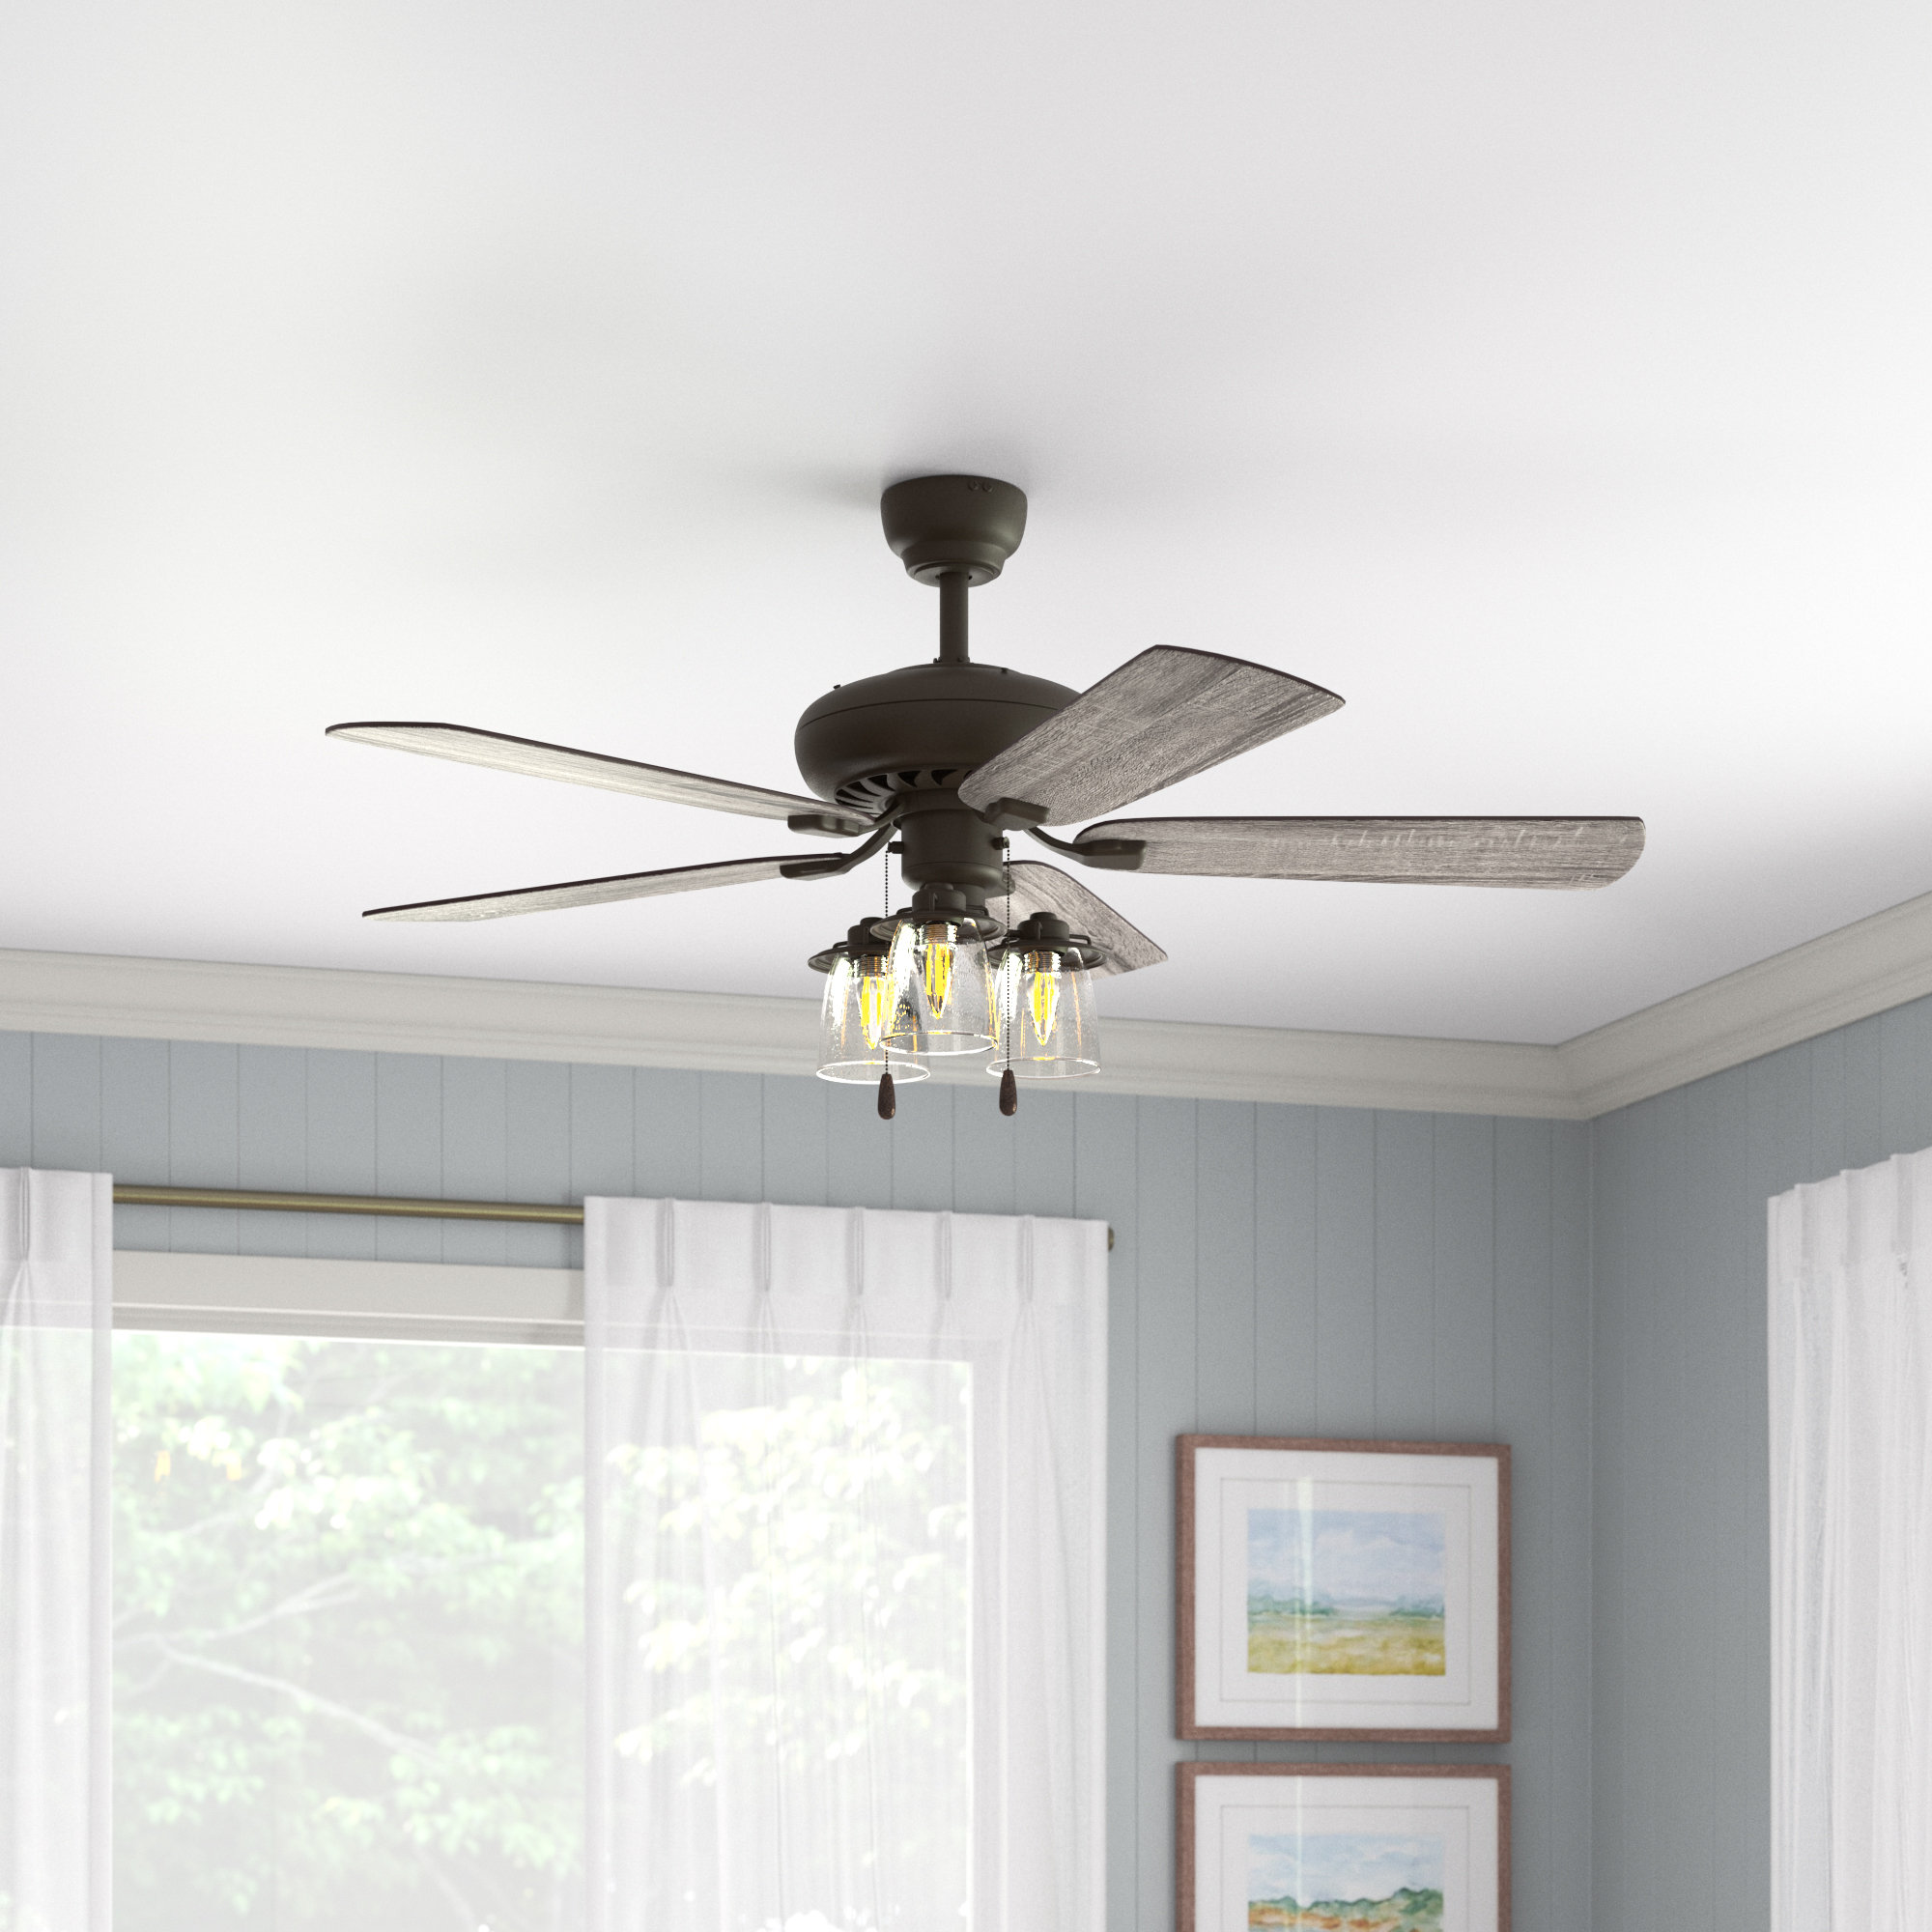
Installing a ceiling fan light kit is a fantastic way to upgrade your living space while simultaneously improving air circulation and adding illumination to the room. Whether you’re looking to replace an existing light fixture or starting from scratch, this step-by-step guide will walk you through the process of installing a ceiling fan light kit in your home.
Before you begin installing the ceiling fan light kit, it’s essential to gather all the necessary tools and materials. Having everything on hand will streamline the installation process and allow for a smoother workflow. You’ll need a screwdriver, wire connectors, a voltage tester, wire strippers, a ladder, electrical tape, and, of course, the ceiling fan light kit itself. It’s always a good idea to double-check that you have all the required components before starting the installation.
Once you’ve gathered your tools and materials, the next crucial step is to turn off the power supply. This is for your safety and ensures that you won’t accidentally be working with live electrical wires. Locate the circuit breaker or fuse box and switch off the power to the room where you’ll be installing the ceiling fan light kit.
Now that the power is safely turned off, it’s time to remove the fan blades. Carefully unscrew the blades from the motor housing and set them aside. Keep track of the screws, as you’ll need them later to reattach the blades.
With the fan blades removed, it’s time to mount the fan light kit bracket. This bracket will serve as the base for attaching the light kit to the ceiling fan. Follow the manufacturer’s instructions to securely fasten the bracket to the motor housing.
Now comes the wiring part. Start by identifying the wires in your ceiling fan. Typically, you’ll find a black wire, a white wire, and a green or copper wire. These wires correspond to the fan’s lighting, neutral, and ground connections, respectively. Use wire connectors to join the corresponding wires from the ceiling fan to the wires in the light kit. Make sure to follow the color-coding and secure each connection with electrical tape for added safety.
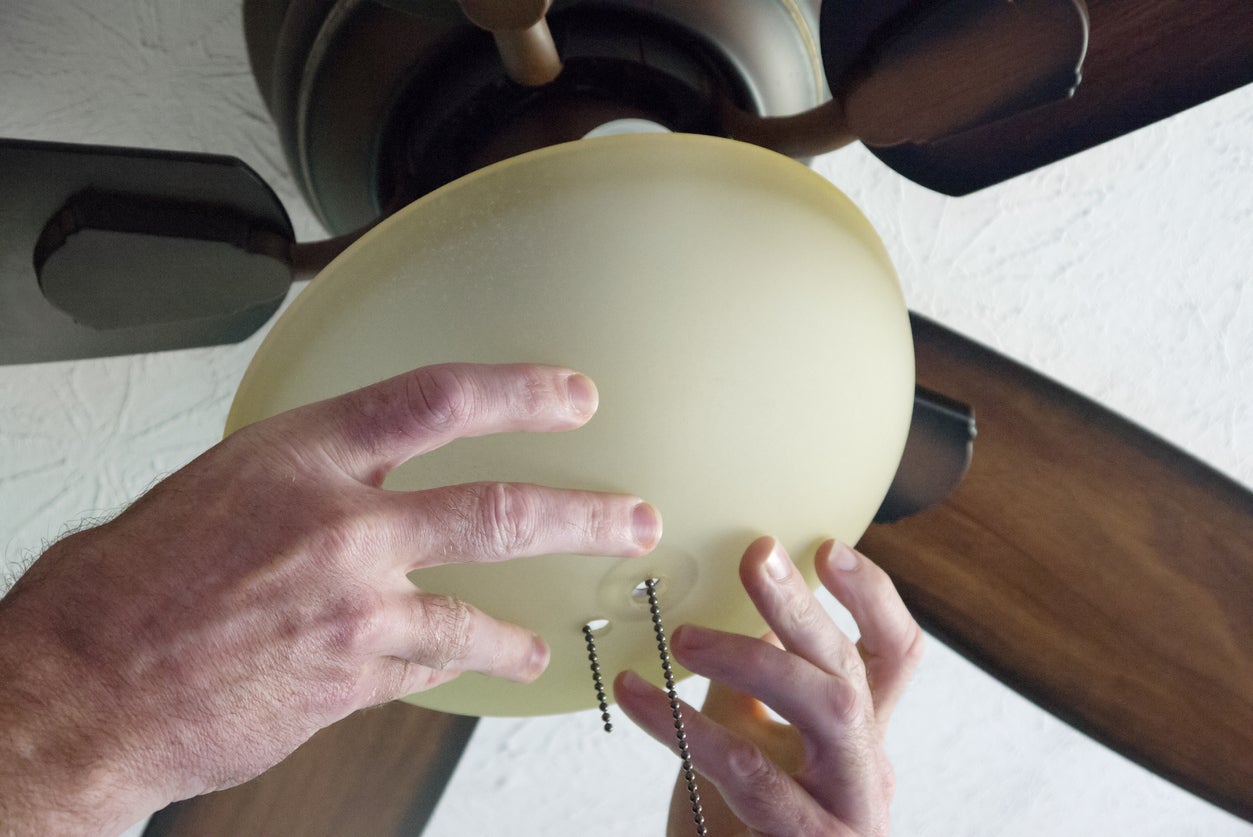
Once the wiring is complete, it’s time to attach the fan light kit. Position the light kit onto the bracket and secure it in place using the provided screws. Double-check that all connections are tight and secure before proceeding.
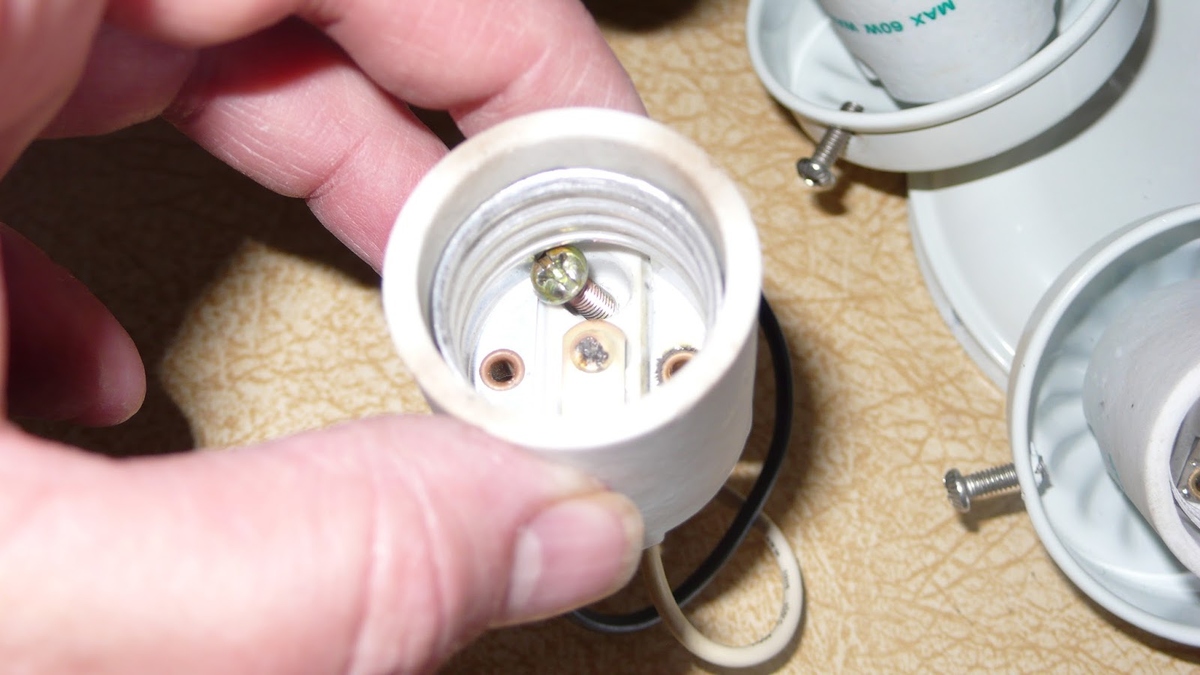
With the light kit attached, it’s time to install the light bulbs. Most ceiling fan light kits accommodate standard light bulbs, so choose the appropriate wattage and style that best suits your needs. Screw the light bulbs into their respective sockets and ensure they are firmly in place.
After installing the light bulbs, it’s time to reattach the fan blades. Retrieve the screws you set aside earlier and carefully screw the blades back onto the motor housing. Make sure each blade is securely fastened and properly aligned.
With the ceiling fan blades reattached, it’s time to turn the power back on. Return to the circuit breaker or fuse box and switch the power supply back on to the room where the ceiling fan light kit was installed.
Finally, it’s time to test the newly installed light kit. Turn on the fan and the light switch to ensure everything is functioning correctly. If all is well, sit back, relax, and enjoy the enhanced comfort and illumination your new ceiling fan light kit brings to your space.
Installing a ceiling fan light kit may seem intimidating at first, but with the right tools, materials, and guidance, it can be a rewarding DIY project. By following this step-by-step guide, you’ll be able to upgrade your living space, improve air circulation, and add beautiful illumination to any room in your home.
Key Takeaways:
- Prioritize safety by turning off the power supply and confirming no electricity is present before installing a ceiling fan light kit. Carefully follow each step to ensure a successful and rewarding DIY project.
- Gather all necessary tools and materials before beginning the installation process to streamline the workflow and ensure a hassle-free experience. Enjoy the enhanced comfort and illumination brought by your new ceiling fan light kit.
Read more: How To Install Ceiling Fan Where Light Was
Step 1: Gather the necessary tools and materials
Before beginning the installation process of a ceiling fan light kit, it’s essential to gather all the necessary tools and materials. Having everything on hand will make the installation process much more convenient and efficient. Here’s a list of the items you’ll need:
- Screwdriver: A screwdriver is essential for removing and attaching screws during the installation process. Make sure you have both a flathead and a Phillips screwdriver to accommodate different screw types.
- Wire connectors: These connectors are used to secure and join the wires during the wiring process. Ensure you have a variety of wire connectors on hand to accommodate different wire thicknesses and connections.
- Voltage tester: A voltage tester is a crucial tool for ensuring the power supply to the ceiling fan light kit is turned off during the installation process. It’s important to prioritize safety, and using a voltage tester will help prevent any accidents involving live electrical wires.
- Wire strippers: Wire strippers are necessary to remove the plastic insulation from the ends of the wires. This allows for proper connection and ensures reliable electrical conductivity.
- Ladder: Depending on the height of the ceiling, you may need a ladder to reach the ceiling fan and perform the installation. Ensure you have a safe and sturdy ladder that allows you to reach the installation area comfortably.
- Electrical tape: Electrical tape is used to secure wire connections and provide additional insulation. It helps protect against any accidental contact with exposed wires and ensures a secure electrical connection.
- Ceiling fan light kit: Of course, you’ll need the ceiling fan light kit itself. Make sure to choose a light kit that is compatible with your ceiling fan model and matches the aesthetics of your room.
Before starting the installation process, double-check that you have all the necessary tools and materials. This way, you won’t have to interrupt the installation to search for missing items. It’s a good idea to lay out all the tools and materials in a convenient workspace, ensuring easy access throughout the installation.
By gathering all the necessary tools and materials beforehand, you’ll be well-prepared to tackle the installation process smoothly. Having everything on hand will save you time and ensure a successful and hassle-free installation of your ceiling fan light kit.
Step 2: Turn off the power supply
Before embarking on the installation of a ceiling fan light kit, it is crucial to prioritize safety by turning off the power supply. Working with live electrical wires can be hazardous, so taking this precautionary step is essential. Following these instructions will ensure a safe installation process:
- Locate the circuit breaker or fuse box: The circuit breaker or fuse box is typically located in a utility room, basement, or garage. Take note of the specific breaker or fuse that controls the electrical supply to the room where you will be installing the ceiling fan light kit.
- Turn off the power supply: Once you have identified the correct breaker or fuse, switch it off by flipping the breaker switch or removing the fuse. This action will completely cut off the electricity to the designated room.
- Confirm the power is off: To ensure that the power supply has been successfully turned off, use a voltage tester. Simply touch the tester to the wires or electrical outlets in the room. If the tester does not indicate any electrical current, you can proceed with the installation safely. However, if the tester still detects electricity, double-check the breaker or fuse to ensure it is switched off. If the issue persists, it is advisable to seek professional assistance.
It is essential to remember that safety should always be the top priority when working with electrical installations. By turning off the power supply, you will minimize the risk of electrocution and ensure a secure environment for the installation process.
Additionally, it is recommended to inform other household members about the power outage to prevent any accidents. Posting a note near the circuit breaker or fuse box will serve as a reminder for others to avoid handling electrical devices or switches during the installation process.
Always remember to exercise caution when working with electricity. If you feel uncertain or uncomfortable at any point during the installation process, do not hesitate to consult with a professional electrician. Your safety should never be compromised.
Once you have turned off the power supply and confirmed that no electricity is present in the designated room, you can proceed to the next step of the installation process with confidence.
Step 3: Remove the fan blades
Now that you have turned off the power supply, it’s time to move on to the next step of installing a ceiling fan light kit: removing the fan blades. Removing the fan blades will provide easier access to the motor housing where the light kit will be installed. Follow these steps to safely remove the fan blades:
- Gather your screwdriver: You will need a screwdriver, either a flathead or a Phillips, depending on the type of screws used to attach the fan blades to the motor housing.
- Locate the screws: Look for the screws that secure the fan blades to the motor housing. In most cases, these screws will be positioned at the base of each fan blade or on the sides of the motor housing.
- Unscrew the screws: Using your screwdriver, carefully unscrew each screw. Make sure to keep track of the screws as you remove them, as you will need them later to reattach the fan blades.
- Detach the fan blades: Once all the screws have been removed, gently pull each fan blade away from the motor housing. Be cautious not to drop the blades or damage any wiring connected to the motor.
- Place the fan blades in a safe location: Set the fan blades aside in a secure area to prevent them from getting damaged or causing any accidents during the rest of the installation process.
Removing the fan blades is a critical step to ensure that there is enough space to install the ceiling fan light kit. By doing so, you’ll have easy access to the motor housing and wiring necessary for the light kit installation.
While removing the fan blades, it’s important to handle them with care to avoid any damage. Check for any signs of wear or damage on the blades and replace them if necessary. This step also presents an opportunity to clean the blades, removing any dust or debris that may have accumulated over time.
Remember to keep the screws in a safe place as you will need them when reattaching the fan blades later in the installation process. It’s helpful to lay them out in an organized manner so that you can easily retrieve them when needed.
By completing this step, you are now ready to move on to the next phase of the installation process, which involves mounting the fan light kit bracket to the motor housing.
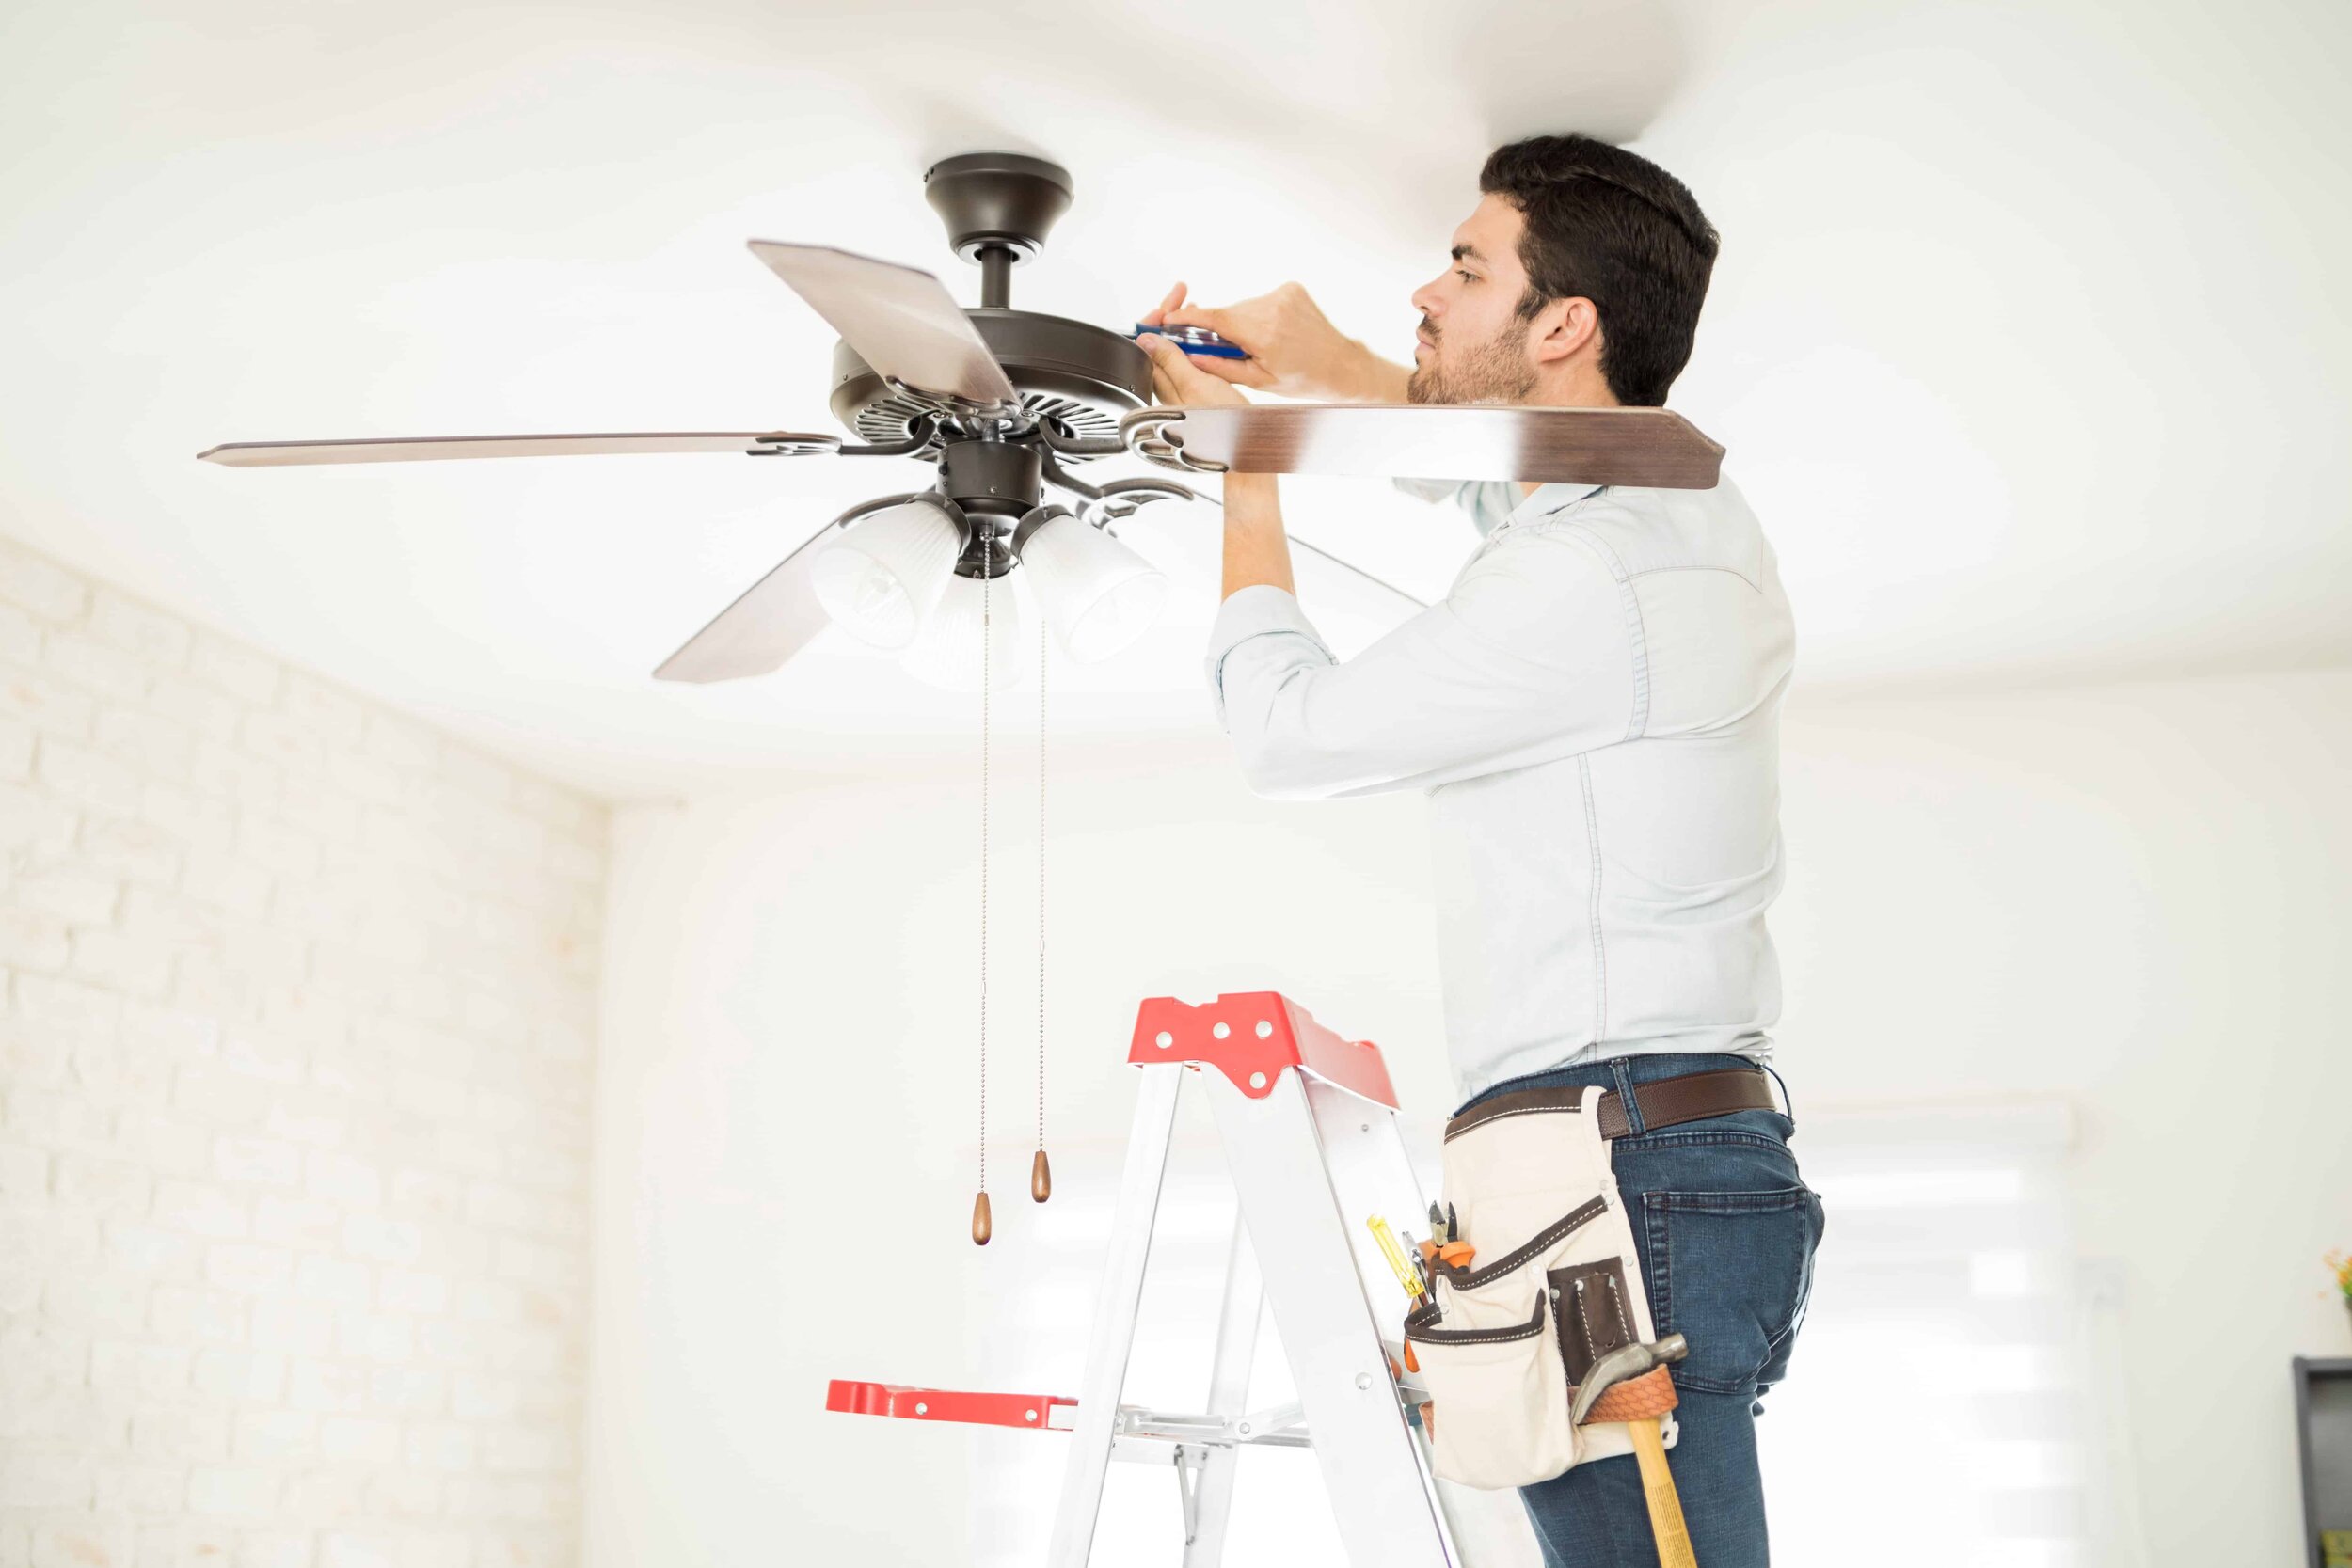
Step 4: Mount the fan light kit bracket
With the fan blades removed, it’s time to move on to the next step of installing a ceiling fan light kit: mounting the fan light kit bracket. The bracket serves as the base for attaching the light kit to the motor housing of the ceiling fan. Follow these steps to securely mount the fan light kit bracket:
- Retrieve the fan light kit bracket: The fan light kit should come with its own specific bracket that is designed to fit your ceiling fan model. Locate the bracket and ensure that all the necessary hardware is included.
- Position the bracket: Identify the spot on the motor housing where the fan light kit will be installed. Hold the bracket up to the motor housing, aligning it with the pre-drilled holes or mounting slots on the housing. Make sure the bracket is level and centered before proceeding.
- Attach the bracket: Once the bracket is properly positioned, use the provided screws or other hardware to secure it to the motor housing. Use a screwdriver or other appropriate tools to tighten the screws and ensure a firm connection. Be careful not to overtighten and damage the bracket or the motor housing.
- Double-check the stability: Give the bracket a gentle shake to ensure it is securely attached to the motor housing. If there is excessive movement or the bracket feels loose, tighten the screws further. It’s important for the bracket to be stable to support the weight of the light kit.
Mounting the fan light kit bracket is an essential step in ensuring the stability and proper installation of the ceiling fan light kit. The bracket acts as a secure foundation for the light kit, preventing it from wobbling or falling during operation.
When positioning the bracket, take your time to align it correctly. A level and centered bracket will ensure the light kit hangs straight and enhances the aesthetic appeal of the ceiling fan. Be mindful of any instructions provided by the manufacturer regarding the specific location and orientation of the bracket for optimal installation.
Upon securing the bracket, test its stability by giving it a gentle shake. This step will help identify any loose connections that need tightening. It’s crucial to ensure a tight and secure attachment to prevent any issues or hazards when the light kit is in use.
By completing this step, you have successfully mounted the fan light kit bracket to the motor housing. You are now ready to proceed with the next step, which involves connecting the wiring for the ceiling fan light kit.
Read more: How Install Ceiling Fan
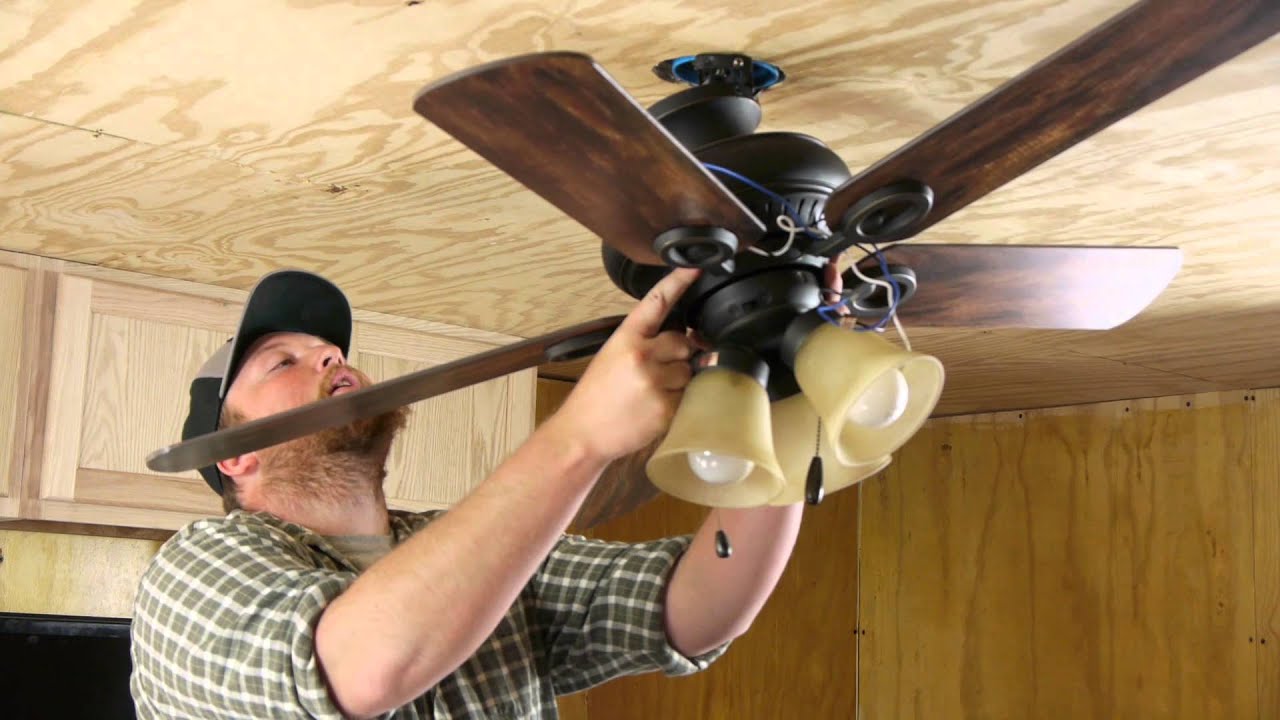
Step 5: Connect the wiring
Now that the fan light kit bracket is securely mounted, it’s time to move on to the next step in installing a ceiling fan light kit: connecting the wiring. Properly connecting the wires is essential for ensuring the functionality and safety of the light kit. Follow these steps to connect the wiring:
- Identify the wires: Start by identifying the wires in your ceiling fan. You should typically find a black wire, a white wire, and a green or copper wire. These wires correspond to the fan’s lighting, neutral, and ground connections, respectively.
- Strip the wires: Use wire strippers to carefully remove the plastic insulation from the ends of each wire. Be cautious not to cut into the wire itself while stripping the insulation. This will expose a small length of bare wire for proper connection.
- Connect the wires: Match the corresponding wires from the ceiling fan to the wires in the light kit based on their color codes. Use wire connectors to join the black wires together, the white wires together, and the green or copper wires together. Twist the wires firmly together before securing them with the wire connectors.
- Secure the connections: Once the wires are connected, use electrical tape to wrap around each wire connector, covering the exposed metal and providing additional insulation. This helps prevent any accidental contact between the wires and enhances the safety of the electrical connections.
- Tuck the connected wires: Carefully tuck the connected wires into the fan light kit housing. Ensure that they are neatly arranged and not pinched or strained in any way. This will allow for smooth installation of the light kit and prevent any interference with the fan blades or other components.
Connecting the wiring is a critical step in the installation process. It is vital to match the wires correctly to their corresponding colors to ensure proper functionality and prevent any electrical issues. Following the manufacturer’s instructions regarding wire connections is always recommended.
Remember to strip the insulation from the ends of the wires before connecting them. This provides a clean and exposed section of wire for a secure connection. Take your time to properly strip the insulation, ensuring that no excess wire is exposed beyond the connector.
Twist the wires firmly together before inserting them into the corresponding wire connectors. This will create a strong and reliable connection. Use the appropriate wire connectors for the gauge of the wires being joined, and ensure that they are securely fastened. A loose connection may lead to electrical problems and can be hazardous.
Completing the wiring connections, use electrical tape to wrap each wire connector. This provides an extra layer of insulation and further secures the connection. Ensure that the tape is tightly wrapped, covering the entire wire connector and a portion of the insulated wire.
Once the connections are properly secured and the wires are neatly arranged, you are now ready to proceed with the next step, which involves attaching the fan light kit to the bracket.
Before installing a ceiling fan light kit, make sure to turn off the power at the circuit breaker to avoid any electrical accidents. Always follow the manufacturer’s instructions for proper installation.
Step 6: Attach the fan light kit
With the wiring connected and secured, it’s time to move on to the next step of installing a ceiling fan light kit: attaching the light kit to the fan light kit bracket. Follow these steps to ensure a proper and secure attachment:
- Retrieve the fan light kit: Take the fan light kit and position it below the fan light kit bracket that you previously mounted. Ensure that the mounting holes on the light kit align with the corresponding holes on the bracket.
- Align the light kit: Hold the light kit in place, aligning it with the bracket. Make sure the kit is centered and level before proceeding.
- Secure the light kit: Using the provided screws or other mounting hardware, attach the light kit to the fan light kit bracket. Insert each screw into its corresponding hole and use a screwdriver to tighten them securely. Be careful not to overtighten and risk damaging the light kit or the bracket.
- Check for stability: After attaching the light kit, give it a gentle shake to ensure that it is secure and stable. If there is excessive movement or the light kit feels loose, double-check the screws and tighten them if necessary.
Attaching the fan light kit to the bracket is an important step in completing the installation process. It ensures that the light kit is properly mounted and will remain securely in place when the ceiling fan is in operation.
When aligning the light kit with the bracket, take your time to position it properly. A centered and level installation will enhance the aesthetics of your ceiling fan and provide proper illumination to the room.
Using the provided screws or mounting hardware, attach the light kit to the bracket according to the manufacturer’s instructions. Make sure to insert each screw correctly into its designated hole and tighten them securely. However, be cautious not to overtighten, as this could cause damage to the light kit or the bracket.
After attaching the light kit, check for stability by gently shaking it. The light kit should not have excessive movement or feel loose. If you notice any instability, double-check the screws and tighten them accordingly to ensure a secure connection.
By completing this step, you have successfully attached the fan light kit to the fan light kit bracket. You are now ready to proceed with the next step, which involves installing the light bulbs in the kit.
Step 7: Install the light bulbs
With the fan light kit securely attached, it’s time to move on to the next step of installing a ceiling fan light kit: installing the light bulbs. Follow these steps to ensure a proper and safe installation of the light bulbs:
- Check the light bulb compatibility: Before installing the light bulbs, make sure to check the specifications and recommendations provided by the manufacturer. Ensure that the light bulbs you have chosen are compatible with the light kit and meet the maximum wattage requirements.
- Prepare the light bulb sockets: Remove any protective covers or packaging from the light bulb sockets in the light kit. Ensure that the sockets are clean and free from any debris or obstructions.
- Select the appropriate light bulbs: Choose the light bulbs that best suit your desired lighting preferences and the décor of the room. Make sure to select bulbs that match the recommended wattage and type specified by the manufacturer.
- Insert the light bulbs: Gently insert each light bulb into its respective socket, making sure it is seated securely. Give the bulb a slight twist to ensure it is properly engaged in the socket. Repeat this step for each light bulb in the kit.
- Test the light bulbs: Once all the light bulbs are installed, turn on the power supply and test each bulb individually to ensure they are functioning properly. This will allow you to identify any faulty bulbs that need to be replaced.
Installing the light bulbs is the final step in completing the installation of a ceiling fan light kit. It provides the illumination that enhances the functionality and aesthetics of the ceiling fan.
Prior to installing the light bulbs, refer to the manufacturer’s specifications to verify the compatibility and maximum wattage requirements. Using bulbs that are within the recommended range will ensure the longevity and efficiency of the light kit.
Before inserting the light bulbs, inspect the sockets to ensure they are clean and free from any debris or obstruction. This will facilitate a secure connection between the bulbs and sockets, enhancing electrical conductivity and minimizing the risk of damage or malfunction.
Select light bulbs that suit your lighting preferences and the ambiance of the room. Consider factors such as color temperature and bulb type to achieve the desired lighting effect. Ensure that the chosen bulbs match the recommended wattage specified by the manufacturer to prevent overheating or electrical issues.
Gently insert each light bulb into its respective socket, ensuring a proper fit. Give the bulb a slight twist to secure it in place. Be careful not to apply excessive force, as this can damage the socket or the bulb itself.
Once all the light bulbs are installed, turn on the power supply to test the bulbs individually. This will allow you to identify any faulty bulbs that may need to be replaced. If any bulbs fail to light up or exhibit abnormal behavior, replace them with new bulbs of the same specifications.
By completing this step, you have successfully installed the light bulbs in your ceiling fan light kit. You are now ready to proceed to the next step, which involves reattaching the fan blades.
Step 8: Reattach the fan blades
With the light bulbs in place and the installation nearing completion, it’s time to move on to the next step in installing a ceiling fan light kit: reattaching the fan blades. Follow these steps to ensure a secure and balanced reattachment of the fan blades:
- Retrieve the fan blades: Locate the fan blades that were set aside during earlier steps of the installation. Ensure that all the blades are clean and free from any dust or debris.
- Align the fan blades: Identify the correct orientation of each fan blade and align them with the corresponding fan blade brackets or attachment points on the motor housing. Each blade should fit smoothly into its designated location.
- Secure the fan blades: Once the fan blades are correctly aligned, insert the screws that were removed earlier into the pre-drilled holes on each blade. Use a screwdriver to tighten the screws securely, ensuring that each blade is firmly attached to the motor housing.
- Check for balance: After attaching all the fan blades, use a level or observe the fan blades from a distance to ensure they are balanced. If any blades appear to be misaligned or cause the fan to wobble, adjust them carefully by slightly loosening the screws and making small adjustments.
Reattaching the fan blades is the last major step in completing the installation of a ceiling fan light kit. It restores the functionality and airflow of the ceiling fan while enhancing the overall aesthetic appeal of the room.
Before reattaching the fan blades, inspect them to ensure they are clean and free from any dust or debris. This will prevent any obstructions that could affect the smooth operation of the fan and ensure optimal performance.
Align each fan blade with its corresponding bracket or attachment point on the motor housing. Take care to properly orient the blades in the correct direction as indicated by any manufacturer instructions or markings on the blades themselves. With the proper alignment, each blade should fit smoothly into place.
Secure the fan blades by inserting the screws into the pre-drilled holes on each blade and tightening them with a screwdriver. Be careful not to overtighten, as this can lead to damage or misalignment of the blades. Each blade should be securely attached to the motor housing, ensuring stability and balanced operation.
After attaching all the fan blades, check for balance by observing the fan from a distance or using a level. If any blades appear to be misaligned or cause the fan to wobble, make minor adjustments by slightly loosening the screws and repositioning the blades. Once balanced, tighten the screws securely to maintain the proper alignment.
By completing this step, you have successfully reattached the fan blades, bringing the ceiling fan back to its fully functional state. You are now ready to proceed to the final step, which involves turning on the power supply and testing the light kit.
Step 9: Turn on the power supply and test the light kit
Congratulations! You’ve reached the final step of installing a ceiling fan light kit. Now it’s time to turn on the power supply and test the functionality of the light kit. Follow these steps to ensure everything is working properly:
- Locate the circuit breaker or fuse box: If you haven’t already done so, find the circuit breaker or fuse box that controls the power supply to the room where the ceiling fan light kit is installed.
- Switch on the power supply: Flip the corresponding breaker switch or reinsert the fuse to restore the power supply to the room. Keep in mind that it may take a moment for the power to fully restore.
- Turn on the light switch: Use the light switch associated with the fan light kit to turn on the lights. If you have a separate fan and light switch, ensure both switches are in the on position.
- Check the functionality: Observe the light kit to ensure that all the light bulbs are illuminating. Pay attention to any flickering, dimming, or other irregularities. If any issues arise, turn off the power supply and inspect the connections and bulbs for loose or faulty components.
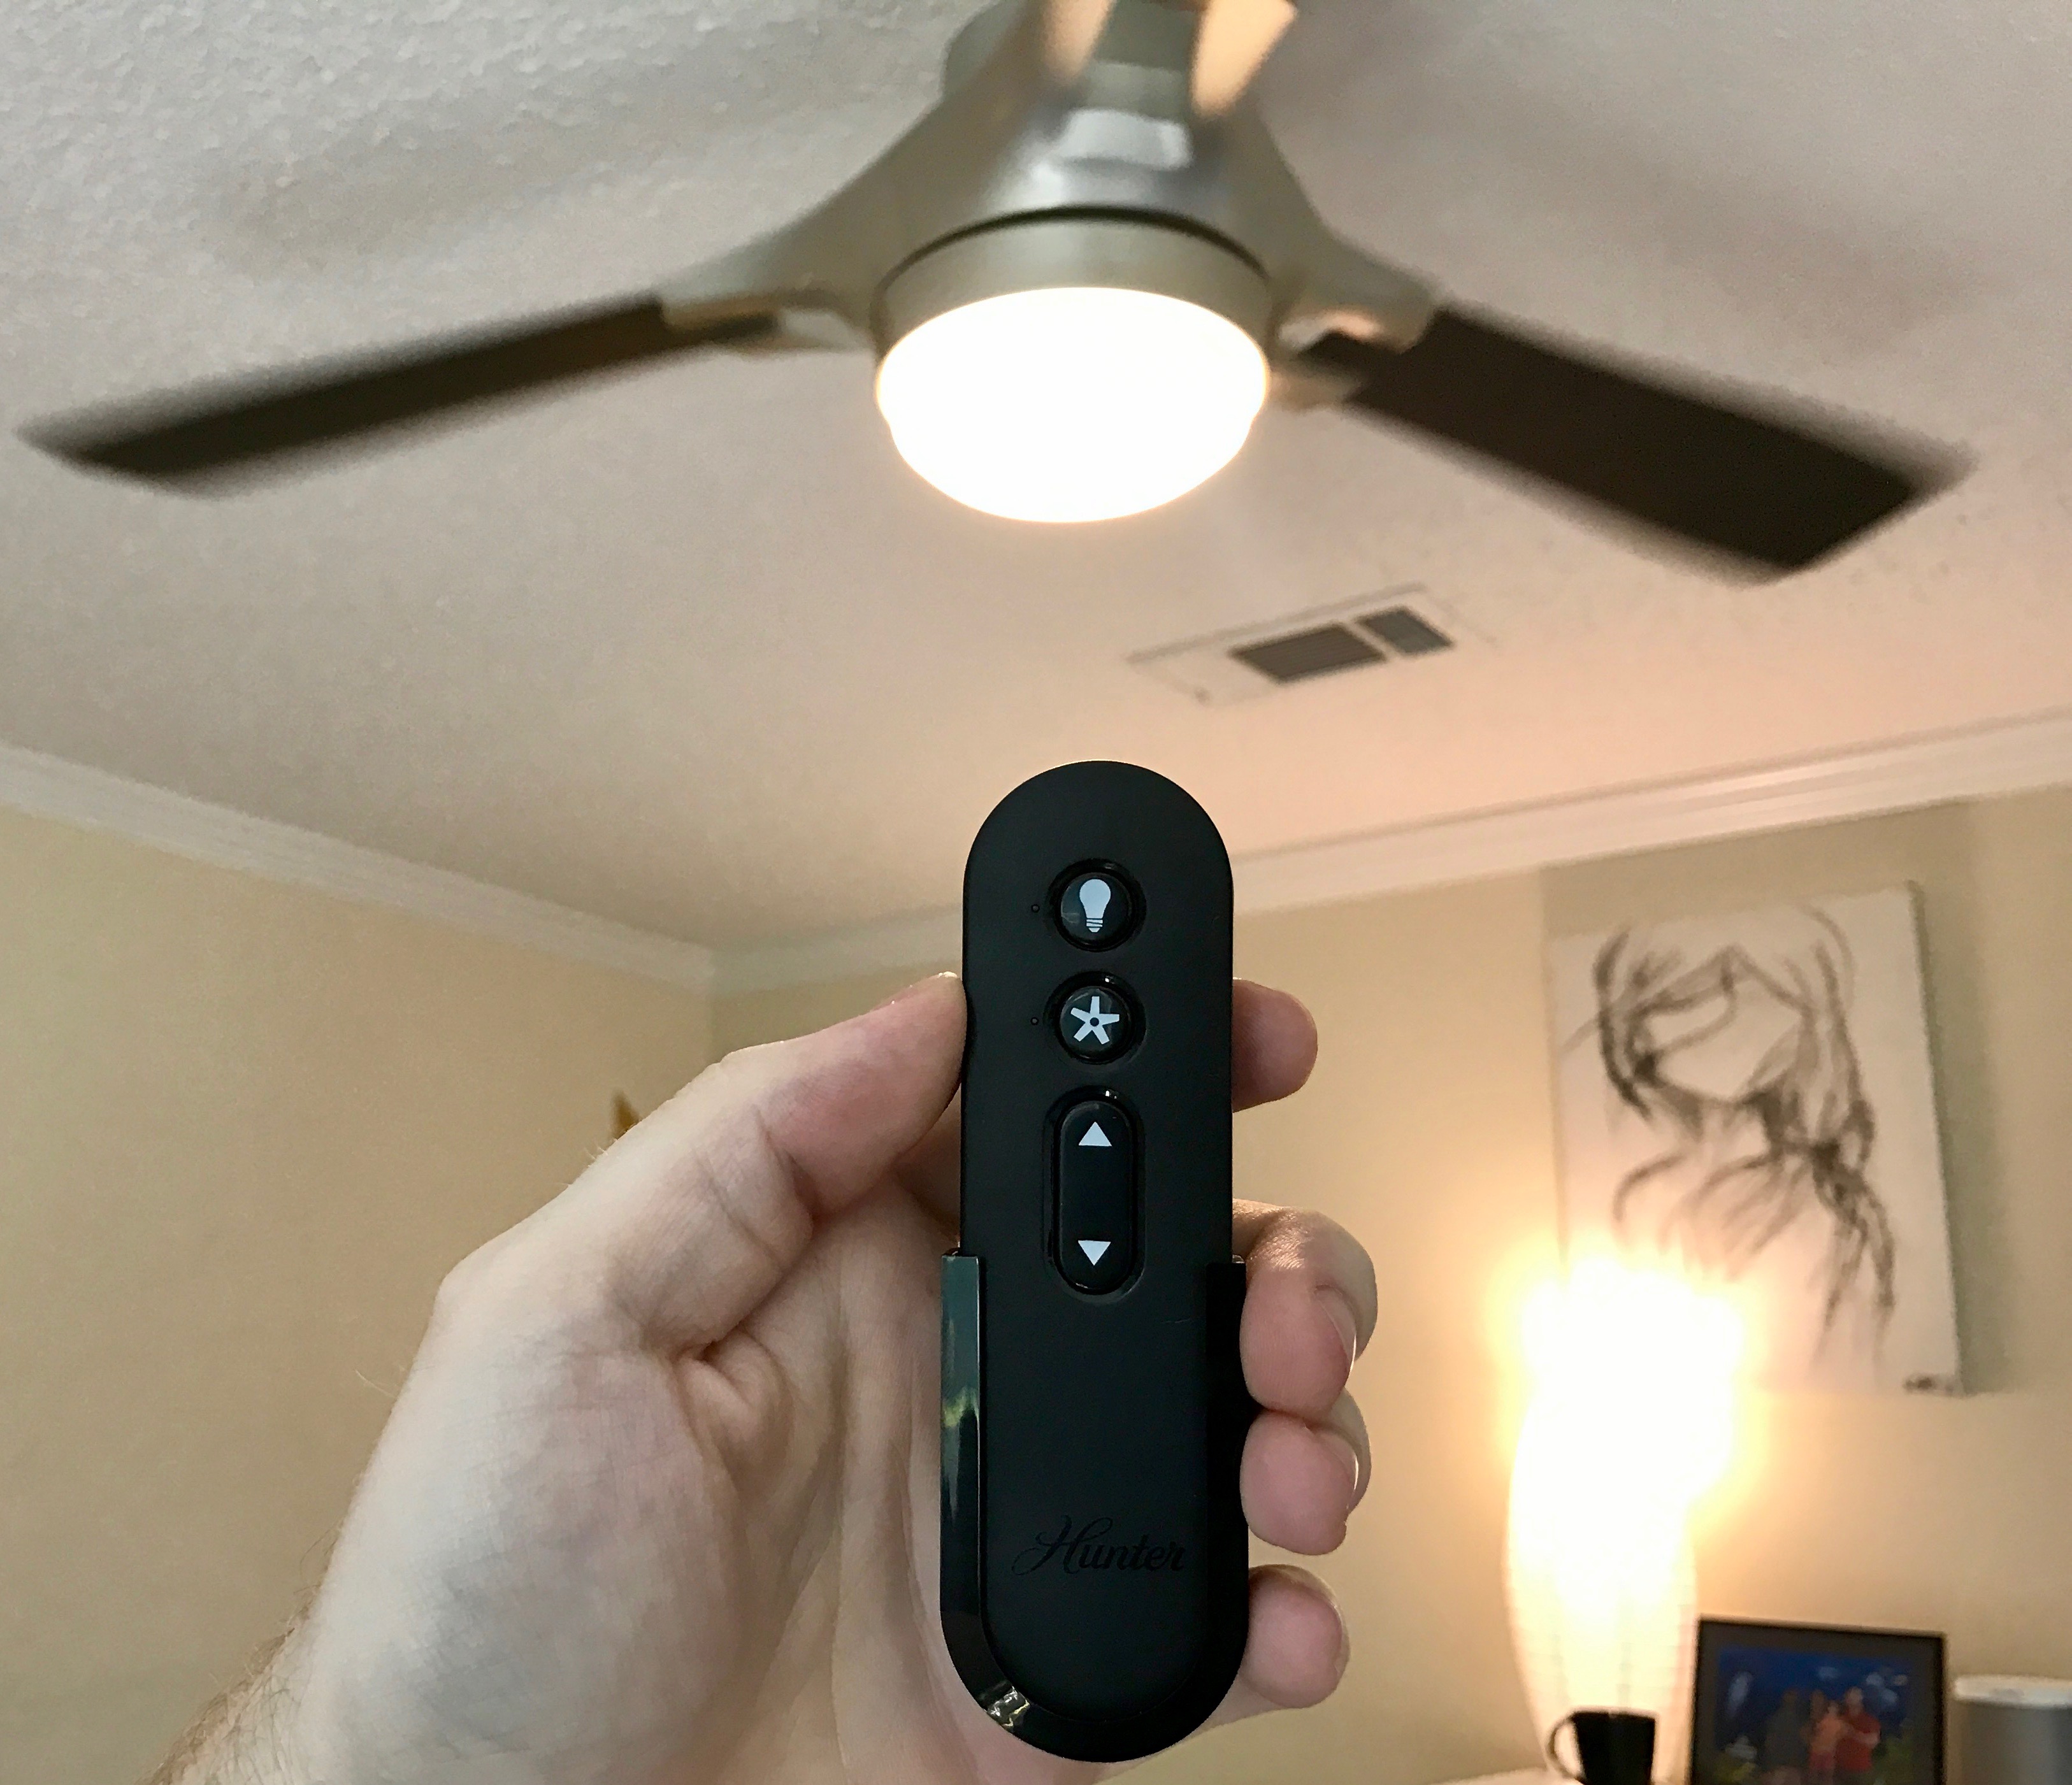
- Test the fan functionality: If your ceiling fan has multiple speed options or a fan remote, test these functions to ensure proper operation. Pay attention to any unusual noises or vibrations coming from the fan.
Turning on the power supply and testing the light kit is an exciting moment in the installation process. It allows you to see the fruits of your labor and ensure that everything is functioning as expected.
Locate the circuit breaker or fuse box that controls the power supply to the room where the ceiling fan light kit is installed. This step ensures that you are prepared to switch on the power supply once you’ve completed the installation.
Switch on the power supply by flipping the corresponding breaker switch or reinserting the fuse. Keep in mind that it may take a few moments for the power to fully restore, so be patient during this time.
Use the light switch associated with the fan light kit to turn on the lights. If you have separate switches for the fan and the light, ensure both switches are in the on position. This step will activate the light kit and allow you to assess its functionality.
Observe the light kit to ensure that all the light bulbs are illuminating as expected. Look for any flickering, dimming, or other irregularities that may indicate loose connections or faulty bulbs. If any issues arise, turn off the power supply and inspect the connections and bulbs for any loose or faulty components before testing again.
In addition to testing the light kit, don’t forget to test the fan functionality. If your ceiling fan has multiple speed options or a fan remote, test these functions to ensure they are working properly. Listen for any unusual noises or vibrations that may indicate a problem with the fan.
By following these steps and testing the light kit and fan functionality, you can ensure that the installation is successful and that you can enjoy the full benefits of your newly installed ceiling fan light kit.
Congratulations again on completing the installation process! Sit back, relax, and enjoy the enhanced comfort and illumination that your ceiling fan light kit brings to your space.
Conclusion
Installing a ceiling fan light kit is a rewarding DIY project that can bring numerous benefits to your home. Not only does it enhance the functionality and comfort of a room, but it also adds a touch of style and ambiance. By following the nine-step guide outlined in this article, you can successfully install a ceiling fan light kit and enjoy its many advantages.
The process begins with gathering all the necessary tools and materials, ensuring that you have everything on hand before starting. Safety should always be a priority, so remember to turn off the power supply and confirm that no electricity is present before proceeding with any installation steps.
Removing the fan blades provides easy access to the motor housing, allowing you to securely mount the fan light kit bracket. Connecting the wiring correctly is crucial for the proper functioning of the light kit, so take your time to ensure each wire is properly stripped, joined, and secured. Attaching the fan light kit securely to the bracket and installing the light bulbs properly complete the physical installation.
Reattaching the fan blades and testing the functionality of the light kit and fan ensure that everything is in working order. Careful attention to detail and adjustments, if necessary, will help maintain a stable and balanced ceiling fan.
Finally, remember to always prioritize safety while working with electrical installations. If you are unsure or uncomfortable at any point during the installation process, consult a professional electrician for assistance.
By following this comprehensive and engaging guide, you have gained the knowledge and confidence to install a ceiling fan light kit in your home. Not only will you enjoy improved air circulation and better lighting, but you will also have a stylish and functional addition to your living space.
So go ahead, gather your tools, turn off the power supply, and embark on this exciting DIY project. With patience and careful attention to detail, you will successfully install a ceiling fan light kit and transform your space into a more comfortable and inviting environment.
Frequently Asked Questions about How To Install Ceiling Fan Light Kit
Was this page helpful?
At Storables.com, we guarantee accurate and reliable information. Our content, validated by Expert Board Contributors, is crafted following stringent Editorial Policies. We're committed to providing you with well-researched, expert-backed insights for all your informational needs.


0 thoughts on “How To Install Ceiling Fan Light Kit”