Articles
How To Replace Bathroom Tile Floor
Modified: August 26, 2024
Looking for articles on how to replace bathroom tile floor? Check out our expert tips and step-by-step guides to tackle this DIY project and transform your bathroom today!
(Many of the links in this article redirect to a specific reviewed product. Your purchase of these products through affiliate links helps to generate commission for Storables.com, at no extra cost. Learn more)
Introduction
Replacing bathroom tile floor can give your bathroom a fresh new look and improve its overall functionality. Whether you want to update the design of your bathroom or you are dealing with damaged or outdated tiles, this step-by-step guide will help you successfully replace the tile floor in your bathroom.
Replacing bathroom tile floor may seem like a daunting task, but with the right tools, materials, and a little bit of patience, it is a project that you can tackle on your own. By following these steps, you can achieve professional-looking results and create a bathroom floor that you can be proud of.

Key Takeaways:
- Replacing a bathroom tile floor is a manageable DIY project with the right tools and steps. Prioritize safety, precision, and patience for professional-looking results that enhance your bathroom’s aesthetics and functionality.
- Proper preparation, planning, and attention to detail are crucial for a successful bathroom tile floor replacement. From removing old tiles to grouting and finishing, each step contributes to a durable and stylish outcome.
Read more: How To Replace Floor Tile
Tools and Materials Needed
Before you start replacing your bathroom tile floor, it’s important to gather all the necessary tools and materials. Here is a list of what you will need:
- Protective gear: Safety glasses, work gloves, and a dust mask to protect yourself while working.
- Tile removal tools: A hammer, chisel, and pry bar to remove the old tiles.
- Measuring tools: A tape measure and a level to measure and ensure accurate tile placement.
- Tile cutter or wet saw: Depending on the type of tile you choose, you will need either a manual tile cutter or a wet saw to cut the tiles to fit.
- Grout float: A rubber float used to apply and smooth the grout between the tiles.
- Grout sponge: A sponge used to clean excess grout from the tiles after grouting.
- Tile adhesive or mortar: The product used to adhere the tiles to the floor.
- Tile spacers: Small plastic crosses used to evenly space the tiles and ensure straight lines.
- Grout: The material used to fill the gaps between the tiles and provide a finished look.
- Tile sealer: A protective sealer applied to the tiles to prevent staining and damage.
- Trowel: A notched trowel for spreading the adhesive or mortar onto the floor.
- Bucket and mixing tools: For mixing the adhesive or mortar and the grout.
- Cleaner: A mild cleaner for preparing the subfloor and cleaning the tiles.
- Rags or towels: For wiping away excess adhesive, mortar, and grout.
Having these tools and materials ready before you begin will ensure a smooth and efficient tile replacement process. Now that you have everything you need, let’s move on to the first step: removing the old tiles.
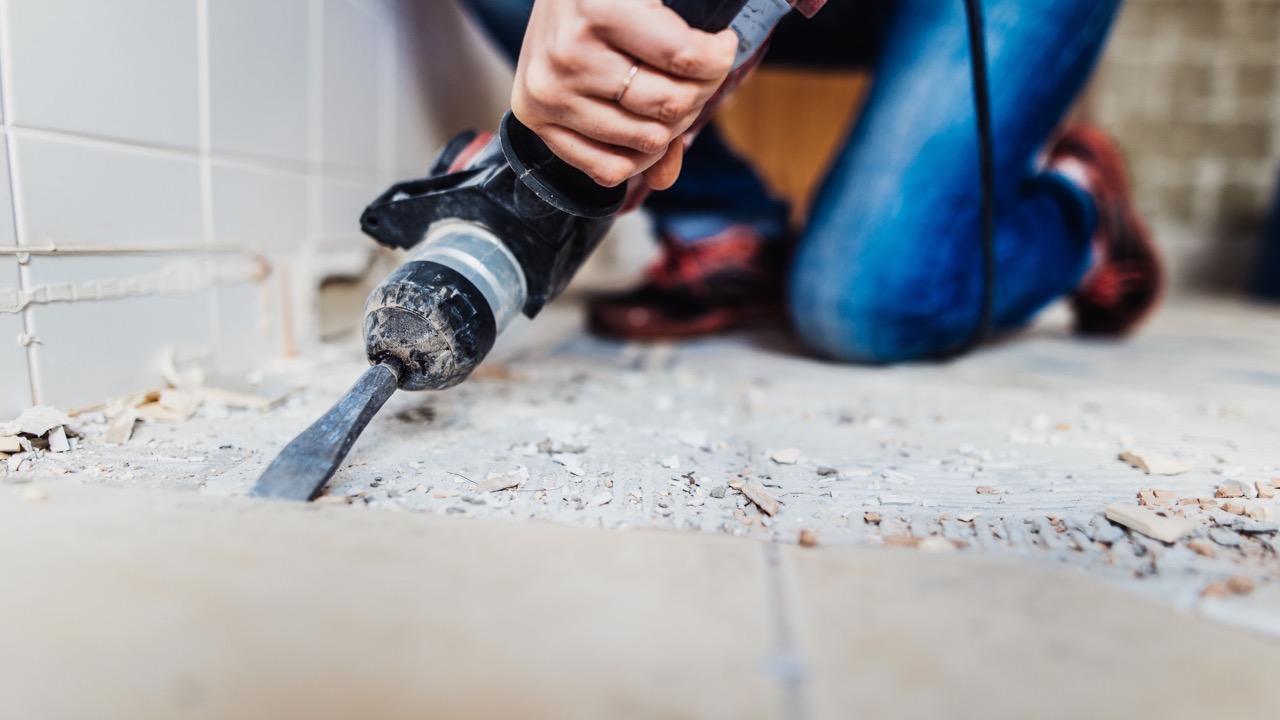
Step 1: Remove the Old Tiles
The first step in replacing your bathroom tile floor is to remove the old tiles. This process can vary depending on the type of tile and adhesive used, but the general steps are as follows:
- Start by putting on your protective gear, including safety glasses, work gloves, and a dust mask.
- Inspect the tiles to identify any loose or cracked ones. These tiles should be removed first.
- Use a hammer and chisel to carefully chip away at the grout surrounding the tile. Start at the grout line and work your way towards the center of the tile.
- Once the grout is removed, insert a pry bar or chisel under the tile and gently lift it away from the subfloor. Be careful not to damage the surrounding tiles.
- Continue this process, working your way across the floor until all the old tiles are removed.
- Use a scraper or putty knife to scrape away any remaining adhesive or mortar on the subfloor. Ensure that the subfloor is clean and smooth before moving on to the next step.
If you encounter stubborn tiles or adhesive, you may need to use a heat gun or an adhesive remover to help loosen them. Follow the manufacturer’s instructions for these products and take necessary precautions. Once all the old tiles are removed and the subfloor is prepared, you’re ready to move on to the next step: preparing the subfloor.
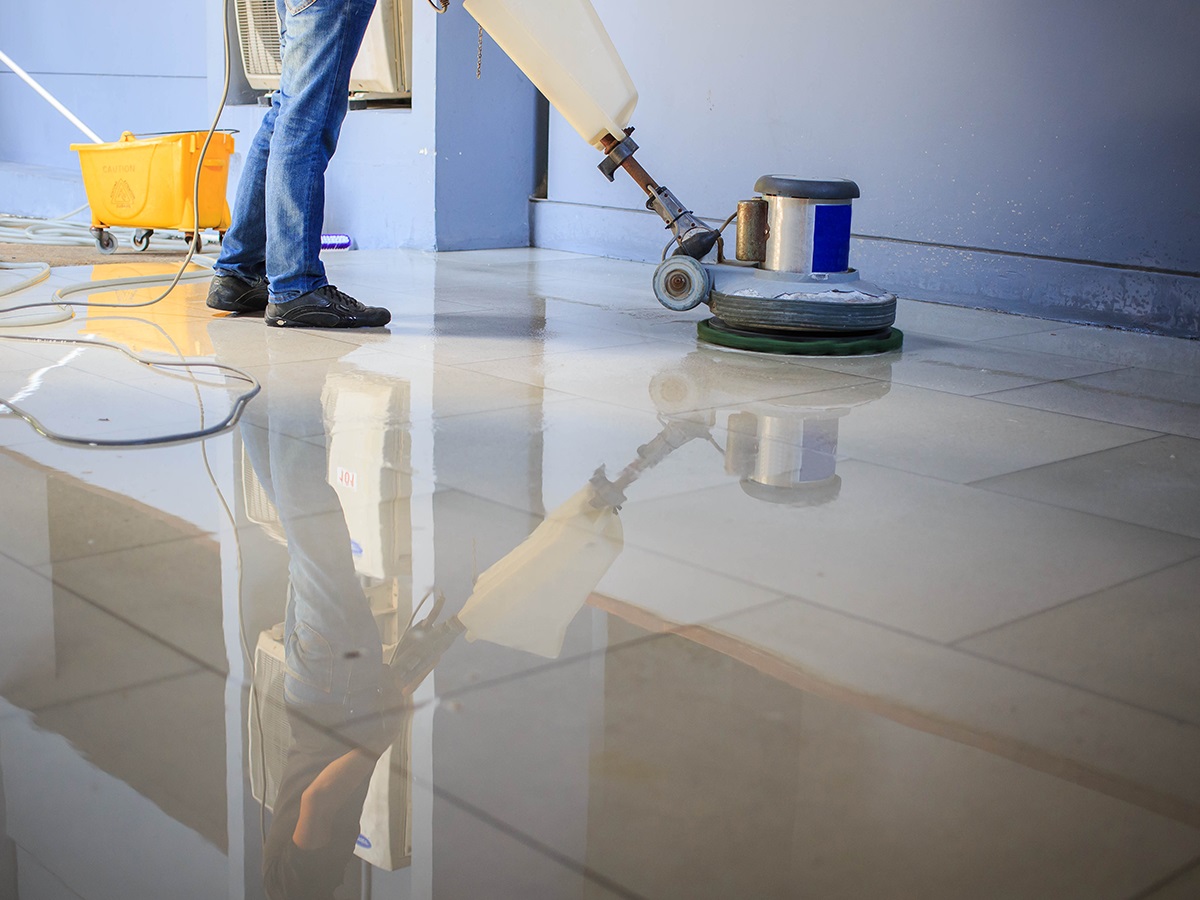
Step 2: Prepare the Subfloor
Preparing the subfloor is crucial to ensure a stable and long-lasting tile installation. Follow these steps to properly prepare the subfloor:
- Inspect the subfloor for any damage or unevenness. Repair or replace any damaged areas, and ensure that the subfloor is level.
- If you have a wooden subfloor, ensure that it is properly secured and free of any loose or squeaky boards. Use screws to secure any loose boards and address any squeaks.
- If you have a concrete subfloor, ensure that it is clean, dry, and free of cracks. Use a suitable concrete patching compound to repair any cracks or uneven spots.
- Remove any debris or dust from the subfloor, and give it a thorough cleaning using a mild cleaner. Allow the subfloor to dry completely before moving on.
- Apply a primer or bonding agent to the subfloor. This will create a strong bond between the subfloor and the adhesive or mortar.
- If you are installing tiles on a wooden subfloor, consider adding a cement backer board. This will provide extra support and prevent moisture-related issues in the future. Follow the manufacturer’s instructions for installing the backer board.
- Once the subfloor is clean, dry, and prepared, you’re ready to move on to the next step: measuring and planning the tile layout.
Properly preparing the subfloor is crucial to ensure a successful tile installation. By taking the time to address any issues and create a solid foundation, you’ll be setting yourself up for a beautiful and durable bathroom tile floor. Now that the subfloor is ready, let’s move on to the next step: measuring and planning the tile layout.
Step 3: Measure and Plan the Tile Layout
Before you start installing the new tiles, it’s important to measure and plan the tile layout to ensure an aesthetically pleasing and well-balanced design. Follow these steps to measure and plan the tile layout:
- Measure the dimensions of the bathroom floor to determine the square footage. This will help you calculate the number of tiles needed for the project.
- Consider the size and shape of the tiles you will be using. Smaller tiles are typically easier to work with, especially if you have intricate or curved areas to cover.
- Decide on the desired orientation of the tiles. You can choose to lay them in a straight pattern, diagonal pattern, or create a unique pattern using different tile sizes or colors.
- Start planning the tile layout from the center of the room. This will create a balanced and symmetrical look. Use a chalk line or pencil to mark a straight line down the center of the room in both directions.
- Using the measured dimensions and the size of the tiles, lay out a dry run of the tiles without adhesive. This will give you a visual representation of how the tiles will fit in the space and allow you to make any necessary adjustments or cuts.
- Pay attention to areas around fixtures, corners, and edges. Plan for full tiles and partial tiles, ensuring that the cut tiles are evenly distributed throughout the room.
- Make precise measurements and use a tile cutter or wet saw to cut the tiles to fit around fixtures or along the edges. Take your time and double-check the measurements to avoid unnecessary mistakes.
By taking the time to measure and plan the tile layout, you will achieve a professional-looking result with a well-balanced and visually appealing design. Once you’ve finalized the tile layout, you’re ready to move on to the next step: applying adhesive or mortar.
Step 4: Apply Adhesive or Mortar
With the tile layout planned, it’s time to apply the adhesive or mortar to securely attach the tiles to the subfloor. The type of tile you’re using will determine whether you need adhesive or mortar. Follow these steps to apply the appropriate material:
- Start by mixing the adhesive or mortar according to the manufacturer’s instructions. Use a bucket and mixing tool to create a smooth and consistent mixture.
- Using a notched trowel, spread a layer of adhesive or mortar onto a small section of the subfloor, following the guidelines of your plan.
- Hold the trowel at a 45-degree angle and use the notched edge to create ridges in the adhesive or mortar. This ensures proper adhesion and helps with tile placement.
- Place the first tile on the adhesive or mortar, pressing it firmly into place. Twist the tile slightly to ensure a good bond between the tile and the subfloor.
- Insert tile spacers along the edges of the tile to create even and consistent spacing between the tiles. Adjust the tile as needed to align with the layout plan.
- Continue spreading the adhesive or mortar in small sections and laying the tiles one by one, following the layout plan. Remember to periodically check for levelness and adjust if necessary.
- Be mindful of the drying time and work in manageable sections to prevent the adhesive or mortar from drying out too quickly.
Once you have completed the tile installation, allow the adhesive or mortar to set according to the manufacturer’s instructions. This typically takes 24 to 48 hours. Avoid walking on the tiles during this time to ensure they bond properly.
Applying the adhesive or mortar correctly is crucial to ensure the durability and longevity of your bathroom tile floor. With the tiles securely in place, you’re ready to move on to the next step: cutting tiles to fit the edges.
When replacing bathroom tile floor, make sure to properly prepare the subfloor by removing any old adhesive or grout. This will ensure a smooth and even surface for the new tiles to adhere to.
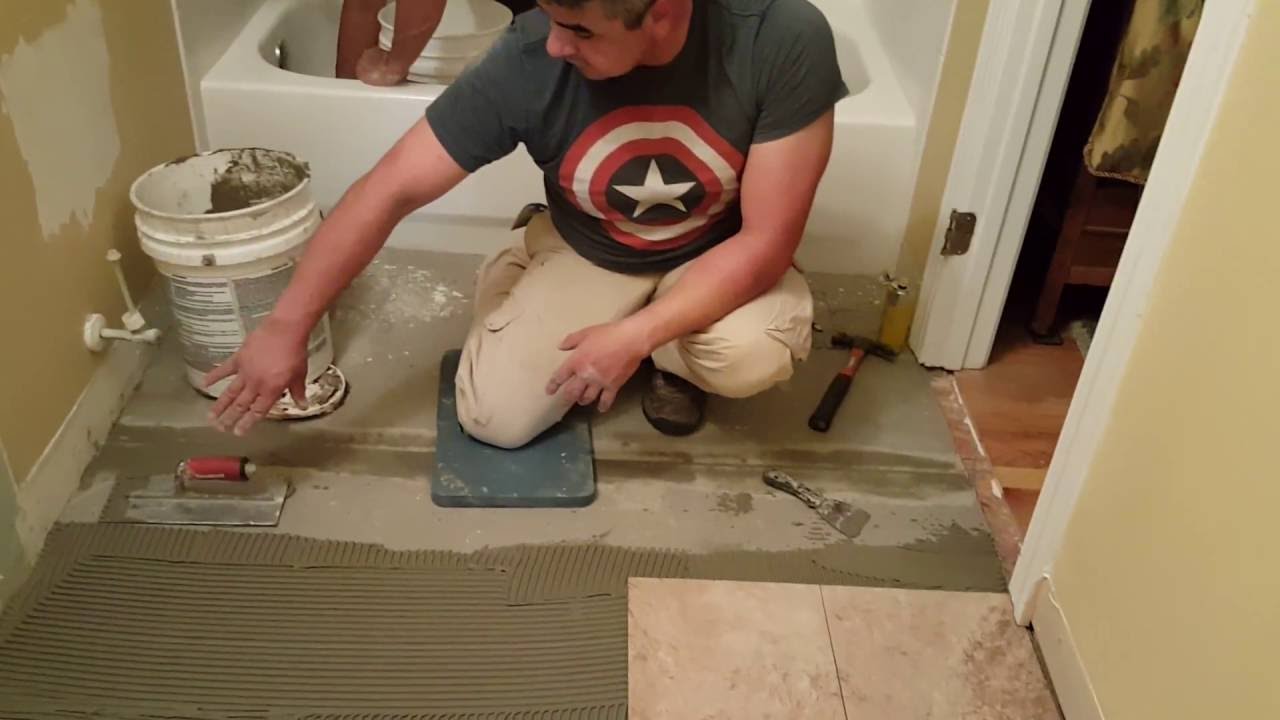
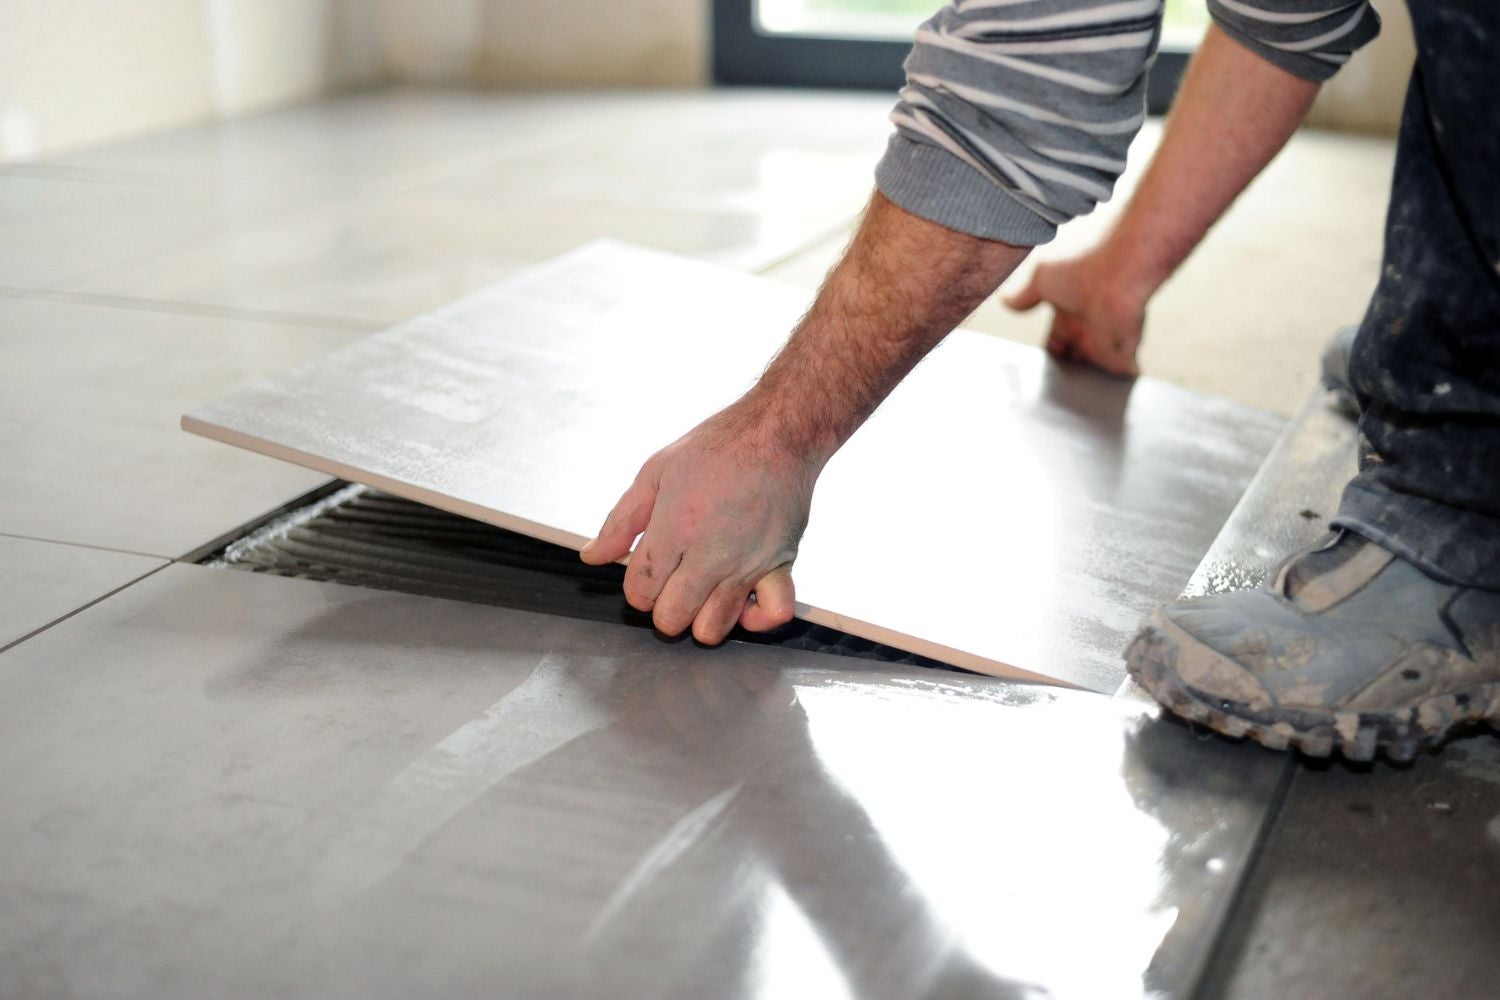
Step 5: Install the New Tiles
With the adhesive or mortar set, it’s time to install the new tiles onto the bathroom floor. Follow these steps to ensure a successful and smooth installation:
- Remove the tile spacers from between the tiles.
- Starting in one corner, spread a layer of adhesive or mortar onto the subfloor using a notched trowel, covering an area that is manageable for you to work with.
- Place the first tile onto the adhesive or mortar, pressing it firmly into place and ensuring it aligns with the layout plan. Twist the tile slightly to help it adhere to the floor.
- Continue applying the adhesive or mortar and laying the tiles row by row, pressing each tile firmly into place and adjusting as needed.
- Use a level periodically to ensure the tiles are flat and even. Adjust the tiles if necessary to maintain a smooth surface.
- Work methodically from one section to another, spreading adhesive or mortar and installing the tiles until the entire bathroom floor is covered.
- If you come across any areas that require smaller or cut tiles, use a tile cutter or wet saw to make the necessary cuts. Take accurate measurements and double-check before cutting to ensure a precise fit.
- As you lay the tiles, periodically clean off any excess adhesive or mortar with a damp cloth or sponge. This will prevent it from hardening on the surface of the tiles.
- Allow the installed tiles to set according to the manufacturer’s instructions. This generally takes 24 to 48 hours.
By carefully following these steps, you will achieve a beautifully installed bathroom tile floor. Now that the tiles are in place, it’s time to move on to the next step: cutting tiles to fit the edges.
Step 6: Cut Tiles to Fit the Edges
When installing tiles, you will inevitably encounter areas along the edges where full tiles won’t fit. This is where cutting tiles to fit the edges comes in. Follow these steps to cut tiles and ensure a precise fit:
- Measure the space where the tile needs to fit. Use a tape measure to determine the dimensions accurately.
- Mark the measurements on the tile that needs to be cut. Use a pencil or a marker to make clear and visible marks.
- With safety goggles and gloves on, carefully position the marked tile on a tile cutter or wet saw. Align the mark with the cutting guide on the tool.
- Follow the manufacturer’s instructions for cutting the tile. Push the tile firmly against the cutting blade or wheel, applying steady and even pressure.
- Once the tile is cut, double-check the fit before applying adhesive or mortar. Make any necessary adjustments or refinements to ensure a precise fit.
- If you need to make curved cuts, use a tile nipper or tile file to gradually shape the tile until it fits the desired area.
Remember to wear safety goggles and gloves when cutting tiles, as the process can produce shards of tile. Take your time and make accurate measurements to achieve a seamless and professional-looking installation.
Now that you have cut the tiles to fit the edges, it’s time to move on to the next step: grouting the tiles.
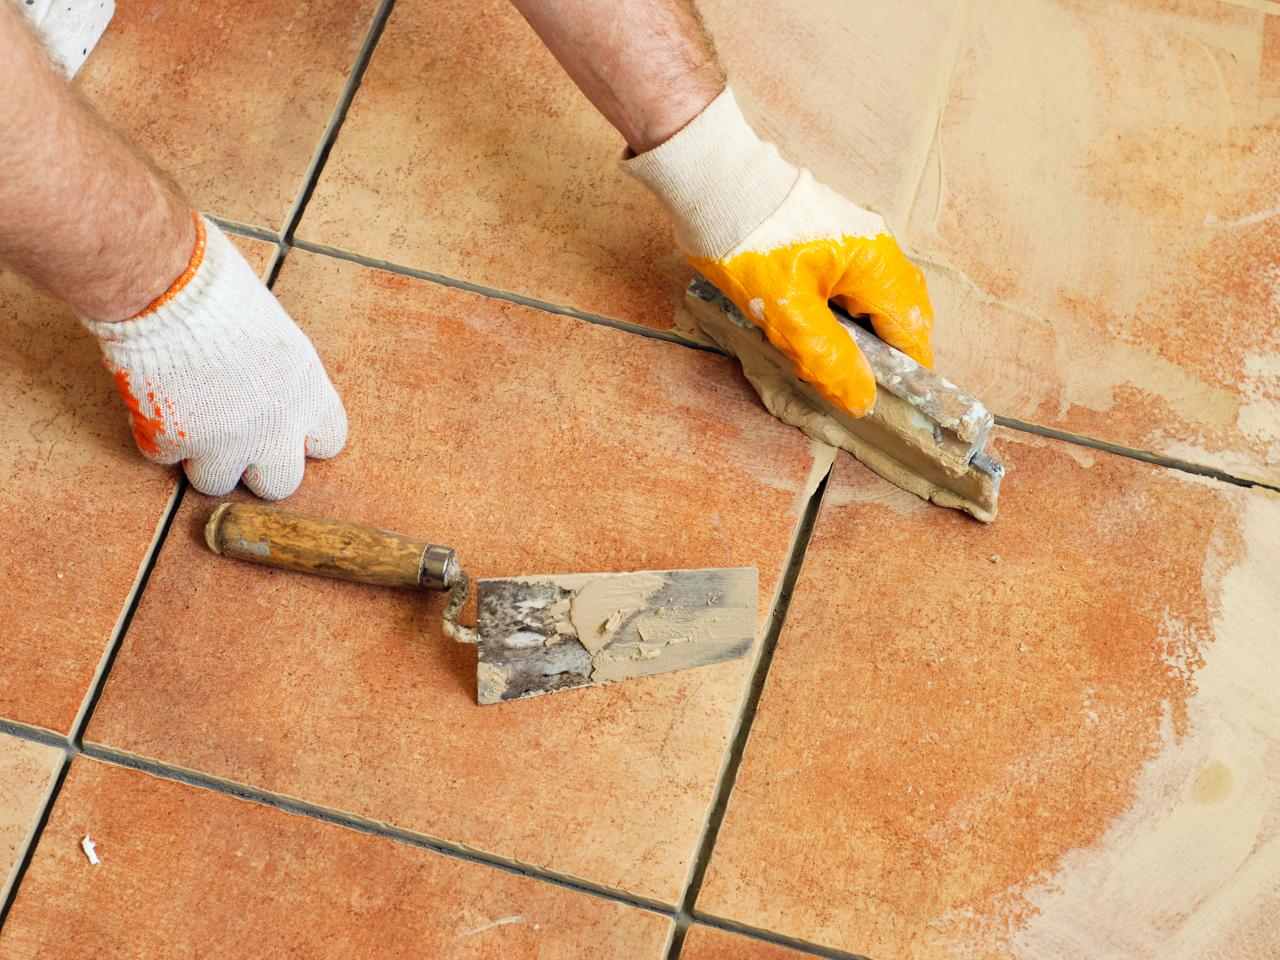
Step 7: Grout the Tiles
Grouting is the final step in the tile installation process and is essential for sealing the gaps between the tiles, providing stability, and enhancing the overall appearance of the floor. Follow these steps to grout the tiles:
- Start by selecting the appropriate grout color that complements your tile and desired aesthetic.
- Prepare the grout mixture according to the manufacturer’s instructions. Mix it in a bucket using a grout float or a trowel until you achieve a smooth and consistent paste-like consistency.
- Using a rubber grout float, scoop a generous amount of grout onto the float’s surface.
- Hold the float at a 45-degree angle and apply the grout onto the tiles, ensuring that the gaps between the tiles are completely filled.
- Hold the float diagonally and push the grout into the gaps, working in small sections at a time. Remove any excess grout from the tile surface with the float’s edge.
- Once a section is grouted, use a damp sponge to gently wipe away the excess grout from the tiles. Rinse the sponge frequently and avoid using excessive water, as it can wash away the grout.
- Continue grouting and wiping the tiles until the entire floor is grouted. Allow the grout to set for the length of time recommended by the manufacturer.
- After the initial setting period, use a clean, dry cloth to buff away any remaining haze or residue on the tiles. This will reveal the final clean and polished surface.
Grouting can be a messy process, so it’s essential to clean up any spills or excess grout promptly. Taking your time with the grouting process will ensure that the results are neat and professional-looking. Now that the grout is complete, it’s time to move on to the final step: cleaning and finishing the project.
Read more: How To Replace Bathroom Floor
Step 8: Clean and Finish the Project
Once you have completed the grouting process, it’s time to clean and finish the project to bring out the beauty of your newly tiled bathroom floor. Follow these steps to ensure a pristine and finished look:
- Use a clean, damp sponge or cloth to wipe away any remaining grout residue or haze from the tiles. Rinse the sponge frequently to avoid spreading the residue.
- Inspect the tiles for any remaining stubborn grout stains. If needed, use a grout haze remover or a mixture of vinegar and water to gently clean the tiles.
- Allow the tiles to dry completely before proceeding to the next step.
- Once the tiles are dry, apply a high-quality tile sealer according to the manufacturer’s instructions. The sealer will protect the tiles from stains, moisture, and daily wear and tear.
- Allow the sealer to dry completely before allowing foot traffic on the floor. This drying process may take a few hours, so be patient.
- After the sealer has dried, give the tiles a final wipe-down with a clean, dry cloth to remove any excess sealer and bring out their shine.
By properly cleaning and finishing the project, you will be able to admire the beautiful and polished appearance of your newly replaced bathroom tile floor. Regular maintenance and cleaning will help preserve its beauty for years to come.
Congratulations! You have successfully replaced your bathroom tile floor. The hard work and attention to detail have paid off, and your bathroom now has a refreshed and inviting look. Enjoy your newly renovated space!
Conclusion
Replacing the tile floor in your bathroom can be a rewarding and transformative project. By following the steps outlined in this guide, you have learned how to remove old tiles, prepare the subfloor, measure and plan the tile layout, apply adhesive or mortar, install the new tiles, cut tiles to fit the edges, grout the tiles, and clean and finish the project.
Throughout the process, it’s important to prioritize safety by wearing protective gear and taking necessary precautions. Additionally, attention to detail, patience, and precision are key to achieving professional-looking results.
By successfully replacing your bathroom tile floor, you have not only improved the aesthetics of your bathroom but also increased its functionality and value. You now have a clean, durable, and stylish tile floor that will bring joy and satisfaction for years to come.
Remember to regularly maintain and clean your new tile floor to preserve its beauty. Be sure to follow any specific care instructions provided by the manufacturer of the tiles and the grout.
With your newfound knowledge and skills, you may feel inspired to take on more home improvement projects in the future. Embrace the opportunity to enhance your living space and explore other areas where your DIY skills can shine.
Thank you for following this comprehensive guide on how to replace a bathroom tile floor. We hope it has been helpful, and we wish you success in all your future home improvement endeavors!
Frequently Asked Questions about How To Replace Bathroom Tile Floor
Was this page helpful?
At Storables.com, we guarantee accurate and reliable information. Our content, validated by Expert Board Contributors, is crafted following stringent Editorial Policies. We're committed to providing you with well-researched, expert-backed insights for all your informational needs.


0 thoughts on “How To Replace Bathroom Tile Floor”