Articles
How To Seal Carpet Edges At Home
Modified: August 16, 2024
Learn how to seal carpet edges at home with these informative articles. Transform your space with professional-looking finishes.
(Many of the links in this article redirect to a specific reviewed product. Your purchase of these products through affiliate links helps to generate commission for Storables.com, at no extra cost. Learn more)
Introduction
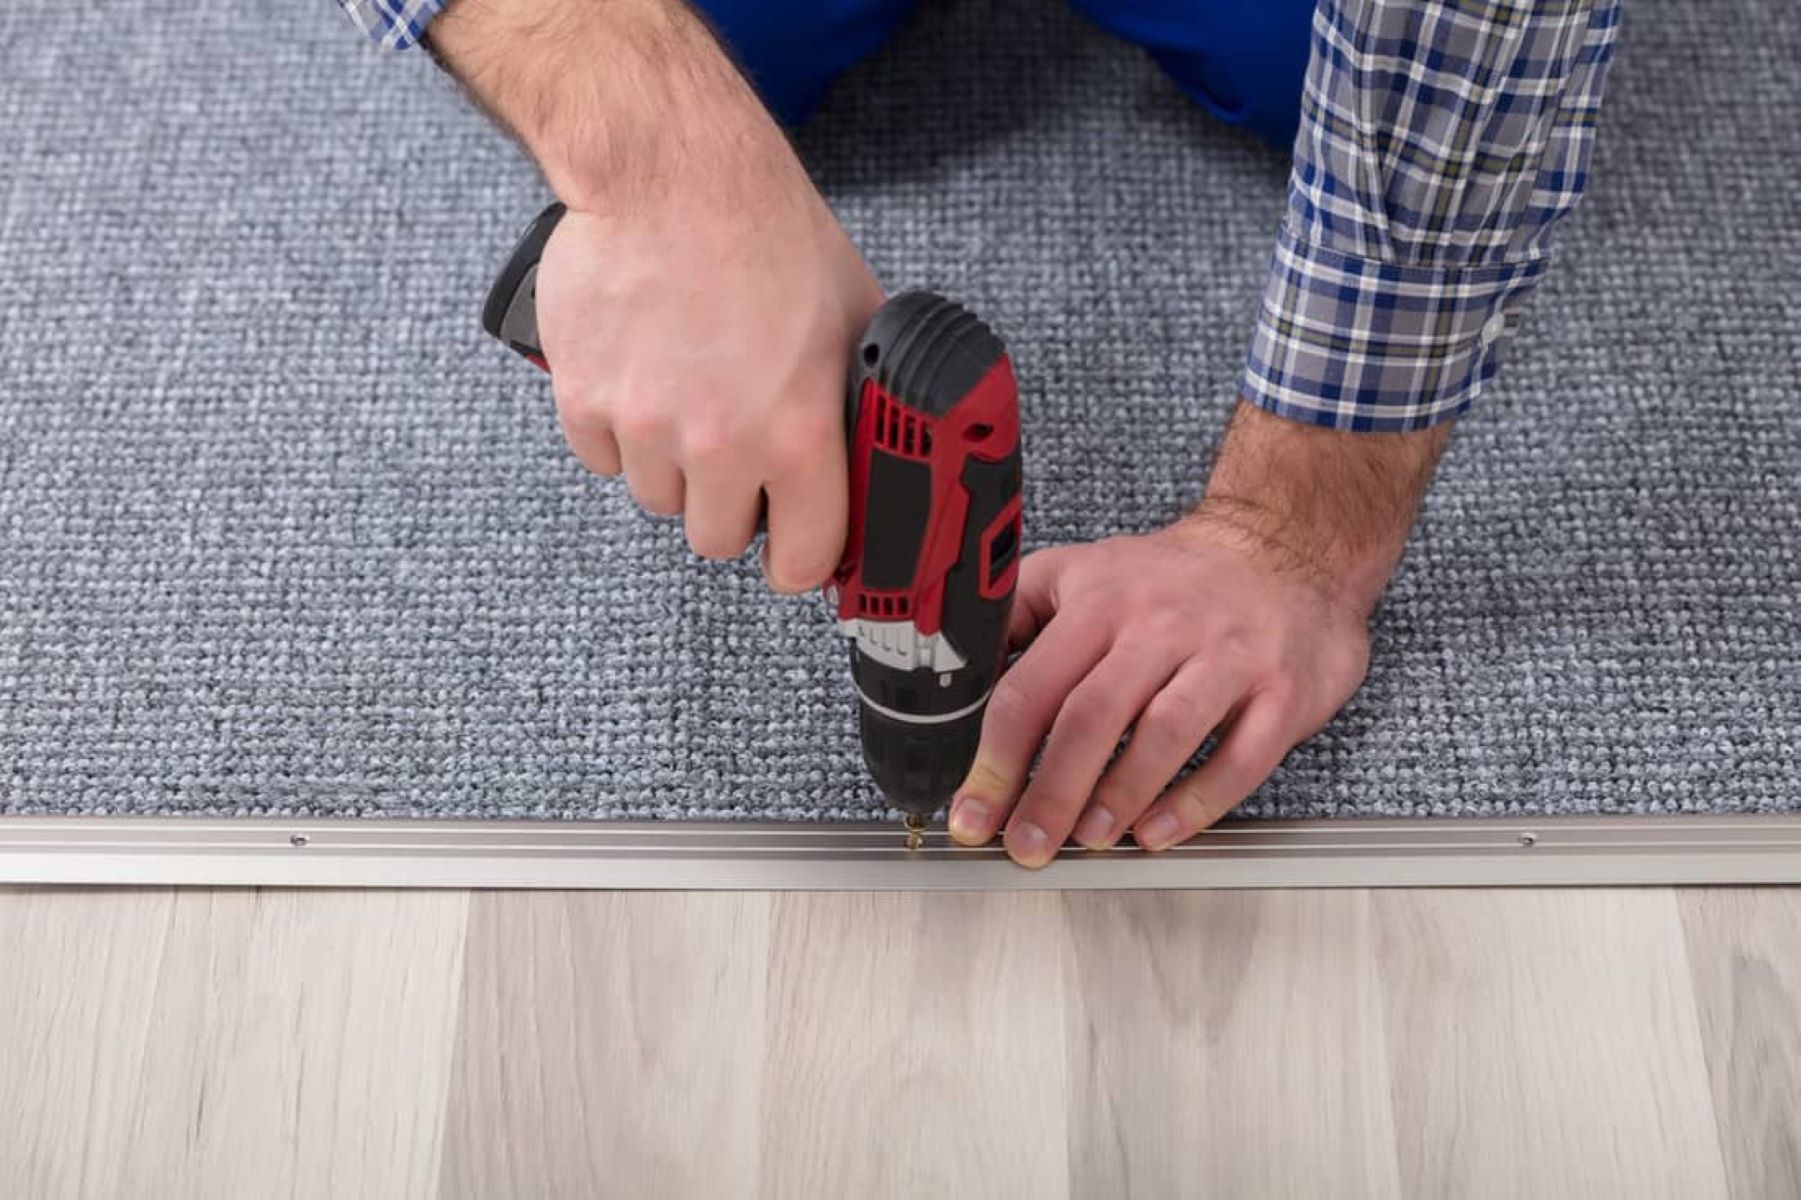
When it comes to carpet installation, one crucial step that often gets overlooked is sealing the carpet edges. A properly sealed carpet ensures a neat and professional finish while preventing fraying, unraveling, and potential tripping hazards.
Sealing carpet edges at home may seem like a daunting task, but with the right tools and materials, it can be a straightforward DIY project. In this guide, we will walk you through the step-by-step process of sealing your carpet edges effectively.
Before we delve into the details, let’s briefly discuss why sealing carpet edges is important. Over time, constant foot traffic and general wear and tear can lead to fraying and unraveling of the carpet edges. This not only affects the aesthetic appeal of your flooring but also poses a safety risk for everyone in your home. By sealing the edges, you can prolong the lifespan of your carpet and create a clean and finished look.
Now, let’s gather the tools and materials needed for this project.
Key Takeaways:
- Properly sealing carpet edges at home is crucial for longevity and safety. Follow the step-by-step process, choose the right sealant, and allow for thorough drying to achieve a professional finish.
- By preparing, selecting, applying, and allowing for proper drying, you can successfully seal your carpet edges at home. Prioritize safety, follow guidelines, and enjoy a well-maintained carpet for years to come.
Read more: How To Clean The Edges Of A Carpet
Tools and Materials Needed
Before you begin the process of sealing the carpet edges, make sure you have the following tools and materials:
- Utility knife or carpet cutter: You will need this to neatly trim the carpet edges and create a clean, straight line.
- Sealant: Choose a sealant specifically designed for carpet edge sealing. There are various types available, such as liquid seam sealants or carpet edge binding tapes. Consider the type of carpet and your personal preference when selecting the sealant.
- Sealant applicator: Depending on the type of sealant you choose, you may need a brush, roller, or nozzle applicator to apply it to the edges.
- Carpet tucker: This tool is used to push the carpet edges under the baseboard or skirting board, creating a seamless transition.
- Measuring tape: Measure the length of the edges that need to be sealed to ensure you have enough sealant.
- Protective gloves: Wear gloves to protect your hands from the sealant and any sharp objects.
- Protective goggles: Safeguard your eyes when using the utility knife.
- Drop cloth or plastic sheet: Lay down a protective barrier to catch any spills or drips during the sealing process.
Once you have gathered all the necessary tools and materials, you’re ready to begin sealing your carpet edges. Let’s move on to the step-by-step process.
Step 1: Prepare the Carpet Edges
The first step in sealing the carpet edges is to prepare them properly. Follow these steps to ensure a smooth and successful sealing process:
- Remove any existing carpet trim or binding: If there are any old trim or binding materials on the edges, carefully remove them using a utility knife or carpet cutter. Be cautious not to damage the carpet fibers while doing so.
- Trim the edges of the carpet: Use a utility knife or carpet cutter to trim the edges of the carpet neatly. Make sure to create a straight and even line. It is recommended to leave a small gap of around 1/4 inch between the carpet and the wall.
- Clean the edges: Thoroughly clean the trimmed edges of the carpet to remove any dust, dirt, or debris. You can use a vacuum cleaner or a brush to ensure a clean surface.
- Straighten the carpet fibers: Using your fingers or a carpet brush, gently straighten any loose or bent carpet fibers along the edges. This will help create a smoother and more polished appearance once the sealant is applied.
By properly preparing the carpet edges, you ensure a clean and even surface for the sealant application. Now that the edges are ready, let’s move on to the next step: selecting the suitable sealant.
Step 2: Choose the Suitable Sealant
Choosing the right sealant for your carpet edges is essential to ensure a durable and long-lasting finish. There are several types of sealants available, so consider the following factors before making your decision:
- Type of carpet: Different types of carpets may require different types of sealants. For example, if you have a looped or Berber carpet, you may need a sealant that specifically addresses the needs of these types of carpets.
- Sealant durability: Look for a sealant that is known for its durability and ability to withstand high traffic areas. A strong and resilient sealant will ensure that the carpet edges remain intact for a longer period of time.
- Application method: Consider your comfort level and the ease of application when choosing a sealant. Some sealants come in the form of liquid seam sealants that can be applied with a brush or roller, while others may require adhesive tapes.
- Aesthetic preferences: If you have a specific color or finish in mind, look for a sealant that matches your desired aesthetic. Some sealants are available in a variety of colors to blend seamlessly with your carpet.
- Budget: Take into account your budget when selecting a sealant. While it’s important to invest in a quality sealant, there are options available at different price points to suit your needs.
Do your research and read reviews to determine which sealant will work best for your carpet type and preferences. Once you have chosen the suitable sealant, you can proceed to the next step: applying the sealant to the edges.
Use a hot glue gun to seal the edges of your carpet at home. Simply apply a thin line of hot glue along the edge and press the carpet down firmly to create a secure seal.
Step 3: Apply the Sealant to the Edges
Now that you have chosen the suitable sealant, it’s time to apply it to the carpet edges. Follow these steps for a successful application:
- Read and follow the manufacturer’s instructions: Before applying the sealant, carefully read and understand the instructions provided by the manufacturer. Each sealant may have specific application guidelines that you need to follow for optimal results.
- Prepare the sealant: If you are using a liquid seam sealant, mix or prepare it according to the instructions. Ensure that the sealant is well-mixed and ready for application.
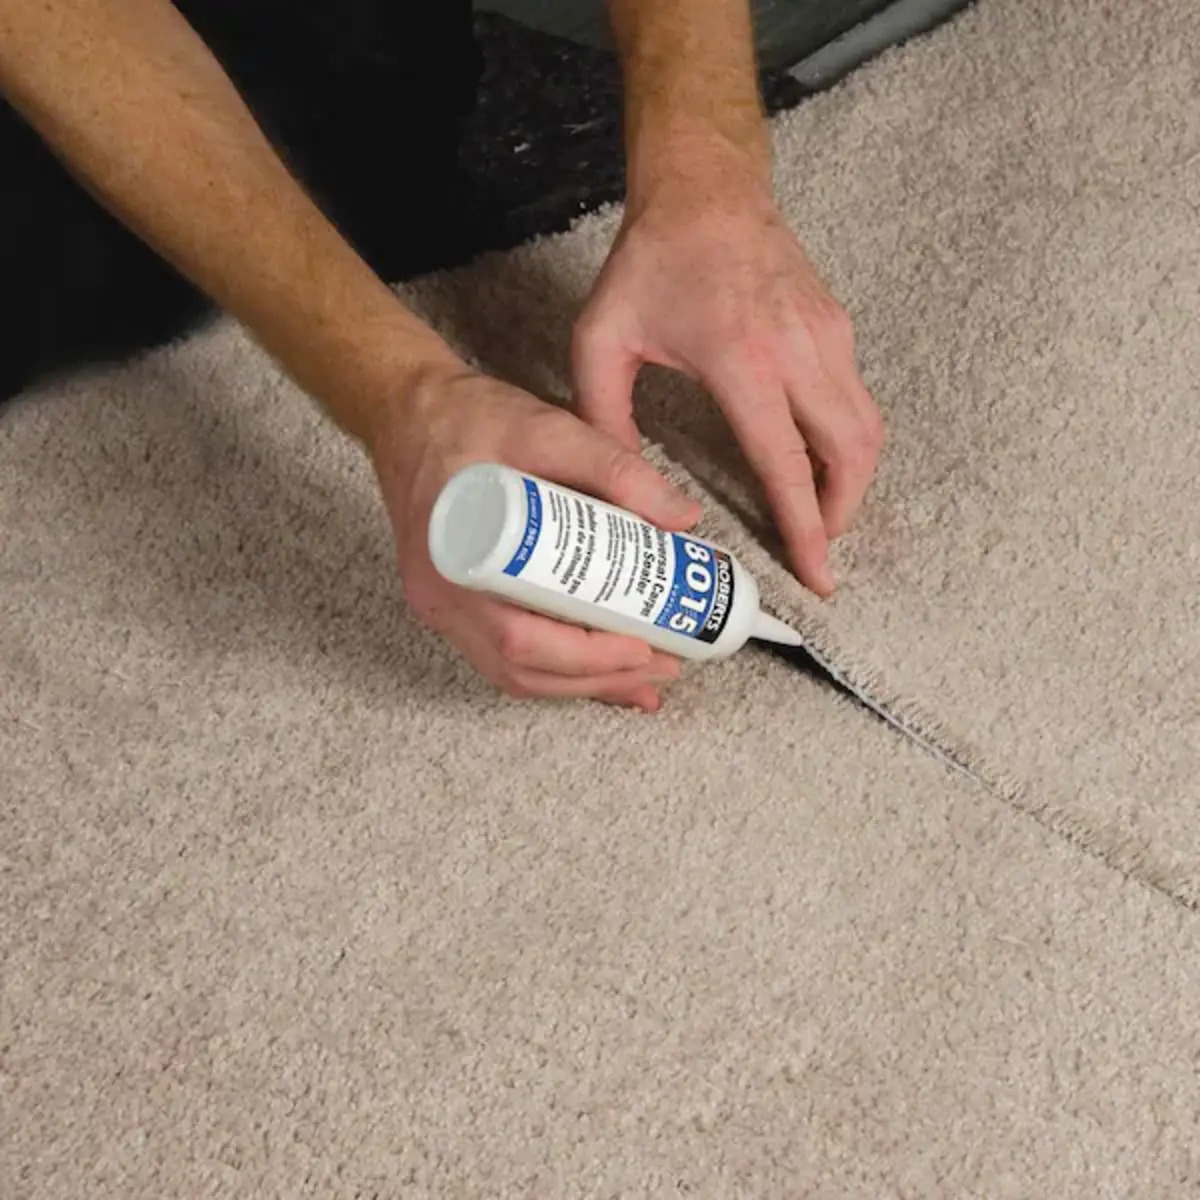
- Start at one end: Begin applying the sealant at one end of the carpet edge. If you are using a brush or roller, dip it into the sealant and apply a thin, even layer along the edge. If you are using adhesive tape, carefully adhere it to the edge, making sure it is secure.
- Work in sections: Continue applying the sealant in small sections, moving along the entire length of the carpet edge. Make sure to apply a consistent amount of sealant and avoid excess pooling or dripping.
- Smooth the sealant: Use a sealant applicator, such as a brush or roller, to smooth out the applied sealant. This will help ensure an even distribution and adherence to the carpet fibers.
- Remove excess sealant: If there is any excess sealant or drips, carefully remove them using a clean cloth or sponge. It’s important to remove these before the sealant dries to avoid a messy finish.
Take your time and work diligently to apply the sealant to the carpet edges. Once you have completed this step, move on to the next step: smoothing and pressing the edges.
Read more: How To Keep Carpet Edges From Fraying
Step 4: Smooth and Press the Edges
After applying the sealant to the carpet edges, the next step is to smooth and press them for a seamless finish. Follow these steps to ensure a professional and polished look:
- Use a carpet tucker: Take a carpet tucker and gently push the sealed edges of the carpet under the baseboard or skirting board. This will create a smooth and seamless transition between the carpet and the wall.
- Apply pressure: Use your hands or a carpet roller to apply gentle pressure along the entire length of the sealed edges. This will help the sealant adhere to the carpet fibers and ensure a secure bond.
- Smooth out any wrinkles or bumps: If you notice any wrinkles or bumps along the edges, use your hands or the carpet roller to smooth them out. This will result in a visually appealing and even surface.
- Check for any loose areas: Inspect the sealed edges carefully, checking for any loose areas or gaps. If you find any, apply additional sealant and repeat the smoothing and pressing process to ensure a tight and secure seal.
It’s important to take your time during this step to ensure that the carpet edges are properly pressed and adhered. Once you are satisfied with the smoothness and tightness of the edges, proceed to the final step: allowing the sealant to dry.
Step 5: Let the Sealant Dry
After completing the previous steps of sealing, smoothing, and pressing the carpet edges, it’s essential to allow the sealant to dry completely. This will ensure that the sealant forms a strong bond and provides the necessary protection. Follow these guidelines for optimal drying:
- Follow manufacturer’s instructions: Check the instructions provided by the sealant manufacturer for the recommended drying time. It’s crucial to adhere to these guidelines to allow the sealant to cure properly.
- Avoid foot traffic: During the drying process, it’s best to avoid walking on the newly sealed edges. This will prevent any accidental damage or disruption to the sealant bond. Make sure to inform other household members to refrain from stepping on the area as well.
- Provide sufficient ventilation: To promote proper drying, ensure that the room is well-ventilated. Open windows or turn on fans to improve air circulation, helping the moisture in the sealant evaporate more efficiently.
- Check for touch-dryness: After the recommended drying time has passed, you can gently touch the sealed edges to check if they feel dry to the touch. If there is any stickiness or tackiness, allow more time for the sealant to dry completely.
- Final inspection: Once the sealant is dry, inspect the carpet edges to ensure a smooth and secure seal. Look for any signs of loose edges or gaps and address them if necessary.
By allowing the sealant to dry thoroughly, you ensure the longevity and effectiveness of the sealing process. Once the sealant is completely dry, you can enjoy the benefits of a properly sealed carpet.
Conclusion
Sealing the edges of your carpet is an important step in maintaining its longevity, safety, and overall visual appeal. By following the steps outlined in this guide, you can successfully seal your carpet edges at home and achieve a polished and professional finish.
Begin by properly preparing the carpet edges, ensuring they are clean, trimmed, and straightened. Then, choose a suitable sealant based on your carpet type, durability needs, application method, aesthetic preferences, and budget.
Next, apply the sealant carefully, following the manufacturer’s instructions, and work in small sections to achieve an even and consistent coverage. Smooth and press the edges using a carpet tucker and apply gentle pressure to ensure a secure bond.
Allow the sealant to dry completely, following the recommended drying time provided by the manufacturer. Avoid foot traffic and provide adequate ventilation during this process. Once the sealant is dry, inspect the edges for any loose areas or gaps that may require additional attention.
Sealing your carpet edges not only enhances the appearance of your flooring but also prevents fraying, unraveling, and tripping hazards. It’s a DIY project that can be completed with the right tools, materials, and a little bit of patience.
Remember to always prioritize safety by wearing protective gloves and goggles when handling tools and sealants. If you feel unsure or uncomfortable with the sealing process, don’t hesitate to consult a professional for assistance.
By sealing your carpet edges properly, you can enjoy a well-maintained and appealing carpet that lasts for years to come.
Frequently Asked Questions about How To Seal Carpet Edges At Home
Was this page helpful?
At Storables.com, we guarantee accurate and reliable information. Our content, validated by Expert Board Contributors, is crafted following stringent Editorial Policies. We're committed to providing you with well-researched, expert-backed insights for all your informational needs.