Articles
How To Seal Under Siding
Modified: January 8, 2024
Learn how to properly seal under your siding with our informative articles. Get expert tips and step-by-step instructions to ensure a secure and watertight installation.
(Many of the links in this article redirect to a specific reviewed product. Your purchase of these products through affiliate links helps to generate commission for Storables.com, at no extra cost. Learn more)
Introduction
Welcome to this comprehensive guide on how to seal under siding. If you own a home or are planning to build one, you’ve probably heard about the importance of properly sealing the exterior of your house. While many homeowners focus on sealing windows, doors, and other obvious areas, one critical area that is often overlooked is the space underneath the siding.
Sealing under siding is crucial for several reasons. First and foremost, it helps to prevent water intrusion. Water can easily seep in through gaps or cracks in the siding, leading to water damage, mold growth, and structural issues. Additionally, sealing under siding can improve energy efficiency by reducing drafts and preventing air infiltration, which can help lower heating and cooling costs.
In this guide, we will walk you through the step-by-step process of sealing under siding, from preparing the area to applying the sealant. We will also discuss the tools and materials you will need for the job. By following these instructions, you can ensure that your home is properly protected and well-insulated.
Before we begin, it’s important to note that sealing under siding can be a time-consuming and physically demanding task. Depending on the size of your house and the condition of the siding, the process may take several hours or even a few days to complete. However, the benefits of sealing under siding far outweigh the effort involved.
So, if you’re ready to learn how to seal under siding and enhance the durability and energy efficiency of your home, let’s dive in!
Key Takeaways:
- Properly sealing under siding is crucial for preventing water damage, improving energy efficiency, and deterring pests from entering your home. It also enhances the overall appearance and value of your property.
- By diligently following the steps to seal under siding, you can ensure a long-lasting and effective barrier against water infiltration, ultimately safeguarding your home for years to come.
Read more: How To Seal Garage Door Sides
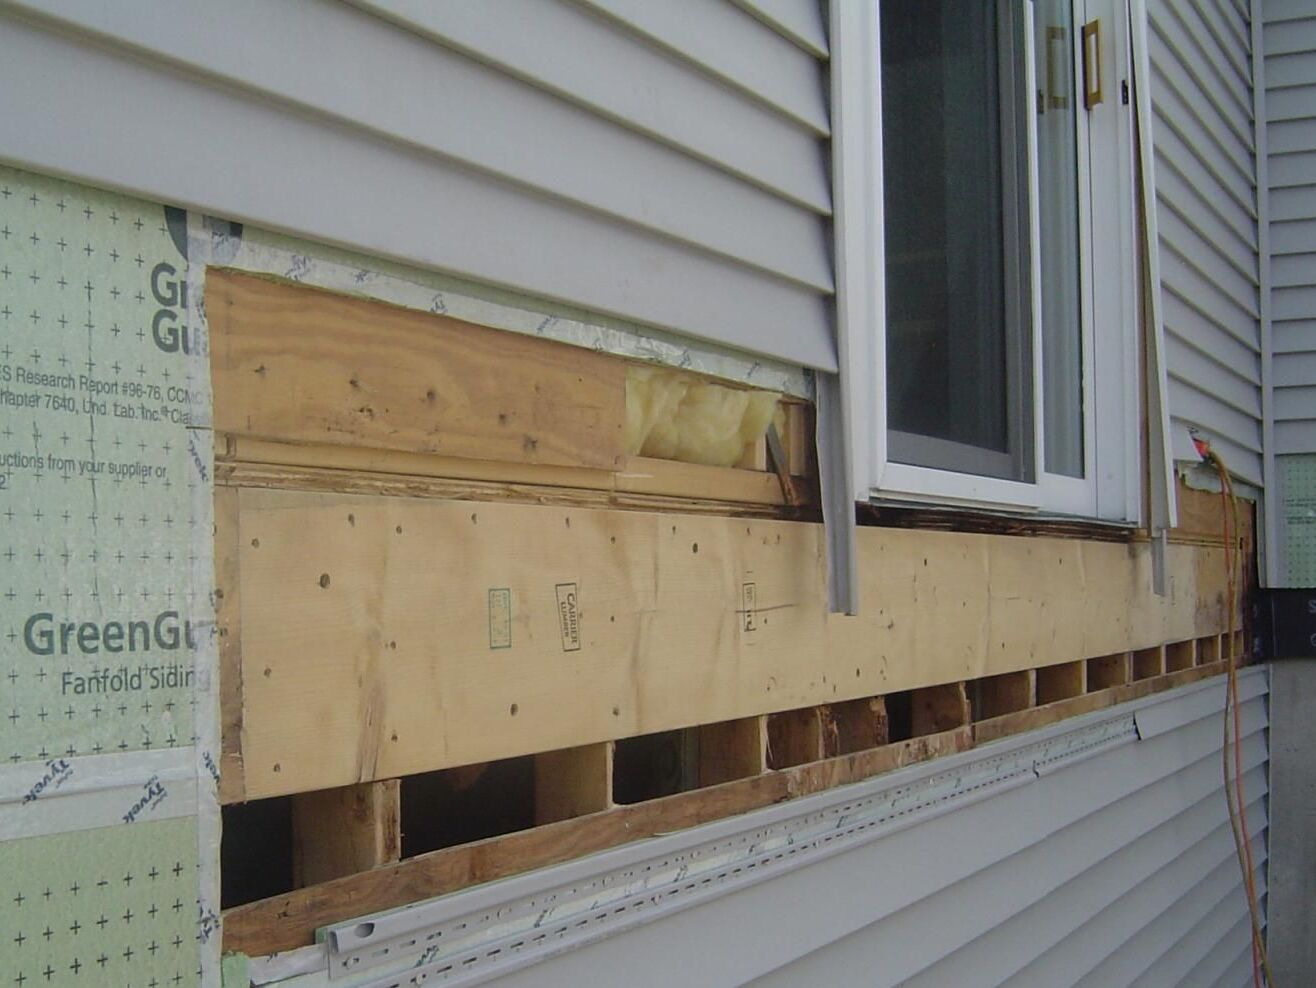
Why is it important to seal under siding?
Sealing under siding is a critical aspect of maintaining the integrity of your home’s exterior. It plays a crucial role in protecting your house from various elements. Let’s take a closer look at why it is essential to seal under siding:
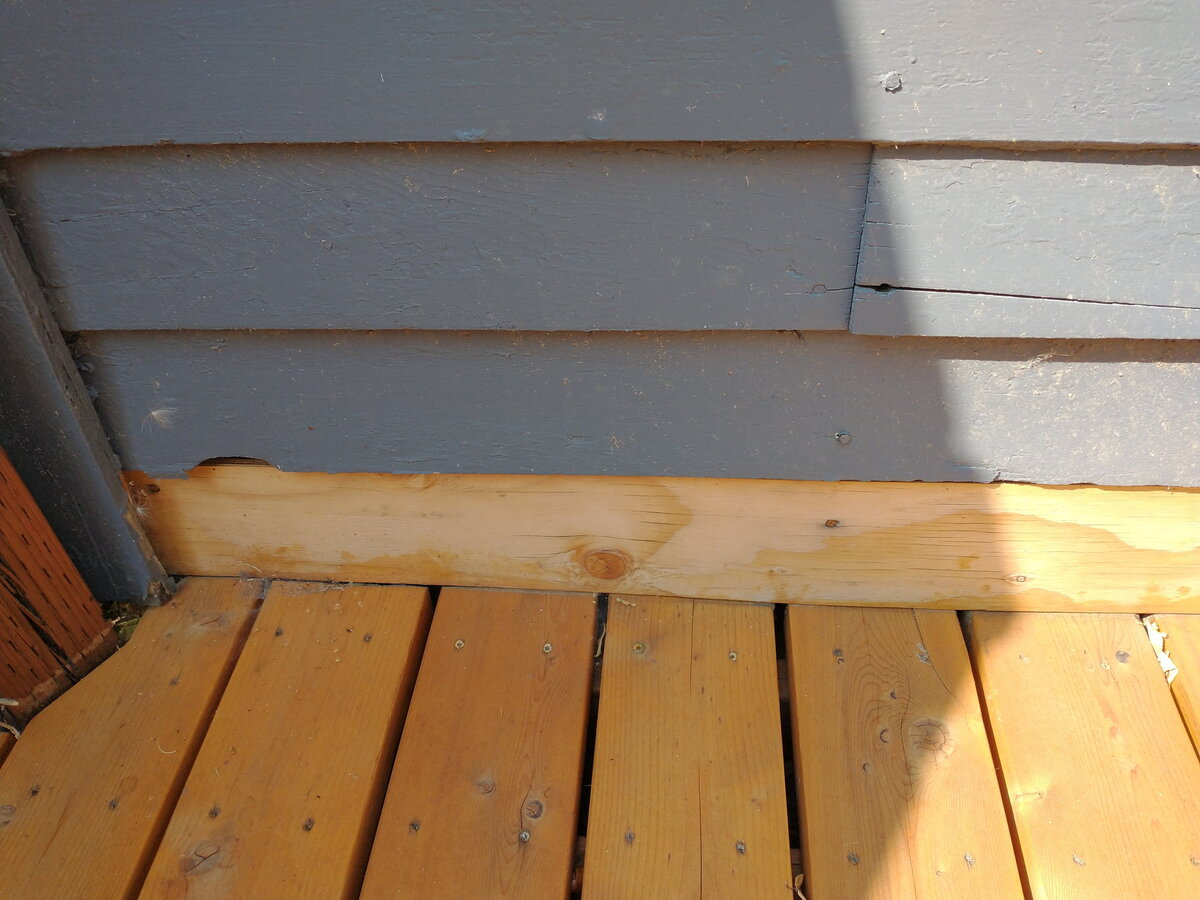
- Water protection: One of the primary reasons to seal under siding is to prevent water infiltration. Siding acts as a protective barrier against moisture, but over time, it can develop gaps, cracks, or holes due to weathering, aging, or improper installation. These openings can allow water to seep behind the siding, leading to water damage, rot, and mold growth. By sealing the gaps and cracks, you ensure that water doesn’t penetrate the siding and compromise the structure of your home.
- Energy efficiency: Another crucial benefit of sealing under siding is improved energy efficiency. Gaps or openings in the siding can allow air to enter or escape, creating drafts and reducing the effectiveness of your insulation. As a result, your heating and cooling systems need to work harder to maintain a comfortable indoor temperature, leading to increased energy consumption and higher utility bills. By sealing under siding, you can prevent these air leaks and enhance the energy efficiency of your home.
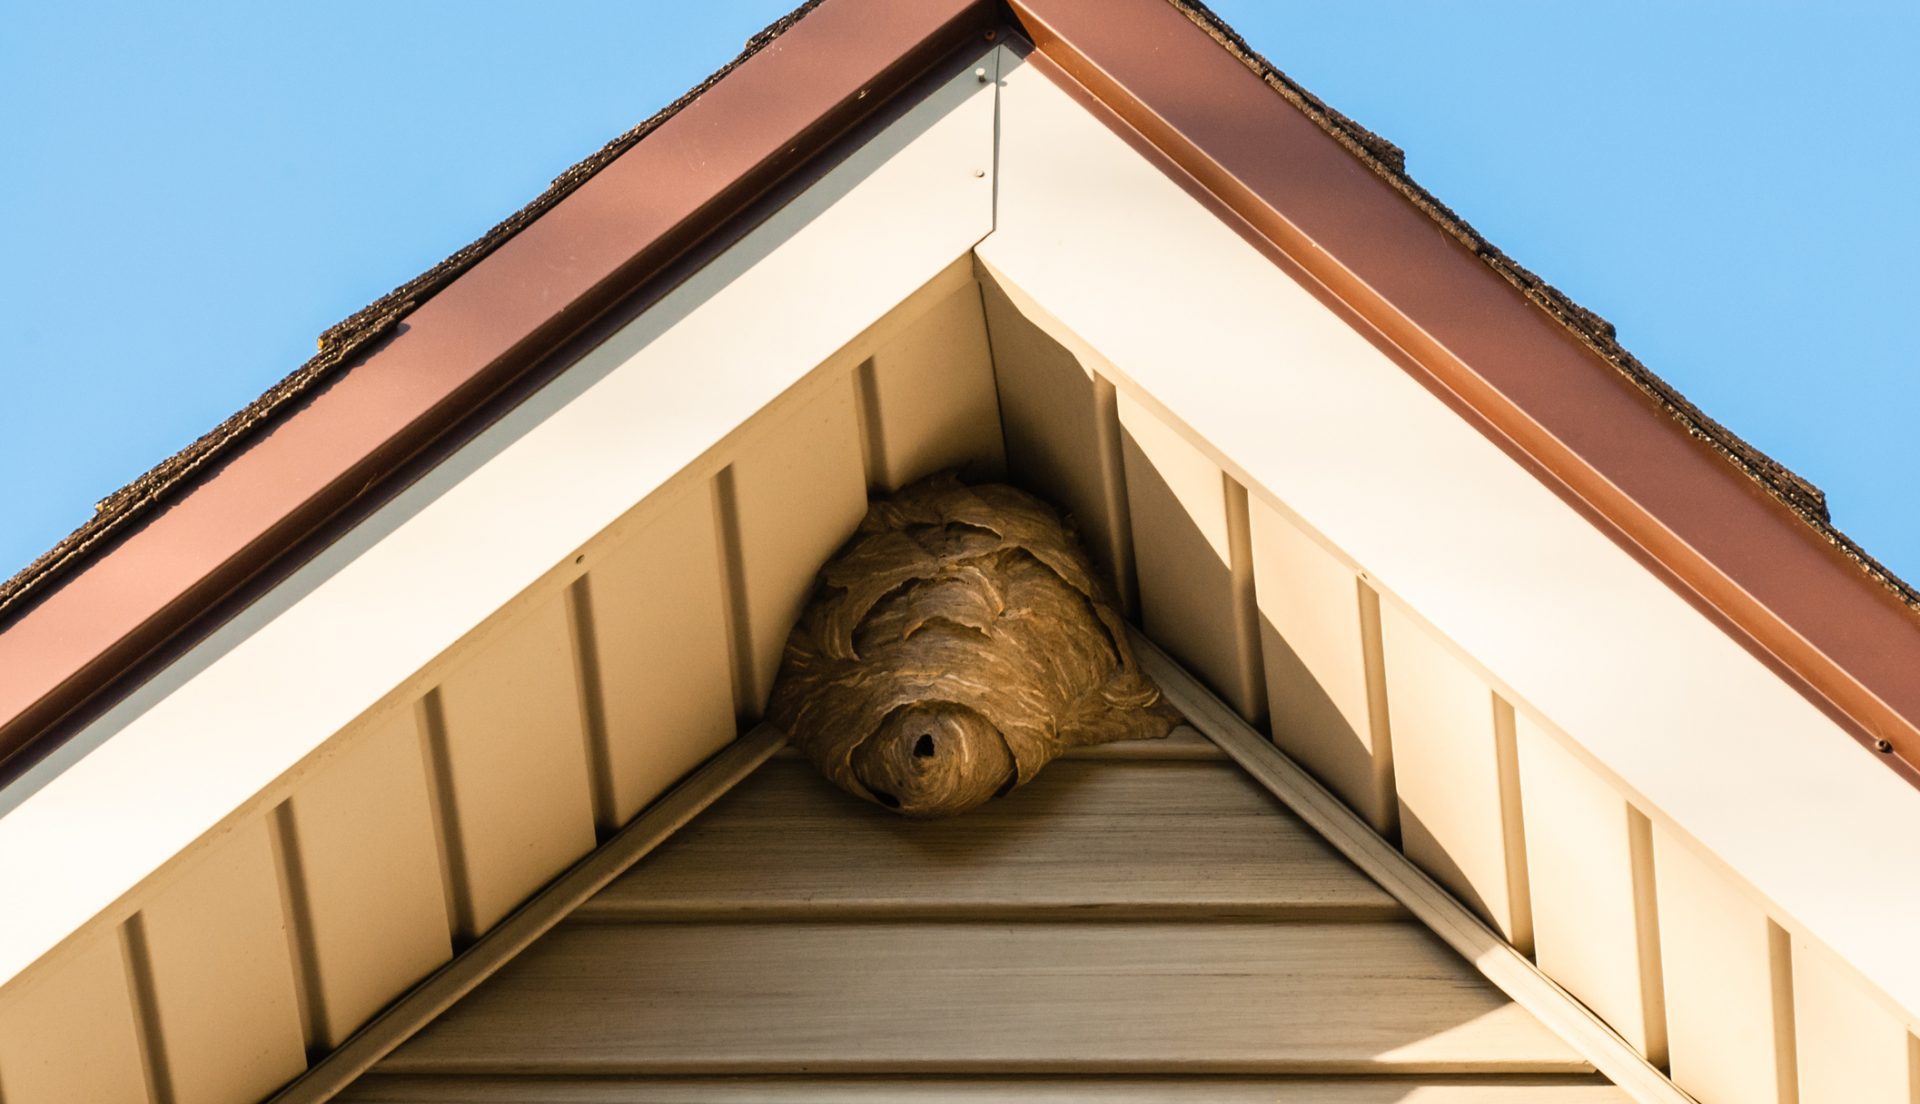
- Pest prevention: Sealing under siding can also help deter pests from making their way into your home. Small gaps or cracks in the siding can serve as entry points for insects, rodents, and other critters seeking shelter. Once inside, these pests can cause significant damage and pose health risks to you and your family. By sealing the gaps and crevices, you create a barrier that prevents pests from gaining access to your home.
- Improved curb appeal: Sealing under siding not only provides functional benefits but also enhances the aesthetic appeal of your home’s exterior. Gaps and cracks in the siding can make your house look worn and neglected. By properly sealing the area, you can restore a seamless and uniform appearance to your siding, resulting in improved curb appeal and increased property value.
Overall, sealing under siding is essential for maintaining the structural integrity, energy efficiency, and overall appearance of your home. By taking the time to seal any gaps or cracks, you can protect your investment and ensure a comfortable and secure living environment.
Tools and materials needed
Before you begin the process of sealing under siding, it’s important to gather all the necessary tools and materials. Having everything prepared in advance will make the job smoother and more efficient. Here’s a list of the tools and materials you’ll need:
- Caulk gun: A caulk gun is essential for applying the sealant. Make sure to choose a high-quality, durable caulk gun that fits comfortably in your hand.
- Siding sealant: Invest in a high-quality siding sealant that is specifically designed for outdoor use. Look for a sealant that is waterproof, flexible, and able to adhere to a variety of surfaces, including wood, vinyl, or fiber cement siding.
- Utility knife: A utility knife will come in handy for cutting and trimming the sealant tubes and for removing any loose or damaged parts of the siding.
- Putty knife: A putty knife or a caulking tool is useful for smoothing and leveling the sealant to create a seamless finish.
- Cleaner and brushes: Before applying the sealant, it’s important to thoroughly clean the area. Use a mild detergent or a specialized siding cleaner along with a stiff-bristle brush or a scrub brush to remove dirt, debris, and any loose paint or old caulk.
- Sanding block: If there are rough or uneven areas on the siding, a sanding block can be used to smooth them out and create a clean surface for the sealant.
- Protective gear: Wear protective gear such as safety goggles and gloves to protect yourself from any chemicals, debris, or sharp edges while working on the siding.
- Ladder or scaffolding: Depending on the height of your house, you may need a ladder or scaffolding to reach the area under the siding safely. Make sure to choose a stable and secure option to avoid any accidents.
- Extension cord and power wash or hose: If the siding is heavily soiled or requires a deeper clean, you may need a power wash or a hose with an extension cord to wash away the dirt and debris effectively.
Having these tools and materials ready before you begin will save you time and ensure that you have everything you need to complete the sealing process. It’s always better to be well-prepared to achieve the best results.
Step 1: Prepare the area
Before you start sealing under the siding, it’s important to properly prepare the area to ensure the best results. This involves taking some necessary steps to clean and protect the surrounding surfaces. Here’s a step-by-step guide on how to prepare the area:
- Inspect the siding: Begin by inspecting the siding for any signs of damage or deterioration. Look for cracks, holes, or loose pieces of siding that may need to be repaired before sealing. It’s crucial to address these issues to prevent further damage.
- Clear the area: Remove any obstacles or furniture near the area you’ll be working on. This will provide you with ample space and prevent any accidental damage to objects or hindrance to your movement.
- Cover sensitive surfaces: If there are nearby plants, delicate surfaces, or objects that may be damaged by water or sealant, cover them with plastic sheets or drop cloths to protect them from overspray or spillage.
- Ensure proper ventilation: If you’re working with chemical cleaners or strong sealants, ensure that the area is well-ventilated to prevent the accumulation of fumes. Open windows and doors, or use fans to improve airflow.
- Secure access: If you’re using a ladder or scaffolding to reach high areas, make sure it is securely positioned and stable. Follow proper ladder safety guidelines, or enlist the help of a professional if needed.
- Disconnect electrical connections: If there are any electrical outlets or fixtures in the vicinity, switch off the power and cover them with plastic to prevent water or sealant from coming into contact with them.
By properly preparing the area, you minimize the risk of accidents, protect surrounding surfaces, and ensure that the sealing process goes smoothly. Taking the time to prepare will also help you achieve a professional-looking finish and maintain the integrity of your home’s exterior.
Step 2: Clean and remove any debris
Once you have prepared the area, the next step in sealing under siding is to thoroughly clean the surface and remove any debris. Cleaning the siding ensures that the sealant adheres properly and provides a long-lasting seal. Follow these steps to clean the area effectively:
- Remove loose dirt and debris: Use a stiff-bristle brush or a scrub brush to sweep away any loose dirt, cobwebs, or debris from the siding. Pay attention to the edges and corners where dirt tends to accumulate.
- Inspect for mold and mildew: Check the siding for any signs of mold, mildew, or moss growth. These can be removed by using a mixture of water and mild detergent or a specialized siding cleaner. Follow the instructions on the cleaner and scrub the affected areas gently with a brush.
- Power wash the siding (if needed): If your siding is heavily soiled or has stubborn stains, you may need to use a power wash or a hose with sufficient water pressure to remove the dirt. Ensure that the power wash or hose is set to a suitable pressure level to avoid damaging the siding.
- Let the siding dry completely: After cleaning, allow the siding to dry completely before proceeding to the next step. This ensures that the sealant adheres properly and eliminates any moisture that could lead to mold growth or hinder the sealant’s effectiveness.
- Address any loose or damaged parts: While cleaning, you may come across loose or damaged parts of the siding. Take the time to secure these pieces or make any necessary repairs before proceeding with the sealing process. This will ensure a smooth and even surface for the sealant application.
By cleaning the siding and removing any debris, you create a clean and well-prepared surface for the sealant. This step is crucial for achieving a strong and durable seal under the siding, protecting your home from water infiltration and ensuring the longevity of the sealant.
When sealing under siding, use a high-quality exterior caulk to fill any gaps or cracks. Make sure the area is clean and dry before applying the caulk, and consider using a backer rod for larger gaps. This will help prevent water and pests from getting behind the siding.
Read more: How To Install Flashing Under Siding
Step 3: Identify and repair any damaged areas
Before applying the sealant, it’s important to identify and repair any damaged or deteriorated areas of the siding. Addressing these issues will ensure a solid and secure surface for the sealant and help prevent further damage to your home. Follow these steps to identify and repair any damaged areas:
- Inspect the siding: Carefully examine the siding for any cracks, holes, or signs of rot. Pay close attention to corners, edges, and areas that are exposed to moisture or prone to damage.
- Remove loose or damaged pieces: If you come across any loose or severely damaged pieces of siding, carefully remove them using a utility knife or a pry bar. Take caution not to cause further damage to the surrounding areas.
- Replace damaged siding: Once you have removed the damaged siding, replace it with a new piece that matches the style and color of the existing siding. Follow the manufacturer’s instructions for proper installation.
- Repair cracks or holes: If you encounter cracks or small holes in the siding, they can be repaired using an appropriate filler or caulk. Choose a filler or caulk that is specifically designed for outdoor use and is compatible with the siding material. Apply the filler or caulk according to the manufacturer’s instructions, ensuring a smooth and even finish.
- Address any rot: If you discover any signs of rot, it’s crucial to address the issue promptly. Remove the affected area, treating it with a wood stabilizer to prevent further deterioration. Replace the rotted section with new siding or repair it using a suitable method recommended for the specific type of siding.
By identifying and repairing any damaged areas of the siding, you ensure that the sealant application is done on a solid and stable surface. This step is crucial for maintaining the integrity of your siding and providing a strong barrier against water intrusion and further damage.
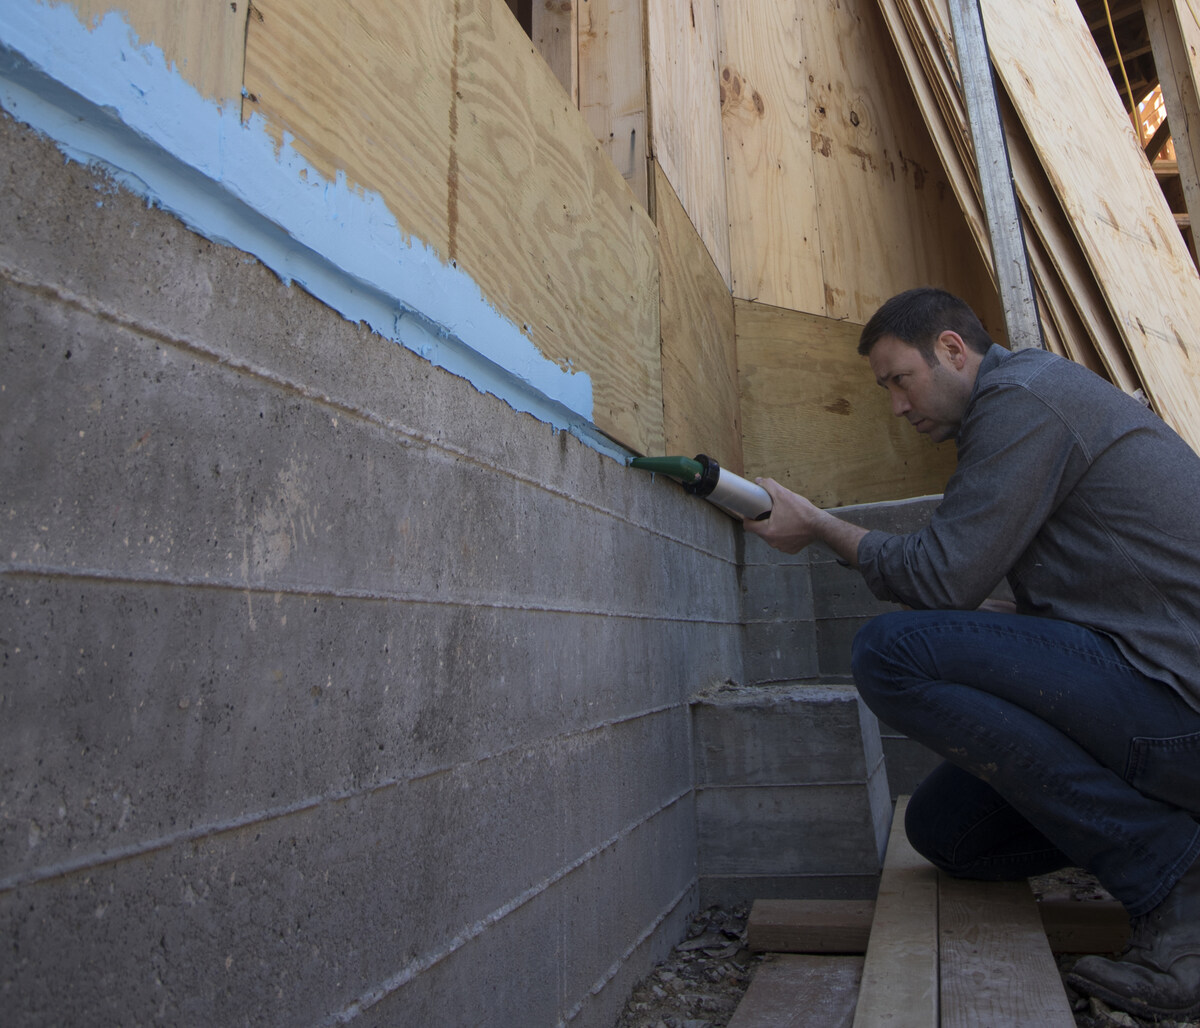
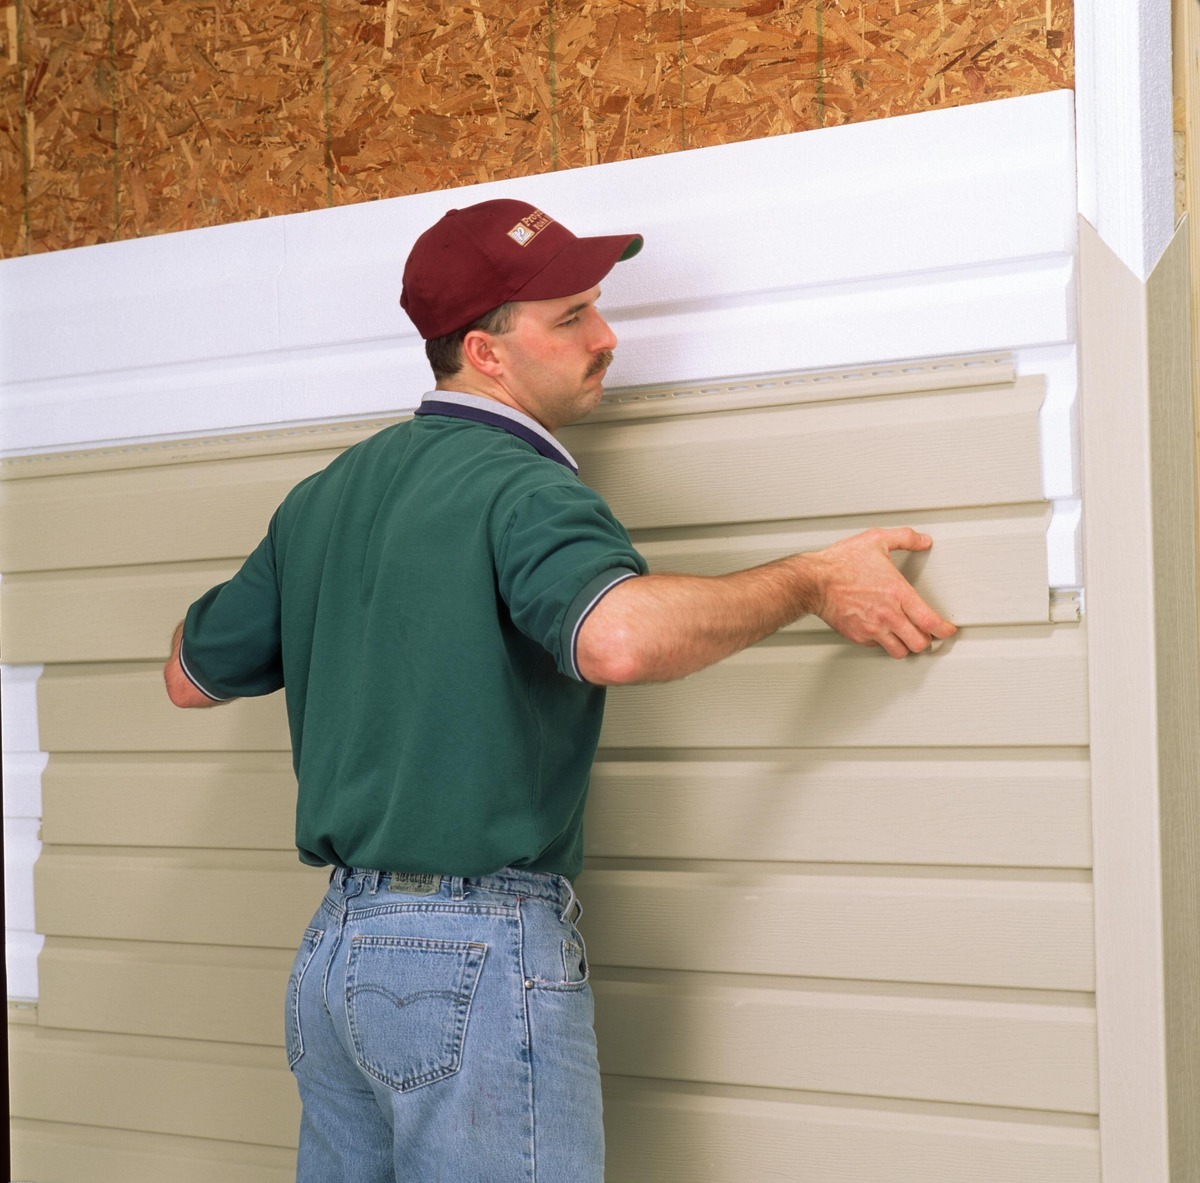
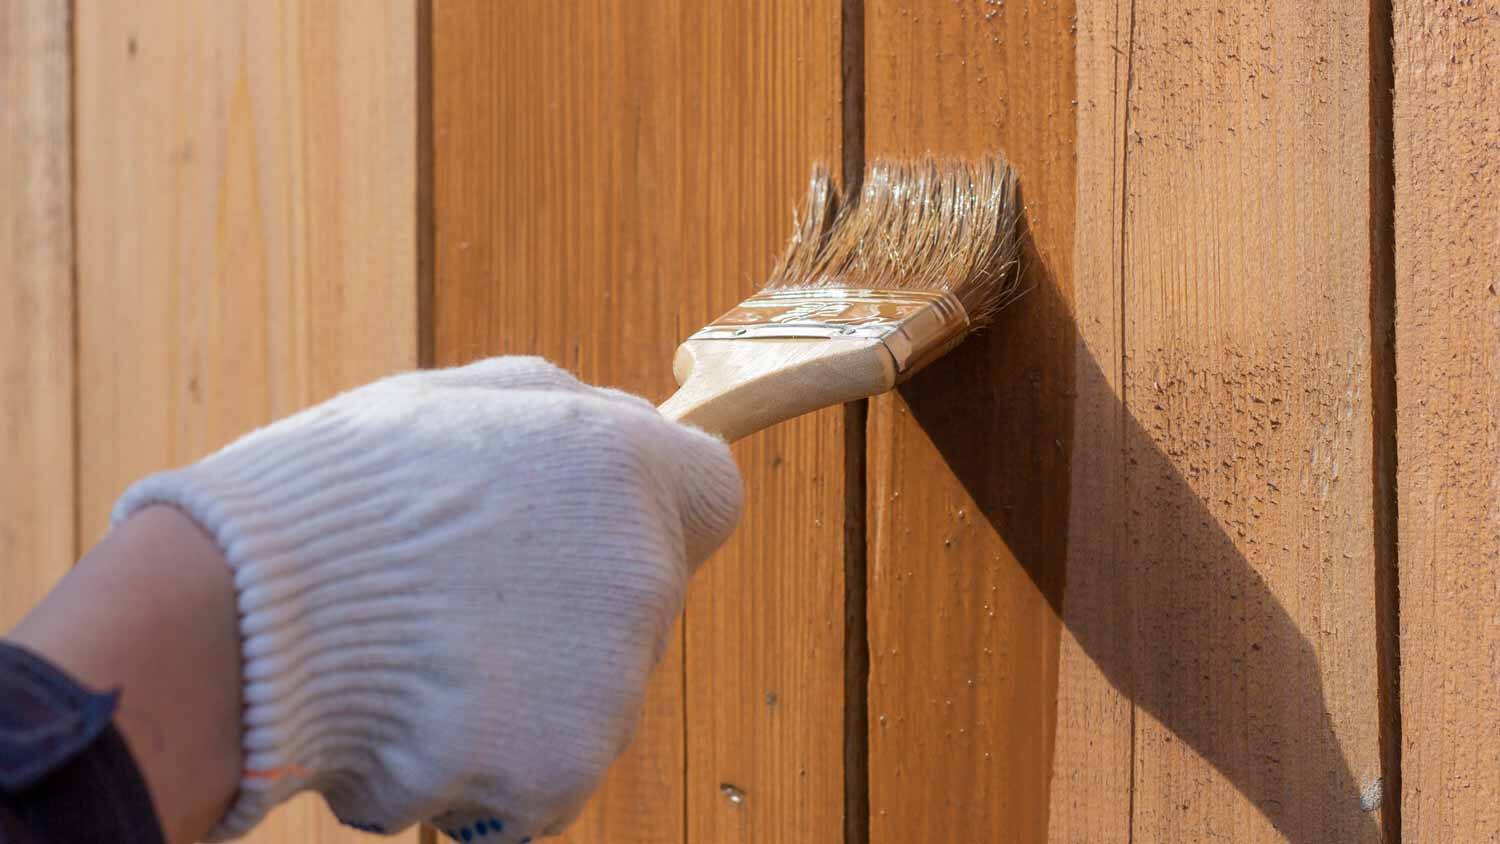
Step 4: Apply the sealant
Now that you have prepared the area and repaired any damaged sections, it’s time to apply the sealant under the siding. The sealant creates a watertight barrier, preventing water from seeping in and causing damage. Follow these steps to apply the sealant effectively:
- Load the sealant: Load the sealant tube into a caulk gun following the manufacturer’s instructions. Cut the nozzle of the sealant tube at a 45-degree angle to create a small opening for precise application.
- Start at one end: Begin applying the sealant at one end of the area, moving steadily along the length. Hold the caulk gun at a 45-degree angle and squeeze the trigger gently to release a steady stream of sealant.
- Apply a continuous bead: Apply a continuous bead of sealant along the gap between the siding and the wall, ensuring that it fills the entire gap. Use slow and consistent movements to achieve an even application.
- Fill larger gaps: For larger gaps or holes, it may be necessary to apply multiple layers of sealant. Allow each layer to dry before applying the next one. Fill the gap completely, ensuring there are no voids or gaps left behind.
- Overlap the sealant: If the gap between the siding and the wall is wider, it’s important to overlap the sealant onto both surfaces. This creates a more secure bond and ensures complete protection against water infiltration.
- Work in sections: Depending on the size of your house and the complexity of the siding, it may be necessary to work in sections to ensure proper application. Complete one section before moving on to the next, maintaining a consistent and continuous seal along the entire length.
- Follow the siding pattern: Follow the natural pattern of the siding, ensuring that the sealant follows the contours and lines of the siding. This helps blend the sealant with the overall appearance and creates a more seamless finish.
Take your time during the sealant application process to ensure precision and thorough coverage. Work systematically to ensure that every gap and crevice under the siding is properly sealed, creating an effective barrier against water and air infiltration.
Step 5: Smooth and level the sealant
After applying the sealant under the siding, the next step is to smooth and level it to create a seamless and professional-looking finish. This ensures that the sealant adheres properly and provides optimal protection. Follow these steps to smooth and level the sealant:
- Prepare a putty knife: Get a putty knife or a caulking tool that is suitable for the width of the gap. You can also use a specialized caulking tool with a concave or convex edge for easy smoothing and leveling.
- Wet the putty knife: Wet the putty knife or caulking tool with a small amount of water or a mild soapy solution. This prevents the tool from sticking to the sealant and allows for smoother movement.
- Gently glide the putty knife: Lightly press the wet putty knife onto the sealant and gently glide it along the gap, ensuring even pressure. This helps to smooth out any unevenness and removes any excess sealant that may have been squeezed out during application.
- Keep the putty knife clean: Regularly wipe off any excess sealant from the putty knife with a clean cloth or paper towel. This will prevent the excess sealant from transferring onto other areas or causing streaks.
- Continue smoothing and leveling: Repeat the process of gliding the putty knife along the entire length of the sealant, working in small sections if necessary. Take your time to ensure a neat and even finish.
- Remove any smudges or excess sealant: If you notice any smudges or excess sealant on the siding or surrounding surfaces, immediately clean them with a damp cloth or sponge. This will help maintain the cleanliness and appearance of your home.
By smoothing and leveling the sealant, you ensure that it blends seamlessly with the siding and provides a professional finish. This step also helps to prevent water and dirt from accumulating on the sealant surface, prolonging its effectiveness and maintaining the overall integrity of your siding.
Step 6: Allow the sealant to dry
Once you have applied and leveled the sealant under the siding, the final step is to allow it to dry completely. Drying time can vary depending on the type of sealant and environmental conditions, so it’s important to be patient and allow sufficient time for the sealant to fully cure. Here are some important points to consider during the drying process:
- Follow manufacturer’s instructions: Consult the manufacturer’s instructions for the specific sealant you are using to determine the recommended drying time. This will give you a guideline of how long you should wait before considering the sealant fully cured.
- Avoid disturbing the sealant: Once the sealant is applied, it’s important to avoid touching or disturbing it during the drying period. This can disrupt its bonding process and compromise its effectiveness.
- Consider environmental conditions: The drying time of the sealant can be influenced by factors such as temperature, humidity, and air circulation. Warmer temperatures and lower humidity levels generally result in quicker drying times.
- Protect the area: During the drying period, it’s important to protect the area from any potential damage or contamination. Keep pets, children, and other household members away from the freshly applied sealant to prevent accidental smudging or denting.
- Monitor the drying progress: Periodically check the sealant to see if it has dried completely. You can lightly touch a small hidden area to test its tackiness. If it feels dry and is no longer sticky to the touch, it is likely cured.
- Schedule future maintenance: Even after the sealant has dried, it’s important to schedule regular inspections and maintenance of your siding. Check for any signs of damage or deterioration and address them promptly to prevent further issues in the future.
By allowing the sealant to dry completely, you ensure that it forms a strong and durable barrier under the siding. This provides optimal protection against water intrusion, improves energy efficiency, and enhances the overall longevity of your home’s exterior.
Read more: How To Seal T1-11 Siding
Conclusion
Congratulations! You have successfully learned how to seal under siding, a crucial step in maintaining the integrity, energy efficiency, and overall protection of your home. By following the steps outlined in this guide, you have taken proactive measures to prevent water damage, enhance energy efficiency, and improve the appearance of your home’s exterior.
Sealing under siding is an essential task that should not be overlooked. It helps to create a barrier against water infiltration, prevents air leaks, and deters pests from entering your home. By sealing gaps and cracks, you have added an extra layer of protection to your siding, safeguarding it for years to come.
Remember to properly prepare the area, clean and remove any debris, identify and repair damaged areas, apply the sealant, smooth and level it, and allow for sufficient drying time. Following these steps diligently will ensure a successful and long-lasting seal.
Regular maintenance is key to the longevity of your seal. Schedule periodic inspections to check for any signs of damage or wear, and address them promptly. By doing so, you can extend the lifespan of your sealant and maintain the effectiveness of the sealing under the siding.
Sealing under siding may require some effort and time, but the benefits far outweigh the investment. Not only does it protect your home from potential damage and increase energy efficiency, but it also enhances the overall curb appeal and value of your property.
Now that you are well-equipped with the knowledge and techniques of sealing under siding, you can confidently tackle the task and enjoy the peace of mind that comes with a well-protected home. Get started on sealing under your siding and reap the rewards of a sturdy and comfortable living environment.
Frequently Asked Questions about How To Seal Under Siding
Was this page helpful?
At Storables.com, we guarantee accurate and reliable information. Our content, validated by Expert Board Contributors, is crafted following stringent Editorial Policies. We're committed to providing you with well-researched, expert-backed insights for all your informational needs.


0 thoughts on “How To Seal Under Siding”