Articles
How To Splice Electrical Cord
Modified: February 22, 2024
Learn how to splice electrical cord with our informative articles. Enhance your electrical skills and safely repair cords with step-by-step guides and tips.
(Many of the links in this article redirect to a specific reviewed product. Your purchase of these products through affiliate links helps to generate commission for Storables.com, at no extra cost. Learn more)
Introduction
When it comes to electrical repairs or DIY projects, sometimes you may find yourself in a situation where you need to splice an electrical cord. Whether you have accidentally cut through a cord or need to replace a damaged section, knowing how to properly splice an electrical cord is essential for ensuring safety and functionality.
In this article, we will guide you through the process of splicing an electrical cord step by step. By following these instructions and using the right tools, you can confidently repair or extend electrical cords, saving you the hassle and expense of buying a new one.
Before we dive into the process, it’s important to note that working with electricity can be dangerous if not done correctly. If you’re not comfortable or familiar with electrical work, it’s recommended to seek the assistance of a professional electrician to ensure your safety. However, for those who have some experience and are confident in their abilities, let’s get started!
Key Takeaways:
- Safety First
Before attempting to splice an electrical cord, prioritize safety. Gather the necessary tools, inspect the cord for damage, and follow the step-by-step process to ensure a secure and reliable connection. - Test and Verify
After splicing the cord, always test it for functionality and safety. Look for signs of overheating or damage, and if in doubt, seek the assistance of a professional electrician for peace of mind.
Read also: 8 Best Electrical Cord Splice for 2024
Necessary Tools and Materials
Before you begin splicing an electrical cord, it’s important to gather all the necessary tools and materials. Having everything on hand will help make the process smoother and more efficient. Here’s a list of what you’ll need:
- Wire cutters: These are essential for cutting through the cord insulation and wires.
- Wire strippers: Used to remove the insulation from the wires without damaging the conductive material.
- Electrical tape: This will be used to insulate and secure the spliced wires.
- Heat shrink tubing: An alternative to electrical tape, heat shrink tubing provides a more secure and professional-looking insulation.
- Soldering iron (optional): If you’re confident in your soldering skills, you can use a soldering iron to join the wires together.
- Solder (optional): If you choose to solder the wires, you’ll need soldering wire or soldering paste.
- Heat gun or lighter: Used to shrink the heat shrink tubing, providing tight and secure insulation.
- Marker or label: It’s a good idea to label the spliced area so you can easily identify it later.
- Safety goggles and gloves: To protect your eyes and hands while working with the tools and materials.
Make sure to have a clean and well-lit workspace where you can comfortably perform the splicing process. Having these tools and materials ready will ensure you can complete the task without any interruptions, improving both efficiency and safety.
Step 1: Gather the Supplies
Before you begin splicing an electrical cord, it’s important to gather all the necessary supplies. This will save you time and ensure that you have everything you need for a successful splice.
First, make sure you have a clean and well-lit workspace. This will allow you to work comfortably and see the details of the cord and wires clearly.
Next, gather the following supplies:
- Wire cutters: These will be used to cut through the cord insulation and wires.
- Wire strippers: These will help you remove the insulation from the wires without damaging the conductive material.
- Electrical tape: This will be used to insulate and secure the spliced wires.
- Heat shrink tubing: Alternatively, you can use heat shrink tubing for a more secure and professional-looking insulation.
- Soldering iron (optional): If you are confident in your soldering skills, you may choose to solder the wires together.
- Solder (optional): If soldering, you’ll need soldering wire or soldering paste.
- Heat gun or lighter: These will be used to shrink the heat shrink tubing and provide a tight and secure insulation.
- Marker or label: It’s a good idea to label the spliced area so that you can easily identify it later.
- Safety goggles and gloves: Safety is crucial, so make sure to wear goggles and gloves to protect your eyes and hands.
By having all these supplies ready, you can ensure a smooth and efficient splicing process. Double-check that you have everything you need before moving on to the next steps.
Step 2: Examine the Electrical Cord
Before you start splicing the electrical cord, it’s important to thoroughly examine it for any signs of damage or wear. This step is crucial as it will help you determine the extent of the repair needed and ensure the safety of the splice.
Here are a few things to check for:
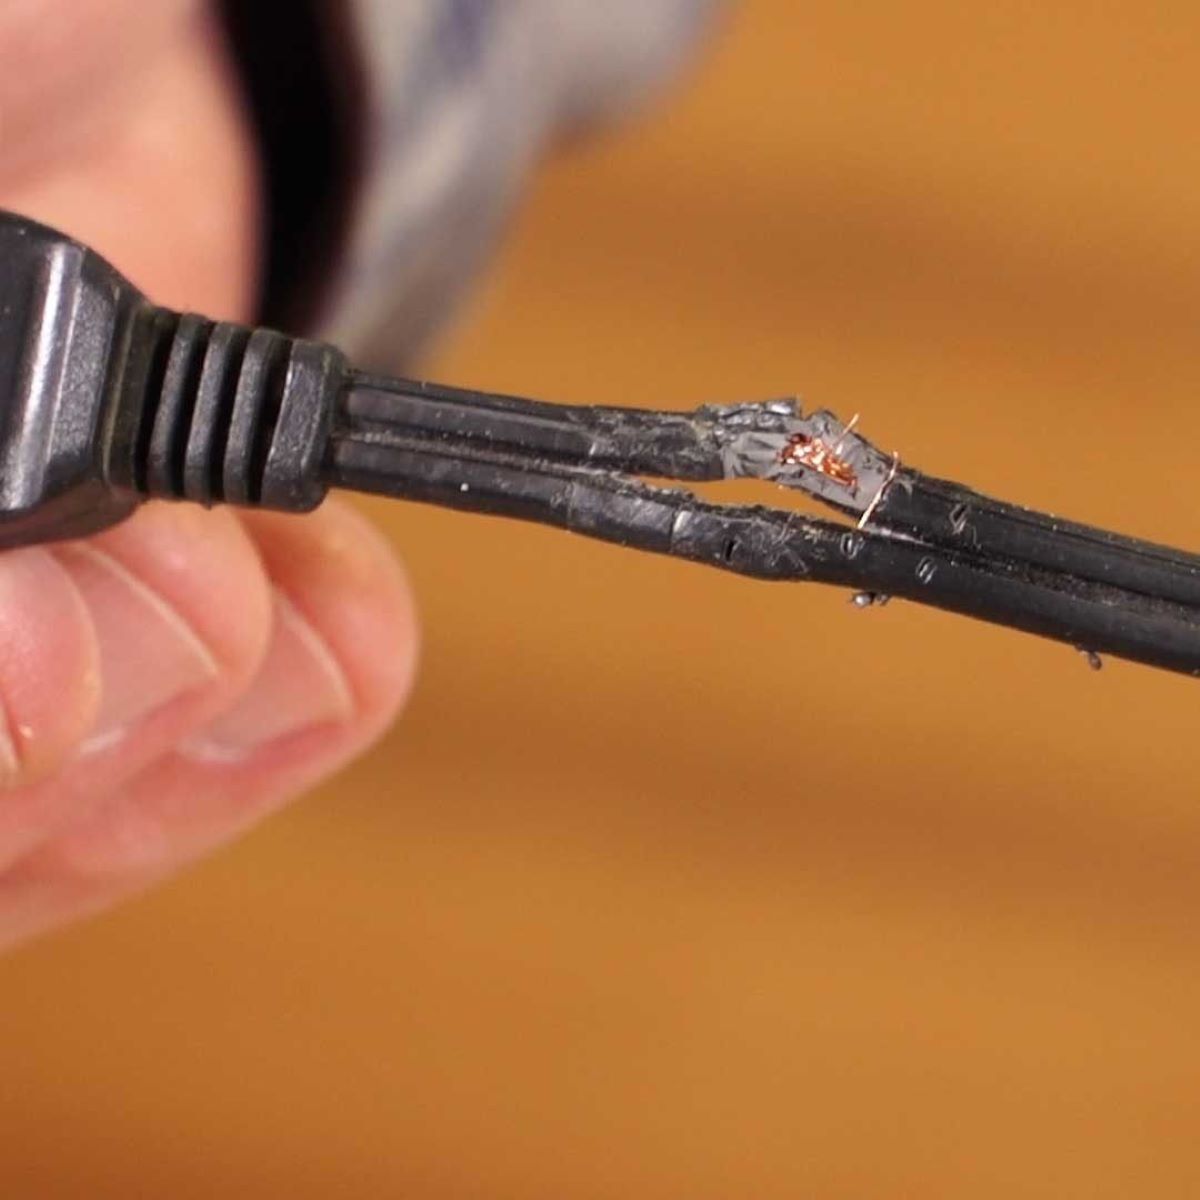
- Cuts or abrasions: Look for any visible cuts or abrasions on the cord’s insulation. Even small nicks can weaken the cord and pose a safety hazard.
- Exposed wires: Check if any of the wires are exposed. Exposed wires are a clear indication that the cord is damaged and needs immediate repair.
- Weak or loose connections: Inspect the plug ends of the cord for any loose or weak connections. Loose connections can result in intermittent power or electrical hazards.
- Burn marks or discoloration: Look for any burn marks or discoloration on the cord. These signs may indicate overheating or electrical faults, requiring immediate attention.
If you notice any of these issues, it’s essential to address them before proceeding with the splice. For minor cuts or abrasions, you can simply use electrical tape to cover them. However, if the damage is severe or the cord is frayed, it’s best to replace the entire cord to ensure safety.
Remember, always prioritize safety when working with electricity. If you’re unsure about the condition of the cord or are uncomfortable with performing the repairs, it’s best to consult a professional electrician for assistance.
Once you have examined the electrical cord and determined that it is suitable for splicing, you can proceed to the next step: preparing the cord for splicing.
Step 3: Prepare the Cord for Splicing
Now that you have examined the electrical cord and ensured it is in a suitable condition for splicing, it’s time to prepare the cord for the repair process. This step involves removing any damaged areas and creating a clean surface for the splice.
Follow these steps to prepare the cord for splicing:
- Identify and mark the damaged section: Use a marker or label to clearly mark the area of the cord that needs to be spliced. This will help you locate the exact spot later during the splice.
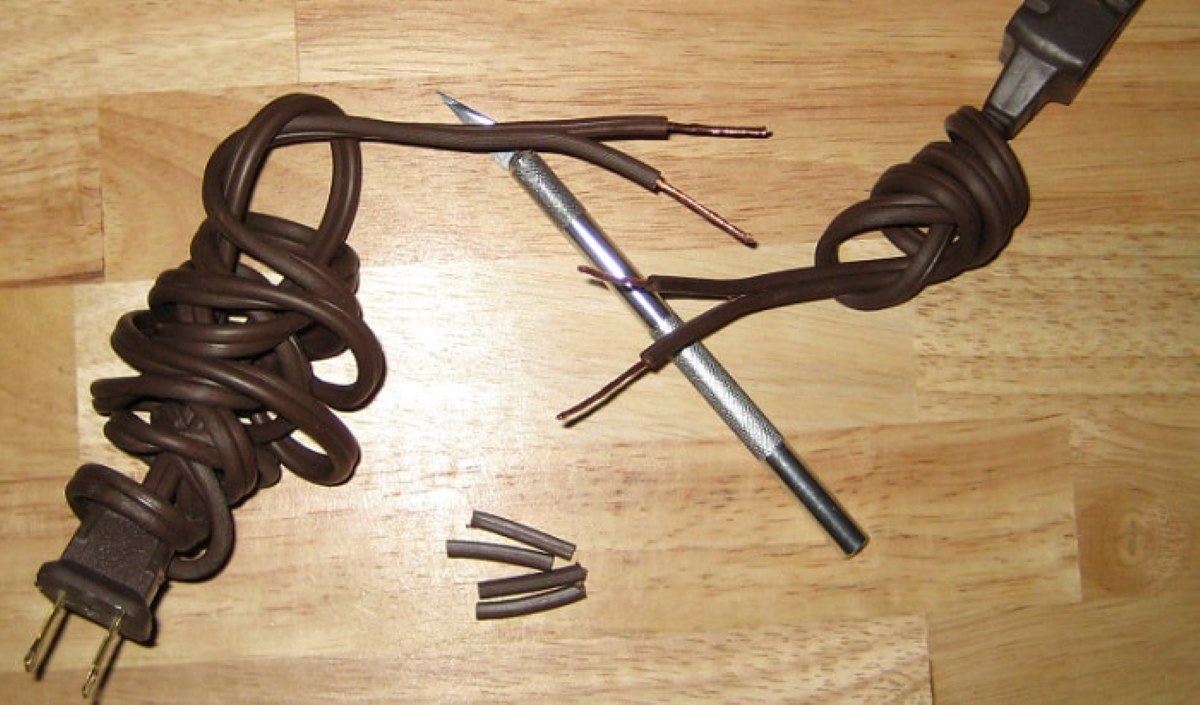
- Cut the cord: Using wire cutters, cut through the cord on both sides of the marked area. Make sure to leave enough room on each side to work with. Avoid cutting too close to the damaged section to prevent further damage.
- Trim the cut ends: With wire cutters, trim the cut ends of the cord to ensure a clean and even surface for the splice. Remove any frayed strands or uneven edges.
- Expose the wires: Using wire strippers, carefully remove the outer insulation from the cut ends of the cord. Take caution not to damage the conductor wires inside. Strip around an inch of the insulation to provide enough room for splicing.
After completing these steps, you should be left with two clean, exposed ends of the cord. The damaged area has been removed, and you are ready to proceed with the actual wire splicing process.
Preparing the cord properly is essential for a successful and secure splice. By creating clean and exposed wire ends, you will ensure a strong connection between the wires, enabling the electrical current to flow uninterrupted.
Next, we will move on to the next step: stripping the wire insulation.
When splicing electrical cord, always make sure to match the wire gauge and use the appropriate connectors. Insulate the connections properly with electrical tape or heat shrink tubing to ensure safety.
Read more: How To Splice A Lamp Cord
Step 4: Strip the Wire Insulation
Now that you have prepared the cord by cutting and trimming the ends, it’s time to strip the insulation from the wires. This step will expose the bare conductive wires so that they can be properly connected during the splice.
Follow these steps to strip the wire insulation:
- Inspect the wires: Take a close look at the exposed ends of the cord and identify the individual wires. Most electrical cords have two or three wires: a live wire (usually black or red), a neutral wire (typically white or gray), and a ground wire (often green or bare copper).
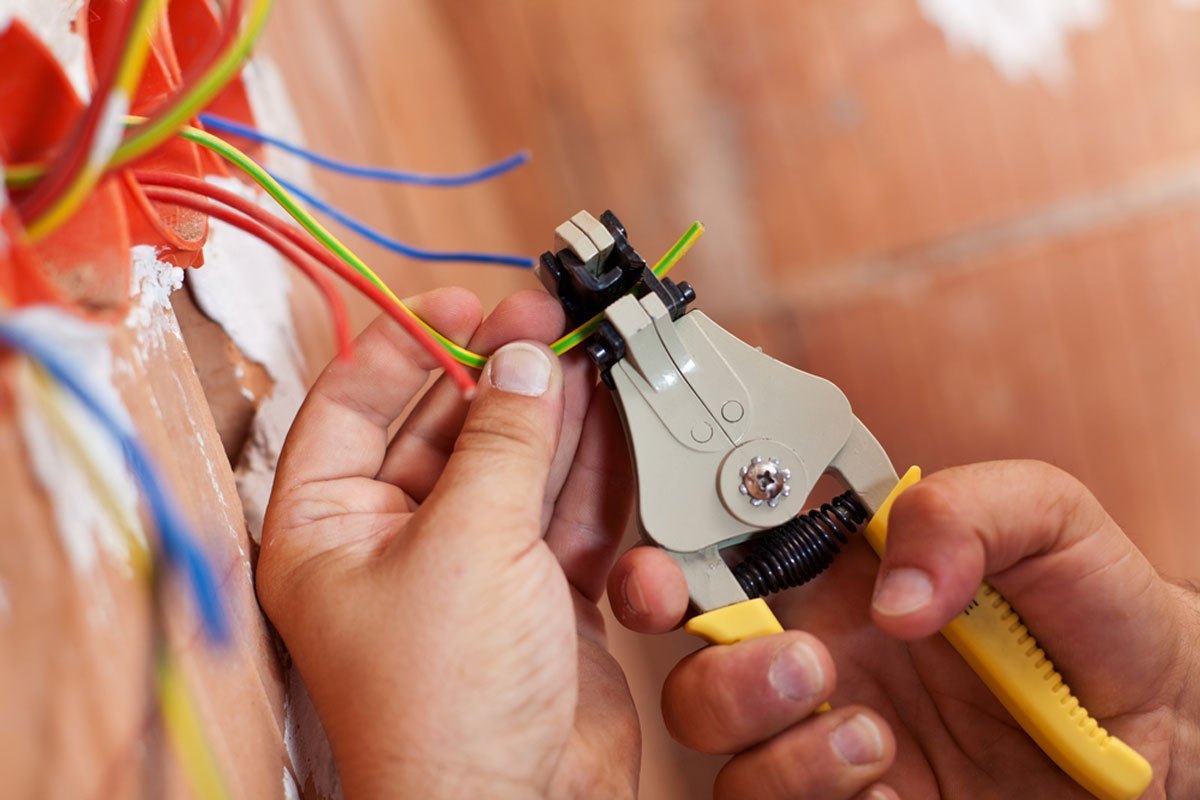
- Choose the appropriate wire stripper: Select a wire stripper that matches the gauge of the cord’s wires. The wire stripper should have a notch or hole that corresponds to the size of the wire to be stripped.
- Insert the wire into the stripper: Insert the exposed end of one wire into the appropriate hole or notch in the wire stripper. Make sure to position it so that the insulation covers the desired length to be stripped.
- Strip the insulation: Close the wire stripper around the wire and gently rotate it a few times to score the insulation. Apply slight pressure while pulling the stripper toward the end of the wire. The insulation should come off smoothly, leaving the bare wire exposed.
- Repeat for the other wires: Repeat the wire stripping process for each wire, ensuring that the proper length of insulation is removed from each one. Be careful not to cut into or damage the wire strands while stripping.
By stripping the wire insulation correctly, you expose the conductive wire strands while keeping them intact and undamaged. This will facilitate a strong and reliable connection during the splice.
After stripping the wire insulation, you are ready to move on to the next step: connecting the wires for the splice.
Step 5: Connect the Wires
With the wire insulation stripped, it’s time to connect the wires for the splice. This step involves joining the corresponding wires from each end of the cord to ensure the electrical current can flow through the newly spliced section.
Follow these steps to connect the wires:
- Identify the corresponding wires: Match the color-coded or labeled wires from each end of the cord. The live wire should be connected to the live wire, the neutral to the neutral, and the ground to the ground.
- Twist the wires together: Take the corresponding wires and twist them tightly together. Make sure the wire strands are securely intertwined to create a solid connection.
- Optional soldering step: If you choose to solder the connection, heat the soldering iron and apply solder to the twisted wires. This will create a permanent and secure bond between the wires.
It’s important to ensure a proper and secure connection between the wires. A loose or incomplete connection can result in poor electrical conductivity, which can lead to safety hazards or device malfunctions.
If you opt for soldering, be cautious not to overheat the wires or hold the soldering iron in one spot for too long. Excessive heat can damage the wires or insulation, compromising the integrity of the splice.
Once the wires are connected, you can proceed to the next step: securing the connection.
Step 6: Secure the Connection
Now that the wires are connected, it’s important to secure the splice to ensure a safe and reliable electrical connection. This step involves insulating the spliced area to prevent any exposed wires and to protect the connection from damage or moisture.
Follow these steps to secure the connection:
- Insulate with electrical tape: Start by wrapping the spliced area with electrical tape. Begin a few inches away from the splice and wrap the tape tightly and evenly around the wires. Continue to wrap until the entire spliced area is covered, extending a few inches beyond the splice on each side.
- Apply heat shrink tubing (optional): For added protection and a more professional finish, you can use heat shrink tubing. Slide a piece of heat shrink tubing over the spliced area, ensuring it covers the entire connection. Use a heat gun or a lighter to shrink the tubing, creating a tight seal around the wires.
- Inspect for secure insulation: Once the insulation is applied, inspect the spliced area to ensure that all wires are properly insulated and no bare wires are exposed. Double-check the integrity of the electrical tape or heat shrink tubing. Any exposed areas should be rewrapped or covered accordingly.
Properly securing the connection is crucial for the safety and longevity of the splice. By effectively insulating the spliced area, you protect the connection from moisture, dirt, and other environmental factors that can compromise the electrical conductivity.
Remember to take your time and ensure a thorough and secure insulation. A well-insulated connection will provide peace of mind and minimize the risk of electrical hazards down the line.
Now that the connection is secured, it’s time to test the spliced cord to ensure everything is working correctly.
Step 7: Test the Spliced Cord
After completing the splicing process and securing the connection, it’s crucial to test the spliced cord to ensure it is functioning properly before putting it into regular use.
Follow these steps to test the spliced cord:
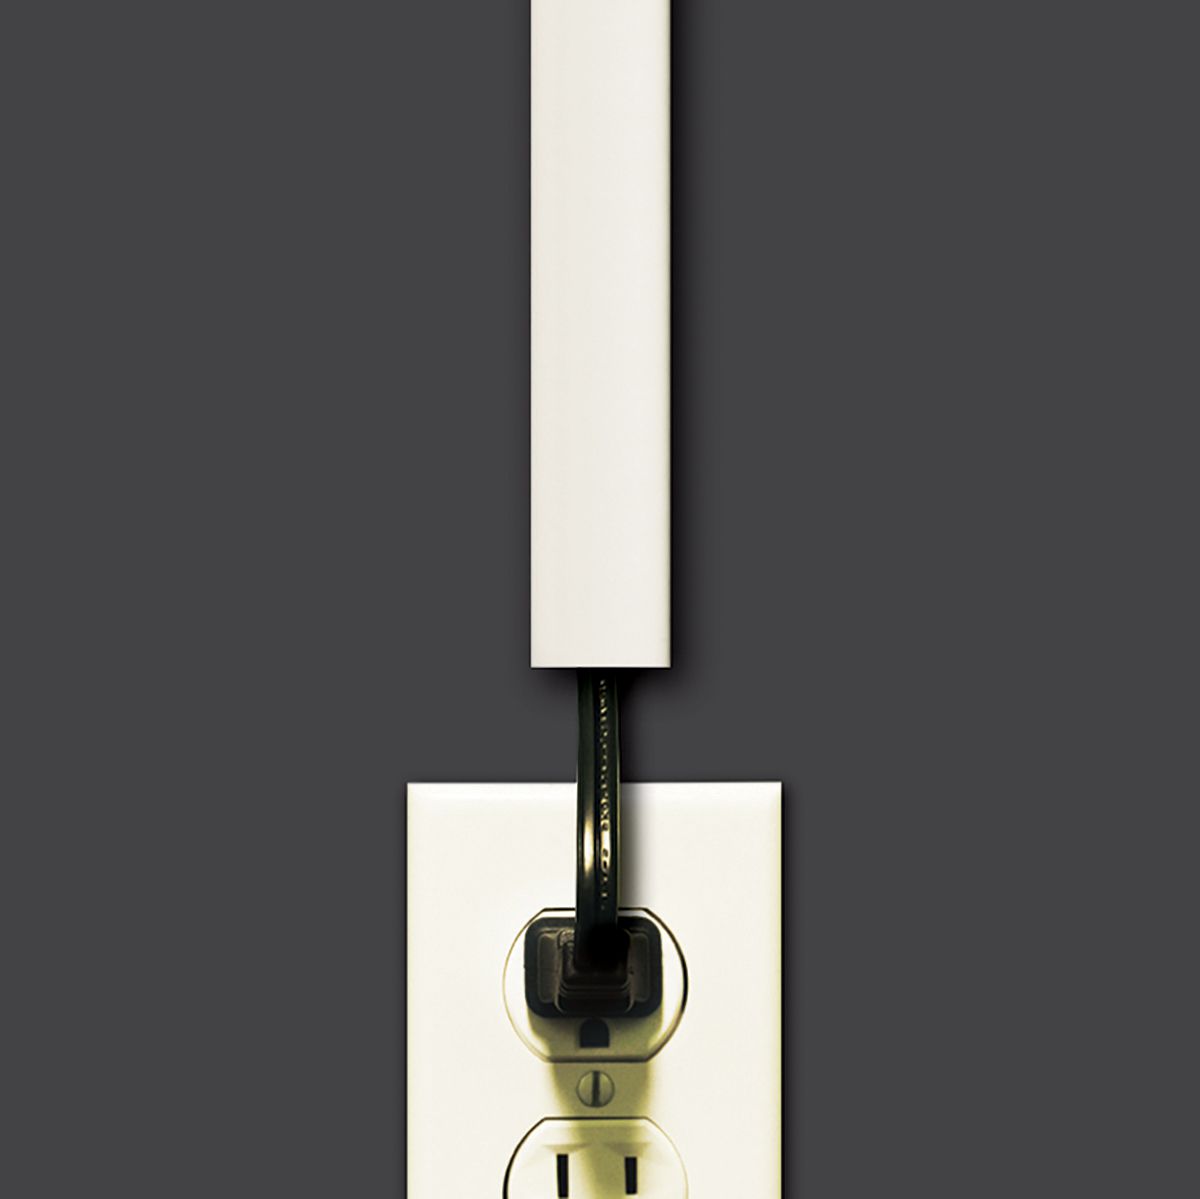
- Plug in the cord: Insert the plug end of the cord into a power outlet or device.
- Turn on the device: If applicable, turn on the device or appliance connected to the cord.
- Check for functionality: Verify that the device is receiving power and operating as expected. Ensure that all functions, switches, and buttons are functioning correctly.
- Inspect the cord: While the device is connected and running, carefully inspect the spliced area of the cord. Look for any signs of heat, smoke, or unusual noises. Check that the insulation and connection remain secure and intact.
If the device operates normally and there are no signs of electrical issues, you can conclude that the spliced cord is working correctly.
However, if you notice any problems during the testing process or suspect any issues with the spliced cord, immediately unplug the cord and double-check the connection. Inspect for any loose wires, damaged insulation, or signs of overheating.
If you encounter any problems or are unsure of the integrity of the spliced cord, it’s highly recommended to seek the assistance of a professional electrician. They will be able to inspect, troubleshoot, and rectify any issues to ensure the safety and proper functioning of the cord.
Once you have tested the spliced cord and ensured its functionality, you can confidently put it back into regular use.
Read more: How To Splice Extension Cord
Conclusion
Splicing an electrical cord may seem like a daunting task, but with the right tools, materials, and knowledge, it can be easily accomplished. By following the steps outlined in this article, you can safely and effectively splice an electrical cord, saving you the expense of purchasing a new one.
Remember to prioritize safety throughout the entire process. If you’re unsure or uncomfortable working with electricity, it’s always best to seek the help of a professional electrician who can ensure a proper and safe repair.
By gathering the necessary tools and materials, examining the cord for damage, preparing and stripping the wire insulation, connecting the wires securely, and insulating the splice, you can create a strong and reliable connection that will withstand regular use.
Once the spliced cord is completed, be sure to test it to verify its functionality and safety. Always exercise caution and conduct regular inspections to ensure the integrity of the splice and the overall condition of the cord.
Remember, when it comes to electrical repairs, safety should be the top priority. If you have any doubts or concerns, it’s best to consult a professional. With proper knowledge and care, you can successfully splice an electrical cord and continue to use your electrical devices with confidence.
So, the next time you find yourself in need of splicing an electrical cord, don’t panic. Simply follow the steps outlined in this guide and take the necessary precautions to ensure a successful repair. Happy splicing!
Frequently Asked Questions about How To Splice Electrical Cord
Was this page helpful?
At Storables.com, we guarantee accurate and reliable information. Our content, validated by Expert Board Contributors, is crafted following stringent Editorial Policies. We're committed to providing you with well-researched, expert-backed insights for all your informational needs.


0 thoughts on “How To Splice Electrical Cord”