Articles
How To Sand Concrete Floor
Modified: January 26, 2024
Learn how to sand a concrete floor with our informative articles. Transform your space with our step-by-step guides and tips for a perfect finish.
(Many of the links in this article redirect to a specific reviewed product. Your purchase of these products through affiliate links helps to generate commission for Storables.com, at no extra cost. Learn more)
Introduction
When it comes to remodeling or renovating your home, a great way to give your concrete floors a fresh new look is by sanding them. Sanding concrete floors not only removes imperfections and stains but also creates a smooth and even surface for further treatment. Whether you want to apply a fresh coat of paint, stain the concrete, or simply leave it as is, sanding is a crucial step in the process.
In this guide, we will walk you through the steps needed to sand your concrete floors effectively. We will discuss the tools and materials you will need, the preparation required, the different methods of sanding, and the techniques to achieve a professional finish. By the end of this article, you will have the knowledge and confidence to tackle your concrete floor sanding project.
Before we dive into the specifics, it is essential to note that sanding concrete floors can be a labor-intensive task. It requires patience, precision, and attention to detail. However, the results can be truly transformative, giving your floors a brand-new lease of life.
So, if you are ready to take on the challenge and want to learn how to sand concrete floors like a pro, let’s get started!
Key Takeaways:
- Transform your concrete floors with a professional finish by following the comprehensive guide to sanding. Prioritize safety, progress systematically, and achieve stunning results with the right tools and techniques.
- Prepare, fill, sand, and seal your concrete floors like a pro. From gathering essential tools to applying a protective finish, this guide provides the knowledge and confidence for a successful transformation.
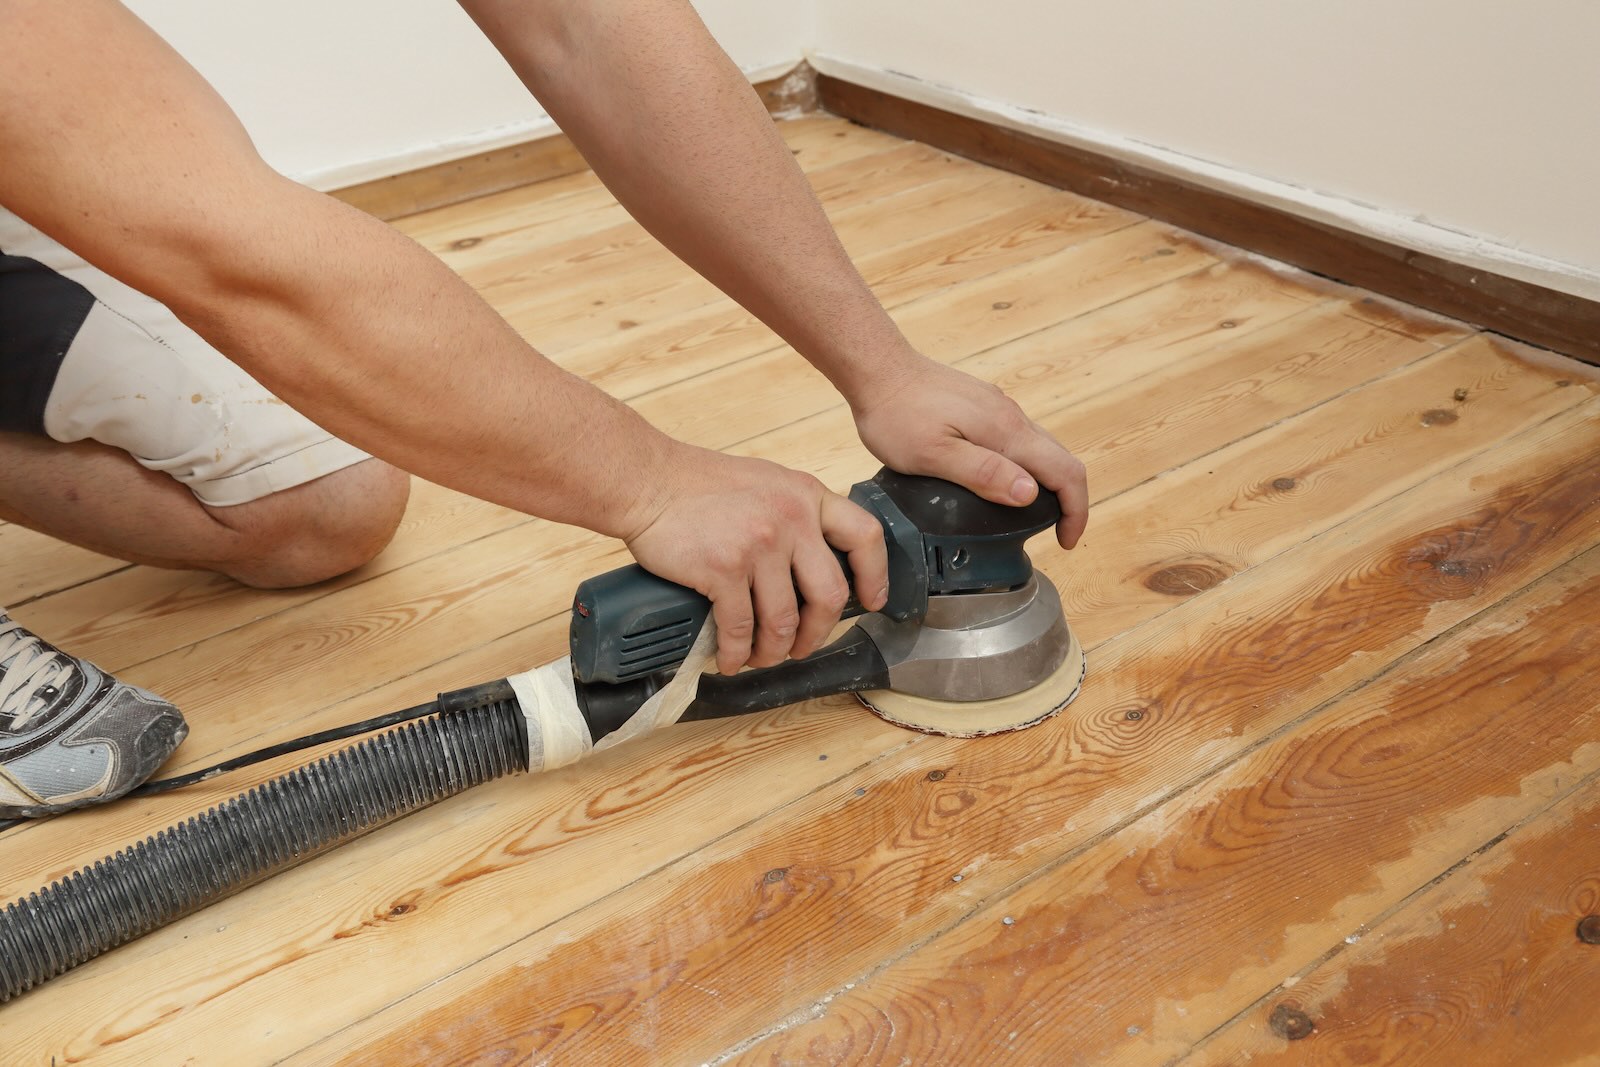
Read more: How To Sand A Wood Floor
Tools and Materials Needed
Before you begin sanding your concrete floors, it’s important to gather all the necessary tools and materials. Having everything ready will help ensure a smooth and efficient sanding process. Here are the essential tools and materials you will need:
- Safety equipment: Safety should always be a priority when working on any project. It is recommended to wear protective goggles, a dust mask, and earplugs to protect your eyes, lungs, and ears from dust and excessive noise.
- Concrete grinder or sander: A concrete grinder or sander is the primary tool you will use to sand your concrete floors. You can rent this equipment from a home improvement store or consider hiring a professional concrete contractor.
- Diamond grinding pads or sanding pads: These are specialized pads that attach to the concrete grinder or sander. They come in various grits, from coarse to fine, and are used to achieve different levels of smoothness.
- Edger or hand grinder: An edger or hand grinder is a smaller tool used to reach areas that the main grinder cannot access, such as corners, edges, and tight spaces.
- Dust collection system: To minimize dust and debris during the sanding process, it is recommended to use a dust collection system. This can be a vacuum cleaner with a suitable attachment or a dedicated dust extractor.
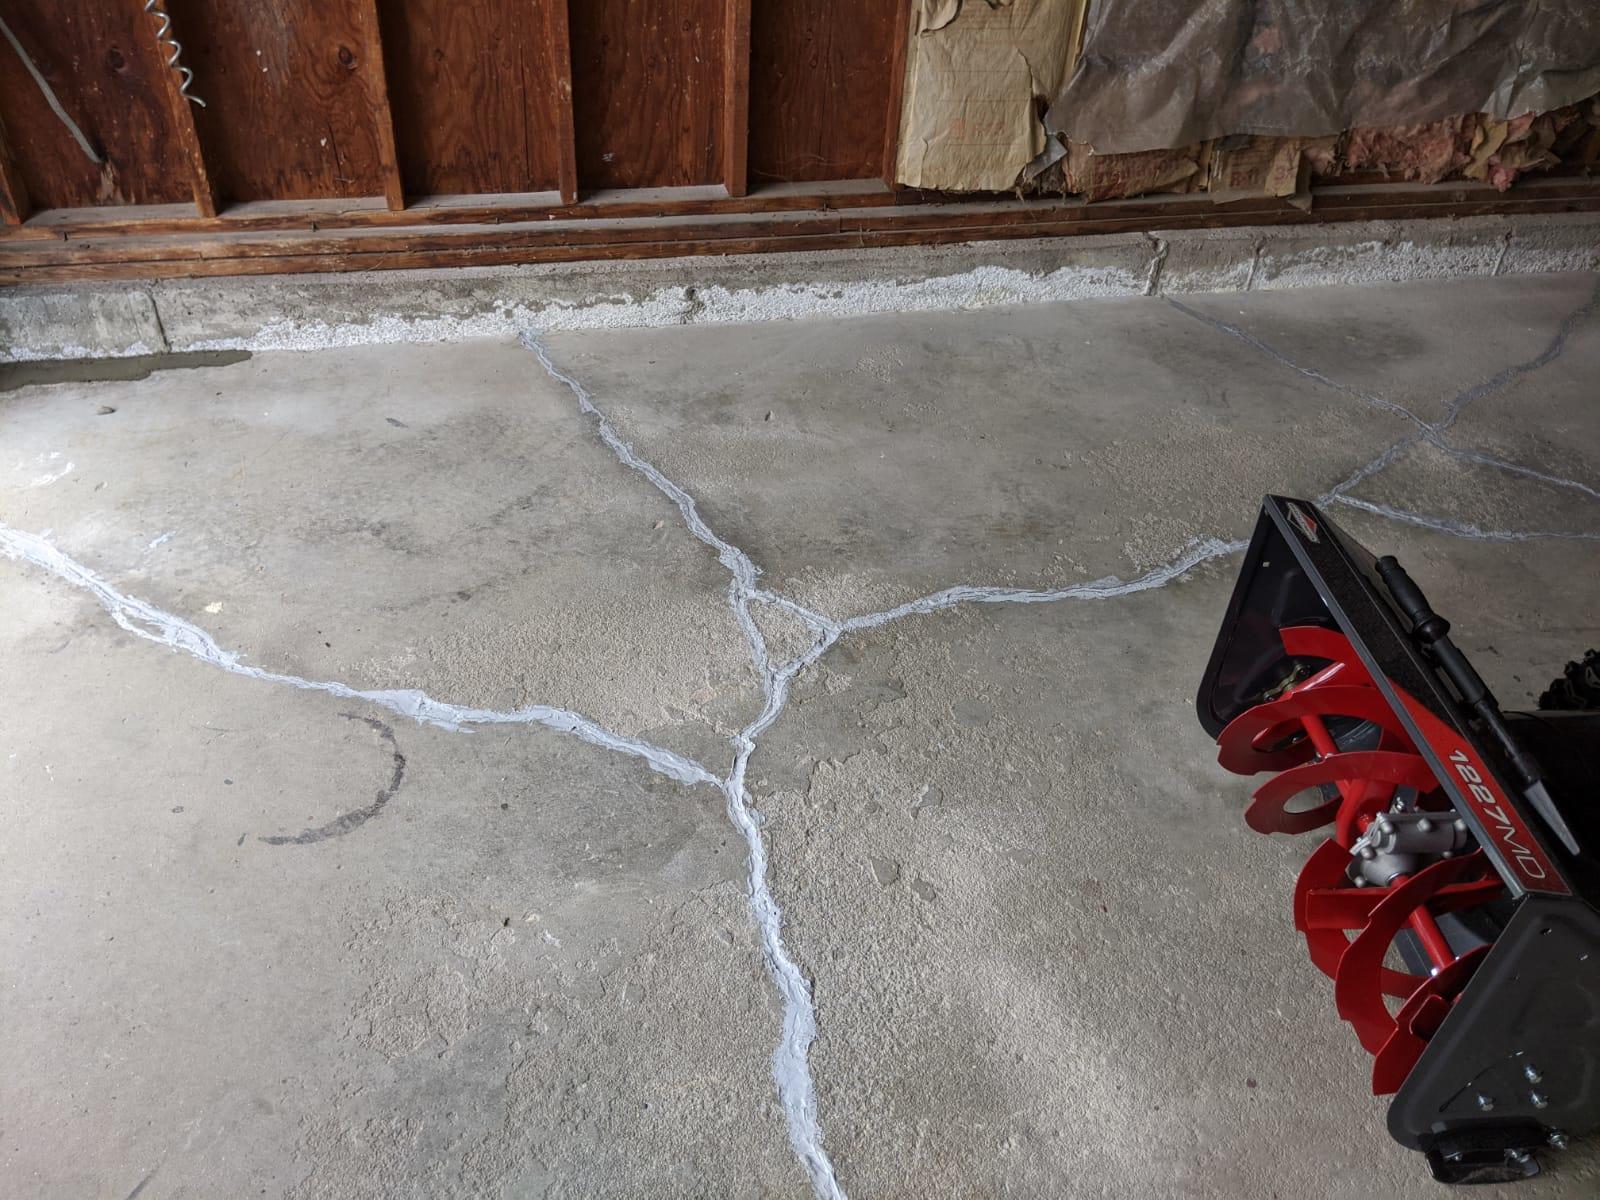
- Filling compound: Before sanding, it’s crucial to fill any cracks, holes, or imperfections in the concrete. A high-quality filling compound specifically designed for concrete repair should be used.
- Putty knife or trowel: These tools will be necessary to apply the filling compound and smoothen it to match the surrounding surface.
- Cleaning supplies: After sanding, you will need cleaning supplies such as a broom, mop, and bucket to thoroughly clean the surface and remove any dust or debris.
- Protective covers: Lastly, it’s essential to protect any adjacent surfaces, furniture, or fixtures in the area where you will be sanding. Plastic covers, drop cloths, or masking tape can be used to shield these items from dust and damage.
By gathering all these essential tools and materials before you begin, you will be well-prepared and able to carry out the sanding process efficiently and safely. So, ensure that you have everything you need at hand to achieve the best results for your concrete floors.
Preparing the Area
Before you start sanding your concrete floors, it’s important to properly prepare the area to ensure a smooth and successful sanding process. Taking the time to prepare the area will help minimize the mess and potential damage to surrounding surfaces. Here are the steps to follow when preparing the area:
- Clean the floor: Begin by thoroughly cleaning the concrete floor using a broom or vacuum cleaner to remove any loose dirt, dust, or debris. This will help prevent these particles from getting trapped in the sanding process.
- Remove any obstacles: Clear the floor of any furniture, objects, or fixtures that may obstruct the sanding process. This includes rugs, chairs, tables, and any other items that can be temporarily relocated.
- Protect adjacent surfaces: Use plastic covers, drop cloths, or masking tape to protect adjacent surfaces, walls, baseboards, and any other areas that you do not want to be exposed to dust or scratched during the sanding process.
- Seal off doorways and vents: To prevent dust from spreading to other areas of your home, consider sealing off doorways with plastic sheets or tape. Close or cover any vents to avoid dust circulation through the ventilation system.
- Check for moisture: Concrete floors should be thoroughly dry before sanding. Use a moisture meter to check for any moisture content in the concrete. If moisture is present, it is recommended to allow the floor to dry completely before proceeding.
- Repair cracks and holes: Inspect the floor for any cracks or holes and use a suitable filling compound to repair them. Follow the manufacturer’s instructions for mixing and applying the compound, and allow it to fully cure before starting the sanding process.
By following these steps, you will create a clean and safe working environment for sanding your concrete floors. Proper preparation will not only make the sanding process easier but also help achieve a more professional finish. Take the time to prepare the area before you begin, and you’ll be rewarded with great results.
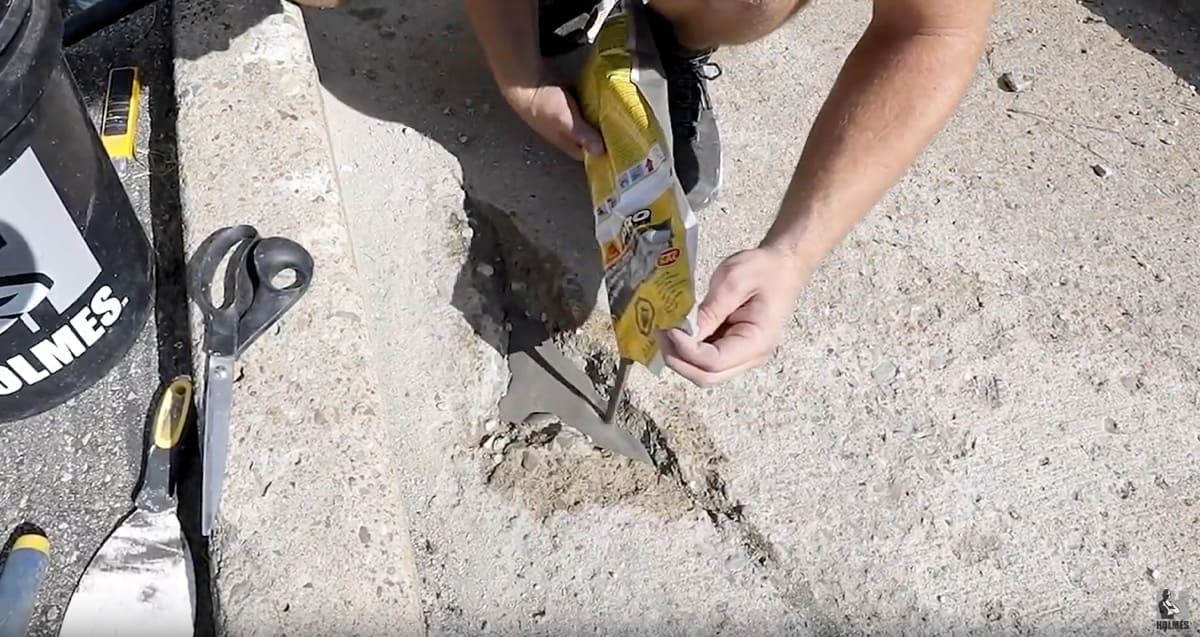
Filling Cracks and Holes
Before you begin sanding your concrete floors, it’s crucial to fill any cracks, holes, or imperfections in the surface. Failing to do so can result in an uneven finish and compromise the integrity of the floor. Here’s a step-by-step guide on how to effectively fill cracks and holes in your concrete:
- Clean the cracks: Start by cleaning out the cracks and holes using a stiff brush, broom, or air compressor. Remove any loose debris, dirt, or dust from the crevices to ensure proper adhesion of the filling compound.
- Choose the right filling compound: Select a high-quality filling compound that is specifically designed for concrete repair. There are various options available, such as epoxy-based fillers or hydraulic cement, depending on the size and depth of the cracks.
- Mix the filling compound: Follow the manufacturer’s instructions for mixing the filling compound. Use a trowel or putty knife to create a smooth and workable consistency. Ensure that you mix only the amount you will need, as some compounds have limited working times.
- Apply the filler: Using the putty knife or trowel, carefully apply the filling compound into the cracks and holes. Press the filler firmly into the crevices, ensuring that it fully fills the voids and is level with the surrounding surface. Smooth out the excess compound to create a seamless repair.
- Allow the compound to cure: Give the filling compound sufficient time to cure according to the manufacturer’s instructions. This typically ranges from a few hours to several days, depending on the product and environmental conditions. Avoid stepping on or applying any pressure to the filled areas until they are fully cured.
- Sand down any excess: Once the compound is fully cured, use sandpaper or a sanding block to sand down any excess filler. Make sure the surface is smooth and even, blending it with the surrounding concrete.
Filling cracks and holes in your concrete is an essential step to achieve a flawless and professional finish when sanding your floors. By taking the time to properly address these imperfections, you’ll ensure a more even and aesthetically pleasing result. So, be meticulous during this process and give the filling compound enough time to cure before proceeding to the sanding stage.
Choosing the Right Sanding Method
When it comes to sanding concrete floors, there are different methods you can choose from depending on the size of the project, the condition of the floor, and the desired end result. Each method has its own advantages and considerations. Here are the most common sanding methods for concrete floors:
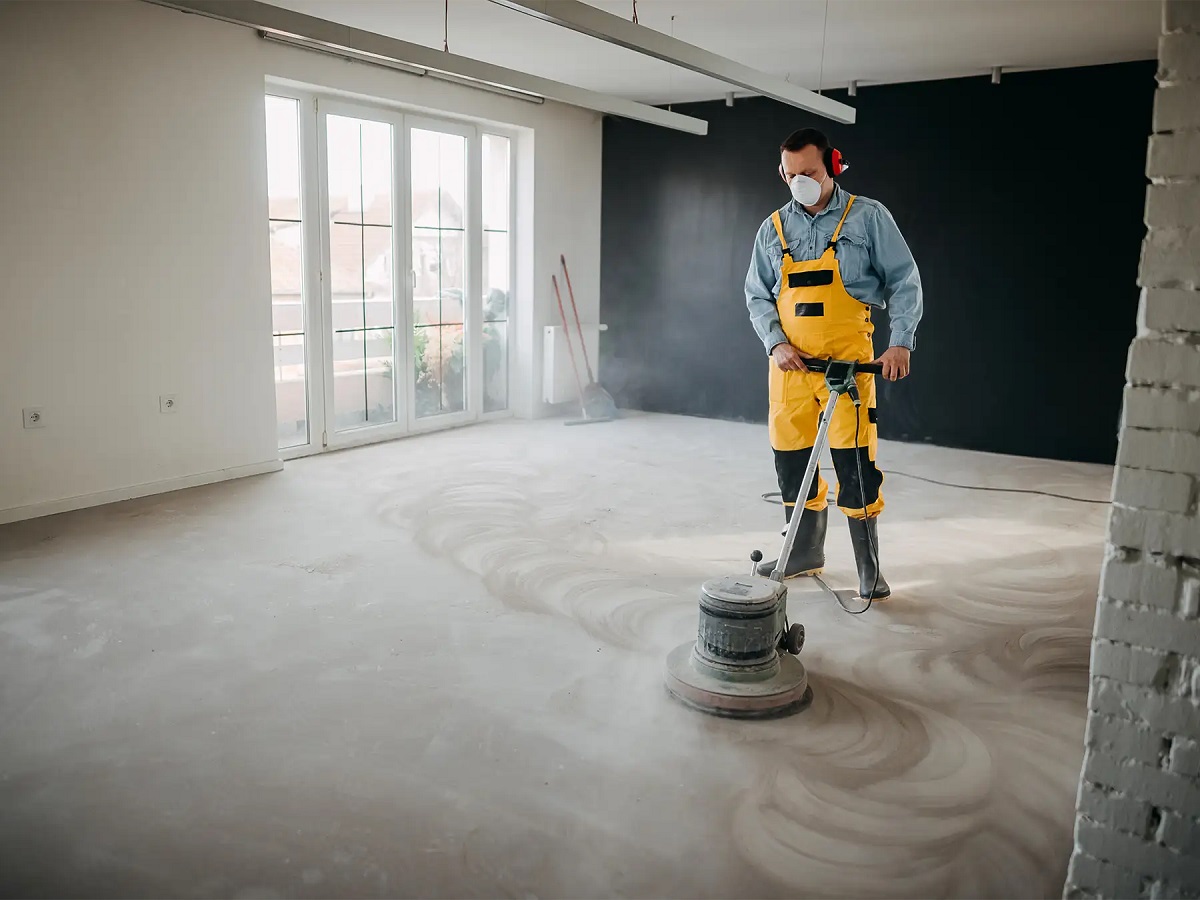
- Dry sanding: Dry sanding is the traditional method of sanding concrete floors using a concrete grinder or sander with diamond grinding pads. This method is highly effective in removing surface imperfections, such as stains, scratches, and unevenness. Dry sanding produces a significant amount of dust, so it’s important to use proper dust collection methods and wear appropriate safety gear.
- Wet sanding: Wet sanding involves using water or a water-based solution to lubricate the surface during the sanding process. This method helps minimize dust and keeps the grinding pads or sandpaper cool, preventing them from clogging. Wet sanding is commonly used for smaller projects or when working indoors where dust control is essential.
- Polishing: Polishing is a more advanced sanding technique that is typically performed after the initial sanding process. It involves using progressively finer grits of diamond pads to achieve a smooth and glossy finish. Polishing can enhance the appearance of your concrete floors and bring out the natural beauty of the material.
- Shot blasting: Shot blasting is another method used to sand concrete floors, especially for larger and heavily damaged surfaces. It involves propelling small steel pellets at high speeds to remove surface contaminants, coatings, and imperfections. Shot blasting is an aggressive method that requires specialized equipment and expertise.
When choosing the right sanding method for your concrete floors, consider factors such as the size and condition of the floor, the level of dust control required, and the desired finish. If you’re unsure which method to use, consulting with a professional concrete contractor can provide valuable insights and guidance based on their expertise and experience.
Remember, regardless of the sanding method you choose, always follow the manufacturer’s instructions for the equipment and materials used. This will ensure safety, efficiency, and optimal results throughout the sanding process.
When sanding a concrete floor, start with a coarse-grit sandpaper to remove any imperfections, then gradually move to finer grits for a smooth finish. Always wear a dust mask and eye protection.
Read more: How To Waterproof A Concrete Floor
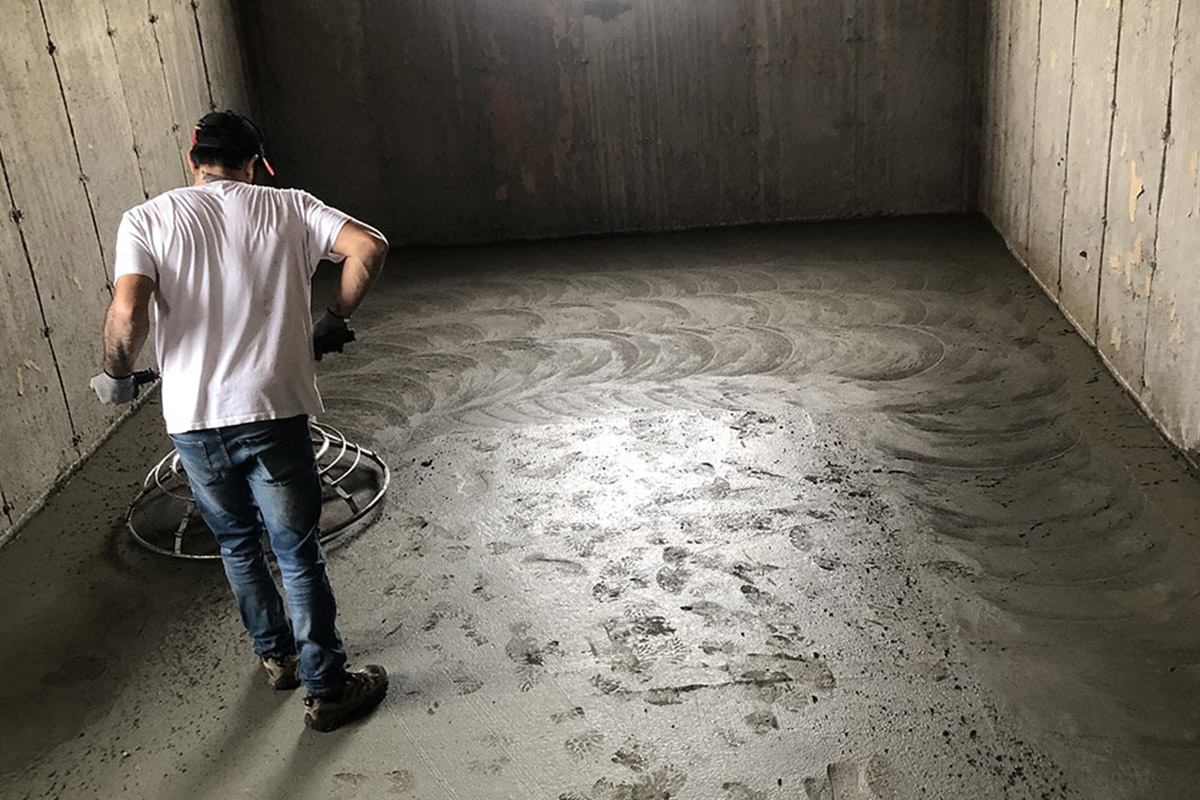
Starting the Sanding Process
Now that you have prepared the area, filled any cracks, and chosen the right sanding method for your concrete floors, it’s time to start the sanding process. Follow these steps to begin sanding:
- Prepare the sanding equipment: Set up your concrete grinder or sander with the appropriate diamond grinding pads or sandpaper. Ensure that the equipment is in good working condition and the pads or sandpaper are securely attached.
- Start in a corner: Begin sanding in a corner of the room, preferably in the farthest corner from the exit. This will allow you to work your way towards the exit without stepping on the freshly sanded areas. It’s also helpful to have an extension cord if needed to reach all areas of the room.
- Hold the grinder or sander at a slight angle: Hold the equipment at a slight angle, about 10-15 degrees, to the surface of the concrete. This will ensure effective removal of material and prevent gouging or uneven sanding. Keep the tool moving in a smooth and consistent motion.
- Work in sections: Divide the floor into manageable sections and sand one section at a time. Overlapping your passes by about 1-2 inches will help ensure even sanding and avoid leaving any un-sanded spots.
- Monitor the progress: As you sand, periodically check the surface to assess how much material has been removed and to ensure that you are achieving the desired level of smoothness. Adjust the pressure or angle of the tool if necessary to achieve the best results.
- Keep the surface moist (if wet sanding): If you are using the wet sanding method, periodically wet the surface with a water sprayer to keep it moist. This will prevent excessive heat and clogging of the grinding pads or sandpaper.
- Continue sanding until the entire floor is complete: Repeat the sanding process for each section of the floor, working your way towards the exit. Take breaks as needed to rest and allow the equipment to cool down.
Remember to work systematically and at a comfortable pace. Rushing through the sanding process can lead to uneven results or missed spots. Take your time and ensure that each section is thoroughly sanded before moving on to the next.
Keep in mind that concrete dust can be harmful if inhaled, so make sure you have proper dust collection methods in place and wear appropriate safety gear, including a dust mask, goggles, and ear protection.
By following these steps, you will be well on your way to achieving a smooth and beautifully sanded surface for your concrete floors.
Progressing to Finer Grits
As you continue the sanding process for your concrete floors, it’s important to progress from coarser grits to finer grits. This step-by-step progression ensures a smooth and refined finish by gradually removing any remaining imperfections and creating a polished surface. Here’s how to progress to finer grits:
- Complete the initial sanding: Once you have finished sanding the entire floor with the initial grit, typically a coarse or medium grit, take a moment to assess the surface. Ensure that you have achieved the desired level of smoothness and removed any major imperfections.
- Change to a finer grit: Replace the diamond grinding pads or sandpaper with a finer grit. The grit number represents the coarseness or fineness of the abrasive material, with higher numbers indicating finer grits. For example, you can switch from a 30-grit pad to a 60-grit pad, gradually progressing towards finer grits.
- Repeat the sanding process: Sand the entire floor again using the finer grit. Follow the same technique as before, working in sections and overlapping your passes. This will further refine the surface and remove any remaining scratches or marks from the previous sanding stage.
- Assess the progress: Regularly inspect the surface as you sand with the finer grit to gauge your progress. Look for any areas that may require extra attention or additional passes. Make sure you are achieving consistent smoothness across the entire floor.
- Continue to even finer grits: If desired, continue the sanding process with even finer grits, such as 100, 200, or 400-grit diamond pads or sandpaper. Each pass with a finer grit will further refine the surface and enhance its smoothness and shine.
- Monitor dust and clean as needed: Throughout the sanding process, be mindful of dust accumulation. Clean the surface periodically to remove dust and debris using a broom or vacuum cleaner. This will help you better assess the progress and achieve a cleaner finish.
Remember, progressing to finer grits gradually is key to achieving a polished and professional-looking result. Each stage of sanding with a finer grit helps to smooth out the surface and blend any imperfections for a more refined appearance.
Take your time and be thorough with each stage of sanding. While it may require more effort, the end result will be worth it. The smooth and polished finish will provide a stunning transformation to your concrete floors.
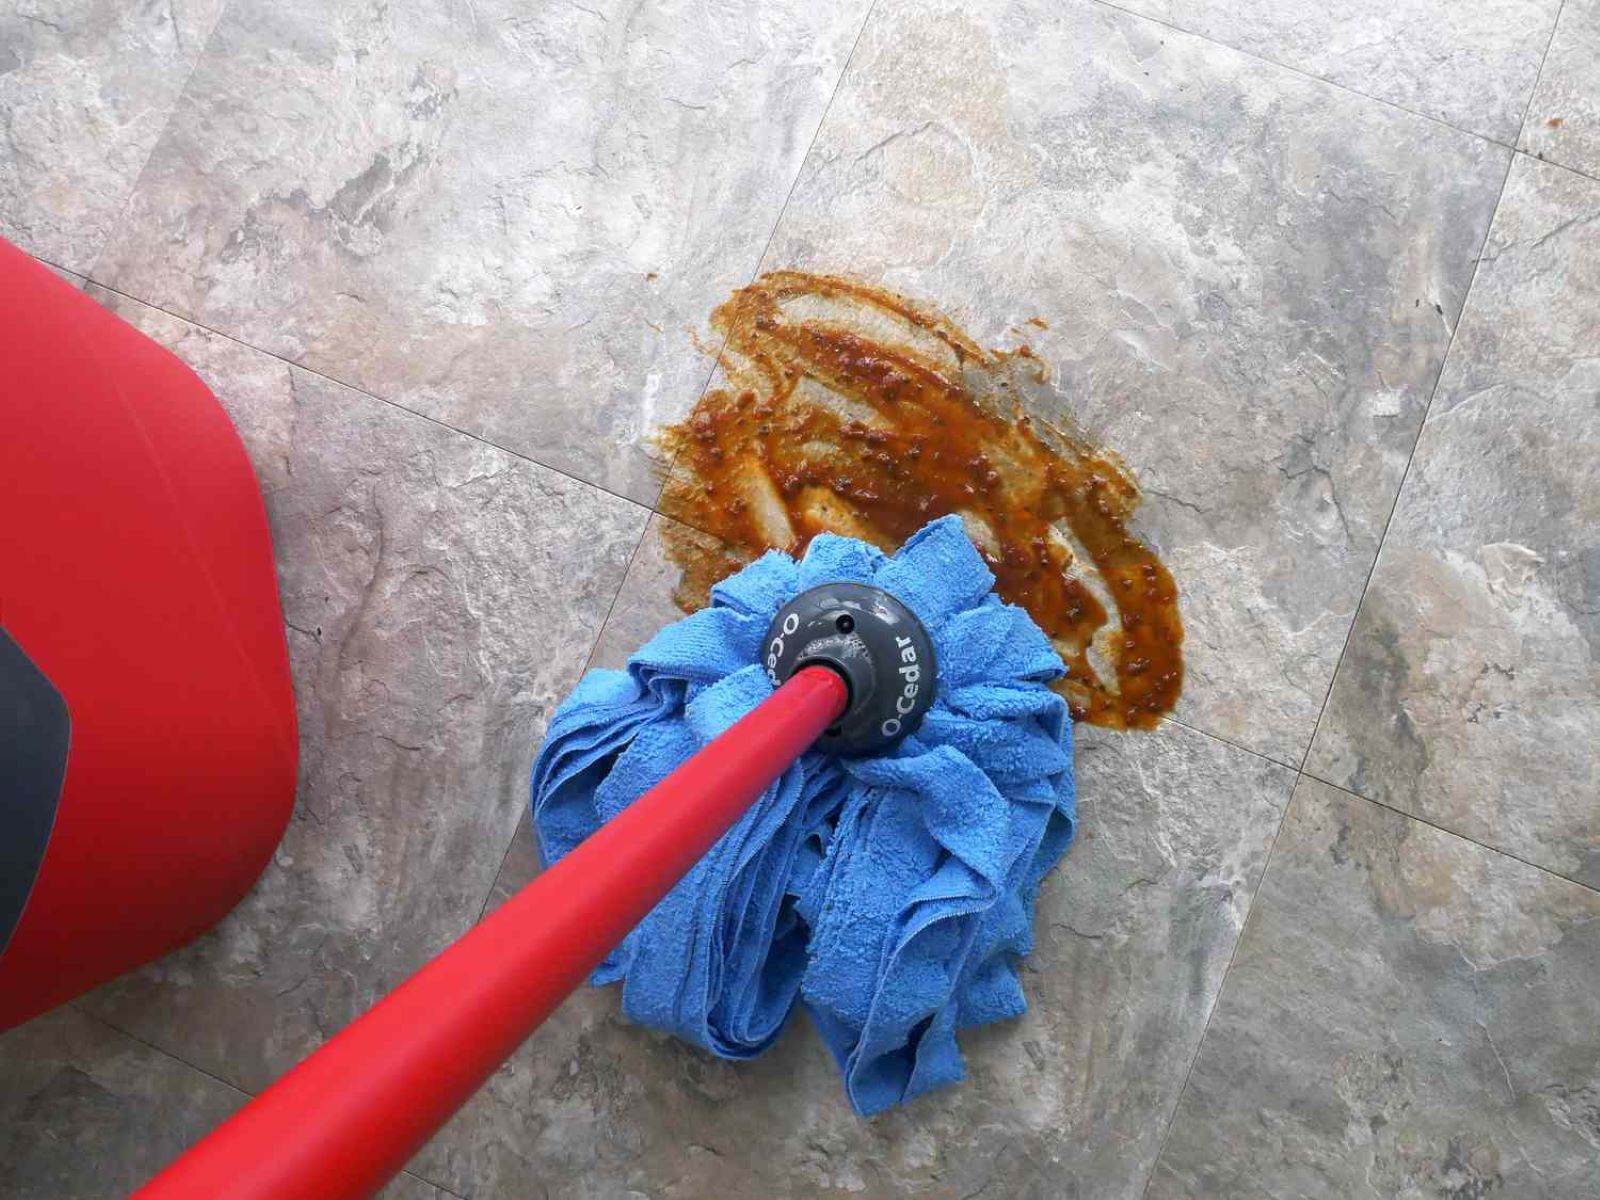
Cleaning the Surface
After completing the sanding process for your concrete floors, it’s essential to thoroughly clean the surface to remove any dust, debris, or residue left behind. Cleaning the surface not only improves the overall appearance but also ensures a proper foundation for any subsequent treatments or finishes. Here’s how to effectively clean your sanded concrete floors:
- Sweep or vacuum: Begin by sweeping the floor or using a vacuum cleaner with a brush attachment to remove loose dust and debris. Pay attention to corners, edges, and hard-to-reach areas where particles may have accumulated. Alternatively, you can use a leaf blower to blow away dust.
- Mop with plain water: After removing loose dust, mop the floor with plain water. This will help pick up remaining particles and remove any residual dust. Use a clean mop and change the water as needed to ensure thorough cleaning.
- Remove stubborn stains: If there are any stubborn stains or marks on the surface, you may need to use a mild detergent or concrete cleaner. Follow the manufacturer’s instructions and use a scrub brush or sponge to gently scrub the stained areas. Rinse with clean water to remove any cleaning residue.
- Dry the floor: Allow the floor to air dry or use a clean towel or mop to dry any excess water. Ensure that the surface is completely dry before proceeding to any further treatments or finishes. Moisture trapped in the concrete can affect the adhesion of coatings or sealers.
- Inspect for missed spots: Take the time to inspect the surface for any missed spots or areas that may require additional cleaning. Use a flashlight and examine the floor from different angles to ensure it is free from dust or debris.
Properly cleaning the surface after sanding is crucial to achieve a professional and pristine result. Even small amounts of dust or debris left behind can affect the appearance and performance of any coatings or finishes applied to the concrete.
It’s important to note that if you plan to apply a sealer, stain, or paint to your concrete floors, always follow the manufacturer’s instructions for surface preparation and cleaning. This will ensure proper adhesion and the best possible outcome for your chosen treatment.
By taking the time to thoroughly clean the surface, your sanded concrete floors will be ready for the next step, whether it’s the application of a sealer to protect and enhance the surface or any other desired treatment.
Applying a Sealer or Finish
After sanding and cleaning your concrete floors, applying a sealer or finish is the final step in the process. Sealing the concrete not only enhances its appearance but also provides protection against stains, moisture, and everyday wear and tear. Here’s how to apply a sealer or finish to your sanded concrete floors:
- Select the right sealer: There are various types of concrete sealers available, including acrylic, epoxy, polyurethane, and penetrating sealers. Choose a sealer that is suitable for your specific needs, taking into consideration factors such as the level of gloss, durability, and maintenance requirements.
- Prepare the surface: Make sure the surface is clean and completely dry before applying the sealer. Remove any lingering dust or debris using a broom or vacuum cleaner. If necessary, lightly dampen the surface with water to help the sealer adhere properly.
- Apply the sealer: Follow the manufacturer’s instructions for the specific sealer you are using. Use a brush, roller, or sprayer to evenly apply the sealer to the floor. Work in small sections to ensure thorough coverage and avoid puddling or uneven application.
- Allow drying and curing: After applying the initial coat of sealer, allow it to dry and cure according to the manufacturer’s instructions. This typically takes several hours or even a full day, depending on the product and environmental conditions. Keep foot traffic and any moisture away from the freshly sealed floor during this time.
- Apply additional coats (if necessary): Depending on the type and desired level of protection, you may need to apply multiple coats of sealer. Follow the manufacturer’s guidelines for applying subsequent coats, including any recommended drying times between coats.
- Maintain the sealed surface: Once the sealer has fully cured, follow the manufacturer’s instructions for maintenance and care. This may include regular cleaning using mild detergents, avoiding harsh chemicals, and reapplying the sealer periodically to ensure ongoing protection.
Applying a sealer or finish to your sanded concrete floors not only adds a layer of protection but also enhances the overall appearance and makes maintenance easier. The type of sealer you choose will depend on your desired finish and the level of protection required for your specific application.
Remember to work in a well-ventilated area and wear appropriate safety gear, such as gloves and a respirator, when applying the sealer. Follow all safety precautions outlined by the manufacturer.
By properly applying a sealer or finish, you will extend the lifespan of your sanded concrete floors and enjoy a beautiful and durable surface for years to come.
Read more: How To Stain A Concrete Floor
Conclusion
Sanding your concrete floors is a rewarding and transformative process that can breathe new life into your space. With the right tools, techniques, and a bit of patience, you can achieve a smooth and polished surface that enhances the overall aesthetics of your home. Here’s a recap of the important steps:
- Start by gathering all the essential tools and materials needed for the project.
- Properly prepare the area by cleaning the floor, removing obstacles, and protecting adjacent surfaces.
- Fill cracks and holes with a suitable filling compound to ensure a even surface.
- Choose the right sanding method based on the size of the project, condition of the floor, and desired end result.
- Begin the sanding process, working in sections and gradually progressing from coarser to finer grits.
- Thoroughly clean the surface to remove any dust, debris, or residues left behind from sanding.
- Apply a sealer or finish to protect and enhance the surface, following the manufacturer’s instructions.
Throughout the entire process, make sure to prioritize safety by wearing protective gear and using appropriate dust collection methods. Take your time, be meticulous, and assess your progress as you go to achieve the best possible results.
Remember, sanding concrete floors can be a labor-intensive task, but the end result is well worth the effort. Whether you are refreshing the look of your floors or preparing them for a new treatment, sanding is a crucial step in the process.
By following this comprehensive guide, you now have the knowledge and confidence to successfully sand your concrete floors like a pro. So, roll up your sleeves, prepare your tools, and get ready to transform your concrete floors into a stunning focal point in your home!
Frequently Asked Questions about How To Sand Concrete Floor
Was this page helpful?
At Storables.com, we guarantee accurate and reliable information. Our content, validated by Expert Board Contributors, is crafted following stringent Editorial Policies. We're committed to providing you with well-researched, expert-backed insights for all your informational needs.


0 thoughts on “How To Sand Concrete Floor”