
Articles
How To Vent A Kitchen Sink
Modified: January 7, 2024
Discover the best techniques and tips for properly venting your kitchen sink. Read our informative articles on how to effectively install a kitchen sink vent to keep your space clean and odor-free.
(Many of the links in this article redirect to a specific reviewed product. Your purchase of these products through affiliate links helps to generate commission for Storables.com, at no extra cost. Learn more)
Introduction
Proper ventilation is crucial for maintaining a healthy and functional kitchen space. One area that often requires ventilation is the kitchen sink. Without proper ventilation, odors, moisture, and potentially harmful gases can accumulate in the kitchen, leading to discomfort and potential health hazards.
In this article, we will guide you through the process of venting a kitchen sink. Venting helps to remove unpleasant odors and prevent the buildup of harmful gases, ensuring a clean and fresh kitchen environment. By following these step-by-step instructions, you will be able to install a venting system for your kitchen sink with ease.
Before we begin, it is important to note that venting requirements may vary depending on local building codes and regulations. Always consult with a professional if you are unsure about any aspect of the installation process.
Now, let’s dive into the steps required to successfully vent your kitchen sink.
Key Takeaways:
- Proper ventilation of a kitchen sink is essential for a healthy and pleasant cooking environment. Follow the step-by-step guide to install a venting system and enjoy a fresh kitchen space.
- Ensure a secure and effective venting system by testing the installation and conducting regular maintenance. Proper ventilation eliminates odors and promotes a safer cooking environment.
Read more: How To Vent Sink
Step 1: Gather the Required Tools and Materials
Before starting the installation process, it is essential to collect all the necessary tools and materials. Having everything on hand will help you complete the project smoothly and efficiently. Here are the tools and materials you will need:
- Plumber’s wrench
- Hacksaw or pipe cutter
- Tape measure
- PVC pipe and fittings (size may vary depending on your specific sink setup)
- PVC primer and cement
- Teflon tape
- Vent pipe
- Angle grinder or reciprocating saw (if cutting through walls or floors)
- Safety goggles and gloves
Once you have gathered all the necessary tools and materials, you can proceed to the next step. Make sure to double-check that you have everything before moving forward to avoid any delays during the installation process.
Step 2: Measure the Distance for Venting
Measuring the distance for venting is an important step in ensuring that your kitchen sink will be properly ventilated. The vent pipe needs to be the correct length to effectively remove odors and gases from the sink area. Here’s how you can do it:
- Locate the drainage pipe or the wall where the sink drain connects. This will be the starting point for your venting system.
- Measure the vertical distance from the drainage pipe or wall to the height where the vent needs to exit the roof or the exterior wall. This distance will vary depending on your local building codes, but it is typically around 3-4 feet above the roofline or above ground level.
- Measure the horizontal distance from the starting point to the location where the vent pipe will exit the roof or exterior wall. Ensure that the vent pipe follows a straight path as much as possible, avoiding any sharp bends or horizontal runs longer than 10 feet.
- Add the vertical and horizontal distances together to determine the total length of the vent pipe required for your kitchen sink.
It is crucial to get accurate measurements to ensure that the venting system functions effectively. Double-check your measurements to avoid any errors or miscalculations. Consulting a professional or referring to local building codes can provide further guidance on specific measurement requirements for your area.
Once you have measured the distance for venting, you can move on to the next step: planning the venting route.
Step 3: Plan the Venting Route
Planning the venting route is crucial to ensure the efficient and effective ventilation of your kitchen sink. You need to determine the best path for the vent pipe to follow, taking into consideration any obstacles such as walls or floors. Here’s how you can plan the venting route:
- Start by examining the layout of your kitchen and identifying the most direct path for the vent pipe to reach the intended venting location on the roof or exterior wall.
- Avoid running the vent pipe near any electrical lines, plumbing pipes, or other essential infrastructure to prevent any interference or damage.
- If a direct path is not possible due to structural obstacles, consider using elbows and fittings to navigate around the obstructions.
- Ensure that the vent pipe runs vertically as much as possible, as horizontal runs can accumulate condensation and hinder proper airflow. When running horizontally, limit the length to 10 feet or less.
- Take into account local building codes and regulations regarding the venting route. Some areas may have specific requirements for the distance the vent pipe needs to be from windows, doors, or neighboring buildings.
By carefully planning the venting route, you can ensure that the vent pipe will efficiently remove odors and gases from your kitchen sink, promoting a clean and healthy environment. Once you have determined the best route, you can proceed to the next step: installing the vent pipe.
Step 4: Install the Vent Pipe
Now that you have planned the venting route, it’s time to install the vent pipe for your kitchen sink. Follow these steps to complete the installation:
- Using a hacksaw or pipe cutter, cut the vent pipe to the determined length based on your measurements.
- Apply PVC primer to the ends of the vent pipe and the corresponding fittings.
- Apply PVC cement to the primed surfaces and join the pipe and fittings together, ensuring a secure and tight connection.
- Secure the vent pipe to the wall or floor using pipe straps or hangers. Make sure the pipe is supported adequately along its length to prevent sagging or potential damage.
- If the vent pipe needs to pass through walls or floors, use an angle grinder or reciprocating saw to create a suitable opening. Ensure that the opening is sealed properly to prevent any air leakage or water damage.
- Continue to install the vent pipe following the planned route, making any necessary adjustments or fitting additions as needed.
It’s important to follow the manufacturer’s instructions for the specific type of vent pipe and fittings you are using. This will ensure a proper installation and minimize any potential issues in the future.
Once the vent pipe is installed, you can move on to connecting it to the sink drain in the next step.
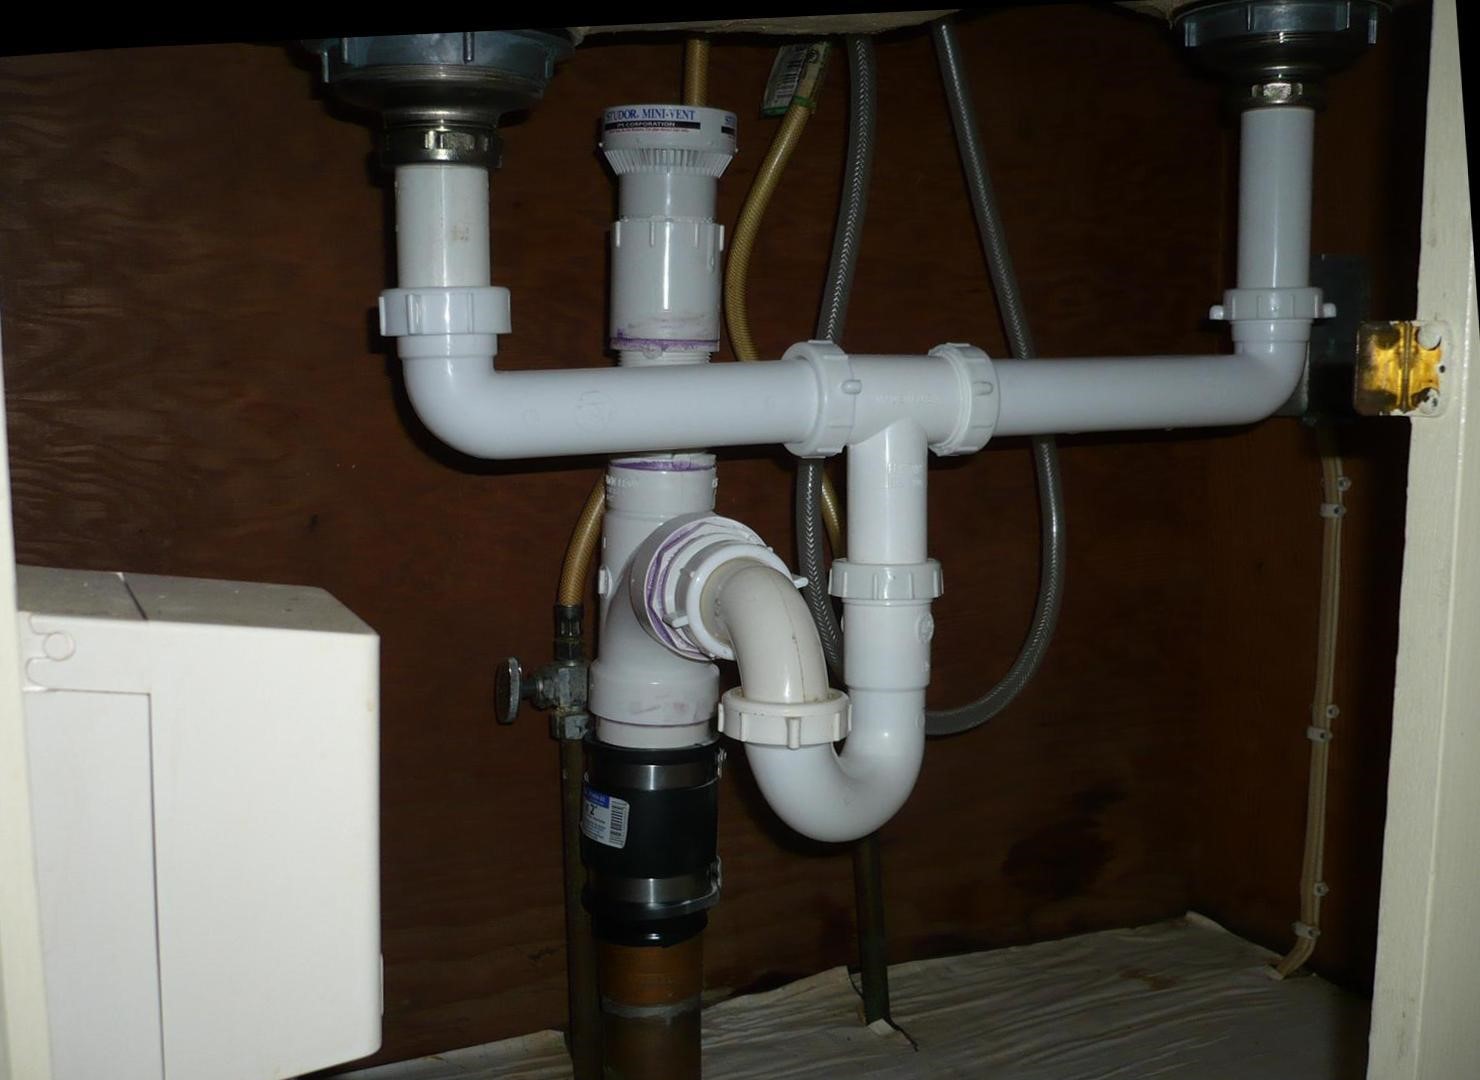
Make sure to use a vent pipe that is at least 1.5 inches in diameter to effectively vent your kitchen sink. This will help prevent clogs and allow for proper drainage.
Read more: How To Vent An Island Sink
Step 5: Connect the Vent Pipe to the Sink Drain
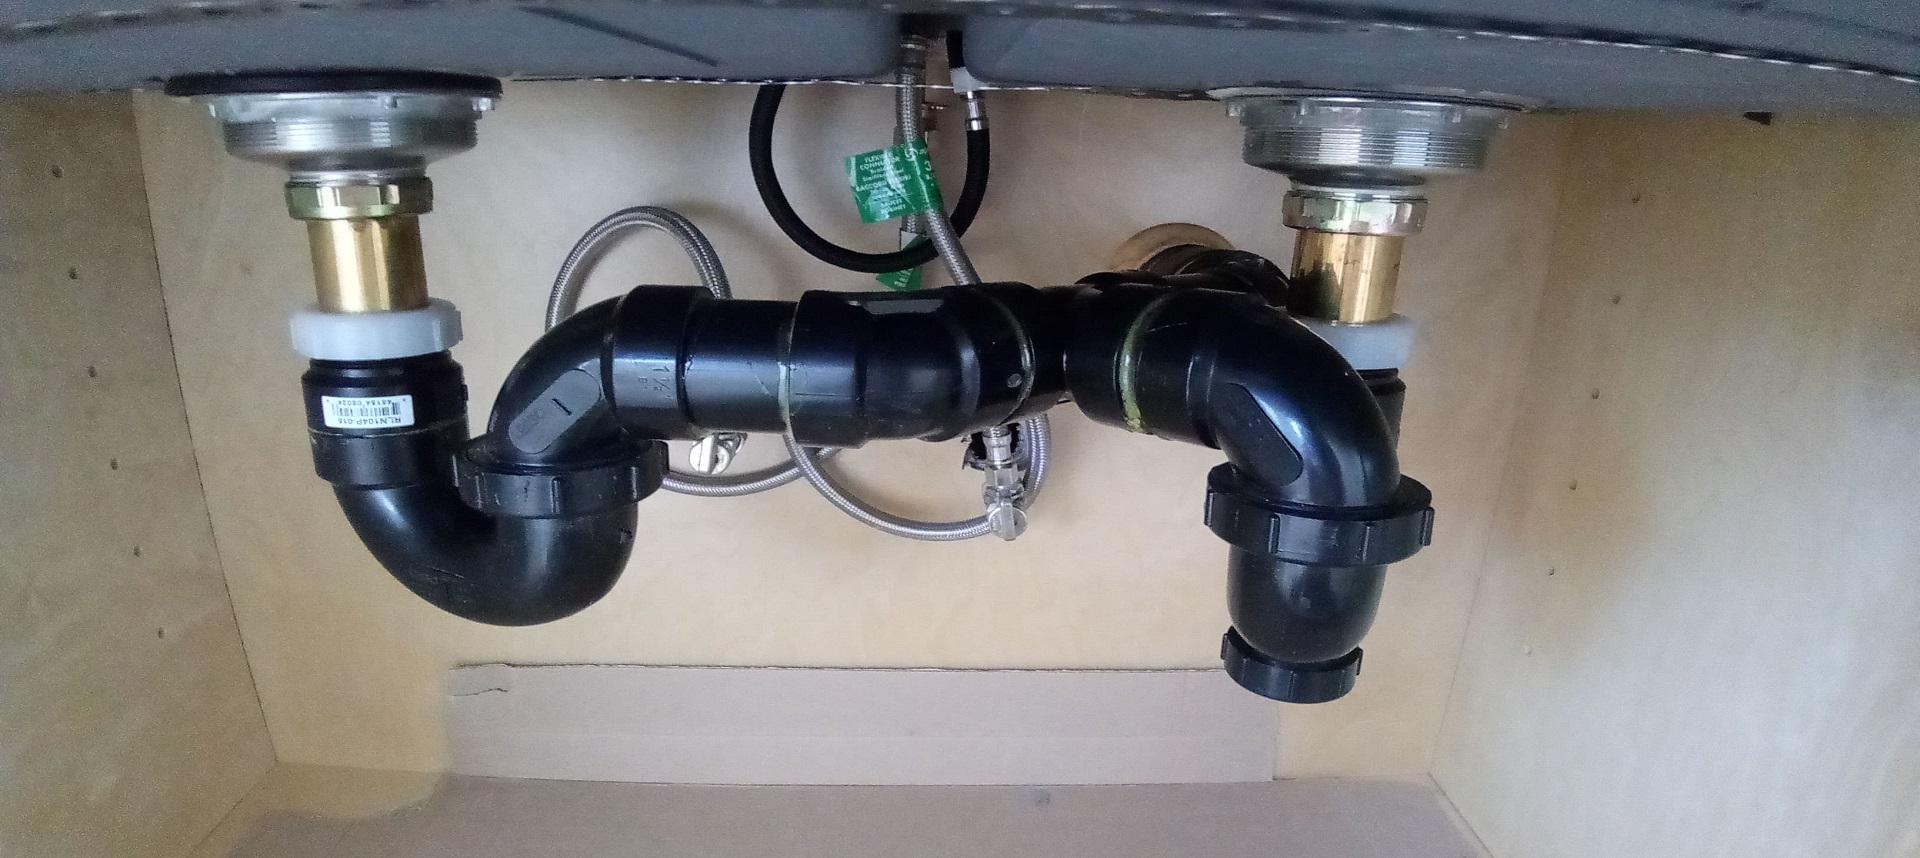
With the vent pipe installed, it’s time to connect it to the sink drain. This connection is crucial for allowing the vent pipe to properly ventilate the kitchen sink. Follow these steps to complete the connection:
- Locate the drain pipe coming down from the sink.
- Measure and cut a section of PVC pipe that will connect the vent pipe to the sink drain. Ensure the length is appropriate for a secure connection.
- Prep the ends of the PVC pipe with PVC primer and cement.
- Attach one end of the prepared PVC pipe to the vent pipe, making sure it fits snugly.
- Attach the other end of the pipe to the sink drain, securing it with a compression fitting or a rubber coupling.
- Tighten any connections to ensure a leak-proof seal.
It’s important to ensure a proper and secure connection between the vent pipe and the sink drain. A secure connection will prevent any leaks or sewer gases from escaping into your kitchen.
Once the vent pipe is connected to the sink drain, you can proceed to the next step: securing and sealing the vent pipe.
Step 6: Secure and Seal the Vent Pipe
Now that the vent pipe is connected to the sink drain, it’s necessary to secure and seal it to ensure proper functionality. Follow these steps to secure and seal the vent pipe:
- Inspect the connections between the vent pipe, sink drain, and any other joints along the route. Ensure that they are tightly secured and properly aligned.
- Wrap Teflon tape around the threaded connections to provide an additional layer of sealing. This will help prevent any air or water leaks.
- If there are any gaps or openings around the pipe, use a waterproof sealant or caulk to seal them. This will further prevent any air or water from escaping or entering the venting system.
- Ensure that all supporting brackets or straps holding the vent pipe are secure and properly positioned. This will help prevent any sagging or movement of the pipe.
- Test the stability of the vent pipe by gently shaking it. If there is any noticeable movement, reinforce the support brackets or straps to ensure a stable and secure installation.
Securing and sealing the vent pipe is essential for maintaining the integrity of the venting system. It helps to prevent any air or water leaks and ensures that the system functions optimally.
After completing this step, you’re almost done! The final step is to test the venting system to ensure its effectiveness.
Step 7: Test the Venting System
Once you have completed the installation and secured the vent pipe, it’s essential to test the venting system to ensure its proper functioning. Follow these steps to test the system:
- Turn on the kitchen sink faucet and let the water run for a few minutes.
- Observe the flow of water in the sink drain. If the venting system is working correctly, the water should drain smoothly and quickly without any gurgling sounds or fluctuations in water levels.
- If you notice any signs of poor drainage, such as slow draining or gurgling, it may indicate an issue with the venting system. In such cases, it’s recommended to consult a professional plumber to identify and resolve the problem.
- Another way to test the venting system is to introduce smoke or a smoke test product into the system. This will help you visually inspect the airflow and identify any potential leaks or obstructions.
- If you detect any leaks or issues during the testing phase, make the necessary adjustments or repairs to ensure a properly functioning venting system.
Regular maintenance is important to keep the venting system in good condition. Ensure that the vent pipe remains clear of any debris or obstructions that could inhibit its performance. Additionally, periodically inspect the vent pipe and connections for any signs of damage or wear.
Congratulations! By completing these steps and testing the venting system, you have successfully installed a vent pipe for your kitchen sink. Enjoy the benefits of a properly ventilated kitchen space!
Conclusion
In conclusion, properly venting a kitchen sink is crucial for maintaining a clean and healthy kitchen environment. By following the step-by-step instructions outlined in this article, you can successfully install a venting system for your kitchen sink.
Starting with gathering the necessary tools and materials, measuring the distance for venting, and planning the route, you can ensure an efficient and effective ventilation system. Installing the vent pipe, connecting it to the sink drain, and securing and sealing the pipe are essential steps to guarantee a proper installation.
Remember to test the venting system by running water in the sink and inspecting the drainage flow. If any issues arise, seek professional assistance to resolve them and ensure optimal performance.
Proper ventilation not only eliminates odors and moisture but also prevents the buildup of harmful gases, creating a safer and more pleasant cooking environment. Regular maintenance and periodic inspections are essential to keep the system running smoothly.
By following the guidelines provided in this article and adhering to local building codes and regulations, you can successfully vent your kitchen sink and enjoy the benefits of improved air quality and functionality in your kitchen.
So go ahead and take the necessary steps to vent your kitchen sink. Enjoy a clean and fresh kitchen space as you cook, wash dishes, and carry out other daily activities in your kitchen!
Frequently Asked Questions about How To Vent A Kitchen Sink
Was this page helpful?
At Storables.com, we guarantee accurate and reliable information. Our content, validated by Expert Board Contributors, is crafted following stringent Editorial Policies. We're committed to providing you with well-researched, expert-backed insights for all your informational needs.


0 thoughts on “How To Vent A Kitchen Sink”