Home>Construction & Tools>Building Materials>How To Install A Sliding Door Into A Brick Wall

Building Materials
How To Install A Sliding Door Into A Brick Wall
Modified: October 30, 2024
Learn how to install a sliding door into a brick wall with the right building materials. Our step-by-step guide makes it easy!
(Many of the links in this article redirect to a specific reviewed product. Your purchase of these products through affiliate links helps to generate commission for Storables.com, at no extra cost. Learn more)
Introduction
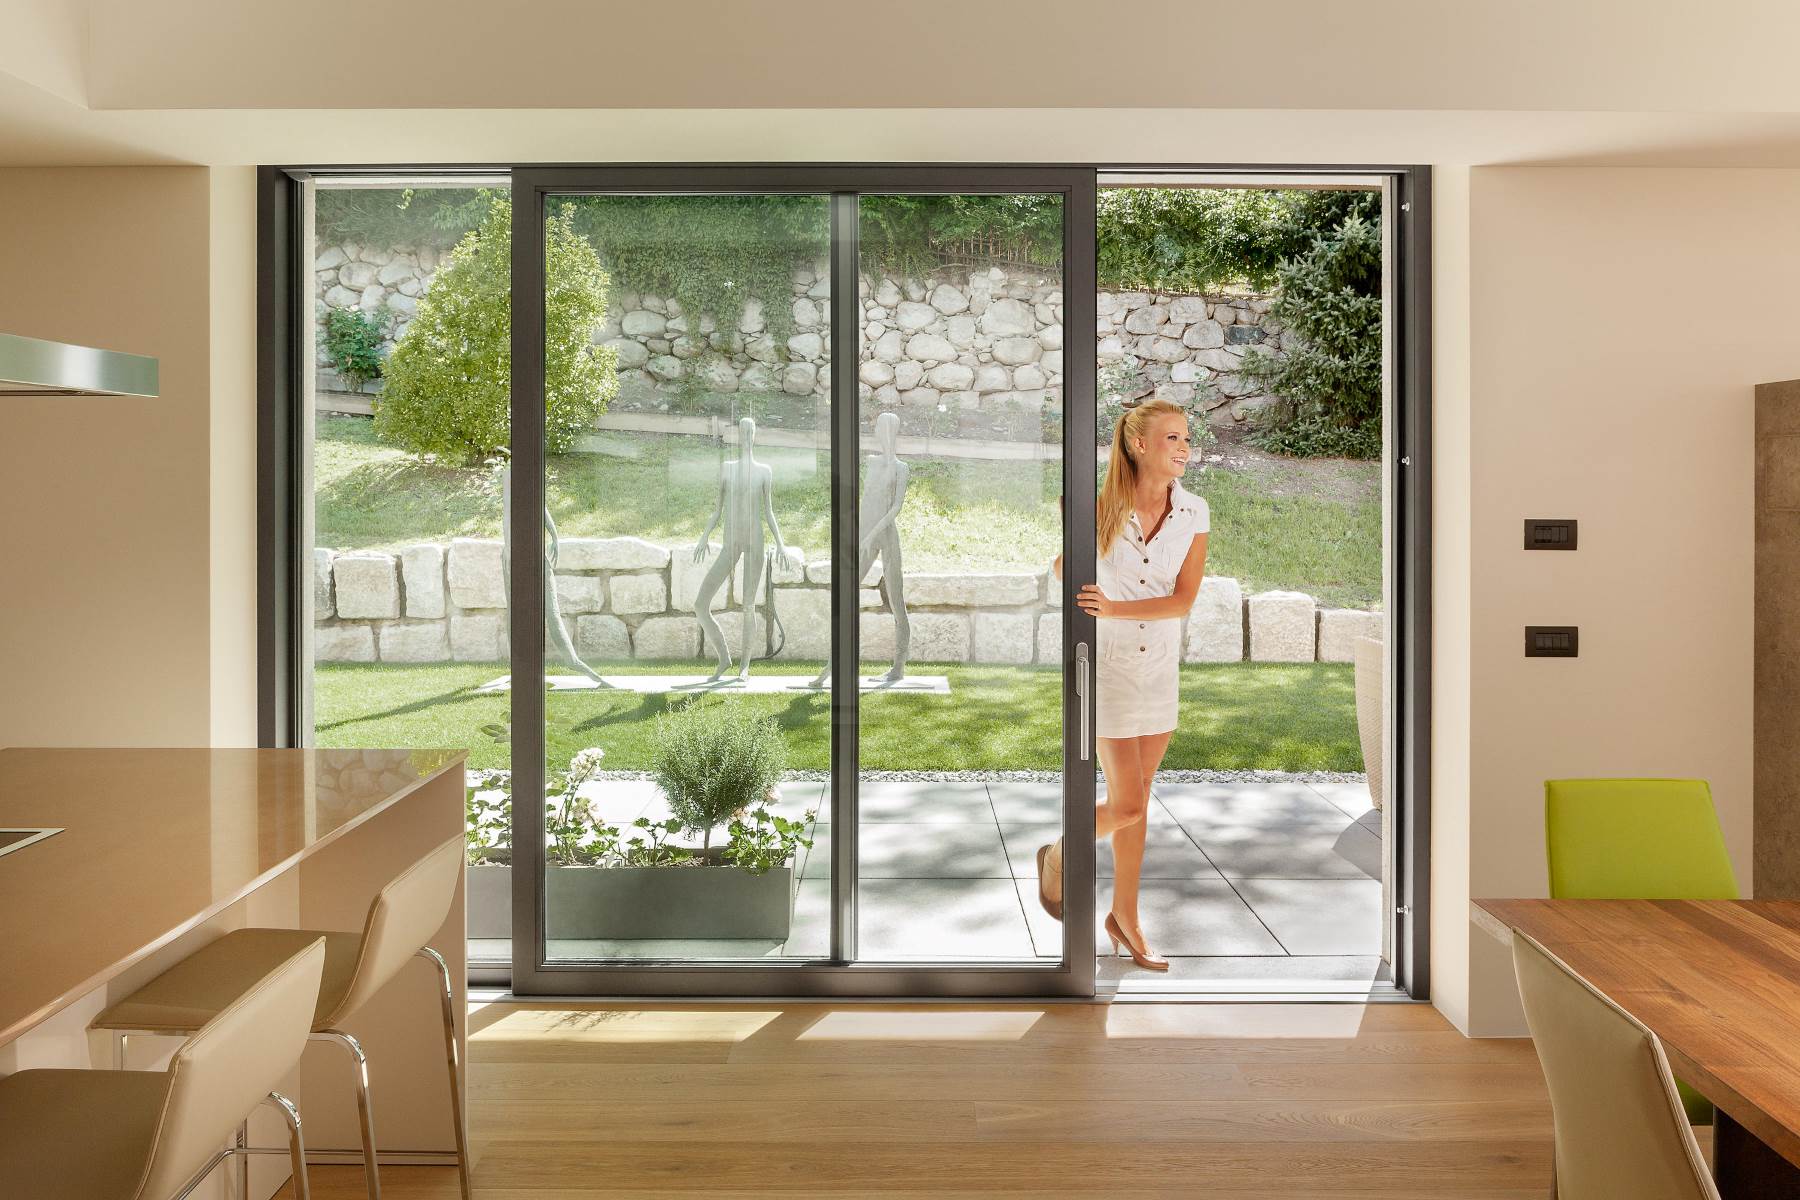
Welcome to the world of home improvement, where the possibilities are as endless as your imagination. If you"re considering adding a touch of modern elegance to your living space, installing a sliding door into a brick wall can be a game-changer. Not only does it create a seamless transition between indoor and outdoor spaces, but it also maximizes natural light and adds a contemporary flair to your home.
In this comprehensive guide, we"ll walk you through the step-by-step process of installing a sliding door into a brick wall. Whether you"re a seasoned DIY enthusiast or a first-time home renovator, this guide will equip you with the knowledge and confidence to tackle this project with ease.
So, roll up your sleeves, gather your tools, and let"s embark on this exciting journey of transforming your living space with a stunning sliding door installation.
Key Takeaways:
- Transform Your Space
Installing a sliding door into a brick wall adds modern elegance, maximizes natural light, and seamlessly connects indoor and outdoor spaces, transforming your living space into a stylish and welcoming retreat. - DIY Confidence
By following this guide, you’ll gain the skills and knowledge to tackle challenging home improvement projects with confidence and creativity, creating a visually stunning and functional living environment.
Tools and Materials Needed
Before diving into the installation process, it’s essential to gather the necessary tools and materials to ensure a smooth and efficient workflow. Here’s a comprehensive list of what you’ll need:
Tools:
- Measuring tape
- Level
- Hammer drill
- Masonry drill bits
- Screwdriver
- Adjustable wrench
- Safety goggles
- Work gloves
- Protective mask
- Utility knife
- Chisel
- Caulking gun
- Power saw (if trimming the door or frame is necessary)
Materials:
- Sliding door kit (including the door panels, frame, and hardware)
- Pressure-treated lumber for framing
- Masonry screws and anchors
- Shims
- Expanding foam insulation
- Silicone caulk
- Exterior-grade sealant
- Paint or stain (if finishing the door frame)
By ensuring you have the right tools and materials on hand, you’ll be well-prepared to tackle each step of the installation process with confidence and precision.
Preparing the Brick Wall
Before diving into the installation process, it’s crucial to prepare the brick wall to ensure a solid foundation for the sliding door. Here’s a step-by-step guide to preparing the brick wall:
Read more: How To Install Sliding Door Lock
1. Measure and Mark:
Begin by measuring the dimensions of the sliding door frame. Mark the outline of the frame on the brick wall using a pencil and a level to ensure accuracy.
2. Clear the Area:
Remove any obstructions, such as plants, debris, or furniture, from the area where the sliding door will be installed. This will provide ample space to work and maneuver during the installation process.
3. Protective Gear:
Prior to any drilling or demolition work, ensure that you are equipped with safety goggles, work gloves, and a protective mask to safeguard against dust and debris.
4. Drill Pilot Holes:
Using a hammer drill and masonry drill bits, carefully drill pilot holes at the corners of the marked outline. This will provide guidance for cutting into the brick wall.
Read more: How To Install A Sliding Glass Door
5. Cut the Opening:
With the pilot holes in place, use a power saw equipped with a masonry blade to carefully cut along the marked outline. Exercise caution and patience during this step to achieve clean and precise cuts.
6. Remove Excess Brick:
Once the outline is cut, use a chisel and hammer to remove the excess brick and create a smooth, even opening for the door frame. Take your time to ensure the edges are clean and free from debris.
7. Clean and Inspect:
Thoroughly clean the newly cut opening, removing any dust, loose mortar, or debris. Inspect the area to ensure it is structurally sound and ready to receive the door frame.
By meticulously preparing the brick wall, you’ll set the stage for a seamless and secure installation of the sliding door, laying the groundwork for a stunning transformation of your living space.
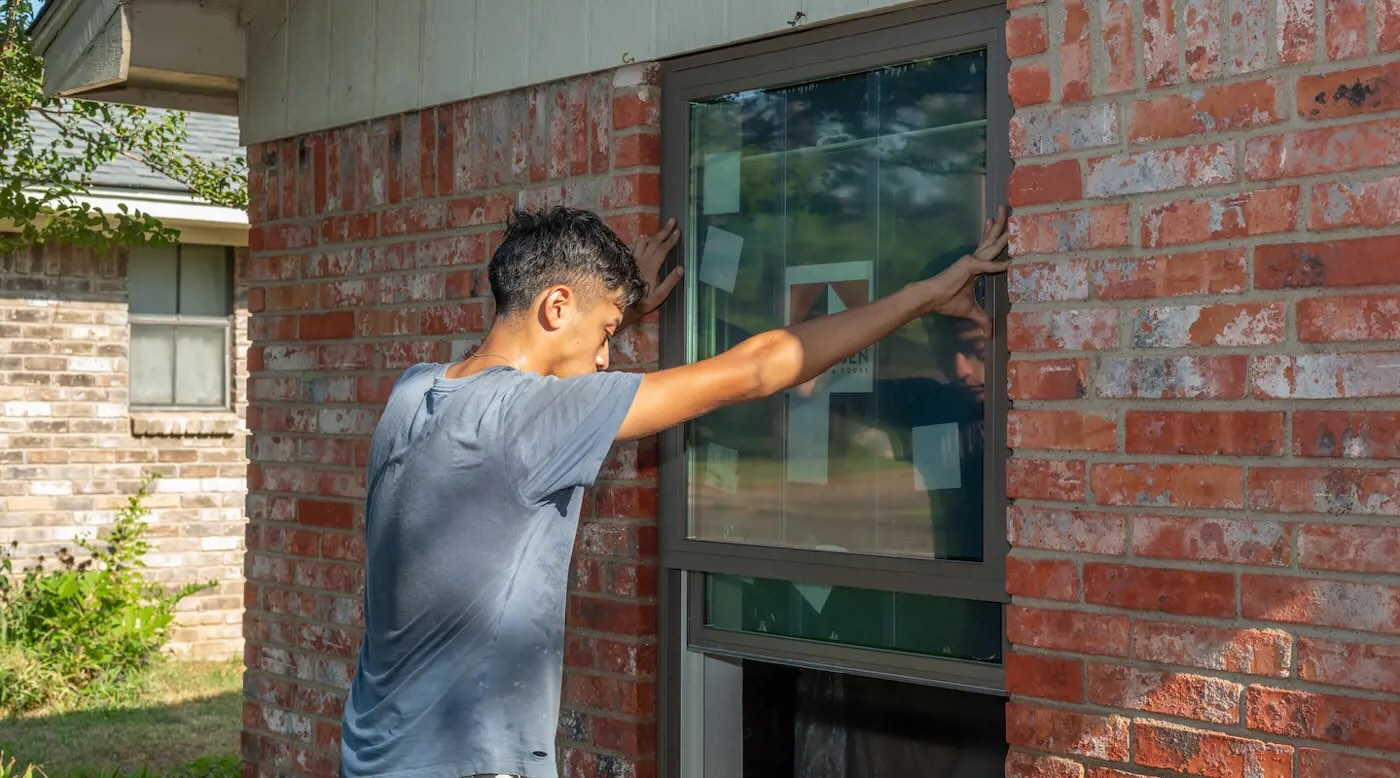
Installing the Door Frame
With the brick wall prepared, it’s time to proceed with installing the door frame. This pivotal step sets the stage for seamlessly integrating the sliding door into the brick wall. Follow these detailed steps to ensure a sturdy and precise installation:
Read more: How To Install A Sliding Closet Door
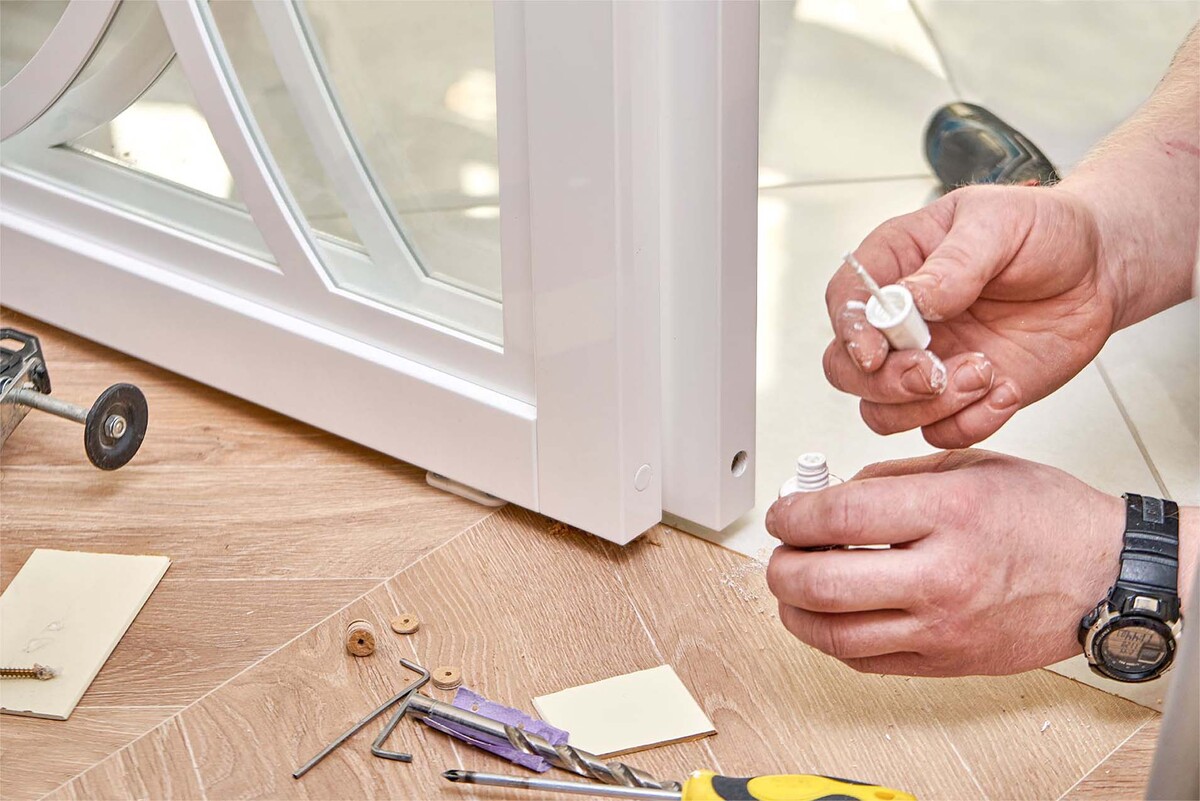
1. Prepare the Frame Components:
Begin by assembling the door frame components according to the manufacturer’s instructions. This typically involves connecting the frame sections and ensuring they are square and level.
2. Position the Frame:
With the assistance of a partner, position the assembled door frame into the prepared opening in the brick wall. Ensure that the frame is plumb, level, and fits snugly within the opening.
3. Secure the Frame:
Using shims to provide additional support, secure the door frame in place by driving masonry screws through the frame and into the brick wall. Ensure that the frame remains level and plumb during this process.
4. Insulate the Gaps:
Apply expanding foam insulation around the perimeter of the door frame to fill any gaps between the frame and the brick wall. This will enhance energy efficiency and provide added insulation.
Read more: How To Install Sliding Patio Doors
5. Seal the Joints:
Using silicone caulk, seal the joints between the door frame and the brick wall to prevent air or moisture infiltration. This step is crucial for maintaining the integrity of the installation and protecting against external elements.
6. Trim and Finish (if necessary):
If the door frame requires trimming to fit the opening precisely, use a power saw to make any necessary adjustments. Once the frame is perfectly fitted, apply exterior-grade sealant and finish the frame according to your aesthetic preferences.
By meticulously following these steps, you’ll successfully install the door frame, laying the groundwork for seamlessly integrating the sliding door into the brick wall. This marks a significant milestone in the transformation of your living space, bringing you one step closer to enjoying the benefits of a stunning sliding door installation.
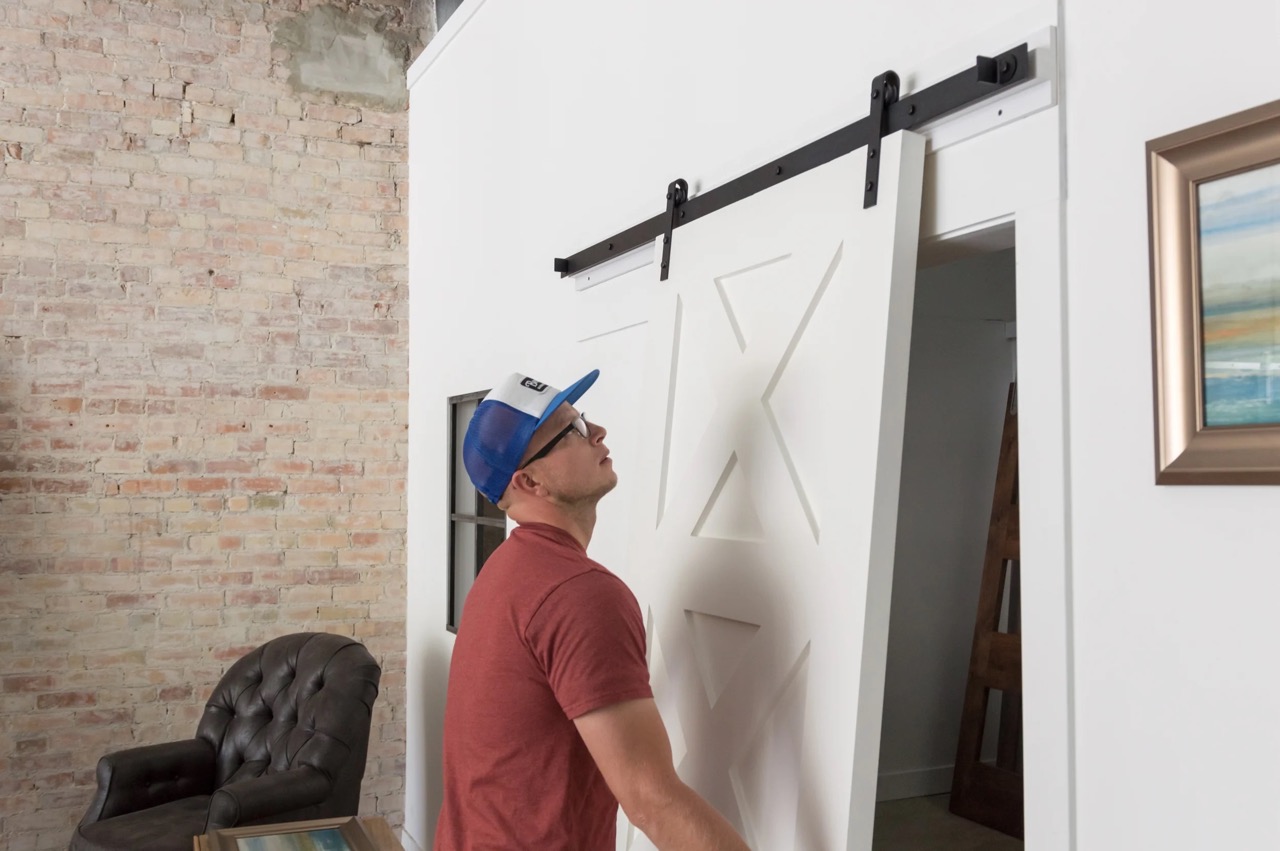
Mounting the Sliding Door
With the door frame securely in place, it’s time to proceed with mounting the sliding door panels. This transformative step will bring the elegance and functionality of a sliding door to your living space. Follow these detailed steps to ensure a smooth and precise mounting process:
1. Prepare the Door Panels:
Begin by preparing the sliding door panels according to the manufacturer’s instructions. This typically involves attaching the rollers and handles to the panels, ensuring they are securely in place and functioning smoothly.
Read more: How To Install A Pella Sliding Patio Door
2. Install the Bottom Track:
Position the bottom track of the sliding door along the threshold of the door frame. Ensure that it is level and securely anchored to the floor using appropriate fasteners, such as screws or anchors, depending on the flooring material.
3. Hang the Door Panels:
With the assistance of a partner, carefully lift and hang the sliding door panels onto the top track within the door frame. Ensure that the rollers are properly aligned and glide smoothly along the track.
4. Adjust and Test:
Once the door panels are in place, adjust the rollers as needed to ensure that the doors slide open and close effortlessly. Test the functionality of the sliding doors to confirm that they operate smoothly and securely within the frame.
5. Secure the Door Panels:
Once the door panels are functioning perfectly, secure them in place by fastening any provided anti-lift devices to prevent the doors from being lifted off the track. This is a crucial safety feature that adds stability to the installation.
Read more: How To Install Fireplace Doors On Brick
6. Apply Finishing Touches:
Inspect the door panels and surrounding areas for any gaps or exposed hardware. Apply silicone caulk or weather-stripping as needed to seal any gaps and enhance the energy efficiency of the installation.
By meticulously following these steps, you’ll successfully mount the sliding door panels, bringing the transformative beauty and functionality of a sliding door to your living space. This marks a significant milestone in the installation process, bringing you one step closer to enjoying the seamless integration of indoor and outdoor spaces.
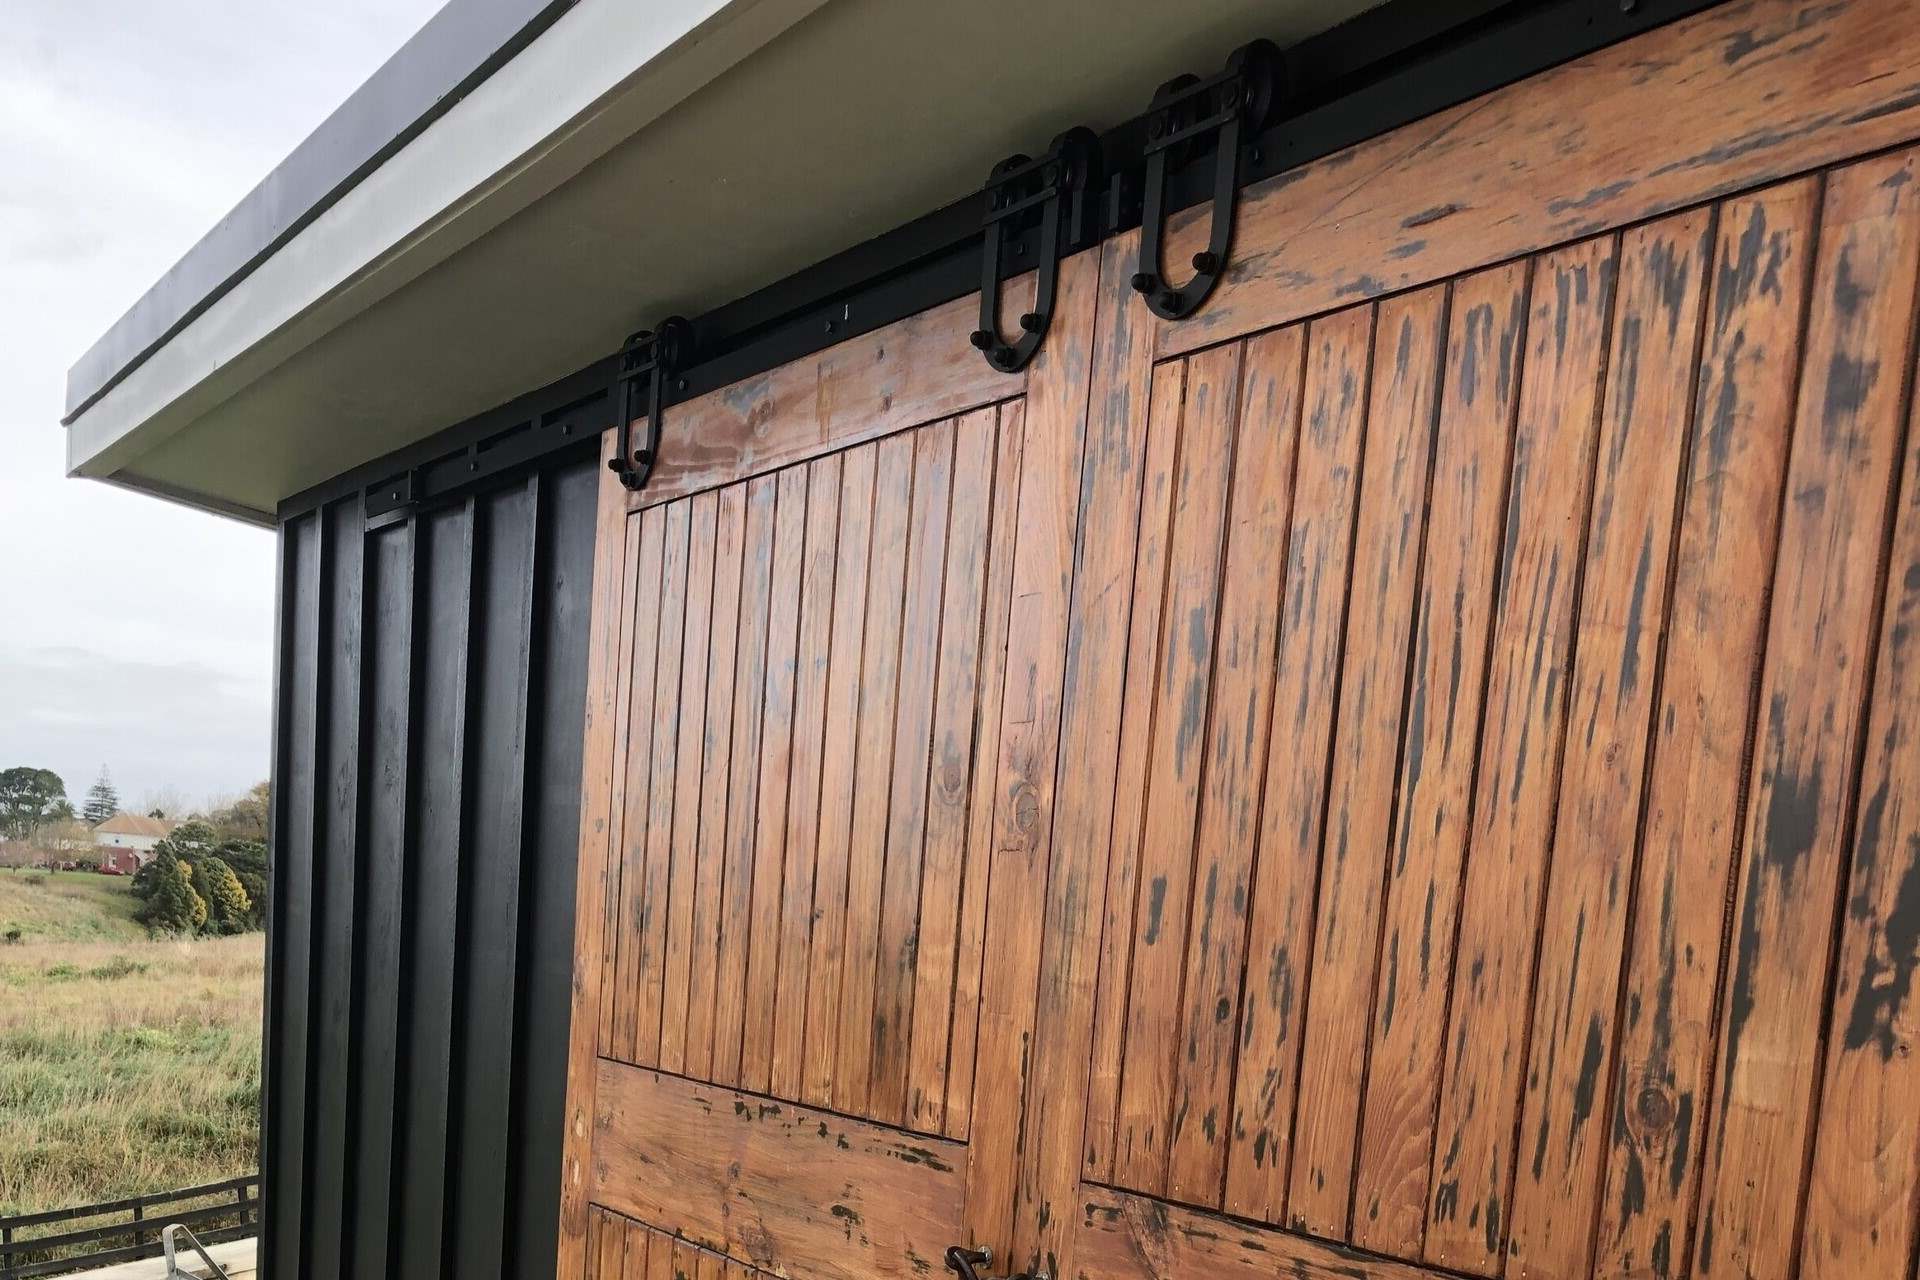
Finishing Touches
As you approach the final stages of installing a sliding door into a brick wall, it’s essential to focus on the finishing touches to ensure a polished and seamless integration. These details not only enhance the visual appeal of the installation but also contribute to its functionality and longevity. Here’s a comprehensive guide to the finishing touches:
1. Weatherproofing:
Apply exterior-grade sealant and weather-stripping around the perimeter of the door frame to create a weatherproof barrier. This step is crucial for preventing air and moisture infiltration, enhancing energy efficiency, and protecting the interior of your home.
2. Trim and Casing:
If desired, add trim and casing around the door frame to create a polished and cohesive look. This finishing touch adds a touch of elegance and frames the sliding door, elevating its visual impact within your living space.
3. Hardware and Accessories:
Install any additional hardware and accessories, such as handles, locks, and privacy features, to complete the functionality of the sliding door. Ensure that all hardware is securely fastened and operates smoothly.
4. Exterior Finishing:
If the sliding door leads to an outdoor space, consider the exterior finishing touches, such as adding a threshold, exterior trim, and appropriate sealing to protect against the elements and create a seamless transition between indoor and outdoor areas.
5. Aesthetic Enhancements:
Consider any aesthetic enhancements, such as painting or staining the door frame and surrounding areas to complement your interior or exterior design scheme. This step adds a personalized touch and enhances the overall visual appeal of the installation.
6. Final Inspection:
Thoroughly inspect the entire installation, ensuring that all components are securely in place, the doors operate smoothly, and the surrounding areas are clean and free from debris. Address any final details to ensure a flawless finish.
By meticulously attending to these finishing touches, you’ll elevate the sliding door installation to a new level of sophistication and functionality. Each detail contributes to the overall impact and longevity of the installation, creating a seamless and visually stunning addition to your living space.
Read more: How To Install Faux Brick Wall Panels
Conclusion
Congratulations on successfully completing the installation of a sliding door into a brick wall! This transformative project has not only added a touch of modern elegance to your living space but has also enhanced the functionality and visual appeal of your home. As you stand back and admire the seamless integration of indoor and outdoor spaces, it’s evident that the effort and attention to detail have truly paid off.
By following the step-by-step guide provided, you’ve not only acquired the skills and knowledge to tackle a challenging home improvement project but have also gained a deeper appreciation for the craftsmanship and artistry involved in such installations. The satisfaction of witnessing the tangible results of your hard work is a testament to your dedication and passion for creating a beautiful and functional living environment.
As you enjoy the benefits of your newly installed sliding door, take pride in the fact that you’ve transformed your living space into a welcoming and stylish retreat. Whether it’s the seamless transition between indoor and outdoor areas, the influx of natural light, or the enhanced aesthetic appeal, the sliding door serves as a focal point that enriches your daily living experience.
Remember, the successful completion of this project is a testament to your resourcefulness, determination, and willingness to embark on new challenges. As you continue to explore the world of home improvement, may this experience inspire you to pursue future projects with confidence and creativity.
With the installation of a sliding door into a brick wall, you’ve not only enhanced the value of your home but have also created a space that reflects your unique style and vision. Here’s to many more fulfilling home improvement endeavors and the enduring enjoyment of your beautifully transformed living space.
Frequently Asked Questions about How To Install A Sliding Door Into A Brick Wall
Was this page helpful?
At Storables.com, we guarantee accurate and reliable information. Our content, validated by Expert Board Contributors, is crafted following stringent Editorial Policies. We're committed to providing you with well-researched, expert-backed insights for all your informational needs.
0 thoughts on “How To Install A Sliding Door Into A Brick Wall”