Home>Construction & Tools>Building Materials>How To Install Sawtooth Brick Edging
Building Materials
How To Install Sawtooth Brick Edging
Modified: October 18, 2024
Learn how to install sawtooth brick edging with our comprehensive guide. Find the best building materials and step-by-step instructions for a professional finish.
(Many of the links in this article redirect to a specific reviewed product. Your purchase of these products through affiliate links helps to generate commission for Storables.com, at no extra cost. Learn more)
Introduction
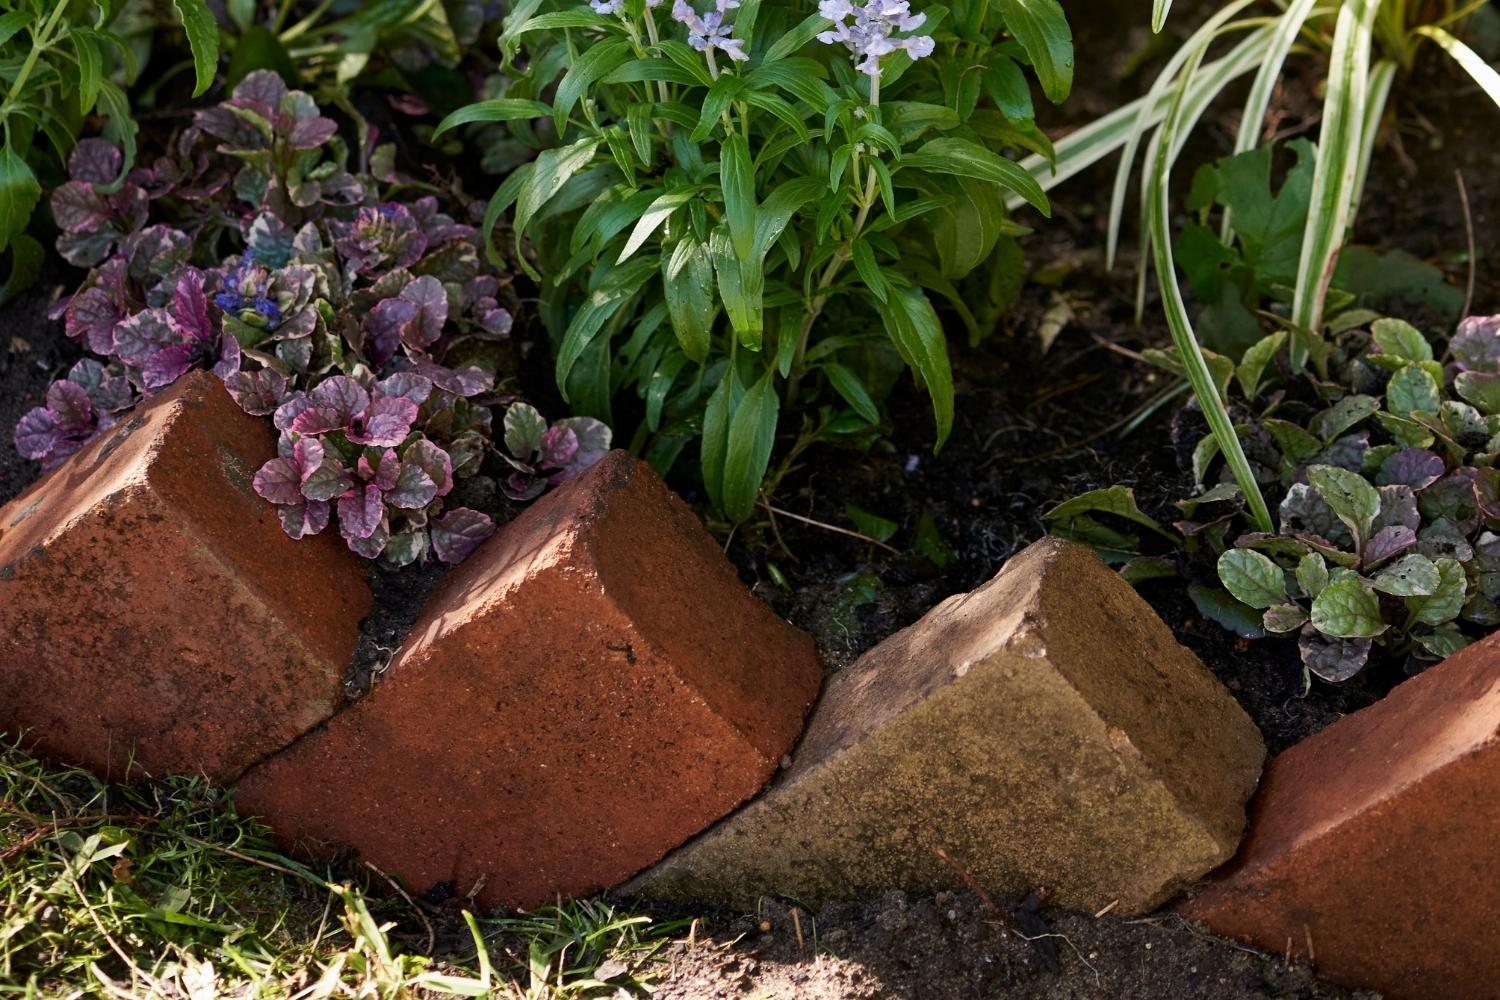
Welcome to the ultimate guide on how to install sawtooth brick edging. Whether you’re looking to enhance the aesthetic appeal of your garden, create a defined border for your flower beds, or add a decorative touch to your landscape, sawtooth brick edging is a versatile and visually appealing option. In this comprehensive guide, we’ll walk you through the step-by-step process of installing sawtooth brick edging, providing you with the knowledge and confidence to tackle this project with ease.
Creating a neatly defined edge with sawtooth bricks not only adds a polished look to your outdoor space but also helps to prevent grass and weeds from encroaching into your flower beds or walkways. With the right tools, materials, and a clear understanding of the installation process, you can achieve professional-looking results that will elevate the overall appearance of your landscape.
Whether you’re a seasoned DIY enthusiast or a novice looking to embark on your first landscaping project, this guide is designed to equip you with the essential knowledge and practical tips to successfully install sawtooth brick edging. So, roll up your sleeves, gather your tools, and let’s dive into the world of sawtooth brick edging installation!
Key Takeaways:
- Installing sawtooth brick edging requires tools like a shovel, level, and masonry saw, and materials such as gravel, concrete mix, and landscape fabric. Proper preparation and precise placement are key to achieving a professional-looking result.
- After installing the sawtooth brick edging, filling gaps with sand, compacting the bricks, and applying a sealant (optional) are essential finishing touches. This enhances the edging’s stability, longevity, and visual appeal, transforming the outdoor space.
Read more: How To Set Brick Edging
Tools and Materials Needed
Before you begin the installation process, it’s essential to gather all the necessary tools and materials to ensure a smooth and efficient workflow. Here’s a comprehensive list of what you’ll need:
Tools:
- Shovel
- Tape measure
- Level
- Rubber mallet
- String and stakes
- Masonry saw or chisel
- Work gloves
- Safety glasses
- Wheelbarrow
- Trowel
- Hand tamper
Materials:
- Sawtooth bricks
- Gravel
- Concrete mix
- Edge restraint
- Landscape fabric
- Marking paint
- Sand
- Water
Having these tools and materials on hand will streamline the installation process and ensure that you’re well-equipped to tackle each step effectively. Additionally, it’s important to prioritize safety by wearing protective gear, such as safety glasses and work gloves, especially when working with masonry tools and materials.
Now that you have your tools and materials ready, it’s time to prepare the area for the installation of sawtooth brick edging. Proper preparation is key to achieving a durable and visually appealing end result.
Preparing the Area
Before diving into the installation of sawtooth brick edging, it’s crucial to prepare the area where the edging will be installed. Follow these steps to ensure a solid foundation for your sawtooth brick edging:
Read more: How To Lay Bricks For Garden Edging
Step 1: Marking the Layout
Begin by marking the desired layout of the edging using marking paint or a string and stakes. This will provide a clear visual guide for the installation and help you visualize the final placement of the bricks.
Step 2: Excavation
Use a shovel to excavate the marked area to a depth that accommodates the sawtooth bricks, edge restraint, and a base of gravel and concrete. The depth will depend on the size and type of the bricks you are using, so be sure to refer to the manufacturer’s recommendations.
Step 3: Adding Gravel
Once the area is excavated, add a layer of gravel to the bottom of the trench. The gravel will provide drainage and stability for the edging, ensuring that it remains level and secure over time.
Step 4: Compact the Gravel
Use a hand tamper to compact the gravel firmly. This step is crucial for creating a solid and stable base for the edging, preventing shifting and settling over time.
Read more: How To Install Landscaping Edging
Step 5: Install Edge Restraint
Place the edge restraint along the excavated area, following the marked layout. The edge restraint will hold the sawtooth bricks in place and prevent them from shifting outward, maintaining a clean and defined edge.
Step 6: Add Landscape Fabric
Lay landscape fabric along the excavated area inside the edge restraint. This will help prevent weed growth and maintain the integrity of the base over time.
By meticulously preparing the area for the installation of sawtooth brick edging, you’ll establish a sturdy foundation that sets the stage for the next steps in the process. With the area prepared, you’re now ready to move on to the installation of the base for the edging.
Installing the Base
With the area prepared for the installation of sawtooth brick edging, the next crucial step is to create a solid and level base. The base provides essential support for the bricks, ensuring that they remain stable and evenly positioned. Follow these steps to install the base for your sawtooth brick edging:
Step 1: Mixing Concrete
Prepare the concrete mix according to the manufacturer’s instructions. The concrete will serve as a durable foundation for the bricks, providing stability and preventing shifting over time.
Read more: How To Install Roof Drip Edge
Step 2: Pouring Concrete
Carefully pour the mixed concrete into the excavated area, ensuring an even distribution along the entire length of the trench. Use a trowel to level the surface of the concrete, creating a smooth and uniform base for the bricks.
Step 3: Adding Sand
Once the concrete is in place, add a layer of sand on top. The sand will help to further level the surface and provide a cushioning layer for the sawtooth bricks, allowing for minor adjustments during the placement process.
Step 4: Compact the Base
Use a hand tamper to compact the sand and concrete base firmly. This step is essential for ensuring a stable and level foundation for the sawtooth brick edging, minimizing the risk of uneven settling or movement.
Step 5: Check for Level
Use a level to verify that the base is even and level along the entire length of the trench. Making adjustments at this stage will help guarantee a professional-looking end result.
By diligently following these steps to install a sturdy and level base, you’ll establish a solid foundation for the sawtooth brick edging. With the base in place, you’re now ready to proceed with the exciting phase of placing the sawtooth bricks to create the distinctive edge for your landscape. Let’s dive into the next steps of the installation process.
Read more: How To Install Drip Edge On A Shed
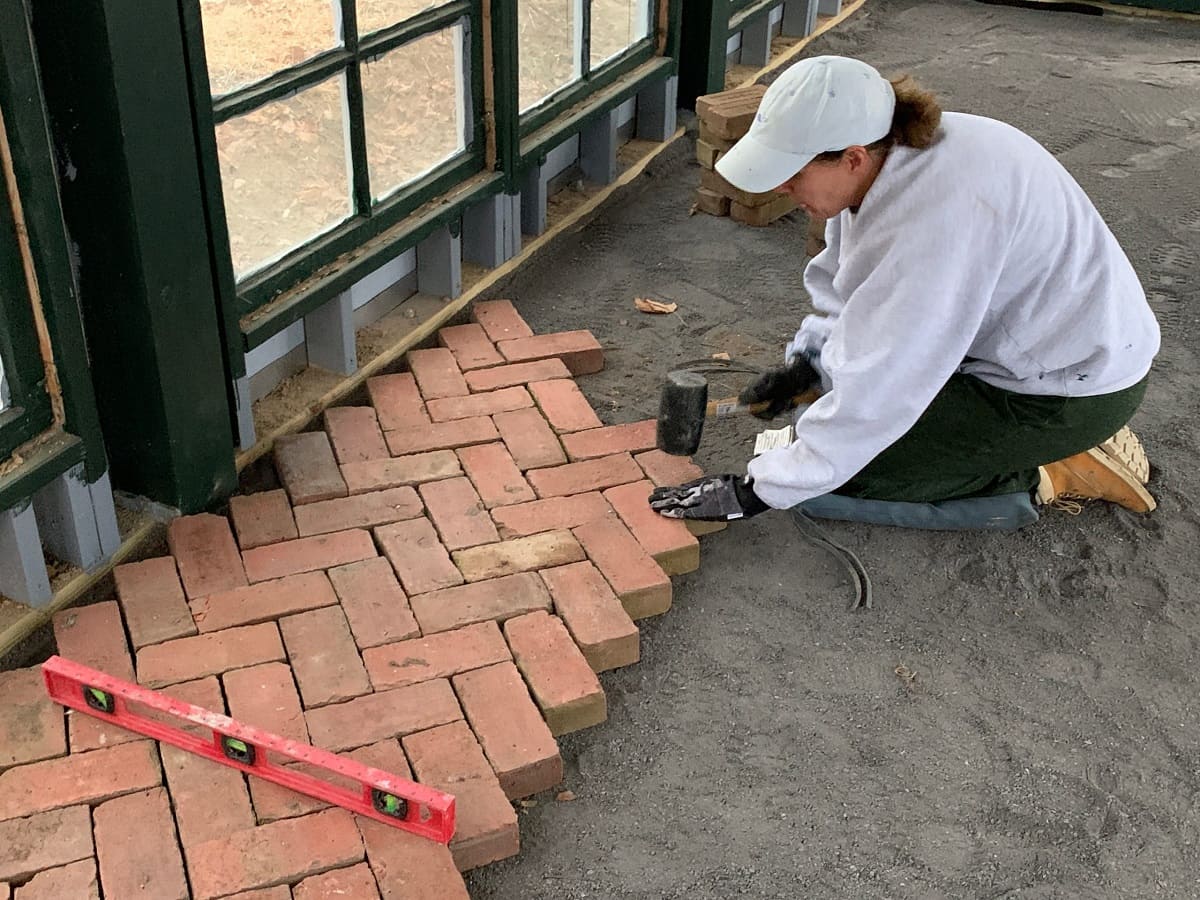
Placing the Bricks
As you embark on the installation of sawtooth brick edging, the placement of the bricks is a pivotal step that contributes to the overall visual impact and durability of the edging. Follow these steps to expertly position the sawtooth bricks and create a stunning border for your landscape:
Step 1: Positioning the First Brick
Begin by placing the first sawtooth brick at one end of the prepared trench, ensuring that it is snug against the edge restraint. Take care to position it level and aligned with the layout markings, as this will set the foundation for the entire edging.
Step 2: Placing Subsequent Bricks
Lay the remaining sawtooth bricks end to end, aligning them tightly to create a seamless and uniform border. Use a level to ensure that each brick is positioned evenly and maintain a consistent height along the entire length of the edging.
Step 3: Making Adjustments
If necessary, use a rubber mallet to gently tap the bricks into place, making minor adjustments to ensure a precise fit and level alignment. This step is crucial for achieving a professional finish and sturdy construction.
Read more: How To Install Gutters With Drip Edge
Step 4: Cutting Bricks
When reaching the end of the trench or encountering obstacles, such as curves or corners, use a masonry saw or chisel to carefully cut the sawtooth bricks to fit the desired shape and dimensions. Precision in cutting will contribute to a polished and tailored appearance.
Step 5: Verify Alignment and Level
Periodically check the alignment and level of the bricks as you progress, making any necessary adjustments to maintain a consistent and visually appealing border. Attention to detail during this phase will ensure a professional and enduring result.
By methodically placing the sawtooth bricks and paying close attention to alignment and level, you’ll create a visually striking and structurally sound edging for your landscape. With the bricks in place, it’s time to add the finishing touches that will elevate the overall appearance and longevity of the sawtooth brick edging.
Finishing Touches
As you near the completion of the sawtooth brick edging installation, adding the finishing touches will enhance both the visual appeal and longevity of the border. Follow these essential steps to refine and fortify the edging, ensuring a professional and enduring result:
Step 1: Filling Gaps with Sand
Once the sawtooth bricks are securely in place, fill any gaps between the bricks with sand. This will help stabilize the bricks and prevent shifting, while also providing a cohesive and finished appearance to the edging.
Read more: How To Install Belgian Block Driveway Edging
Step 2: Compact the Bricks
Use a hand tamper to gently compact the bricks and sand, ensuring a solid and uniform surface. This step will further secure the bricks in place and create a stable border for your landscape.
Step 3: Watering and Settling
Thoroughly water the edging to help settle the sand and promote cohesion between the bricks. This will aid in the overall stability and longevity of the installation.
Step 4: Clean Up
Remove any excess sand or debris from the surface of the bricks using a broom or brush. A clean and tidy finish will showcase the meticulous craftsmanship of the sawtooth brick edging.
Step 5: Apply a Sealant (Optional)
Consider applying a sealant to the sawtooth brick edging to enhance its resistance to weathering and moisture, as well as to intensify the color of the bricks. Be sure to select a sealant specifically designed for use with masonry materials.
By attending to these finishing touches, you’ll not only elevate the aesthetic appeal of the sawtooth brick edging but also fortify its structural integrity, ensuring a long-lasting and professional result. With the completion of these steps, stand back and admire the transformation that the sawtooth brick edging has brought to your landscape.
Read more: How To Install Brick Siding
Conclusion
Congratulations on successfully completing the installation of sawtooth brick edging! By following the step-by-step process outlined in this guide, you’ve not only added a visually appealing border to your landscape but also enhanced its functionality and durability. The meticulous preparation, precise placement of the bricks, and attention to finishing details have culminated in a professional and polished result that will elevate the overall aesthetic of your outdoor space.
With sawtooth brick edging in place, you’ve created a defined border for your flower beds, pathways, or garden features, adding a touch of elegance and structure to your landscape. The clean lines and enduring quality of the edging will contribute to the maintenance and longevity of your outdoor environment, while also serving as a visually striking design element.
As you admire the impact of the sawtooth brick edging on your landscape, take pride in the craftsmanship and dedication you’ve invested in this project. The enduring beauty and functionality of the edging are a testament to your commitment to creating a welcoming and well-maintained outdoor space.
Whether you’re a seasoned DIY enthusiast or a novice embarking on your first landscaping project, the successful installation of sawtooth brick edging is a testament to your ability to transform your vision into reality. As you enjoy the fruits of your labor, take a moment to appreciate the beauty and functionality that the edging brings to your outdoor environment.
Thank you for entrusting us with guiding you through the installation process. We hope this comprehensive guide has equipped you with the knowledge and confidence to tackle future landscaping projects with enthusiasm and expertise. Embrace the transformative power of sawtooth brick edging as you continue to enhance and enjoy your outdoor sanctuary.
Now that you've mastered sawtooth brick edging, why not enhance your outdoor space even further? Dive into our guide on landscaping ideas that transform any garden into a delightful retreat. If you're feeling ambitious, check out our compilation of outdoor projects, perfect for DIY enthusiasts eager to tackle new challenges. Both articles offer valuable tips and creative solutions to elevate your home's exterior.
Frequently Asked Questions about How To Install Sawtooth Brick Edging
Was this page helpful?
At Storables.com, we guarantee accurate and reliable information. Our content, validated by Expert Board Contributors, is crafted following stringent Editorial Policies. We're committed to providing you with well-researched, expert-backed insights for all your informational needs.


0 thoughts on “How To Install Sawtooth Brick Edging”