Home>Construction & Tools>Building Materials>How To Lay A Brick Border In A Garden


Building Materials
How To Lay A Brick Border In A Garden
Modified: February 18, 2024
Learn how to lay a brick border in your garden with our step-by-step guide. Find the best building materials and tips for a professional finish.
(Many of the links in this article redirect to a specific reviewed product. Your purchase of these products through affiliate links helps to generate commission for Storables.com, at no extra cost. Learn more)
Introduction
Welcome to the world of gardening and landscaping! Adding a brick border to your garden can elevate its aesthetic appeal and provide a defined edge to your flower beds or pathways. The timeless charm of brick, combined with its durability, makes it a popular choice for creating borders that withstand the test of time and weather. Whether you are a seasoned gardener or a novice enthusiast, laying a brick border can be a rewarding and achievable project with the right guidance.
In this comprehensive guide, we will walk you through the step-by-step process of laying a brick border in your garden. From gathering the necessary materials and tools to the final touches that bring your vision to life, we will cover each stage in detail, ensuring that you have the knowledge and confidence to embark on this fulfilling endeavor.
So, roll up your sleeves, put on your gardening gloves, and let’s dive into the art of laying a brick border that will enhance the beauty of your outdoor space for years to come!
Key Takeaways:
- Laying a brick border in your garden adds timeless charm and durability, enhancing the aesthetic appeal and defining the boundaries of your outdoor space. It’s a rewarding and achievable project with the right guidance.
- By meticulously planning, excavating, laying, securing, and finishing the brick border, you create a personalized, enduring, and visually captivating element that reflects your creativity and dedication to your garden.
Read more: How To Lay Brick Garden Edging
Step 1: Gather Materials and Tools
Before diving into the project, it’s essential to gather all the necessary materials and tools to ensure a smooth and efficient process. Here’s a comprehensive list to get you started:
Materials:
- Bricks: Choose durable, weather-resistant bricks that complement the style of your garden.
- Sand: Opt for coarse sand, which provides a stable base for the bricks.
- Landscape Fabric: This will help prevent weed growth beneath the brick border.
- Gravel: Use gravel for drainage and to create a sturdy foundation.
- Edging Stones (optional): If you prefer a more decorative border, edging stones can be used in combination with the bricks.
- Backfill Material: This can include topsoil or mulch to fill the area behind the brick border.
Tools:
- Shovel: For excavating the border area and moving materials.
- Rake: To level the ground and distribute the sand and gravel evenly.
- Tape Measure: Essential for accurate measurements and planning.
- Masonry Saw (optional): If you need to cut bricks to fit specific areas.
- Work Gloves: Protect your hands during the construction process.
- Safety Glasses: Always prioritize safety when cutting or handling materials.
- Wheelbarrow: For transporting heavy materials such as gravel and sand.
- Hand Tamper: Used to compact the gravel and create a solid foundation.
- Carpenter’s Level: Ensures the bricks are laid evenly and at the desired height.
By ensuring that you have all the required materials and tools at your disposal, you can streamline the construction process and minimize interruptions. With everything in place, you are ready to move on to the next step: planning and marking the border.
Step 2: Plan and Mark the Border
Before you begin laying the bricks, it’s crucial to plan the layout and mark the border to ensure a visually appealing and structurally sound result. Here’s how you can approach this essential phase:
Read more: How To Lay Brick
1. Design Considerations:
Take the time to visualize the desired shape and path of the brick border. Consider the overall design of your garden and how the border will complement existing features. Whether you opt for a straight, curved, or intricate design, ensure that it harmonizes with the surrounding elements.
2. Measurements and Marking:
Use a tape measure to mark the border’s dimensions accurately. If you are creating a curved border, consider using a garden hose or rope to outline the shape. This flexible material allows you to experiment with different curves before finalizing the design.
3. Consider Drainage:
Ensure that the planned border allows for proper drainage to prevent water from pooling in your garden beds. A gentle slope away from the house or other structures can help direct water away from the garden area.
4. Marking the Edge:
Once you are satisfied with the layout, use a spray paint or garden-friendly marking tool to outline the border on the ground. This visible guide will serve as a reference point as you move on to the excavation stage.
By meticulously planning and marking the border, you set the stage for a successful brick-laying process. The next step involves excavating the area to prepare the foundation for your brick border.
Read more: How To Lay Brick Pavers
Step 3: Excavate the Area
Excavating the designated area is a crucial step in preparing the foundation for your brick border. This process sets the stage for a stable and long-lasting installation. Here’s how to approach the excavation phase:
1. Start the Dig:
Using a shovel, begin excavating the outlined area, aiming for a depth of around 4 to 6 inches. Ensure that the trench maintains a consistent width, following the marked border closely. If you encounter roots or obstacles during the digging process, carefully work around them to maintain the integrity of the border’s layout.
2. Check for Levelness:
As you dig, periodically check the depth and levelness of the trench using a carpenter’s level. This ensures that the base of the trench is even, which is essential for the stability and uniformity of the brick border.
3. Remove Debris:
Clear the excavated area of any rocks, roots, or debris that could interfere with the subsequent steps of the installation. A smooth and debris-free base is crucial for achieving a professional-looking result.
Read more: How To Lay Brick Floor
4. Consider Weed Prevention:
At this stage, it’s beneficial to lay landscape fabric at the bottom of the trench to inhibit weed growth beneath the brick border. This proactive measure helps maintain the border’s appearance and reduces the need for ongoing maintenance.
5. Compact the Soil:
Using a hand tamper, compact the soil at the base of the trench to create a firm foundation. This step is essential for minimizing shifting and settling of the bricks over time, contributing to the border’s overall durability.
With the area excavated and prepared, you are now ready to lay the foundation for your brick border, setting the stage for the next phase of the installation process.
Step 4: Lay the Foundation
With the area excavated and the groundwork set, it’s time to establish a solid foundation for your brick border. This foundational layer provides stability and support for the bricks, ensuring a level and enduring installation. Here’s how to proceed with this critical step:
1. Add a Layer of Gravel:
Begin by adding a layer of coarse gravel to the compacted trench. The gravel serves multiple purposes, including providing drainage, minimizing soil shifting, and creating a stable base for the bricks. Spread the gravel evenly, using a rake to achieve a uniform layer.
Read more: How To Lay Brick For A Fireplace
2. Level the Gravel:
Using a carpenter’s level, ensure that the layer of gravel is uniformly flat and level across the entire trench. This step is essential for preventing uneven settling of the bricks and maintaining the integrity of the border’s structure.
3. Compact the Gravel:
Once the gravel is in place and leveled, use a hand tamper to compact it thoroughly. This compaction process enhances the stability of the foundation, reducing the risk of shifting and settling over time. Pay particular attention to the edges and corners to ensure a consistently firm base.
4. Add a Layer of Sand:
Following the compaction of the gravel, spread a layer of coarse sand over the compacted gravel base. The sand provides a level surface for laying the bricks and allows for minor adjustments to achieve a uniform height for the border.
5. Level the Sand:
Using a straight board or a screed, smooth and level the layer of sand to create an even surface. This step is crucial for achieving a uniform height for the brick border and ensuring that the bricks lay flush and stable.
Read more: How To Lay Brick Patio
6. Verify the Levelness:
Double-check the levelness of the sand layer using a carpenter’s level, making any necessary adjustments to achieve a consistent height across the entire border area.
With the foundation meticulously laid and leveled, you are now prepared to move on to the next phase: the actual placement of the bricks, where your vision begins to take tangible form.
Step 5: Lay the Bricks
As you transition to laying the bricks, the visual transformation of your garden border begins to unfold. This step requires precision and attention to detail to ensure a professional and visually appealing result. Here’s how to proceed with laying the bricks:
1. Begin at a Corner:
Select a corner of the border as your starting point. Starting from a corner provides a reference point for the alignment and layout of the bricks along the entire border.
2. Lay the First Course:
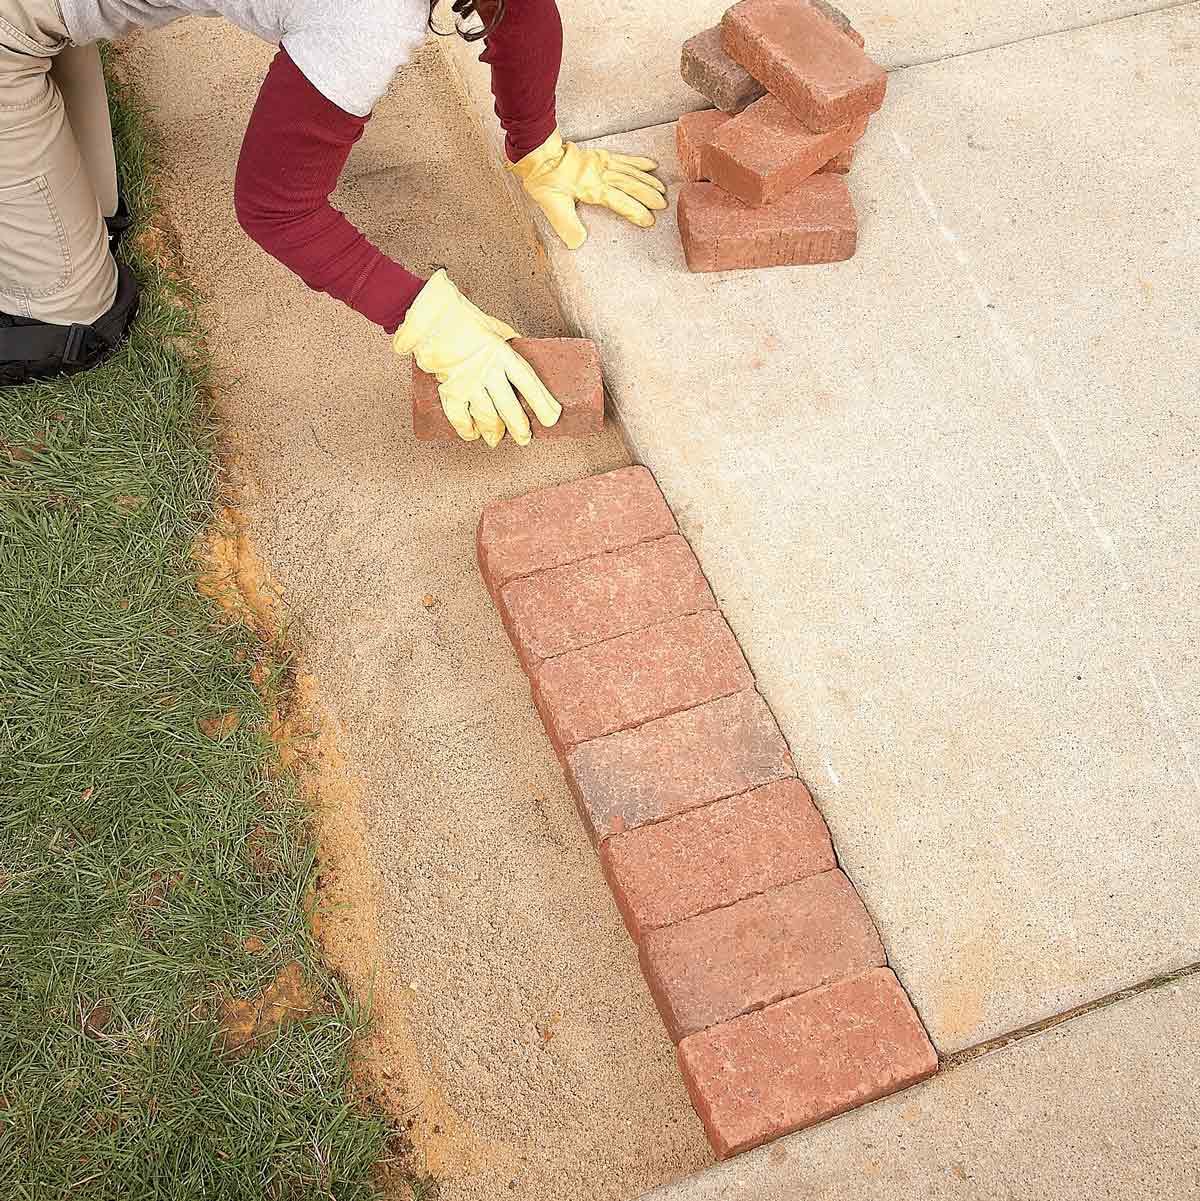
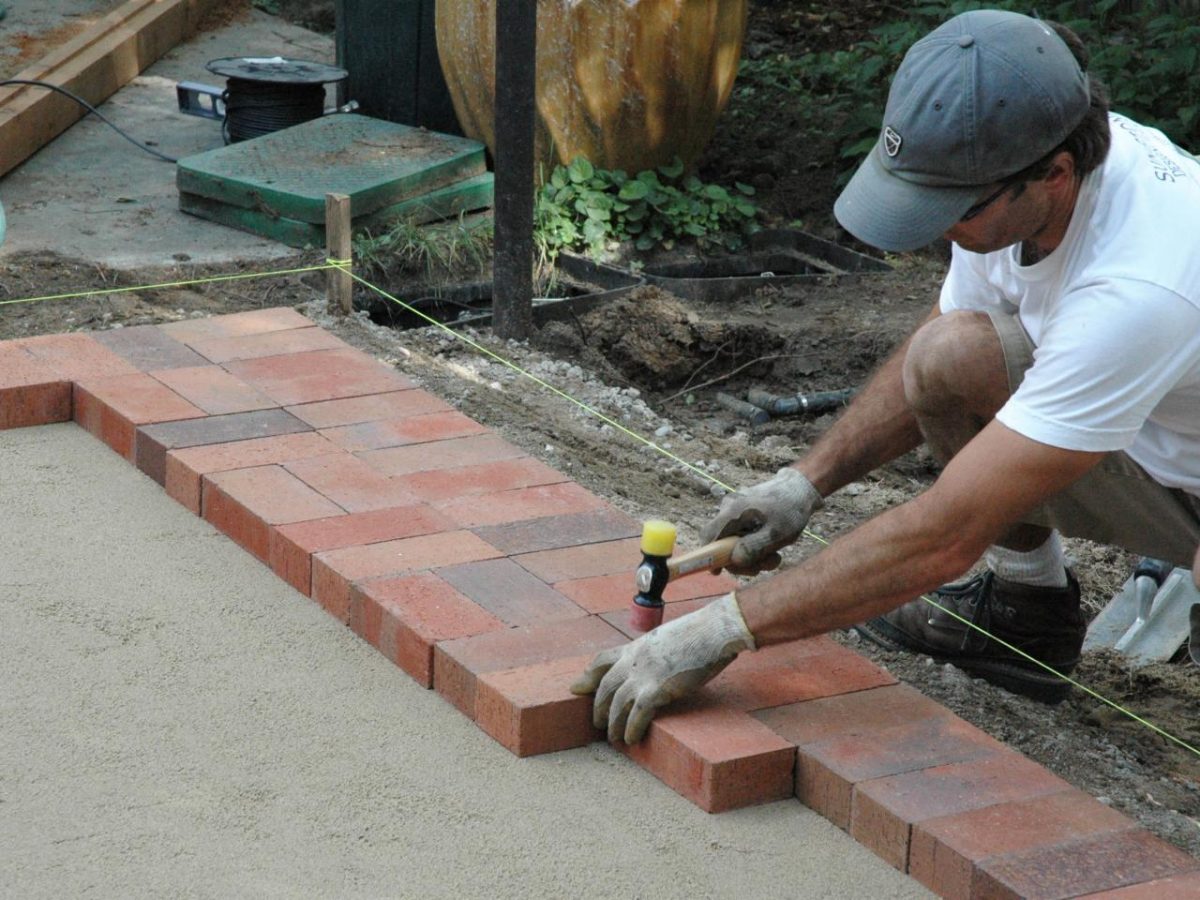
Place the bricks end to end along the trench, ensuring a snug fit without large gaps between the bricks. Use a carpenter’s level to verify that the bricks are level and adjust the sand base as needed to achieve a uniform height.
Read more: How To Lay Brick Walkway
3. Maintain Consistent Spacing:
As you lay the first course of bricks, pay attention to maintaining consistent spacing between each brick. This uniformity contributes to the overall visual appeal and structural integrity of the border.
4. Cut Bricks as Needed:
If the border’s layout requires partial bricks to fit the design, use a masonry saw to cut the bricks to the appropriate size. Ensure that the cuts are precise to maintain a professional and seamless appearance.
5. Create Smooth Transitions:
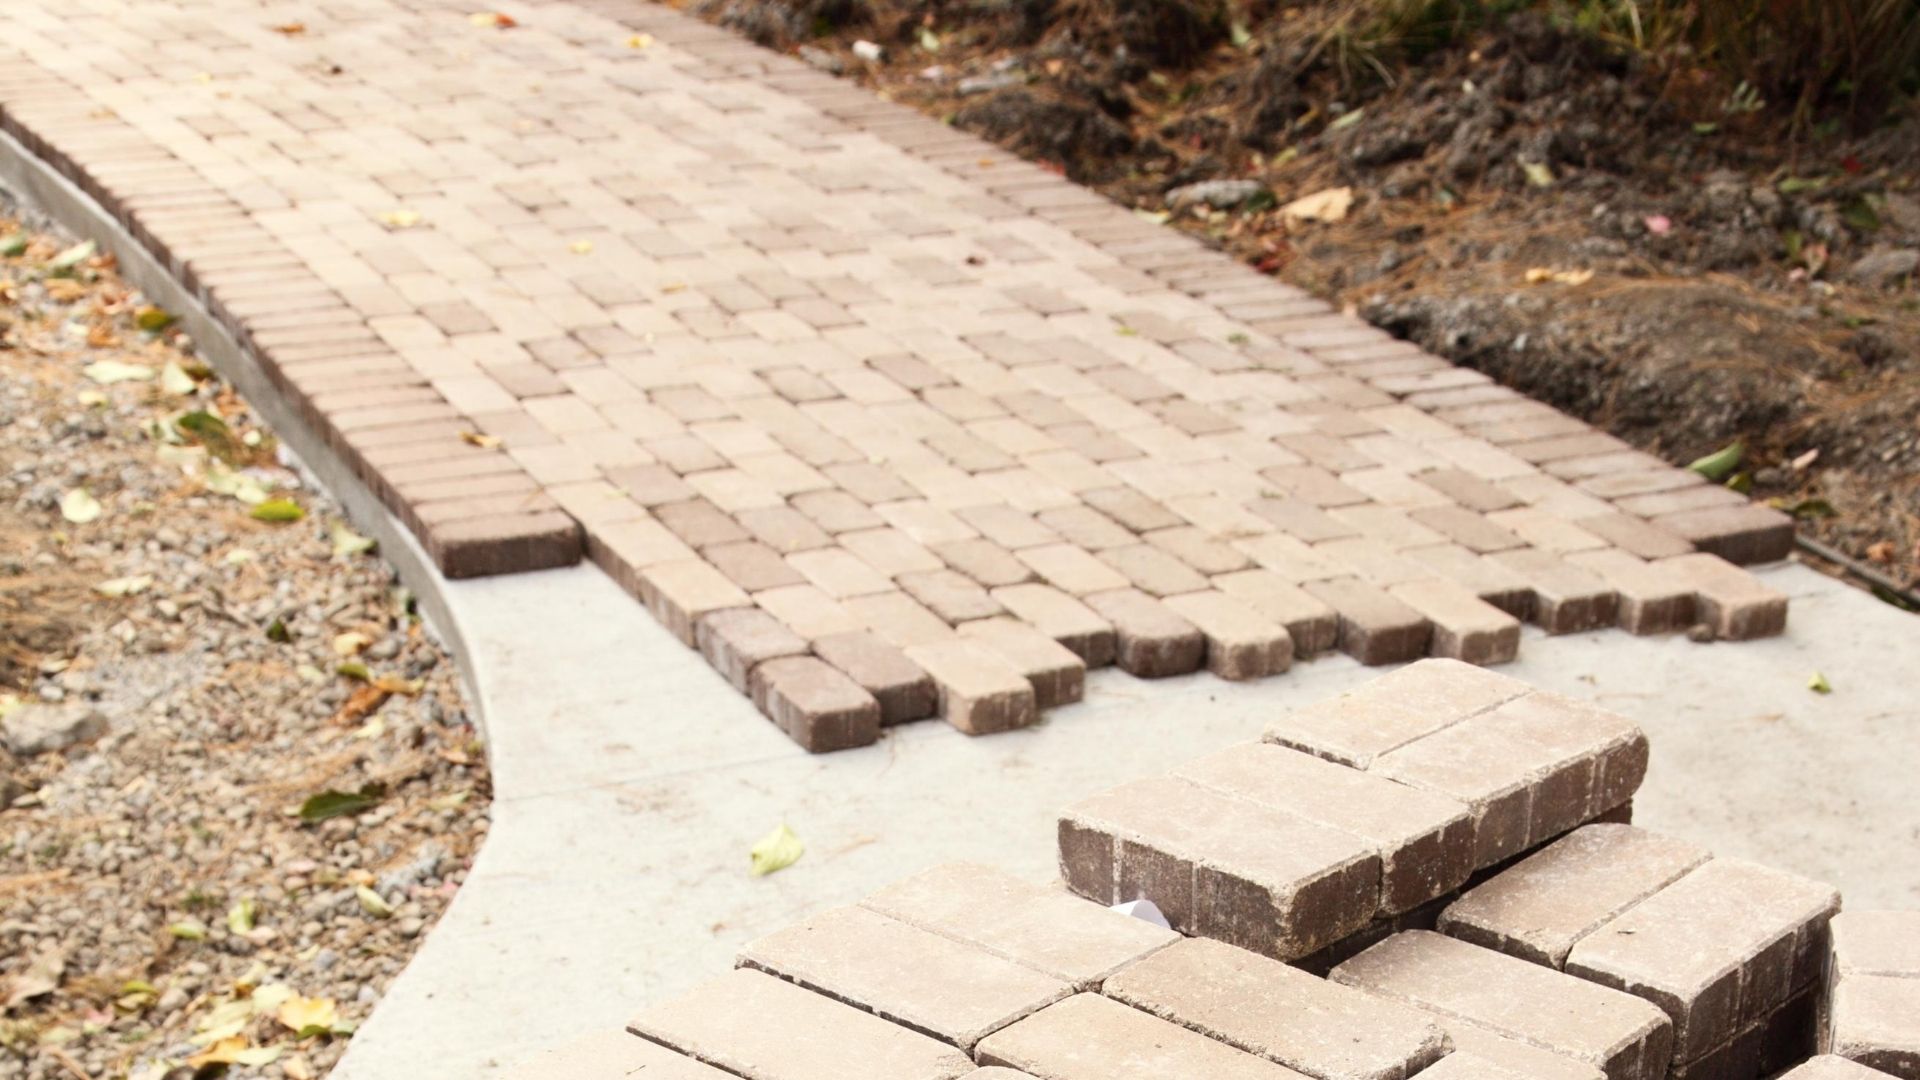
As you approach corners or curved sections, take the time to create smooth transitions by angling and fitting the bricks accordingly. This attention to detail enhances the border’s visual appeal and ensures a cohesive design.
6. Verify Alignment and Levelness:
Periodically check the alignment and levelness of the laid bricks, making adjustments as needed to maintain a uniform and visually pleasing border. A carpenter’s level and straight edge can assist in this process.
Read more: How To Lay A Mortared Brick Patio
7. Consider Decorative Patterns:
If desired, explore the option of incorporating decorative patterns or alternating brick orientations to add visual interest to the border. This creative touch can personalize the design and elevate its aesthetic appeal.
As the bricks take their place along the border, the vision of your garden enhancement comes to life. With the bricks laid in place, the next step involves securing them to ensure lasting stability and endurance.
Step 6: Secure the Bricks
Securing the laid bricks is a crucial step in ensuring the long-term stability and integrity of your garden border. By anchoring the bricks in place, you mitigate the risk of shifting or displacement, especially in high-traffic areas. Here’s how to effectively secure the bricks:
1. Add Joint Sand:
Once the bricks are in place, spread a layer of fine joint sand over the entire border. Use a broom to sweep the sand into the gaps between the bricks, ensuring that it fills the spaces and crevices evenly.
2. Compact the Sand:
Using a hand tamper or a plate compactor, carefully compact the joint sand to encourage settling and interlocking between the bricks. This step enhances the stability of the border and minimizes the potential for shifting over time.
Read more: How To Lay Brick Pavers On Concrete
3. Reapply Joint Sand:
After compacting the initial layer of joint sand, add a second layer and repeat the process of sweeping and compacting. This ensures that the gaps are adequately filled and that the bricks are securely interlocked.
4. Wetting the Border:
Lightly mist the entire border with water to activate the joint sand and promote the interlocking process. The moisture encourages the sand to settle and solidify, enhancing the cohesion of the brick border.
5. Addressing Low Spots:
If any areas exhibit low spots or settling after wetting the border, add additional joint sand and repeat the compaction process to achieve a uniform and stable surface.
6. Edge Restraints (Optional):
If desired, consider installing edge restraints along the border to provide additional support and prevent the lateral movement of the bricks. Edge restraints can be made of plastic, metal, or concrete, offering a tailored solution for securing the border.
Read more: How To Lay Bricks For Garden Edging
7. Final Verification:
Once the securing process is complete, verify the levelness and alignment of the bricks, making any necessary adjustments to ensure a visually cohesive and structurally sound border.
With the bricks securely in place, the border begins to embody its intended form and function. The final steps involve backfilling the border and adding the finishing touches to complete the project.
Step 7: Backfill and Finish
As you approach the final stages of laying a brick border in your garden, the focus shifts to backfilling the border area and adding the finishing touches that elevate its appearance and functionality. Here’s how to complete the project with precision and attention to detail:
1. Backfilling the Border:
Using topsoil or mulch, carefully backfill the area behind the brick border. This process not only provides a clean transition between the border and the garden bed but also offers structural support to the bricks, enhancing their stability.
2. Compact the Backfill:
After backfilling, gently compact the soil or mulch to ensure a firm and even surface. This compacting process contributes to the overall stability of the border and minimizes the risk of settling over time.
Read more: How To Lay Brick Pavers On Dirt
3. Define the Edge (Optional):
If you opted for edging stones to complement the brick border, ensure that they are securely in place and form a defined edge. Edging stones can enhance the visual appeal of the border and provide a polished transition between the garden bed and the border.
4. Clean the Surface:
Take the time to clean the surface of the bricks, removing any excess joint sand or debris that may have accumulated during the securing process. A clean and well-maintained surface enhances the overall appearance of the border.
5. Apply Sealant (Optional):
If you desire added protection and a glossy finish, consider applying a sealant to the bricks. This optional step can help safeguard the bricks from moisture and enhance their color, providing a lasting and vibrant aesthetic appeal.
6. Landscaping Touches:
As a final touch, consider adding landscaping elements such as decorative rocks, low-maintenance plants, or ornamental features near the border to complement its visual impact. These additions can further enhance the overall appeal of your garden space.
Read more: How To Lay A Brick Floor On Concrete
7. Step Back and Admire:
Once the backfilling and finishing touches are complete, take a moment to step back and admire your handiwork. The newly laid brick border not only adds a touch of elegance to your garden but also serves as a testament to your dedication and craftsmanship.
With the backfilling and finishing touches in place, your garden border project is successfully brought to fruition, adding a timeless and enduring element to your outdoor oasis.
Conclusion
Congratulations on successfully completing the process of laying a brick border in your garden! Through meticulous planning, precise execution, and attention to detail, you have added a touch of timeless elegance and structural definition to your outdoor space. As you reflect on the journey from envisioning the border to witnessing its tangible presence, consider the enduring benefits it brings to your garden:
Enhanced Aesthetic Appeal:
The brick border serves as a visually captivating element, framing your garden beds and pathways with a touch of classic charm. Its structured presence adds a refined and polished look to your outdoor landscape, enhancing the overall aesthetic appeal of your garden.
Defined Garden Boundaries:
By delineating specific areas within your garden, the brick border provides a clear separation between different elements, such as flower beds, lawns, and walkways. This defined structure not only adds visual interest but also contributes to the organization and functionality of your outdoor space.
Read more: How To Lay Out A Garden
Long-Term Durability:
The careful construction and securing of the brick border ensure its long-term stability and endurance. With proper maintenance, the border will withstand the elements and the passage of time, maintaining its structural integrity and visual allure for years to come.
Personalized Expression:
Your choice of brick type, border design, and finishing touches reflects your unique style and vision for your garden. The border becomes an expression of your creativity and passion for outdoor aesthetics, adding a personal touch to your outdoor sanctuary.
As you bask in the satisfaction of completing this project, take pride in the craftsmanship and dedication you have invested in enhancing your garden. The brick border stands as a testament to your commitment to creating a beautiful and inviting outdoor environment. Whether you’re admiring your handiwork from a nearby patio or strolling through the garden, the border serves as a captivating focal point that enriches the overall ambiance of your outdoor haven.
Now, as you immerse yourself in the beauty of your garden, take a moment to appreciate the transformation that the brick border has brought to your outdoor space. Your garden is now adorned with a touch of enduring elegance, a testament to your creativity and dedication.
Frequently Asked Questions about How To Lay A Brick Border In A Garden
Was this page helpful?
At Storables.com, we guarantee accurate and reliable information. Our content, validated by Expert Board Contributors, is crafted following stringent Editorial Policies. We're committed to providing you with well-researched, expert-backed insights for all your informational needs.


0 thoughts on “How To Lay A Brick Border In A Garden”