Articles
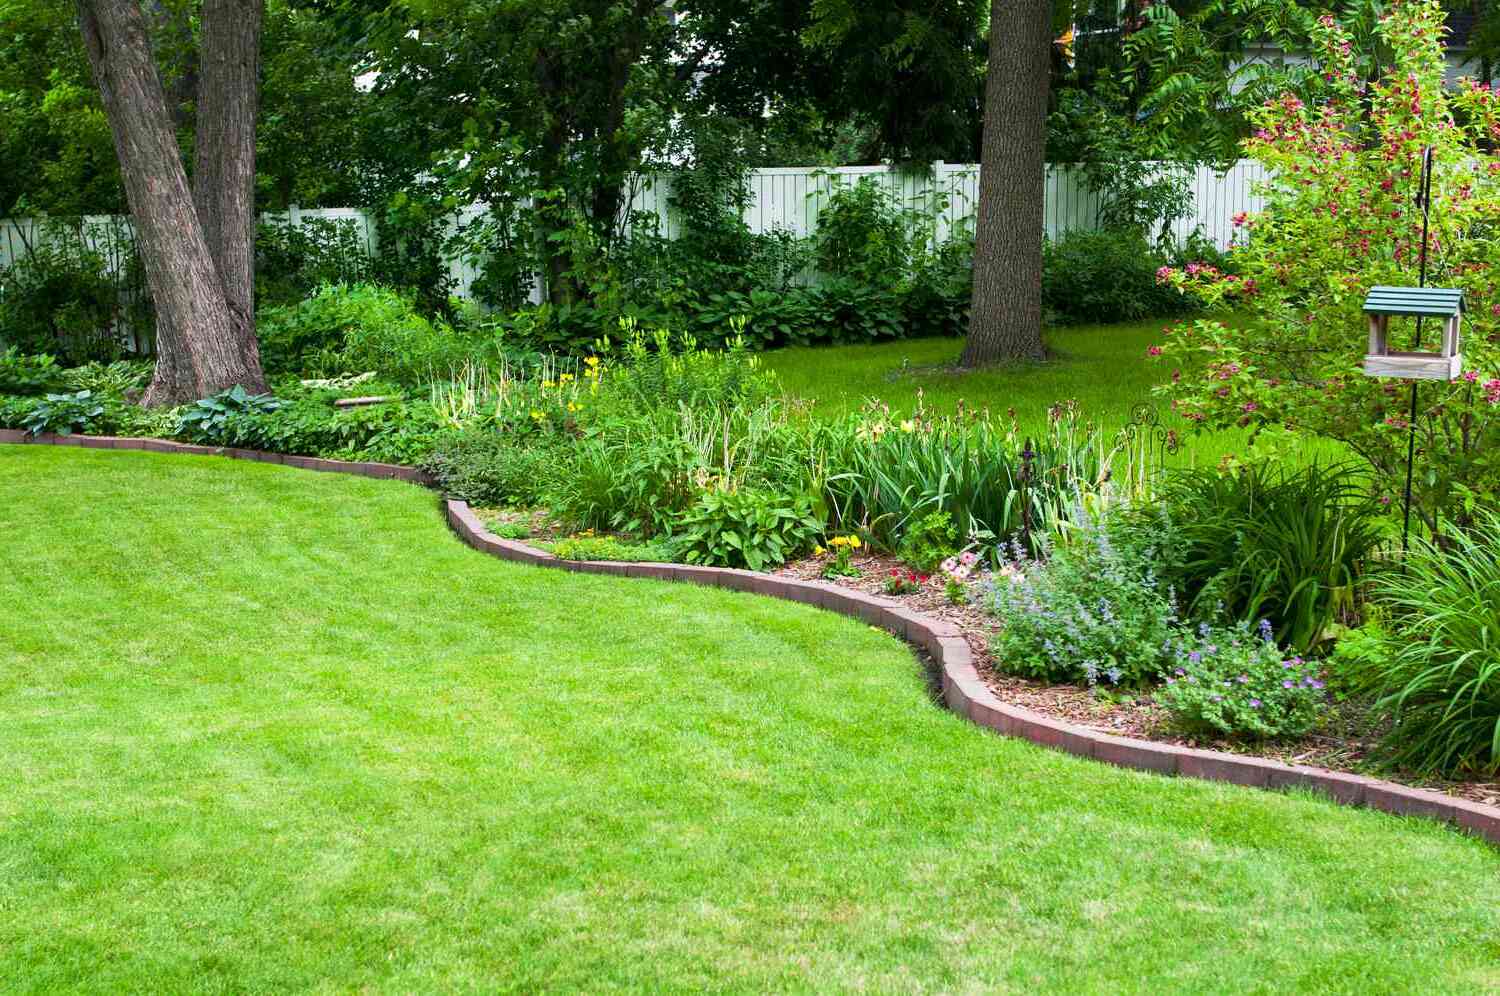
How To Lay Bricks For Garden Edging
Modified: October 19, 2024
Learn how to lay bricks for garden edging and take your gardening skills to the next level. Create beautiful and durable boundaries for your flower beds with our step-by-step guide.
(Many of the links in this article redirect to a specific reviewed product. Your purchase of these products through affiliate links helps to generate commission for Storables.com, at no extra cost. Learn more)
Introduction
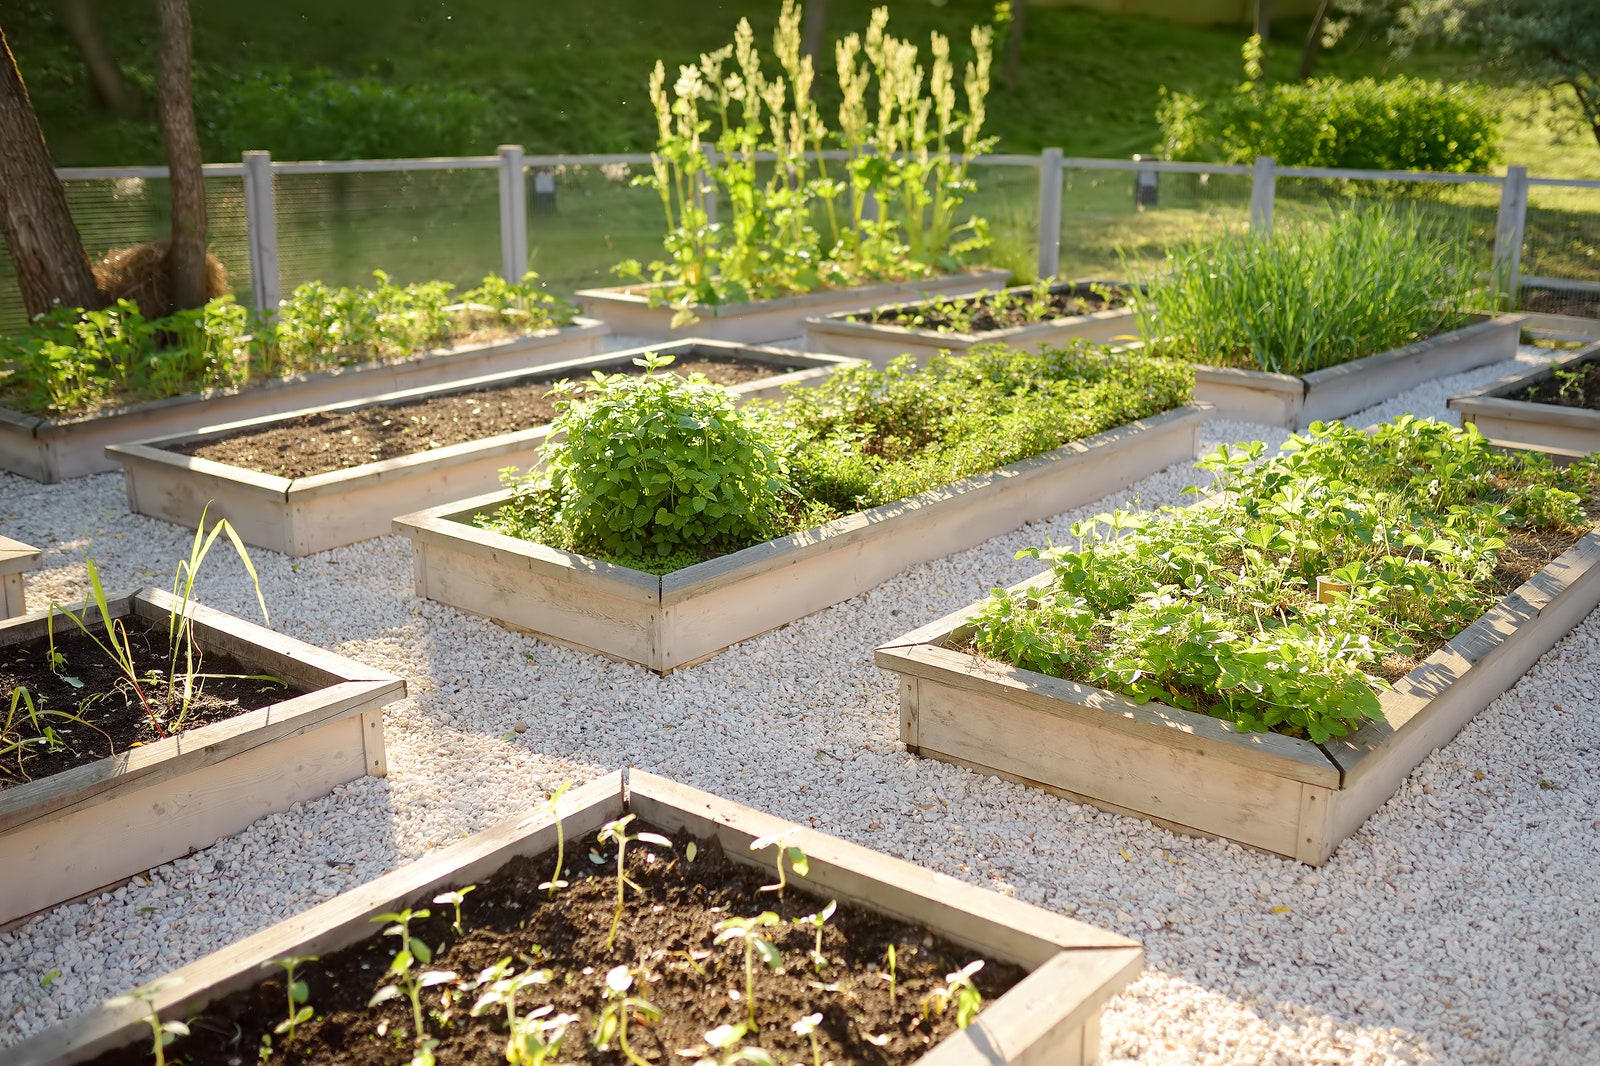
Creating a beautiful and well-organized garden involves paying attention to every detail, including the boundaries and edges. One effective way to define and enhance the aesthetic appeal of your garden is by laying bricks for garden edging. This not only provides a neat and tidy appearance but also adds a touch of elegance and sophistication to your outdoor space.
In this guide, we will walk you through the step-by-step process of laying bricks for garden edging. You don’t need to be an expert to accomplish this task; with the right tools, materials, and a bit of patience, you can achieve professional-looking results. So, let’s dive in and learn how to create a beautiful and durable garden edging using bricks.
Before we begin, it’s essential to gather all the necessary tools and materials. This will help you work efficiently and ensure that you have everything you need throughout the process.
Key Takeaways:
- Create a professional and durable garden edging using bricks by following a step-by-step process. From planning and marking the area to building the rows, precision and attention to detail are key to achieving stunning results.
- Whether opting for straight lines or curved edges, laying bricks for garden edging not only defines the garden but also offers an opportunity to showcase creativity and style. Regular maintenance ensures long-term beauty and functionality.
Read more: How To Lay Brick
Tools and Materials Needed
To successfully lay bricks for garden edging, you will need the following tools and materials:
- Bricks: Choose bricks that are suitable for outdoor use and complement the style of your garden. You will need enough bricks to cover the desired length and height of your garden edging.
- Mortar: This is used to bond the bricks together. You can use pre-mixed mortar or mix your own with cement, sand, and water.
- Trowel: A trowel is essential for applying and shaping the mortar.
- String and Stakes: These will be used to mark the area and ensure straight lines and even spacing.
- Level: A level is necessary to ensure that the bricks are laid evenly and at the desired height.
- Wheelbarrow: Use a wheelbarrow for mixing mortar and transporting materials.
- Masonry Saw or Chisel: You may need a masonry saw or chisel to cut bricks to the desired size and shape.
- Gloves and Safety Glasses: Protect your hands and eyes with gloves and safety glasses.
Make sure you have all of these tools and materials ready before you start the project. This will save you time and ensure a smoother process.
Step 1: Planning and Marking the Area
Before you start laying bricks for garden edging, it’s essential to plan and mark the area where you want your edging to be. This will help you visualize and ensure that you have a clear idea of the desired shape and size.
Here’s how you can plan and mark the area:
- Measure the length and width of the area: Use a measuring tape to determine the length and width of the space you want to edge with bricks. This will help you calculate how many bricks you will need.
- Create a layout: Once you have the measurements, sketch out a plan on paper or use stakes and string to create an outline on the ground. This will help you visualize the shape and size of your garden edging.
- Ensure even spacing: Depending on the pattern you choose, make sure to mark the placement of each brick with equal spacing. This will create a visually pleasing and symmetrical look.
- Check for straight lines: Use a level and string to ensure that the lines of your layout are straight and aligned. This will help you achieve a professional-looking finish.
By taking the time to plan and mark the area accurately, you will have a clear roadmap for laying the bricks. This will ensure that your garden edging turns out exactly how you envision it.
Step 2: Preparing the Ground
Once you have planned and marked the area for your garden edging, it’s time to prepare the ground. This step is crucial as it helps create a stable base for the bricks and ensures the longevity of your garden edging.
Follow these steps to prepare the ground:
- Clear the area: Remove any plants, weeds, or debris from the area where you will be laying the bricks. This will provide a clean surface to work on and ensure the bricks sit flat and level.
- Excavate the soil: Dig a trench along the marked outline, making it deep and wide enough to accommodate the bricks and mortar. The depth will depend on the desired height of your garden edging.
- Level the ground: Use a shovel and a level to ensure the bottom of the trench is even and level. This will provide a solid foundation for the bricks and prevent any unevenness in the edging.
- Add a layer of gravel: To improve drainage and stability, add a layer of gravel to the bottom of the trench. Spread it evenly and compact it with a tamper to create a firm base.
- Install landscape fabric (optional): If you want to prevent weed growth and maintain the neatness of your garden edging, consider laying landscape fabric on top of the gravel. This will help suppress the growth of unwanted plants.
By properly preparing the ground, you will ensure that your garden edging remains stable, level, and durable over time. It will also help prevent any weed growth and maintain the overall appearance of your garden.
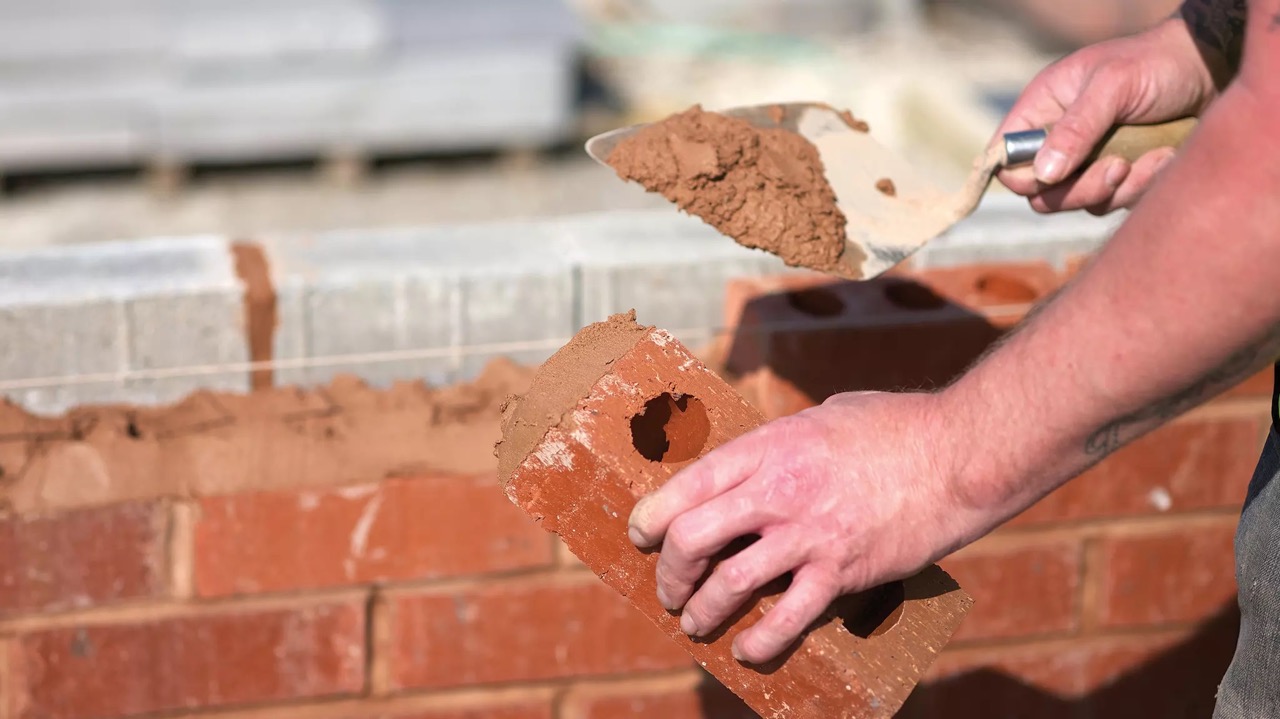
Step 3: Mixing Mortar
Now that the ground is prepared, it’s time to mix the mortar. Mortar is the binding agent that holds the bricks together and provides strength to the garden edging.
Here’s how you can mix mortar:
- Choose the right mortar mix: Depending on the type of bricks you are using and the climate in your area, select a mortar mix that is appropriate for outdoor applications. You can find pre-mixed mortar at your local home improvement store, or you can mix your own using cement, sand, and water.
- Measure the ingredients: If you are mixing your own mortar, follow the instructions on the packaging or use the recommended ratio of cement to sand. Use a bucket or wheelbarrow to measure the ingredients.
- Add water gradually: Start by adding a small amount of water to the dry mixture and gradually mix it in. Use a trowel or a mixing tool to combine the ingredients. Continue adding water until you achieve a thick but workable consistency.
- Check the consistency: The mortar should be sticky enough to hold the bricks together but not too runny or watery. Test the consistency by scooping up a small amount of mortar on the trowel and turning it upside down. If it holds its shape without slumping or sliding off, it is ready to use.
Properly mixed mortar is essential for the stability and strength of your garden edging. Take your time and ensure that the consistency is just right before moving on to the next step.
When laying bricks for garden edging, make sure to use a level to ensure they are all at the same height. This will create a neat and professional-looking border for your garden.
Read more: How To Set Brick Edging
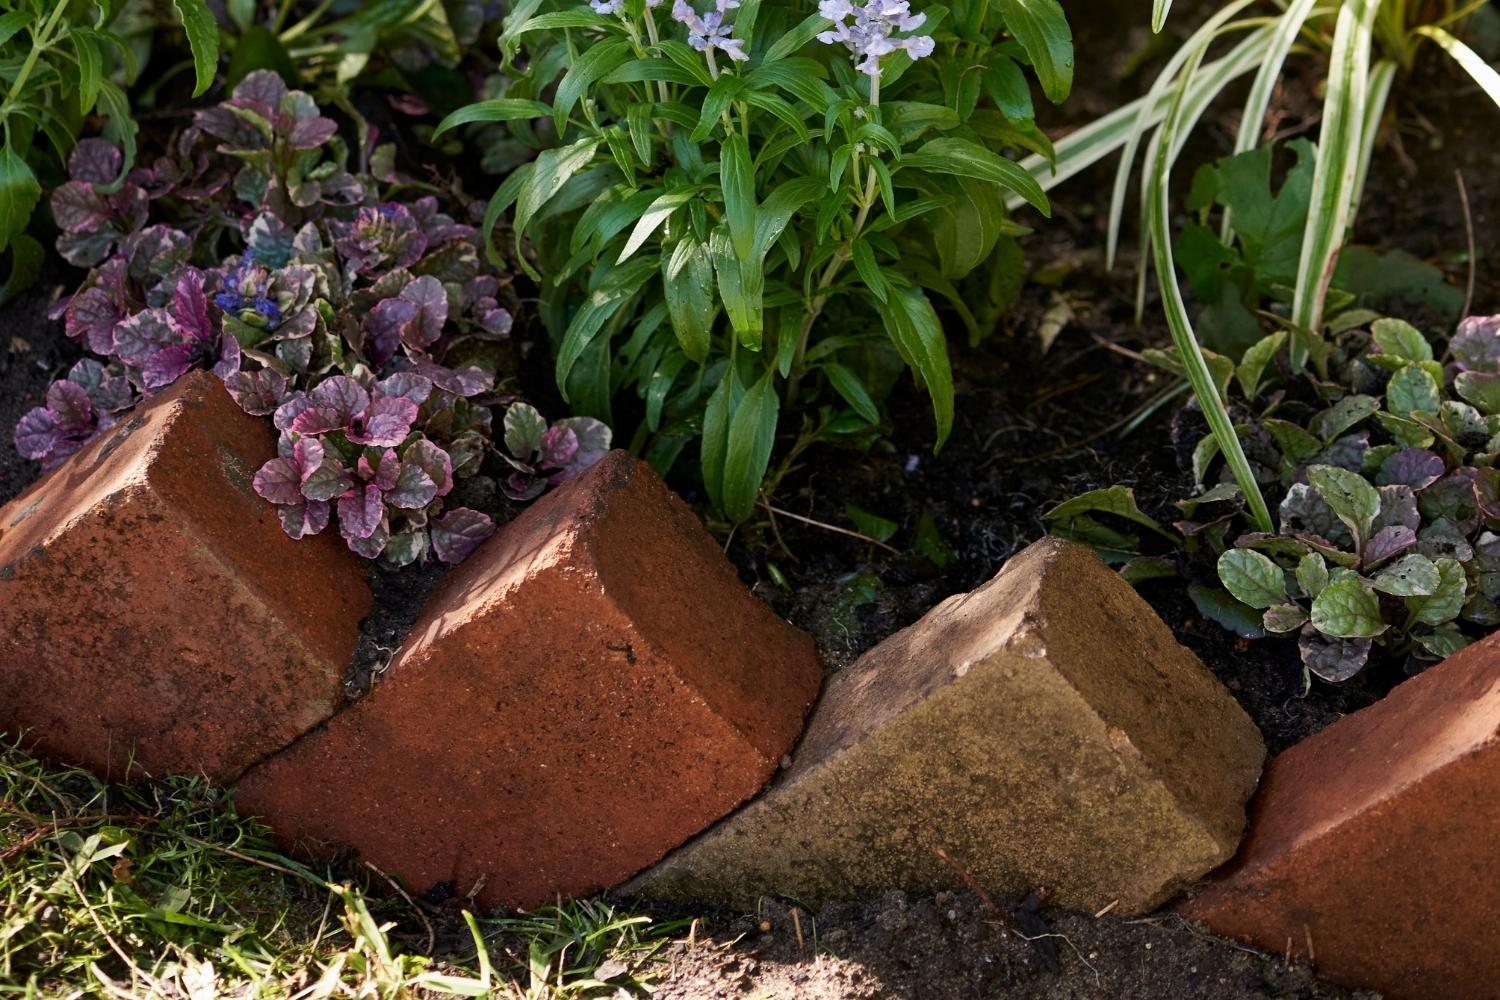
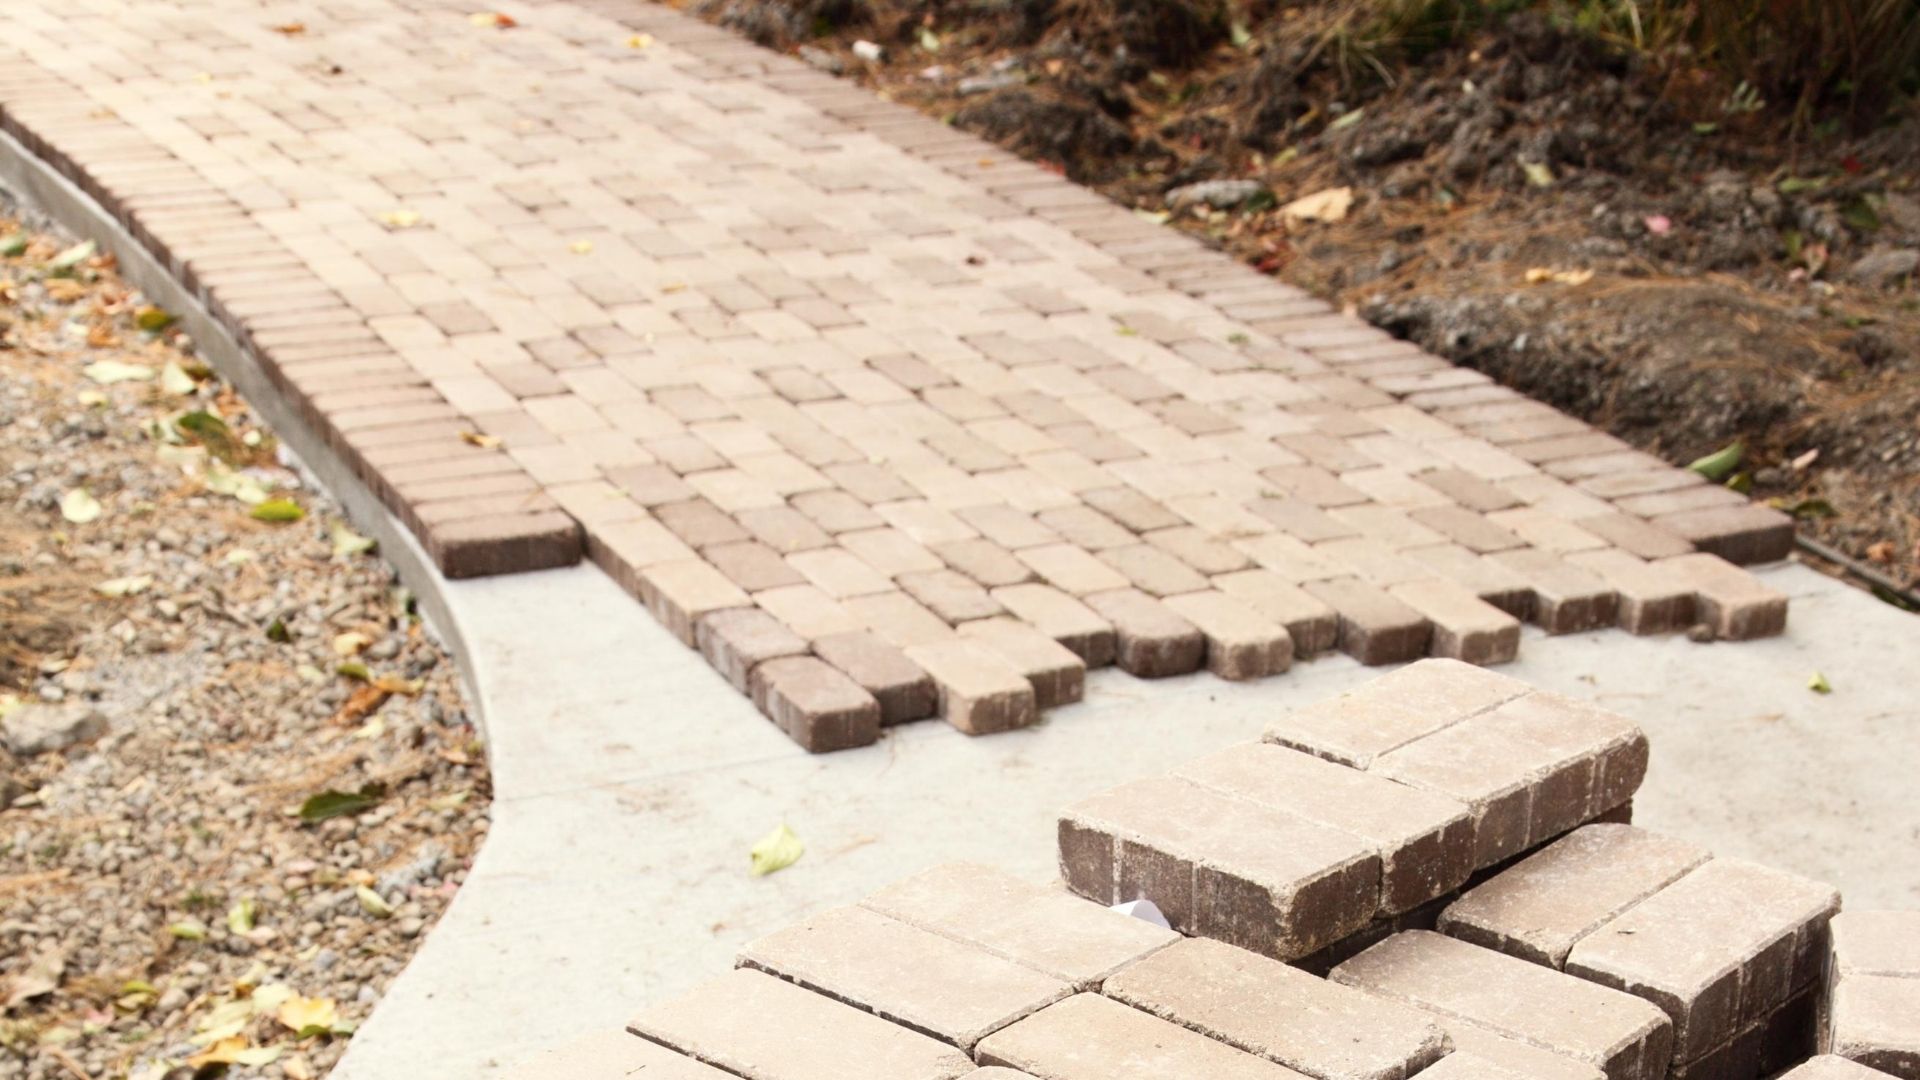
Step 4: Laying the First Row of Bricks
With the mortar mixed and ready to use, it’s time to start laying the first row of bricks for your garden edging. This step sets the foundation for the rest of the edging, so it’s important to take your time and ensure everything is aligned and level.
Follow these steps to lay the first row of bricks:
- Dampen the ground: Before applying mortar, dampen the bottom of the trench with water. This helps the mortar adhere better to the bricks and the ground.
- Apply mortar: Using a trowel, apply a layer of mortar along the bottom of the trench where you will be placing the first row of bricks. Create an even layer of mortar, around 1 inch thick.
- Place the first brick: Press the first brick into the mortar, ensuring it is level and aligned with the marked layout. Use a level to check and adjust the position of the brick. Apply gentle pressure to secure it in place.
- Add more bricks: Continue placing bricks next to each other, applying mortar between each brick to create a bond. Use a level to ensure that the bricks are level and aligned horizontally. Adjust the position as needed.
- Check for even spacing: As you lay each brick, check for consistent spacing between them. Use spacers or the width of a trowel to maintain uniform spacing.
- Scrape off excess mortar: As you work, regularly clean off any excess mortar from the edges of the bricks using a trowel. This will give your garden edging a clean and professional look.
Take your time with this step to ensure that the first row of bricks is accurately laid and level. This will set the tone for the rest of the garden edging and ensure a visually pleasing result.
Step 5: Building Additional Rows
After successfully laying the first row of bricks, it’s time to build additional rows to create a sturdy and visually appealing garden edging. Building multiple rows adds height and stability to the edging, making it more durable.
Follow these steps to build additional rows of bricks:
- Prepare the mortar: If necessary, mix more mortar following the same steps as mentioned in Step 3.
- Apply mortar for the next row: Using a trowel, apply a layer of mortar on top of the first row of bricks. Make sure it is evenly spread and has a thickness similar to the first row.
- Place the bricks: Carefully place the bricks on top of the mortar, aligning them horizontally and vertically with the previous row. Use a level to ensure that each brick is level and adjust if needed. Press the bricks into the mortar to create a secure bond.
- Continue adding rows: Repeat the process of applying mortar and placing bricks for each additional row. Check for alignment, levelness, and consistent spacing between the bricks.
- Alternate brick joints: To improve the stability and visual appeal of the garden edging, alternate the joints between the bricks for each row. This creates a staggered pattern that enhances the strength of the edging.
- Clean off excess mortar: As you work on each row, use a trowel to scrape off any excess mortar that squeezes out from the joints. This will help maintain a clean and professional finish.
Continue building additional rows until you reach the desired height for your garden edging. Take your time to ensure that each row is level and aligned properly with the previous row. This will result in a strong and visually appealing edging for your garden.
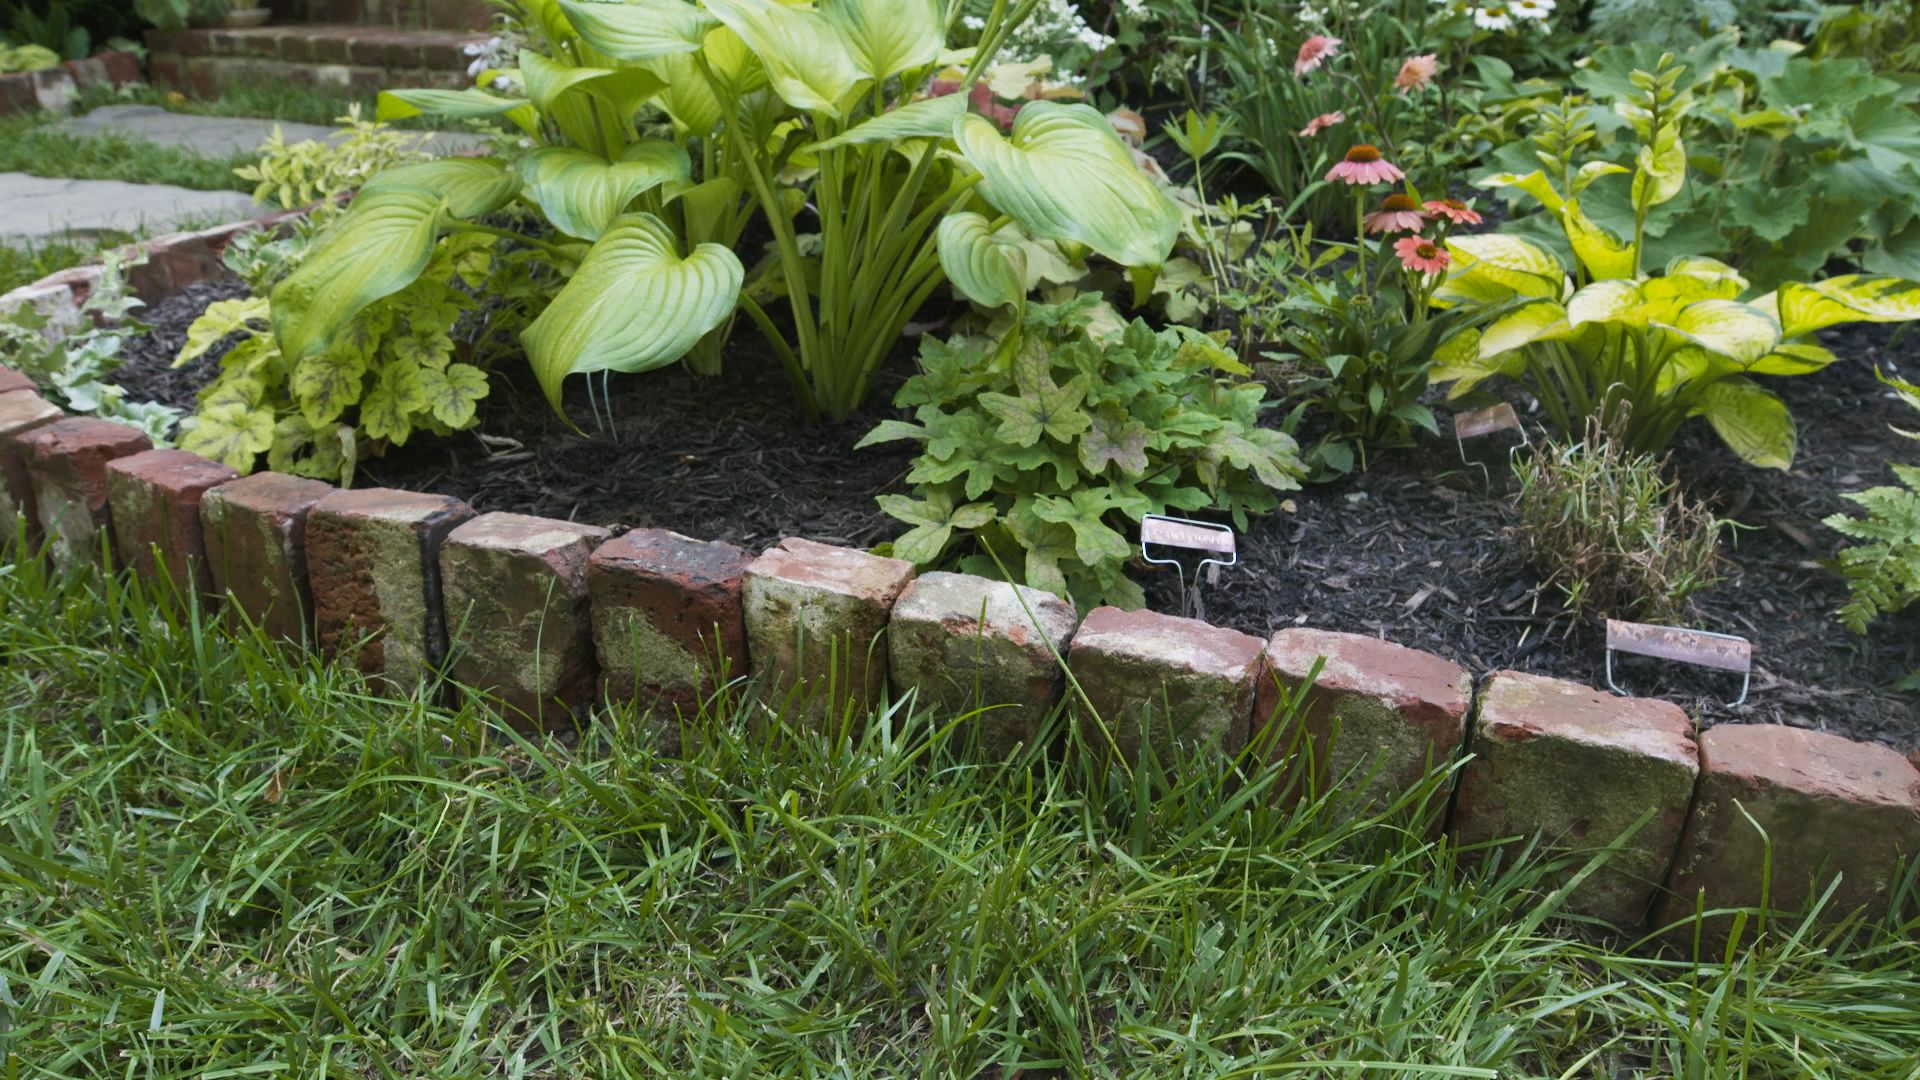
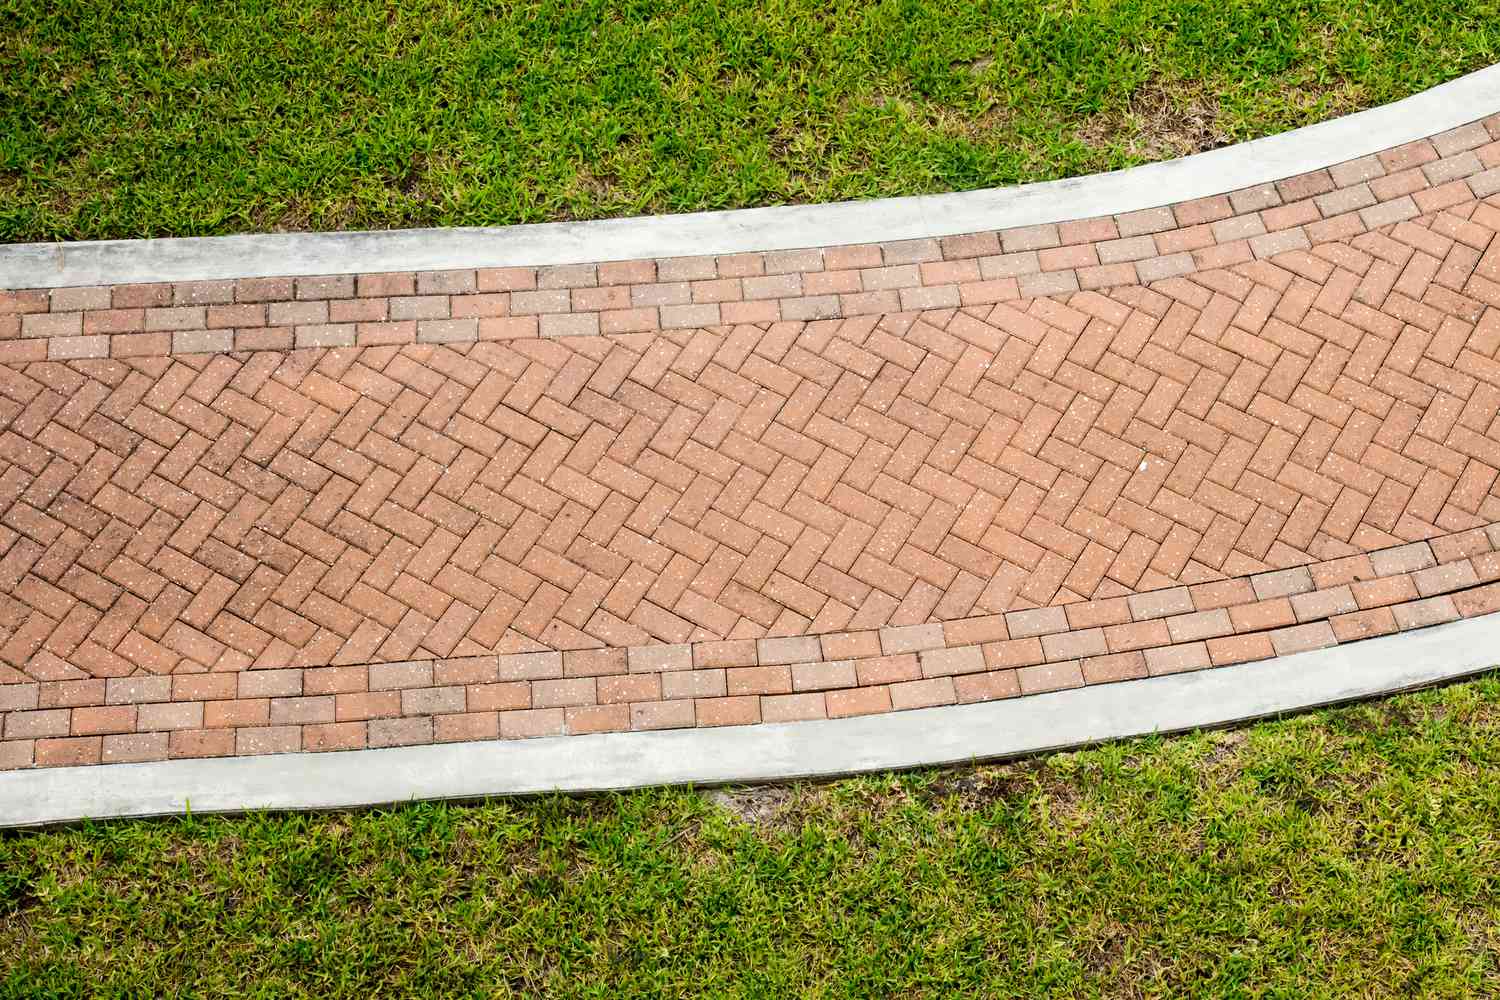
Step 6: Making Curved Edges
If you want to add a touch of creativity and uniqueness to your garden edging, you can choose to create curved edges instead of straight lines. Curved edges can add visual interest and create a natural flow within your garden.
Here’s how you can make curved edges with brick garden edging:
- Mark the curve: Use a garden hose or a rope to mark the desired curve of your garden edging. Lay it along the path you want the bricks to follow and adjust it until you’re satisfied with the shape.
- Determine brick placement: Using the marked curve as a guide, determine how the bricks will be placed to follow the curve. You may need to cut some bricks into smaller pieces to fit the curve appropriately.
- Cut the bricks (if needed): Use a masonry saw or a chisel to cut the bricks into the desired size and shape. Take your time and make precise cuts to ensure accuracy.
- Prepare the mortar: Mix mortar, as mentioned in Step 3, ensuring you have enough to accommodate the curved edges.
- Apply mortar and lay bricks: Start by applying a layer of mortar along the curve, using a trowel. Place the bricks on top of the mortar, following the marked curve. Use a level to ensure each brick is level and aligned properly.
- Continue building rows: Repeat the process of applying mortar, placing bricks, and building additional rows along the curved edge. Make sure to maintain the desired curve and adjust the position of each brick as needed.
- Clean excess mortar: As you work, be mindful of any excess mortar that squeezes out from the joints. Clean it off promptly using a trowel to maintain the neatness of the curved edges.
Creating curved edges requires careful planning and precision, but the results can be stunning. Take your time while laying the bricks along the curve, ensuring the proper alignment and levelness. Once completed, your garden will boast beautiful, flowing curves that add a unique touch to your landscape.
Step 7: Finishing Touches
With the bricks laid and the garden edging taking shape, it’s time to add the finishing touches to complete the project. This step will not only enhance the overall appearance of your garden edging but also ensure its longevity and durability.
Follow these steps to add the finishing touches:
- Allow the mortar to dry: Before making any further adjustments or additions, allow the mortar to dry completely. Refer to the manufacturer’s instructions or wait at least 24 hours for the mortar to cure.
- Check for stability: Once the mortar is dry, gently press against the bricks to ensure they are securely bonded and stable. If any bricks are loose, remove them, reapply mortar, and place them back into position.
- Cut or shape bricks (if necessary): If there are any uneven or protruding bricks, you can carefully cut them or shape them using a masonry saw or chisel to achieve a smoother and more visually appealing finish.
- Seal the bricks (optional): To enhance the durability and longevity of your garden edging, consider applying a brick sealer. This will protect the bricks from moisture, weathering, and stains. Follow the manufacturer’s instructions for application.
- Clean and maintain: Regularly clean the bricks and remove any dirt, debris, or moss that may accumulate. This will help maintain the appearance of your garden edging and prevent any potential damage or deterioration.
By following these finishing touches, you can ensure that your garden edging is not only aesthetically pleasing but also durable and long-lasting. Take the time to perform these steps to achieve the best possible results for your garden.
Read more: How To Lay Brick For A Fireplace
Conclusion
Creating a beautiful and well-defined garden is a rewarding endeavor, and laying bricks for garden edging is one effective way to achieve this. By following the step-by-step process outlined in this guide, you can create a stunning garden edging that adds structure, elegance, and visual appeal to your outdoor space.
From planning and marking the area to building the rows of bricks, each step plays a crucial role in achieving a professional-looking finish. Taking the time to prepare the ground, mix the mortar correctly, and lay the bricks with precision will result in a solid and durable garden edging that can withstand the test of time.
Whether you choose straight lines or curved edges, adding a layer of bricks as garden edging will define your garden and create a clean and organized look. The bricks not only serve as a functional border but also offer an opportunity to showcase your creativity and style.
Remember, maintaining your garden edging is important to ensure its long-term beauty and functionality. Regularly inspect and clean the bricks, watch out for any signs of damage or instability, and make any necessary repairs promptly to maintain the integrity of your edging.
Now that you are equipped with the knowledge and steps needed to lay bricks for garden edging, it’s time to put your skills to use and transform your garden. With a bit of patience, attention to detail, and a touch of creativity, you can create a stunning garden edging that perfectly complements your outdoor space and brings your garden to life.
Once you've mastered laying bricks for garden edging, why not take your outdoor skills up a notch? Dive into our collection of outdoor projects, where you'll find creative ideas to enhance your backyard or garden. From simple builds to more complex endeavors, there's something for everyone looking to add a personal touch to their outdoor space. Ready for more hands-on activities? Check out our guide packed with inspiration!
Frequently Asked Questions about How To Lay Bricks For Garden Edging
Was this page helpful?
At Storables.com, we guarantee accurate and reliable information. Our content, validated by Expert Board Contributors, is crafted following stringent Editorial Policies. We're committed to providing you with well-researched, expert-backed insights for all your informational needs.


0 thoughts on “How To Lay Bricks For Garden Edging”