Articles
How To Lay A Mortared Brick Patio
Modified: November 1, 2024
Learn how to lay a mortared brick patio with our informative articles. Find step-by-step instructions and expert tips to create the perfect outdoor space.
(Many of the links in this article redirect to a specific reviewed product. Your purchase of these products through affiliate links helps to generate commission for Storables.com, at no extra cost. Learn more)
Introduction
Building a mortared brick patio is a great way to enhance the beauty and functionality of your outdoor space. Whether you want to create a cozy seating area, an outdoor dining space, or a place for entertaining guests, a brick patio provides a durable and visually appealing solution. In this article, we will guide you through the process of laying a mortared brick patio, from planning and preparation to the finishing touches.
Before you get started, it’s important to have a clear idea of what you want your patio to look like and the purpose it will serve. Consider the size and shape of the area, as well as any existing structures or features that need to be taken into account. This will help you determine the quantity of materials needed and ensure a smooth construction process.
Once you have a plan in place, the next step is to gather all the necessary materials and tools. You will need bricks, mortar mix, sand, gravel, a shovel, a wheelbarrow, a trowel, a level, a tape measure, and a rubber mallet. It’s important to use high-quality materials to ensure the longevity and stability of your patio.
Now that you have everything you need, it’s time to start excavating the area. Use a shovel to remove any existing vegetation, rocks, and debris. Dig down to a depth of about 6-8 inches to accommodate the base material and the thickness of the bricks. Ensure that the excavated area is level and compact the soil using a hand tamper or plate compactor.
Once the area is prepared, it’s time to create a solid base for your patio. Start by laying a layer of gravel and compact it using a hand tamper or plate compactor. This will provide stability and drainage for the patio. Next, add a layer of coarse sand and level it using a rake and a straightedge. The sand layer should be about 1 inch thick.
Key Takeaways:
- Planning and preparation are crucial for creating a durable and visually appealing mortared brick patio. Pay attention to details, consider drainage, and choose high-quality materials for a successful construction process.
- From laying the bricks to filling the joints and adding finishing touches, each step in creating a mortared brick patio contributes to its longevity and functionality. Enjoy your outdoor oasis with pride and care.
Read more: How To Lay Mortared Brick On Front Steps
Planning and Preparation
Before you start laying a mortared brick patio, it’s important to carefully plan and prepare the area. This will ensure a smooth construction process and a professional-looking finished product. Here are some essential steps to follow:
- Measure the Space: Begin by measuring the area where you want to create your patio. Consider the dimensions, shape, and any existing structures or landscape features that may affect the layout.
- Create a Design: Once you have the measurements, you can start designing your patio. Decide on the pattern or layout of the bricks, taking into consideration the overall style and functionality you envision for your outdoor space.
- Check Local Codes and Regulations: Before proceeding with the construction, it’s important to check your local building codes and regulations. This will ensure that you comply with any necessary permits or restrictions for building a patio.
- Consider Drainage: Evaluate the drainage in the area where you plan to build your patio. It’s crucial to ensure proper water runoff to prevent any issues with pooling or erosion. If needed, make provisions for drainage by incorporating a slope or adding a French drain.
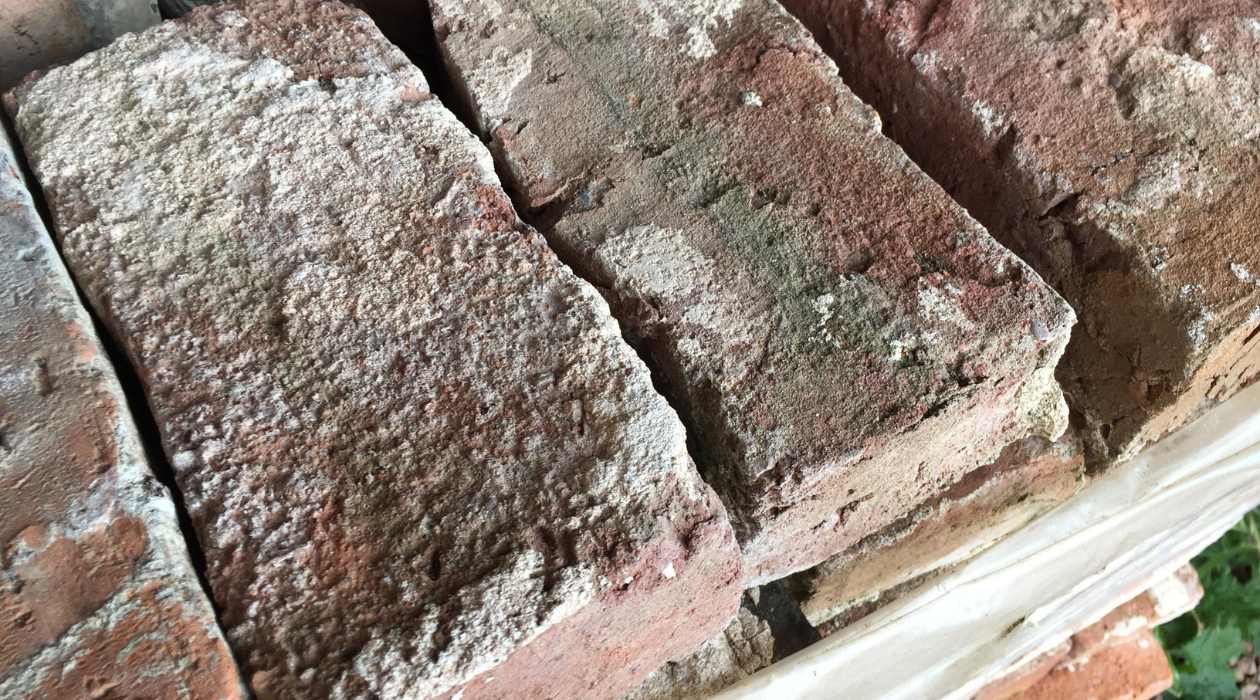
- Choose the Right Bricks: Select high-quality bricks that are suitable for outdoor use. Consider factors such as durability, color, and texture to enhance the aesthetics of your patio. It’s also important to choose bricks that are compatible with the mortar mix you plan to use.
- Gather the Necessary Tools and Materials: Make a list of all the tools and materials you will need for the project. This typically includes bricks, mortar mix, sand, gravel, a shovel, wheelbarrow, trowel, level, tape measure, and a rubber mallet.
- Estimate the Quantity of Materials: To avoid running out of materials during the construction, estimate the quantity you will need. Calculate the number of bricks based on the size of your patio and account for extra bricks for cutting and replacements.
By taking the time to plan and prepare, you set the foundation for a successful and visually appealing brick patio. Be sure to consult any professionals or experts if you have questions or concerns about specific aspects of your patio construction.
Gathering Materials and Tools
Once you have planned and prepared for your mortared brick patio, the next step is to gather all the necessary materials and tools. Having everything you need on hand will ensure a smooth construction process. Here are the essential materials and tools you will need:
- Bricks: Choose high-quality bricks that are suitable for outdoor use. Consider factors such as durability, color, and texture to match your desired aesthetic.
- Mortar Mix: Select a mortar mix that is appropriate for your project. There are various types available, including traditional mortar and mortar with additives for improved strength and flexibility.
- Sand: Purchase coarse sand to use as a base for the patio. It should be free from debris and have consistent grain size. Avoid using fine sand, as it may not provide adequate stability.
- Gravel: Procure gravel to create a sturdy base for your patio. It aids in drainage and helps prevent shifting or settling of the bricks.
- Shovel: Use a sturdy shovel for excavation and moving materials.
- Wheelbarrow: A wheelbarrow is convenient for transporting heavy materials such as gravel and mortar mix.
- Trowel: Invest in a quality trowel for the application of mortar to the bricks.
- Level: A level is essential for ensuring that the patio is even and slope-free.
- Tape Measure: Use a tape measure to accurately measure dimensions and ensure precise placement of the bricks.
- Rubber Mallet: A rubber mallet is useful for gently tapping the bricks into place without damaging them or disrupting the mortar.
It’s essential to use high-quality materials to ensure the longevity and stability of your patio. When purchasing bricks, mortar mix, and other materials, visit a reputable supplier or home improvement store. This ensures that you are getting durable and reliable products.
Additionally, investing in good-quality tools will make the construction process smoother and more efficient. Check customer reviews or seek recommendations from professionals to choose the best tools for your project.
Once you have gathered all the necessary materials and tools, you are ready to move on to the next steps, which involve excavating the area and creating a solid base for your patio.
Excavating the Area
Excavating the area is a crucial step in preparing the foundation for your mortared brick patio. Proper excavation ensures a level surface and adequate space for the base and bricks. Here are the steps to follow when excavating the area:
- Clear the Area: Remove any existing vegetation, rocks, debris, or unwanted structures from the patio area. Use a shovel or a rake to clear the space effectively.
- Mark the Boundaries: Begin by marking the boundaries of your patio using stakes and string. This will help you visualize the layout and ensure accurate excavation.
- Dig Deep: Use a shovel or a spade to dig down to the desired depth for your patio. Typically, a depth of 6-8 inches is recommended to accommodate the base material and the thickness of the bricks.
- Keep it Level: As you excavate, periodically check the area for levelness using a straightedge or a level. This will help you maintain a consistent depth throughout the entire patio area.
- Remove Excess Soil: Once you have reached the desired depth, remove any excess soil from the excavation. You can use a wheelbarrow or a tarp to transport the soil to another location or dispose of it properly.
- Compact the Soil: After the excavation is complete, use a hand tamper or a plate compactor to compact the soil in the patio area. This will provide a stable and sturdy base for your patio.
Excavating the area properly is essential for the overall stability and longevity of your patio. It ensures that the base material and the bricks have a solid foundation to rest upon. Take your time during the excavation process to ensure accuracy and levelness.
Keep in mind that excavation may be more challenging if the patio area has hard or rocky soil. In such cases, consider using mechanical equipment, such as a mini-excavator or a power tiller, to assist with the excavation process.
With the area properly excavated, you can move on to creating a solid base for your mortared brick patio. This step is crucial for ensuring the stability and longevity of the finished patio.
Creating a Solid Base
Creating a solid base is a vital step in the construction of a mortared brick patio. This base provides stability, promotes proper drainage, and helps prevent shifting or settling of the bricks over time. Here are the steps to follow when creating a solid base:
- Start with Gravel: Begin by spreading a layer of gravel evenly over the excavated area. Use a rake or a shovel to distribute the gravel and create a uniform thickness of about 2-3 inches.
- Compact the Gravel: Compact the gravel layer using a hand tamper or a plate compactor. This will ensure that the gravel is firmly packed and provides a stable base for the patio.
- Check for Levelness: Use a level or a straightedge to check the levelness of the compacted gravel. Adjust the gravel as needed to achieve a level surface across the entire patio area.
- Add a Layer of Coarse Sand: Once the gravel layer is level, add a layer of coarse sand on top. The sand should have a thickness of about 1 inch. Use a rake and a straightedge to distribute the sand evenly.
- Level the Sand: Use a level or a straightedge to ensure that the sand layer is even and level. This is crucial for creating a smooth and professional-looking brick patio.
- Fill in Low Spots: If there are any low spots or uneven areas in the sand layer, add additional sand and level it out to create a consistent base for the bricks.
- Compact the Sand: Finally, use a hand tamper or a plate compactor to lightly compact the sand layer. This will help settle the sand and create a solid surface for laying the bricks.
Creating a solid base is essential for the stability and longevity of your mortared brick patio. The compacted gravel provides a sturdy foundation, while the sand layer helps facilitate proper drainage and supports the bricks.
During the compacting process, pay attention to areas that may require extra attention. Regularly check for levelness to ensure a flat and uniform base. This will help prevent any unevenness or shifting of the bricks once they are laid.
With a solid base in place, you are now ready to move on to the next step: mixing mortar. Mortar is essential for bonding the bricks together and creating a strong and durable patio surface.
Read more: How To Lay Brick
Mixing Mortar
Mixing mortar is a critical step in the construction of a mortared brick patio. The mortar acts as the adhesive that holds the bricks together and creates a strong, cohesive surface. Here’s how to properly mix mortar for your patio:
- Gather the Required Materials: To mix mortar, you will need mortar mix, water, a bucket or mixing container, and a trowel.
- Read the Instructions: Read the instructions on the package of your mortar mix to determine the proper ratio of mix to water. Different brands and types of mortar may require slightly different ratios, so it’s important to follow the manufacturer’s recommendations.
- Measure and Pour: Measure the appropriate amount of mortar mix into your mixing container. Add the mix gradually, ensuring that you have enough to cover the entire patio area.
- Add Water: Slowly add water to the mix while stirring with a trowel or a mixing paddle. Start with a small amount of water and gradually add more as needed. Aim for a consistency that is similar to peanut butter.
- Mix Thoroughly: Mix the mortar thoroughly until it is smooth and free of lumps. It should have a uniform consistency and be easy to spread.
- Check the Workability: Test the workability of the mortar by scooping a small amount onto your trowel and turning it upside down. The mortar should stay in place on the trowel without sagging or dripping.
- Adjust as Needed: If the mortar is too dry, add a small amount of water and continue mixing. If it is too wet, add more mortar mix to achieve the desired consistency.
It’s important to mix mortar in small batches to ensure that it remains workable and doesn’t dry out prematurely. Only mix enough mortar that you can use within a 30-minute to 1-hour time frame, depending on the specific mortar mix you are using.
Always follow the manufacturer’s instructions and guidelines when mixing mortar. This will help you achieve the optimal consistency and ensure the mortar’s effectiveness in bonding the bricks together.
Now that you have properly mixed the mortar, you can move on to the exciting step of laying the bricks and bringing your mortared brick patio to life!
When laying a mortared brick patio, make sure to use a sturdy base of compacted gravel and sand to prevent shifting and settling over time. This will ensure a long-lasting and stable patio.
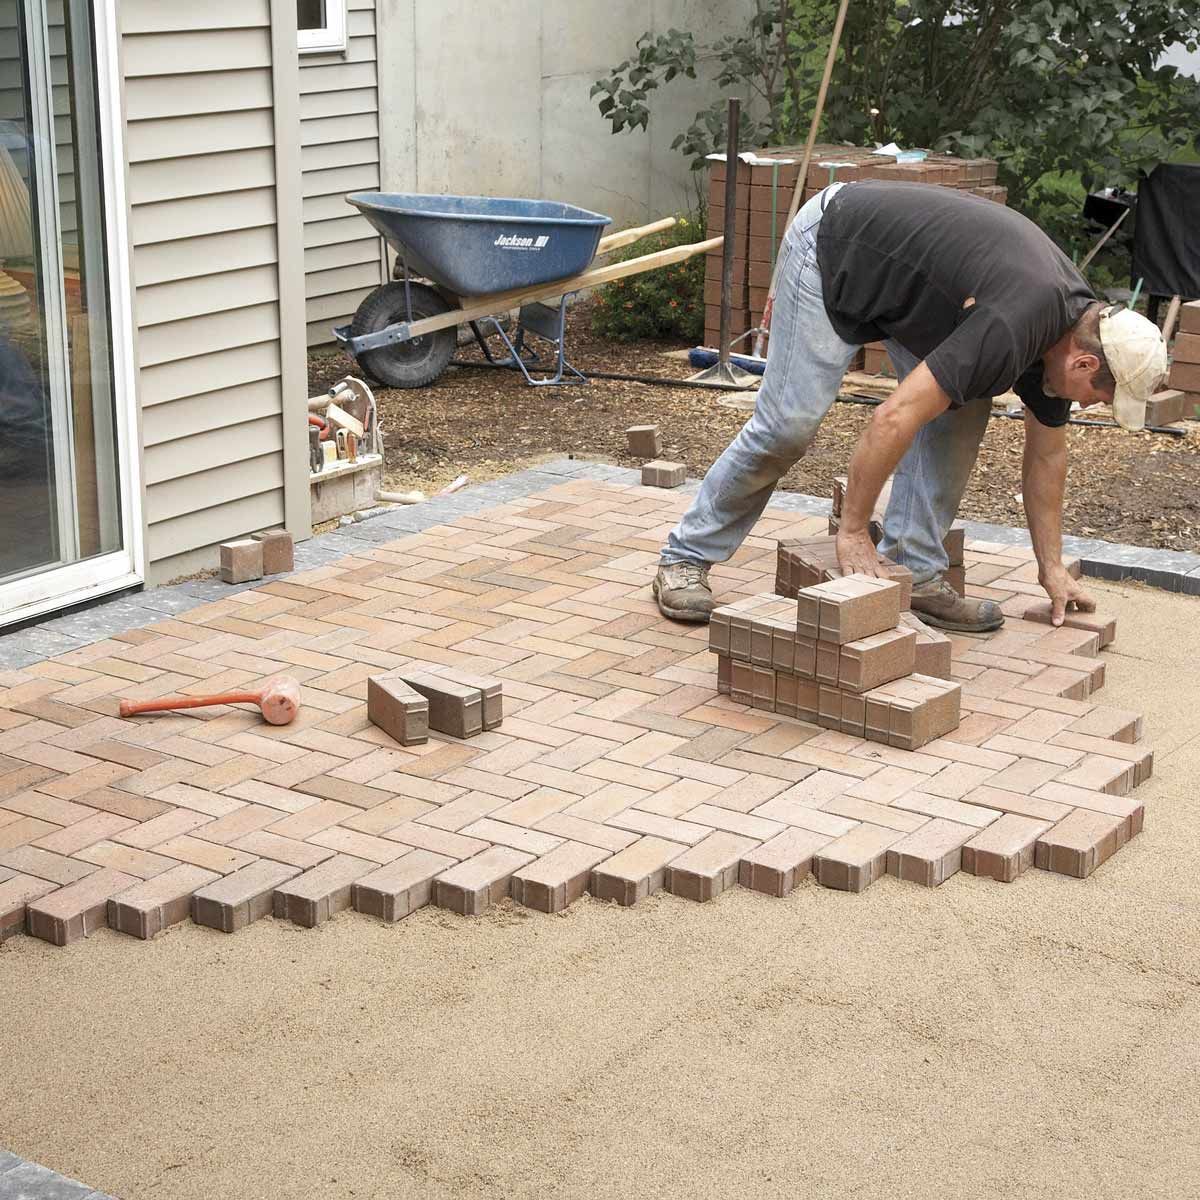
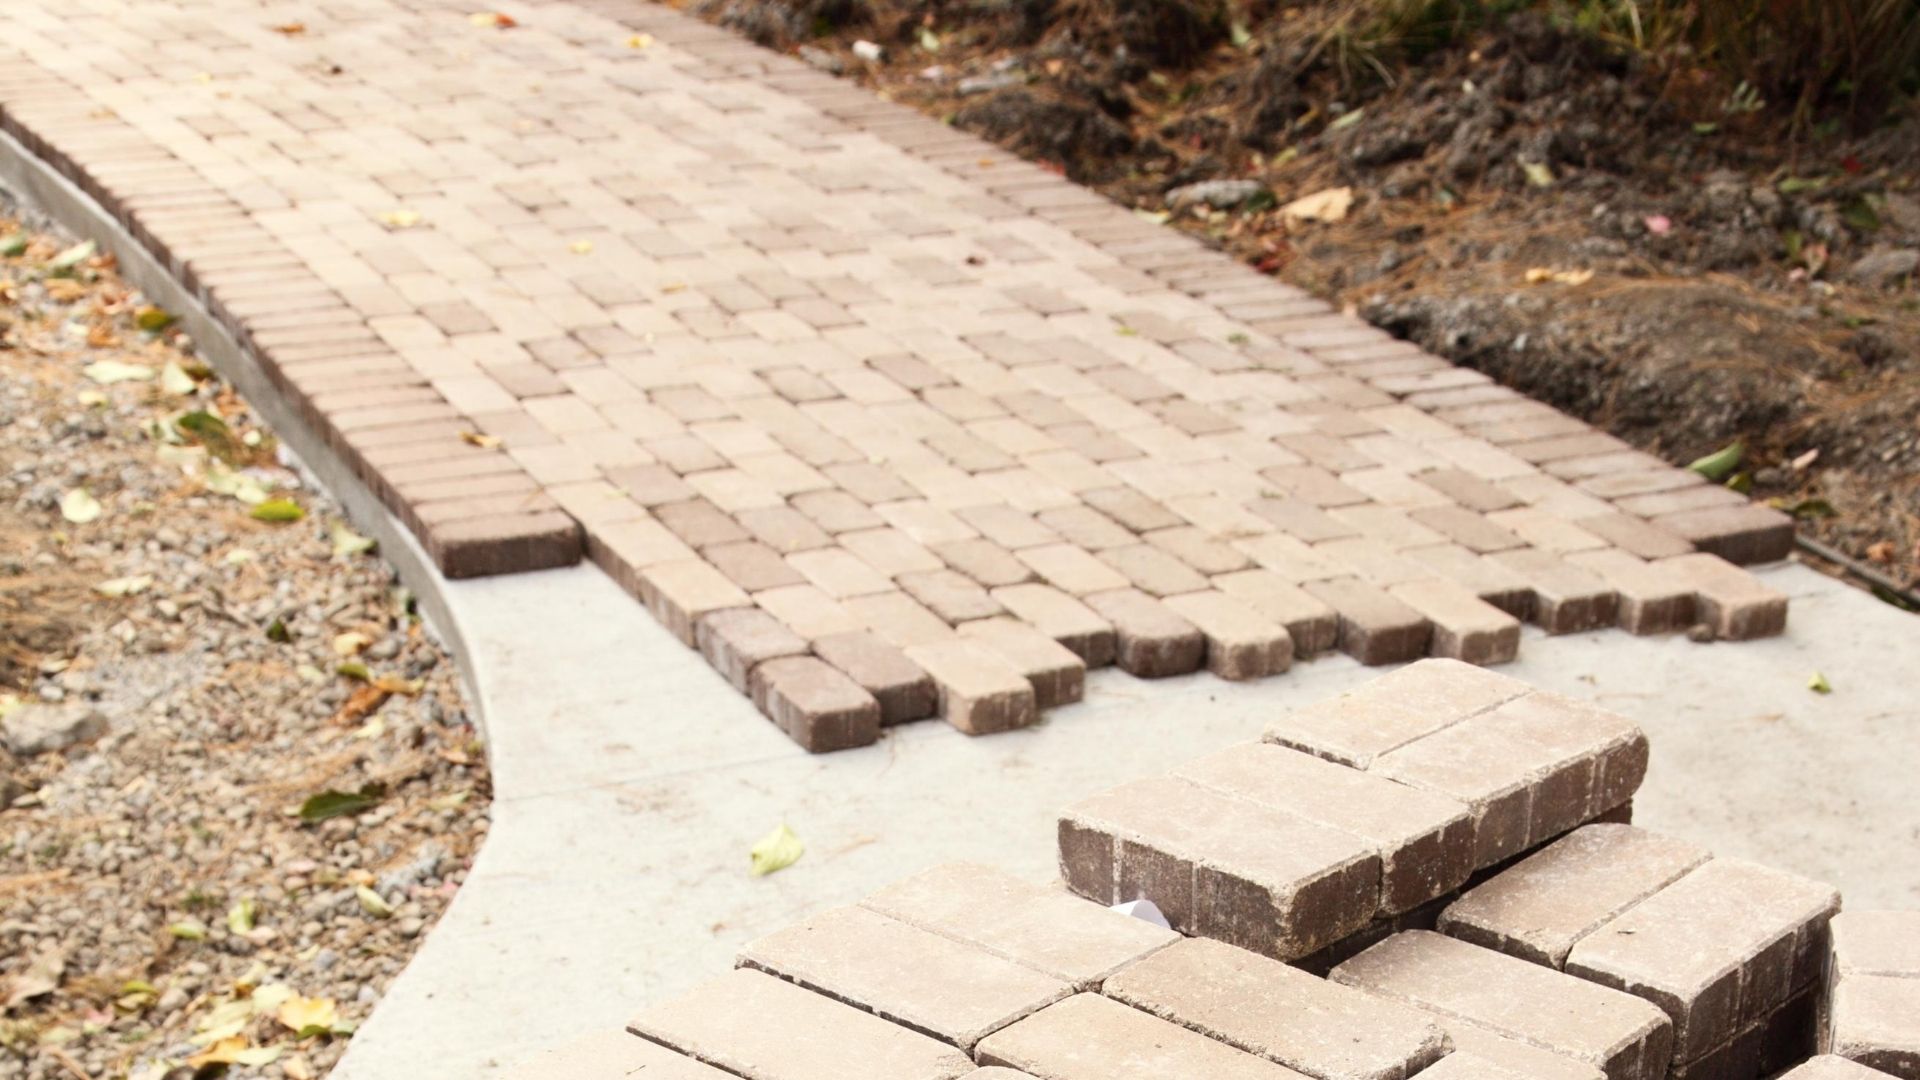
Laying the Bricks
Now that you have your mortar mixed and prepared, it’s time to start laying the bricks for your mortared brick patio. This step requires precision and attention to detail to ensure a sturdy and visually appealing patio surface. Follow these steps to lay the bricks:
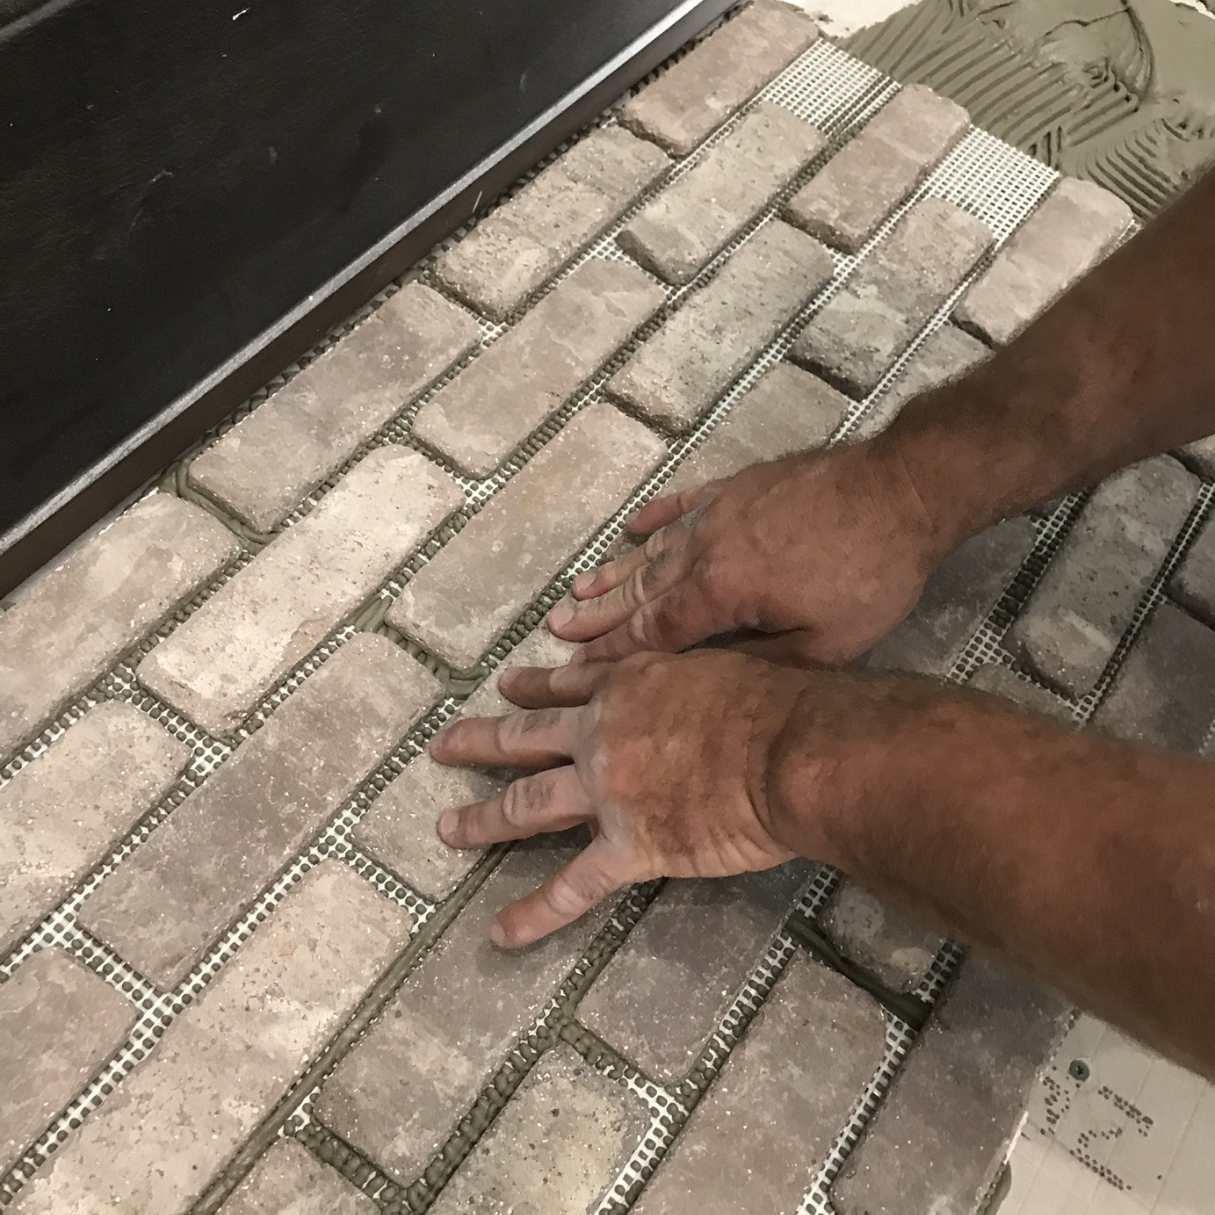
- Start at a Corner: Begin at one corner of the patio area. Apply a layer of mortar on the prepared base, using a trowel or a pointing trowel. The layer should be about 1/2 inch thick.
- Place the First Brick: Carefully place the first brick on the mortar bed, pressing it firmly into place. Use a slight twisting motion to settle it securely in the mortar.
- Add Mortar and Level: Apply mortar to the side of the next brick and position it next to the first brick, leaving a consistent gap between them for the mortar joints. Use a level to ensure that the brick is level and aligned with the layout plan.
- Continue Laying Bricks: Repeat the process of applying mortar, placing the brick, and aligning it with the previous ones. Work methodically, row by row, while ensuring that the bricks are level and evenly spaced.
- Use Spacers: To maintain an even gap between the bricks, insert plastic spacers or wooden dowels between them as you lay each brick. These spacers will help create consistent mortar joints.
- Check for Alignment: Regularly check for alignment and adjust as necessary. Ensure that the bricks are laid in straight lines and that the corners are at 90-degree angles.
- Cut Bricks if Needed: You may need to cut bricks to fit into smaller spaces or create custom shapes for your patio. Use a masonry saw or a chisel and hammer to carefully cut the bricks to the desired size.
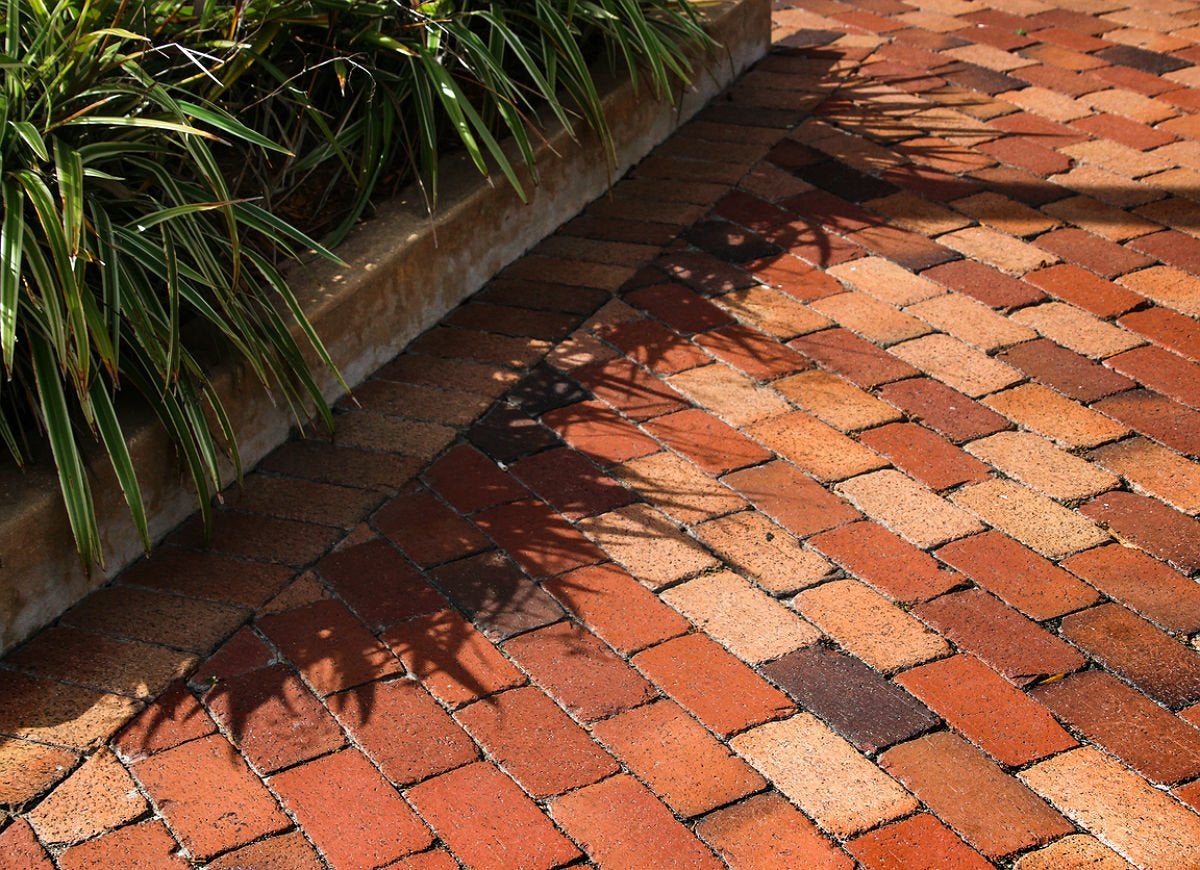
- Continue the Pattern: Maintain the chosen pattern or layout of the bricks, whether it’s a running bond, herringbone, or any other design. Consistency in the pattern will enhance the visual appeal of your patio.
- Work in Sections: Divide the patio area into manageable sections and focus on completing one section at a time. This approach helps you maintain control and ensures that the mortar doesn’t dry out before you finish.
As you lay the bricks, maintain a consistent mortar joint thickness between them, typically around 3/8 to 1/2 inch. Use a trowel to remove any excess mortar that squeezes out between the bricks to keep the joints clean and neat.
Remember to periodically check for levelness and alignment to ensure a professional-looking result. Take your time during this crucial step to ensure the bricks are securely bonded and evenly placed.
With the bricks laid, the next step is to level and align them for a visually pleasing patio surface. Keep reading to learn how to achieve a perfectly level and aligned brick patio.
Leveling and Aligning
Leveling and aligning the bricks is a critical step in creating a polished and visually appealing mortared brick patio. This step ensures that the patio surface is even, straight, and aesthetically pleasing. Here’s how to level and align the bricks:
- Check for Levelness: Use a level to assess the overall levelness of the bricks. Place the level on top of the bricks and adjust as necessary. Tap gently on any high spots with a rubber mallet to level them with the rest of the bricks.
- Adjust the Mortar Bed: If you notice any areas where the mortar bed is uneven, use a trowel to add or remove mortar to achieve a consistent bed height.
- Align the Bricks: Use a string line or a straightedge laid across the top of the bricks to ensure they are aligned properly. Adjust any misaligned bricks by nudging them with a rubber mallet until they are in line with the rest of the bricks.
- Check for Proper Spacing: Ensure that the gaps between the bricks are consistent and even. Adjust the spacing by adding or removing mortar if needed or by slightly shifting the bricks.
- Use a Jointing Tool: Once the bricks are leveled and aligned, use a jointing tool, such as a pointing trowel or a jointer, to smooth and shape the mortar joints. This step adds a finishing touch to your brick patio.
- Brush Off Excess Mortar: While the mortar is still soft, use a stiff brush to gently sweep away any excess mortar from the brick surfaces. This will help maintain a clean and polished appearance.
- Continue working in sections: Level and align the bricks in one section of the patio at a time, ensuring that each section is properly leveled and aligned before moving on to the next.
Pay close attention to detail during the leveling and aligning process to ensure a professional-looking result. Taking the time to achieve levelness and alignment will not only enhance the visual appeal of your patio but also contribute to its structural integrity.
Remember to periodically check for levelness and alignment throughout the construction process to maintain consistency and ensure a precise end result.
With the bricks leveled and aligned, the next step is to fill the mortar joints to complete the construction of your mortared brick patio.
Filling the Joints
Filling the joints is a crucial step in completing the construction of your mortared brick patio. This process involves adding mortar to the gaps between the bricks, creating a strong bond and a finished look. Follow these steps to properly fill the joints:
- Mix Additional Mortar: Prepare a fresh batch of mortar according to the manufacturer’s instructions. The consistency of the mortar should be similar to peanut butter, ensuring it is workable but not too wet.
- Prepare Your Tools: Have a pointing trowel, a pointing tool, or a mortar bag ready for filling the joints. These tools will help you apply the mortar evenly and efficiently.
- Fill the Joints: Start by loading the mortar onto the pointing trowel, pointing tool, or mortar bag. Apply the mortar into the joints by pressing it firmly and filling the gaps completely. Ensure that the mortar is packed tightly to create a strong bond.
Properly filling the joints is essential for the structural integrity and visual appeal of your patio. The mortar acts as an adhesive, anchoring the bricks together and providing strength and stability.
Take your time when filling the joints, ensuring that they are neatly shaped, smoothed, and packed with mortar. This attention to detail will enhance the overall appearance of your finished mortared brick patio.
Once the mortar has dried and cured, you can add the finishing touches to your patio to complete the project.
Read more: How To Lay A Cobblestone Patio
Finishing Touches
With the bricks laid, joints filled, and mortar dried, it’s time to add the finishing touches to your mortared brick patio. These final steps will enhance the overall appearance and functionality of your patio. Here are some finishing touches you can consider:
- Seal the Brick Surface: Applying a sealant to the brick surface can protect it from stains, weather damage, and fading. Choose a sealant that is suitable for outdoor use and follow the manufacturer’s instructions for application.
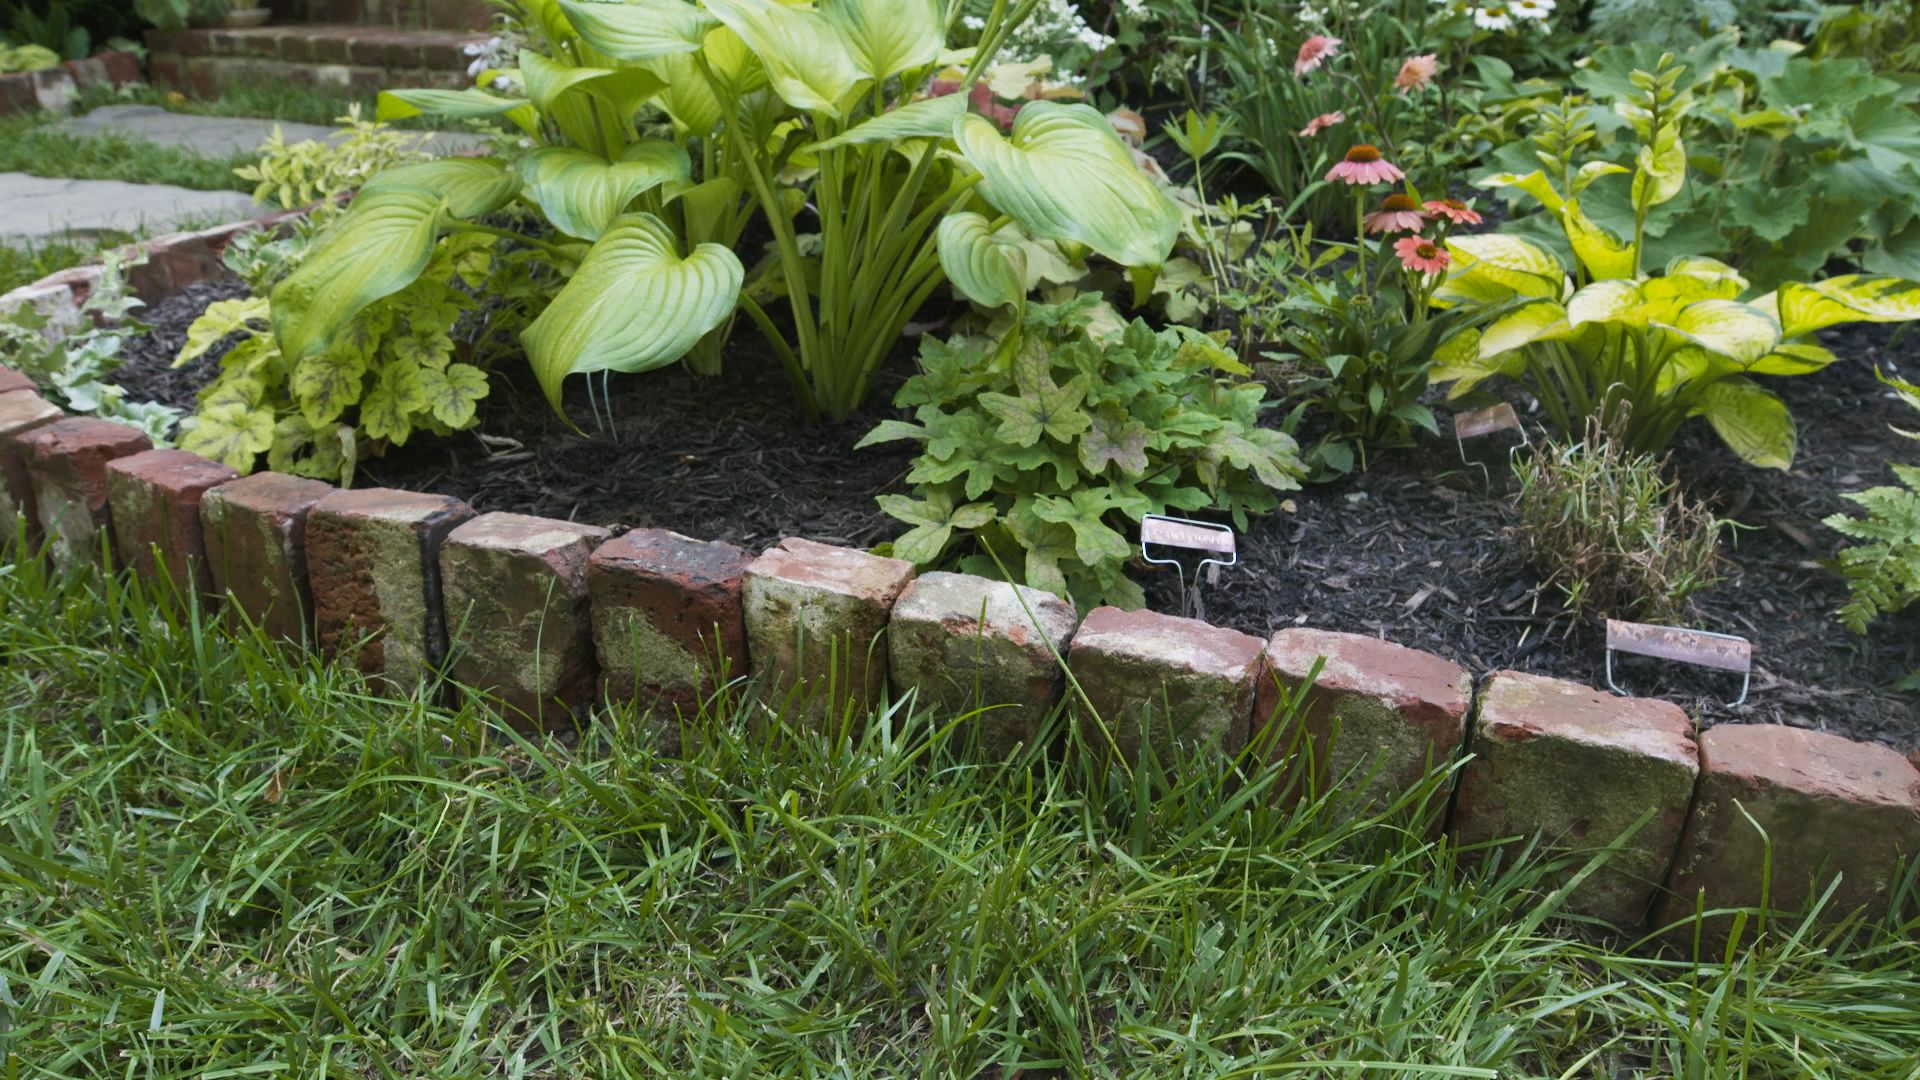
- Add Edging: Consider installing edging around the perimeter of your patio. This can be done using materials such as brick, stone, or metal. Edging provides a clean and defined border, preventing the bricks from shifting or spreading over time.
Adding these finishing touches will not only enhance the aesthetics of your mortared brick patio but also contribute to its functionality and longevity. Take pride in your creation and make the most of your outdoor oasis.
Remember, periodically assess the condition of your patio and make any necessary repairs or maintenance to ensure its longevity. With proper care, your mortared brick patio will provide years of enjoyment for you and your loved ones.
Congratulations on completing your mortared brick patio project!
Conclusion
Creating a mortared brick patio is a rewarding project that adds both beauty and functionality to your outdoor space. With careful planning, preparation, and execution, you can transform a bland area into a stunning patio where you can relax, entertain, and enjoy the outdoors. Throughout the process, it’s crucial to pay attention to detail, ensuring levelness, alignment, and consistency in spacing to create a professional-looking finish.
By following the steps outlined in this guide, from planning and preparation to the finishing touches, you can successfully create a mortared brick patio that will stand the test of time. From excavating the area and creating a solid base to mixing the mortar, laying the bricks, and filling the joints, each step plays an important role in constructing a durable and visually appealing patio.
Remember to infuse your personal style into the patio design and consider adding additional elements such as edging, lighting, and planters to further enhance the space. Regular maintenance, including cleaning and sealing, will help protect your patio and ensure its longevity.
Now that your mortared brick patio is complete, it’s time to sit back, relax, and enjoy the fruits of your labor. Whether you’re hosting gatherings, sipping a cup of coffee, or simply basking in the sun, your new patio will provide a welcoming and inviting outdoor retreat.
So grab a chair, invite your loved ones, and make lasting memories in your beautifully crafted mortared brick patio. Enjoy the beauty and functionality it brings to your outdoor space for years to come.
Frequently Asked Questions about How To Lay A Mortared Brick Patio
Was this page helpful?
At Storables.com, we guarantee accurate and reliable information. Our content, validated by Expert Board Contributors, is crafted following stringent Editorial Policies. We're committed to providing you with well-researched, expert-backed insights for all your informational needs.


0 thoughts on “How To Lay A Mortared Brick Patio”