Home>Furniture>Outdoor Furniture>How To Lay A Patio Slab
Outdoor Furniture
How To Lay A Patio Slab
Modified: March 7, 2024
Learn how to lay a patio slab for your outdoor furniture and create the perfect outdoor space. Our step-by-step guide will help you achieve a beautiful and functional patio.
(Many of the links in this article redirect to a specific reviewed product. Your purchase of these products through affiliate links helps to generate commission for Storables.com, at no extra cost. Learn more)
Introduction
Welcome to this comprehensive guide on how to lay a patio slab. If you’re looking to transform your outdoor space into a beautiful and functional area, laying patio slabs is a great way to achieve that. Whether you’re planning to create a cozy seating area, a stylish dining space, or a place to relax and unwind, a well-laid patio can make all the difference.
Before you dive into the process of laying patio slabs, it’s essential to have a clear plan in mind. From the initial preparation to the finishing touches, each step requires attention to detail and careful execution. By following this guide, you’ll learn the step-by-step process of laying patio slabs, ensuring a successful and long-lasting result.
Whether you’re a seasoned DIY enthusiast or a beginner looking for some guidance, this guide will provide you with all the information you need to lay a patio slab. From planning and preparation to the finishing touches, we’ll cover each step in detail, offering tips and tricks along the way.
So, grab your tools and let’s get started on creating the perfect patio slab for your outdoor space!
Key Takeaways:
- Create a beautiful and functional patio by carefully planning, leveling the area, and positioning the slabs with precision. Add finishing touches to personalize your outdoor space and enjoy the transformation for years to come.
- Transform your outdoor space into a welcoming oasis by following the step-by-step process of laying patio slabs. From clearing and leveling the area to filling the gaps and adding final touches, create a durable and visually appealing patio surface.
Read more: How To Lay Patio Slabs On Grass
Step 1: Planning and Preparation
Before you begin laying patio slabs, it’s crucial to spend some time planning and preparing for the project. This step sets the foundation for a successful patio installation and helps ensure that your finished patio meets your desired vision. Follow these steps to effectively plan and prepare for your patio slab project:
- Measure and Mark: Start by measuring the area where you want to lay the patio. Use a tape measure to determine the dimensions and mark the boundaries with stakes and string. This will help you visualize the size and shape of the patio.
- Consider Drainage: Evaluate the slope and drainage patterns in the area. It’s essential to ensure that water will flow away from your house and the patio surface to prevent any potential water damage. If necessary, make adjustments to the slope or consider adding drainage solutions.
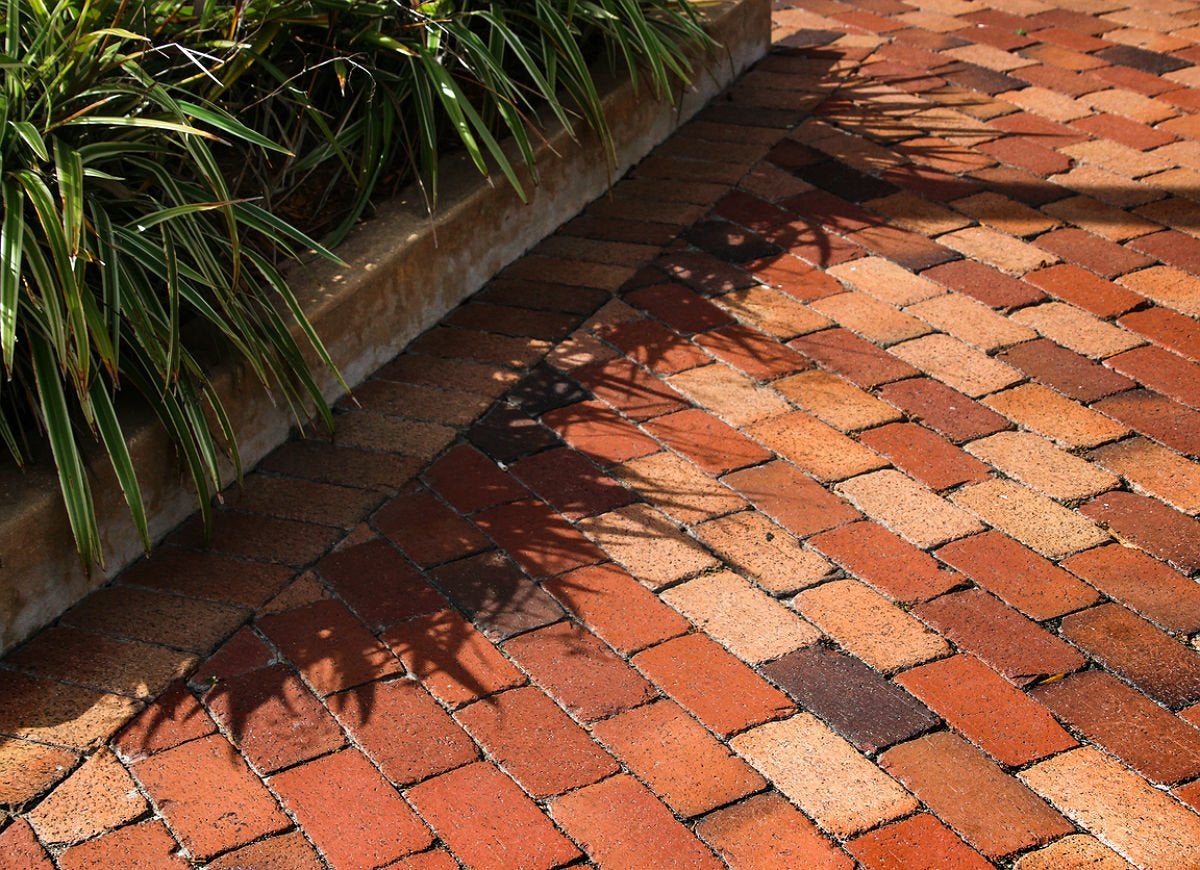
- Choose the Slab Type: There are various types of patio slabs available, including concrete, stone, brick, and composite materials. Consider the style, durability, and maintenance requirements of each option to choose the best slab type for your patio.
- Create a Design: Sketch out your desired patio design, including any patterns, borders, or focal points you want to incorporate. This will help you visualize the final look and guide you during the installation process.
- Check Local Regulations: Before proceeding with the project, check your local building codes and regulations. Some areas may have specific guidelines for patio installations, such as setback requirements or permits. Ensure you comply with the necessary regulations to avoid any issues down the line.
- Calculate Materials: Determine the number of slabs and additional materials you’ll need for the project. Take into account the dimensions of the patio and the recommended spacing between each slab. It’s always advisable to purchase extra slabs to account for any breakage or mistakes.
By investing time in careful planning and preparation, you’ll be well-equipped to tackle the patio slab installation with confidence and efficiency. Taking these initial steps will help minimize potential issues and ensure that your patio turns out exactly as you envision it.
Step 2: Gathering Materials and Tools
Once you have completed the planning and preparation phase, it’s time to gather all the necessary materials and tools for laying your patio slabs. Having everything you need on hand will make the installation process smoother and more efficient. Here are the essential materials and tools you’ll need:
Materials:
- Patio slabs: Choose the type, size, and color of slabs that align with your design and preferences.
- Base material: This can include crushed stone, gravel, or sand. The choice will depend on your local soil conditions and the recommended base material for your particular patio slab type.
- Edge restraints: These help keep the slabs in place and provide stability to your patio. Options include plastic or metal edge restraints.
- Mortar or jointing compound: Depending on the type of slabs you’re using, you may need a mortar mix or a jointing compound to fill the gaps between the slabs.
- Jointing sand: For certain types of slabs, jointing sand is used to lock the pavers together and create a stable surface.
- Landscape fabric: It is recommended to lay landscape fabric beneath the base material to prevent weed growth.
- Grading rake: This long-handled rake is useful for leveling the base material and ensuring a smooth surface.
Tools:
- Shovel: A sturdy shovel is essential for digging and excavating the area where the patio will be installed.
- Tape measure: Accurate measurements are crucial for ensuring a proper fit and alignment of your patio slabs.
- Level: This tool is used to check the evenness and alignment of the patio surface.
- Rubber mallet: A rubber mallet is handy for tapping the slabs into place without damaging them.
- Circular saw or wet saw: If you need to make any cuts or adjustments to the slabs, a circular saw or wet saw will come in handy.
- Broom: A broom will be used to sweep the jointing sand or jointing compound into the gaps between the slabs.
- Protective gear: Don’t forget important safety items such as gloves, safety glasses, and a dust mask.
Ensure that you have all the necessary materials and tools before beginning the patio slab installation. This will save you time and frustration, allowing you to focus on the task at hand and achieve professional results.
Read more: How To Lay A Concrete Slab For A Shed
Step 3: Clearing and Leveling the Area
Once you have gathered all the materials and tools, it’s time to clear and level the area where the patio will be installed. This step is crucial to ensure a stable and even surface for laying the patio slabs. Follow these steps to clear and level the area effectively:
- Clear the Area: Remove any obstacles, such as plants, rocks, or debris, from the designated patio area. Clearing the area will provide a clean slate for the installation process.
- Mark the Boundaries: Use stakes and string to mark the boundaries of the patio. This will help you visualize the area and ensure that the patio is properly aligned.
- Excavate the Area: Use a shovel to excavate the area within the marked boundaries. Dig down to a depth of approximately 6 to 8 inches to allow for the base material and the thickness of the slabs.
- Check for Levelness: Use a level to ensure that the excavated area is even and level. Make adjustments as necessary by adding or removing soil until you achieve a level surface.
- Compact the Soil: Use a hand tamper or plate compactor to compact the soil in the excavated area. This will create a firm base for the patio slabs and help prevent settling over time.
- Lay Landscape Fabric: To prevent weed growth, lay landscape fabric over the compacted soil. This will help maintain the integrity of the patio surface.
Clearing and leveling the area may require some physical effort, but it is essential for the successful installation of your patio slabs. By taking the time to properly prepare the area, you’ll ensure a stable foundation for your patio and achieve long-lasting results.
Step 4: Laying the Base
With the area cleared and leveled, it’s time to lay the base for your patio slabs. The base provides support and stability for the slabs, ensuring they remain level and durable over time. Follow these steps to properly lay the base for your patio:
- Add Base Material: Begin by adding a layer of crushed stone, gravel, or sand to the excavated area. The choice of base material depends on your local soil conditions and the recommended base material for your specific patio slab type.
- Spread the Base Material: Use a grading rake to evenly spread the base material over the excavated area. Aim for a thickness of around 4 to 6 inches, but refer to the manufacturer’s recommendations for your specific patio slab type.
- Compact the Base Material: Use a hand tamper or plate compactor to compact the base material. This step ensures a firm and stable base for the patio slabs. Continue compacting until the base material is solid and level.
- Check for Levelness: Use a level to ensure that the compacted base material is level. Make any necessary adjustments by adding or removing base material until you achieve a level surface.
- Add Edge Restraints: Install edge restraints around the perimeter of the patio area. This helps keep the slabs in place and provides stability to the patio. Follow the manufacturer’s instructions for installing the specific type of edge restraints you’ve chosen.
- Compact Again: After installing the edge restraints, compact the base material once more. This helps secure the edge restraints in place and ensures a solid base for the patio slabs.
Laying a proper base is essential to the longevity and overall stability of your patio. Take your time to properly prepare and compact the base material, as it will provide a solid foundation for the patio slabs and help prevent any future issues.
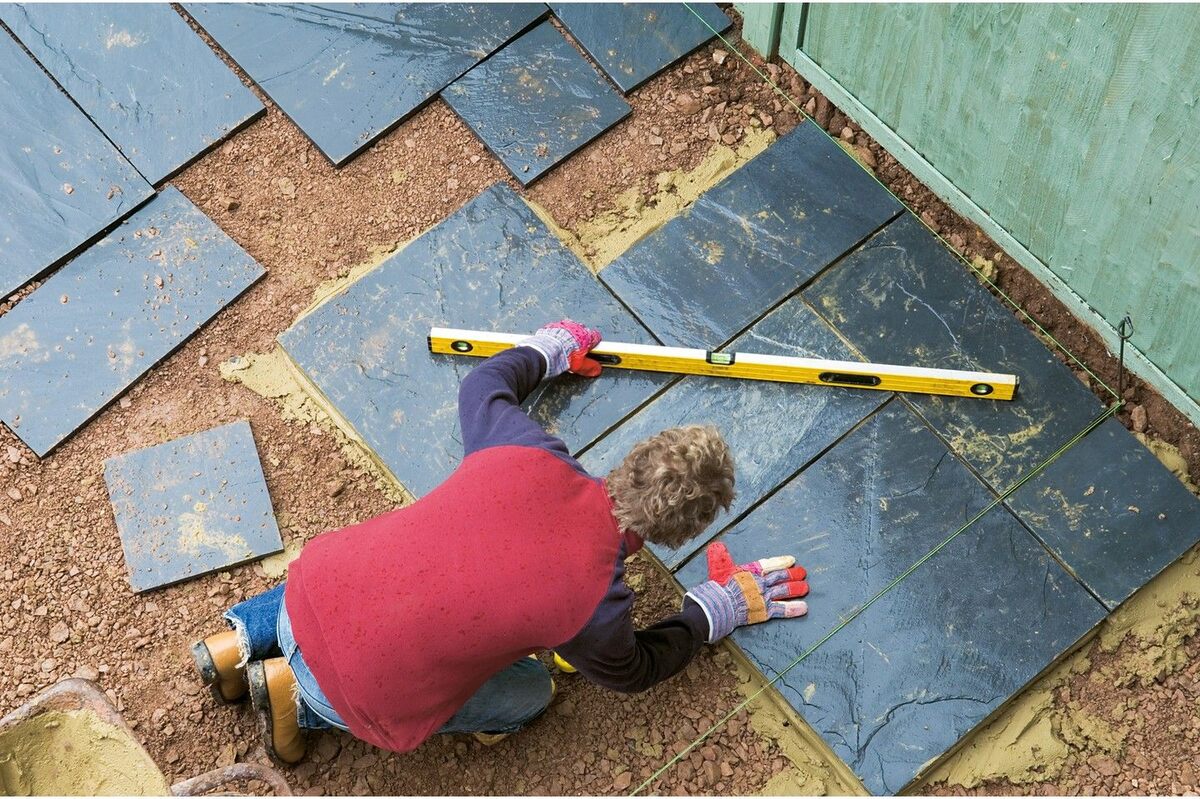
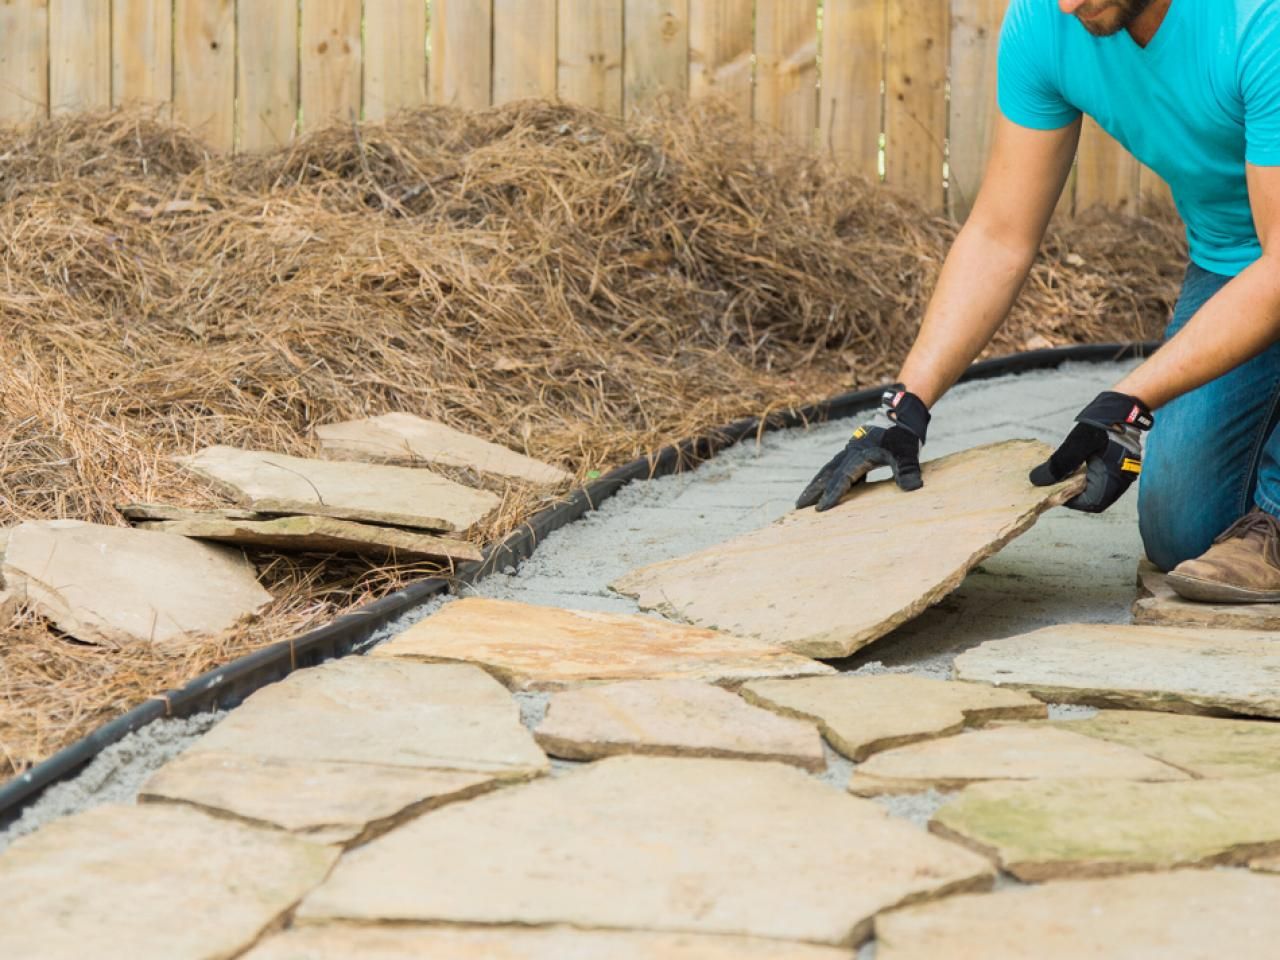
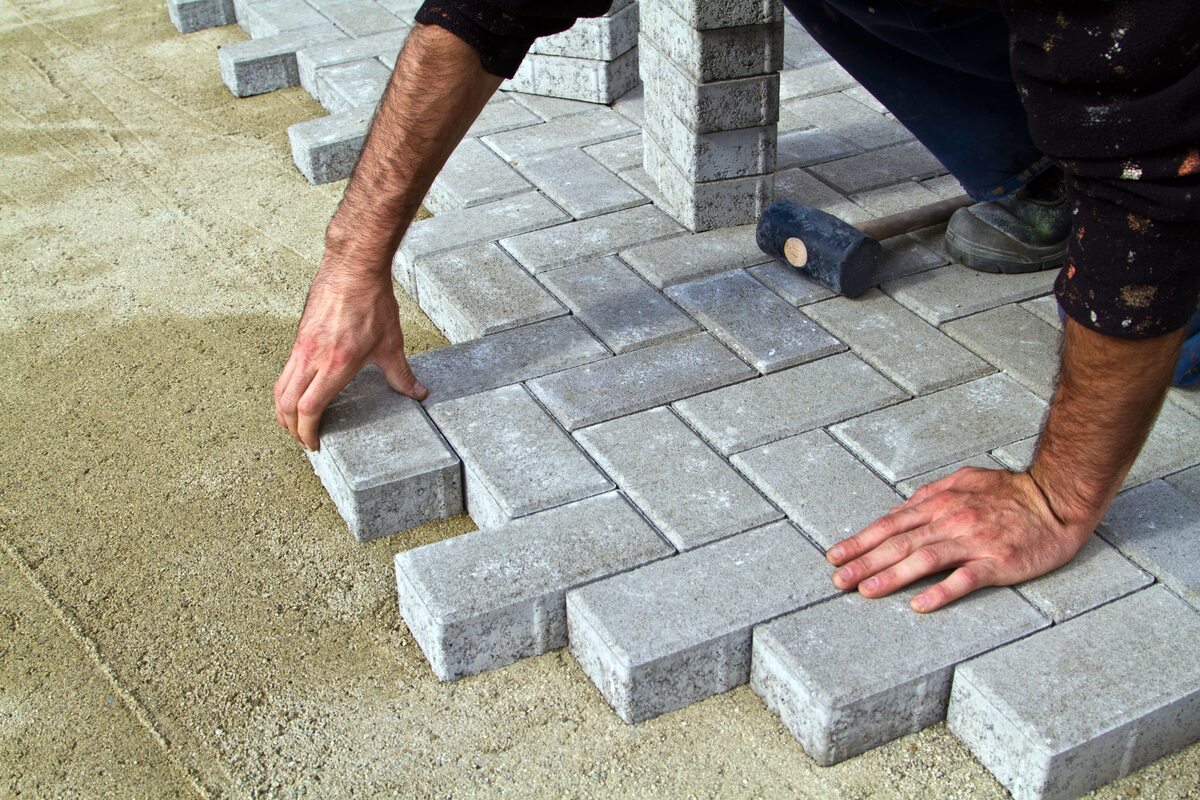
Step 5: Positioning the Slabs
Now that you have laid the base for your patio, it’s time to position the slabs in their designated spots. Proper positioning is crucial to ensure an even and visually appealing patio surface. Follow these steps to properly position the slabs:
- Start at a Corner: Begin laying the slabs at one corner of the patio area. This will provide a reference point and help ensure a consistent pattern and alignment.
- Use Spacers: Place plastic spacers between each slab to maintain consistent spacing. These spacers will create uniform gaps between the slabs, allowing for jointing material later on.
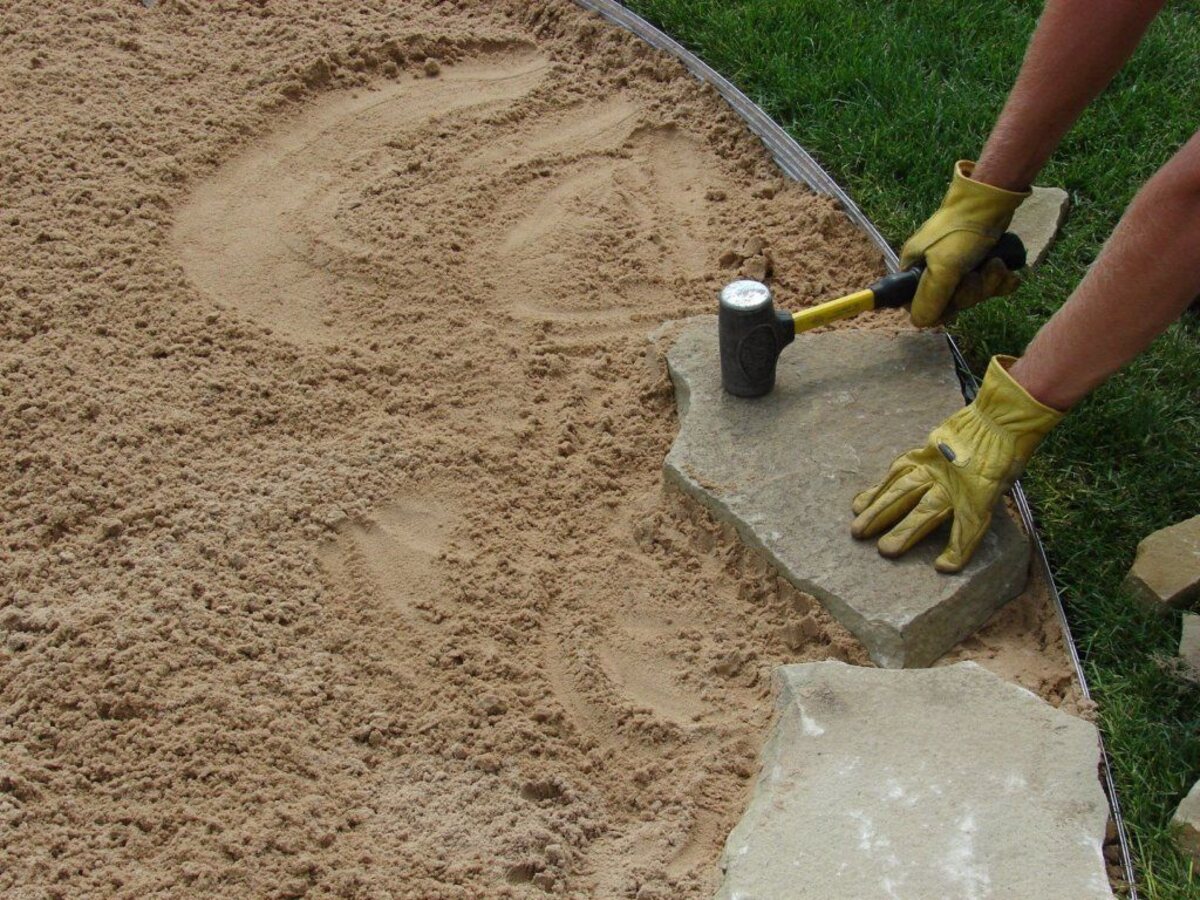
- Check for Levelness: Use a level to ensure that each individual slab is level. Tap gently with a rubber mallet to adjust if needed. It’s crucial to ensure that the slabs are level both individually and in relation to one another for a professional finish.
- Continue the Pattern: Lay the slabs in the desired pattern, following your initial design sketches or instructions. Take your time to align each slab with precision, ensuring a visually appealing layout.
- Check Alignment: Periodically step back and check the alignment of the slabs. This will ensure that the overall layout is visually balanced and aligned with the edges of the patio area.
As you position the slabs, take care to maintain proper spacing and alignment. This attention to detail will result in a visually pleasing and cohesive patio surface. Continue laying the slabs in the desired pattern until the entire patio area is covered.
Take your time during this step to ensure the slabs are positioned accurately. A well-executed placement will make the subsequent steps of the installation process much easier.
Before laying a patio slab, make sure the ground is level and compacted. Use a string line and level to ensure the slabs are laid evenly. Fill the gaps with sand for stability.
Step 6: Cutting and Adjusting Slabs
During the patio slab installation process, it’s common to encounter situations where you’ll need to make cuts and adjustments to ensure a proper fit. This step involves carefully cutting and adjusting the slabs to fit around edges, corners, or obstructions. Follow these steps for cutting and adjusting slabs:
- Measure the Cuts: Use a tape measure to measure the area where a cut is needed. Take precise measurements to ensure accuracy.
- Mark the Slab: Transfer the measurements onto the slab using a pencil or chalk. Double-check the measurements before proceeding.
- Wear Safety Gear: Put on safety glasses and a dust mask to protect yourself during the cutting process.
- Use a Circular Saw or Wet Saw: Depending on the type of slab material, use a circular saw or wet saw to make the necessary cuts. Follow the manufacturer’s instructions for operating the saw safely and accurately.
- Cut Slowly and Carefully: When making the cuts, it’s important to go slowly and maintain control over the saw to ensure a clean and precise cut. Take your time and avoid rushing the process.
- Test the Fit: After making the cut, carefully test the fit of the slab in the designated area. Make any necessary adjustments or additional cuts until the slab fits properly.
- Adjust for Obstructions or Curves: If you encounter obstructions, such as columns or curves, use a wet saw or chisel to shape the slab accordingly. This will ensure a seamless fit around the obstruction.
- Smooth the Edges: Use a hand file or sandpaper to smooth any rough edges created from the cuts. This will give the slabs a finished look.
Keep in mind that cutting and adjusting slabs require precision and careful attention to detail. Take your time and exercise caution to achieve clean and accurate cuts. Remember to prioritize safety by wearing appropriate protective gear.
By properly cutting and adjusting the slabs, you’ll ensure a seamless and professional-looking patio surface, even in areas with edges, corners, or obstructions.
Read more: How To Lay Concrete Slabs On Grass
Step 7: Filling the Gaps
After positioning and adjusting the patio slabs, it’s time to fill the gaps between them. This step provides stability to the patio surface and enhances its overall appearance. Follow these steps to properly fill the gaps between the slabs:
- Choose the Jointing Material: Depending on the type of slabs you’re using, you can choose between mortar, jointing compound, or jointing sand. Refer to the manufacturer’s instructions to determine the recommended material for your specific patio slab type.
- Pour the Jointing Material: Pour the jointing material over the slabs, ensuring that it fills the gaps completely. Use a broom or brush to push the material into the gaps and ensure even coverage.
- Compact the Material: Use a plate compactor or rubber mallet to gently compact the jointing material. This will help settle it into the gaps and create a solid surface.
- Remove Excess Material: Use a broom or brush to sweep away any excess jointing material from the surface of the slabs. This will leave a clean and finished look.
- Moisten the Patio: Lightly spray water over the patio surface to activate the jointing material. Follow the manufacturer’s recommendations for how much water to apply.
- Allow for Drying Time: Let the jointing material dry and set according to the manufacturer’s instructions. This can range from a few hours to a few days, depending on the type of material used.
Properly filling the gaps between the slabs not only enhances the visual appeal of your patio but also helps prevent weed growth and ensures stability. The jointing material binds the slabs together and provides a secure and durable surface.
Take care during this step to ensure that the gaps are evenly filled and the jointing material is properly compacted. This will result in a professional-looking finish that will stand the test of time.
Step 8: Finishing Touches
With the patio slabs laid, the gaps filled, and the jointing material set, it’s time to add the final touches to complete your patio installation. These finishing touches will enhance the overall aesthetics and functionality of your outdoor space. Follow these steps to add the final touches:
- Clean the Patio: Sweep away any remaining debris or dust from the surface of the patio. This final cleaning step will ensure a pristine finish.
- Seal the Slabs (Optional): Consider applying a sealer to the slabs to protect them from stains and weathering. Follow the manufacturer’s instructions for the specific sealer you’re using.
- Add Edging: Install decorative edging around the perimeter of the patio area. This not only adds a visually pleasing element but also helps prevent slabs from shifting or spreading over time.
- Accessorize the Space: Add outdoor furniture, plants, lighting, or other decorative elements to personalize and enhance your patio area. These accessories create a welcoming and inviting atmosphere.
- Consider a Patio Cover: Depending on your climate and intended use of the patio, you may want to consider adding a patio cover or umbrella to provide shade and protection from the elements.
By attending to these finishing touches, you will elevate the overall look and functionality of your newly installed patio. These final steps allow you to customize the space and create an outdoor area that reflects your style and meets your specific needs.
Remember to regularly maintain and care for your patio to preserve its beauty and durability. This includes routine cleaning, resealing (if applicable), and addressing any necessary repairs.
Congratulations on completing the installation of your patio slabs and adding the finishing touches! Take a step back, relax, and enjoy your newly transformed outdoor space.
Conclusion
Congratulations! You have successfully completed the process of laying a patio slab. By following the step-by-step guide outlined in this article, you have transformed your outdoor space into a beautiful and functional area that you can enjoy for years to come.
From the initial planning and preparation to the final finishing touches, each step was crucial in achieving a professionally installed patio. By clearing and leveling the area, laying the base, positioning the slabs, making necessary cuts and adjustments, filling the gaps, and adding the finishing touches, you have created a solid and visually appealing patio surface.
Remember to regularly maintain your patio by cleaning it, resealing (if applicable), and addressing any repairs or maintenance needs. This will help ensure the longevity and durability of your patio.
Now, it’s time to bring your patio to life. Add your personal touch with outdoor furniture, plants, and decorative elements. Create a space that reflects your style and allows you to enjoy the outdoors in comfort and relaxation.
Whether you envision a cozy seating area for gatherings, a stylish dining space for entertaining, or a tranquil oasis for relaxation, your newly laid patio slab will provide the perfect foundation for realizing your outdoor dreams.
Thank you for following this comprehensive guide on how to lay a patio slab. We hope you found it informative and useful throughout your patio installation journey. Enjoy your new outdoor space and make lasting memories with family and friends!
Frequently Asked Questions about How To Lay A Patio Slab
Was this page helpful?
At Storables.com, we guarantee accurate and reliable information. Our content, validated by Expert Board Contributors, is crafted following stringent Editorial Policies. We're committed to providing you with well-researched, expert-backed insights for all your informational needs.


0 thoughts on “How To Lay A Patio Slab”