Home>Furniture>Outdoor Furniture>How To Lay Down Pavers For A Patio
Outdoor Furniture
How To Lay Down Pavers For A Patio
Modified: March 7, 2024
Learn how to lay down pavers for a patio and create a stunning outdoor furniture area. Transform your backyard into a comfortable and inviting space.
(Many of the links in this article redirect to a specific reviewed product. Your purchase of these products through affiliate links helps to generate commission for Storables.com, at no extra cost. Learn more)
Introduction
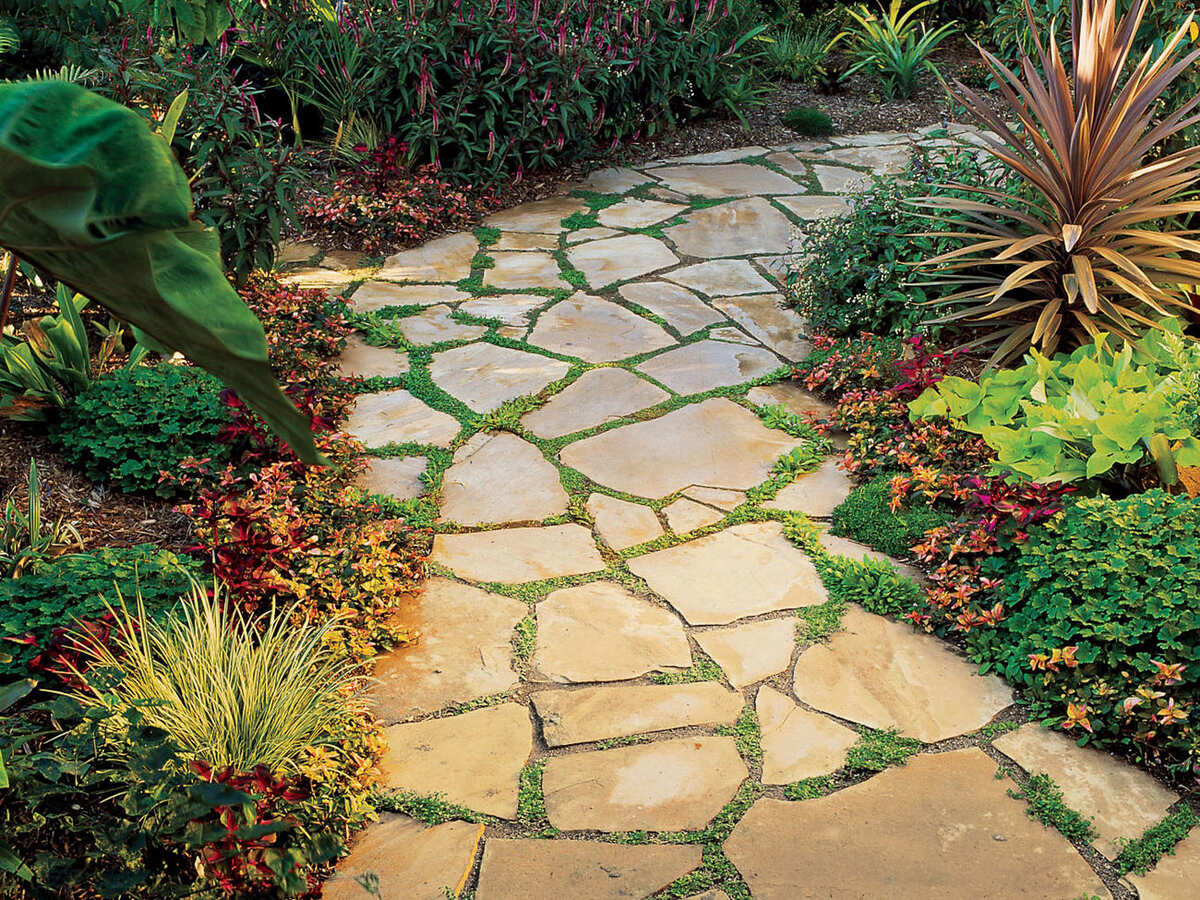
Welcome to our comprehensive guide on how to lay down pavers for a patio. If you’re looking to create a beautiful outdoor space for relaxation and entertainment, laying pavers can be a great option. Whether you’re an experienced DIY enthusiast or just starting to explore the world of outdoor projects, this step-by-step guide will provide you with the knowledge and techniques needed to successfully lay down pavers and transform your patio.
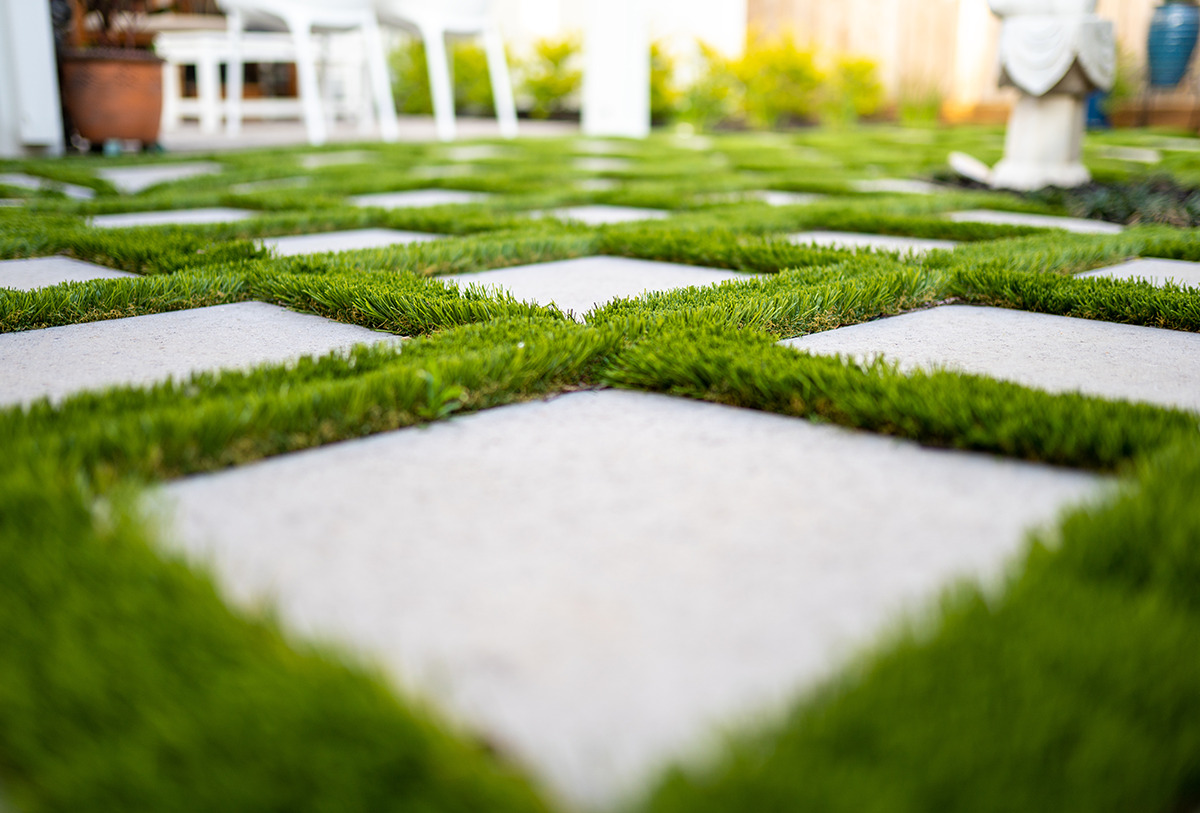
Building a patio with pavers offers numerous advantages. Pavers are versatile, durable, and easy to maintain, making them a popular choice for outdoor spaces. With a wide range of sizes, colors, and materials available, you can customize your patio design to match your personal style and complement the existing aesthetics of your outdoor area. Additionally, pavers provide a stable and level surface, perfect for patio furniture, outdoor cooking, and hosting gatherings.
Before we dive into the process, it’s important to gather the necessary materials and tools for the project. This will ensure that you have everything you need on hand before you begin, saving you time and avoiding unnecessary delays.
Key Takeaways:
- Transform your outdoor space with a beautiful and functional patio by following our step-by-step guide to laying down pavers. Enjoy the process and create lasting memories in your outdoor oasis!
- Proper preparation, precise placement, and meticulous joint filling are key to creating a stunning and durable patio. Take care of your new outdoor space to ensure its longevity and continued enjoyment.
Read more: How To Lay A Paver Patio
Materials and Tools Needed
Before getting started, it’s essential to gather all the necessary materials and tools for laying down pavers for your patio. Here’s a list of what you’ll need:
- Pavers – Choose the type, size, and color that best suits your design preferences and budget. Make sure to calculate the area you will be covering to determine how many pavers you’ll need.
- Base Material – This can be a combination of gravel, crushed stone, or sand. The base material provides a stable and level surface for your pavers.
- Sand – Used as a leveling agent and to fill the joints between pavers.
- Edge Restraints – These are necessary to keep your pavers in place and prevent shifting over time. Options include plastic or metal edging, or even pressure-treated wood.
- Landscape Fabric – This can be used to prevent weed growth between the base material and the pavers.
- String and Stakes – Used to mark the area and create straight lines for guidance during excavation and installation.
- Shovel or Excavator – For removing grass, plants, and excavating the patio area.
- Rake – To level the base material and sand.
- Tamper or Plate Compactor – For compacting the base material and pavers to provide a sturdy foundation.
- Masonry Saw or Wet Saw – Used to cut pavers to fit around edges, corners, or obstructions.
- Broom – For sweeping and cleaning the patio area after installation.
- Protective Gear – Safety goggles, gloves, and knee pads are essential for protecting yourself during the installation process.
Having these materials and tools prepared will ensure a smoother and more efficient installation process. Once you have everything ready, you’re all set to move on to the next step: preparing the area for your new patio.
Step 1: Preparing the Area
The first step in laying down pavers for your patio is to prepare the area where the patio will be installed. Proper preparation is crucial to ensure a stable and long-lasting patio. Follow these steps to prepare the area:
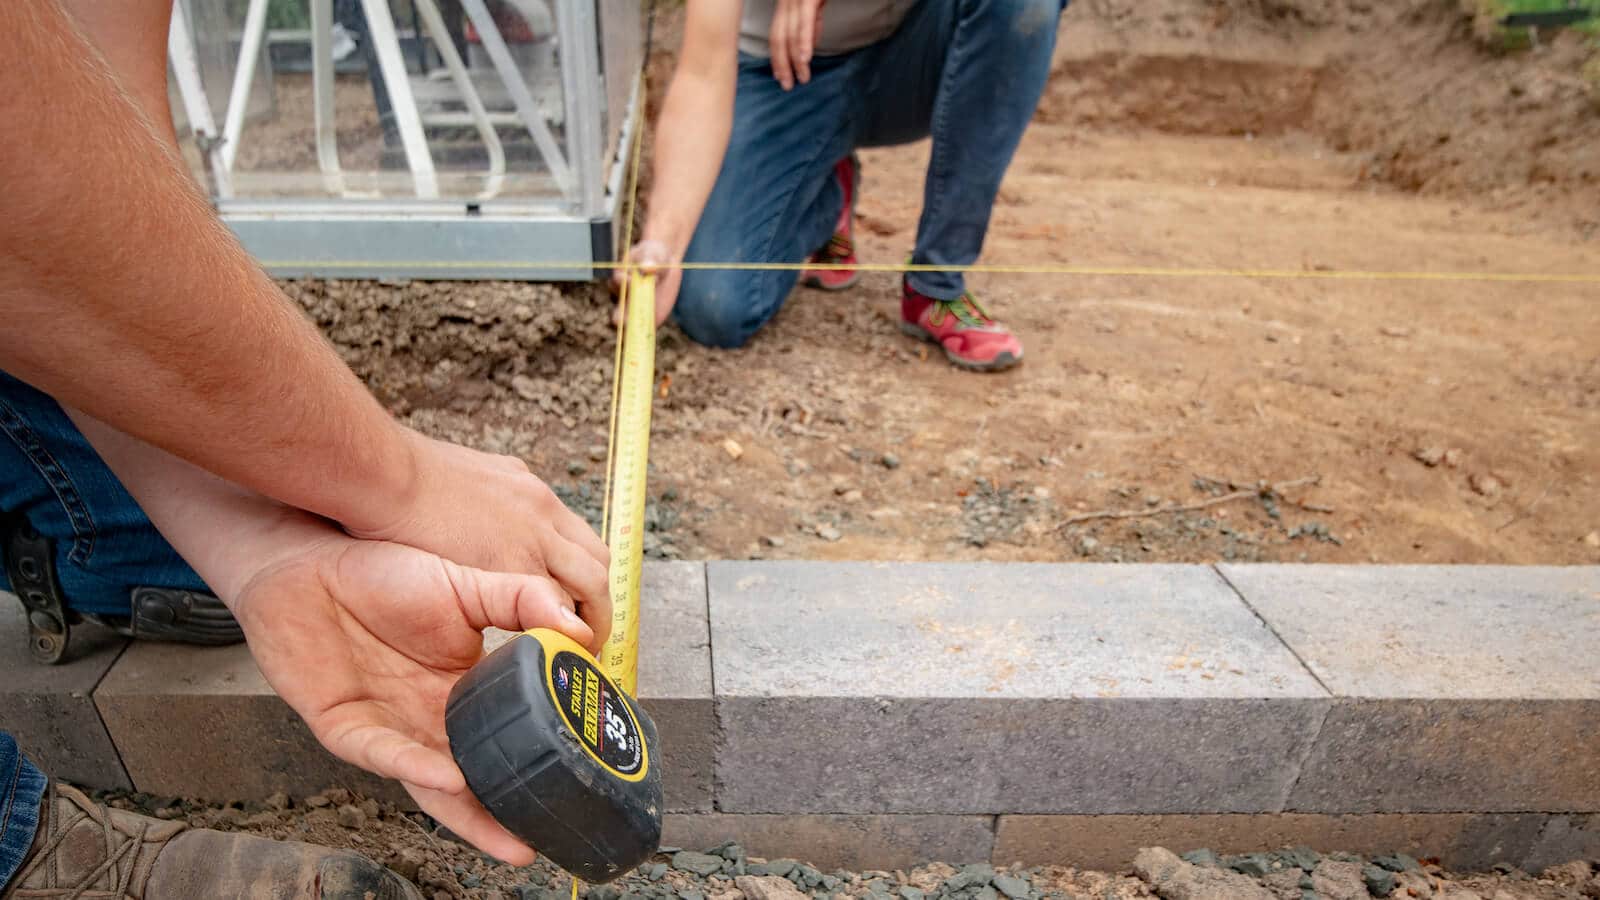
- Measure and Mark: Start by measuring the area where you want to install the patio. Use a measuring tape to determine the dimensions accurately. Once you have the measurements, use string and stakes to mark the perimeter of the patio. This will provide a clear visual guide during the excavation process.
- Check for Utilities: Before proceeding with any excavation, it’s essential to locate and mark any underground utilities such as gas, water, or electrical lines. Contact your local utility providers or use a utility locating service to ensure that you do not accidentally damage any existing pipelines.
- Clear the Area: Remove any obstacles such as rocks, debris, or vegetation from the marked area. Use a shovel or other suitable tools to clear the surface.
- Identify the Slope: Assess the slope of the area to ensure proper drainage. Ideally, the patio surface should slope away from the house at a rate of 1/8 inch per foot. This will prevent water from pooling on the patio and causing damage.
- Adjust the Slope (if necessary): If the natural slope of the area is not sufficient, you may need to adjust it by adding or removing soil. Use a rake to distribute the soil evenly, ensuring a gradual slope away from the house.
By carefully preparing the area, you create the foundation for a successful patio installation. Once you have completed these steps, you can move on to the next stage: removing any existing grass or plants in the designated area.
Step 2: Removing Existing Grass or Plants
Once you have prepared the area for your new patio, the next step is to remove any existing grass or plants from the designated space. This ensures a clean and even surface for laying down the pavers. Follow these steps to remove the vegetation:
- Use a shovel or sod cutter: Start by using a shovel or a sod cutter to cut through the grass and create manageable sections. This will make it easier to remove the grass from the area. If you’re dealing with a larger area, a sod cutter can be a more efficient tool for this task.
- Remove the grass: Lift up the sections of grass, pulling them out one by one. Shake off any excess soil from the roots of the grass or plants. If you want to reuse the grass elsewhere in your yard, carefully roll it up and set it aside for later use.
- Dispose of the grass: If you don’t plan to reuse the grass, dispose of it properly. You can either compost it or contact your local waste management facility for guidance on proper disposal methods.
- Inspect for remaining roots or weeds: After removing the grass, inspect the area for any remaining roots or weeds. Use a garden rake or a hand trowel to remove any stubborn roots or weeds to ensure a clear and smooth surface.
By removing the existing grass or plants, you create a blank canvas for your patio project. This step also allows you to assess and address any underlying issues before proceeding with the installation of the pavers. Once you have cleared the area, you can move on to the next step: excavating the site.
Step 3: Excavating the Site
Excavating the site is a crucial step in laying down pavers for your patio. This process involves digging out the existing soil to create space for the base materials and pavers. Follow these steps to excavate the site:
- Set the depth: Determine the desired depth for your patio. The depth will depend on the thickness of the pavers, the base material, and the sand layer. Typically, a depth of 6-8 inches is recommended to accommodate the necessary layers.
- Start digging: Begin by digging along the marked perimeter, starting from one corner and working your way around. Use a shovel or an excavator to remove the soil. Be mindful of the slope requirements, ensuring that the depth remains consistent throughout the excavation.
- Level the excavated area: As you excavate, periodically check the depth using a measuring tape or a level. Ensure that the entire area is level and matches the desired depth. Make any necessary adjustments by adding or removing soil as needed.
- Inspect for drainage: While excavating, pay attention to the drainage patterns around the area. Ensure that the slopes are properly directed away from the house to prevent water accumulation on the patio surface.
- Remove any debris: As you excavate, remove any roots, rocks, or other debris that may interfere with the installation process. This will ensure a smooth and stable base for your patio.
By thoroughly excavating the site, you create space for the base materials and establish a solid foundation for your patio. Remember to always be cautious of any underground utility lines and take the necessary safety precautions. Once the excavation is complete, you can proceed to the next step: adding a base material to the site.
Read more: How To Lay Patio Pavers On Grass
Step 4: Adding a Base Material
Adding a base material is an important step in the process of laying down pavers for your patio. The base material provides stability, helps with drainage, and ensures that the pavers are properly supported. Follow these steps to add a base material to your patio site:
- Choose the Base Material: There are several options for base materials, including gravel, crushed stone, or sand. The choice will depend on factors such as the type of pavers you’re using and the climate of your area. Consult with a local supplier or a landscaping professional to determine the best base material for your project.
- Distribute the Base Material: Start by spreading a layer of the chosen base material evenly throughout the excavated area. The depth of the base material layer will depend on the depth of the excavation, but a common recommendation is around 4-6 inches. Use a rake or a shovel to distribute the material and create a level surface.
- Compact the Base Material: Use a tamper or a plate compactor to compact the base material. This is important to ensure stability and prevent future shifting or settling of the patio. Starting from one corner, carefully tamp down the base material in a systematic and overlapping pattern until the entire area is compacted.
- Check for Level: After compacting the base material, check for levelness using a level or a long straightedge. Adjust the material where necessary to achieve a smooth and level surface. This step is crucial to ensure that the pavers will sit uniformly and create an even patio.
- Inspect for Drainage: Take the time to inspect the slope and ensure that the base material provides proper drainage away from the house. This will help prevent water accumulation and potential damage to the patio or the surrounding area.
Adding a base material creates a stable and level surface for your patio. This layer provides a solid foundation that will support the pavers and help maintain their integrity over time. Once the base material is in place, you’re ready to move on to the next step: leveling the base.
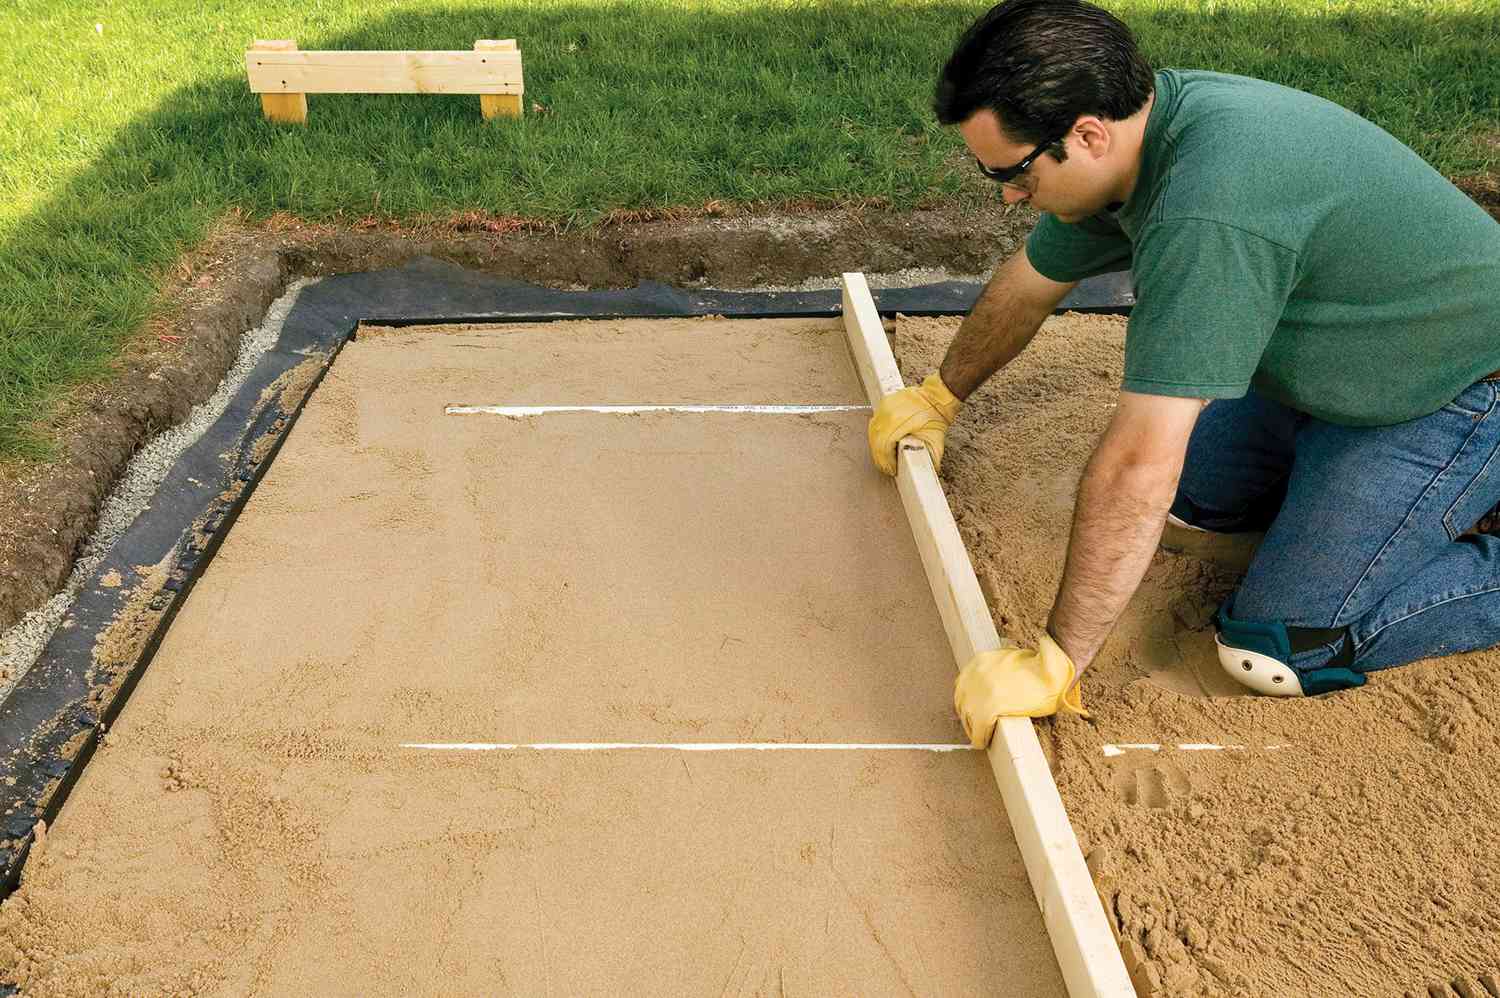
Step 5: Leveling the Base
Leveling the base is a crucial step in the process of laying down pavers for your patio. A level base ensures that the pavers will be properly aligned and provide a smooth and even surface. Follow these steps to level the base for your patio:
- Prepare the Leveling Material: Before proceeding with leveling, prepare a layer of sand for the base. This layer will help create a level surface and allow for minor adjustments during the paver installation. Use fine sand or a sand-and-concrete mix for this purpose.
- Spread the Sand: Start by spreading a layer of sand across the compacted base material. Use a rake to distribute the sand evenly, ensuring consistent coverage across the entire area. Aim for a depth of about 1 inch of sand.
- Smooth and Level the Sand: Use a screed board, a long piece of lumber, or a straight-edged board to smooth and level the layer of sand. Place the screed board at one end of the patio area and drag it across the sand, filling any gaps or low areas as you go. This process will create a flat and even layer of sand.
- Check for Levelness: Use a level or a long straightedge to check the levelness of the sand layer. Place the level across the surface in different areas of the patio to ensure that it appears flat and even. Adjust the sand as needed to achieve the desired levelness.
- Double-check Slope and Drainage: While ensuring the base is level, also double-check the slope for proper drainage away from the house. This will help prevent water pooling on the patio surface and potential damage. Make any necessary adjustments to ensure the proper slope.
Leveling the base is a critical step in the installation process. A level and even base will ensure that your pavers are properly aligned and create a visually appealing patio. Once the base is leveled, you’re now ready to move on to the next step: laying the sand layer.
Before laying down pavers for a patio, make sure to properly prepare the base by leveling the ground, adding a layer of gravel, and compacting it. This will ensure a stable and long-lasting patio surface.
Step 6: Laying the Sand Layer
Now that you have leveled the base, it’s time to lay the sand layer for your patio. The sand layer provides a cushioning effect, allowing for minor adjustments and ensuring that the pavers are properly seated. Follow these steps to lay the sand layer:
- Choose the Sand: Select a fine-grained sand or a sand-and-concrete mix for the sand layer. This type of sand is commonly referred to as “paver sand” or “jointing sand” and is specifically designed for use with pavers.
- Spread the Sand: Start by spreading a layer of sand evenly over the leveled base. Use a shovel or a rake to distribute the sand, ensuring that it covers the entire area. Aim for a depth of about 1 inch of sand, but adjust as needed based on the size and thickness of your pavers.
- Use a Leveling Tool: Use a straight piece of lumber or a long, flat board as a leveling tool. Place the board on top of the sand and move it back and forth in a sawing motion. This process redistributes the sand and helps level the surface.
- Check for Levelness: Use a level to check the levelness of the sand layer. Place the level on different areas of the patio to ensure an even and uniform surface. Make any necessary adjustments by adding or removing sand to achieve the desired levelness.
- Smooth the Surface: After leveling, use a broom to sweep the surface of the sand layer. This helps to remove any excess sand and create a smooth surface for laying the pavers. Sweeping also helps fill any small gaps or low areas with sand, providing a firm and stable base for the pavers.
Laying the sand layer is an important step as it ensures that the pavers are properly seated and have a stable surface to rest on. Once the sand layer is in place, you’re now ready to move on to the exciting part: placing the pavers!
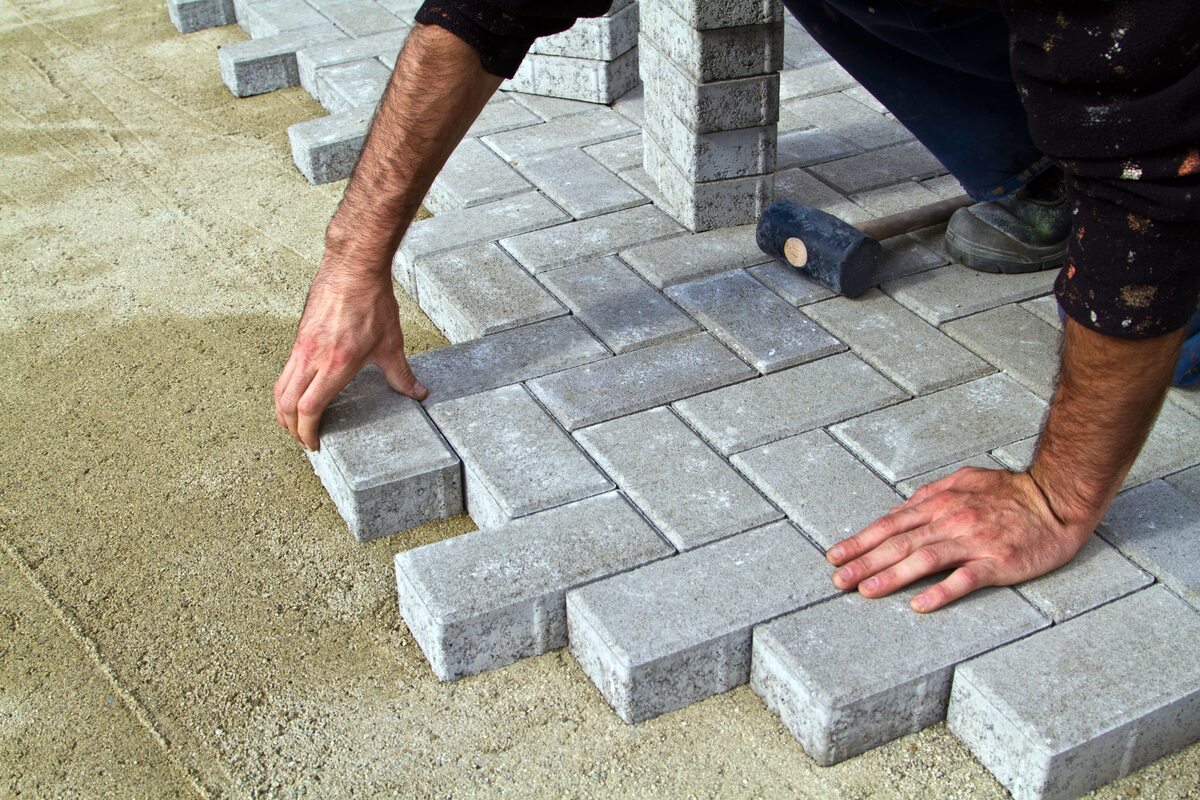
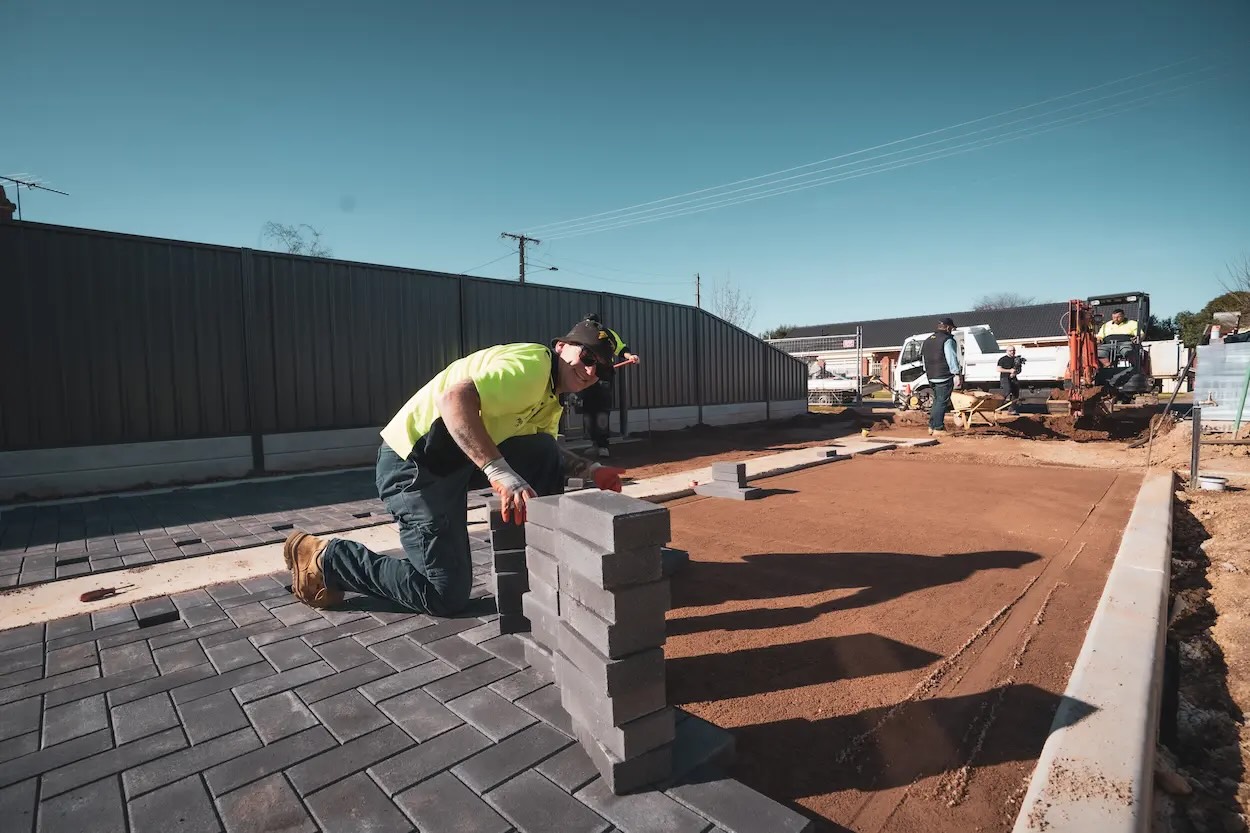
Step 7: Placing the Pavers
Now that the sand layer is ready, it’s time to start placing the pavers for your patio. Carefully aligning and positioning the pavers will create the foundation of your outdoor space. Follow these steps to effectively place the pavers:
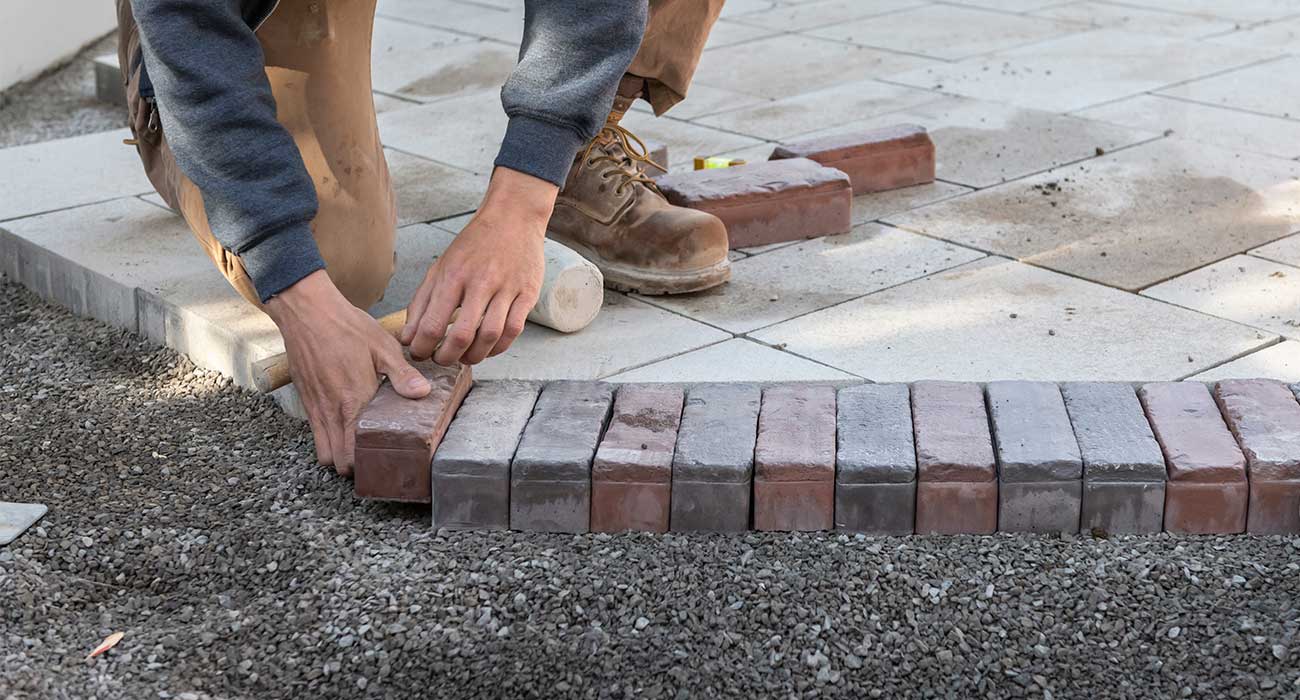
- Start from a corner: Begin placing the pavers from a corner of the patio area. This will provide a starting point and a reference for the rest of the installation.
- Lay pavers in the chosen pattern: Depending on the design you have in mind, lay the pavers in the desired pattern. Common patterns include running bond, herringbone, basket weave, or random placement. Follow your predetermined plan or explore different layout options for a unique look.
- Leave gaps between pavers: As you place the pavers, leave small gaps between them to create the desired joint width. The gap width depends on personal preference and the type of pavers being used.
- Ensure proper alignment: As you lay each paver, use a rubber mallet or a wooden block to tap it gently into place. Ensure that each paver is level with the surrounding ones and aligned properly with the adjacent pavers. Take your time to achieve an even and uniform appearance.
- Check for levelness and alignment: Periodically use a level and straightedge to check the levelness and alignment of the pavers. Make adjustments as needed to maintain a straight and even surface. Take extra care when working around corners or curved areas.
- Continue laying the pavers: Repeat the process of placing and aligning the pavers, working your way across the patio area. Take breaks and step back occasionally to assess the overall pattern and ensure consistency in spacing and alignment.
Placing the pavers requires attention to detail and patience. Take your time to ensure proper alignment and levelness, as this will contribute to the overall quality and aesthetic appeal of your patio. Once all the pavers are in place, proceed to the next step: cutting pavers (if necessary).
Read more: How To Lay Down Patio Stones
Step 8: Cutting Pavers (if necessary)
In some cases, you may need to cut pavers to fit around edges, corners, or obstacles in your patio design. This step requires precision and careful handling to achieve clean and accurate cuts. Follow these steps to effectively cut pavers:
- Gather the necessary tools: To cut the pavers, you’ll need a masonry saw or a wet saw equipped with a diamond blade. These tools will provide clean and precise cuts. Make sure you wear appropriate safety gear, including goggles and gloves, when operating the saw.
- Measure and mark: Before cutting, measure the space where the paver needs to fit and mark it accordingly on the paver surface. Use a pencil or a marker to make clear and visible lines.
- Set up the saw: Follow the manufacturer’s instructions to set up the masonry saw or wet saw. Adjust the blade to the appropriate depth and ensure that the saw is securely set on a stable surface.
- Make the cut: Place the paver on the saw, aligning the marked line with the cutting guide. Carefully push the paver into the blade, allowing the saw to make a clean and controlled cut. Move the paver slowly along the cutting guide to ensure an even and accurate cut. Always exercise caution and maintain a firm grip on the paver to prevent accidents.
- Check the fit: After making the cut, check the fit of the newly cut paver in the designated area. If adjustments are needed, carefully trim or refine the cut until the paver fits seamlessly into the space.
- Continue cutting as necessary: Repeat the process for any additional pavers that require cutting to properly fit the patio design. Take your time to ensure precise cuts and double-check the fit before permanently placing the pavers.
Remember, cutting pavers can be challenging, especially if you are new to the process. It’s always better to start with small cuts and gradually work your way up to more complex cuts. If you’re not comfortable with cutting pavers yourself, consider hiring a professional with experience in handling these tasks.
Once all necessary cuts have been made and the pavers fit properly, you’re ready to move on to the next step: filling the joints between the pavers.
Step 9: Filling the Joints
Filling the joints between the pavers is an essential step to ensure stability, prevent weed growth, and enhance the overall appearance of your patio. Properly filling the joints will help lock the pavers in place and create a seamless finish. Follow these steps to effectively fill the joints:
- Select the jointing material: There are various options for jointing materials, including polymeric sand, regular sand, or mortar. Consider factors such as the desired finished look, climate conditions, and the type of pavers you’re using to choose the most suitable option.
- Pour the jointing material: Start by pouring the chosen jointing material evenly over the paver surface. Use a broom or a brush to sweep the material into the joints, ensuring it fills the gaps completely. Be careful not to sweep the material off the paver surface.
- Compact the material: Use a plate compactor or a rubber mallet to lightly compact the jointing material. This ensures that it settles tightly into the joints and creates a secure bond with the pavers. Follow the instructions provided by the manufacturer for specific compaction guidelines.
- Check for evenness: After compacting, inspect the joints for evenness. Add more jointing material or redistribute as needed to achieve a consistent fill level across the entire patio. The goal is to have the joints filled evenly and flush with the top surface of the pavers.
- Remove excess material: Use a broom or a brush to sweep away any excess jointing material from the paver surface. This will help ensure a clean and finished appearance. Be careful not to disturb the filled joints while removing the excess material.
- Moisten the joints (if necessary): Depending on the type of jointing material used, you may need to lightly mist the patio surface with water. This will activate the binding properties of certain jointing compounds and help them set and harden.
By properly filling the joints, you enhance the stability and longevity of your patio while creating an aesthetically pleasing look. This step also helps deter weed growth and minimizes maintenance requirements. With the joints filled, you’re now ready for the final step: compacting the pavers.
Step 10: Compact the Pavers
The final step in laying down pavers for your patio is to compact them. This step ensures that the pavers are securely set in place, creating a stable and durable surface. Follow these steps to effectively compact the pavers:
- Select the compactor: Use a plate compactor specifically designed for pavers. These compactors exert the right amount of force without damaging the surface of the pavers.
- Begin compaction: Start at one corner of the patio and slowly move the compactor across the paver surface. Apply even pressure and avoid speeding up or slowing down during the process. The compactor will vibrate and exert force, helping the pavers settle firmly into the base and jointing material.
- Repeat the process: Go over the entire patio surface with the compactor, making multiple passes to ensure thorough compaction. Pay special attention to areas near edges, corners, and irregular shapes to ensure proper stability throughout the entire patio.
- Check for levelness: Periodically use a level or a straightedge to check the levelness of the pavers. If any pavers appear higher or lower than the surrounding ones, adjust them as needed by adding or removing sand from the base or jointing material.
- Inspect the joints: After compaction, inspect the joints to ensure they remain filled and intact. If any joints appear loose or low in material, add more jointing material and compact again to create a solid bond between the pavers.
- Clean the patio: Once the compaction is complete, use a broom or a brush to sweep away any remaining debris or excess jointing material from the surface of the patio. This will leave you with a clean and pristine finish.
By properly compacting the pavers, you ensure that they are tightly secured in place, minimizing the risk of shifting or settling. This step enhances the overall durability and stability of your patio, allowing for years of enjoyment and relaxation. With the pavers compacted, you have successfully completed the installation process!
Congratulations on transforming your outdoor space with a beautiful and functional patio. Take the time to appreciate your hard work and enjoy the fruits of your labor. Invite friends and family over to showcase your new patio and create lasting memories in your outdoor oasis.
Conclusion
Congratulations on successfully completing the process of laying down pavers for your patio! By following the step-by-step guide provided, you’ve created a beautiful and functional outdoor space that is sure to enhance your enjoyment of your property. Let’s recap the key points:
Throughout this guide, we covered the importance of proper preparation, including measuring and marking the area, checking for utilities, clearing the space, and creating the desired slope. We also discussed the significance of excavating the site and adding a stable base material to provide a solid foundation for your patio.
You learned how to level the base and lay down the sand layer, ensuring a smooth and even surface for the pavers. We explained the process of placing the pavers, checking for levelness, and aligning them correctly. Additionally, we discussed the importance of cutting pavers, if necessary, to fit around edges and obstacles.
The next steps covered filling the joints between the pavers with the appropriate jointing material to ensure stability and prevent weed growth. Finally, we explained the importance of compacting the pavers to firmly set them in place and create a durable patio surface.
By following these steps and paying attention to the details, you’ve created a stunning patio that adds value and functionality to your outdoor space. Whether you plan to relax and unwind, host gatherings with family and friends, or simply enjoy the beauty of nature, your new patio will be the perfect setting.
Remember to periodically inspect and maintain your patio by cleaning the surface, checking for any loose pavers or joints, and addressing any necessary repairs promptly. By taking care of your patio, you can ensure its longevity and continued enjoyment for years to come.
Thank you for choosing our comprehensive guide on how to lay down pavers for a patio. We hope this information has been helpful to you throughout the process. Now it’s time to sit back, relax, and enjoy your newly transformed outdoor space!
Frequently Asked Questions about How To Lay Down Pavers For A Patio
Was this page helpful?
At Storables.com, we guarantee accurate and reliable information. Our content, validated by Expert Board Contributors, is crafted following stringent Editorial Policies. We're committed to providing you with well-researched, expert-backed insights for all your informational needs.


0 thoughts on “How To Lay Down Pavers For A Patio”