Articles
How To Make A Silicone Mold For Candles
Modified: August 27, 2024
Learn how to make a silicone mold for candles with our comprehensive articles. Discover step-by-step instructions and helpful tips for creating beautiful candle molds.
(Many of the links in this article redirect to a specific reviewed product. Your purchase of these products through affiliate links helps to generate commission for Storables.com, at no extra cost. Learn more)
Introduction
Creating your own candles can be a rewarding and relaxing hobby. Not only can you customize the scent, color, and design of your candles, but you can also save money by making them yourself. One essential component of candle making is having a mold to shape the melted wax into a desired form.
In this article, we will guide you through the process of making a silicone mold for candles. Silicone molds are popular among candle makers due to their flexibility, durability, and ability to capture intricate details. By following these step-by-step instructions, you’ll be able to create your own silicone molds and produce beautiful candles that are unique to your personal style.
Key Takeaways:
- Create personalized candles with a handmade silicone mold, allowing for unique scents, colors, and designs. Enjoy the rewarding process of candle making while saving money and expressing creativity.
- Patience is key in every step of making a silicone mold for candles, from preparing the materials to removing the candle from the mold. Embrace the journey of candle making and unleash your creativity.
Read more: How To Make Molded Candles
Step 1: Gather Materials
Before you start making your silicone mold for candles, gather all the necessary materials. Having everything prepared in advance will save you time and ensure a smooth process. Here’s a checklist of the materials you’ll need:
- Silicone mold making material: There are different types of silicone mold making materials available in the market. Choose a food-grade silicone that is suitable for candle making. Make sure to check if the silicone material is compatible with the type of wax you intend to use.
- Candle container: This will serve as the base for your mold. Select a container that is the desired shape and size for your candle. You can use glass jars, metal tins, or any other heat-resistant container.
- Measuring cups: You’ll need one or more measuring cups depending on the size of your mold. It’s best to use a dedicated measuring cup for the silicone material to avoid any potential cross-contamination.
- Stirring utensil: Choose a mixing tool like a wooden dowel or a disposable stir stick. Avoid using metal utensils as they can interfere with the curing process of the silicone.
- Release agent: A release agent is used to prevent the silicone from sticking to the candle container. You can use a commercial release spray or alternatives like petroleum jelly or cooking oil.
- Protective gear: It’s important to prioritize safety during the mold-making process. Wear protective gloves, goggles, and an apron to protect your skin and clothing from any potential spills or splatters.
- Work area: Find a well-ventilated and clean work area where you can comfortably work on your mold. Cover the surface with plastic or a disposable tablecloth to avoid any damage or staining.
Once you have gathered all the necessary materials, you are ready to move on to the next step: preparing the candle container.
Step 2: Prepare the Candle Container
Preparing the candle container is an essential step in the process of making a silicone mold for candles. This involves ensuring that the container is clean and properly prepped before pouring the silicone material. Follow these steps to prepare the candle container:
- Clean the container: Thoroughly clean the candle container to remove any dust, debris, or residue. Wash it with soap and water, and then dry it completely. Any contaminants can negatively affect the quality of the mold.
- Apply a release agent: To prevent the silicone material from sticking to the candle container, apply a release agent. This can be done by spraying a thin layer of commercial release spray onto the inside of the container. Alternatively, you can apply petroleum jelly or a small amount of cooking oil and spread it evenly with a paper towel.
- Ensure stability: It’s important to ensure that the candle container remains stable during the pouring and curing process. Place the container on a flat surface or use adhesive putty to secure it in place.
By properly preparing the candle container, you can ensure that the silicone mold will release easily without any damage to the mold or the candle container itself. This step sets the foundation for creating a successful silicone mold for your candles.
Step 3: Mix Silicone Mold Material
Next, it’s time to mix the silicone mold material. This is a crucial step that requires precision and careful attention to detail. Follow these steps to mix the silicone mold material for your candle mold:
- Read the instructions: Before starting, carefully read the instructions provided by the manufacturer of the silicone mold material. Different silicone materials may have varying ratios and mixing times, so it’s important to follow the specific guidelines.
- Wear protective gear: Put on your protective gloves and goggles to protect your hands and eyes during the mixing process.
- Prepare the mixing container: Use a clean and dry measuring cup or container to mix the silicone material. Make sure it’s large enough to hold the required amount of silicone without overflowing.
- Pour the silicone base: Measure the required amount of silicone base according to the manufacturer’s instructions. Be precise with your measurements to ensure the proper curing of the silicone.
- Add the catalyst: Depending on the type of silicone mold material you’re using, you may need to add a catalyst or hardener. Measure the required amount of catalyst, as specified in the instructions, and add it to the mixing container with the silicone base.
- Mix thoroughly: Use a stirring utensil to mix the silicone base and catalyst together. Ensure that the mixture is well blended, scraping the sides and bottom of the container as you stir. Follow the recommended stirring time to achieve a homogeneous mixture.
Remember, it’s crucial to follow the manufacturer’s instructions for the specific silicone mold material you’re using. Mixing the silicone mold material correctly will ensure that it cures properly and creates a durable and flexible mold for your candles. Once the silicone material is mixed, you’re ready to move on to the next step: pouring it into the container.
Step 4: Pour Silicone into Container
With the silicone mold material properly mixed, it’s time to pour it into the prepared candle container. This step requires patience and precision to ensure that the silicone is evenly distributed and fills the container completely. Follow these steps to pour the silicone into the container:
- Start pouring: Hold the mixing container with the mixed silicone material and slowly pour it into the prepared candle container. Pour in a controlled manner to avoid creating bubbles or splashing the silicone.
- Fill the container: Continue pouring the silicone material into the container until it reaches the desired level. Depending on the size of your candle, you may only need to fill the container partially. Leave enough space at the top to allow for the addition of wax later.
- Eliminate air bubbles: To remove any air bubbles that may have formed while pouring, gently tap the sides of the container or use a toothpick or skewer to stir the silicone in a circular motion. This will help release any trapped air and ensure a smooth mold.
- Level the surface: Use a straight edge or a flat tool to level the surface of the silicone in the container. This will create a flat base for your candle mold and ensure that it sits evenly when you pour the wax.
Be careful not to overfill the container as the silicone may spill over. Any excess silicone can be wiped away with a clean cloth or paper towel. Once you’ve poured the silicone into the container and leveled the surface, it’s time to move on to the next step: allowing the silicone to cure.
Read more: How To Store Silicone Molds
Step 5: Let Silicone Cure
After pouring the silicone into the candle container, it’s important to allow it sufficient time to cure. Curing is the process in which the silicone transforms from a liquid to a solid state, creating a sturdy and flexible mold. Follow these steps to ensure proper curing of the silicone mold:
- Follow the manufacturer’s instructions: Refer to the instructions provided by the manufacturer of the silicone mold material for the recommended curing time. Different silicone materials may require varying amounts of time to fully cure, so it’s important to follow the specific guidelines.
- Provide optimal curing conditions: The curing process is influenced by factors such as temperature and humidity. Make sure to place the candle container in an area with a consistent temperature and low humidity to facilitate proper curing. Avoid extreme temperatures or drafts, as they can affect the curing process.
- Be patient: Curing times can vary depending on the type of silicone mold material used. Typically, it can take anywhere from a few hours to a day or more for the silicone to fully cure. Avoid disturbing or moving the mold during this time to ensure a smooth and even surface.
- Perform a touch test: To determine if the silicone has cured, lightly touch the surface of the mold with your fingertips. If it feels firm and no longer tacky, it’s a good indication that the silicone has cured. However, for complete assurance, refer to the recommended curing time provided by the manufacturer.
Properly curing the silicone mold is essential for creating a durable mold that can be used multiple times. Once the silicone has fully cured, you can proceed to the next step: removing the candle container from the mold.
Step 6: Remove the Candle Container
Now that the silicone mold has fully cured, it’s time to remove the candle container from the mold. This step requires caution to prevent any damage to the mold or the container. Follow these steps to safely remove the candle container:
- Gently loosen the edges: Carefully run a thin and flexible tool, such as a butter knife or a plastic spatula, along the edges of the silicone mold. This will help loosen the mold from the sides of the container.
- Apply gentle pressure: Once the edges are loosened, apply gentle pressure to the base of the container to release it from the mold. Use your thumbs or the heel of your hand to press upwards, gradually pushing the container out.
- Remove the container: Slowly lift the candle container out of the mold. If there are any stubborn areas where the mold is still clinging to the container, continue applying gentle pressure until it releases completely.
- Inspect the mold: Carefully examine the mold to ensure that it is free from any tears, cracks, or imperfections. If you notice any issues, you may need to repair or remake the mold before proceeding with the candle-making process.
Removing the candle container from the mold can be a delicate process. Take your time and exercise patience to avoid any mishaps. Once the container is successfully removed, you’re ready to move on to the next step: cleaning the silicone mold.
When making a silicone mold for candles, make sure to use a non-toxic, high-quality silicone that can withstand the heat of the melted wax. It’s important to properly seal the mold to prevent any leakage during the pouring process.
Step 7: Clean the Silicone Mold
After removing the candle container from the silicone mold, it’s important to clean and prepare the mold for future use. Cleaning the mold ensures that it is free from any residue or debris that could affect the quality of your candles. Follow these steps to clean the silicone mold:
- Inspect for residue: Check the mold for any remaining wax, release agent, or other debris. Gently scrape off any residue using a plastic spatula or your fingers. Be careful not to damage the mold in the process.
- Wash with mild soap: Fill a sink or basin with warm water and add a few drops of mild dish soap. Submerge the mold in the soapy water and use a soft sponge or cloth to gently clean its surface, inside and out. Pay attention to any detailed areas and make sure to remove all dirt and residue.
- Rinse thoroughly: Rinse the mold under running water to remove any soap residue. Ensure that all traces of soap are rinsed away to prevent it from interfering with the next candle-making process.
- Pat dry with a cloth: Use a clean cloth or towel to gently pat dry the silicone mold. Make sure it is completely dry before moving on to the next step. Moisture left in the mold can affect the curing of the wax and may lead to imperfections in your candles.
- Store in a clean and dry place: Once the mold is clean and dry, store it in a clean and dry location until you are ready to use it again. Keep it away from excessive heat, direct sunlight, and any sharp objects that could damage or deform the mold.
By properly cleaning and storing the silicone mold, you can ensure its longevity and the quality of your future candle-making endeavors. With the mold clean and ready, it’s time to move on to the next step: preparing the candle wax.
Step 8: Prepare the Candle Wax
With the silicone mold clean and ready, it’s time to prepare the candle wax. The type of wax you choose will depend on your personal preference and the desired characteristics of your candles. Follow these steps to prepare the candle wax:
- Select the appropriate wax: Choose a type of wax that is suitable for your candle-making project. Popular options include soy wax, beeswax, and paraffin wax. Each wax has its own unique characteristics, such as burn time, fragrance retention, and color possibilities.
- Melt the wax: Place the desired amount of wax into a heat-resistant container, such as a double boiler or a melting pot. Heat the wax gently over low to medium heat until it melts completely. Stir the wax occasionally to ensure even melting.
- Add fragrance and color (optional): If desired, add fragrance oils and colorants to the melted wax. Stir well to distribute the fragrance and color evenly. The amount of fragrance and colorant to use will depend on the specific product and your desired scent strength and color intensity.
- Monitor the temperature: Keep a close eye on the temperature of the melted wax. Different types of wax have different optimal pouring temperatures. Refer to the instructions provided by the wax manufacturer for the recommended temperature range.
- Remove from heat: Once the wax has melted and reached the desired pouring temperature, remove it from the heat source. Allow the wax to cool slightly, but make sure it remains in a liquid state to ensure easy pouring into the silicone mold.
Properly preparing the candle wax is crucial for achieving desired scent, color, and overall quality in your candles. Take your time during this step to ensure that the wax is melted and mixed to perfection. When the wax is ready, you can move on to the next step: pouring it into the silicone mold.
Read more: How To Make Brick Molds
Step 9: Pour Wax into the Mold
Now that the candle wax is prepared and at the optimal pouring temperature, it’s time to carefully pour it into the silicone mold. This step requires precision and a steady hand to ensure that the wax fills the mold evenly. Follow these steps to pour the wax into the mold:
- Prepare the mold: Place the silicone mold on a stable surface and double-check that it is clean and properly positioned. If necessary, secure the mold in place using adhesive putty or a non-slip mat to prevent any shifting or spillage during the pouring process.
- Slowly pour the wax: Begin pouring the melted wax into the silicone mold in a slow and controlled manner. Aim for the center of the mold, allowing the wax to gradually spread outwards. The slow pouring helps minimize the formation of air bubbles and ensures a smooth finish.
- Fill to the desired level: Continue pouring the wax into the mold until it reaches the desired level. Take into account any shrinkage that may occur as the wax cools and solidifies. Leave a small amount of space at the top to allow for the wick and any additional wax that may be needed during the topping-up process.
- Tap out any air bubbles: To remove any air bubbles trapped in the wax, gently tap the sides of the mold or use a toothpick to stir the wax. This will help release the bubbles and ensure a smooth surface in your finished candle.
- Allow the wax to cool and solidify: After pouring the wax into the mold, let it sit undisturbed until it cools and solidifies. The cooling time will vary depending on the type and size of the candle. Refer to the wax manufacturer’s instructions for specific cooling times.
Take your time while pouring the wax into the mold to ensure precision and avoid any spills or uneven filling. Once the wax has cooled and solidified, you’re one step closer to completing your candle-making process. The next step is to allow the wax to harden fully before removing the candle from the mold.
Step 10: Let the Wax Harden
After pouring the melted wax into the silicone mold, it’s essential to allow it sufficient time to harden and solidify. This step ensures that the candle retains its shape and structure. Follow these steps to let the wax harden:
- Patience is key: Allow the wax enough time to cool and harden completely. The hardening process can take several hours, depending on the size and thickness of the candle. Refer to the wax manufacturer’s instructions for specific hardening times.
- Avoid disturbing the mold: While the wax is hardening, it’s important to avoid moving or disrupting the silicone mold. Any movement or disturbances can result in an uneven surface or misshapen candle.
- Find a stable and cool location: Place the silicone mold in a safe and cool location where it won’t be disturbed. Avoid exposure to direct sunlight or extreme temperatures, as this can affect the cooling process and result in a less-than-perfect candle.
- Perform a touch test: To check if the wax has fully hardened, lightly touch the surface of the candle with your fingertips. If it feels firm and no longer yields to pressure, it’s a good indication that the wax has hardened. However, for complete assurance, it’s best to wait until the recommended hardening time has elapsed.
Allowing enough time for the wax to harden is crucial for achieving a high-quality and long-lasting candle. Rushing the hardening process can lead to imperfections, such as sinkholes or cracking. Once the wax has completely hardened, it’s time to remove the candle from the mold and move on to the final step: enjoying your handcrafted candle!
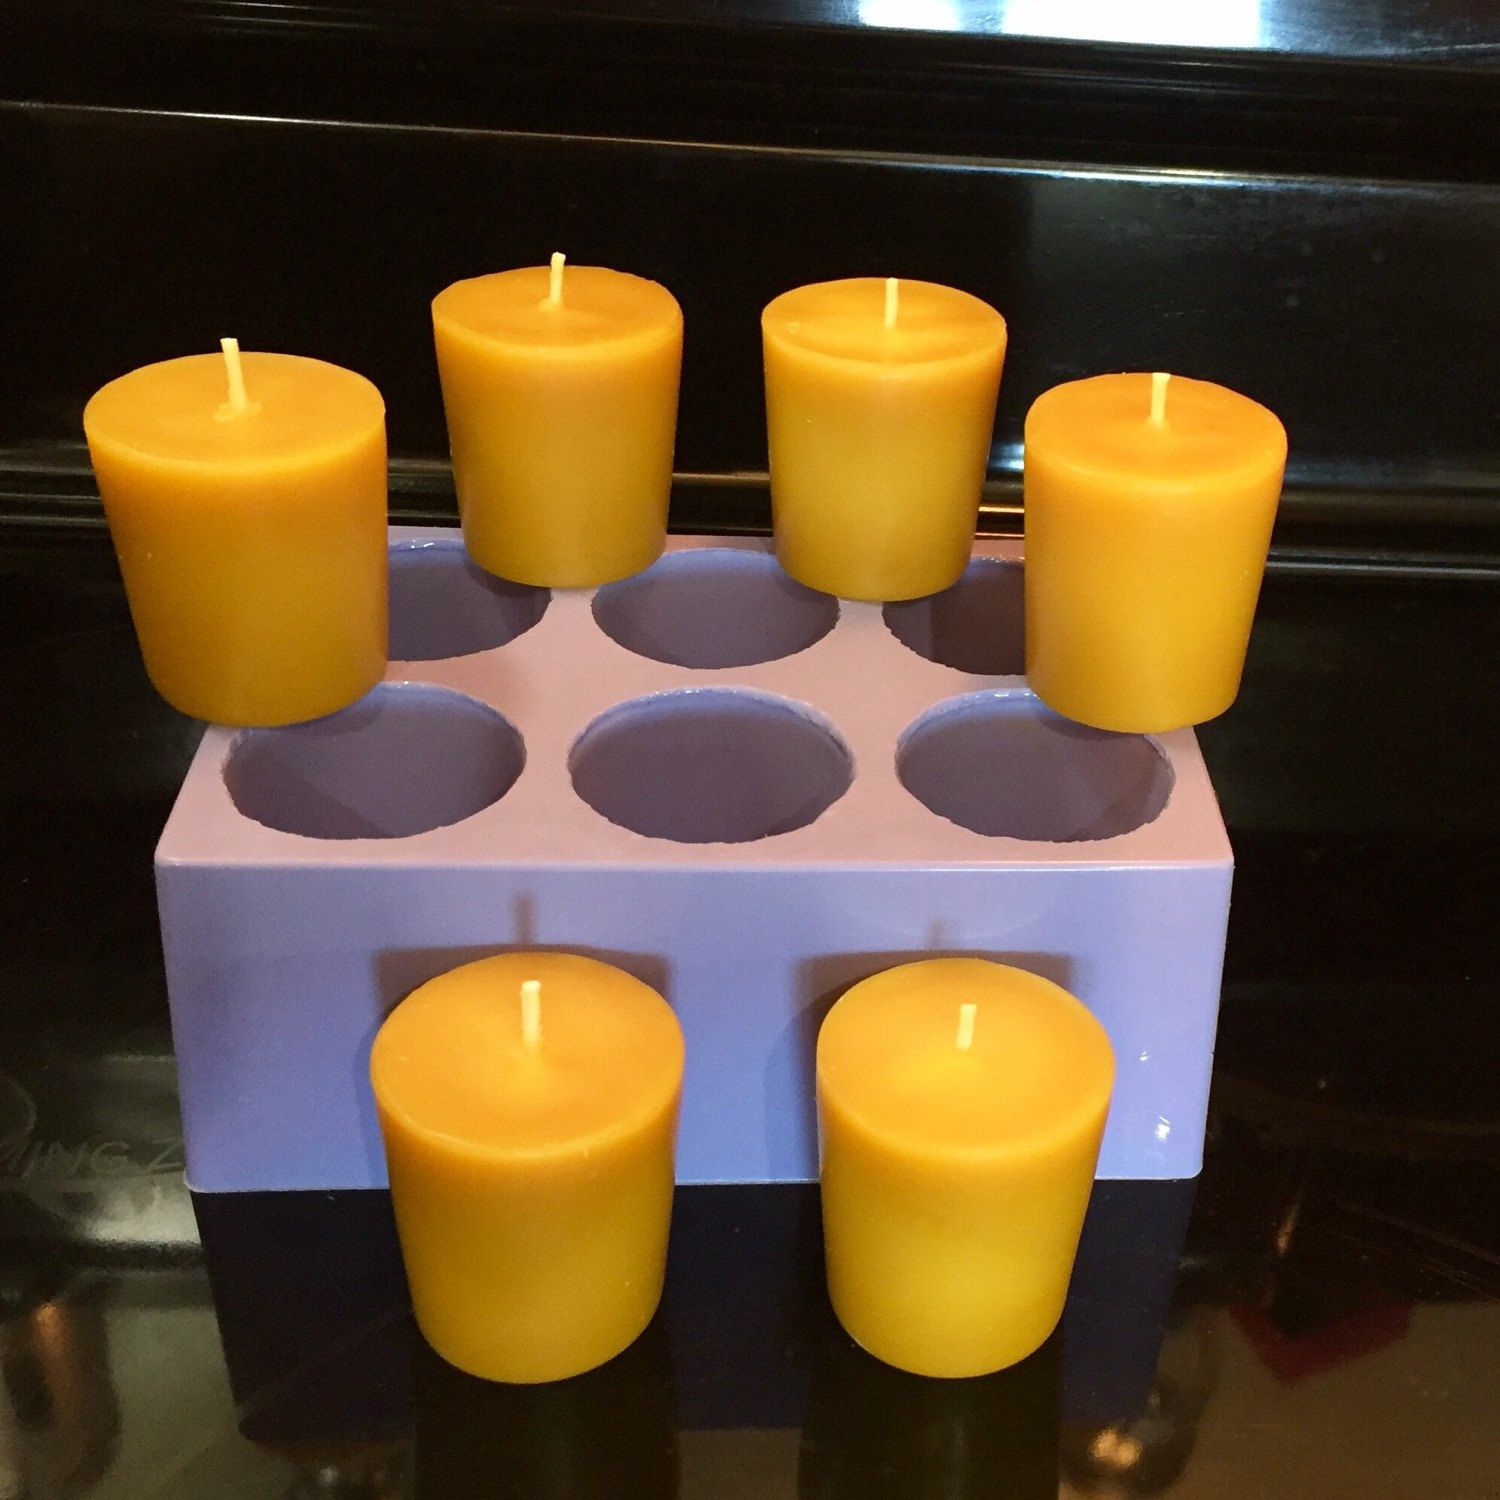
Step 11: Remove the Candle from the Mold
Now that the wax has fully hardened, it’s time to remove the candle from the silicone mold. This step requires a delicate touch to ensure that the candle is released from the mold without any damage. Follow these steps to safely remove the candle from the mold:
- Gently loosen the edges: Carefully run a thin and flexible tool, such as a butter knife or a plastic spatula, along the edges of the mold. This will help loosen the candle from the sides of the mold.
- Apply gentle pressure: Once the edges are loosened, apply gentle pressure to the bottom of the mold to release the candle. Use your thumbs or the heel of your hand to push upwards, gradually pushing the candle out of the mold.
- Remove the candle: Slowly lift the candle out of the mold, ensuring that it detaches completely. If there are any stubborn areas where the candle is still clinging to the mold, continue applying gentle pressure until it releases.
- Inspect the candle: Carefully examine the candle to ensure that it is free from any deformities or imperfections. Check for any rough edges, air bubbles, or uneven surfaces. If needed, you can trim or smooth out any imperfections using a craft knife or sandpaper.
Removing the candle from the mold requires patience and a gentle touch. Take your time to ensure that the candle is released without any damage. Once the candle is successfully removed, it’s ready to be enjoyed or further customized with decorations or additional embellishments.
Congratulations! You have successfully made a candle using your handmade silicone mold. Now you can sit back, relax, and enjoy the warm glow and soothing scent of your own creation. Happy candle-making!
Conclusion
Creating your own candles can be a rewarding and enjoyable experience, and making a silicone mold for candles allows you to customize your creations even further. By following the step-by-step process outlined in this article, you can successfully make a silicone mold and produce beautiful candles that reflect your personal style.
From gathering the materials to removing the candle from the mold, every step plays a crucial role in creating a high-quality candle. Taking the time to properly prepare the candle container, mix the silicone mold material, and pour the wax into the mold ensures that your candles turn out exactly as you envision them.
Remember to be patient throughout the process, allowing the silicone mold material to cure and the wax to harden fully. Rushing these steps may result in imperfections in your final candle. Additionally, take care of your silicone mold by cleaning it properly after each use to ensure its longevity.
The beauty of making your own candles is the freedom to experiment with different scents, colors, and designs. Whether you create candles for yourself or as gifts for loved ones, the process of candle making offers endless possibilities for self-expression and creativity.
So why not embark on this beautiful journey of candle making and unleash your creativity? With a handmade silicone mold, you can continue to explore different candle-making techniques and create unique candles that bring joy and warmth to any space.
Now that you have the knowledge and guidance to make your own silicone mold for candles, it’s time to get started. Enjoy the process, embrace your creativity, and let your candles shine!
Frequently Asked Questions about How To Make A Silicone Mold For Candles
Was this page helpful?
At Storables.com, we guarantee accurate and reliable information. Our content, validated by Expert Board Contributors, is crafted following stringent Editorial Policies. We're committed to providing you with well-researched, expert-backed insights for all your informational needs.


0 thoughts on “How To Make A Silicone Mold For Candles”