Home>diy>Architecture & Design>How To Draw House Design
Architecture & Design
How To Draw House Design
Modified: August 27, 2024
Learn the art of drawing house designs with our step-by-step guide. Explore various architectural design techniques and unleash your creativity.
(Many of the links in this article redirect to a specific reviewed product. Your purchase of these products through affiliate links helps to generate commission for Storables.com, at no extra cost. Learn more)
Introduction
Welcome to the world of architectural design! In this article, we will dive into the exciting process of drawing house designs. Whether you are an aspiring architect or just a curious individual with a passion for creativity, this guide will walk you through the steps to create your very own house design.
Designing a house is like painting a picture – it requires careful thought, attention to detail, and a keen eye for aesthetics. With the right tools and techniques, you can bring your vision to life and create a space that reflects your personal style and meets your functional needs.
Before we begin, it’s important to note that this article will focus mainly on the architectural aspects of house design. We will cover the process of drawing and visualizing the layout, structure, and exterior features of a house. Interior design and decor will be touched upon briefly in the later steps, but for a more comprehensive understanding, we encourage you to explore dedicated resources on interior design.
So let’s get started! Grab a pen and paper, or fire up your favorite design software, and let your creativity flow as we embark on this architectural journey.
Key Takeaways:
- Designing a house involves a meticulous process of creating a basic floor plan, adding walls, windows, doors, and designing the roof, all while considering interior and exterior enhancements to create a harmonious living environment.
- Incorporating landscaping elements is crucial to completing the house design, as it transforms the outdoor space into a haven of beauty and tranquility, seamlessly connecting the home with its natural surroundings.
Read more: How To Draw A Garden
Step 1: Gathering Materials
Before diving into the actual design process, it’s important to gather all the necessary materials and tools. Here’s a list of things you’ll need:
- Measuring tools: A tape measure, ruler, and/or measuring wheel will come in handy for accurately measuring the dimensions of the house and the surrounding area.
- Drawing tools: Whether you prefer traditional methods or digital software, make sure you have the appropriate tools for drawing. This can include drafting pencils, erasers, compasses, protractors, or graphic design software.
- Reference material: It’s helpful to collect inspiration and references for your house design. Look for photos, architectural magazines, or even visit houses or neighborhoods that inspire you. These references will serve as a guide and help shape your vision.
- Graph paper or design software: Depending on your preference, you can choose to work with graph paper to sketch out your initial designs or utilize design software such as AutoCAD, SketchUp, or even free online tools.
- A clear workspace: Create a dedicated area where you can spread out your materials and work comfortably. Make sure you have good lighting and a clutter-free environment to foster creativity.
Once you have gathered all the necessary materials, it’s time to move on to the next step – creating a basic floor plan. This foundational step will serve as the blueprint for your house design, providing a framework on which you can build and refine as you progress through the process. So let’s roll up our sleeves and get ready to bring your design ideas to life!
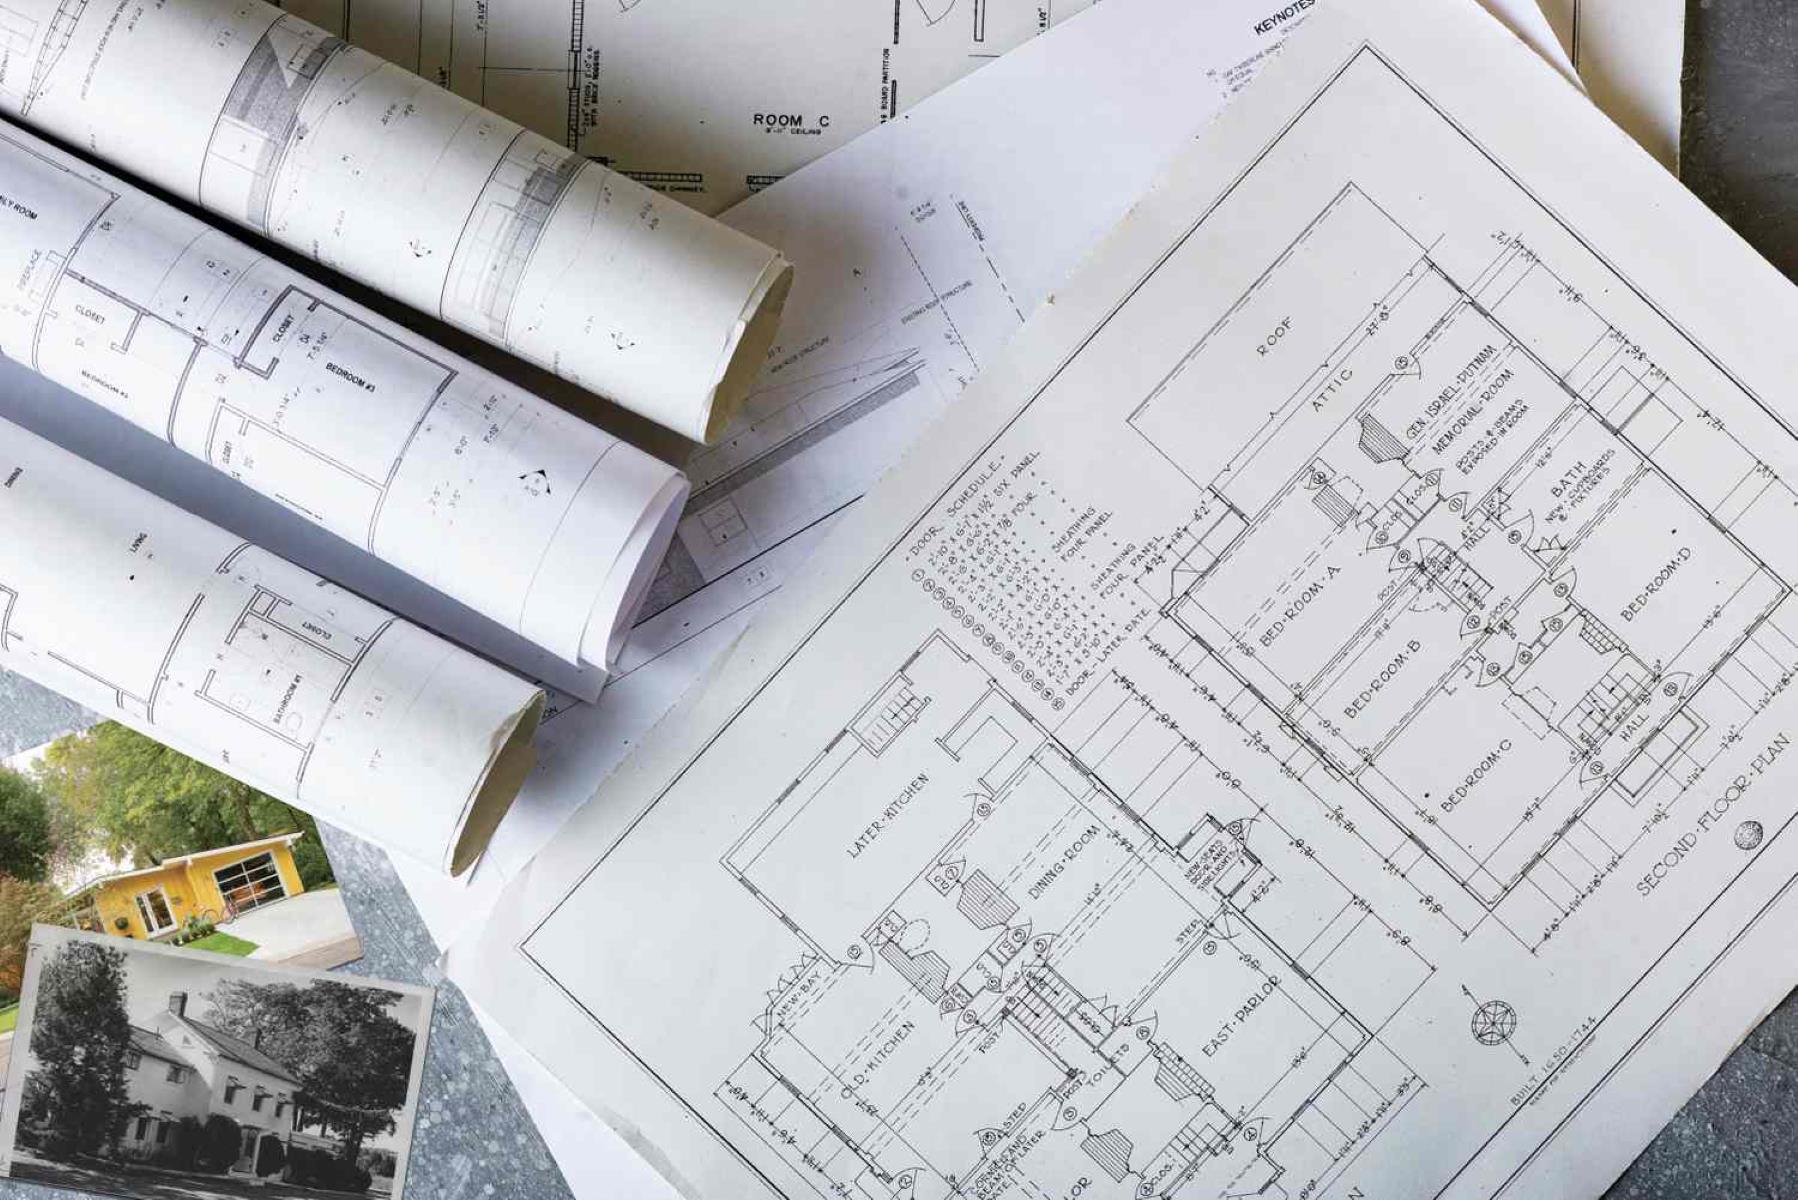
Step 2: Creating a Basic Floor Plan
Now that you have all the necessary materials, it’s time to start creating the basic floor plan for your house design. The floor plan is a two-dimensional representation of the layout and flow of the rooms in your house.
Here’s how you can create a basic floor plan:
- Measure and document the dimensions of the space: Start by measuring the dimensions of the area where you plan to build your house. Measure the length, width, and any special features such as alcoves or windows. Record these measurements accurately as they will be the foundation for your floor plan.
- Determine the scale: Decide on the scale at which you want to create your floor plan. Common scales are 1/8 inch to 1 foot or 1/4 inch to 1 foot. This means that every 1/8 or 1/4 inch on your drawing represents 1 foot in real life. Choose a scale that allows you to clearly and accurately represent the dimensions of your house.
- Sketch out the walls: Using your chosen scale, start to sketch out the walls of your house on your graph paper or design software. Begin by drawing straight lines to represent the exterior walls. Consider the flow and functionality of the space as you determine the placement of each room.
- Add doors and windows: Once the walls are in place, add doors and windows to your floor plan. Use symbols or labeled shapes to represent each opening. Consider factors such as natural light, ventilation, and accessibility when deciding on the placement of doors and windows.
- Label rooms and spaces: Assign labels or symbols to each room or space in your floor plan. This will help you identify and differentiate between different areas. You can use abbreviations or come up with your own labeling system.
Remember, this is just the initial stage of your floor plan. It’s okay if it’s not perfect or if you need to make adjustments along the way. The goal here is to create a basic layout that accurately depicts the structure and flow of your house.
Once you have completed your basic floor plan, you can move on to the next step – adding walls and divisions to further define the rooms and spaces in your design.
Step 3: Adding Walls and Divisions
Now that you have a basic floor plan in place, it’s time to add walls and divisions to further define the rooms and spaces in your house design.
Here’s how you can add walls and divisions:
- Review your floor plan: Take a close look at your basic floor plan and visualize the layout of the rooms. Consider the flow of movement and the functionality of each space. This will help you determine the placement of walls and divisions.
- Start with exterior walls: Begin by adding the exterior walls to your floor plan. Use solid lines to represent these walls, ensuring they are drawn accurately according to the dimensions you recorded in Step 2.
- Add interior walls: Next, add interior walls to divide the rooms and spaces within your house. Decide on the placement and size of these walls based on your desired room layout and functionality. Use dashed or dotted lines to differentiate between exterior and interior walls.
- Consider room proportions: As you add walls, pay attention to the proportions of each room. Aim for balanced and proportionate spaces, avoiding long, narrow rooms or rooms with excessive angles. This will help create a more harmonious and visually pleasing design.
- Account for doors and windows: Make sure to include openings for doors and windows in the walls. Adjust the placement and size of walls as needed to accommodate these features. Remember to maintain proper clearance and flow between rooms.
- Add dimensions: To ensure accuracy, add dimensions to your floor plan. Label the length of each wall and provide measurements for doorways and windows. This will aid in the construction process and help contractors understand the design intent.
Adding walls and divisions to your floor plan will give you a clearer vision of the overall layout and structure of your house. It will help define the individual rooms and create a more detailed representation of your design.
Once you have completed this step, you can move on to the next stage – incorporating windows and doors into your house design.
Step 4: Incorporating Windows and Doors
With the walls and divisions in place, it’s time to incorporate windows and doors into your house design. Windows and doors play a crucial role in both the functionality and aesthetics of a house, providing natural light, ventilation, and access to different areas.
Here’s how you can incorporate windows and doors:
- Evaluate the design: Take a moment to review your floor plan and visualize the flow of movement within the house. Consider where windows would be beneficial to maximize natural light and take advantage of views. Think about the placement of doors to ensure convenient access between rooms and to the exterior.
- Add windows: Start by adding windows to your floor plan. Use symbols or labeled shapes to represent different types of windows (e.g., casement, double-hung, bay windows). Consider the size, shape, and orientation of each window, keeping in mind privacy, ventilation, and the overall aesthetic of the house.
- Include doors: Next, incorporate doors into your design. Consider the purpose of each door, whether it’s an entry door, interior door, or a sliding glass door leading to a patio or deck. Pay attention to the swing of the doors and their impact on the layout and flow of the rooms.
- Ensure proper clearances: Verify that there is enough clearance around doors and windows for comfortable use. Take into account factors such as furniture placement, walking paths, and accessibility requirements. Make any necessary adjustments to the locations of windows and doors to ensure optimal functionality.
- Consider style and aesthetics: Windows and doors contribute significantly to the overall style and character of your house. Consider the architectural style you’re aiming for and select windows and doors that complement that style. Whether you prefer traditional or modern designs, choose options that enhance the aesthetic appeal of your home.
By incorporating windows and doors into your floor plan, you will not only enhance the functionality and livability of the space but also add architectural interest and personality to your design.
With windows and doors integrated into your design, it’s time to move on to the next step – designing the roof of your house.
When drawing a house design, start by sketching the basic shape and then add in the details such as windows, doors, and roof. Use a ruler for straight lines and practice perspective to create depth.
Read more: How To Draw A Balcony
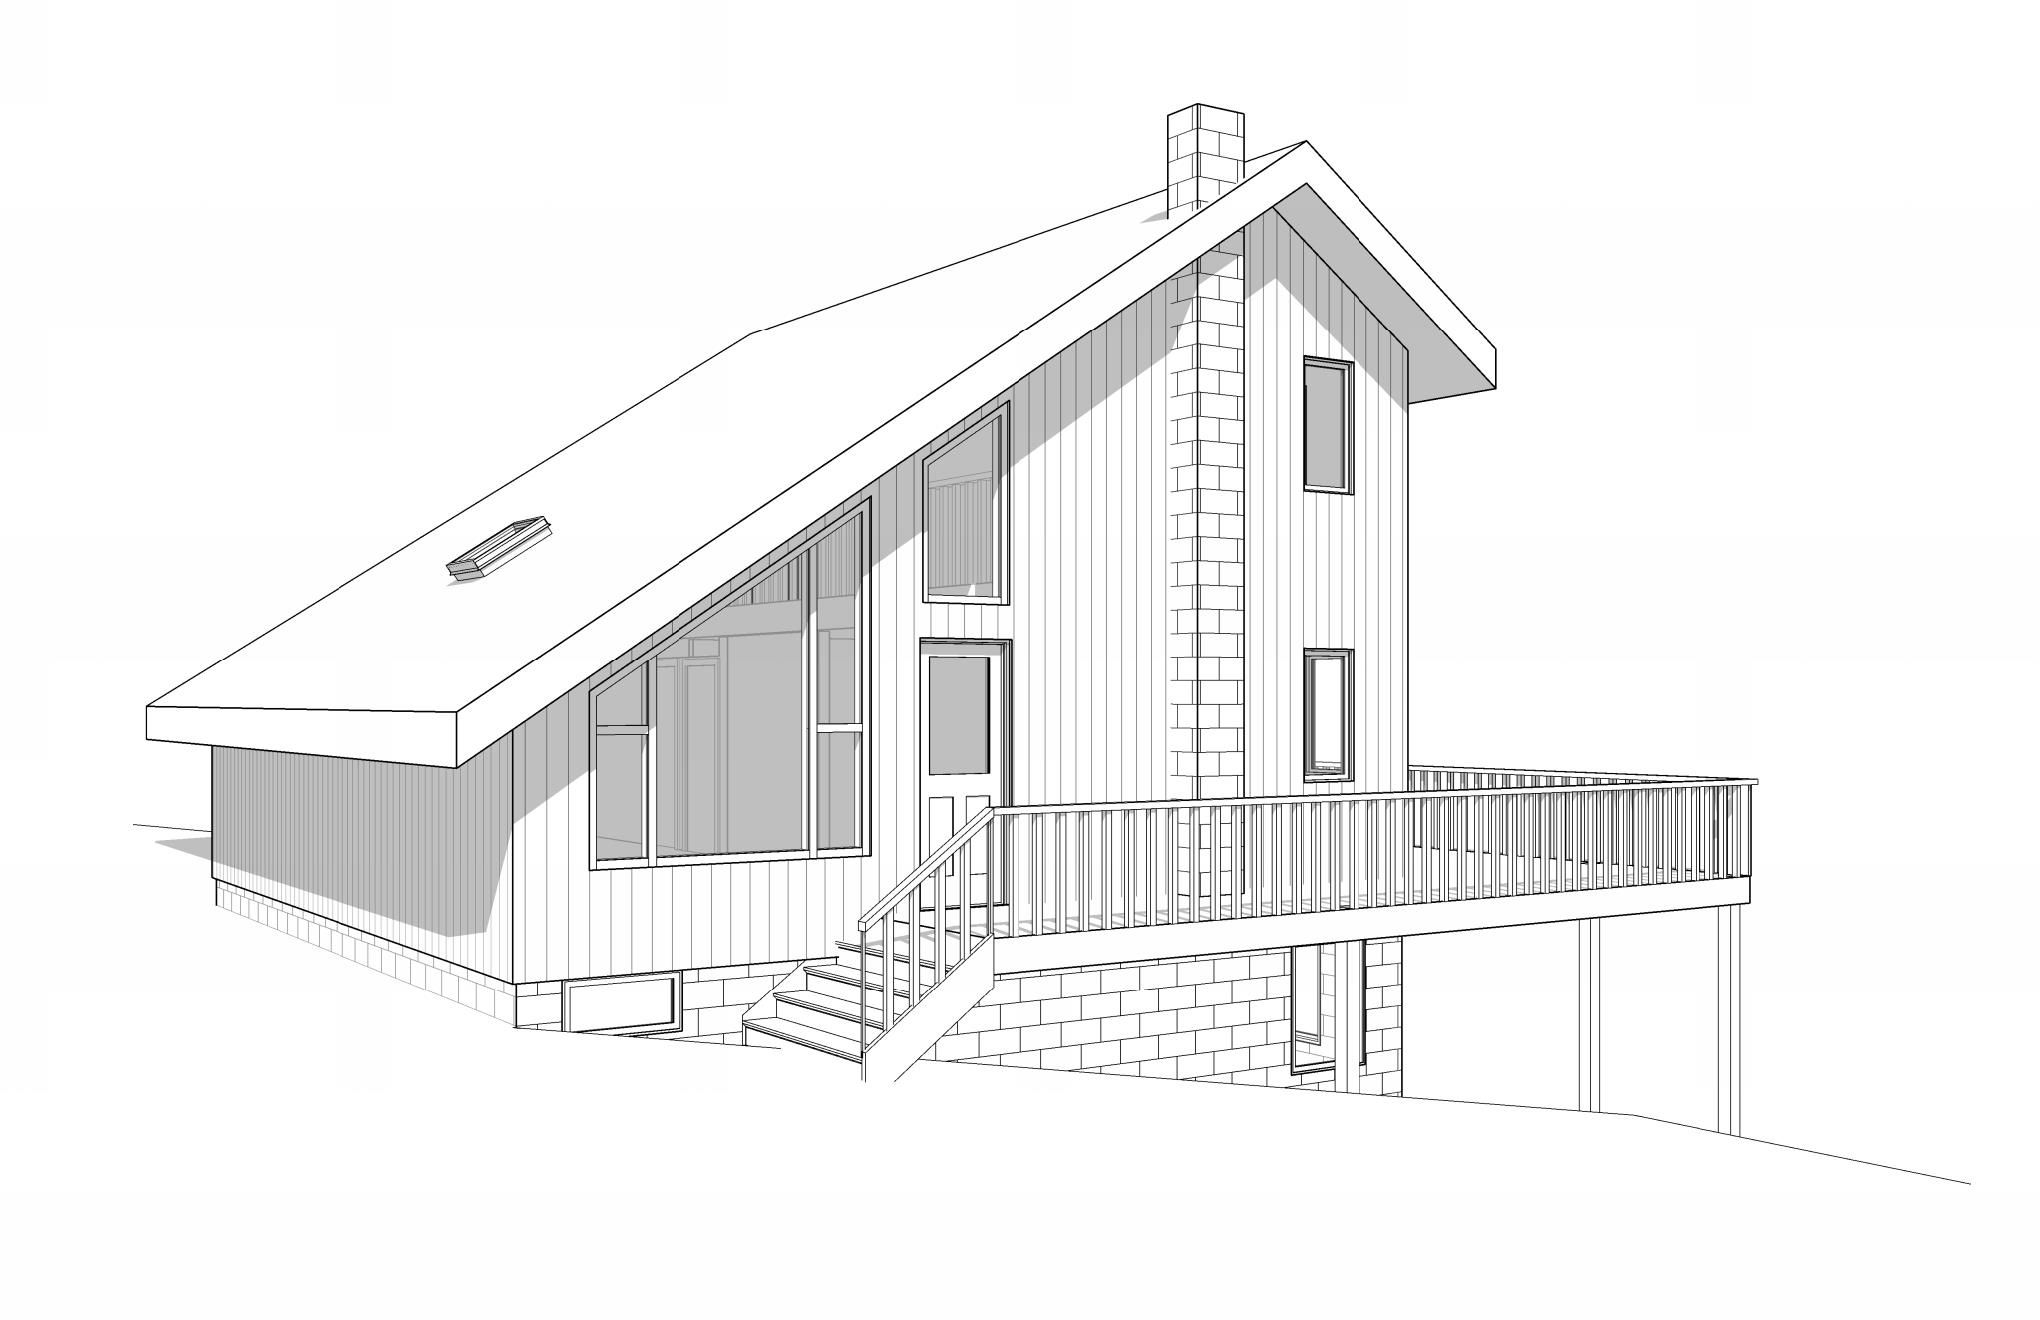
Step 5: Designing the Roof
Designing the roof is an essential step in creating a complete house design. The roof not only provides protection from the elements but also contributes to the overall architectural style and character of the house. It adds dimension, visual interest, and can dramatically impact the aesthetic appeal of your design.
Here’s how you can design the roof of your house:
- Consider the architectural style: Take into account the architectural style you have chosen for your house. Different styles, such as traditional, modern, or Mediterranean, typically have specific roof shapes and features associated with them. Research and understand the roof styles commonly seen in your chosen architectural style.
- Select the roof type: Choose the type of roof that best suits your design and style preferences. Common roof types include gable, hip, flat, shed, or mansard roofs. Each roof type has its own benefits and considerations, so choose one that complements the overall aesthetic and meets your functional requirements.
- Determine the pitch: The pitch of the roof refers to the steepness or slope. It affects the visual appearance of the house and can impact the functionality of the roof, such as shedding water or accommodating attic space. Consider factors such as climate, snow load, and local building codes when determining the pitch of your roof.
- Add roof elements: Incorporate additional roof elements such as dormers, skylights, or chimneys to enhance the design and functionality. These features can add architectural interest and bring character to your house. Ensure that these elements are harmonious with the overall roof design and do not compromise its structural integrity.
- Consider materials: Research various roofing materials and choose the one that best suits your design, climate, and budget. Common roofing materials include asphalt shingles, metal, tile, or slate. Each material has its own aesthetic appeal, durability, and maintenance requirements.
- Consult a professional: If designing the roof seems overwhelming or you want expert advice, consider consulting with a professional architect or roofing specialist. They can provide guidance, offer insights, and ensure that your roof design meets building codes and structural requirements.
A well-designed roof will not only protect your house but also add visual appeal and a sense of completion to your overall design. Take your time to explore different options, consider the architectural style, and choose a roof design that elevates the beauty of your house.
Now that you have designed the roof, it’s time to move on to the next step – adding external details to enhance the overall appearance of your house design.
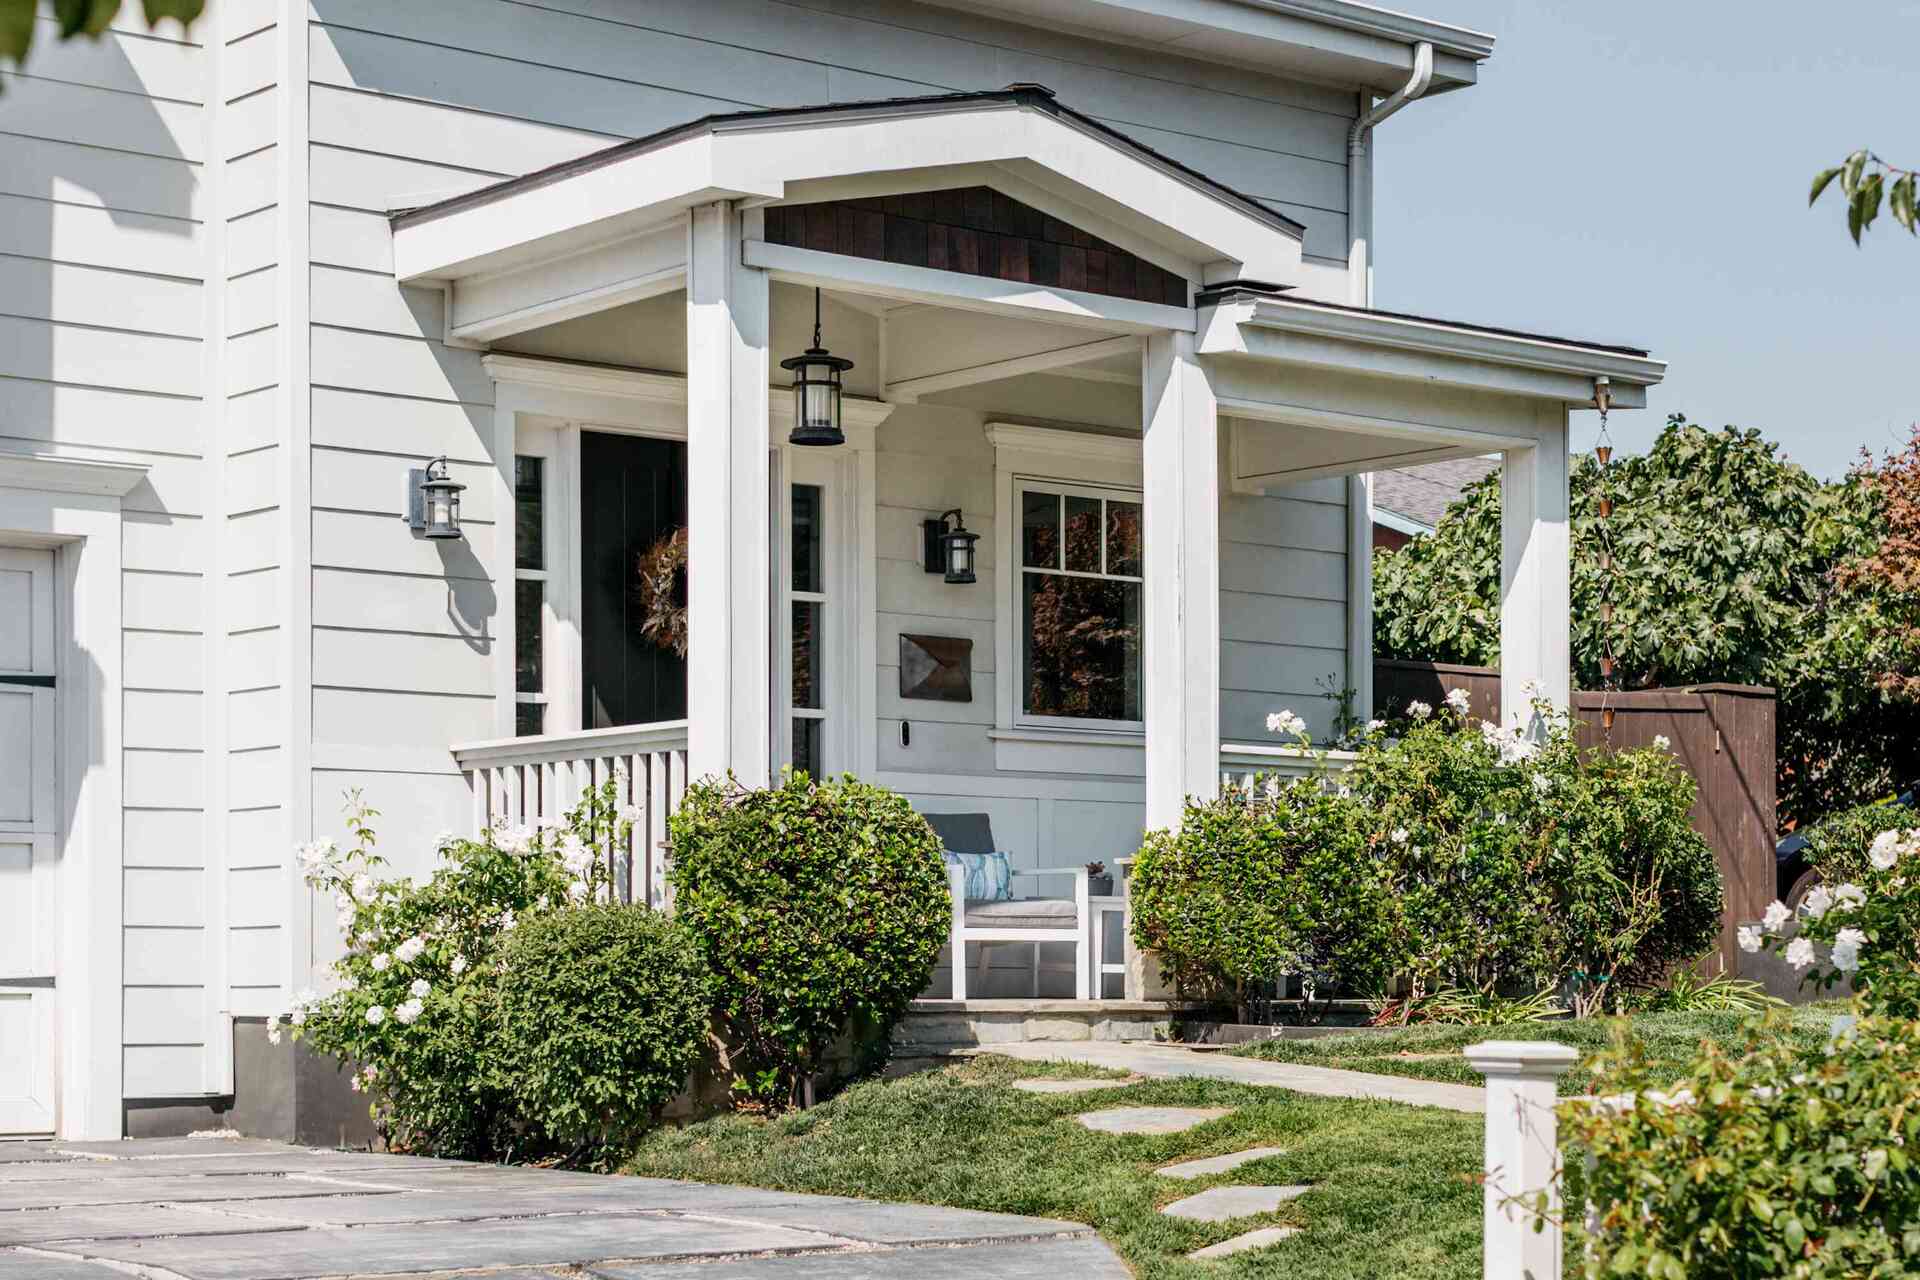
Step 6: Adding External Details
As you continue refining your house design, it’s important to focus on adding external details that enhance the overall appearance and curb appeal of your home. These details will contribute to the visual harmony, character, and uniqueness of your house.
Here’s how you can add external details to your house design:
- Exterior finishes: Decide on the type of exterior finishes you want for your house. This can include materials such as brick, stone, stucco, siding, or a combination of them. Consider the texture, color, and overall aesthetic appeal of the chosen finishes.
- Architectural elements: Incorporate architectural elements that add charm and visual interest to your design. This can include features such as columns, cornices, trim, or decorative moldings. These elements can elevate the style and create a cohesive look for your house.
- Entryway design: Pay special attention to the design of the entryway, as it sets the tone and creates a welcoming impression. Consider the style of the front door, porch, steps, and any other elements that make up the entryway. Add landscaping features such as plants and lighting to further enhance its appeal.
- Windows and shutters: Give careful consideration to the design and placement of windows and shutters. Consider their style, size, and how they contribute to the overall aesthetic of your house. Add decorative shutters or window trim to further enhance their impact.
- Roof details: Look for opportunities to add roof details that complement the design of your house. This can include features such as dormers, gables, or unique rooflines. These details can add depth and visual interest to the exterior of your home.
- Outdoor living spaces: Consider incorporating outdoor living spaces such as patios, decks, or balconies. These spaces not only extend the usable area of your house but also provide opportunities for relaxation, entertainment, and connection with the outdoors.
Adding external details to your house design will bring it to life and make it stand out. Carefully consider every aspect of the exterior, from finishes to architectural elements, to create a harmonious and visually appealing design.
With the external details integrated into your design, it’s time to shift focus towards the interior of your house. In the next step, we will explore how to enhance the interior spaces.
Step 7: Enhancing the Interior
Now that you have designed the exterior of your house, it’s time to shift your focus to enhancing the interior spaces. The interior design plays a crucial role in creating a comfortable, functional, and visually appealing living environment.
Here’s how you can enhance the interior spaces of your house design:
- Layout and flow: Assess the layout of each room and ensure that it allows for a smooth flow of movement. Consider the functionality and purpose of each space. Pay attention to the placement of doors, windows, and walls to optimize the use of space.
- Furniture arrangement: Plan the arrangement of furniture in each room to maximize comfort, functionality, and visual appeal. Consider the size and shape of each room and how you want people to move within the space. Experiment with different furniture layouts to find the most suitable arrangement.
- Lighting design: Pay careful attention to the lighting design of each room. Incorporate a combination of natural and artificial light sources to create ambiance and highlight architectural features. Consider the placement of windows, skylights, and lighting fixtures to ensure adequate illumination throughout the space.
- Color scheme: Choose a color scheme that sets the mood and reflects your personal style. Consider how different colors can impact the perception of space. Use a combination of colors to create visual interest and balance. Experiment with various color palettes to find the one that resonates with the overall design concept.
- Materials and finishes: Select materials and finishes that align with your design vision and complement the overall aesthetic of the house. Consider the durability, maintenance, and functionality of the materials. Use a combination of textures and finishes to add depth and visual interest to the interior spaces.
- Storage solutions: Take into account the storage needs of each room. Incorporate built-in cabinets, closets, and storage units to maximize space and keep the rooms organized. Consider creative storage solutions that blend seamlessly with the overall design.
- Personal touches: Infuse your unique personality into the interior design by adding personal touches, such as artwork, decorative items, or sentimental objects. These elements will make your house feel like a home and reflect your individual style.
Enhancing the interior spaces of your house design is all about creating a harmonious and functional living environment. By paying attention to layout, furniture arrangement, lighting, color scheme, materials, and personal touches, you can transform your house into a place that reflects your lifestyle and brings you joy.
With the interior spaces enhanced, let’s move on to the final step – including landscaping elements to complete the overall design of your house.
Step 8: Including Landscaping Elements
The final step in completing the design of your house is to incorporate landscaping elements that enhance the exterior and create a seamless transition between your home and its surroundings. Landscaping not only adds beauty and curb appeal but also creates a welcoming and inviting atmosphere.
Here’s how you can include landscaping elements in your house design:
- Assess the outdoor space: Evaluate the outdoor area surrounding your house and consider its size, topography, and existing features. Take note of any unique characteristics or challenges that may impact your landscaping choices.
- Create a focal point: Identify a focal point that will draw attention and serve as a centerpiece for your landscaping. This can be a beautiful tree, a water feature, a sculpture, or a well-designed garden area.
- Design pathways: Plan and design pathways that connect different areas of your outdoor space. Pathways can be made using various materials like stone, gravel, or pavers. Consider the flow and function of these paths to ensure convenience and accessibility.
- Add greenery: Incorporate a variety of plants, flowers, trees, and shrubs to bring color, texture, and life to your outdoor space. Consider the climate and maintenance requirements of the plants, as well as their compatibility with the overall design aesthetic.
- Create hardscapes: Integrate hardscape elements such as patios, decks, or seating areas to provide spaces for relaxation and entertainment. These areas can be adorned with furniture, outdoor lighting, and decorative elements to enhance their functionality and visual appeal.
- Consider privacy and screening: If privacy is desired, consider incorporating fences, hedges, or screening elements to create a more secluded outdoor space. These features can also provide a sense of enclosure and define specific areas within your landscape.
- Add lighting: Enhance the ambiance of your outdoor space by incorporating lighting elements. Install landscape lighting to highlight focal points, pathways, and architectural features. This will not only provide safety and security but also create a warm and inviting atmosphere during the evening hours.
- Maintain balance: Maintain a sense of balance and harmony within your landscaping design by considering scale, proportions, and symmetry. Ensure that the landscaping elements complement the architectural style of your house and create a cohesive overall look.
By including landscaping elements, you can transform your outdoor space into a haven of beauty and tranquility. Well-designed landscaping will not only enhance the overall appearance of your house but also create a seamless connection between your home and the natural environment.
With the integration of landscaping elements, your house design is now complete. Take a step back and admire the journey you have taken, from creating a basic floor plan to refining the interior and exterior spaces. Your house design is a reflection of your creativity and vision, ready to be turned into a reality.
Now, armed with this knowledge, you are ready to embark on your own house design journey. Whether you choose to pursue it as a hobby or a profession, remember that architectural design is a blend of art, science, and functionality – a timeless craft that holds the power to shape the way we live and experience our surroundings.
Read more: How To Print A CAD Drawing
Conclusion
Congratulations on completing your journey into the world of house design! Throughout this comprehensive guide, we have explored the essential steps and considerations involved in creating your own house design. From gathering materials to incorporating landscaping elements, you have gained valuable insights into the art of architectural design.
Designing a house is a meticulous process that requires a balance of creativity, functionality, and attention to detail. It begins with creating a basic floor plan, where you establish the layout, walls, and divisions. From there, you add windows, doors, and design the roof to shape the external appearance of your house.
The next steps focus on enhancing the interior and exterior, where you carefully consider elements such as furniture arrangement, lighting, color schemes, materials, and landscaping. Each decision contributes to the overall aesthetics and functionality of your house design, creating a harmonious and inviting living environment.
As you embark on your own house design journey, keep in mind that these steps serve as a framework. Be open to exploration, experimentation, and adapting as you go along. Architecture is an art form that grants you the freedom to express your unique style and vision.
Remember, successful house design is not just about creating a visually stunning structure; it’s about crafting a space that meets the needs and desires of those who will inhabit it. Consider how the design will support daily activities, enhance well-being, and promote a sense of comfort and joy.
Whether you aspire to become an architect, want to renovate your current home, or simply enjoy the creative process of designing houses, this guide has equipped you with the necessary knowledge and tools to get started. Embrace your creativity, unleash your imagination, and let your designs become a reflection of your unique perspective.
So, grab your drafting tools or fire up your design software, and start sketching, planning, and dreaming. Let your house design journey begin!
Now that you've mastered drawing your house design, why not dive deeper into one of its fundamental aspects? Our detailed article on "What Is A Floor Plan" breaks down everything you need to know about floor plans, from their importance in architecture to practical tips on drafting them effectively. Whether you're planning a renovation or simply curious about architectural basics, this guide is packed with valuable insights that will surely pique your interest and expand your understanding.
Frequently Asked Questions about How To Draw House Design
Was this page helpful?
At Storables.com, we guarantee accurate and reliable information. Our content, validated by Expert Board Contributors, is crafted following stringent Editorial Policies. We're committed to providing you with well-researched, expert-backed insights for all your informational needs.


0 thoughts on “How To Draw House Design”