Home>diy>Architecture & Design>How To Flatten CAD File

Architecture & Design
How To Flatten CAD File
Modified: January 9, 2024
Learn how to flatten CAD files in architecture design to ensure compatibility and smooth collaboration. Enhance your design workflow with these expert tips and techniques.
(Many of the links in this article redirect to a specific reviewed product. Your purchase of these products through affiliate links helps to generate commission for Storables.com, at no extra cost. Learn more)
Introduction
Welcome to our comprehensive guide on how to flatten a CAD file. CAD (Computer-Aided Design) is a widely used technology in various industries, including architecture, engineering, and manufacturing. It allows designers to create and modify intricate designs with precision and ease. However, there are situations where flattening a CAD file becomes necessary.
Flattening a CAD file refers to converting the 3D design into a 2D representation, typically for purposes like export, printing, or simplified viewing. This process eliminates the depth information and provides a flat representation of the design. In this article, we will delve into the details of flattening CAD files, the methods available, and the steps involved to ensure a successful outcome.
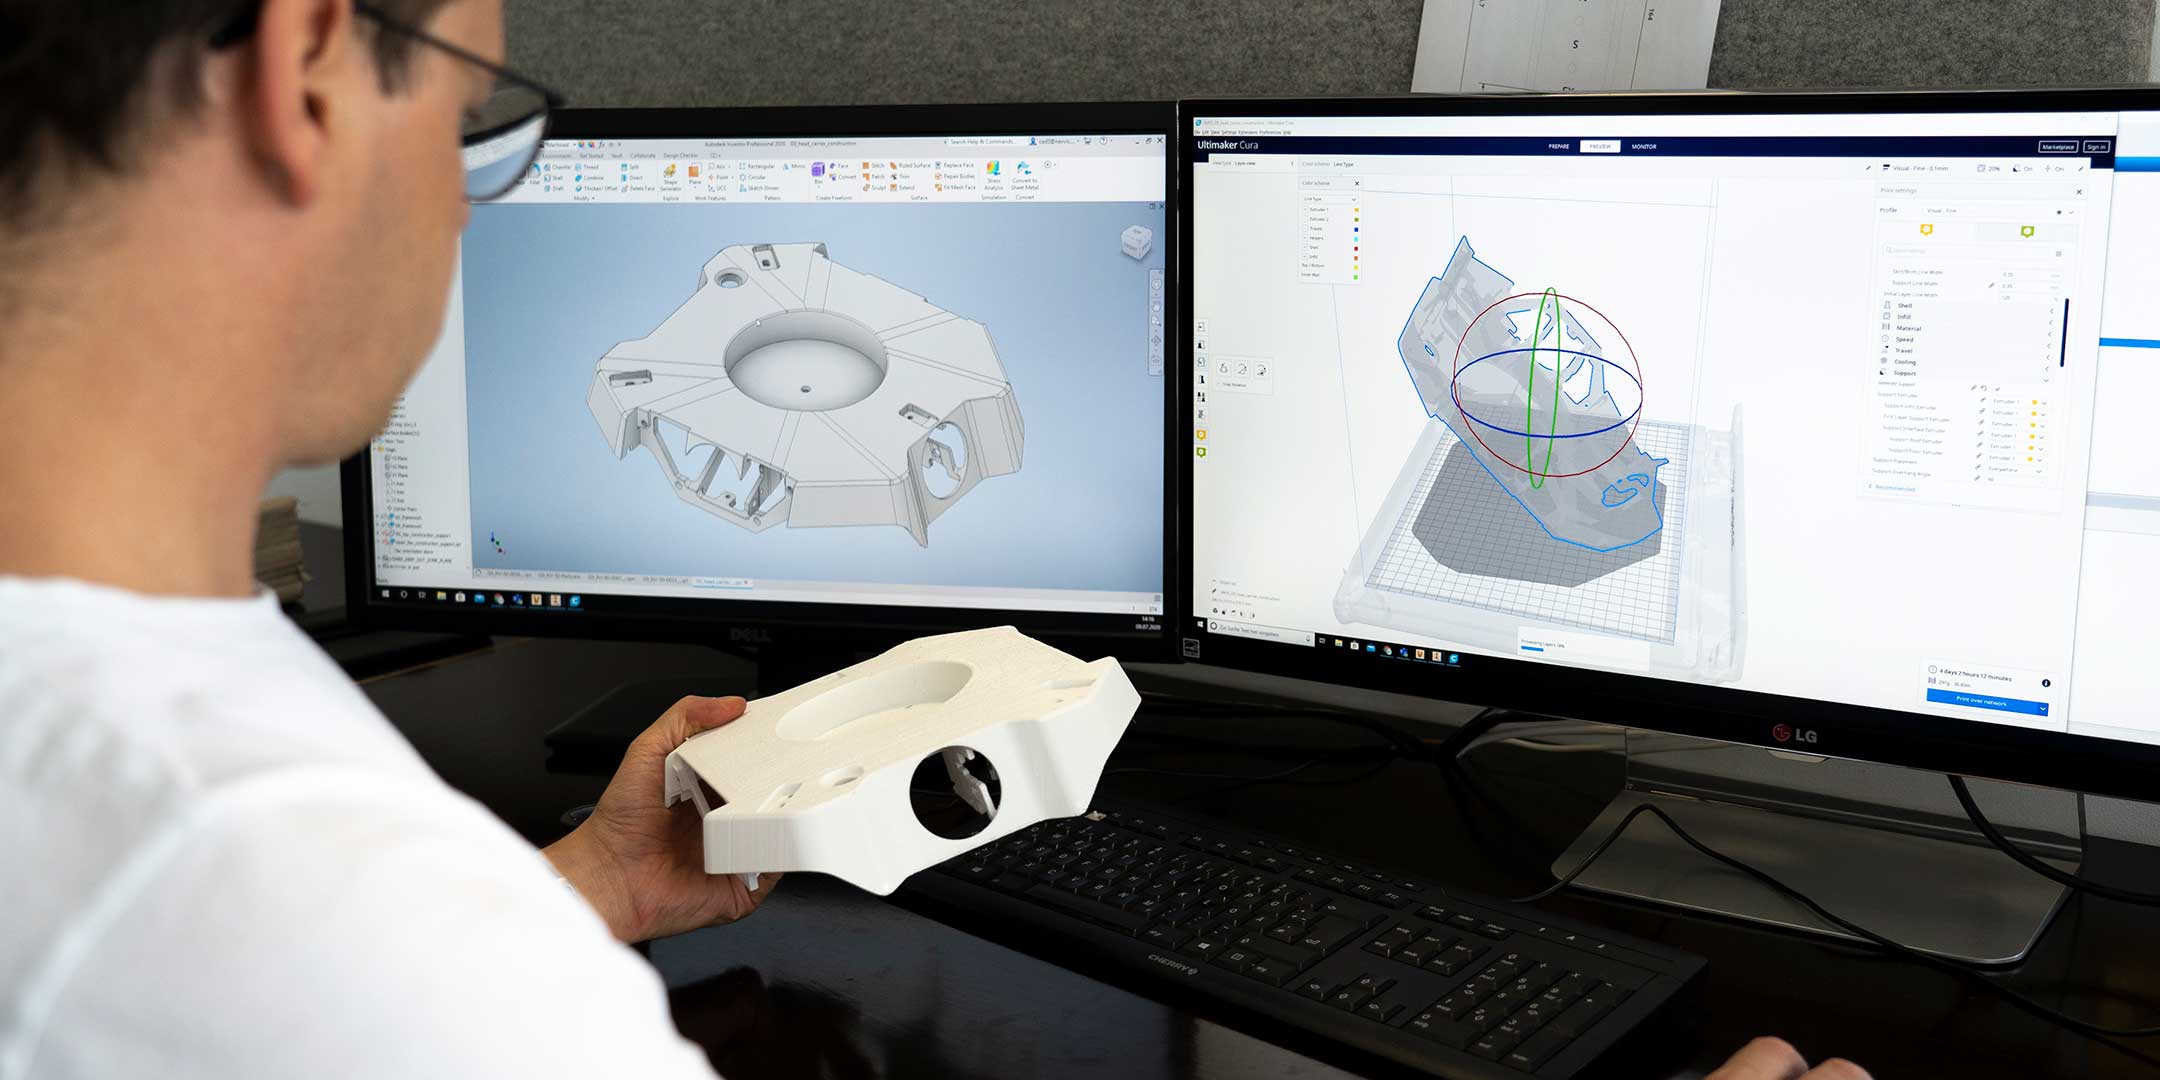
Before we dive into the process of flattening a CAD file, it is important to understand the nature of CAD files and their complexities. CAD files are typically created using specific software applications like AutoCAD, SolidWorks, or Revit. These files consist of various elements, including geometry, dimensions, layers, materials, and textures, all of which contribute to the overall design.
While CAD files are primarily designed to be viewed and manipulated in their 3D format, there are instances when a 2D representation is required. This can be for creating blueprints, generating technical drawings, or simply sharing the design with someone who lacks the necessary CAD software or expertise.
In the following sections, we will explore the process of preparing a CAD file for flattening, selecting the appropriate flattening method, executing the flattening process, and verifying the accuracy of the flattened file. We will also address common issues that may arise during the process and provide troubleshooting tips to overcome them.
By the end of this article, you will have a comprehensive understanding of how to effectively flatten a CAD file, enabling you to convert your 3D designs into 2D representations for various purposes. So, let’s dive in and learn how to flatten CAD files!
Key Takeaways:
- Understanding the complexities of CAD files, preparing them meticulously, and selecting the appropriate flattening method are crucial steps in ensuring the accurate conversion of 3D designs into 2D representations.
- Verifying the accuracy of the flattened CAD file and troubleshooting common issues are essential for overcoming obstacles and producing high-quality 2D representations for various purposes.
Read more: How To Open CAD Files
Understanding the CAD File
Before diving into the process of flattening a CAD file, it is essential to have a clear understanding of the different components and complexities of the file. A CAD file is a digital representation of a design created using specialized software. It contains various elements that contribute to the overall design and play a crucial role in the flattening process.
The primary component of a CAD file is the geometry, which represents the actual shape and structure of the design. It consists of points, lines, curves, and surfaces that define the physical attributes of the object being designed. Understanding the geometry is vital as it influences how the design will be depicted in the flattened version.
In addition to geometry, a CAD file may also include dimensions, which provide specific measurements and scale for the design. Dimensions are crucial for accuracy and ensure that the design can be replicated or manufactured according to the desired specifications.
Layers are another important element of a CAD file. They allow designers to organize and manage different parts of the design. Each layer can contain specific objects or components, such as walls, windows, doors, or electrical elements. Understanding the layer organization is essential when flattening a CAD file, as it can impact the visibility and organization of the flattened version.
Materials and textures are additional elements that may be present in a CAD file. They add visual details and realism to the design, allowing for a more immersive representation of the object. When flattening a CAD file, it is essential to consider how materials and textures will be rendered in the 2D version, as they may need to be simplified or modified.
Lastly, CAD files can also include annotations, such as notes, labels, or callouts, which provide additional information about the design. Annotations are typically used to convey important details or instructions and play a vital role in technical drawings or blueprints. When flattening a CAD file, it is important to determine how annotations will be represented in the 2D version to ensure clarity and accuracy.
By understanding the different components of a CAD file, you can gain insight into the intricacies involved in flattening it. This understanding will assist you in preparing the file, selecting the appropriate flattening method, and verifying the accuracy of the flattened version. Now that we have a clear understanding of the CAD file, let’s move on to the next step: preparing the CAD file for flattening.
Preparing the CAD File
Before you begin the process of flattening a CAD file, it is crucial to ensure that the file is properly prepared. Proper preparation will help streamline the flattening process and ensure the accuracy of the final result. Here are some essential steps to follow when preparing a CAD file for flattening:
- Create a backup: It is always a good practice to create a backup of the original CAD file before making any modifications. This way, if any issues arise during the flattening process, you can revert back to the original file without losing any important design data.
- Simplify the design: Often, CAD files contain complex elements and details that are not necessary for the 2D representation. Before flattening the file, simplify the design by removing unnecessary components, simplifying intricate details, and reducing the level of complexity. This will help optimize the file size and improve processing speed during the flattening process.
- Organize layers: Pay close attention to the layer organization within the CAD file. Ensure that objects are assigned to the appropriate layers and that the layer structure is logical and easy to navigate. This will make it easier to select and manipulate specific objects during the flattening process.
- Check for errors: Before proceeding with the flattening process, it is crucial to check the CAD file for any errors, such as gaps in geometry, overlapping lines, or missing dimensions. Use the appropriate tools within the CAD software to identify and fix these errors to ensure the accuracy of the flattened version.
- Set the view: Determine the specific view or perspective from which you want to flatten the CAD file. This can be a top-down view, a side view, or any other desired angle. Set the view in the CAD software to ensure that the flattened version accurately represents the intended perspective.
By following these preparatory steps, you can ensure that the CAD file is optimized for the flattening process and reduce the likelihood of encountering issues or inaccuracies. Once the file is properly prepared, you can move on to the next step: selecting the appropriate flattening method.
Selecting the Flattening Method
When it comes to flattening a CAD file, there are several methods available, each suited for different purposes and desired outcomes. The choice of the flattening method depends on factors such as the specific software being used, the complexity of the design, and the desired level of detail in the flattened version. Here are some common flattening methods to consider:
- 2D Export: Many CAD software applications offer the option to directly export the design as a 2D file format, such as a PDF or a DWG (Drawing) file. This method typically retains the dimensions and other relevant information, allowing for accurate scaling and measurements in the flattened version. This method is ideal when precise measurements and details need to be preserved in the flattened CAD file.
- Rasterization: Rasterization involves converting the CAD file into a raster image format, such as JPEG or PNG. This method simplifies the design by merging all the elements into a 2D image. While this method may not retain the vector-based information, it can be useful for creating simplified representations or for quick visualization purposes.
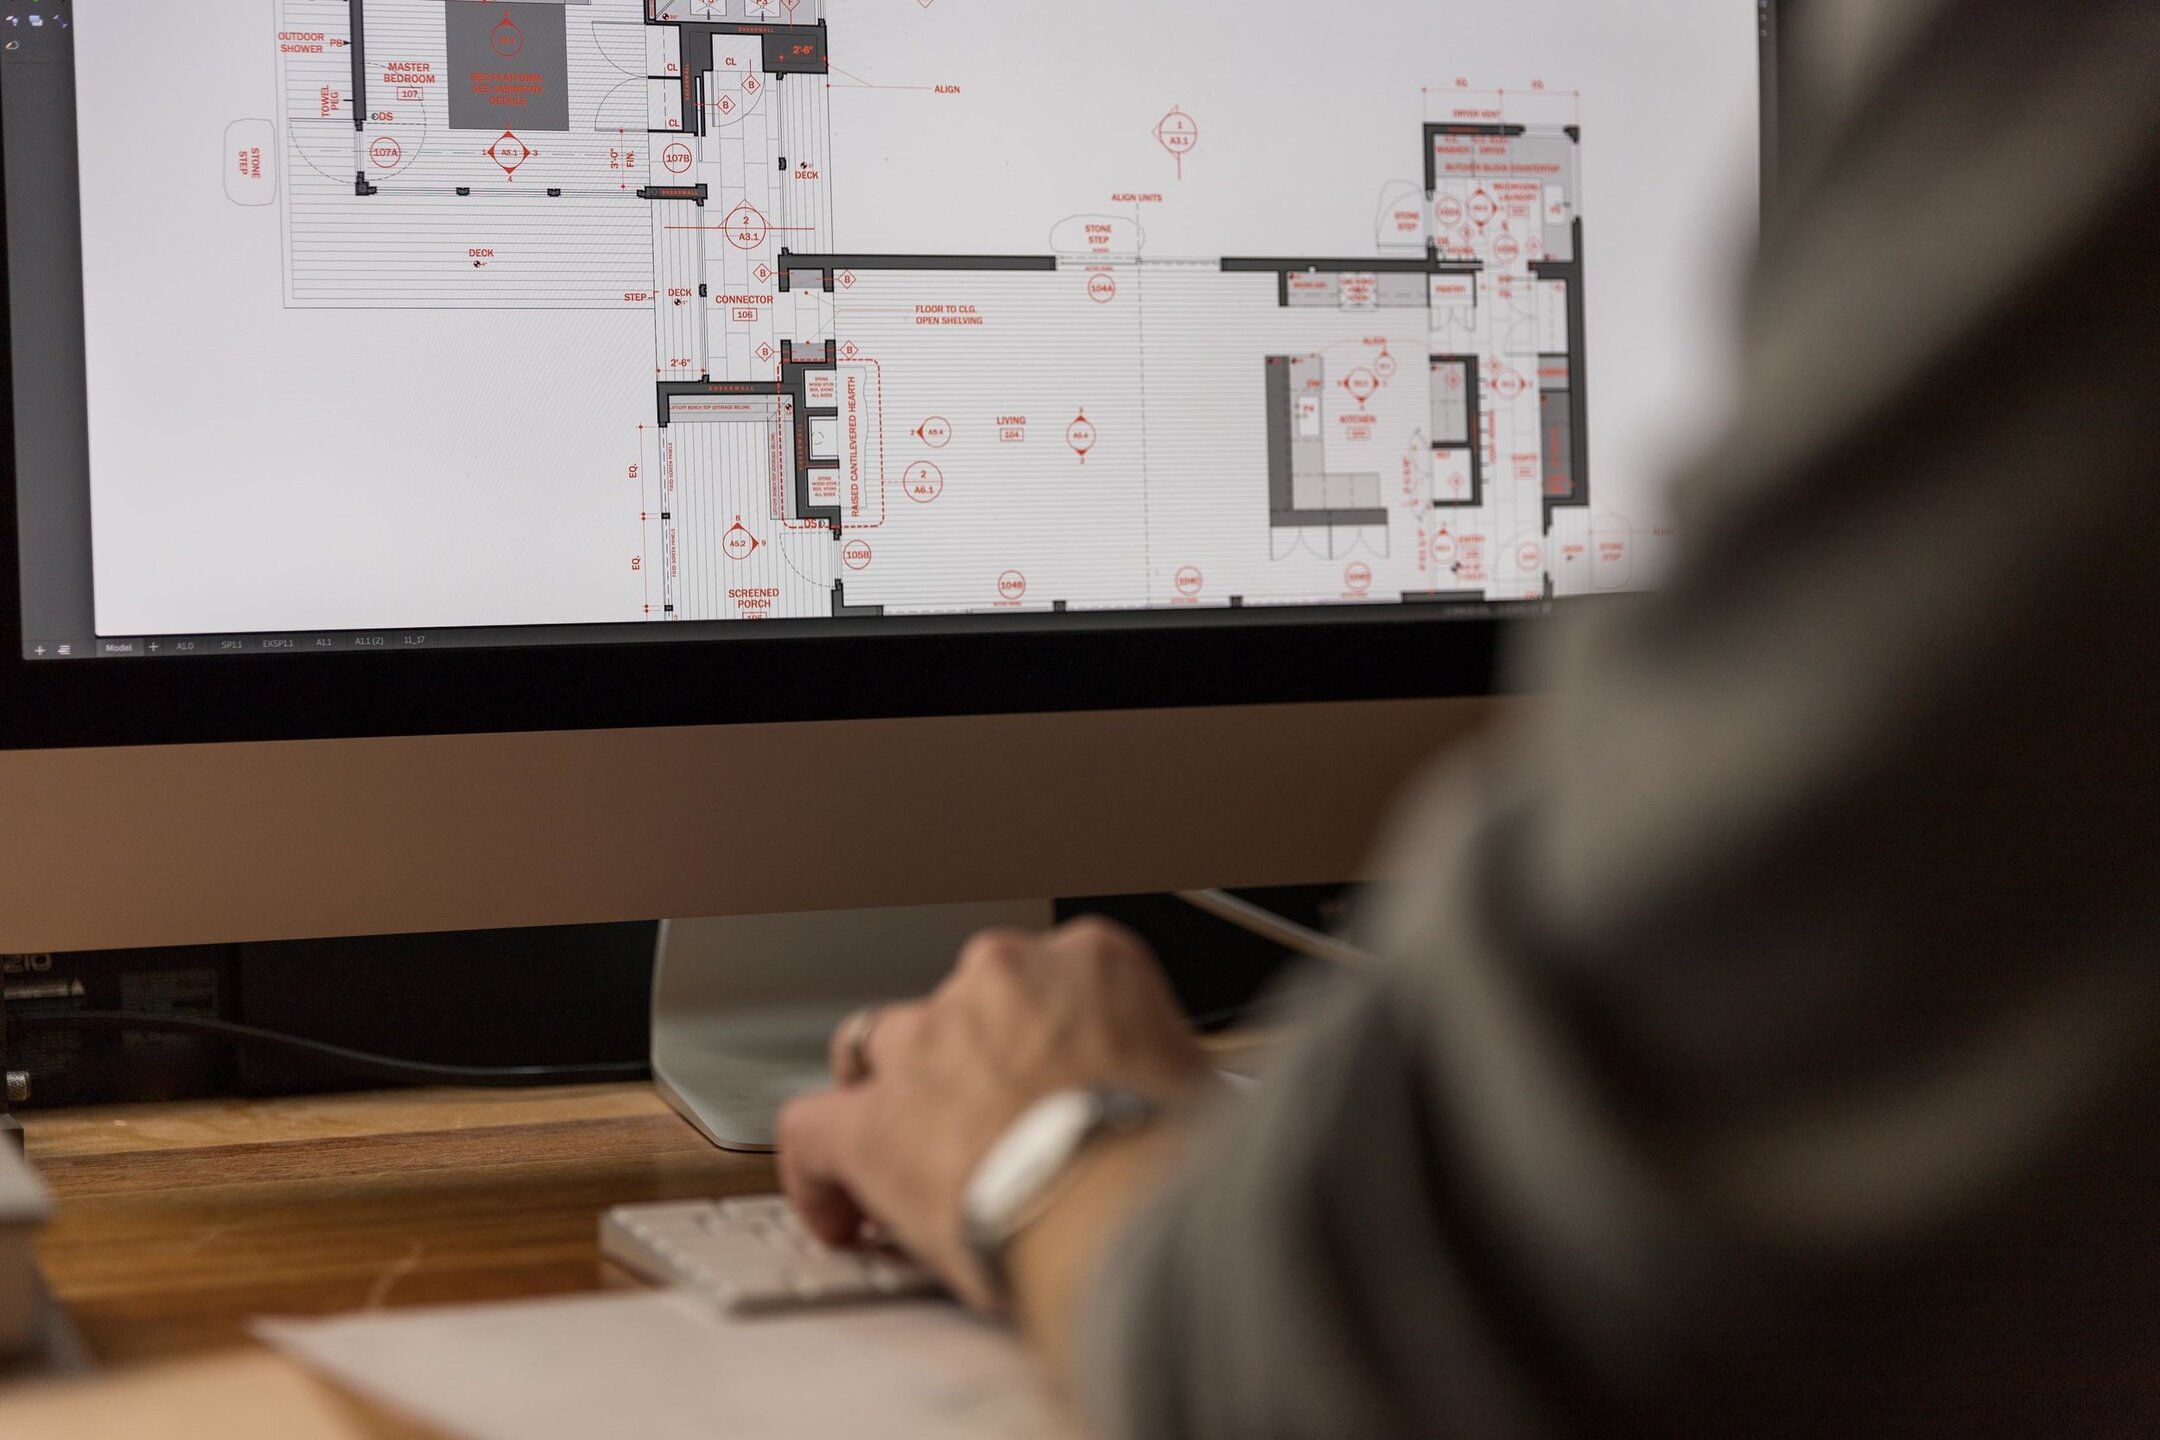
- Projection: The projection method involves creating a projection of the 3D CAD file onto a 2D plane. This method maintains the overall shape and geometry of the design while eliminating the depth information. It is commonly used in architectural drawings and floor plans to accurately represent the layout of a building.
- Sectioning: Sectioning involves slicing the 3D CAD model at a specific plane or cutting plane to reveal the internal components or details. This method is useful when showing cross-sections or specific views of a design, such as mechanical parts or building interiors.
- Manual Conversion: In some cases, manually converting the CAD file to a 2D representation may be necessary. This method involves meticulously selecting and adjusting the elements of the design to create a flattened version. While labor-intensive, manual conversion provides complete control over the final result and allows for customizations as per specific requirements.
When selecting the flattening method, consider the intended use of the flattened CAD file, the level of detail required, and the capabilities of the CAD software being used. It is also worth exploring any additional plugins or extensions that may offer specialized flattening features for specific industries or use cases.
Now that you have an understanding of the various flattening methods, you can choose the method that best suits your needs. Once you have made your selection, it’s time to proceed with the flattening process itself.
When flattening a CAD file, make sure to remove any unnecessary layers, blocks, or references to reduce file size and simplify the drawing for easier sharing and collaboration.
Flattening the CAD File
Now that you have taken the necessary steps to prepare the CAD file and selected the appropriate flattening method, it’s time to proceed with the actual process of flattening the CAD file. The steps may vary depending on the specific software you are using, but here is a general guideline to follow:
- Open the CAD file: Launch the CAD software and open the CAD file that you want to flatten.
- Select the flattening method: Depending on the software and the selected method, choose the appropriate tool or feature for flattening the CAD file.
- Adjust the settings: If applicable, adjust the settings of the flattening tool to suit your needs. This may include selecting the desired view, adjusting the resolution or image quality, or specifying any additional parameters.
- Execute the flattening process: Trigger the flattening process within the software by clicking the appropriate button or executing the command. The software will perform the necessary calculations and transformations to produce the flattened version of the CAD file.
- Review the flattened CAD file: Once the flattening process is complete, review the resulting flattened CAD file. Check for any distortions, missing details, or inaccuracies. Pay attention to dimensions, readability of annotations, and the overall accuracy of the design representation.
- Make adjustments if necessary: If you notice any issues or discrepancies in the flattened CAD file, go back to the original file and adjust the settings or parameters before executing the flattening process again. This may involve modifying the view, simplifying the design, or adjusting other settings to achieve the desired result.
It is important to note that some flattening methods may require additional steps or considerations. For example, when using the 2D export method, you may need to specify the scale and paper size for the flattened file. When using the projection method, you may need to set up the desired perspective and adjust any associated parameters.
By following these steps and paying attention to detail, you can successfully flatten the CAD file and obtain an accurate and usable 2D representation. Once you have verified the accuracy of the flattened file, it’s time to move on to the next step: verifying the flattened CAD file.
Read more: What Are CAD Files
Verifying the Flattened CAD File
After flattening a CAD file, it is crucial to verify the accuracy and integrity of the flattened version. Verifying the flattened CAD file ensures that the intended design and details have been properly translated into the 2D representation. Here are some steps to follow when verifying the flattened CAD file:
- Compare with the original design: Open the original CAD file alongside the flattened version and compare them side by side. Pay close attention to the geometry, dimensions, annotations, and other design elements to ensure that they have been correctly translated in the flattened file.
- Check for missing details: Carefully examine the flattened CAD file to ensure that no critical design elements or details are missing. Check for any gaps, holes, or missing lines that may have been unintentionally excluded during the flattening process.
- Verify dimensions and scaling: If accurate measurements are important in the flattened CAD file, verify that the dimensions and scaling have been preserved. Take measurements directly from the flattened file and compare them with the original design to ensure accuracy.
- Review annotations and labels: If the CAD file contains annotations or labels, review them to confirm that they are clear, legible, and accurately represent the relevant information. Ensure that the labeling is in the correct location and properly corresponds to the design elements.
- Test functionality: If the flattened CAD file will be used for functional purposes, such as assembly instructions or manufacturing specifications, it is important to test the functionality. Check that the flattened file accurately conveys the necessary instructions and information for the intended use.
During the verification process, it is helpful to involve multiple stakeholders, such as designers, engineers, or clients, to collaborate and provide feedback. Their input can help identify any discrepancies or issues that may have been overlooked during the initial verification. Additionally, utilizing design review software or tools that allow for interactive exploration of the flattened file can further aid in the verification process.
If any inaccuracies or discrepancies are identified during the verification process, go back to the original CAD file and make the necessary adjustments before re-flattening the file. Repeat the verification steps until the flattened CAD file accurately represents the original design and meets the intended requirements.
Once the flattened CAD file has been thoroughly verified and deemed accurate, it is ready for use in various applications such as printing, sharing, or incorporating into technical documents. Congratulations, you have successfully flattened the CAD file and ensured its accuracy!
Troubleshooting Common Issues
While flattening a CAD file, you may encounter certain issues that can impact the accuracy or quality of the flattened version. Understanding and troubleshooting these common issues will help ensure a successful flattening process. Here are some common issues that may arise and how to address them:
- Misalignment of elements: Sometimes, the elements in the flattened CAD file may appear misaligned or skewed. This can happen due to errors in the flattening process or inconsistencies in the original CAD file. To address this issue, check if the original CAD file has any inconsistencies or errors. If so, correct them and re-flatten the file.
- Missing or distorted geometry: In some cases, certain geometric elements may be missing or distorted in the flattened CAD file. This can occur due to a variety of reasons, such as complex geometry, overlapping objects, or errors during the flattening process. To address this issue, carefully review the original CAD file and ensure that all objects are properly defined and visible. If needed, simplify or modify the design to facilitate the flattening process.
- Incorrect scaling: Scaling issues can occur when the dimensions in the flattened CAD file do not accurately represent the original design. This can be caused by incorrect settings during the flattening process or inconsistencies in the original CAD file. To resolve this issue, double-check the settings used for the flattening process, ensuring that the correct units and scaling options are selected. Also, verify that the original CAD file has accurate dimensioning and scaling before attempting to flatten it again.
- Loss of details: Flattening a CAD file may result in the loss of intricate details, such as fine textures or small components. This can happen when the flattening method or settings do not adequately capture the level of detail required. To overcome this issue, consider using a different flattening method that better preserves details, or manually adjust the settings to ensure that important details are not lost. Additionally, carefully review the original CAD file to determine if certain objects or details need to be simplified or modified before flattening.
- Inaccurate annotations or labels: Annotations or labels in the flattened CAD file may appear distorted, misplaced, or incorrect. This issue can arise due to factors like scaling, alignment, or errors in the original CAD file. To address this issue, ensure that the annotations are placed correctly, and verify that the original CAD file has accurate annotations. Adjust any misaligned or incorrect annotations before re-flattening the file.
If you encounter any other issues during the flattening process that are not mentioned here, consult the documentation or support resources provided by the CAD software you are using. Additionally, reaching out to the software support team or seeking assistance from experienced CAD professionals can help resolve complex issues and ensure a successful flattening process.
By troubleshooting common issues and addressing them promptly, you can overcome obstacles and produce a flattened CAD file that accurately represents the original design. With the knowledge and solutions provided here, you are well-equipped to tackle any challenges that may arise during the flattening process.
Conclusion
Flattening a CAD file is a critical process for converting 3D designs into 2D representations. Whether you need to create technical drawings, generate blueprints, or simply share the design with others, understanding the steps involved in flattening a CAD file is essential. By following the guidelines outlined in this comprehensive guide, you can successfully navigate the flattening process and ensure the accuracy of the resulting flattened CAD file.
We began by gaining a deeper understanding of CAD files, exploring their various components such as geometry, dimensions, layers, materials, and annotations. This understanding allowed us to grasp the complexities of CAD files and their impact on the flattening process.
We then delved into the preparatory steps necessary to optimize the CAD file for flattening, including creating backups, simplifying the design, organizing layers, checking for errors, and setting the appropriate view. These steps helped streamline the flattening process and lay a solid foundation for obtaining accurate results.
Once the CAD file was prepared, we discussed the different flattening methods available, such as 2D export, rasterization, projection, sectioning, and manual conversion. By selecting the most suitable method based on the specific requirements and capabilities of the CAD software, you can effectively flatten the CAD file and achieve the desired 2D representation.
During the flattening process, we emphasized the importance of verifying the accuracy of the flattened CAD file. By comparing it with the original design, checking for missing details, ensuring correct dimensions and scaling, reviewing annotations and labels, and testing functionality, you can validate the accuracy and integrity of the flattened version.
Finally, we addressed common issues that may arise during the flattening process, including misalignment of elements, missing or distorted geometry, incorrect scaling, loss of details, and inaccurate annotations or labels. By troubleshooting these issues and following the suggested solutions, you can overcome obstacles and achieve a high-quality flattened CAD file.
In conclusion, flattening a CAD file requires careful preparation, appropriate method selection, and thorough verification. By following the steps outlined in this guide and utilizing the knowledge and troubleshooting tips provided, you can successfully flatten CAD files and create accurate 2D representations of your designs. Whether you are an architect, engineer, or designer, the ability to effectively flatten CAD files expands your capabilities and facilitates efficient collaboration and communication in various industries.
Frequently Asked Questions about How To Flatten CAD File
Was this page helpful?
At Storables.com, we guarantee accurate and reliable information. Our content, validated by Expert Board Contributors, is crafted following stringent Editorial Policies. We're committed to providing you with well-researched, expert-backed insights for all your informational needs.


0 thoughts on “How To Flatten CAD File”