Home>diy>Home Improvement>How To Clean Up Dust After Renovation
Home Improvement
How To Clean Up Dust After Renovation
Modified: February 29, 2024
Learn how to properly clean up dust after a home improvement renovation. Our step-by-step guide will help you remove dust and restore cleanliness to your living space.
(Many of the links in this article redirect to a specific reviewed product. Your purchase of these products through affiliate links helps to generate commission for Storables.com, at no extra cost. Learn more)
Introduction
Renovating your home can be an exciting and rewarding endeavor, but it often leaves behind a significant amount of dust and debris. Cleaning up after a renovation is essential not only for aesthetic reasons but also for maintaining a healthy living environment. Dust particles can trigger allergies and respiratory issues if left unchecked. Therefore, it’s crucial to take the time to thoroughly clean up the dust after a renovation.
In this article, we will provide you with a step-by-step guide on how to effectively clean up dust after a renovation. We will cover everything from preparing for the cleanup process to the tools and techniques needed to achieve a sparkling clean home. So, let’s roll up our sleeves and get ready to tackle that post-renovation dust!
Subtitle: Preparing for Dust Cleanup
Before diving into the cleaning process, it’s essential to prepare your space properly. Here are a few steps to take before getting started:
- Clear Out the Area: Remove any furniture, decorations, or items that could obstruct your cleaning efforts. This will make it easier to access all surfaces and ensure a thorough clean-up.
- Protect Surfaces: Cover any delicate and valuable surfaces, such as countertops, flooring, or furniture, with plastic sheets or drop cloths. This will help protect them from dust and potential damage during the cleaning process.
- Close Off Vents and Registers: Dust particles can easily get blown around by air circulation systems. Shutting off vents and registers in the renovation area will prevent dust from spreading to other parts of the house.
- Don Dust-Proof Clothing: Dress appropriately for the task at hand. Wear long sleeves, pants, gloves, and a dust mask to protect yourself from inhaling the fine particles during the cleaning process.
Key Takeaways:
- Thoroughly preparing the space, gathering the right tools, and taking safety precautions are essential for effective post-renovation dust cleanup.
- From removing large debris to cleaning walls, ceilings, and soft furnishings, a step-by-step approach ensures a sparkling, healthy home after renovation.
Read more: How To Clean Up A Spackle Dust
Preparing for Dust Cleanup
Subtitle: Gathering the Necessary Tools and Equipment
Before embarking on your dust cleanup mission, it’s essential to gather the necessary tools and equipment. Having the right supplies will make the process more efficient and ensure a thorough clean-up. Here’s a list of items you will need:
- Dust Mask: A high-quality dust mask is crucial to protect your lungs from inhaling fine particles of dust. Choose a mask that fits snugly and has a rating of N95 or higher.
- Gloves: Wear gloves to protect your hands from dust and potential irritants in cleaning products.
- Dustpan and Brush: A dustpan and brush set will come in handy for sweeping up larger debris before vacuuming.
- Broom and Dust Mop: A broom or dust mop with soft bristles will help you tackle dust on hard floors and larger surface areas.
- Vacuum Cleaner with HEPA Filter: A vacuum cleaner equipped with a HEPA filter is highly effective in capturing and containing fine dust particles. Make sure to empty the vacuum bag or canister regularly during the cleaning process.
- Microfiber Cloths: Microfiber cloths are excellent at trapping and holding onto dust particles. Use them for dusting surfaces such as shelves, countertops, and furniture.
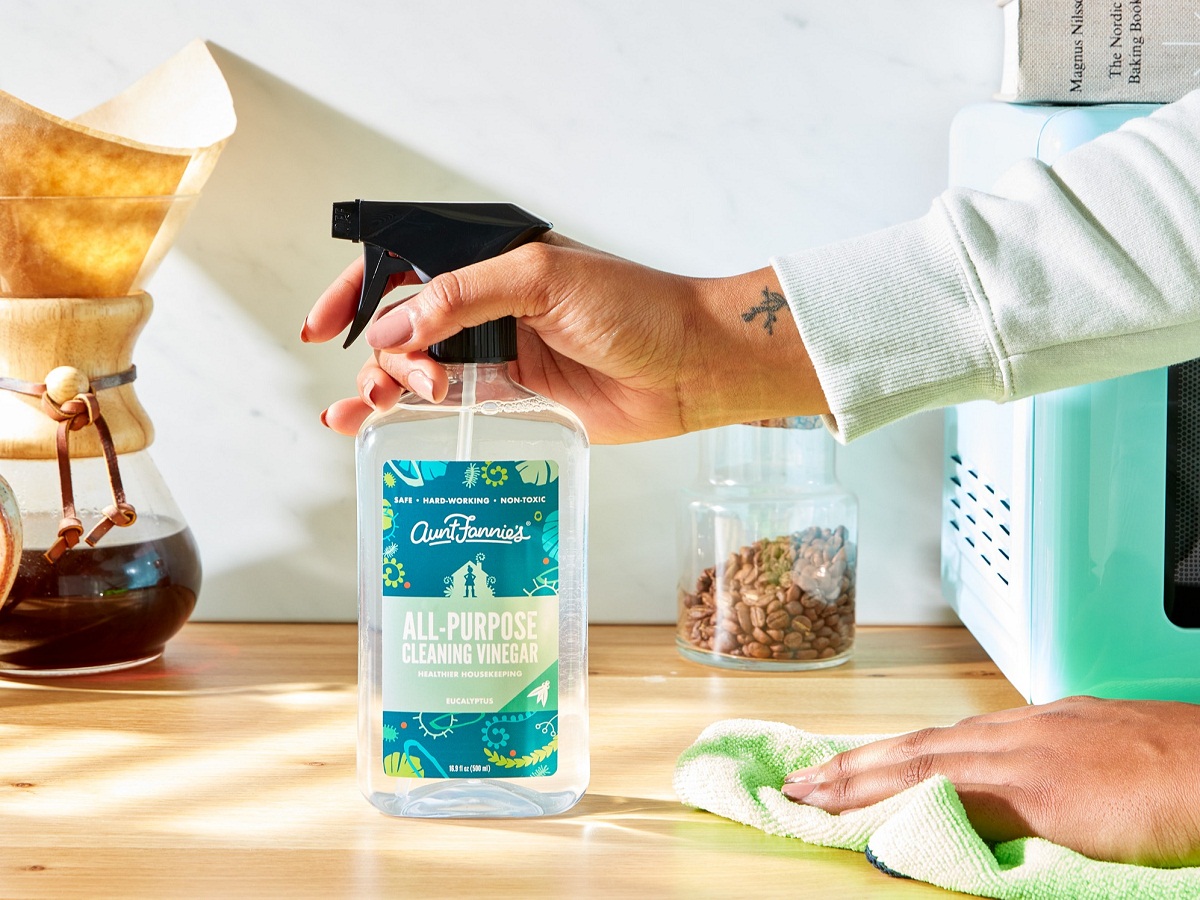
- All-Purpose Cleaner: Choose a mild all-purpose cleaner that is suitable for different surfaces, such as countertops, walls, and furniture.
- Glass Cleaner: Opt for a streak-free glass cleaner to clean windows, mirrors, and glass surfaces.
- Furniture Polish: If you have wooden furniture, consider using a furniture polish to bring back its shine and protect the surface.
- Step Stool or Ladder: Depending on the height of the surfaces you need to clean, you may require a step stool or ladder for easy access.
By ensuring that you have these tools and equipment on hand, you’ll be well-prepared to begin the dust cleanup process effectively.
Gathering the Necessary Tools and Equipment
Subtitle: Gathering the Necessary Tools and Equipment
Before embarking on your dust cleanup mission, it’s essential to gather the necessary tools and equipment. Having the right supplies will make the process more efficient and ensure a thorough clean-up. Here’s a list of items you will need:
- Dust Mask: A high-quality dust mask is crucial to protect your lungs from inhaling fine particles of dust. Choose a mask that fits snugly and has a rating of N95 or higher.
- Gloves: Wear gloves to protect your hands from dust and potential irritants in cleaning products.
- Dustpan and Brush: A dustpan and brush set will come in handy for sweeping up larger debris before vacuuming.
- Broom and Dust Mop: A broom or dust mop with soft bristles will help you tackle dust on hard floors and larger surface areas.
- Vacuum Cleaner with HEPA Filter: A vacuum cleaner equipped with a HEPA filter is highly effective in capturing and containing fine dust particles. Make sure to empty the vacuum bag or canister regularly during the cleaning process.
- Microfiber Cloths: Microfiber cloths are excellent at trapping and holding onto dust particles. Use them for dusting surfaces such as shelves, countertops, and furniture.
- All-Purpose Cleaner: Choose a mild all-purpose cleaner that is suitable for different surfaces, such as countertops, walls, and furniture.
- Glass Cleaner: Opt for a streak-free glass cleaner to clean windows, mirrors, and glass surfaces.
- Furniture Polish: If you have wooden furniture, consider using a furniture polish to bring back its shine and protect the surface.
- Step Stool or Ladder: Depending on the height of the surfaces you need to clean, you may require a step stool or ladder for easy access.
By ensuring that you have these tools and equipment on hand, you’ll be well-prepared to begin the dust cleanup process effectively.
Removing Large Debris and Garbage
Subtitle: Removing Large Debris and Garbage
After a renovation, there is often a buildup of large debris and garbage that needs to be cleared before starting the dust cleanup process. Follow these steps to effectively remove the larger debris:
- 1. Use a Dustpan and Brush: Begin by using a dustpan and brush to sweep up larger pieces of debris like wood chips, drywall scraps, or nails. It’s important to remove these items first to prevent them from being further distributed during the cleaning process.
- 2. Dispose of the Debris Properly: Once you have collected the debris in the dustpan, carefully transfer it to a garbage bag or a designated construction waste bin. Be cautious when handling sharp objects to avoid injuries. Follow local waste disposal guidelines for the proper disposal of construction debris.
- 3. Check for Hidden Debris: Pay attention to hidden areas such as corners, crevices, and under furniture, as they tend to accumulate hidden debris. Use a flashlight to help you identify any smaller debris that may have been missed.
- 4. Clean Out Ventilation System: If your renovation project involved any work near ventilation systems, it’s important to check and clean them. Dust and debris can accumulate in the vents and filters, potentially affecting indoor air quality. Remove and clean the vent covers, and consider replacing the air filters as well.
- 5. Sweep the Area: After removing the large debris, sweep the floor using a broom or dust mop. Start from the furthest corner of the room and work your way towards the exit to ensure that all debris is collected.
- 6. Dispose of Garbage Bags: Seal the garbage bags containing the larger debris and dispose of them according to the appropriate waste management guidelines in your area.
By following these steps, you will clear away the larger debris and garbage, creating a clean foundation to proceed with the rest of the dust cleanup process.
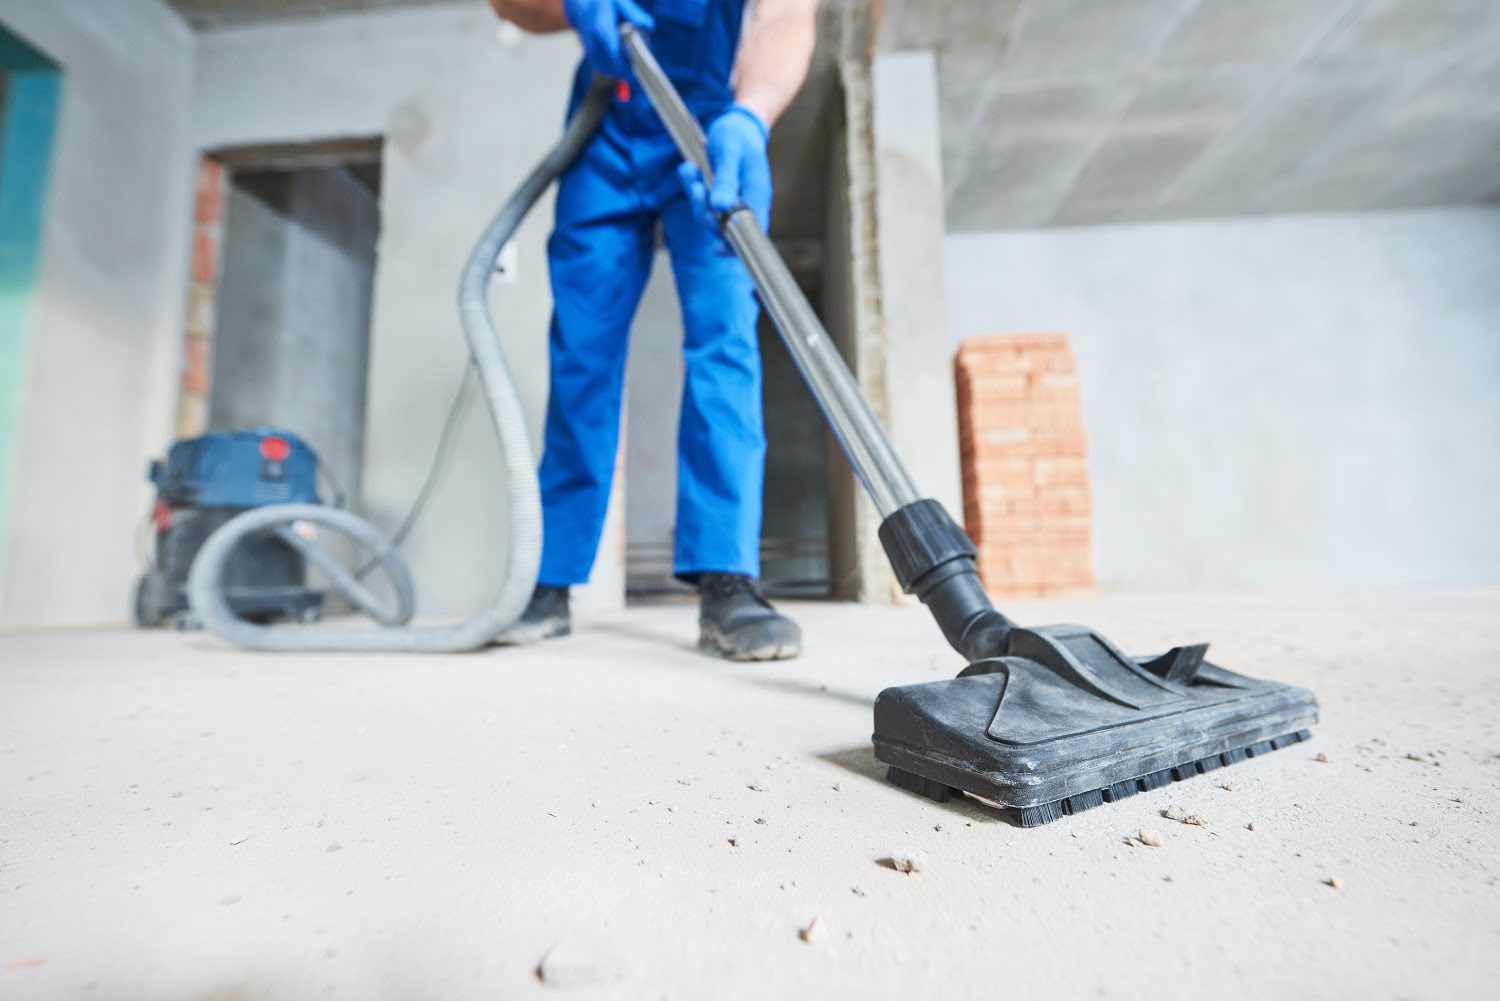
Vacuuming the Area
Subtitle: Vacuuming the Area
Now that you have cleared away the larger debris, it’s time to tackle the dust that has settled on surfaces and in hard-to-reach areas. Vacuuming is an effective way to remove fine particles and ensure a thorough clean. Follow these steps to effectively vacuum the area:
- 1. Choose a Vacuum with a HEPA Filter: Using a vacuum cleaner with a High-Efficiency Particulate Air (HEPA) filter is highly recommended. HEPA filters are designed to capture tiny particles, including dust and allergens, ensuring cleaner air during and after the vacuuming process.
- 2. Attach the Appropriate Vacuum Accessories: Depending on the type of surface you are vacuuming, attach the appropriate accessory. Use the floor attachment for carpets and rugs, and switch to a soft brush or crevice tool for hard-to-reach corners, baseboards, and furniture.
- 3. Move Furniture and Vacuum Underneath: If possible, move lightweight furniture to access the dust that may have accumulated underneath. Dust and debris tend to settle in these hidden areas, so lifting or shifting furniture is essential for a thorough clean.
- 4. Vacuum from Top to Bottom: Start by vacuuming high surfaces such as shelves, window sills, and light fixtures, working your way down to furniture, baseboards, and finally the floor. This ensures that any dust dislodged from higher surfaces is captured as you move downward.
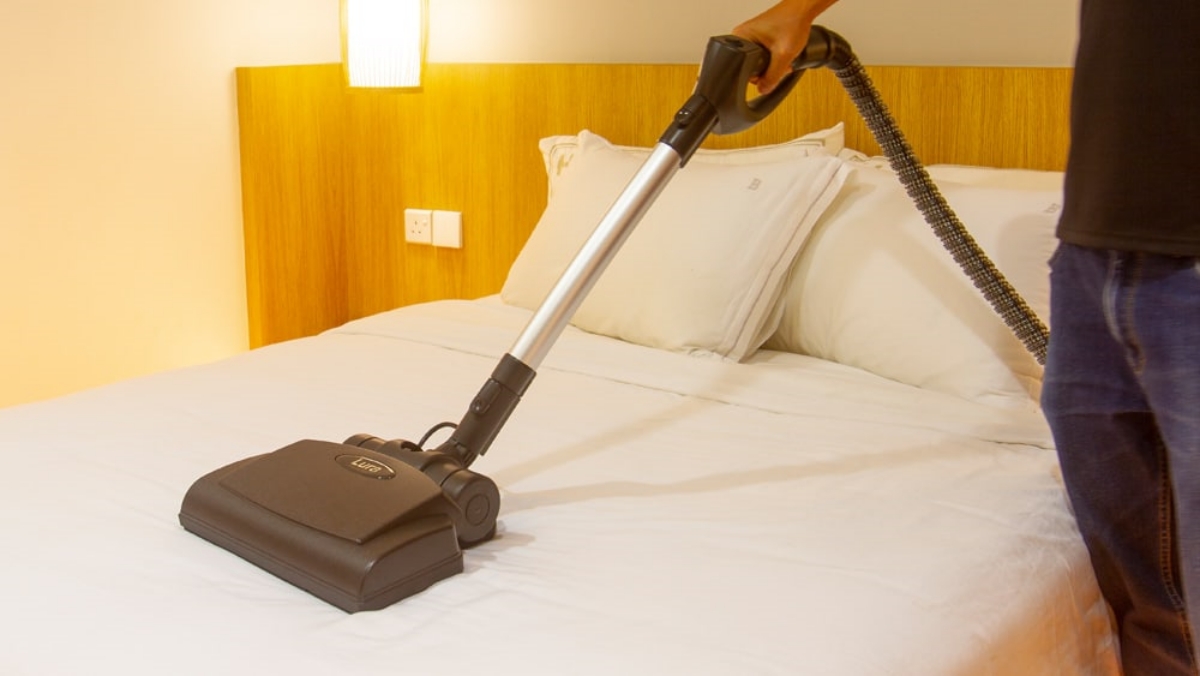
- 5. Pay Attention to Upholstered Furniture: Use the upholstery attachment to vacuum upholstered furniture, cushions, and curtains, as they tend to collect dust particles. Remember to vacuum both sides of cushions for a comprehensive clean.
- 6. Slow and Steady: To maximize the effectiveness of the vacuuming process, move the vacuum cleaner slowly and steadily. This allows the vacuum to suction up as much dust as possible, rather than scattering it around.
- 7. Clean or Replace the Vacuum Filter: Regularly check the vacuum filter during the cleaning process and clean or replace it as needed. A clogged or dirty filter reduces the vacuum’s efficiency and may release dust back into the air.
- 8. Empty the Vacuum Bag or Canister: Ensure that the vacuum bag or canister is empty before starting the cleaning process, and empty it as needed during the vacuuming process. This prevents the vacuum from losing suction power and ensures that the captured dust is properly contained.
Vacuuming thoroughly not only removes dust, but also helps improve indoor air quality. By following these steps, you will effectively remove dust from different surfaces, leaving your home cleaner and healthier.
Read more: How To Clean House After Construction Dust
Dusting Surfaces
Subtitle: Dusting Surfaces
After vacuuming the area, it’s time to focus on dusting surfaces. Dust can accumulate on various surfaces, including furniture, shelves, countertops, and decorative items. Dusting ensures that these surfaces are free from allergens and gives your home a fresh and clean appearance. Follow these steps to effectively dust surfaces:
- 1. Clear Surfaces: Before dusting, clear off any items or decorations from the surfaces you will be dusting. This will make it easier to clean and prevent items from getting knocked over or damaged.
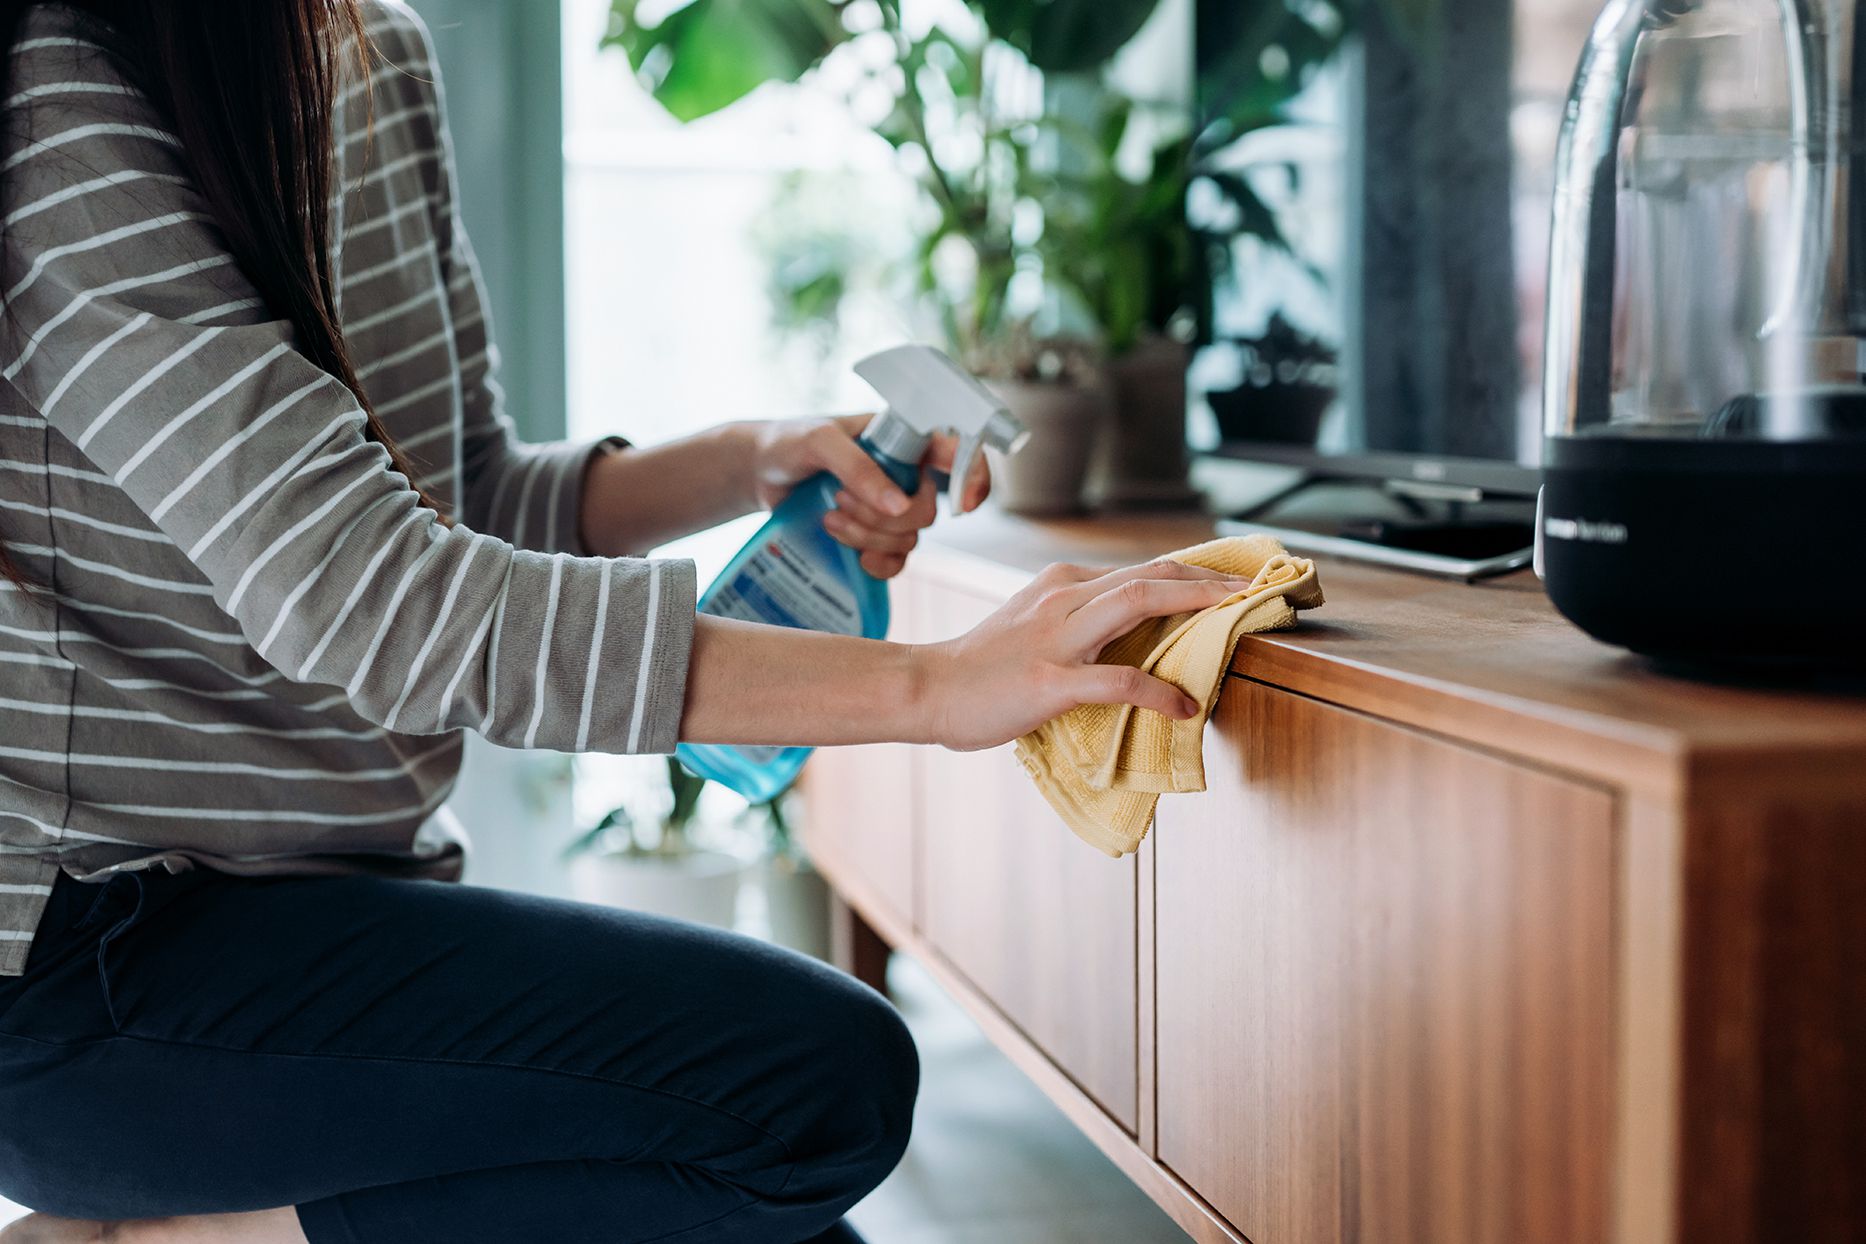
- 2. Use Microfiber Cloths: Microfiber cloths are excellent for dusting as they attract and trap dust particles efficiently. Dampen the cloth slightly for better dust capture. Avoid feather dusters or dry cloths, as they may only move dust around without effectively removing it.
- 3. Start from the Top: Begin dusting from the highest surfaces, such as shelves or tall furniture, and work your way down. This way, any dust that falls from higher surfaces will be captured as you move downward.
- 4. Dust Shelves and Furniture: Using the microfiber cloth, gently wipe down shelves, bookcases, tables, and other furniture surfaces. Pay attention to corners, crevices, and decorative items as dust tends to accumulate in those areas. Remember to dust both the top and undersides of shelves and furniture.
- 5. Dust Electronics and Appliances: Use a microfiber cloth or specialized electronics cleaning wipes to gently remove dust from electronic devices, such as televisions, computers, and stereo equipment. Remember to turn off and unplug electronics before dusting them.
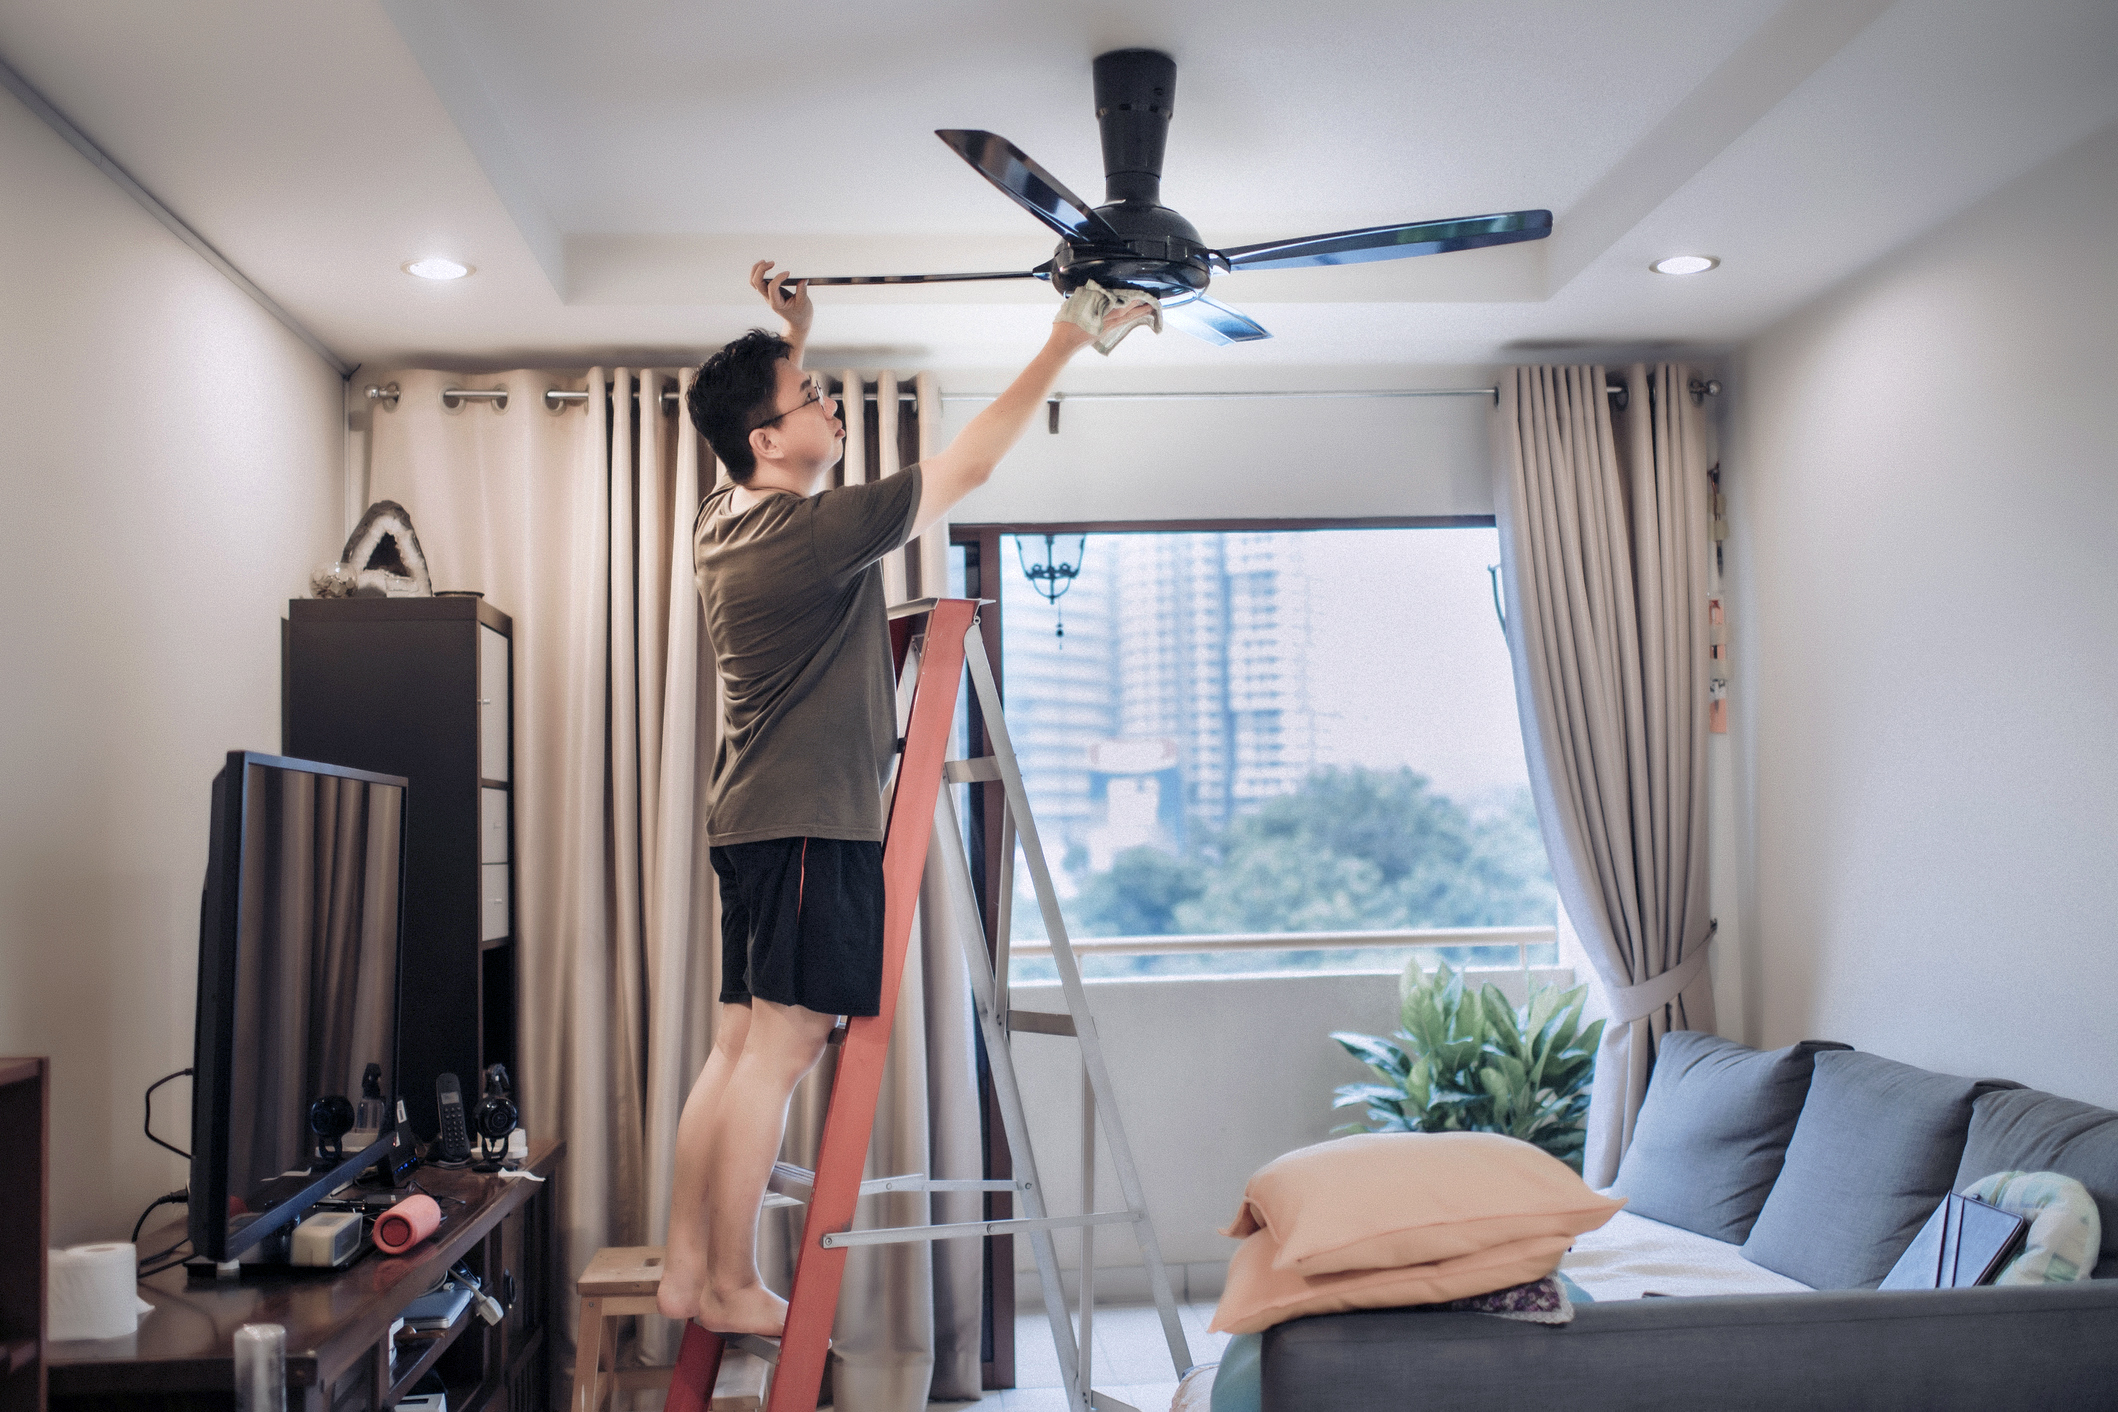
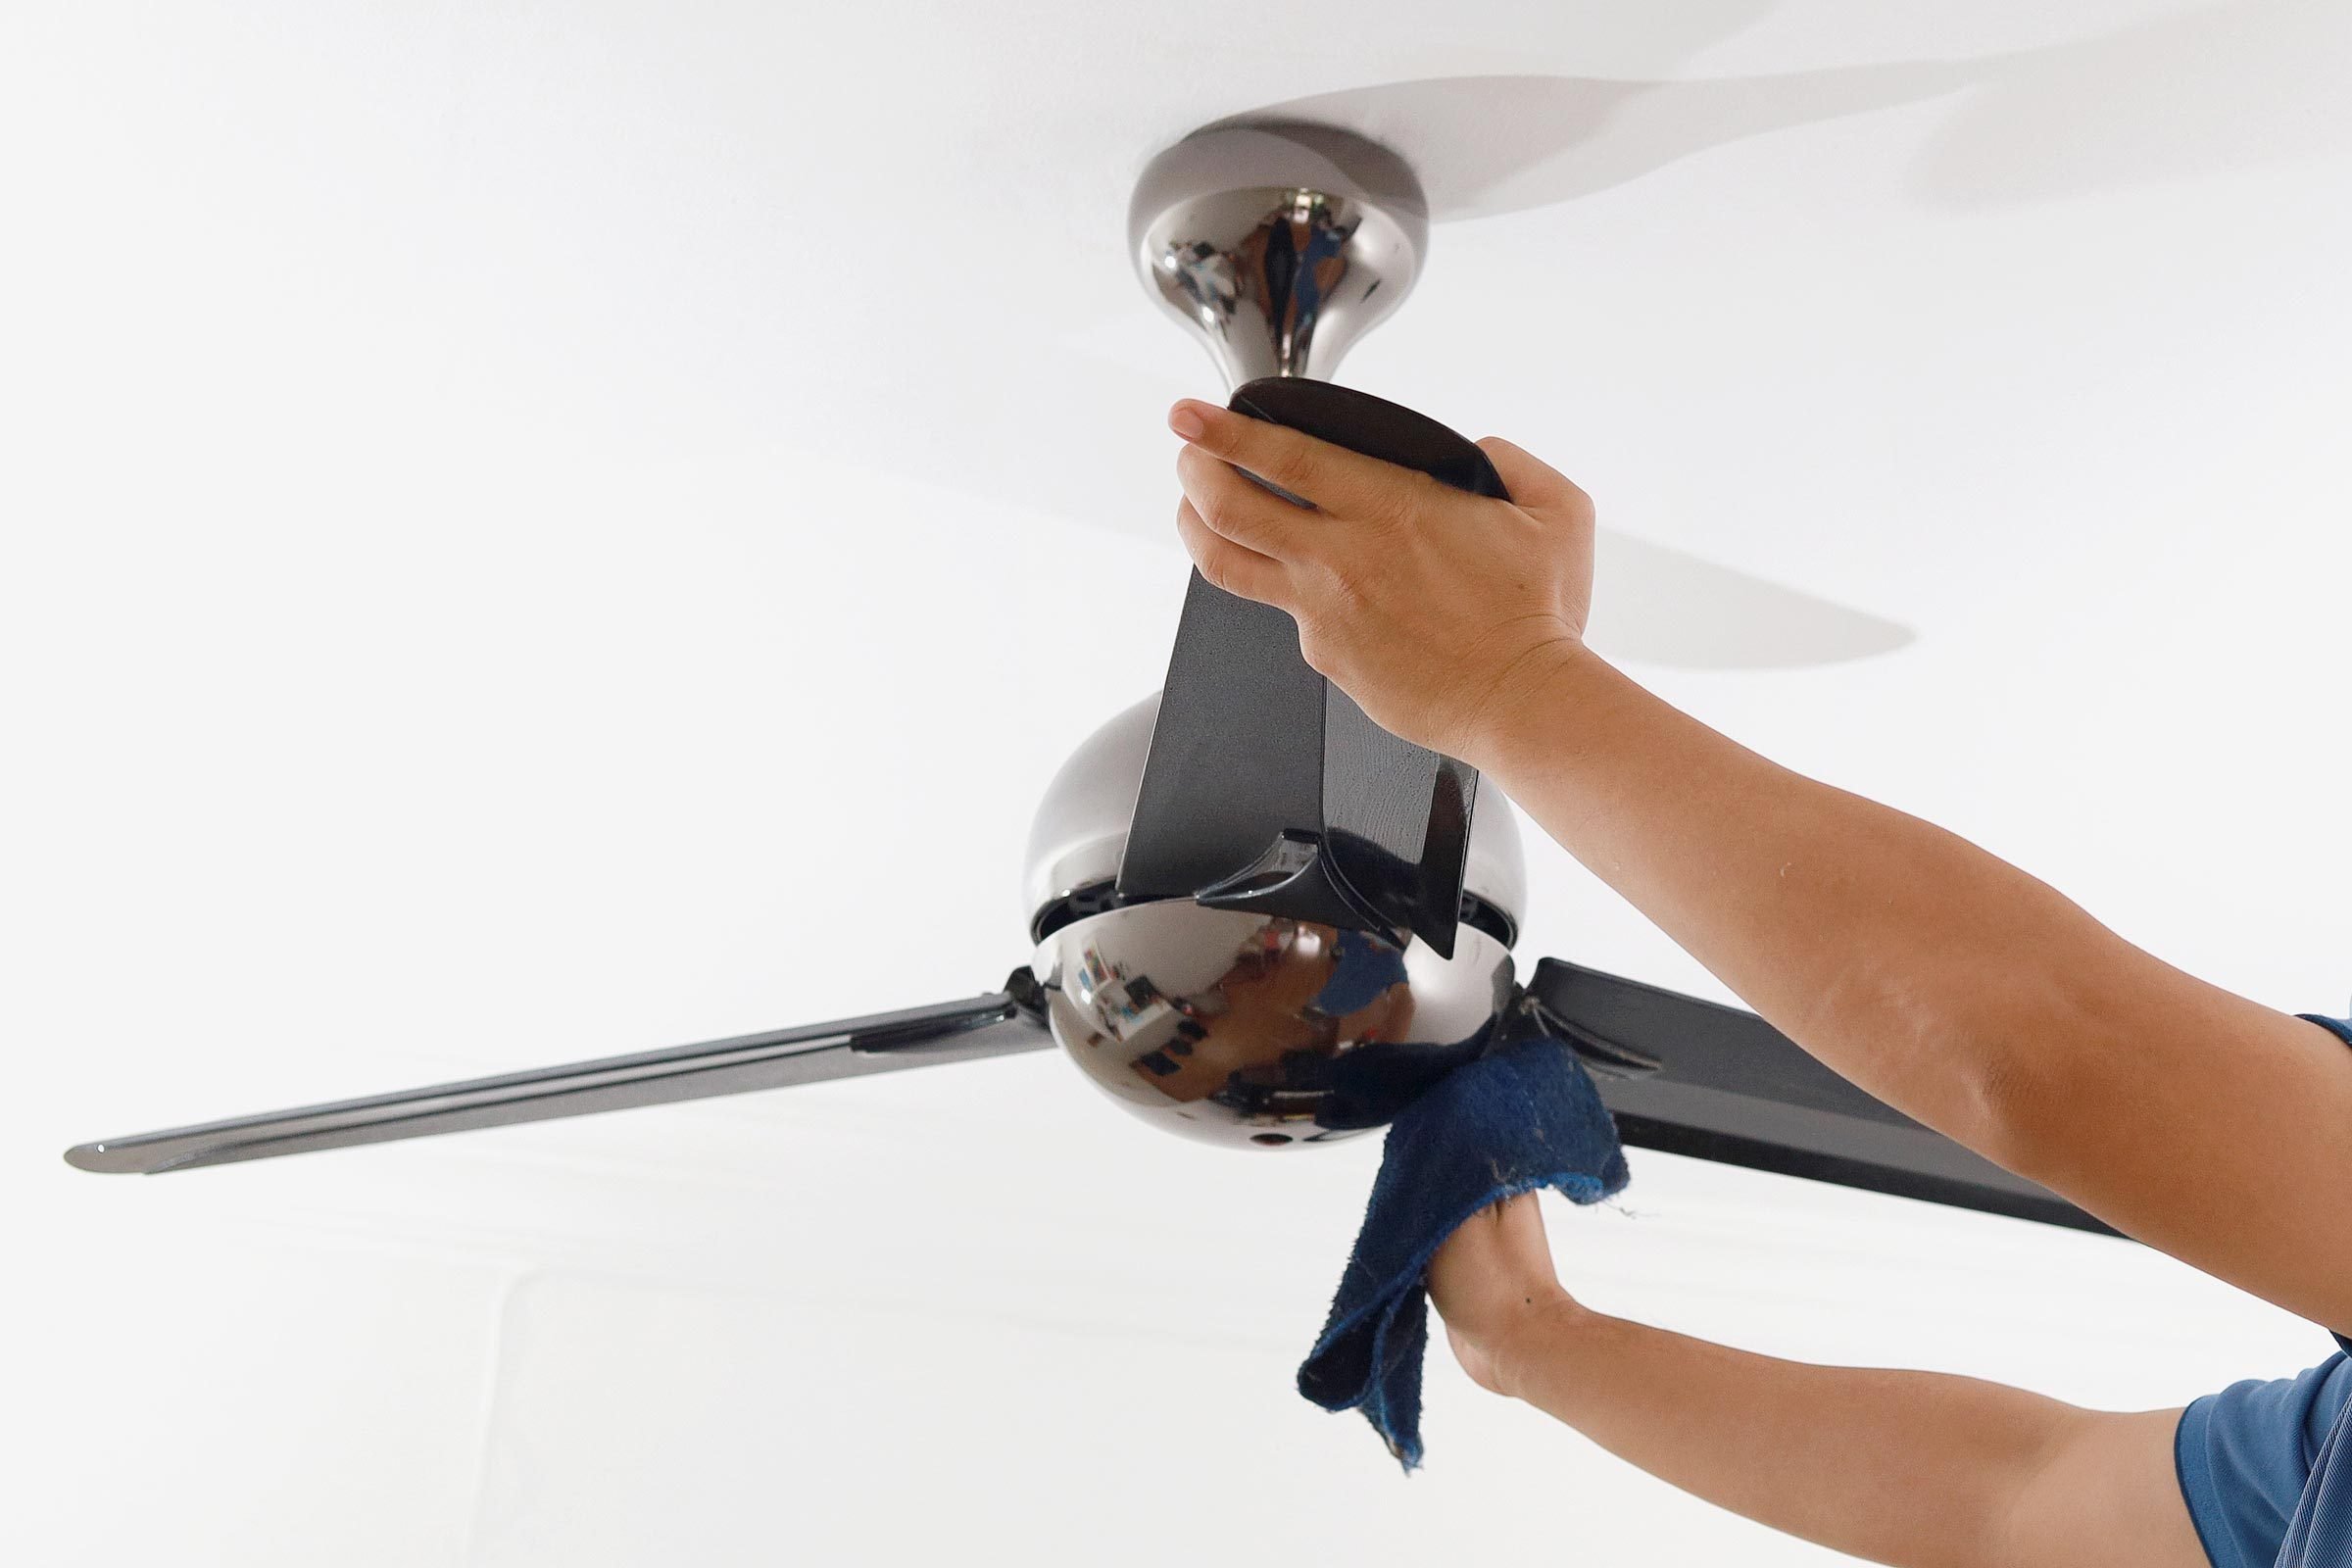
- 6. Clean Light Fixtures and Ceiling Fans: Dust and dirt easily accumulate on light fixtures and ceiling fans. Use a microfiber cloth or extendable duster to clean them. Be careful when dusting fragile or delicate fixtures.
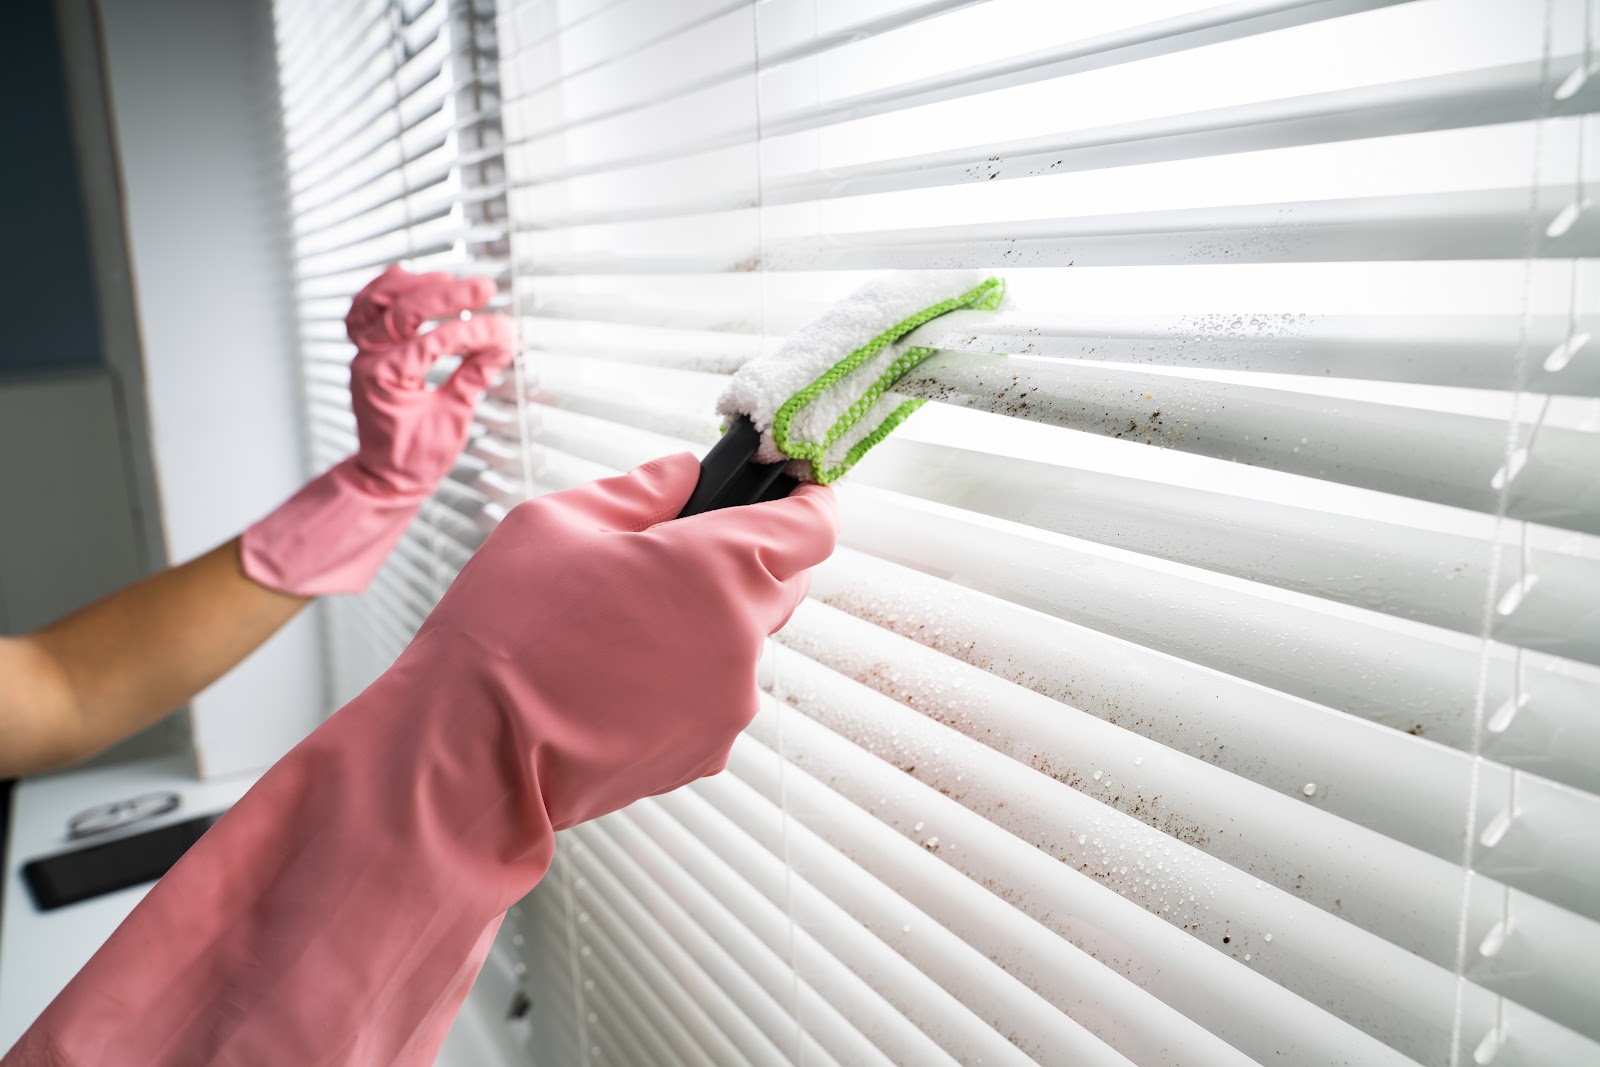
- 7. Dust Blinds and Window Treatments: Dust blinds, curtains, and window treatments using a microfiber cloth or a specialized blind duster. Be sure to clean both sides to remove any hidden dust.
- 8. Don’t Forget Decorative Items: Dust decorative items like picture frames, figurines, and plants. Use a microfiber cloth or a small brush to gently remove dust from these items. If necessary, move them to a dedicated dusting area to prevent dust from spreading to other surfaces.
- 9. Shake Out and Wash Dust Covers: If you have dust covers on furniture or delicate items, gently shake them out outside to remove loose dust. Wash the covers according to the care instructions before replacing them.
By following these steps, you will effectively remove dust from various surfaces, leaving your home cleaner and more visually appealing. Dusting regularly will also help reduce the amount of dust that accumulates, making future cleaning tasks quicker and easier.
Use a vacuum with a HEPA filter to clean up dust after renovation. Wipe down surfaces with a damp cloth to capture remaining particles.
Cleaning Walls and Ceilings
Subtitle: Cleaning Walls and Ceilings
After dusting surfaces, it’s time to turn our attention to cleaning walls and ceilings. Over time, walls and ceilings can accumulate dust, dirt, and stains, especially after a renovation. Cleaning them not only enhances the appearance of your home but also improves indoor air quality. Follow these steps to effectively clean your walls and ceilings:
- 1. Prepare a Cleaning Solution: Start by preparing a gentle cleaning solution. Mix warm water with a small amount of mild all-purpose cleaner. Make sure to read the instructions on the cleaner and dilute it according to the recommended ratio.
- 2. Test the Solution: Before cleaning larger areas, it’s important to test the cleaning solution on an inconspicuous area of the wall or ceiling. This ensures that the solution does not cause any discoloration or damage to the surface.
- 3. Work from Top to Bottom: Begin cleaning the walls and ceilings from the top and work your way down. This prevents dirty water or cleaning solution from dripping onto already cleaned areas.
- 4. Use a Soft Cloth or Sponge: Dip a soft cloth or sponge into the cleaning solution, then wring out excess liquid. Gently wipe the walls and ceilings in a circular motion, paying extra attention to areas with visible stains or dirt buildup.
- 5. Be Gentle: Avoid using excessive force or scrubbing vigorously, as this can damage the paint or finish. Instead, use light pressure and let the cleaning solution do the work.
- 6. Dry with a Clean Cloth: After cleaning a section, use a clean, dry cloth to wipe away any excess moisture. This helps prevent streaks and water damage.
- 7. Focus on Problem Areas: For stubborn stains or heavily soiled areas, you may need to repeat the cleaning process or use a slightly stronger cleaning solution. Be cautious and test on a small area first.
- 8. Clean Ceiling Fans and Light Fixtures: Dust and dirt can accumulate on ceiling fans and light fixtures. Use a soft brush or microfiber cloth to gently remove dust from these surfaces. If necessary, use a ladder or step stool to safely reach higher fixtures.
- 9. Check for Mold or Mildew: While cleaning, keep an eye out for signs of mold or mildew on the walls or ceilings. If you spot any, it’s important to address the issue promptly by consulting a professional for proper remediation.
- 10. Rinse and Dry: Once you have finished cleaning, dampen a clean cloth with plain water and gently wipe down the walls and ceilings to remove any remaining cleaning solution. Finally, allow the surfaces to air dry thoroughly.
By following these steps, you will be able to effectively clean and refresh your walls and ceilings, restoring their beauty and cleanliness.
Cleaning Hard Floors
Subtitle: Cleaning Hard Floors
Hard floors, such as tile, laminate, hardwood, or vinyl, can accumulate dust, dirt, and grime over time. Proper cleaning not only improves the appearance of your floors but also helps prolong their lifespan. Follow these steps to effectively clean your hard floors:
- 1. Sweep or Vacuum: Begin by sweeping or vacuuming the floor to remove loose dirt, dust, and debris. Use a broom or a vacuum cleaner with a hard floor attachment to effectively capture particles.
- 2. Choose the Right Cleaning Solution: Select a suitable cleaning solution based on your specific floor type. Read and follow the manufacturer’s instructions for the recommended cleaning products to avoid causing damage.
- 3. Mix Cleaning Solution: Dilute the cleaning solution with water according to the instructions provided. Be mindful of the recommended ratio and use warm water for best results.
- 4. Test in an Unnoticeable Area: Before applying the cleaning solution to a larger area, test it in a small, inconspicuous spot to ensure that it does not cause any discoloration or damage to the floor.
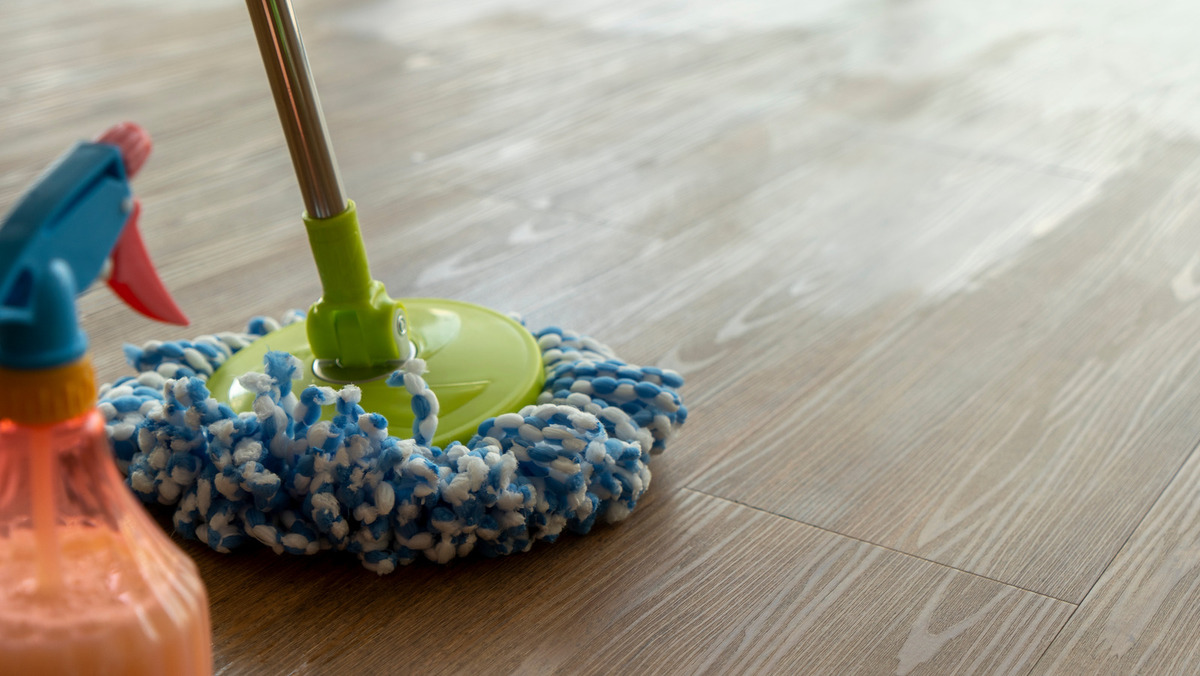
- 5. Mop the Floors: Use a mop or a microfiber pad that is suitable for your specific floor type. Dip the mop or pad into the cleaning solution, wring out excess liquid, and mop the floor in gentle, overlapping motions.
- 6. Pay Attention to Stains and Spills: For stubborn stains or spills, apply the cleaning solution directly to the affected area and let it sit for a few minutes. Gently scrub using a soft brush or sponge, then rinse and mop as usual.
- 7. Be Mindful of Excess Moisture: While mopping, avoid using excessive water or soaking the floor. Excess moisture can seep into cracks and joints, potentially damaging the floor or the subfloor. Wring out the mop or pad thoroughly to prevent excessive water on the surface.
- 8. Rinse if Needed: Depending on the cleaning solution you use, it may be necessary to follow up with a rinse. Use a clean mop or pad dampened with plain water to remove any residue left behind by the cleaning solution.
- 9. Dry the Floor: After cleaning, allow the floor to air dry completely. Avoid walking on the wet floor until it is dry to prevent slips and falls.
- 10. Apply Floor Finish (If Applicable): If you have hardwood or vinyl floors, you may consider applying a floor finish or polish after cleaning to restore shine and protect the surface. Follow the manufacturer’s instructions for the proper application.
By following these steps, you will achieve clean and sparkling hard floors that enhance the overall appearance of your home.
Washing Windows and Glass Surfaces
Subtitle: Washing Windows and Glass Surfaces
Windows and glass surfaces can easily accumulate fingerprints, smudges, and dust, affecting the overall cleanliness and clarity of your home. Cleaning these surfaces regularly not only improves their appearance but also allows more natural light to enter your space. Follow these steps to effectively wash windows and glass surfaces:
- 1. Gather Your Cleaning Materials: Before you begin, gather the necessary cleaning materials. You will need a glass cleaner, a squeegee, a microfiber cloth, a bucket of warm water, and a sponge or a soft brush.
- 2. Prepare the Cleaning Solution: If you prefer using a homemade solution, mix equal parts distilled vinegar and water. Alternatively, use a commercial glass cleaner according to the manufacturer’s instructions.
- 3. Dust and Wipe the Window Frames: Start by removing dust and dirt from the window frames and sills. Use a dry cloth or a vacuum with a brush attachment to clean these areas thoroughly.
- 4. Wet the Glass: Dip your sponge or soft brush into the cleaning solution and wet the glass surface. Make sure to cover the entire area, working from top to bottom.
- 5. Scrub the Glass: Gently scrub the glass surface using the sponge or brush, paying extra attention to any stubborn stains or spots. Start from the top and work your way down in small circular motions.
- 6. Clean the Window Frames: After scrubbing the glass, use a damp cloth or sponge to wipe down the window frames. Remove any cleaning solution or dirt that might have splattered onto the frames during the cleaning process.
- 7. Wipe with a Squeegee: Use a squeegee to remove the cleaning solution from the glass. Start at the top corner of the window and pull the squeegee straight down while maintaining continuous contact with the glass. Wipe the squeegee blade with a clean cloth between each stroke.
- 8. Dry and Polish: After using the squeegee, wipe off any remaining moisture or streaks with a clean microfiber cloth. Polish the glass surface to achieve a sparkling, streak-free finish.
- 9. Pay Attention to Difficult Spots: For stubborn spots or stubborn residues, you may need to repeat the cleaning process or use a specialized glass cleaner. Avoid using abrasive materials that could scratch the glass.
- 10. Clean Other Glass Surfaces: Don’t forget to clean other glass surfaces in your home, such as glass tabletops, mirrors, and glass cabinet doors. Use the same cleaning technique to achieve a gleaming, crystal-clear result.
By following these steps, you will be able to effectively wash your windows and glass surfaces, allowing for clear views and a bright, refreshed atmosphere in your home.
Read more: How To Remove Dust After Construction
Cleaning Soft Furnishings and Upholstery
Subtitle: Cleaning Soft Furnishings and Upholstery
Soft furnishings and upholstery, such as sofas, chairs, and curtains, can easily accumulate dust, dirt, and stains over time. Regular cleaning not only keeps them looking fresh and inviting but also helps maintain their lifespan. Follow these steps to effectively clean your soft furnishings and upholstery:
- 1. Check the Care Label: Before starting the cleaning process, check the care label on your soft furnishings and upholstery. The label provides important information about the recommended cleaning methods and can help you avoid damage.
- 2. Vacuum First: Begin by using a vacuum cleaner with a upholstery attachment to remove loose dirt, dust, and pet hair from the surfaces. Pay special attention to crevices and seams where debris tends to accumulate.
- 3. Spot Test: Before applying any cleaning solution, it’s important to spot test a small, inconspicuous area of the fabric or upholstery to ensure that the cleaner won’t cause any discoloration or damage. Wait for the spot to dry before proceeding.
- 4. Choose the Right Cleaning Method: Different fabrics and materials require specific cleaning methods. Refer to the care label for guidance on whether the item is machine washable, dry clean only, or suitable for spot cleaning.
- 5. Machine Washable Items: If the fabric or upholstery is machine washable, follow the care label instructions. Use a gentle cycle, a mild detergent, and cold water. Avoid using bleach or harsh chemicals, as they can damage the fabric.
- 6. Dry Clean Only Items: For items labeled as “dry clean only,” it is best to follow the care instructions and take them to a professional dry cleaner. They have the knowledge and expertise to handle delicate fabrics and ensure proper cleaning.
- 7. Spot Cleaning: For small stains or spills, spot cleaning may be sufficient. Use a mild detergent and a soft cloth or sponge to gently dab the stained area without rubbing. Blot the area with a clean cloth to remove excess moisture.
- 8. Upholstery Cleaning Solutions: If you have upholstered furniture with stains or more extensive dirt, consider using a specialized upholstery cleaning solution. Follow the instructions on the product and test it on a hidden area first.
- 9. Professional Upholstery Cleaning: For heavily soiled or delicate upholstery, it may be beneficial to hire a professional upholstery cleaning service. They have the expertise and equipment to deep clean and revitalize your soft furnishings.
- 10. Allow Proper Drying Time: After cleaning, ensure that your soft furnishings and upholstery are allowed to dry thoroughly before using them. Proper drying helps prevent mold and mildew growth.
By following these steps and adhering to the care instructions, you can effectively clean your soft furnishings and upholstery, maintaining their beauty and prolonging their lifespan.
Taking Safety Precautions
Subtitle: Taking Safety Precautions
While cleaning up after a renovation, it’s important to prioritize safety to protect yourself and ensure a smooth cleaning process. Follow these safety precautions to minimize potential risks:
- 1. Wear Personal Protective Equipment (PPE): Before starting any cleaning task, make sure to wear the appropriate personal protective equipment. This includes gloves, a dust mask, safety goggles, and long-sleeved clothing to protect your skin from harmful substances.
- 2. Ventilate the Area: Proper ventilation is crucial when cleaning up dust and using cleaning products. Open windows or use fans to circulate fresh air and reduce the concentration of airborne particles and fumes.
- 3. Handle Cleaning Products with Care: Follow the manufacturer’s instructions when using cleaning products. Some products may contain chemical ingredients that can be harmful if mishandled or mixed improperly. Avoid contact with skin or eyes, and do not ingest cleaning solutions.
- 4. Be Cautious on Ladders or Stepladders: When cleaning high areas or accessing out-of-reach spots, use a sturdy ladder or stepladder. Ensure that it is set up on a stable and even surface. Always maintain three points of contact and avoid overreaching.
- 5. Lift Heavy Objects Properly: If you need to move heavy furniture or debris, be mindful of your lifting technique. Bend at the knees and use your leg muscles to lift, rather than straining your back. Use caution to avoid overexertion or injury.
- 6. Clean up Spills Promptly: Any spills or wet areas can present a slipping hazard. Clean up any spills promptly to prevent accidents. Place warning signs if necessary to alert others in the area.
- 7. Use Caution Around Electrical Outlets and Appliances: When cleaning near electrical outlets or appliances, exercise caution and avoid contact with water. Ensure that your hands are dry and use dry cleaning methods around these areas.
- 8. Keep Children and Pets Safe: If you have young children or pets, ensure their safety during the cleaning process. Keep cleaning products and tools out of their reach, secure any hazardous areas, and consider confining them to a safe area until the cleaning is complete.
- 9. Take Breaks: Cleaning up dust and debris can be physically demanding. Take regular breaks to rest and hydrate, especially if you’re engaging in prolonged cleaning sessions. Listen to your body and avoid pushing yourself too hard.
- 10. Seek Professional Help if Needed: If you encounter hazardous materials, extensive mold growth, or other challenging cleaning situations, don’t hesitate to seek professional assistance. They have the knowledge, skills, and proper equipment to handle complex cleaning tasks safely.
By following these safety precautions, you can minimize potential risks and ensure a safe environment while cleaning up after a renovation.
Conclusion
Renovating your home can bring fresh new spaces and improved aesthetics, but it often leaves behind a trail of dust and debris. Cleaning up after a renovation is necessary not only for the sake of cleanliness and appearance but also for maintaining a healthy living environment. By following the steps outlined in this article, you can effectively clean up the dust and restore the beauty of your home.
Start by preparing for the dust cleanup process, including gathering the necessary tools and equipment. Clearing out the area, protecting surfaces, and donning appropriate protective gear are essential steps to ensure a successful cleaning operation.
Remove large debris and garbage before diving into the deeper cleaning process. Sweep up larger pieces manually using a dustpan and brush, and dispose of them properly. Pay attention to hidden debris and clean out ventilation systems to maintain good indoor air quality.
Vacuuming the area is a crucial step in removing fine dust particles from various surfaces. Use a vacuum cleaner with a HEPA filter and pay attention to hard-to-reach areas. Be thorough in your vacuuming, ensuring that no dust is left behind.
Next, dust surfaces using microfiber cloths to trap and remove dust effectively. Clean windows and glass surfaces using appropriate cleaners and tools, and restore their clarity for a brighter living space.
For soft furnishings and upholstery, follow care labels and use the appropriate cleaning methods. Whether it’s spot cleaning, machine washing, or professional upholstery cleaning, ensure that your soft furnishings remain fresh and free from dirt and stains.
Lastly, take necessary safety precautions throughout the cleaning process. Wear personal protective equipment, ventilate the area, handle cleaning products safely, and be cautious when working on ladders or lifting heavy objects. Prioritize safety to prevent accidents or injuries.
In conclusion, cleaning up dust after a renovation may require some effort, but the result is a clean and healthy living space. By following the steps and guidance provided in this article, you can successfully tackle the post-renovation dust and enjoy the benefits of a sparkling clean home.
Frequently Asked Questions about How To Clean Up Dust After Renovation
Was this page helpful?
At Storables.com, we guarantee accurate and reliable information. Our content, validated by Expert Board Contributors, is crafted following stringent Editorial Policies. We're committed to providing you with well-researched, expert-backed insights for all your informational needs.


0 thoughts on “How To Clean Up Dust After Renovation”