Home>diy>Building & Construction>How To Clean House After Construction Dust
Building & Construction
How To Clean House After Construction Dust
Modified: October 18, 2024
Learn effective cleaning tips to get rid of construction dust and achieve a spotless home post-building-construction. Expert advice for a hassle-free cleaning process!
(Many of the links in this article redirect to a specific reviewed product. Your purchase of these products through affiliate links helps to generate commission for Storables.com, at no extra cost. Learn more)
Introduction
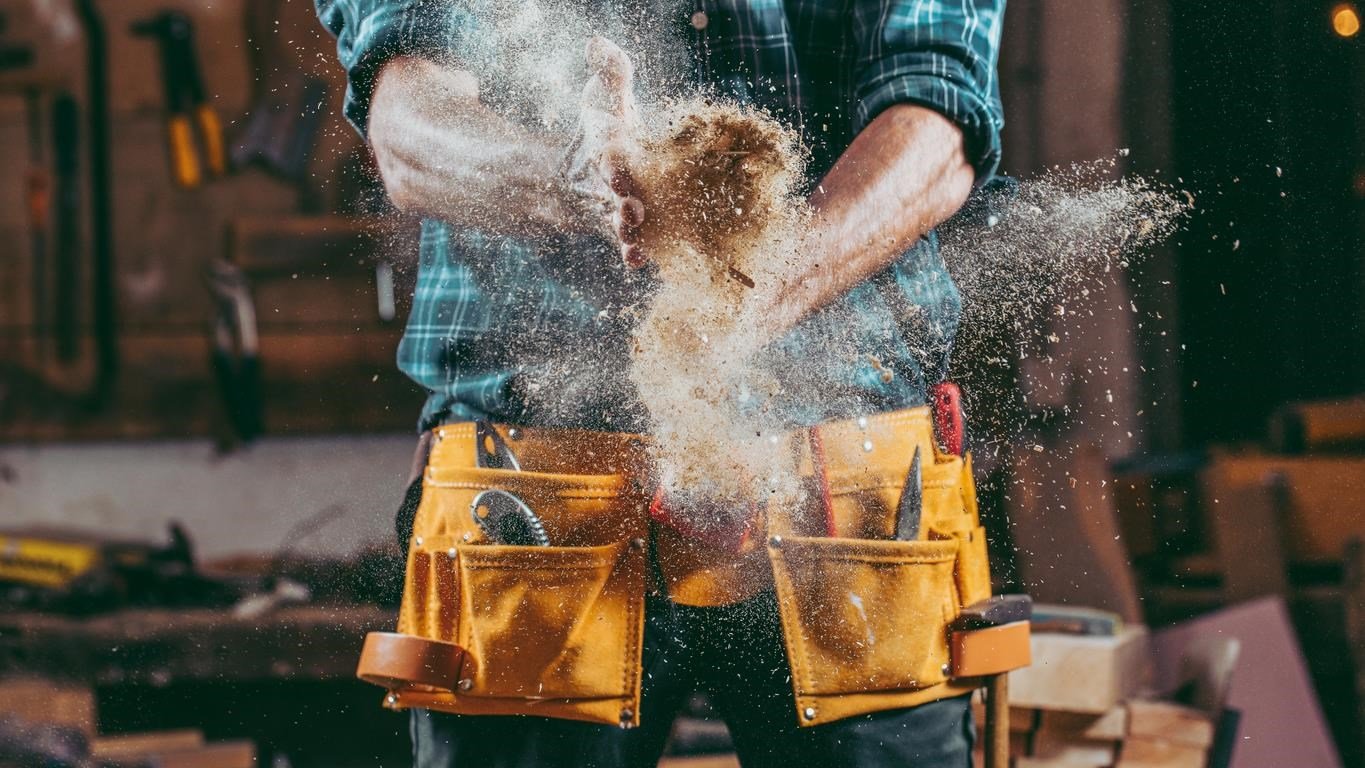
After the long and exhausting process of construction or remodeling your house, you are finally ready to enjoy the fruits of your labor. However, one major obstacle stands in your way – the post-construction dust and debris that has accumulated throughout your home. Cleaning up after construction can be a daunting task, but with the right knowledge and preparation, you can restore your house to its pristine condition.
Before diving into the cleaning process, it’s essential to understand the importance of removing construction dust. Dust particles can linger in the air and settle on surfaces for an extended period. Not only does it pose potential health risks, but it can also damage furniture, flooring, and other delicate items in your home. Therefore, a thorough cleaning after construction is crucial to creating a safe and comfortable living environment.
In this guide, we will walk you through the step-by-step process of cleaning your house after construction. We will provide you with practical tips and techniques to efficiently remove dust from various surfaces, ensuring a sparkling clean home. So, let’s get started!
Key Takeaways:
- Efficiently clean your house after construction by following a step-by-step process, from preparing the space and gathering supplies to dry and wet cleaning methods, ensuring a thorough and safe cleanup.
- Don’t overlook final touches and additional tips, such as organizing, decluttering, and implementing preventative measures, to maintain a clean and healthy home environment post-construction.
Read more: How To Remove Dust After Construction
Preparing for Cleanup
Before you embark on your post-construction cleaning journey, there are a few essential steps you should take to ensure a smooth and efficient process:
- Create a Plan: Start by assessing the extent of the construction dust and debris in each room. This will help you prioritize and plan your cleaning approach.
- Protect Yourself: Construction dust can contain harmful particles, so it’s crucial to wear protective gear such as gloves, goggles, and a mask to prevent any health issues.
- Safety First: Turn off the HVAC system to prevent dust from circulating throughout the house while you clean. Additionally, cover electrical outlets and switches with plastic sheets or tape to protect them from dust and water.
- Clear the Area: Remove any furniture, decorations, or objects that may obstruct your cleaning process. This will allow you to access all surfaces and corners easily.
- Ventilate the Space: Open windows and doors to allow fresh air to circulate, aiding in the removal of dust and speeding up the drying process.
By following these preliminary steps, you will create a safe and organized environment for your post-construction cleanup.
Gathering the Necessary Supplies
Before you begin the actual cleaning process, it’s important to gather all the necessary supplies to ensure an efficient and effective cleanup. Here are the essential items you will need:
- Dust Masks and Gloves: Protect yourself from inhaling dust particles and chemicals by wearing a quality dust mask and gloves.
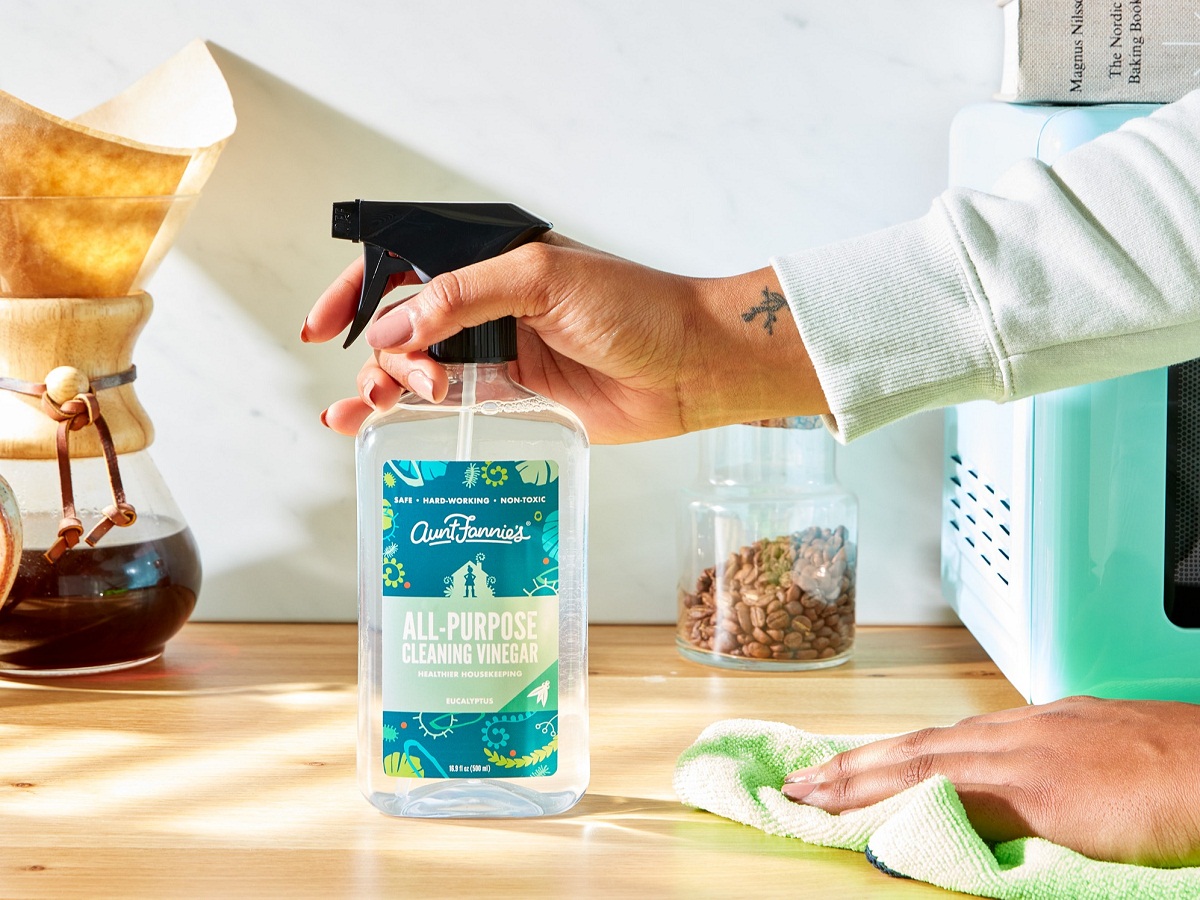
- Cleaning Solutions: Purchase or make appropriate cleaning solutions for different surfaces. Consider using mild detergents, vinegar, or specialized cleaning products based on the material you’re cleaning.
- Microfiber Cloths: These are extremely effective in trapping dust particles and are gentle on sensitive surfaces like glass and electronics.
- Dusters: Invest in high-quality dusters, such as feather or microfiber dusters, to remove loose dust from surfaces, including furniture, walls, and ceilings.
- Vacuum Cleaner: A powerful vacuum cleaner with different attachments is essential for thorough dust removal on carpets, upholstery, and hard-to-reach areas.
- Mops and Brooms: Have a mop for hard floors and a broom with soft bristles for sweeping away dust from tiled areas, hardwood floors, and corners. Additionally, consider getting a dustpan for easy debris collection.
- Window Cleaner: Use a commercial window cleaner or make your own solution using water, vinegar, and a gentle dish soap for streak-free windows and glass surfaces.
- Extension Pole: This will come in handy when cleaning high ceilings, light fixtures, and ceiling fans.
- Trash Bags: Prepare plenty of heavy-duty trash bags to dispose of construction debris and disposal of any items that are beyond cleaning.
By gathering these essential supplies, you will be well-equipped to tackle the post-construction cleaning process efficiently and effectively.
Starting with Dry Cleaning Methods
When it comes to cleaning up after construction, it’s important to start with dry cleaning methods to remove loose dust and debris before moving on to wet cleaning. Dry cleaning methods are effective for surfaces that can’t tolerate moisture or for areas that require gentle cleaning. Here are some techniques to get you started:
- Dusting Surfaces: Begin by dusting all surfaces, including furniture, countertops, shelves, and appliances. Use a microfiber cloth or a feather duster to trap dust particles effectively. Start from the top and work your way down to ensure that you don’t accidentally spread dust to already cleaned areas.
- Vacuuming: Use a vacuum cleaner with a soft brush attachment to vacuum upholstery, curtains, and mattresses. Pay extra attention to seams and crevices where dust can accumulate. Additionally, vacuum any exposed carpets, rugs, or cushions to remove loose dust. Consider using the crevice tool for hard-to-reach areas and corners.
- Air Purifier: Run an air purifier during the cleaning process to filter and eliminate airborne dust particles. This will help improve air quality and minimize dust resettling on surfaces.
- Cleaning Electronics: Use a soft, dry cloth or an electronics-specific duster to clean electronic devices, such as computers, televisions, and speakers. Avoid using water or any cleaning solutions directly on electronics to prevent damage.
- Brushing Light Fixtures: Dust and gently brush light fixtures, chandeliers, and lamps to remove accumulated dust. If necessary, remove the fixtures and clean them separately.
By starting with these dry cleaning methods, you’ll effectively eliminate loose dust and debris from various surfaces in your home. This will make the wet cleaning process more efficient and ensure thorough cleanliness.
Vacuuming All Surfaces
After completing the dry cleaning methods, it’s time to move on to vacuuming. Vacuuming is crucial for removing deeply embedded dust and debris from floors, carpets, and upholstery. Here’s a step-by-step guide to help you effectively vacuum all surfaces in your home:
- Prepare the Vacuum Cleaner: Ensure that your vacuum cleaner is in good working condition and equipped with the appropriate attachments for different surfaces. Clean or replace the filter if necessary to maintain optimal suction power.
- Vacuum Hard Floors: Start by vacuuming hard floors, such as tile, hardwood, or laminate. Use a floor brush attachment or a hard floor setting on your vacuum cleaner. Move the vacuum in a back-and-forth motion, overlapping each stroke, to cover the entire surface area. Pay extra attention to corners and edges where dust tends to accumulate.
- Vacuum Carpets and Rugs: Next, vacuum all carpets and rugs in your home. Use a rotating brush attachment for deeper cleaning and to dislodge embedded dust and dirt. Slowly move the vacuum in a straight line, going over the same area multiple times to ensure thorough cleaning. Don’t forget to vacuum under furniture and along baseboards.
- Vacuum Upholstery: Attach a upholstery tool to your vacuum cleaner and thoroughly vacuum upholstered furniture, including sofas, chairs, and cushions. Pay attention to crevices, seams, and cushions where dust can hide. If there are removable cushion covers, wash them according to the manufacturer’s instructions.
- Vacuum Curtains and Drapes: Lastly, use a brush attachment or a low-suction setting to gently vacuum curtains and drapes. Start from the top and work your way down, ensuring that you cover the entire length. Be careful not to tug or pull on delicate fabrics.
Regular vacuuming will not only remove dust and debris but also improve indoor air quality. Remember to empty the vacuum cleaner’s dust bin regularly and clean or replace the filter as needed to maintain its efficiency. By vacuuming all surfaces, you’ll ensure a thorough and deep clean throughout your home.
Read more: How To Clean Floors After Construction
Dusting and Wiping Down Furniture
Once you have vacuumed all surfaces, it’s time to tackle the dusting and wiping down of furniture. Furniture can quickly accumulate dust during construction, so it’s important to give them a thorough cleaning. Here are the steps to effectively dust and wipe down your furniture:
- Dust First: Before wiping down any furniture, start by dusting it off. Use a microfiber cloth or a feather duster to remove loose dust from surfaces, including tables, shelves, desks, and cabinets. Pay attention to corners, crevices, and intricate details.
- Wood Furniture: For wooden furniture, you can use a specialized wood cleaner or a mixture of mild detergent and warm water. Dampen a microfiber cloth with the cleaning solution and gently wipe down the surfaces. Be careful not to saturate the wood, as excessive moisture can damage it. For stubborn stains, use a soft-bristle brush or a toothbrush to gently scrub the area. Wipe dry with a clean cloth immediately.
- Upholstered Furniture: For upholstered furniture, start by vacuuming the fabric using an upholstery attachment to remove any loose dust. If there are removable cushion covers, follow the manufacturer’s instructions for cleaning. For non-removable upholstery, use a fabric-safe upholstery cleaner or a mixture of mild detergent and water. Dampen a clean cloth with the cleaning solution and gently blot or wipe the fabric. Avoid soaking the fabric, as it may lead to discoloration or damage. Allow the furniture to air dry.
- Glass and Metal Furniture: Use a glass cleaner or a mixture of vinegar and water to clean glass and metal furniture. Spray the cleaner directly onto a microfiber cloth and wipe down the surfaces, focusing on removing fingerprints, smudges, and dust. Dry with a lint-free cloth to leave a streak-free finish.
- Leather Furniture: For leather furniture, use a specialized leather cleaner or a mixture of mild soap and water. Dampen a clean cloth with the cleaning solution and gently wipe the surface. Avoid using excessive water, as it can damage the leather. Wipe dry with a soft cloth immediately after cleaning.
Remember to test the cleaning solution on a small, inconspicuous area of the furniture before applying it to the entire piece. This will ensure that the cleaner doesn’t cause any damage or discoloration. By dusting and wiping down your furniture, you’ll not only remove construction dust but also restore their shine and beauty.
Cleaning Hardwood Floors
Hardwood floors are a beautiful and valuable feature in any home. Cleaning them properly after construction is essential to preserve their appearance and longevity. Here are the steps to effectively clean hardwood floors:
- Sweep or Vacuum: Start by sweeping or vacuuming the hardwood floors to remove loose dust and debris. Use a soft-bristle broom or a vacuum cleaner with a floor brush attachment. Pay attention to corners, edges, and hard-to-reach areas.
- Choose the Right Cleaning Solution: It’s crucial to use a cleaning solution specifically designed for hardwood floors. Avoid harsh chemicals or excessive water, as they can damage the wood. Instead, opt for pH-neutral wood floor cleaners that are safe for use on hardwood.
- Dilute the Cleaning Solution: Follow the manufacturer’s instructions to dilute the cleaning solution with water if necessary. Never pour undiluted cleaner directly onto the floor.
- Mop the Floors: Dip a soft microfiber mop or a well-wrung mop into the cleaning solution. Avoid using excess water, as standing water can penetrate the wood and cause damage. Start mopping from one side of the room, moving in straight lines. Rinse the mop frequently and change the cleaning solution if it becomes dirty.
- Address Stubborn Stains: For stubborn stains, spot-treat the area with a slightly more concentrated cleaning solution. Gently scrub the stain with a soft cloth or a soft-bristle brush. Rinse the area immediately after removing the stain and dry thoroughly.
- Dry the Floors: After mopping, ensure that the hardwood floors are thoroughly dried. Use a dry microfiber cloth or a towel to remove any excess moisture. Opening windows or using fans can help expedite the drying process.
- Protect the Floors: Use furniture pads or felt protectors under the legs of furniture to prevent scratches on the freshly cleaned hardwood floors. Place mats or rugs in high-traffic areas or near entryways to trap dust and dirt.
Regular maintenance, such as sweeping or dusting, is essential to preserve the cleanliness and beauty of hardwood floors. Avoid using steam cleaners or excessive water, as they can cause wood expansion and damage the finish. With proper care and regular cleaning, your hardwood floors will remain a stunning feature of your home for years to come.
Open windows to ventilate the space, start from the top and work your way down, vacuum with a HEPA filter, use microfiber cloths for surfaces, and mop with a damp cloth.
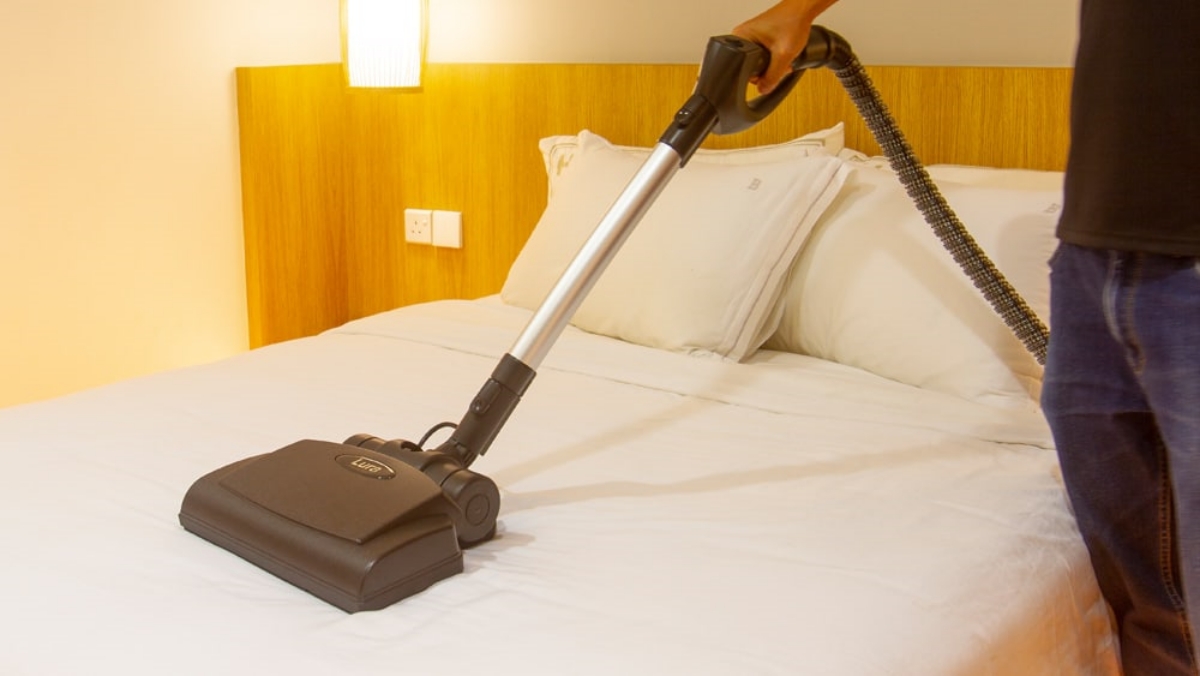
Removing Dust from Carpets and Upholstery
Carpets and upholstery are magnets for dust and debris, especially during and after construction. Properly removing dust from these surfaces is essential to maintain cleanliness and prolong their life. Here are the steps to effectively remove dust from carpets and upholstery:
- Vacuum Thoroughly: Begin by vacuuming the carpets and upholstery using a vacuum cleaner with the appropriate attachments. Use a rotating brush attachment for carpets and a upholstery tool for upholstery. Vacuum in multiple directions and make several passes to ensure thorough dust removal.
- Beat and Shake: For removable smaller carpets, take them outside and beat them with a broom or a carpet beater to dislodge dust. Additionally, you can shake out upholstered cushions, pillows, and small rugs to remove loose dust particles.
- Spot Clean Stains: If there are any visible stains on carpets or upholstery, treat them immediately using a stain remover or a mixture of mild detergent and water. Gently blot the stain with a clean cloth, working from the outside in to prevent spreading the stain.
- Steam Cleaning: For deeper cleaning, consider using a steam cleaner on carpets and upholstery. Follow the manufacturer’s instructions and use the appropriate cleaning solution. Steam cleaning can help remove embedded dust and stains, leaving your carpets and upholstery fresh and revitalized.
- Dry Thoroughly: After steam cleaning or spot cleaning, allow the carpets and upholstery to dry completely. Open windows or turn on fans to speed up the drying process. Avoid using the furniture until it is completely dry to prevent any moisture-related issues or damage.
- Deodorize: If there are any lingering odors on carpets or upholstery, sprinkle baking soda over the surfaces and let it sit for a few hours. Vacuum the baking soda to remove odors while refreshing the fabric.
- Regular Maintenance: To prevent future dust buildup, establish a regular maintenance routine. Vacuum carpets and upholstery regularly to keep them free of dust and debris. Use doormats at entryways to minimize the amount of dirt and dust brought into your home.
By following these steps and incorporating regular maintenance, you can effectively remove dust from carpets and upholstery, creating a clean and fresh environment in your home.
Cleaning Walls and Ceilings
Walls and ceilings are often overlooked when it comes to cleaning after construction, but they can accumulate a significant amount of dust. Cleaning these surfaces is essential to maintain a fresh and pristine look throughout your home. Here are the steps to effectively clean walls and ceilings:
- Dust the Surfaces: Start by dusting the walls and ceilings to remove loose dust particles. Use a microfiber cloth or a feather duster to gently wipe down the surfaces, working from top to bottom. Pay attention to corners, edges, and any intricate details.
- Spot Clean Stains: If there are visible stains on the walls or ceilings, spot clean them using a mild cleaning solution. Mix a small amount of mild detergent with warm water. Dampen a clean cloth with the solution and gently blot the stain. Avoid using excessive water, as it may cause damage or discoloration.
- Wash the Walls and Ceilings: For more significant cleaning, prepare a bucket of warm water with a small amount of mild detergent. Dampen a soft sponge or a clean cloth in the solution and start washing the walls and ceilings in small sections. Use gentle, circular motions to remove dirt and grime.
- Pay Attention to High-Traffic Areas: Focus on areas that are prone to dirt and handprints, such as around light switches, door frames, and baseboards. For stubborn stains or marks, use a melamine sponge or a eraser sponge to gently scrub the area.
- Rinse and Dry: After washing, rinse the walls and ceilings with a clean sponge or cloth dampened with plain water to remove any soapy residue. Dry the surfaces with a soft, absorbent towel to prevent water streaks or damage.
- Touch Up Paint if Necessary: If the cleaning process has affected the paint on your walls, consider touching up any areas with matched paint. Allow the surfaces to dry completely before applying any paint.
- Clean Ceiling Fans and Light Fixtures: Take the opportunity to clean ceiling fans and light fixtures. Use a microfiber duster or a damp cloth to remove dust from fan blades and light fixtures. If necessary, remove the fixtures and clean them separately.
By following these steps, you can effectively clean walls and ceilings, eliminating dust and restoring their appearance. Regular dusting and cleaning maintenance can help prolong the cleanliness and freshness of these surfaces in your home.
Read more: How To Clean Tiles After Construction
Cleaning Windows and Glass Surfaces
Windows and glass surfaces can accumulate a significant amount of dust and smudges during and after construction. Properly cleaning these surfaces will not only enhance the appearance of your home but also allow more natural light to shine through. Here are the steps to effectively clean windows and glass surfaces:
- Gather the Necessary Supplies: Start by gathering the necessary cleaning supplies, including a glass cleaner, microfiber cloths, a squeegee, and a bucket of warm water.
- Dust and Vacuum: Before cleaning the glass, it’s essential to remove any dust or debris from the window frames and sills. Use a microfiber cloth or a brush attachment on your vacuum cleaner to gently brush away the dust.
- Prepare the Cleaning Solution: Fill a bucket with warm water and add a small amount of glass cleaner. Alternatively, you can make your own cleaning solution by mixing equal parts of water and vinegar or water and mild dish soap.
- Start Cleaning: Dip a microfiber cloth into the cleaning solution and wring out any excess liquid. Wipe the glass surfaces in a circular motion, starting from the top and working your way down. Pay attention to corners and edges.
- Use a Squeegee: To achieve streak-free results, use a squeegee to remove the cleaning solution from the glass. Start at the top corner and pull the squeegee smoothly down the window, wiping the blade with a clean cloth after each stroke.
- Remove Stubborn Stains: If there are any stubborn stains or residue on the glass, dampen a clean cloth with a small amount of the cleaning solution and gently scrub the affected areas. Rinse and wipe dry.
- Don’t Forget Window Frames and Sills: After cleaning the glass, wipe down the window frames and sills with a damp cloth. Remove any built-up dirt or grime and dry thoroughly.
- Consider Exterior Window Cleaning: If your windows have exterior access, consider cleaning the outside as well. Use the same cleaning solution and technique to remove dust, dirt, and smudges from the exterior glass surfaces.
- Finish with a Dry Cloth: After cleaning, use a dry microfiber cloth to polish and remove any remaining streaks or moisture from the glass.
Regular maintenance is key to keeping your glass surfaces clean and sparkling. Plan to clean your windows and glass surfaces at least twice a year or as needed to maintain their clarity and shine.
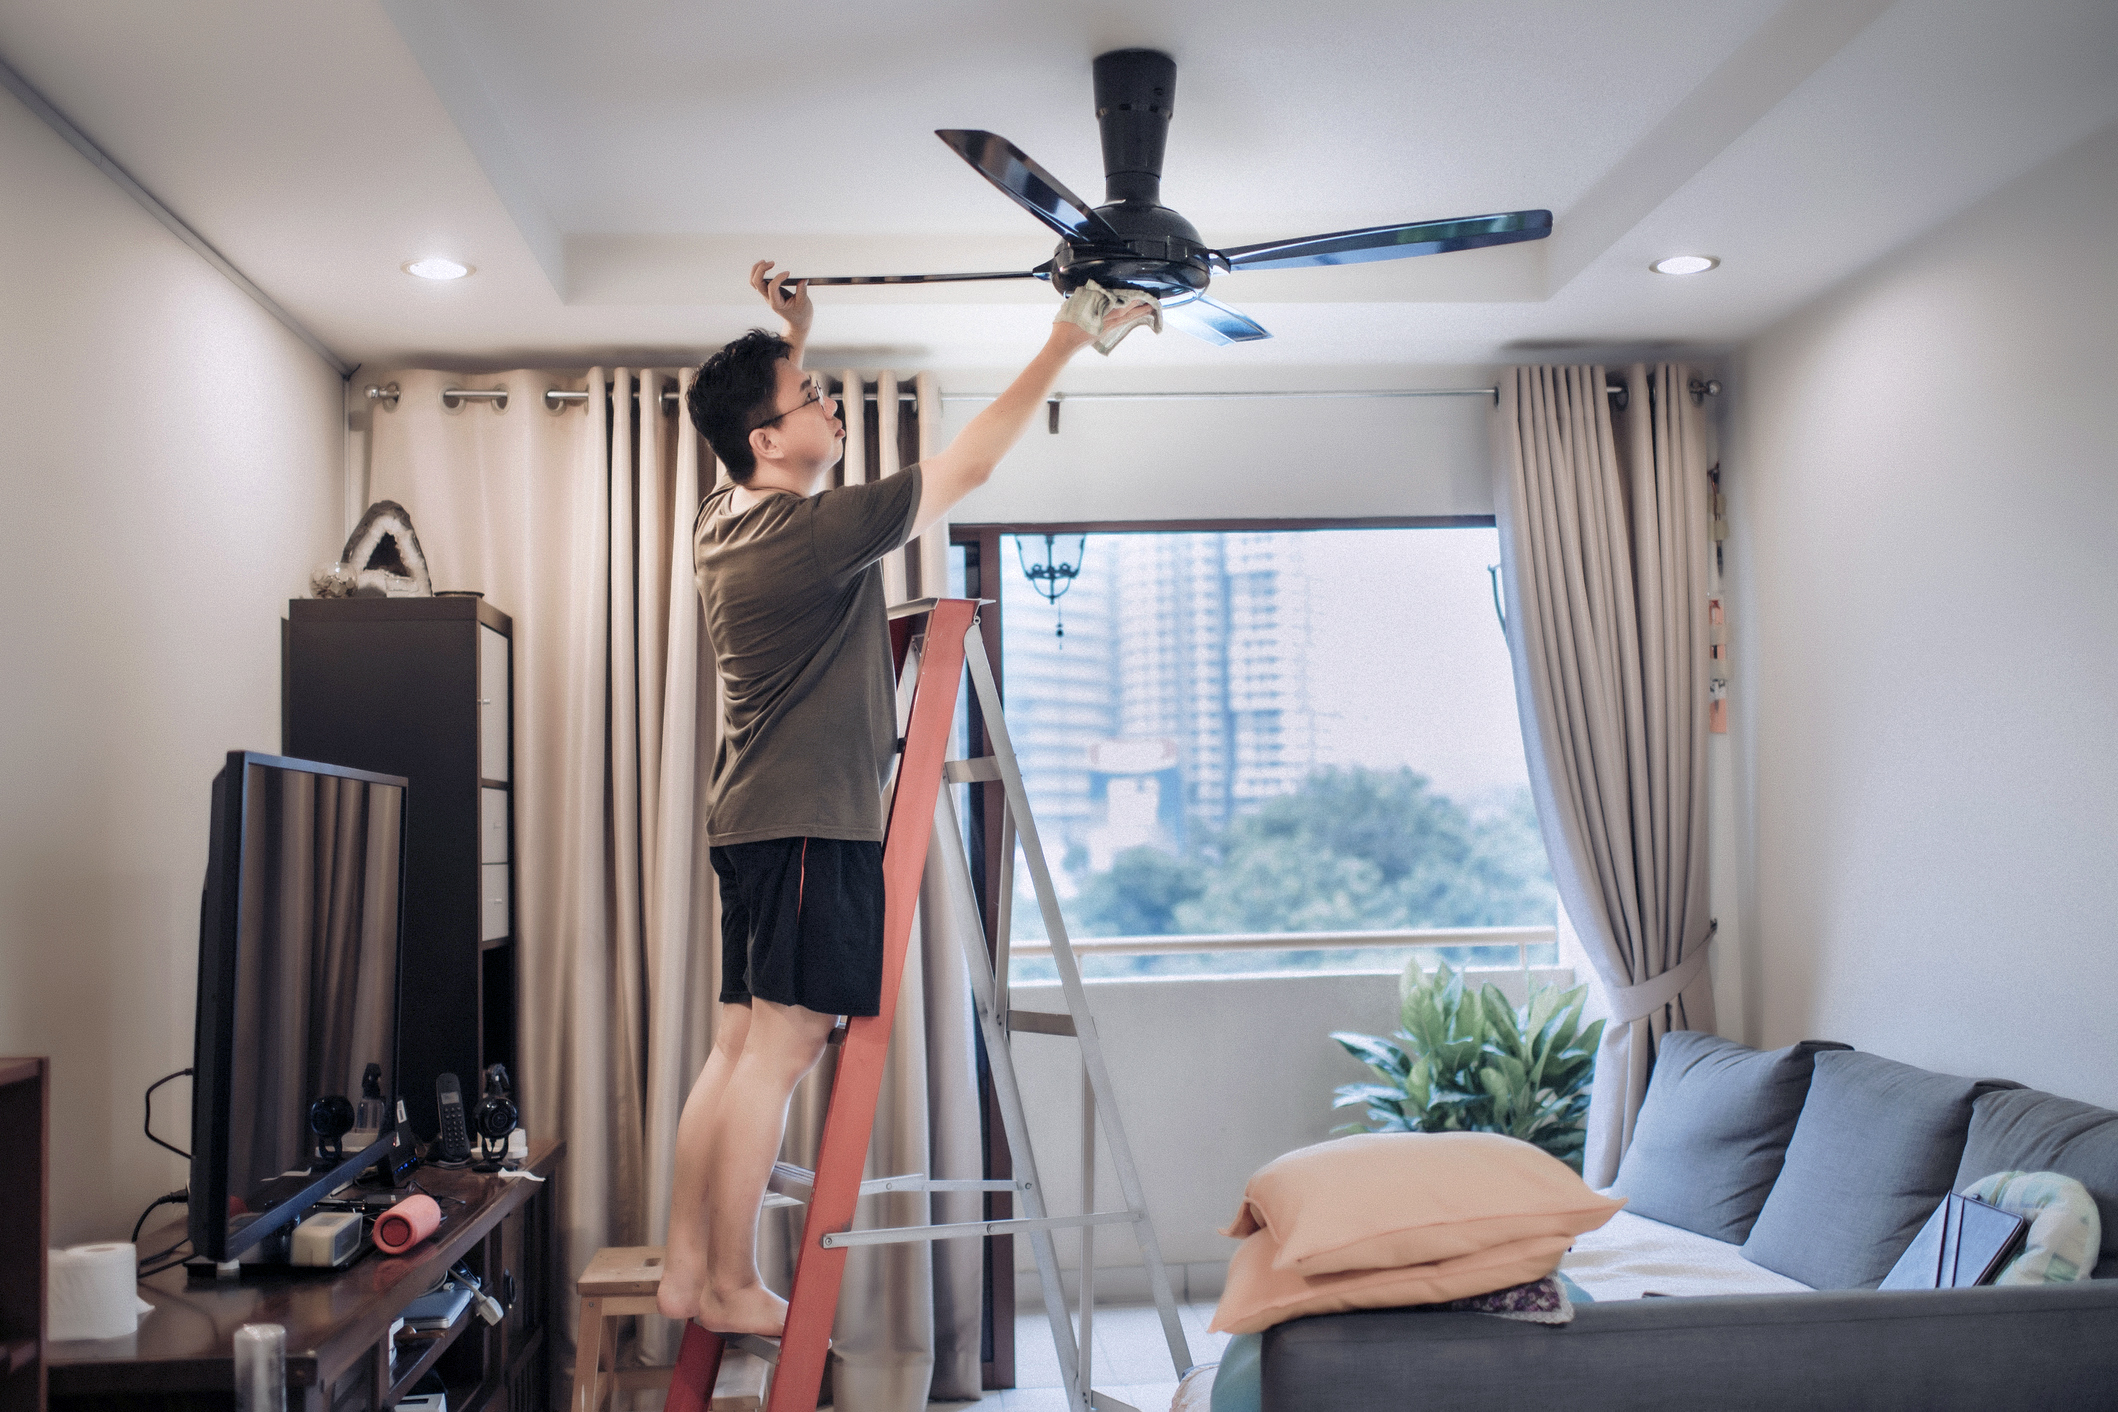
Cleaning Light Fixtures and Ceiling Fans
Light fixtures and ceiling fans can accumulate a significant amount of dust and dirt over time, especially during and after construction. Cleaning these fixtures not only enhances their functionality but also improves the overall aesthetics of your home. Here are the steps to effectively clean light fixtures and ceiling fans:
- Turn Off the Power: Before starting the cleaning process, ensure that the power to the light fixtures and ceiling fans is turned off. This will prevent any accidents or electrical shocks while cleaning.
- Gather the Cleaning Supplies: Prepare a bucket of warm water with a small amount of mild detergent or a glass cleaner. Additionally, gather a step ladder, microfiber cloths, a soft brush, and a vacuum cleaner with a brush attachment.
- Dust the Fixtures: Start by dusting the light fixtures and ceiling fans. Use a microfiber cloth or a soft-bristle brush to gently remove the loose dust and debris. Pay attention to crevices, corners, and areas where dust tends to accumulate.
- Remove Light Covers and Shades: If your light fixtures have removable covers or shades, carefully remove them and place them in a sink or a tub filled with warm, soapy water. Let them soak for a few minutes, then gently scrub with a soft cloth or a sponge. Rinse thoroughly and allow them to air dry.
- Clean Glass and Metal Surfaces: Dampen a microfiber cloth with the cleaning solution and wipe down the glass and metal surfaces of the light fixtures. Use gentle, circular motions to remove dirt and smudges. For stubborn stains or grime, use a soft brush or a toothbrush to scrub the area gently.
- Clean Ceiling Fan Blades: For ceiling fans, use a microfiber cloth or a vacuum cleaner with a brush attachment to remove dust from the blades. Start from the center and work your way outward, wiping or vacuuming each blade thoroughly. If the blades are removable, you can also wash them in a sink with soapy water and dry them before reattaching.
- Wipe Down Motor Housing and Other Surfaces: Use a damp cloth to wipe down the motor housing and any other non-glass or non-metal surfaces of the light fixtures and ceiling fans. Pay attention to switches, chains, and other hard-to-reach areas.
- Replace Light Covers and Shades: Once the light covers and shades are dry, carefully reattach them to the light fixtures.
- Turn the Power Back On: After completing the cleaning process and ensuring that everything is dry, you can safely turn the power back on to the light fixtures and ceiling fans.
Regularly cleaning light fixtures and ceiling fans not only improves their appearance but also ensures optimal performance. Plan to clean them at least once every few months, or as needed, to maintain a dust-free and well-maintained home. With proper care, your light fixtures and ceiling fans will continue to illuminate and circulate air effectively for years to come.
Cleaning Air Vents and HVAC System
Cleaning air vents and the HVAC (Heating, Ventilation, and Air Conditioning) system is essential to maintain good indoor air quality and ensure the efficient operation of your HVAC system. Dust and debris can accumulate in the vents and clog the system, leading to reduced airflow and potentially impacting the performance of your heating and cooling system. Here are the steps to effectively clean air vents and your HVAC system:
- Turn Off the HVAC System: Before you begin the cleaning process, turn off the HVAC system to avoid any air or debris circulating while you work.
- Remove Vent Covers: Start by removing the vent covers from the air vents. Most vent covers can be easily lifted or unscrewed. Place the covers in a sink or a tub filled with warm, soapy water to soak.
- Vacuum the Vent Covers: While the vent covers are soaking, use a vacuum cleaner with a brush attachment to remove dust and debris from both sides of the covers. Gently brush along the ridges and slats to ensure thorough cleaning.
- Clean the Vent Covers: After vacuuming, scrub the vent covers with a soft brush or cloth to remove any stubborn dirt or grime. Rinse them thoroughly with clean water and allow them to air dry before reattaching them.
- Clean Inside the Air Ducts: With the vent covers removed, you can now clean inside the air ducts. Attach a brush attachment to your vacuum cleaner or use a long-handled soft brush to reach inside the ducts and remove any visible dust. Take caution not to damage or dislodge any components within the ductwork.
- Consider Professional Air Duct Cleaning: If you notice excessive dust or suspect mold growth in your air ducts, it may be beneficial to hire a professional air duct cleaning service. They have specialized equipment to thoroughly clean the ductwork and ensure optimal air quality.
- Replace Air Filters: Air filters help trap dust and pollutants, preventing them from entering the HVAC system. Regularly check and replace air filters according to the manufacturer’s recommendations.
- Schedule HVAC System Maintenance: Regular maintenance by a professional HVAC technician is crucial to keep your system in peak condition. This includes cleaning and inspecting the internal components, such as coils and fans, to improve efficiency and prevent potential issues.
- Turn On the HVAC System: Once you have completed the cleaning process and ensured everything is dry, you can safely turn on the HVAC system and resume normal operation.
Regular cleaning and maintenance of air vents and the HVAC system will improve indoor air quality, prevent system inefficiencies, and extend the lifespan of your HVAC system. By following these steps, you can ensure a cleaner and healthier environment for you and your family.
Final Touches and Additional Tips
As you near the end of your post-construction cleaning journey, there are a few final touches and additional tips to consider to ensure a truly comprehensive cleanup. These extra steps will add the finishing touches to your clean house and help maintain its cleanliness in the long run. Here are some final touches and additional tips:
- Inspect and Touch Up: Take the time to inspect your home for any missed areas or lingering dust particles. Touch up these areas with appropriate cleaning methods to ensure a thorough clean.
- Clean Baseboards and Corners: Pay attention to baseboards and corners, as they can collect dust and debris. Use a damp cloth or a soft brush to wipe down baseboards and vacuum corners to remove any dust buildup.
- Wash or Dry Clean Curtains and Drapes: Consider washing or dry cleaning curtains and drapes after post-construction cleaning. This will remove any dust or odors and freshen up the fabric.
- Organize and Declutter: Take the opportunity to declutter and organize your space. Remove any unnecessary items that may have accumulated during construction and find proper storage solutions for a tidy and organized home.
- Maintain Regular Cleaning: Create a regular cleaning schedule to maintain the cleanliness of your home. Regular dusting, vacuuming, and wiping down surfaces will help minimize dust and debris buildup over time.
- Protect Floors and Surfaces: Use rugs and doormats at entryways to prevent dirt and dust from being tracked into your home. Place protective pads or coasters under furniture legs to avoid scratches and damage to floors and surfaces.
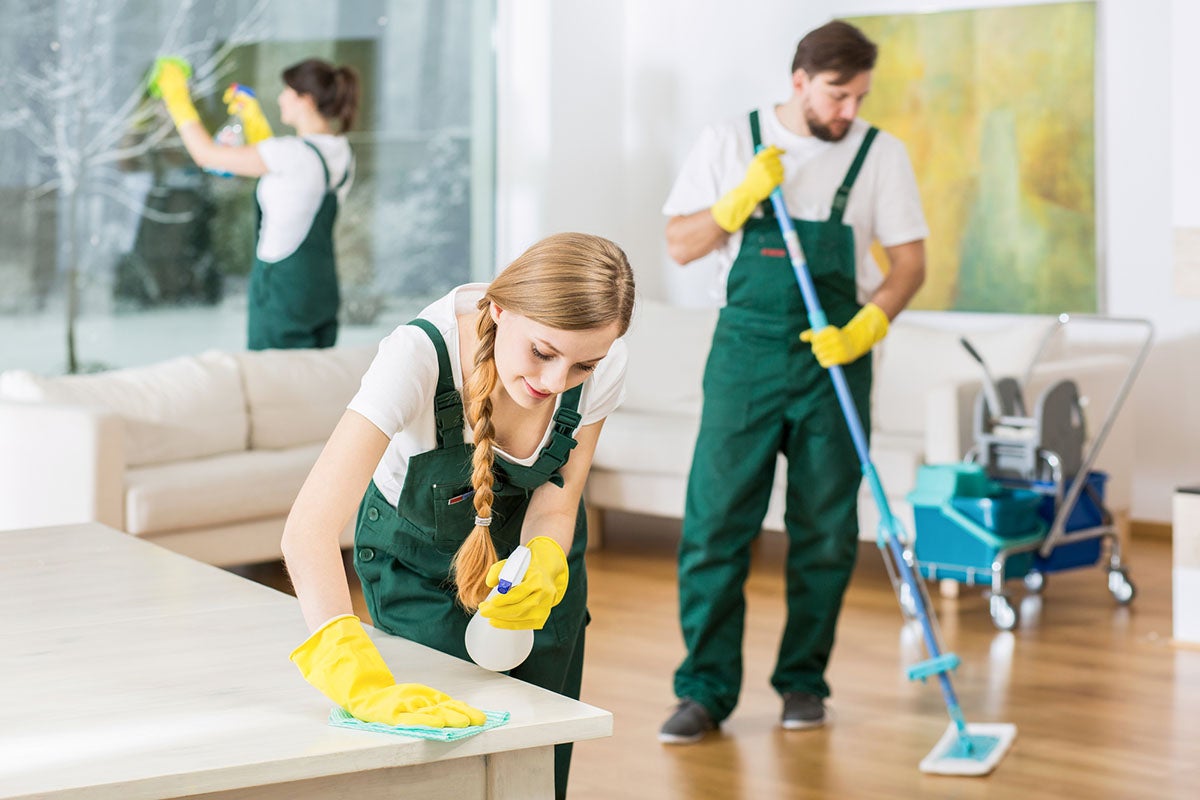
- Consider Professional Cleaning Services: If the post-construction cleaning seems overwhelming or you want to ensure a truly thorough clean, consider hiring professional cleaning services. They have the expertise and equipment to tackle even the toughest cleaning tasks.
- Optimize Air Circulation: Keep your home well-ventilated by opening windows and using fans. This will promote air circulation and help remove any residual odors or airborne dust particles.
- Implement Preventative Measures: To minimize dust accumulation and make future cleanings easier, consider implementing preventative measures. These can include using air purifiers, regularly replacing air filters, and sealing windows and doors to prevent drafts and dust infiltration.
- Celebrate and Enjoy: Finally, take a moment to celebrate your clean and refreshed home! Enjoy the fruits of your labor and invite friends and family over to admire your beautifully cleaned space.
By paying attention to these final touches and following these additional tips, you will ensure a truly comprehensive post-construction cleanup. Your efforts will be rewarded with a clean, organized, and comfortable home that you can proudly enjoy!
Conclusion
Cleaning your house after construction is no small task, but with the right knowledge and preparation, you can restore your home to its former glory and create a clean, healthy, and inviting living environment. By following the steps outlined in this guide, you can efficiently and effectively remove construction dust and debris from various surfaces throughout your home.
Starting with the preparation phase, such as creating a cleaning plan, gathering necessary supplies, and taking safety precautions, sets the stage for a successful cleanup. From there, the guide takes you through the specific cleaning processes for different areas of your home.
Dry cleaning methods, such as dusting and vacuuming, help eliminate loose dust and debris from surfaces. Moving on to wet cleaning, you will learn how to clean hardwood floors, remove dust from carpets and upholstery, clean walls and ceilings, and tackle windows and glass surfaces.
The guide also instructs you on how to clean light fixtures, ceiling fans, air vents, and the HVAC system – areas often overlooked but crucial to maintaining a clean and well-functioning home.
As you near the end of your cleaning journey, the guide provides final touches and additional tips to ensure a comprehensive cleanup. These tips include organizing and decluttering your space, maintaining regular cleaning routines, and implementing preventative measures to minimize dust accumulation in the future.
Cleaning your house after construction may be a time-consuming and labor-intensive process, but the results are well worth it. Not only will your home look and feel fresh, but it will also be a healthier and more enjoyable space to live in.
Remember, this guide is meant to provide you with a comprehensive framework for cleaning your house after construction. Feel free to adapt and modify the steps and techniques to suit your specific needs and preferences. With your expertise and dedication, you can transform your house into a clean and comfortable sanctuary that you can be proud of.
Frequently Asked Questions about How To Clean House After Construction Dust
Was this page helpful?
At Storables.com, we guarantee accurate and reliable information. Our content, validated by Expert Board Contributors, is crafted following stringent Editorial Policies. We're committed to providing you with well-researched, expert-backed insights for all your informational needs.


0 thoughts on “How To Clean House After Construction Dust”