Home>Furniture & Design>Bathroom Accessories>How To Plant Loofah Seeds
Bathroom Accessories
How To Plant Loofah Seeds
Modified: October 19, 2024
Learn how to plant loofah seeds and grow your own natural bathroom accessories. Follow our step-by-step guide for a successful harvest. Discover the joy of creating sustainable products at home.
(Many of the links in this article redirect to a specific reviewed product. Your purchase of these products through affiliate links helps to generate commission for Storables.com, at no extra cost. Learn more)
Introduction
Planting loofah seeds is a rewarding and fulfilling endeavor that allows you to cultivate your own natural sponges. Loofahs, also known as luffa or sponge gourds, are versatile plants that can be grown in various climates, making them an ideal addition to any garden. Whether you're a seasoned gardener or a novice enthusiast, the process of planting loofah seeds is relatively straightforward and can be an enjoyable experience for anyone with a green thumb.
The journey of planting loofah seeds begins with selecting the right location for your garden. This involves considering factors such as sunlight exposure, soil quality, and available space. Once the ideal location is identified, the next step is to prepare the soil to create a nurturing environment for the loofah seeds to thrive. This involves assessing the soil composition, making any necessary amendments, and ensuring proper drainage.
After the soil is primed and ready, it's time to plant the loofah seeds. This step requires attention to detail and care to ensure that the seeds are positioned at the optimal depth and distance from one another. Once the seeds are in place, consistent watering and attentive care are essential to support the growth of the loofah plants. This involves monitoring moisture levels, providing nutrients as needed, and protecting the plants from potential threats.
As the loofah plants mature, the anticipation of harvesting the loofahs builds. The process of harvesting the loofahs involves careful timing and gentle handling to obtain high-quality sponges. By following the proper techniques, you can enjoy the satisfaction of harvesting your own natural loofahs, ready to be used for various household and personal care purposes.
In the subsequent sections, we will delve into each step of the process in detail, providing valuable insights and practical tips to guide you through the journey of planting and harvesting loofahs. Whether you're seeking to expand your gardening skills or simply intrigued by the prospect of growing your own sponges, this comprehensive guide will equip you with the knowledge and confidence to embark on this enriching horticultural adventure.
Key Takeaways:
- Planting loofah seeds is a fun and rewarding way to grow your own natural sponges. Choose a sunny spot, prepare the soil, and give the seeds plenty of care to watch them thrive!
- Harvesting loofahs is a gratifying journey from seed to sponge. Monitor maturity, handle with care, and enjoy the sustainable, eco-friendly benefits of your homegrown sponges.
Read more: What Plant Is A Loofah
Step 1: Choosing the Right Location
Selecting the optimal location for planting loofah seeds is a critical first step in ensuring the success of your gardening venture. When choosing a location, it's essential to consider several key factors that can significantly impact the growth and development of the loofah plants.
Sunlight Exposure: Loofah plants thrive in warm, sunny conditions, making it imperative to choose a location that receives ample sunlight throughout the day. Aim for a spot that offers at least 6-8 hours of direct sunlight, as this will promote robust growth and enhance the overall productivity of the plants.
Soil Quality: Assessing the soil quality is another crucial aspect of selecting the right location for planting loofah seeds. Loofahs prefer well-draining soil with a slightly acidic to neutral pH level. Conduct a soil test to determine the pH and nutrient levels, and make any necessary amendments to optimize the soil for loofah cultivation.
Space Consideration: Loofah plants are vigorous climbers that require ample space to spread out and thrive. Therefore, it's important to choose a location that offers sufficient vertical and horizontal space for the plants to grow unhindered. Consider vertical structures such as trellises or fences to support the climbing nature of the loofah vines.
Climate Suitability: While loofahs can adapt to various climates, they tend to flourish in warm, humid environments. If you live in a region with cooler temperatures, consider planting loofah seeds in containers that can be moved indoors during colder periods or opt for a greenhouse setup to provide the ideal climate for the plants.
By carefully considering these factors and selecting a location that aligns with the sunlight exposure, soil quality, space considerations, and climate suitability, you can lay a solid foundation for the successful cultivation of loofah plants. This thoughtful approach to choosing the right location sets the stage for a thriving loofah garden and sets the tone for the subsequent steps in the planting and harvesting process.
Step 2: Preparing the Soil
Preparing the soil is a crucial step in the process of planting loofah seeds, as it sets the stage for the optimal growth and development of the plants. The goal of soil preparation is to create a nurturing environment that provides essential nutrients, proper drainage, and a suitable texture for the loofah seeds to germinate and thrive.
Assessing Soil Composition
Before initiating the soil preparation process, it's important to assess the composition of the soil in the chosen location. Loofah plants thrive in well-draining soil with a slightly acidic to neutral pH level. Conduct a soil test to determine the pH and nutrient levels, which can provide valuable insights into the soil's composition and guide the necessary amendments.
Making Amendments
Based on the results of the soil test, make any required amendments to optimize the soil for loofah cultivation. If the soil pH is too high or too low, consider adding organic materials such as compost or well-rotted manure to adjust the pH level. Additionally, incorporating organic matter into the soil can enhance its texture, improve moisture retention, and promote the availability of essential nutrients for the loofah plants.
Read more: How To Grow Loofah Seeds
Ensuring Proper Drainage
Effective drainage is essential for the health of loofah plants, as waterlogged soil can lead to root rot and other detrimental conditions. To ensure proper drainage, consider incorporating organic materials such as perlite or coarse sand into the soil to enhance its permeability. Additionally, creating raised beds or mounds can further improve drainage and prevent water accumulation around the loofah plants' root systems.
Enhancing Nutrient Availability
Loofah plants benefit from a nutrient-rich growing medium that supports their vigorous growth and productivity. Incorporating a balanced fertilizer into the soil can provide essential nutrients such as nitrogen, phosphorus, and potassium, which are vital for the development of healthy loofah plants. Consider using a slow-release organic fertilizer to sustainably nourish the soil and promote long-term plant vitality.
Creating a Nurturing Environment
Ultimately, the goal of preparing the soil is to create a nurturing environment that fosters the growth and well-being of the loofah plants. By carefully assessing the soil composition, making necessary amendments, ensuring proper drainage, and enhancing nutrient availability, you can establish an optimal growing medium that sets the stage for the successful cultivation of loofahs.
The process of preparing the soil is a foundational step that lays the groundwork for the subsequent planting of loofah seeds and the ongoing care of the plants. By dedicating attention to soil preparation, you can establish a solid foundation for the thriving growth of loofahs, setting the stage for a bountiful harvest of natural sponges.
Step 3: Planting the Seeds
Planting the loofah seeds marks a pivotal moment in the journey of cultivating these versatile plants. This step requires attention to detail and care to ensure that the seeds are positioned at the optimal depth and distance from one another, setting the stage for successful germination and robust growth.
Read more: When To Plant Loofah In Texas
Seed Selection
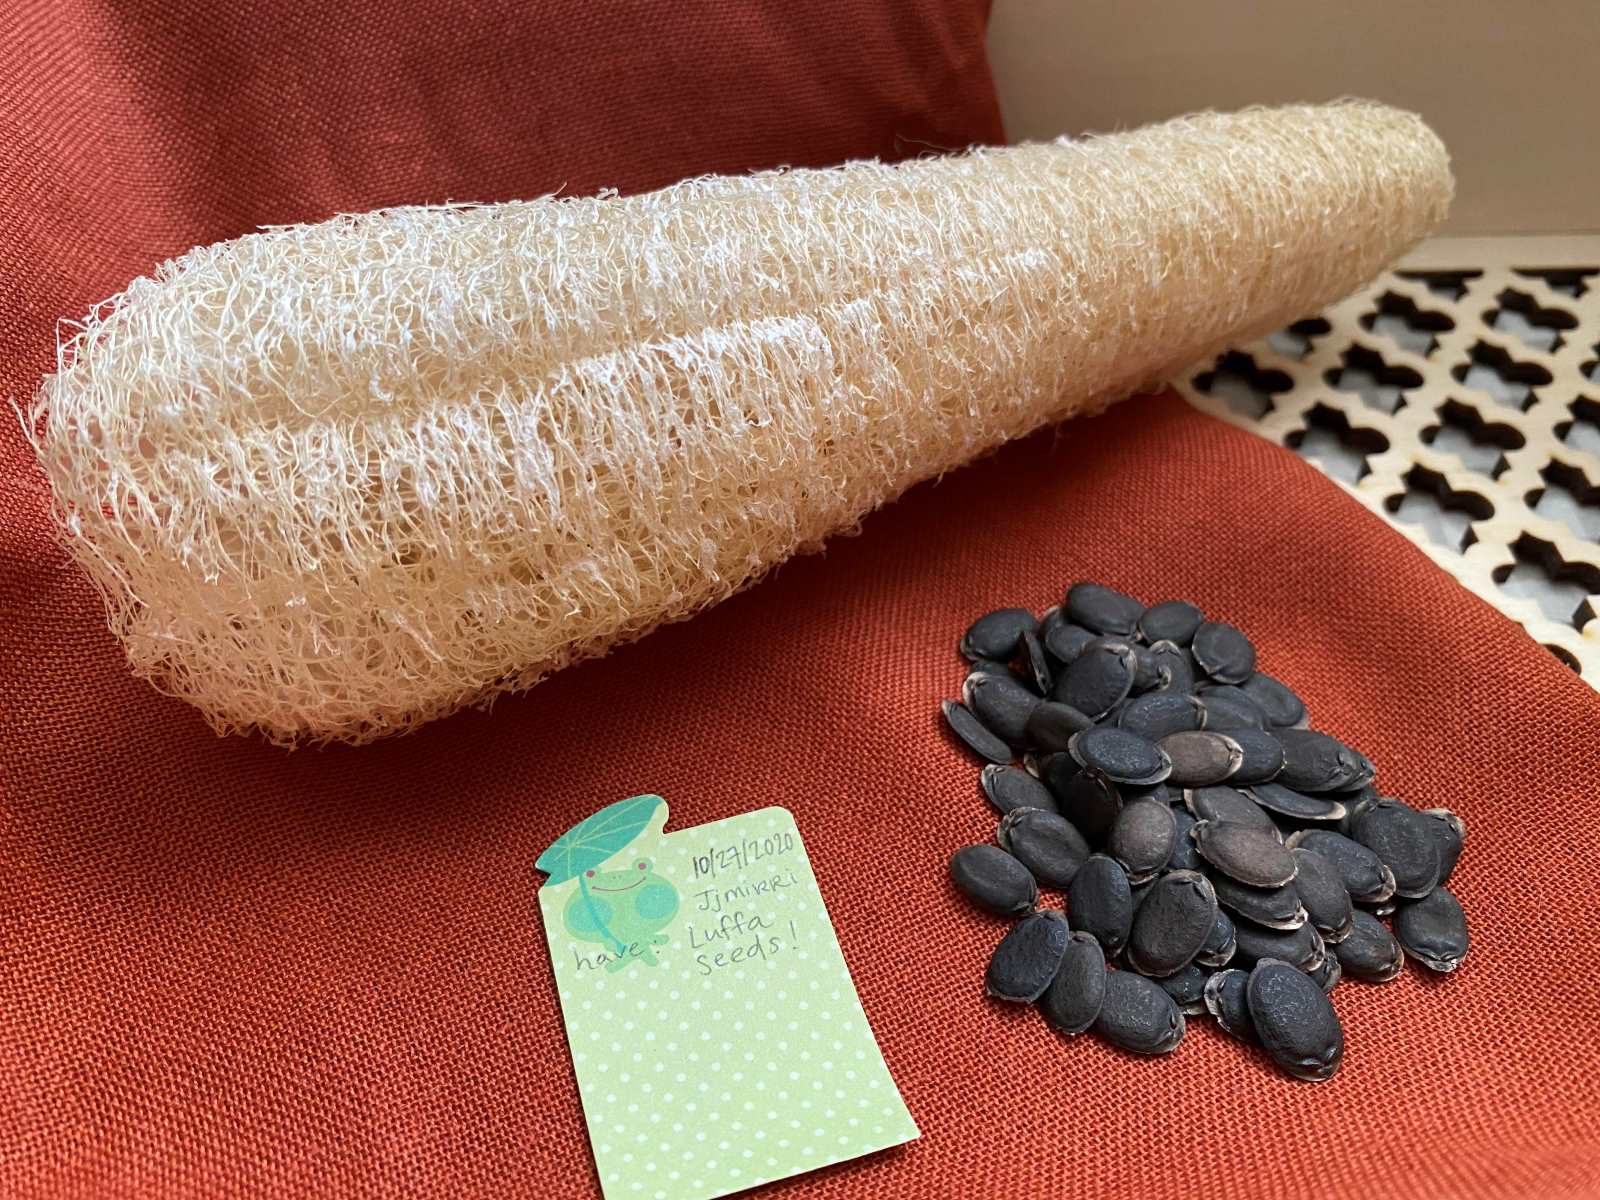
Before planting the loofah seeds, it's essential to select high-quality seeds from a reputable source. Look for seeds that are plump, firm, and free from any signs of damage or decay. Opting for organic or heirloom loofah seeds can further enhance the potential for healthy plant development and abundant harvests.
Timing and Temperature
The timing of planting loofah seeds is crucial, as these plants thrive in warm, sunny conditions. It's recommended to plant the seeds outdoors after the last frost date, ensuring that the soil has warmed to a suitable temperature for germination. Loofah seeds require a soil temperature of at least 70°F (21°C) for optimal sprouting, so it's important to consider the local climate and seasonal variations when determining the ideal planting time.
Soil Preparation
Before planting the loofah seeds, ensure that the soil has been adequately prepared to create a nurturing environment for germination. The soil should be well-draining, nutrient-rich, and free from any compacted areas that may impede seedling emergence. If necessary, create raised beds or mounds to improve soil drainage and provide an optimal growing medium for the seeds.
Planting Depth and Spacing
When planting loofah seeds, it's important to position them at the appropriate depth to facilitate successful germination. Plant the seeds at a depth of approximately 1 inch (2.5 cm) in the soil, covering them gently with loose, fine soil. Ensure that the seeds are spaced at least 12-18 inches (30-45 cm) apart to allow ample room for the vigorous growth of the loofah vines.
Read more: How To Use A Loofah
Watering and Care
After planting the loofah seeds, provide gentle watering to ensure that the soil is evenly moist but not waterlogged. Consistent moisture is essential for seed germination, so monitor the soil moisture levels regularly and adjust the watering frequency as needed. Additionally, protect the newly planted seeds from potential threats such as pests and extreme weather conditions to support their healthy establishment.
By following these guidelines and taking a thoughtful approach to planting the loofah seeds, you can set the stage for successful germination and the emergence of healthy seedlings. This pivotal step in the cultivation process lays the foundation for the growth of robust loofah plants, bringing you one step closer to the rewarding experience of harvesting your own natural sponges.
Step 4: Watering and Care
Proper watering and attentive care are essential components of nurturing healthy loofah plants from seedlings to mature vines. This step requires consistent monitoring of moisture levels, proactive pest management, and providing essential nutrients to support the vigorous growth and development of the loofah plants.
Monitoring Moisture Levels
Maintaining appropriate soil moisture is crucial for the well-being of loofah plants, especially during the early stages of growth. After planting the seeds, ensure that the soil remains evenly moist but not waterlogged. Regularly check the soil moisture by inserting a finger into the soil to gauge its dampness. If the top inch of the soil feels dry to the touch, it's an indication that the plants require watering. However, it's important to avoid overwatering, as excessively wet soil can lead to root rot and other detrimental conditions. Striking a balance by providing consistent, moderate watering is key to supporting healthy plant growth.
Providing Nutrients
Loofah plants benefit from a steady supply of essential nutrients to fuel their growth and productivity. Consider incorporating a balanced fertilizer into the soil around the base of the plants to provide vital nutrients such as nitrogen, phosphorus, and potassium. Organic fertilizers, such as compost or well-rotted manure, can be particularly beneficial in nourishing the soil and promoting the overall health of the loofah plants. Additionally, periodic applications of liquid seaweed or fish emulsion can supplement the plants with micronutrients, further enhancing their vitality.
Read more: How To Germinate A Plant
Pest Management
Vigilant pest management is crucial for safeguarding the loofah plants from potential threats that can impede their growth. Keep a watchful eye for common pests such as aphids, spider mites, and cucumber beetles, which may target the tender foliage and stems of the plants. Consider employing natural pest control methods, such as introducing beneficial insects like ladybugs or using insecticidal soaps, to mitigate pest infestations while minimizing the use of chemical pesticides. By proactively addressing pest issues, you can protect the loofah plants and ensure their uninterrupted growth.
Supporting Growth
As the loofah plants continue to grow, provide physical support for their climbing vines to prevent them from sprawling on the ground and to optimize their exposure to sunlight. Install sturdy trellises or vertical supports near the plants, allowing the vines to climb and spread out freely. This not only promotes efficient space utilization but also facilitates air circulation around the plants, reducing the risk of fungal diseases and promoting overall plant health.
By diligently tending to the watering and care needs of the loofah plants, you can create an environment that fosters their robust growth and resilience. This attentive approach sets the stage for the successful development of the plants, bringing you closer to the gratifying experience of harvesting your own natural loofahs for various household and personal care applications.
Step 5: Harvesting the Loofahs
Harvesting the loofahs marks the culmination of your dedicated efforts in nurturing these versatile plants from seeds to mature vines. The process of harvesting loofahs involves careful timing and gentle handling to obtain high-quality sponges that are ready for various household and personal care applications.
Monitoring Maturity
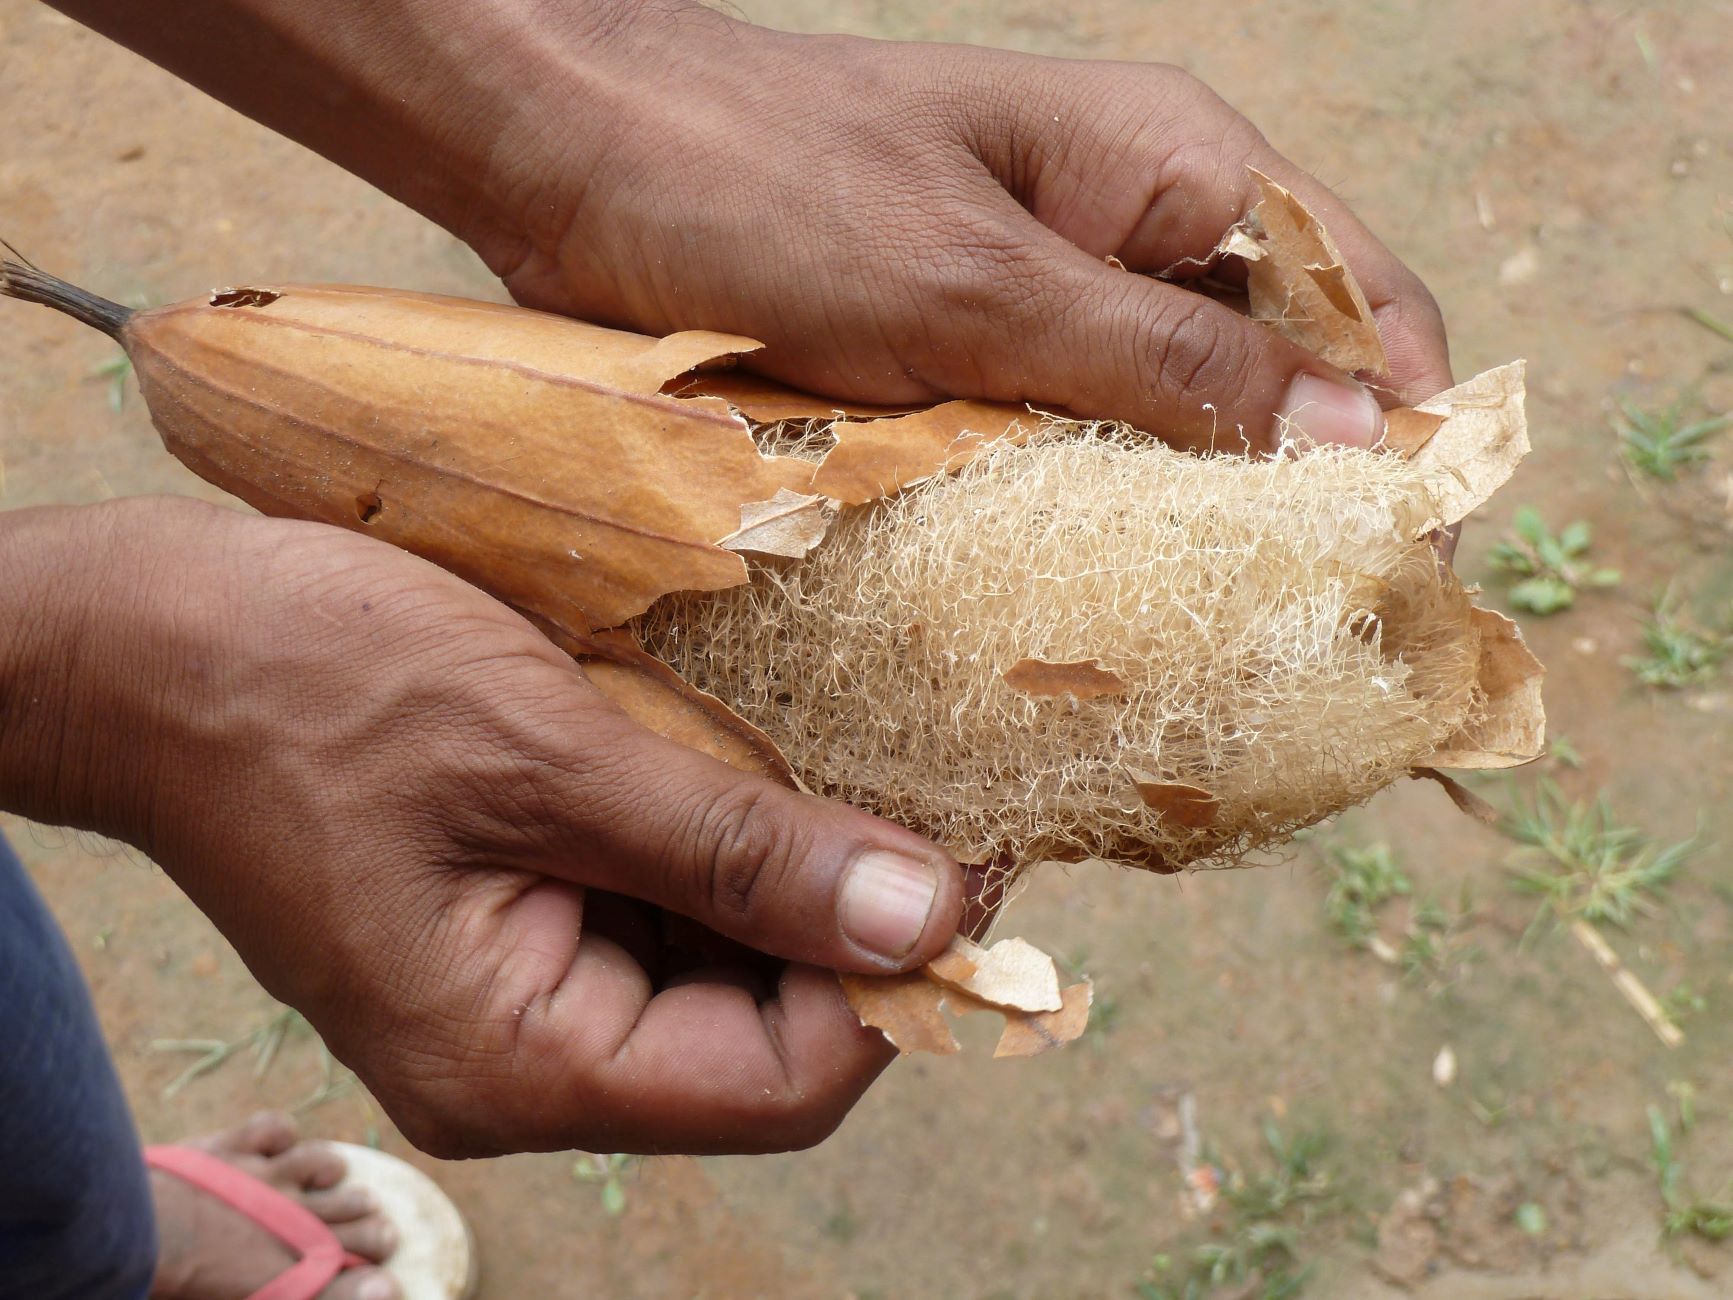
Before embarking on the harvesting process, it's essential to monitor the maturity of the loofahs to ensure that they are ready for harvest. Mature loofahs typically reach a length of 6 to 8 inches (15 to 20 cm) and develop a light brown color. Additionally, the outer skin of the loofahs becomes dry and begins to peel away, indicating that they are ripe for harvesting. By attentively observing these visual cues, you can determine the optimal timing for harvesting the loofahs and maximizing their quality.
Read more: How To Plant Seed
Harvesting Techniques
When the loofahs have reached the appropriate stage of maturity, carefully cut them from the vines using sharp pruning shears or a knife. It's important to handle the loofahs gently to avoid causing any damage to the sponges. Leave a small portion of the stem attached to the loofahs, as this can facilitate the drying process and help preserve the integrity of the sponges. As you harvest the loofahs, take care to avoid excessive handling or squeezing, as this can impact their texture and overall quality.
Drying and Curing
After harvesting, it's crucial to initiate the drying and curing process to prepare the loofahs for use. Begin by rinsing the harvested loofahs under running water to remove any residual dirt or debris. Then, place the loofahs in a well-ventilated area with ample airflow to facilitate the drying process. Allow the loofahs to air dry for approximately 2 to 3 weeks, periodically rotating them to ensure uniform drying. As the loofahs dry, the outer skin will continue to peel away, revealing the fibrous sponge inside.
Final Preparation
Once the loofahs have dried thoroughly and the outer skin has been removed, they are ready for final preparation. Gently shake or brush the loofahs to dislodge any remaining seeds or debris from the sponge. Rinse the loofahs once more to ensure that they are clean and free from any residual particles. At this stage, the loofahs are primed for various applications, including as natural sponges for bathing, exfoliation, and household cleaning.
By following these meticulous harvesting techniques and taking a patient approach to drying and curing the loofahs, you can obtain high-quality sponges that embody the fruits of your labor. The process of harvesting loofahs not only yields practical and sustainable household essentials but also represents the culmination of a gratifying journey from seed to sponge.
Conclusion
The journey of planting and harvesting loofahs is a testament to the rewarding and enriching experience of cultivating natural sponges from seed to maturity. Each step of the process, from choosing the right location to nurturing the plants and ultimately harvesting the loofahs, embodies a harmonious blend of horticultural expertise, attentive care, and a deep appreciation for the wonders of nature.
As we reflect on the comprehensive guide to planting loofah seeds, it becomes evident that this endeavor transcends the mere act of gardening. It represents a connection to the earth, a celebration of sustainable living, and a source of practical, eco-friendly solutions for everyday needs. The careful selection of the ideal location sets the stage for the flourishing growth of loofah plants, while the meticulous preparation of the soil creates a nurturing environment that supports their vitality.
The process of planting the loofah seeds, with its emphasis on timing, depth, and spacing, underscores the significance of precision and patience in fostering the emergence of healthy seedlings. As the plants mature, the attentive watering, care, and pest management practices exemplify the dedication and vigilance required to nurture robust loofah vines that yield high-quality sponges.
The culmination of this journey is the gratifying experience of harvesting the loofahs, a moment that encapsulates the culmination of diligent efforts and the realization of a sustainable, natural resource. The careful monitoring of maturity, gentle harvesting techniques, and meticulous drying and curing process underscore the reverence for the bounties of nature and the desire to harness them responsibly.
In essence, the journey of planting and harvesting loofahs transcends the realm of gardening; it embodies a holistic approach to sustainable living, self-sufficiency, and a profound connection to the natural world. By embracing this journey, individuals not only cultivate their own natural sponges but also foster a deeper appreciation for the intricate processes of growth, the cycles of nature, and the invaluable gifts that the earth provides.
As we conclude this comprehensive guide, it is our hope that the insights, techniques, and principles shared here will inspire and empower individuals to embark on their own journey of planting and harvesting loofahs. May this endeavor serve as a reminder of the beauty and abundance that surrounds us, and the potential for sustainable, mindful practices to enrich our lives and the world around us.
Frequently Asked Questions about How To Plant Loofah Seeds
Was this page helpful?
At Storables.com, we guarantee accurate and reliable information. Our content, validated by Expert Board Contributors, is crafted following stringent Editorial Policies. We're committed to providing you with well-researched, expert-backed insights for all your informational needs.


0 thoughts on “How To Plant Loofah Seeds”