Furniture
How To Make A Balloon Chandelier
Modified: December 7, 2023
Learn how to make a stunning balloon chandelier to add a touch of whimsy and fun to your furniture. Step-by-step guide and tips.
(Many of the links in this article redirect to a specific reviewed product. Your purchase of these products through affiliate links helps to generate commission for Storables.com, at no extra cost. Learn more)
Introduction
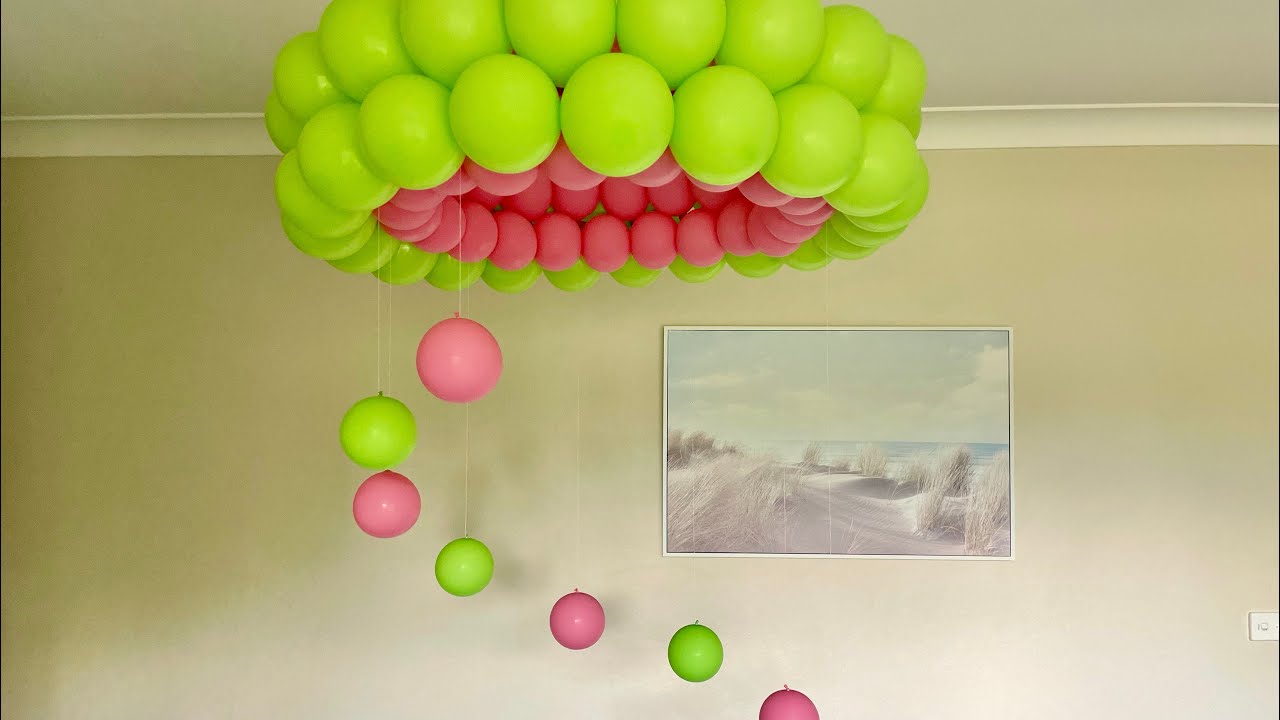
Have you ever wanted to add a touch of whimsy and elegance to your home decor? If so, a balloon chandelier might be just the thing for you! This stunning and unique piece of decor can instantly transform any space into a dreamy and enchanting atmosphere. Whether you’re hosting a special occasion or simply want to add a statement piece to your living room, a balloon chandelier is sure to capture attention and create a memorable focal point.
In this article, we’ll guide you through the step-by-step process of creating your own balloon chandelier. Don’t worry if you’ve never tried your hand at DIY projects before – this is a beginner-friendly project that requires minimal materials and can be completed in just a few hours.
Get ready to unleash your creativity and let’s dive into the world of balloon chandeliers!
Key Takeaways:
- Create a captivating balloon chandelier with a variety of colors and sizes to infuse charm and elegance into any space, whether for a special occasion or everyday whimsy.
- Let your creativity soar as you craft a stunning balloon chandelier, from inflating balloons to arranging and decorating them, to bring a touch of enchantment to your home decor.
Read more: How To Make A Balloon Table Centerpiece
Materials Needed
Before we get started, let’s gather all the necessary materials for your balloon chandelier project. Here’s what you’ll need:
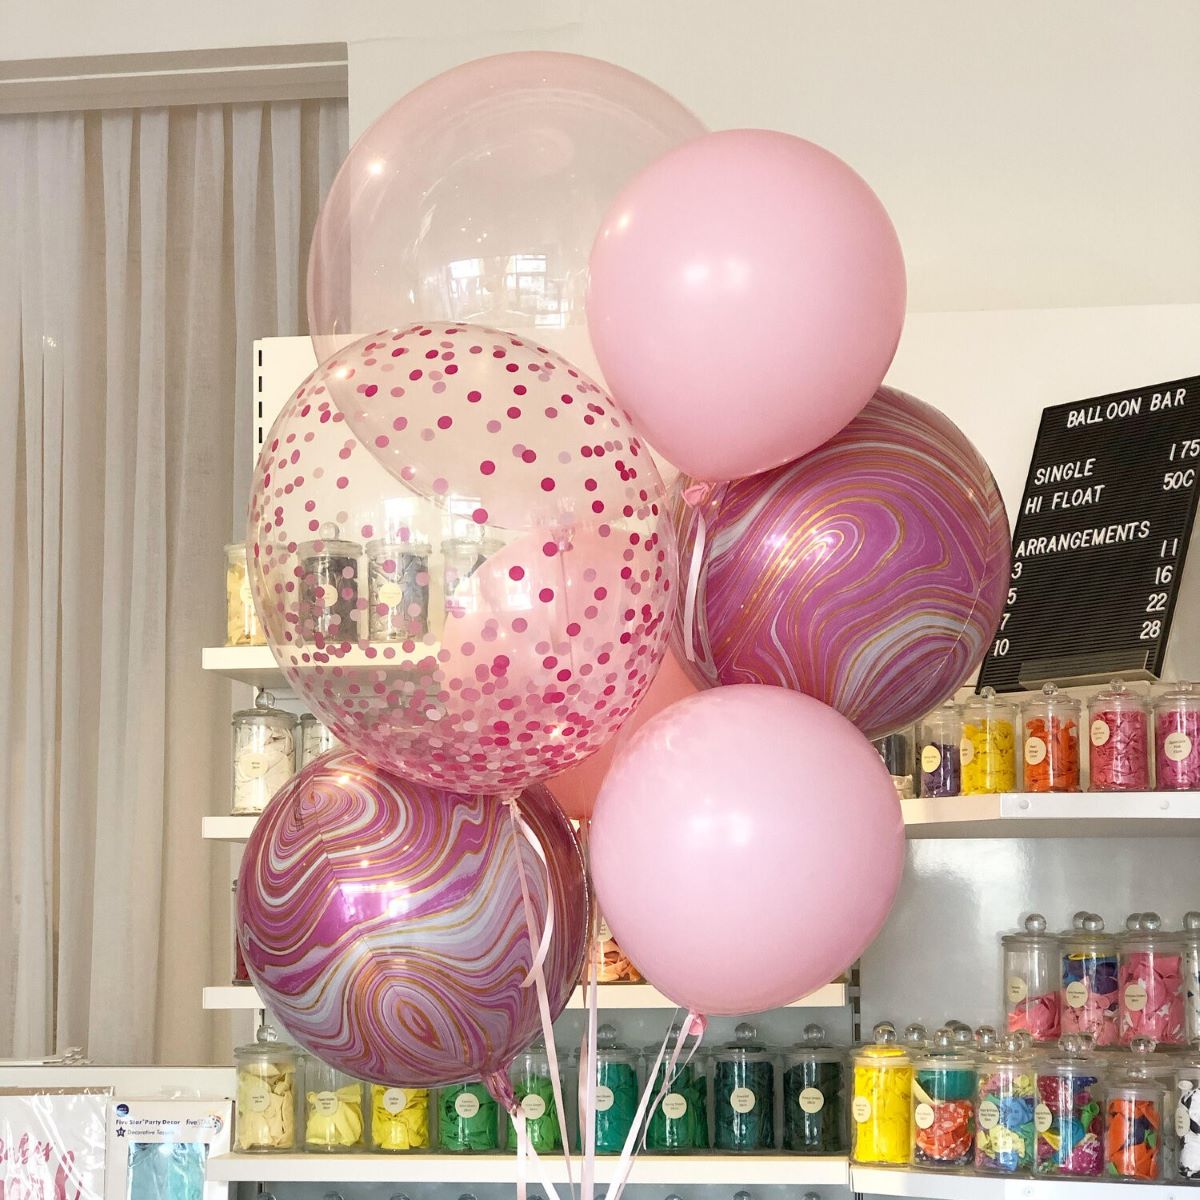
- Balloons: Choose a variety of colors and sizes to create visual interest. Opt for balloons that are sturdy and can hold helium if you want the chandelier to float.
- Fishing Line: This will be used to hang the balloons and create the chandelier structure. Make sure to choose a durable fishing line that can support the weight of the balloons.
- Needle: This will be used to thread the fishing line through the balloons.
- Scissors: You’ll need scissors to cut the fishing line to the desired length and to trim any excess materials.
- Base Material: You’ll need a sturdy base to hang the chandelier from. This can be a hoop, a wire wreath frame, or even a ceiling hook.
- Decorative Accessories (optional): To add an extra touch to your chandelier, consider adding ribbons, tassels, or fairy lights.
- Helium Tank (optional): If you want your chandelier to float, you’ll need a helium tank to inflate the balloons.
Once you have gathered all the materials, you’re ready to start creating your very own balloon chandelier!
Step 1: Gather Your Supplies
Before diving into the creation process, it’s important to gather all your supplies in one place. This will ensure a smooth and uninterrupted crafting experience. Find a spacious and well-lit area where you can comfortably work on your balloon chandelier project.
Start by laying out all the materials you gathered for this project. Check if you have enough balloons in different colors and sizes to create a visually appealing chandelier. Double-check that you have the necessary fishing line, needle, scissors, and any optional decorative accessories you want to incorporate.
Next, inspect the balloons for any defects or leaks. It’s essential to use balloons that are in good condition to prevent them from popping or deflating prematurely.
Make sure your helium tank, if you’re using one, is filled and ready for inflation. If you don’t have a helium tank, determine if your chandelier will be a hanging or tabletop piece. For hanging chandeliers, no helium is required, but for floating ones, you may want to consider purchasing or renting a helium tank.
By gathering all your supplies and checking their quality, you’re setting yourself up for a successful balloon chandelier project. Now that you’re fully prepared, it’s time to move on to the next step: inflating the balloons!
Step 2: Inflate the Balloons
Now that you have all your supplies ready, it’s time to inflate the balloons for your chandelier. Inflating the balloons can be an exciting and fun part of the process, especially if you’re using helium to make them float.
- If you’re using a helium tank, make sure to follow the manufacturer’s instructions for safe and proper use. Attach the nozzle securely to the balloon and gently press down to release the helium. Fill the balloon until it reaches your desired size and tie a knot at the end. Repeat this process for all the balloons you plan to use.
- If you’re not using helium and prefer a hanging chandelier, you can still inflate the balloons by blowing air into them. Pinch the opening of the balloon and blow into it, gradually filling it with air. Tie a knot at the end once it’s inflated to your desired size.
- Consider creating a mix of balloon sizes and colors to add visual interest to your chandelier. You can alternate between large and small balloons or use different colors to create a vibrant and captivating effect.
- As you inflate the balloons, keep in mind the overall size and weight of your chandelier. Balloons that are too heavy may not float if you’re using helium, and too many balloons on a single fishing line may cause it to sag or break. Be mindful of the balance and aesthetics of your design.
Inflating the balloons is an important step to bring your balloon chandelier to life. Take your time and enjoy this creative process. Once all your balloons are inflated, you’re ready to move on to the next step: attaching the balloons to the fishing line.
Step 3: Attach the Balloons to the Fishing Line
With your inflated balloons ready, it’s time to attach them to the fishing line to create the structure of your balloon chandelier. This step requires some patience and precision, but the end result will be worth it!
- Start by cutting a length of fishing line, taking into account the desired height and length of your chandelier. Leave some extra length to account for tying and securing the line.
- Thread the needle with the fishing line, making sure it’s tightly secured. If necessary, tie a knot at the end of the fishing line to prevent it from slipping through the needle.
- Take one of the inflated balloons and carefully insert the needle through the tied end of the balloon. Push the needle through the center of the balloon until it comes out the other side.
- Gently slide the balloon down the fishing line until it reaches your desired position. The needle may be removed once the balloon is secure on the fishing line.
- Repeat this process with the remaining inflated balloons, alternating colors and sizes to create an aesthetically pleasing arrangement. Be mindful of the spacing between the balloons to ensure they are evenly distributed along the fishing line.
- Once all the balloons are attached, take a moment to adjust their positions and tighten the fishing line. You can slide the balloons closer together or farther apart to achieve the desired look.
As you attach the balloons to the fishing line, be cautious of any sharp objects that may puncture the balloons and cause them to deflate. Work slowly and carefully to maintain the integrity of the balloons and ensure a secure attachment.
With all the balloons in place, your chandelier is starting to take shape! Now it’s time to proceed to the next step: creating the base for your balloon chandelier.
When creating a balloon chandelier, use a variety of balloon sizes and colors to add visual interest. Hang the chandelier from the ceiling using fishing line for a floating effect.
Read more: How Do I Make Balloon Centerpieces?
Step 4: Create the Base
Creating a sturdy and visually appealing base is crucial for the overall stability and aesthetic of your balloon chandelier. The base will serve as the anchor point from which your chandelier will hang, so it’s important to choose a suitable option that complements your design.
- If you’re opting for a hanging chandelier, you can use a hoop, such as a metal or wooden embroidery hoop, as the base. Choose a size that fits your desired chandelier dimensions and matches your style preference.
- Another option is to use a wire wreath frame as the base. These frames add a unique twist to your chandelier and provide additional structure and support.
- If you prefer a tabletop chandelier, a decorative basket, vase, or even a small plant stand can serve as a solid and stylish base.
- Once you’ve chosen your base, securely attach the fishing line with the balloons to the center of the base using a knot or a secure fastening method. Make sure the fishing line is taut and properly anchored to prevent any imbalance or tilting.
- Consider adding decorative elements to the base, such as ribbons, foliage, or fabric, to enhance the overall look of your chandelier. These additional accents can further complement your chosen theme or color scheme.
Remember to take into account the weight and size of your balloon chandelier when selecting the base. It should be sturdy enough to support the weight of the chandelier and balanced to prevent any tipping or swaying.
With the base in place, your balloon chandelier is coming together beautifully! Now, let’s move on to the next step: hanging the chandelier.
Step 5: Hang the Chandelier
Now that your balloon chandelier is complete, it’s time to hang it and showcase your creation! Properly hanging the chandelier will ensure that it is secure and displays beautifully in your chosen space.
- If you’re hanging the chandelier indoors, locate a sturdy anchor point on the ceiling or overhead structure. This could be a hook or a beam capable of supporting the weight of the chandelier.
- For outdoor hanging, consider using a tree branch, pergola, or gazebo as the anchor point. Just ensure that it’s stable and can withstand any environmental conditions.
- Attach the fishing line of your chandelier to the anchor point using a secure knot or other suitable fastening method. Ensure that the chandelier is hanging straight and centered in the desired space.
- Double-check the stability of the hanging mechanism to ensure that your chandelier is secure. Give it a gentle tug and make any adjustments as necessary to maintain balance.
Take a step back and admire your suspended masterpiece! The balloons floating or hanging elegantly will create a mesmerizing and magical effect in your space.
Before proceeding to the final step, remember to consider any safety precautions, such as avoiding low ceilings or high-traffic areas where the chandelier may be a hindrance or prone to accidents.
Now that your balloon chandelier is perfectly hung, it’s time for the final step: arranging and decorating the balloons to add those finishing touches!
Step 6: Arrange and Decorate the Balloons
With your balloon chandelier hanging beautifully, it’s time to put the final touches on your creation. This step involves arranging and decorating the balloons to add flair and personalization to your chandelier.
- Take a moment to step back and assess the overall arrangement of the balloons. You can adjust their positions by gently sliding them along the fishing line to achieve your desired composition.
- Consider creating a visual flow by arranging the balloons in a gradient of colors or sizes. This can create a dynamic and eye-catching effect.
- If you want to add an extra touch of charm, incorporate decorative accessories such as ribbons, tassels, or fairy lights. Attach them to the fishing line or the base of your chandelier to enhance its beauty.
- Experiment with different patterns and arrangements to find what best suits your personal style and the intended atmosphere of the space. You can create symmetry, asymmetry, or even clusters of balloons for a playful look.
- Ensure that the balloons are evenly spaced and that their heights are varied for a visually appealing arrangement. This will add depth and dimension to your chandelier.
Take the opportunity to step back and view your balloon chandelier from different angles to ensure that it looks balanced and aesthetically pleasing from all perspectives. Make any necessary adjustments to achieve the desired effect.
Once you’re satisfied with the arrangement and decoration of your chandelier, take a moment to appreciate your creativity and hard work. The unique and alluring design will surely be a conversation starter and a focal point in any space.
Now that your balloon chandelier is complete, it’s time to enjoy and showcase your masterpiece. Whether it’s for a special occasion, a child’s birthday party, or simply to bring a touch of whimsy to your everyday life, your balloon chandelier will undoubtedly add charm and elegance to any space.
Congratulations on successfully creating your very own balloon chandelier!
Conclusion
Creating a balloon chandelier is a delightful DIY project that allows you to infuse your space with charm and elegance. By following the step-by-step process outlined in this article, you can easily craft a stunning centerpiece that captivates the attention of anyone who sees it.
From gathering the necessary materials to inflating the balloons, attaching them to the fishing line, creating a stable base, hanging the chandelier, and arranging and decorating the balloons, each step is essential in bringing your vision to life.
Remember to let your creativity shine through by experimenting with different colors, sizes, and decorative accessories. The possibilities are endless, and you can tailor your balloon chandelier to match any theme or occasion.
Whether you’re hosting a magical celebration, sprucing up your living room, or bringing a touch of whimsy to a nursery, a balloon chandelier is a versatile and captivating addition to any space. The floating or hanging balloons create a dreamy atmosphere that enchants both young and old.
So gather your supplies, let your imagination soar, and embark on the journey of creating your own breathtaking balloon chandelier. The joy and satisfaction of crafting such a delightful piece of decor will be well worth the effort.
Get ready to transform your space into a wonderland with the mesmerizing beauty of a handmade balloon chandelier!
Frequently Asked Questions about How To Make A Balloon Chandelier
Was this page helpful?
At Storables.com, we guarantee accurate and reliable information. Our content, validated by Expert Board Contributors, is crafted following stringent Editorial Policies. We're committed to providing you with well-researched, expert-backed insights for all your informational needs.


0 thoughts on “How To Make A Balloon Chandelier”