Home>Furniture>Outdoor Furniture>How To Build A Covered Patio
Outdoor Furniture
How To Build A Covered Patio
Modified: October 18, 2024
Learn how to build a covered patio and complete it with stylish outdoor furniture. Create a cozy and functional outdoor space with our step-by-step guide.
(Many of the links in this article redirect to a specific reviewed product. Your purchase of these products through affiliate links helps to generate commission for Storables.com, at no extra cost. Learn more)
Introduction
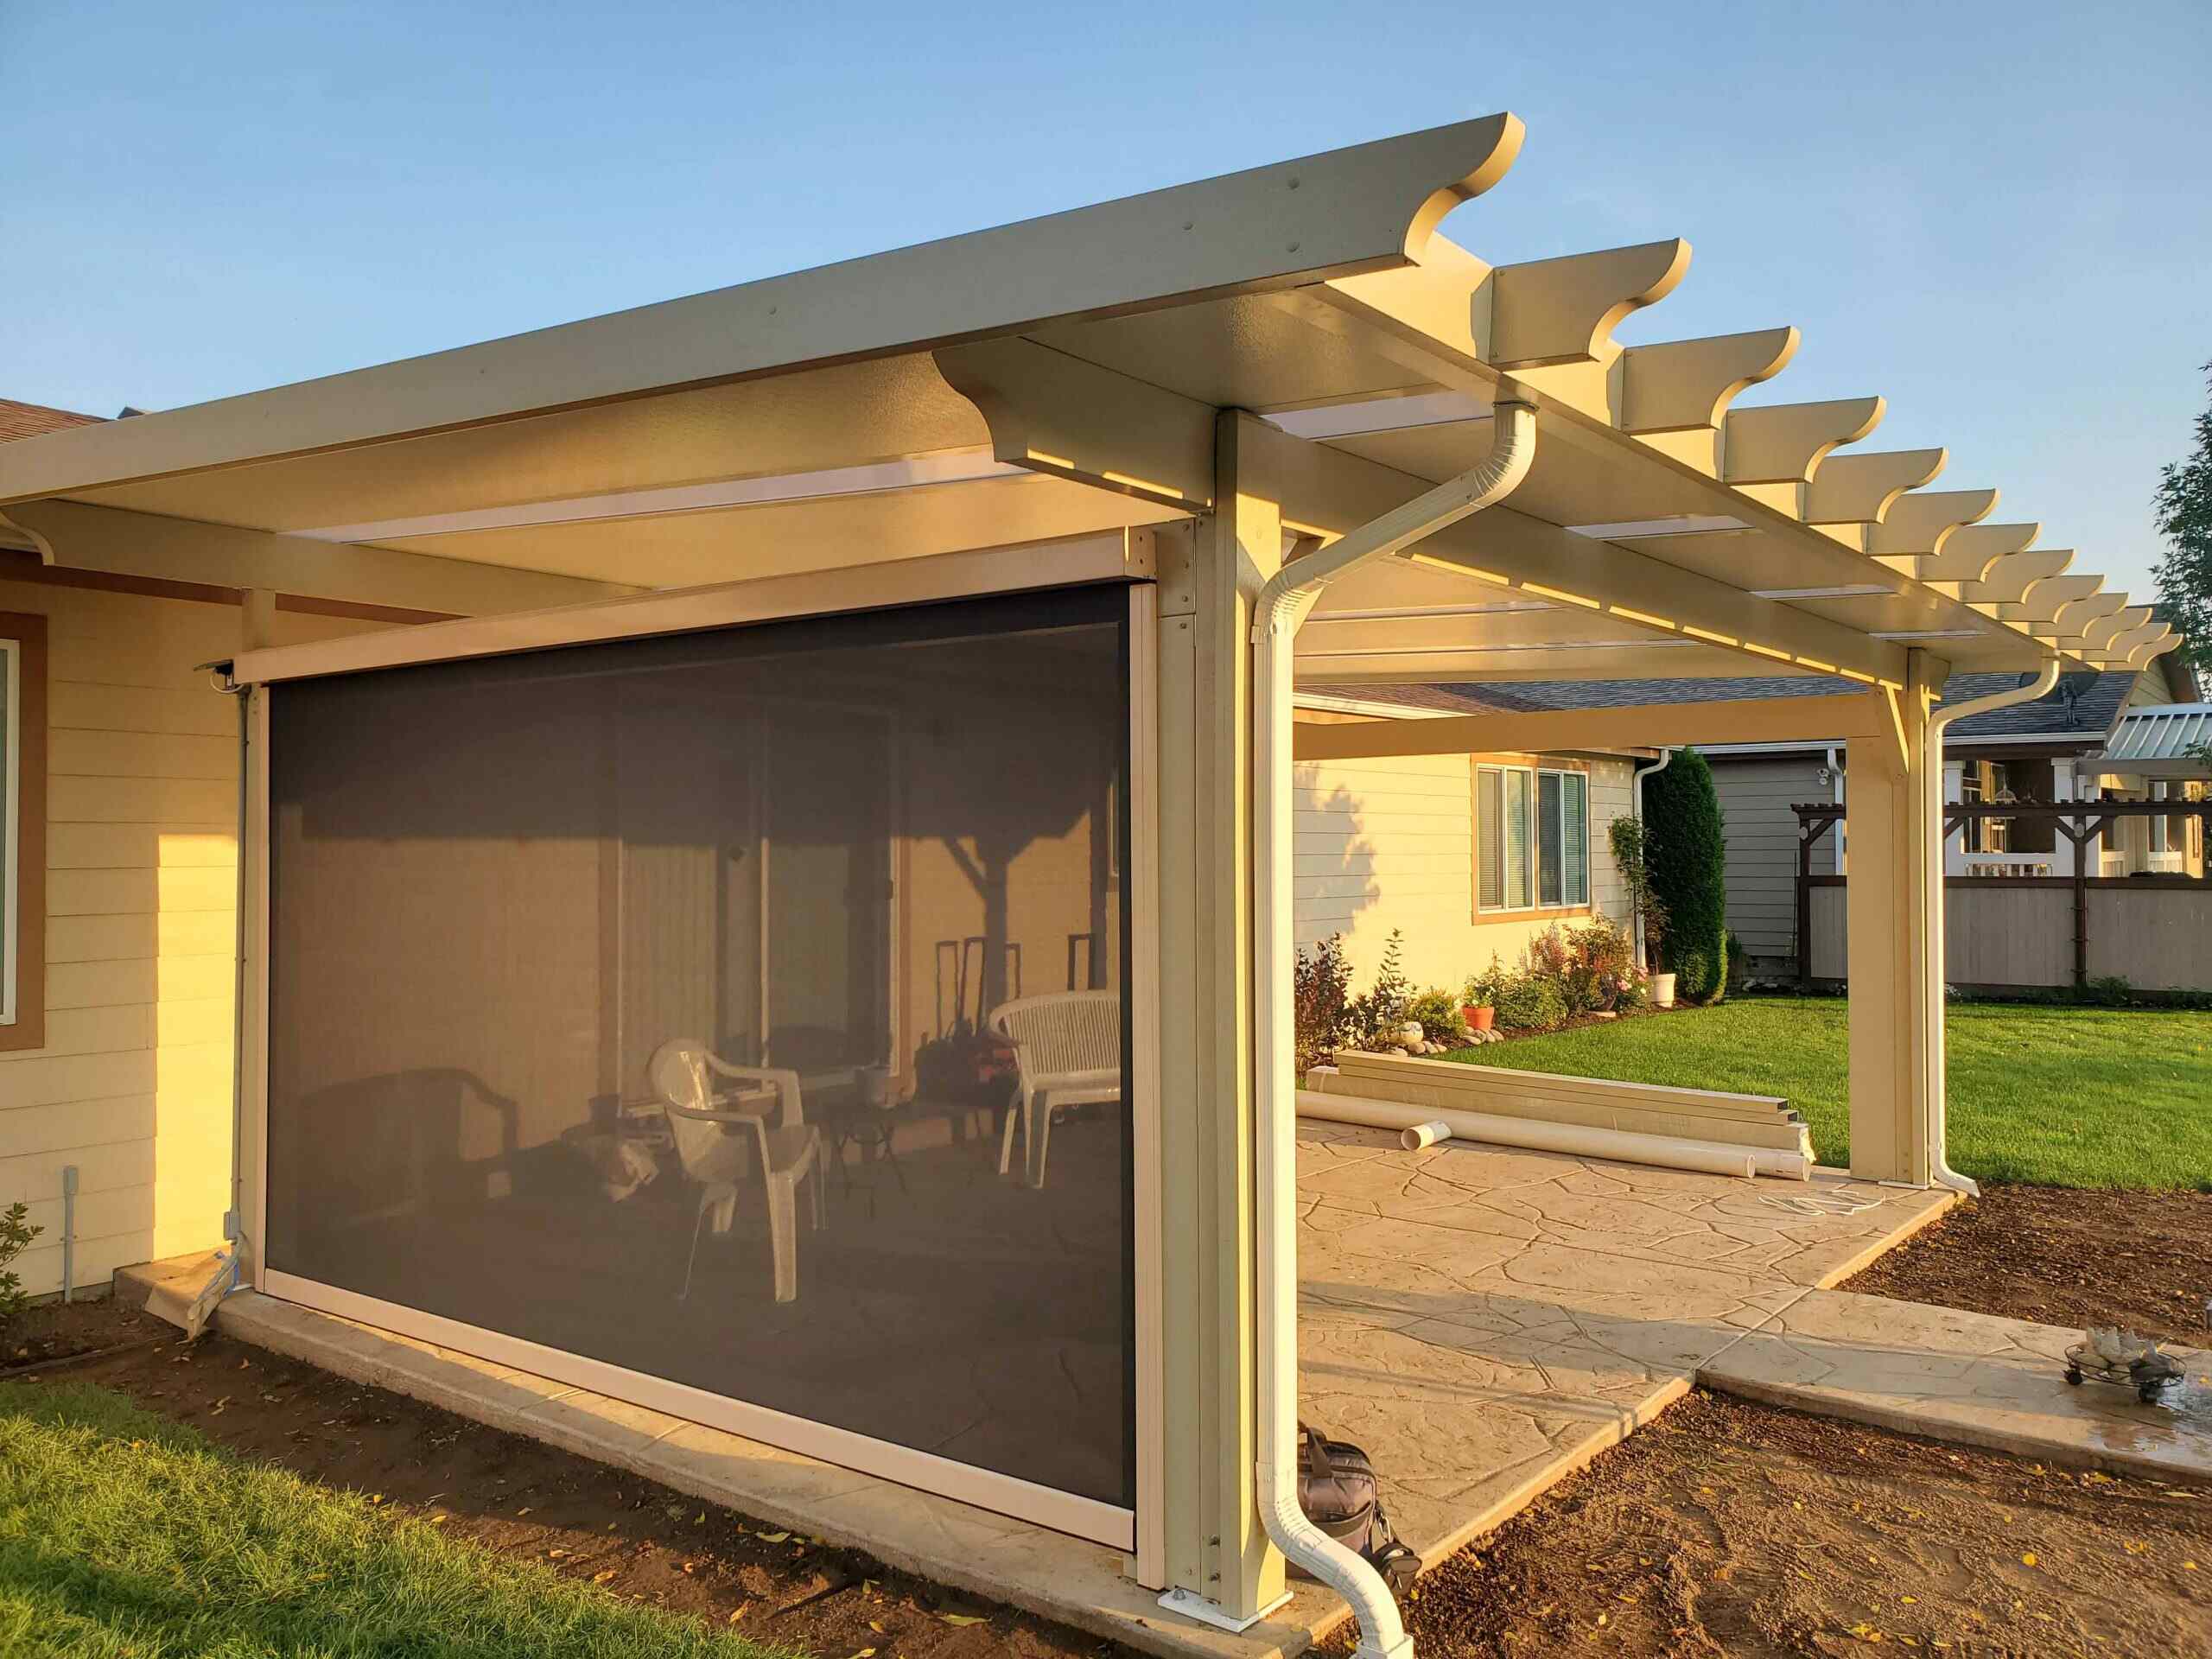
Welcome to the ultimate guide on how to build a covered patio! If you’re looking to create an outdoor space where you can relax and entertain while being protected from the elements, a covered patio is the perfect solution. Whether you want to enjoy the sunshine without getting sunburned or host gatherings outside without worrying about rain, a covered patio offers both functionality and aesthetic appeal.
In this comprehensive guide, we will walk you through the process of planning, designing, and building a covered patio from start to finish. We will cover everything from obtaining permits and regulations to selecting the right materials and tools needed for the project. So, let’s dive in and turn your outdoor dreams into a reality!
Key Takeaways:
- Planning and designing your covered patio is crucial. Consider the purpose, location, size, style, and budget to create a functional and beautiful outdoor space that suits your needs and preferences.
- Regular maintenance and care are essential for preserving the beauty and functionality of your covered patio. Clean regularly, inspect for damage, maintain the roof, and protect your furniture to ensure a safe and enjoyable outdoor space for years to come.
Read more: How To Build A Freestanding Patio Cover
Planning and Design
The first step in building a covered patio is proper planning and design. This stage is crucial as it sets the foundation for the entire project. Here are some key points to consider during the planning and design process:
- Purpose: Determine how you plan to use your covered patio. Will it be used for outdoor dining, lounging, or as a space for entertaining guests? Understanding the purpose will help you make decisions regarding size, layout, and features.
- Location: Consider the location of your patio in relation to your house and surrounding area. Factors such as sun exposure, views, and privacy will play a role in determining the best placement for your covered patio.
- Size and Layout: Measure the available space and determine the size and shape of your patio. Consider how many people you expect to accommodate and any additional features, such as outdoor kitchens or fireplaces.
- Style and Aesthetics: Decide on the overall style and aesthetics of your covered patio. Do you prefer a rustic, contemporary, or traditional look? This will guide your choice of materials, colors, and furnishings.
- Budget: Determine your budget for the project. This will help you make decisions on the materials and features that are within your financial range.
Once you have a clear vision of your covered patio, it’s time to move on to the design phase. Consider creating a sketch or using design software to visualize your ideas. Take into account the flow of the patio, as well as the placement of doors, windows, and existing structures.
During the design process, it’s also essential to think about the integration of lighting, heating, and ventilation systems. These elements will enhance the functionality of your covered patio and allow you to enjoy the space during different seasons and times of the day.
Remember, the planning and design stage is where you have the freedom to be creative and make decisions that best suit your needs and preferences. Take your time, do thorough research, and consult with professionals if needed. With proper planning and design, your covered patio will become a beautiful extension of your home’s living space.
Obtaining Permits and Regulations
Before you start building your covered patio, it is crucial to check with your local authorities about the necessary permits and regulations. Building codes and regulations vary from one area to another, so it’s essential to be aware of any restrictions or requirements that may apply to your project.
Here are some steps to follow when obtaining permits and ensuring compliance with regulations:
- Research Local Building Codes: Start by researching the building codes and regulations in your area. You can usually find this information on the website of your local government or building department. Pay attention to requirements regarding setbacks, height restrictions, and structural requirements.
- Visit your Local Building Department: Schedule a visit to your local building department to discuss your project with a building inspector. They will provide you with specific information on the permits you need, the application process, and any additional requirements.
- Submit Permit Application: Fill out the necessary permit application forms and submit them along with any required documents, such as detailed plans, structural calculations, and site surveys. Ensure that your application is complete and accurate to expedite the approval process.
- Paying Fees: Be prepared to pay permit fees when submitting your application. The fees vary depending on the size and complexity of your project.
- Building Inspections: As you progress through the construction process, you will need to schedule inspections. These inspections ensure that your covered patio complies with building codes and regulations at various stages, such as foundation, framing, electrical, and plumbing.
- Final Approval: Once your project passes all the necessary inspections, you will receive final approval from the building department. This signifies that your covered patio meets all requirements and is safe for use.
It’s important to note that obtaining permits and adhering to regulations is not only a legal requirement but also ensures the safety and structural integrity of your covered patio. Non-compliance may result in fines, delays in construction, or even having to dismantle and rebuild parts of your patio. By following the proper channels and obtaining the necessary permits, you can enjoy your covered patio without any concerns.
Remember to check with your local building authorities for specific guidelines and regulations in your area. Their expertise will guide you through the process and ensure that your covered patio is built to code.
Materials and Tools Needed
Now that you have your plans in place and the necessary permits secured, it’s time to gather the materials and tools needed for your covered patio project. The specific materials and tools required will depend on the design and size of your patio, as well as your personal preferences. However, here are some common materials and tools you may need:
Materials:
- Lumber: Lumber will be needed for framing, supports, and decking. Choose a suitable type of wood that is durable and weather-resistant, such as pressure-treated or cedar.
- Roofing Materials: Depending on your design, you may need roofing materials such as shingles, metal sheets, or polycarbonate panels. Consider the aesthetic appeal and durability of different roofing options.
- Fasteners: Nails, screws, and bolts will be needed to secure the various components together. Make sure to choose corrosion-resistant fasteners suitable for outdoor use.
- Concrete: If your covered patio requires a foundation or footings, you will need concrete for these structural components.
- Waterproofing and Insulation: Consider applying a waterproofing membrane or insulation materials to protect your patio from water damage and create a comfortable environment.
- Finishing Materials: Depending on your design preferences, you may need materials such as paint, stain, sealant, or decorative elements to enhance the appearance of your patio.
Read more: How To Build A Wood Patio Cover
Tools:
- Measuring Tools: A tape measure, level, and square will be essential for accurate measurements and ensuring straight lines and even surfaces.
- Power Tools: Depending on your skill level and the complexity of your project, power tools like a circular saw, drill, and impact driver will be useful. These tools can expedite the building process and make precise cuts and installations.
- Hand Tools: Basic hand tools such as a hammer, screwdrivers, wrenches, and a pry bar will be needed for various tasks throughout the construction process.
- Safety Equipment: Don’t forget to prioritize safety. Safety glasses, gloves, a hard hat, and hearing protection are necessary when working with tools and construction materials.
- Ladder or Scaffolding: Depending on the height of your covered patio, you may need a ladder or scaffolding to access certain areas during construction.
It’s important to invest in high-quality materials and tools, as they will contribute to the longevity and durability of your covered patio. Double-check your plans and consult with professionals or knowledgeable individuals to ensure you have all the necessary materials and tools for a successful project.
Remember to follow manufacturer instructions and safety guidelines when using tools and working with materials. Be cautious and take your time to complete each task with precision and care.
Preparing the Area
Before you can start building your covered patio, it’s important to properly prepare the area where it will be constructed. This step is crucial for ensuring a stable and long-lasting structure. Here are the key steps to follow when preparing the area:
1. Clear the Area:
Remove any existing structures, plants, or debris from the area where the covered patio will be built. Clearing the area will provide you with a clean slate to work with and ensure that there are no obstructions or potential hazards.
2. Level the Ground:
Ensure that the ground where the patio will be constructed is level. Use a laser level or a string level along with wooden stakes to determine any areas that may need to be filled or excavated. A level surface will provide a solid foundation for the structure.
Read more: How Much To Build A Covered Patio
3. Mark the Layout:
Using stakes and string, mark the layout of your covered patio on the ground. This will serve as a guide during the construction process and help you visualize the final positioning of the patio. Double-check the dimensions and ensure that the layout aligns with your design plans.
4. Check for Underground Utilities:
Before digging any holes or trenches, it’s crucial to check for any underground utilities, such as water, gas, or electrical lines. Contact your local utility companies to schedule a visit to mark the location of these utilities. This will prevent any accidental damage during construction.
5. Dig Footings (If Needed):
If your covered patio requires footings for added stability, dig the holes for the footings according to your design and the local building codes. The size and depth of the footings will depend on the size and weight of your patio structure. Ensure that the footings are properly spaced and aligned.
6. Clear Vegetation and Provide Drainage:
If your patio area has vegetation, you may want to consider removing it or providing adequate drainage to prevent water buildup. This will help to keep the area around your patio clean and avoid any potential issues with roots causing damage to the patio structure.
By properly preparing the area, you will create a solid foundation for your covered patio and ensure that it will stand the test of time. Take the time to complete these steps meticulously, as they will significantly impact the stability and longevity of your patio.
Read more: How To Build An Aluminum Patio Cover
Building the Foundation
Now that the area is properly prepared, it’s time to build the foundation for your covered patio. The foundation provides stability and support for the structure, ensuring that it can withstand the elements and remain durable over time. Here are the key steps to follow when building the foundation:
1. Set the Footings:
If your design requires footings, start by pouring concrete into the holes you previously dug. The size and depth of the footings will depend on the size and weight of your patio structure, as well as local building codes. Use a level to ensure that the footings are perfectly horizontal and let the concrete cure according to the manufacturer’s instructions.
2. Create a Crawl Space (Optional):
If your design includes a crawl space beneath the patio, you can construct it at this stage. Use pressure-treated lumber or concrete blocks to create the walls of the crawl space. Ensure that the walls are level and square before securing them in place.
3. Install the Joists:
Once the footings are set and the crawl space is constructed, install the joists. These horizontal beams will provide the framework for the flooring of your covered patio. Use pressure-treated lumber and secure them to the footings or crawl space walls using appropriate connectors or brackets. Space the joists according to your design and local building codes.
Read more: How To Build A Tin Roof Patio Cover
4. Add Support Beams:
Next, install the support beams that will run perpendicular to the joists. These beams will bear the weight of the roof and distribute it evenly across the structure. Use sturdy, pressure-treated beams and attach them to the support posts or walls of your home, depending on your design.
5. Install the Decking:
With the framework in place, it’s time to install the decking material for the flooring of your covered patio. Ensure that the decking material is suitable for outdoor use and is properly treated to withstand the elements. Leave adequate space between the deck boards for proper drainage and expansion.
6. Waterproofing and Insulation:
To protect your foundation and extend the lifespan of your covered patio, consider applying a waterproofing membrane over the joists and between the decking boards. This will prevent water damage and help maintain the structural integrity of the patio. Additionally, you may choose to install insulation material in the crawl space to regulate the temperature and create a more comfortable environment.
By following these steps, you will have a sturdy and reliable foundation for your covered patio. Make sure to double-check the measurements, use high-quality materials, and adhere to local building codes to ensure a safe and long-lasting structure.
Framing the Structure
With the foundation in place, it’s time to move on to framing the structure of your covered patio. The framing provides the framework for the roof and walls, giving your patio its shape and stability. Here are the key steps to follow when framing the structure:
Read more: How To Build A Solar Panel Patio Cover
1. Establish the Perimeter:
Start by establishing the perimeter of your covered patio. Measure and mark the locations where the walls or support posts will be installed. Use a level to ensure that the lines are straight and level, and make any adjustments if necessary.
2. Install the Wall Frames:
If your covered patio design includes walls, begin by installing the wall frames. Use pressure-treated lumber for the wall studs and plates. Cut the lumber to the appropriate lengths and fasten them together using nails or screws. Ensure that the walls are plumb and square, and anchor them securely to the foundation or framing of your home.
3. Install Support Posts:
If your patio design requires support posts, install them according to your plans. Use pressure-treated lumber for the posts, and securely anchor them to the foundation. Ensure that the posts are plumb and level, as they will provide support for the roof structure.
4. Construct the Roof Frame:
Next, construct the roof frame of your covered patio. This can be done using rafters or trusses, depending on your design and preference. Measure and cut the rafters or trusses to the appropriate lengths, ensuring that they are properly spaced and aligned. Use connectors or brackets to secure the rafters or trusses to the wall frames or support posts.
5. Add Additional Support:
Depending on the size and design of your covered patio, you may need to add additional support beams or braces to ensure structural stability. These additional supports will help distribute the weight load and prevent sagging or instability over time.
6. Install Soffits and Fascia:
To give your covered patio a finished look and protect the roof framework, install soffits and fascia. Soffits are installed on the underside of the roof overhang, while fascia is installed along the edge of the roof. These will help to protect the structure from moisture and pests while enhancing the visual appeal of your patio.
By following these steps, you will have a solid and properly framed structure for your covered patio. It’s essential to double-check measurements, ensure that everything is level and plumb, and use appropriate connectors and fasteners to secure the framing. This will create a sturdy and durable structure that will support the roof and walls of your covered patio.
Installing the Roof
Now that the structure is framed, it’s time to install the roof for your covered patio. The roof not only provides protection from the elements but also adds aesthetic appeal to your outdoor space. Here are the key steps to follow when installing the roof:
1. Choose the Roofing Material:
Before you begin the installation process, decide on the roofing material that best suits your design and budget. There are various options available, such as shingles, corrugated metal sheets, polycarbonate panels, or even thatch. Consider factors like durability, aesthetics, and weather resistance when making your choice.
2. Prepare the Roof Surface:
Ensure that the roof surface is clean and free from any debris or protrusions. Remove any loose nails or screws and repair any damaged areas. If needed, install a layer of roofing felt or an underlayment to provide extra protection against moisture.
3. Install the Roofing Material:
Begin installing the selected roofing material according to the manufacturer’s instructions. This may include laying down shingles, securing metal sheets, or connecting polycarbonate panels. Follow the proper technique for each material to ensure a watertight and secure installation.
4. Flashing and Sealing:
To prevent water penetration and protect vulnerable areas, install flashing around any openings or joints in the roof. This may include chimneys, vents, or skylights. Use waterproof sealant or roofing cement to seal the edges and secure the flashing in place.
5. Test for Leaks:
Once the roofing material is installed, it’s important to test for any potential leaks. Spray water on the roof surface and check for any signs of water penetration inside the covered patio. Address any leaks or weak spots immediately to prevent further damage.
Read more: How To Build Patio
6. Gutters and Downspouts:
If your covered patio design includes gutters and downspouts, install them to ensure proper drainage of rainwater. This will prevent water from pooling on the roof surface or around the patio area, protecting the structure and keeping the space dry.
Remember to follow safety guidelines and use appropriate protective gear when working at heights. If you’re not comfortable with roof installation, it’s best to hire a professional to ensure a proper and secure installation.
By carefully installing the roof, you’ll not only provide protection from the elements but also add a beautiful finishing touch to your covered patio. Choose high-quality materials, follow the manufacturer’s instructions, and prioritize proper sealing and drainage to ensure a durable and long-lasting roof for your outdoor space.
Adding Walls or Screens
Adding walls or screens to your covered patio can provide privacy, protection from wind and insects, and an enhanced sense of enclosure. Whether you prefer a fully enclosed space or a more open design, here are the key steps to follow when adding walls or screens to your patio:
1. Decide on the Level of Enclosure:
Determine how much enclosure you want for your covered patio. This could range from partial walls or screens to fully enclosed walls with windows or doors. Consider your specific needs for privacy, ventilation, and protection from the elements.
2. Choose the Material:
Select the material that best suits your design and functional requirements. Common options for patio walls or screens include wood, metal, glass, mesh, or fabric. Consider factors like durability, aesthetics, and maintenance when choosing the material.
Read more: How To Hang Patio Lights On A Covered Patio
3. Measure and Plan:
Measure the dimensions of the areas where the walls or screens will be installed. Plan the placement of openings like doors or windows, ensuring they are in the desired locations for access and natural light. Use these measurements and plans to determine the quantity of materials needed.
4. Install the Posts:
If your design includes walls or screens with support posts, start by installing the posts. Use pressure-treated lumber or metal posts and securely anchor them to the flooring or framing of your covered patio. Ensure the posts are plumb and level, using a level and shims if necessary.
5. Attach the Panels:
Once the posts are in place, attach the wall or screen panels to them. Depending on the material you have chosen, you may need to use nails, screws, or clips to secure the panels to the posts. Ensure that the panels are properly aligned and evenly spaced for a clean and professional look.
6. Add Doors or Windows:
If you desire doors or windows in your enclosed space, install them according to the manufacturer’s instructions. Choose weather-resistant materials and ensure proper sealing to keep the space waterproof and secure.
Read more: How To Cover Patio Doors
7. Finish and Customize:
Apply any finishing touches to the walls or screens, such as paint or stain, to enhance their appearance and durability. Consider adding custom features like built-in seating, shelves, or planters to make the space even more functional and appealing.
Adding walls or screens to your covered patio allows you to create a cozy and secluded outdoor space that meets your specific needs. Customization options are nearly endless, so use your creativity to design a space that reflects your personal style and provides a comfortable environment for relaxation and entertainment.
Flooring and Finishing Touches
When it comes to flooring and finishing touches for your covered patio, there are numerous options to consider to enhance the aesthetics and functionality of the space. Follow these steps to create a beautiful and inviting outdoor living area:
1. Choose the Flooring Material:
Select a flooring material that suits your design, budget, and desired level of maintenance. Common options include stone pavers, concrete, tile, wood decking, or composite materials. Consider factors like durability, slip resistance, and weather resistance when making your decision.
2. Prepare the Surface:
Ensure that the surface is properly prepared before installing the flooring. If necessary, clean and level the existing surface or create a solid base with gravel or sand. This will help to ensure a smooth and stable foundation for your chosen flooring material.
Read more: How To Cover Patio Furniture
3. Lay the Flooring:
Install the chosen flooring material according to the manufacturer’s instructions. This may involve laying pavers or tiles, pouring and finishing concrete, or securing decking planks. Take care to align and space the flooring material properly for an aesthetically pleasing result.
4. Add Lighting:
Illuminate your covered patio with strategic lighting to create a warm and inviting atmosphere. Install overhead lighting, such as pendant lights or recessed lighting, to provide functional lighting for the entire space. Consider adding accent lighting, such as string lights or solar-powered lanterns, for a cozy and ambient effect.
5. Furnish and Decorate:
Select outdoor furniture and décor that complements your style and serves your desired purpose. Consider factors such as comfort, durability, and weather resistance when choosing furniture. Add cushions, throw pillows, and outdoor rugs to create a cozy and inviting seating area. Use plants, artwork, and accessories to personalize and enhance the visual appeal of the space.
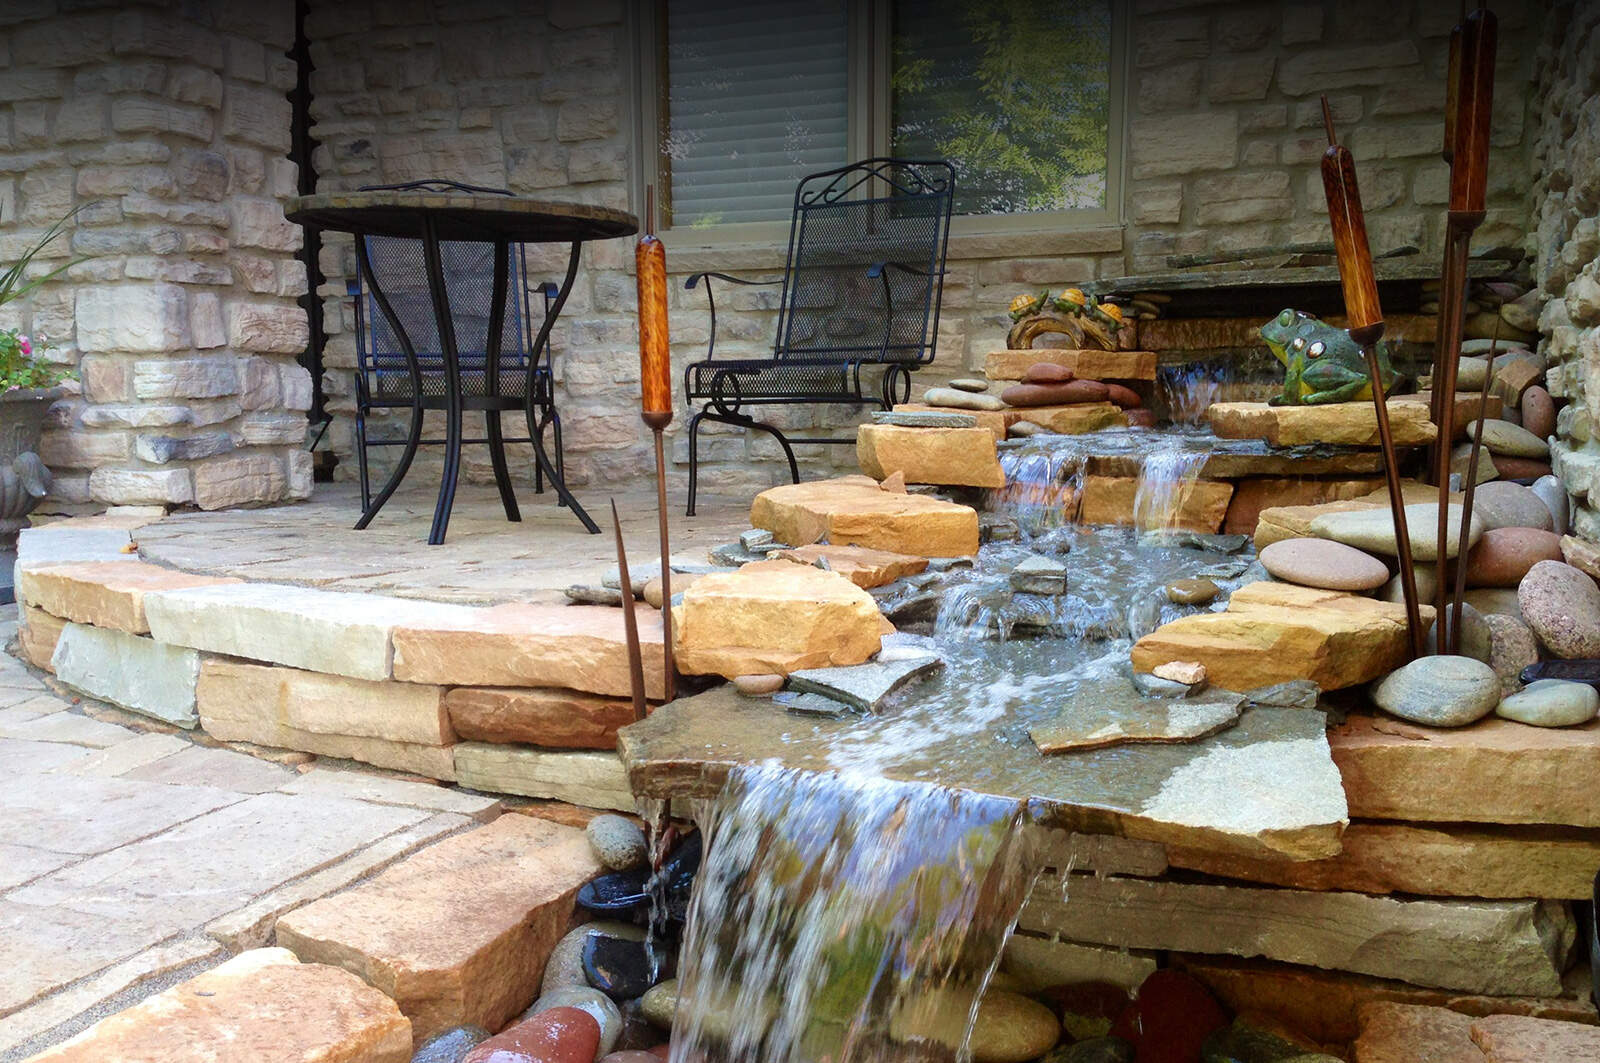
6. Install Outdoor Features:
Consider adding additional features to your covered patio to make it more functional and enjoyable. This could include an outdoor kitchen, a grill, a fire pit, or a water feature. These features can create a focal point and enhance the overall experience of your outdoor living space.
By carefully selecting the flooring material and paying attention to the finishing touches, you can transform your covered patio into a stylish and comfortable retreat. Remember to consider durability, aesthetics, and functionality when choosing materials and decor, and take the time to personalize the space to suit your unique style and preferences.
Read more: How To Build Patio Rugs
Maintenance and Care
Regular maintenance and care are essential to keep your covered patio in excellent condition and prolong its lifespan. By following these guidelines, you can ensure that your outdoor space remains beautiful, functional, and safe:
1. Clean Regularly:
Sweep or leaf blow the patio surface regularly to remove dirt, leaves, and debris. This will help prevent staining and maintain a clean appearance. Use a hose or pressure washer to thoroughly clean the flooring, walls, and screens periodically, removing any built-up grime or mildew.
2. Inspect for Damage:
Regularly inspect the structure, walls, roofing, and flooring for any signs of damage, including cracks, loose boards, or loose fasteners. Address any issues promptly to prevent further damage and ensure safety.
3. Clean and Maintain the Roof:
If you have a roof on your covered patio, perform regular roof inspections. Remove any debris that may accumulate on the roof, and check for signs of damage or leaks. Replace any damaged shingles or repair any damaged roof sections as necessary.
Read more: How To Build A Raised Patio
4. Seal and Stain:
If your patio has wooden surfaces, such as decking or walls, it’s important to seal and stain them periodically to protect against moisture, UV damage, and insect infestations. Follow the manufacturer’s recommendations for the appropriate sealant and stain products, and reapply as needed.
5. Check and Maintain Drainage:
Ensure that your patio has proper drainage to prevent water from pooling or damaging the structure. Clean out gutters and downspouts regularly to prevent clogs. If necessary, adjust the grading around the patio to ensure water flows away from the structure.
6. Protect Furniture and Accessories:
If you have outdoor furniture, cushions, or accessories on your covered patio, protect them from the elements. Consider using covers or storing them indoors during inclement weather or the offseason to prevent damage and prolong their lifespan.
7. Trim Surrounding Vegetation:
Regularly trim any trees, shrubs, or plants near your patio to prevent them from overhanging or touching the structure. This will minimize the risk of branches or leaves causing damage or creating a fire hazard.
Regular maintenance and care will keep your covered patio in excellent condition, extend its lifespan, and ensure a safe and enjoyable outdoor space for years to come. If you’re unsure about any maintenance tasks or notice significant damage, it’s always best to consult with professionals to address the issue properly.
Read more: What Is A Patio Cover Called
Conclusion
Congratulations on completing this comprehensive guide on how to build a covered patio! By following the steps outlined in this guide, you have learned how to plan and design your patio, obtain the necessary permits, gather the materials and tools needed, prepare the area, build the foundation, frame the structure, install the roof, add walls or screens, and finish off with flooring and the necessary maintenance and care.
A covered patio can be a wonderful addition to your outdoor space, providing a versatile and comfortable area for relaxing, entertaining, and enjoying the beauty of the outdoors while protected from the elements. Whether you envision a simple and cozy space or a more elaborate structure, the possibilities are endless.
Remember, as you embark on your covered patio project, take your time and pay attention to detail. Proper planning, design, and adherence to regulations and building codes will ensure a successful outcome. Choose high-quality materials, use the proper tools, and follow the manufacturer’s instructions for installation. Consider factors like aesthetics, functionality, and durability when selecting the flooring, walls, roofing, and furnishings for your patio.
After completing your covered patio, remember to perform regular maintenance and care to preserve its beauty and functionality. Clean regularly, inspect for damage, maintain the roof, seal and stain wooden surfaces, ensure proper drainage, and protect your furniture and accessories from the elements. By doing so, you will prolong the lifespan of your patio and continue to enjoy its benefits for years to come.
We hope that this guide has provided you with valuable knowledge and insights to confidently embark on your covered patio project. Enjoy the process of creating an outdoor space that reflects your personal style and offers the perfect retreat for relaxation and entertainment. So go ahead, start planning, and turn your outdoor dreams into reality!
Frequently Asked Questions about How To Build A Covered Patio
Was this page helpful?
At Storables.com, we guarantee accurate and reliable information. Our content, validated by Expert Board Contributors, is crafted following stringent Editorial Policies. We're committed to providing you with well-researched, expert-backed insights for all your informational needs.
0 thoughts on “How To Build A Covered Patio”