Home>Furniture>Outdoor Furniture>How To Build A Patio Cover Attached To A House
Outdoor Furniture
How To Build A Patio Cover Attached To A House
Modified: October 31, 2024
Learn how to build an outdoor-Furniture patio cover attached to your house with our step-by-step guide. Enhance your outdoor living space and enjoy the comfort and protection!
(Many of the links in this article redirect to a specific reviewed product. Your purchase of these products through affiliate links helps to generate commission for Storables.com, at no extra cost. Learn more)
Introduction
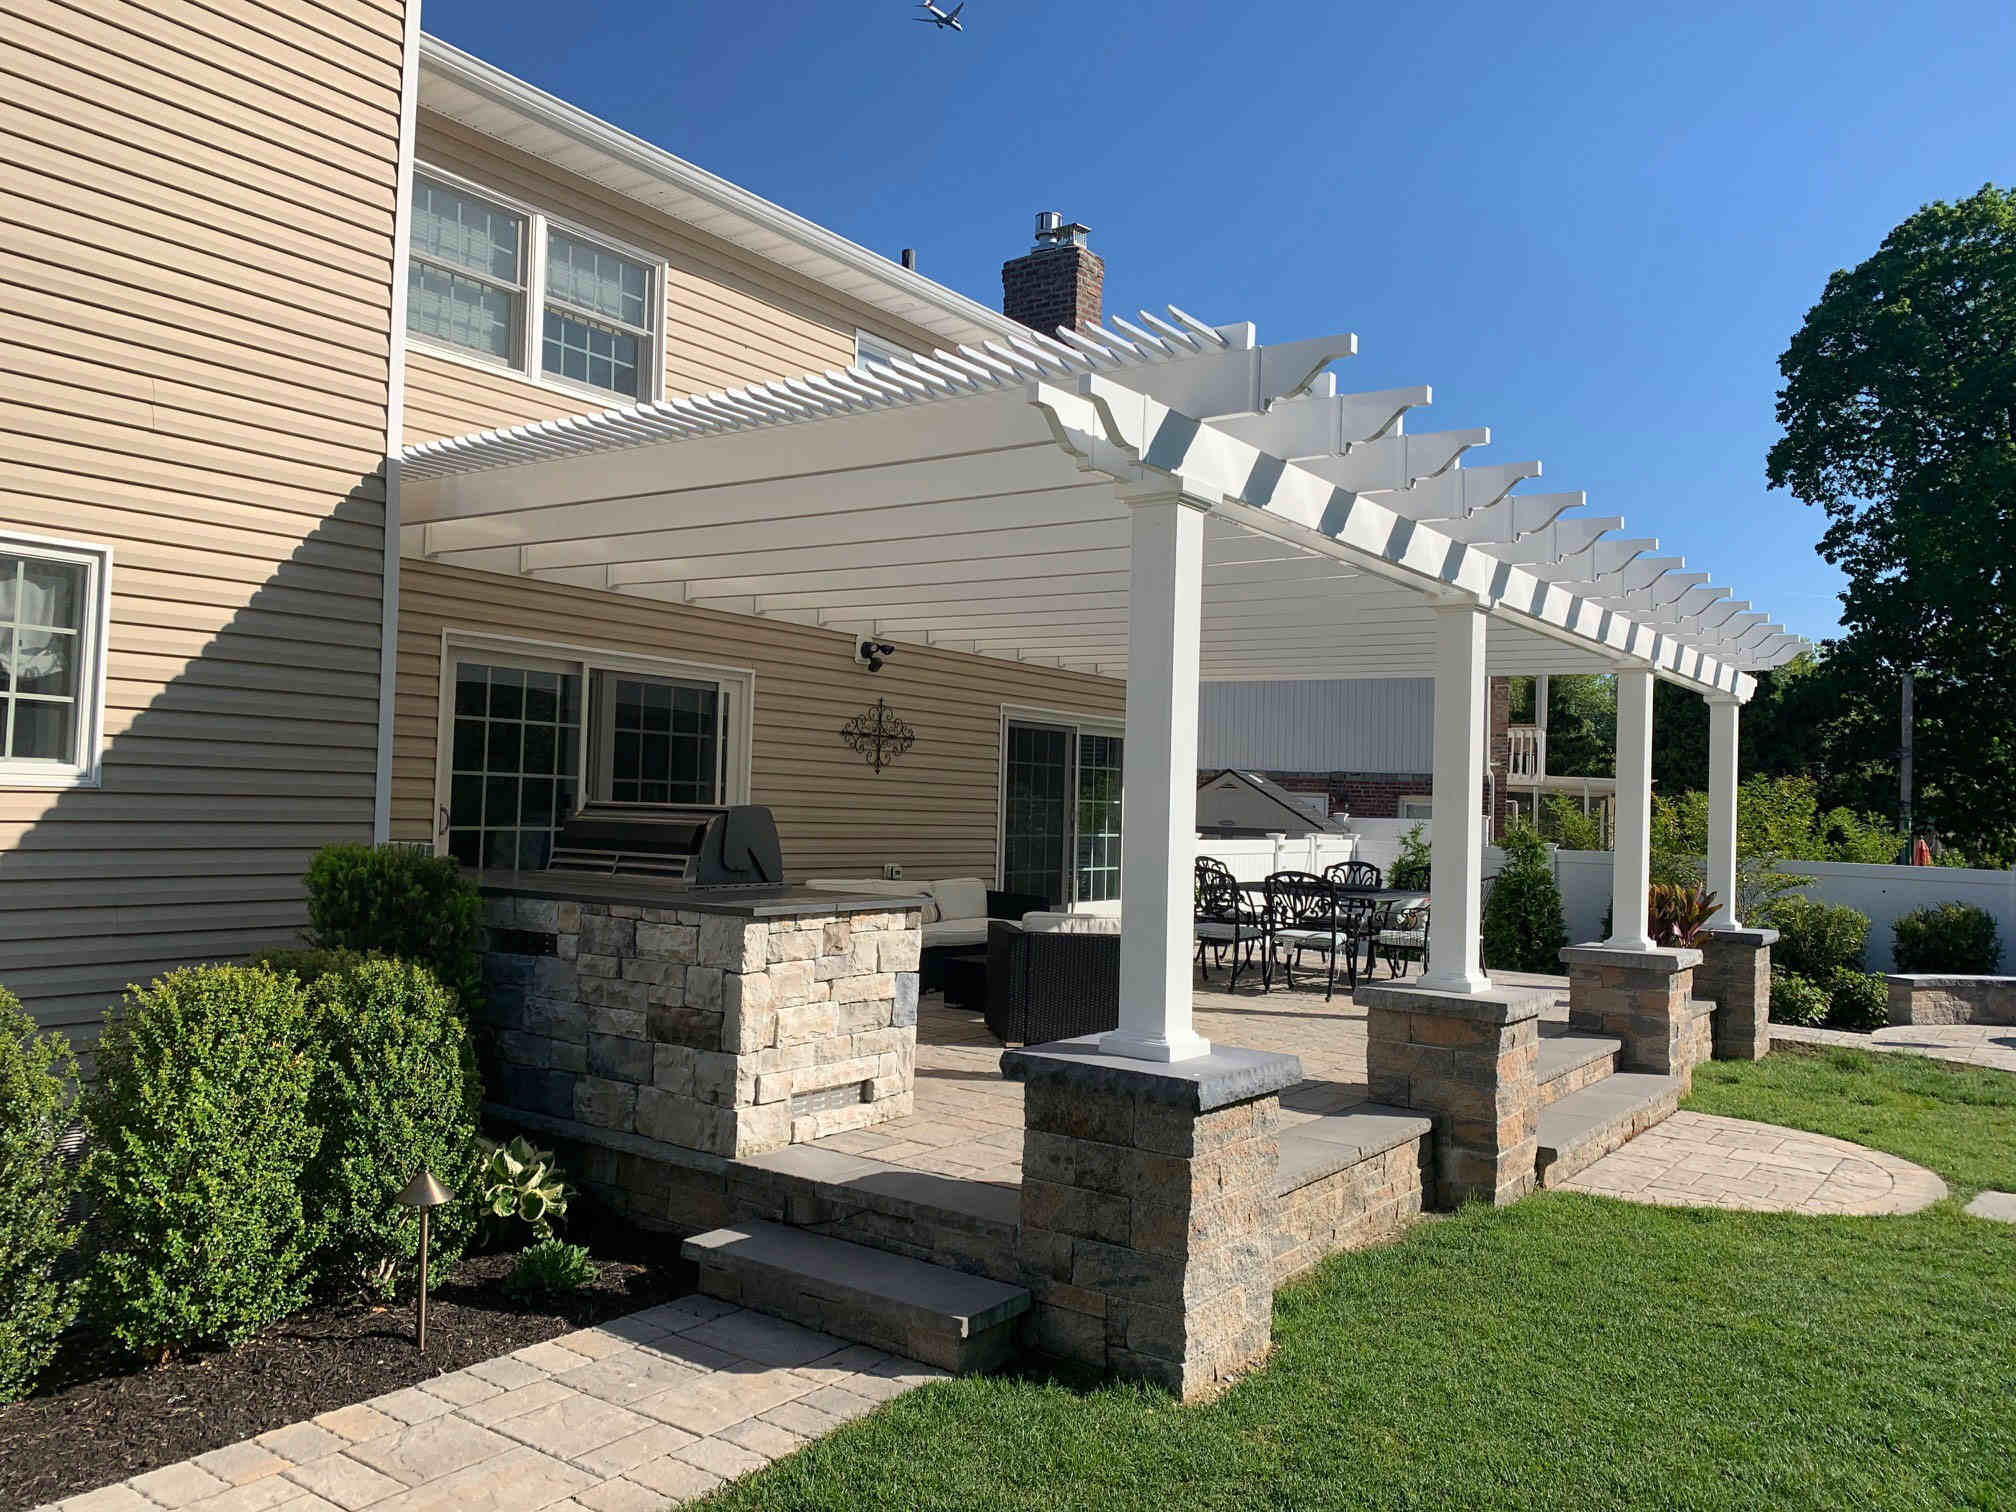
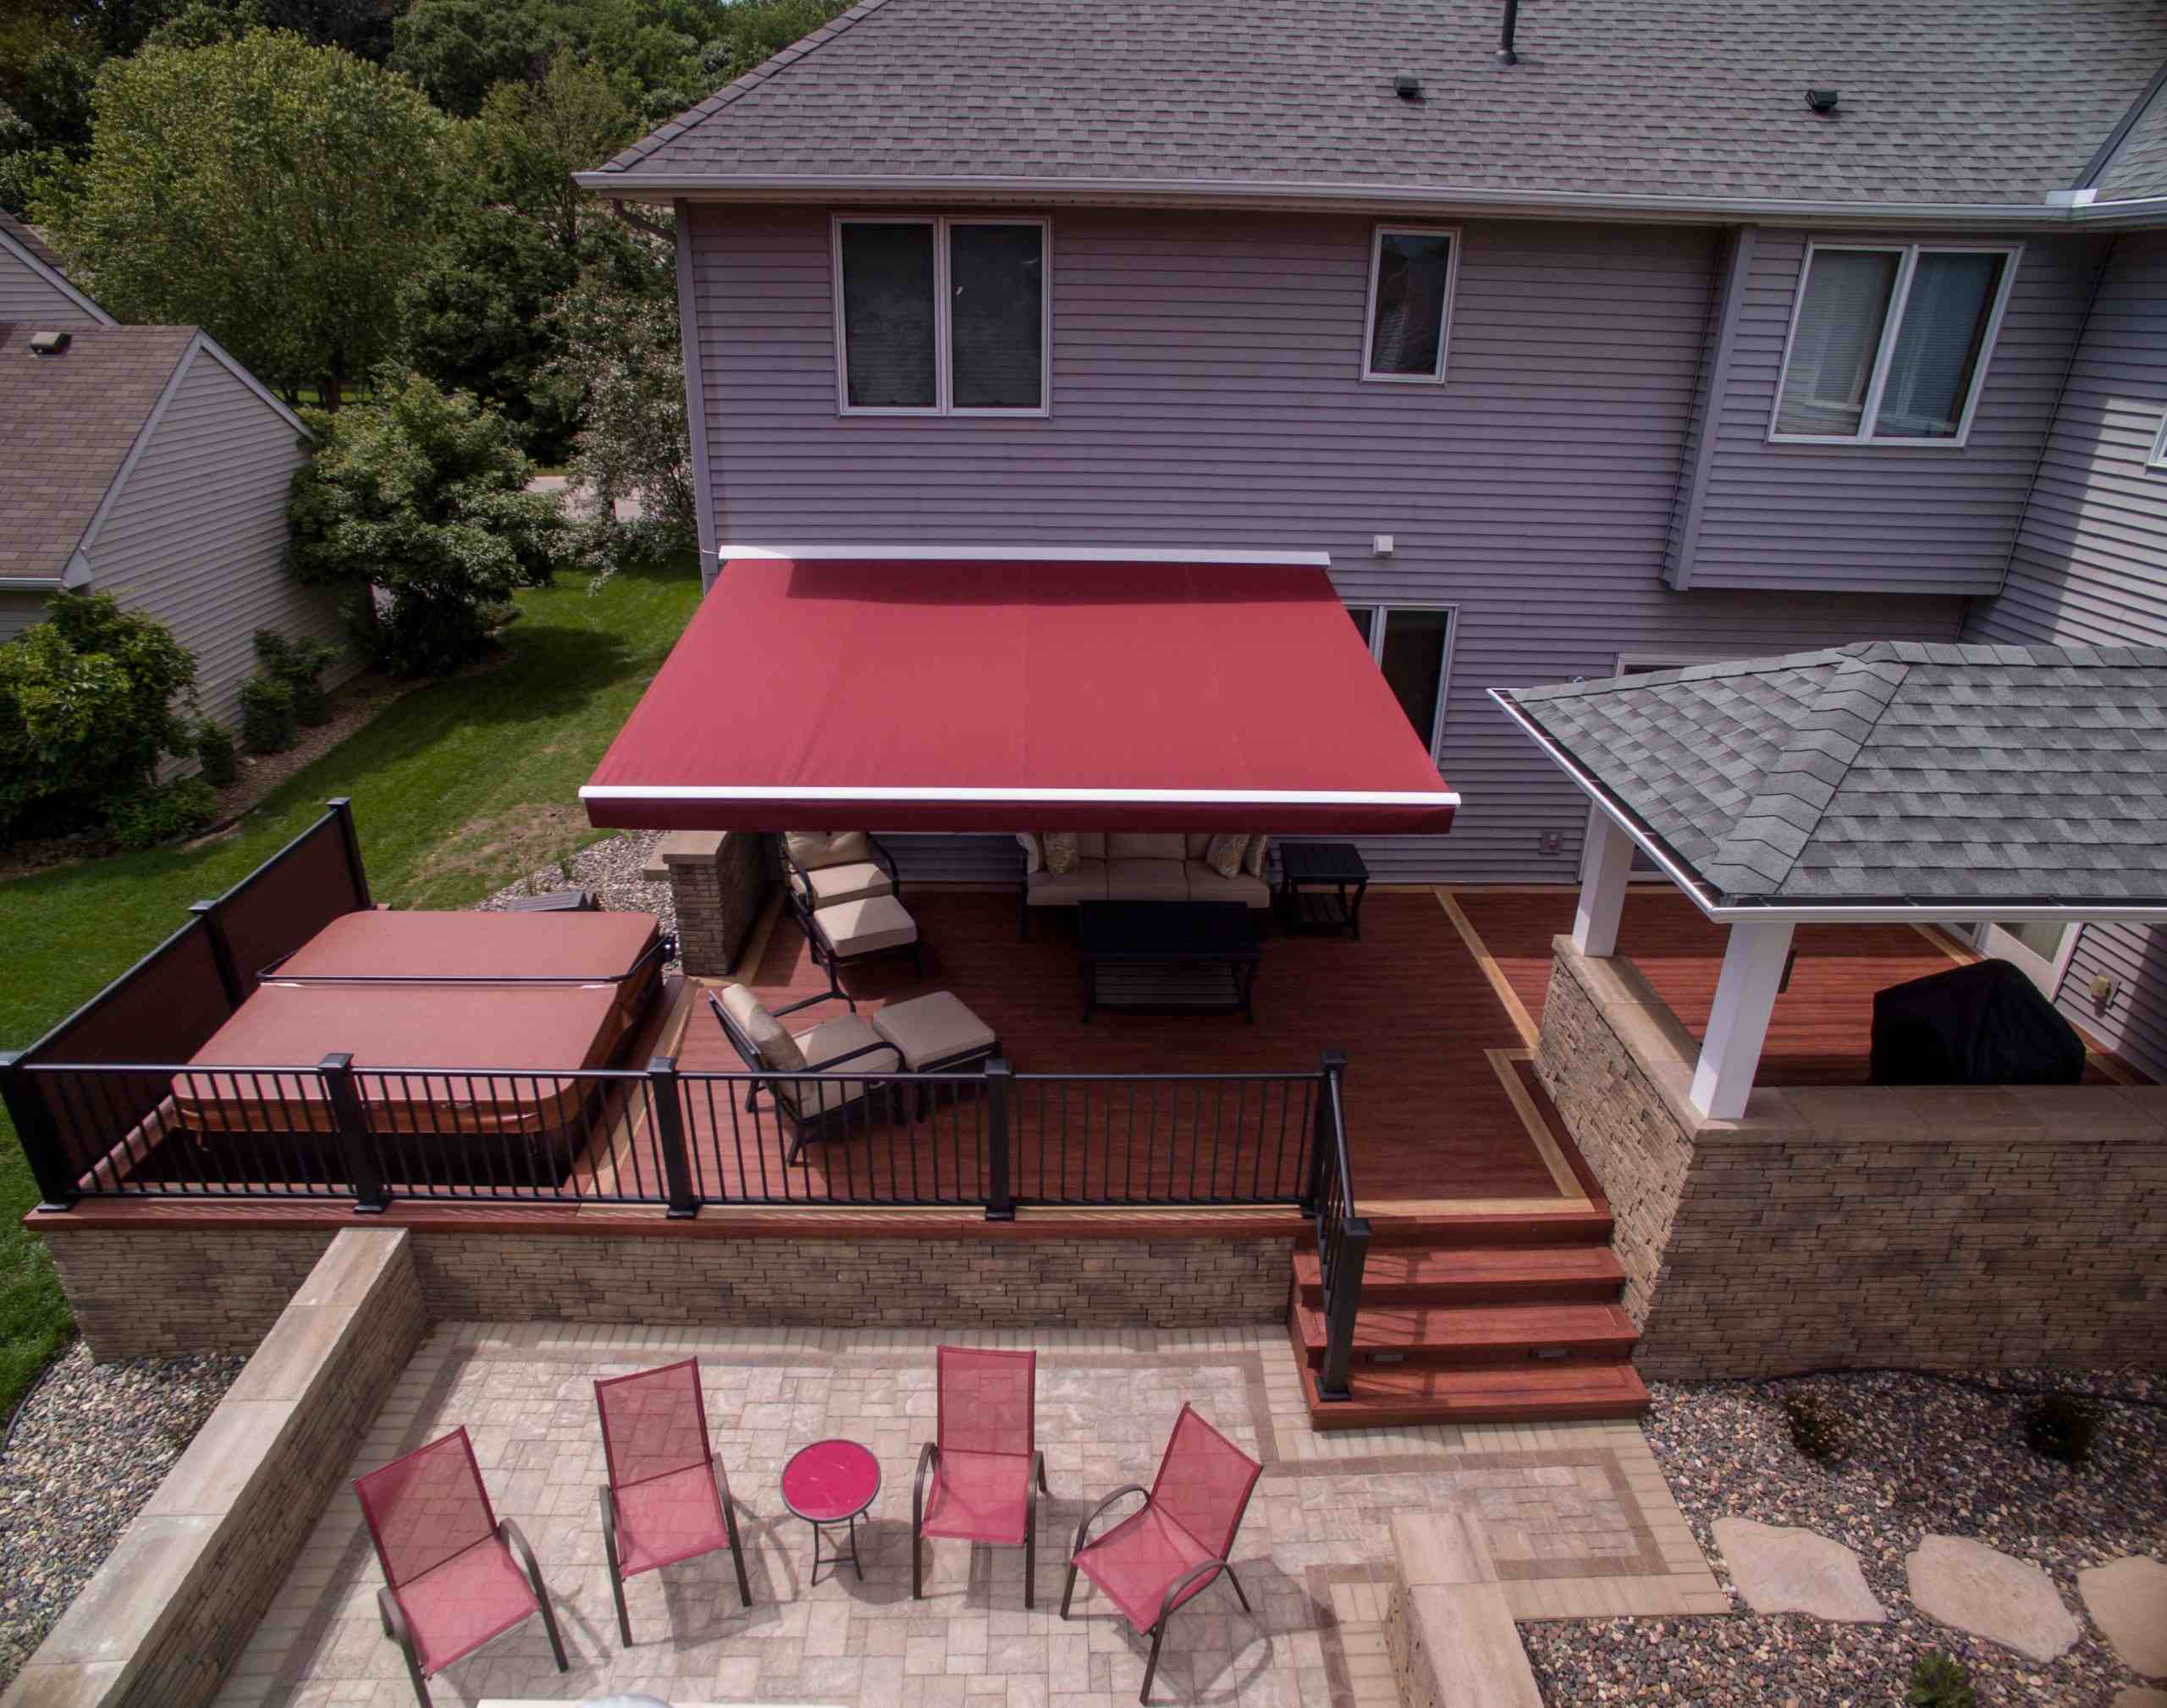
Having a patio cover attached to your house is a great way to extend your living space and create a comfortable outdoor area for relaxation or entertaining. Whether you want to enjoy the shade on a sunny day or protect your patio furniture from the elements, a well-built patio cover can enhance the beauty and functionality of your outdoor area.
In this article, we will guide you through the process of building a patio cover attached to your house. We will provide step-by-step instructions and valuable tips to help you plan, prepare, and execute the construction with confidence. By following these guidelines, you can create a sturdy and visually appealing patio cover that will withstand the test of time.
Before diving into the construction process, it is crucial to understand the purpose of your patio cover. Are you looking for a sheltered space to relax and enjoy the outdoors? Or is it primarily intended to protect your patio furniture or outdoor kitchen equipment? Identifying the purpose will help determine the design and materials needed for your project.
Additionally, familiarize yourself with the local building codes and regulations in your area. Different regions may have specific requirements for patio covers, such as height restrictions, setback requirements, or the need for permits. Ensure that you comply with all the necessary regulations to avoid any issues down the line.
After understanding the purpose and checking the local building codes, it is essential to gather all the necessary permits and permissions before starting the construction. Contact your local building department to determine the specific requirements and documentation you need to obtain. Taking care of these administrative tasks beforehand will save you time and potential headaches later in the process.
Now, let’s delve into the details of building a patio cover attached to a house, including the materials and tools you will need, how to choose the right design, measuring and marking, preparing the existing structure, installing the posts and supports, building the roof frame, installing the roofing material, and adding finishing touches. Let’s get started on creating the perfect outdoor space for your home!
Key Takeaways:
- Proper planning, understanding the purpose, and obtaining necessary permits are crucial before building a patio cover attached to a house. This ensures compliance with regulations and a clear vision for the project.
- Choosing the right design, materials, and tools, as well as accurately measuring and marking the patio area, are essential steps in constructing a sturdy and visually appealing patio cover.
Read more: How To Build A Carport Attached To House
Planning and Preparation
Before you start building a patio cover attached to your house, proper planning and preparation are crucial. This stage ensures that you have a clear understanding of the purpose, comply with local building codes, and acquire the necessary permits and permissions.
Understanding the Purpose
First and foremost, consider the purpose of your patio cover. Are you looking to create a shaded space to relax and enjoy outdoor activities with your family and friends? Perhaps you want to protect your patio furniture from the sun, rain, or snow. Understanding the purpose will help you determine the design, size, and materials needed for your patio cover.
Are you interested in a solid roof or a more open structure that allows sunlight to filter through? Do you prefer a modern or traditional design? Consider your aesthetic preference and how the patio cover will harmonize with the existing architecture and style of your home.
Checking Local Building Codes
Next, you’ll need to familiarize yourself with local building codes and regulations. These codes vary from one jurisdiction to another and may have specific requirements for patio covers. Some common considerations include height restrictions, setback requirements from property lines, and guidelines for the materials used.
Contact your local building department or visit their website to obtain a copy of the building codes. It is important to adhere to these regulations to ensure the safety and structural integrity of your patio cover. Building without following the code may lead to fines, penalties, or the need to tear down and rebuild the structure.
Gathering Necessary Permits and Permissions
Once you have a clear understanding of the purpose and local building codes, it’s time to gather the necessary permits and permissions. Building without the appropriate permits can result in legal issues and complications in the future.
Contact your local building department to determine the specific permits you need for your patio cover project. Depending on the scope and complexity of the construction, you may need a building permit, electrical permit, or plumbing permit. Each permit has its own requirements and fees, so make sure to inquire about the process and associated costs.
In addition to permits, you may also need to seek approval from HOA (Homeowner’s Association) if applicable. Check the bylaws or contact the association to understand their regulations regarding outdoor constructions.
Keep in mind that the approval process may take some time, so it’s important to plan accordingly. Allow ample time for permit review, inspections, and any revisions required by the building department.
By understanding the purpose, checking local building codes, and obtaining the necessary permits and permissions, you are setting the foundation for a successful patio cover project. These initial steps ensure that you are compliant with regulations and have a clear vision of what you want to achieve. Now, you are ready to move on to the next phase of selecting the materials and tools required for your project.
Read more: How To Attach A Patio Roof To A House
Materials and Tools Required
List of Materials
Building a patio cover attached to your house requires a variety of materials to ensure a sturdy and durable structure. Here is a list of the essential materials you will need:
- Pressure-treated lumber: Used for framing the patio cover and supporting structures.
- Roofing materials: Options include asphalt shingles, metal panels, polycarbonate sheets, or thatch for a more tropical aesthetic.
- Fasteners: Nails, screws, and bolts to secure the different components together.
- Concrete mix: Required for cementing the posts and supporting base.
- Flashings: Metal sheets used to prevent water leakage at joints and intersections.
- Patio cover brackets and connectors: Essential for joining and reinforcing the various parts of the structure.
- Waterproofing material: To protect the wood from moisture, you can use a waterproofing membrane or a sealant.
- Paint or stain: Used to enhance the appearance of the patio cover and protect the wood from weathering.
- Gutter system: If you want to collect and redirect rainwater, you will need gutters, downspouts, and other related components.
- Miscellaneous: Depending on your design and preferences, other materials may include lighting fixtures, decorative elements, or additional support brackets.
Make sure to calculate the quantity of materials based on your project’s dimensions and specifications. It’s always a good idea to add a little extra to account for any errors or adjustments during the construction process.
Required Tools
In addition to the materials, you will need the following tools to effectively build your patio cover:
- Tape measure: For accurately measuring the dimensions of the patio area.
- Level: To ensure that the patio cover is straight and even.
- Hammer: Used for driving nails into the wood.
- Drill: Equipped with drill bits for making holes and screwing fasteners.
- Saw: Whether a circular saw or a miter saw, a reliable cutting tool is necessary for trimming and shaping the lumber.
- Socket set: Used for tightening bolts and nuts.
- Post-hole digger: For digging deep and sturdy holes to support the patio cover’s posts.
- Concrete mixing equipment: Depending on the scale of your project, you may need a wheelbarrow, shovel, and hoe for mixing and pouring concrete.
- Ladder or scaffolding: To access higher areas and work safely at heights.
- Safety equipment: Ensure you have safety glasses, gloves, and a dust mask for protection during construction.
Having access to these tools will facilitate the construction process and ensure that you can work efficiently and safely.
Now that you have a list of materials and tools needed, it’s time to move on to the next step: choosing the right design for your patio cover. This will determine the overall look and functionality of your outdoor space.
Choosing the Right Design
Read more: How To Build A Covered Patio
Considering Aesthetic and Functional Requirements
When it comes to choosing the design for your patio cover, you’ll need to consider both the aesthetic and functional aspects. The design should complement the architecture of your house while ensuring that it meets your specific needs.
Take into account the style and theme of your home. If you have a modern house, you might opt for a sleek and minimalist design. Traditional homes may call for a more ornate or rustic look. Consider the materials and colors that will harmonize with your existing outdoor space.
It’s also important to think about the functionality of your patio cover. Will it be primarily used for shelter from the sun or rain? Will it serve as an extension of your living space, providing a comfortable area for entertaining guests? Determine the primary purposes of your patio cover and ensure that the design meets those requirements.
Selecting the Appropriate Roofing Material
The roofing material you choose for your patio cover will have a significant impact on its durability, appearance, and maintenance requirements. Here are some popular options for patio cover roofing:
- Asphalt shingles: A common and cost-effective choice, asphalt shingles are available in an array of colors and can complement various architectural styles.
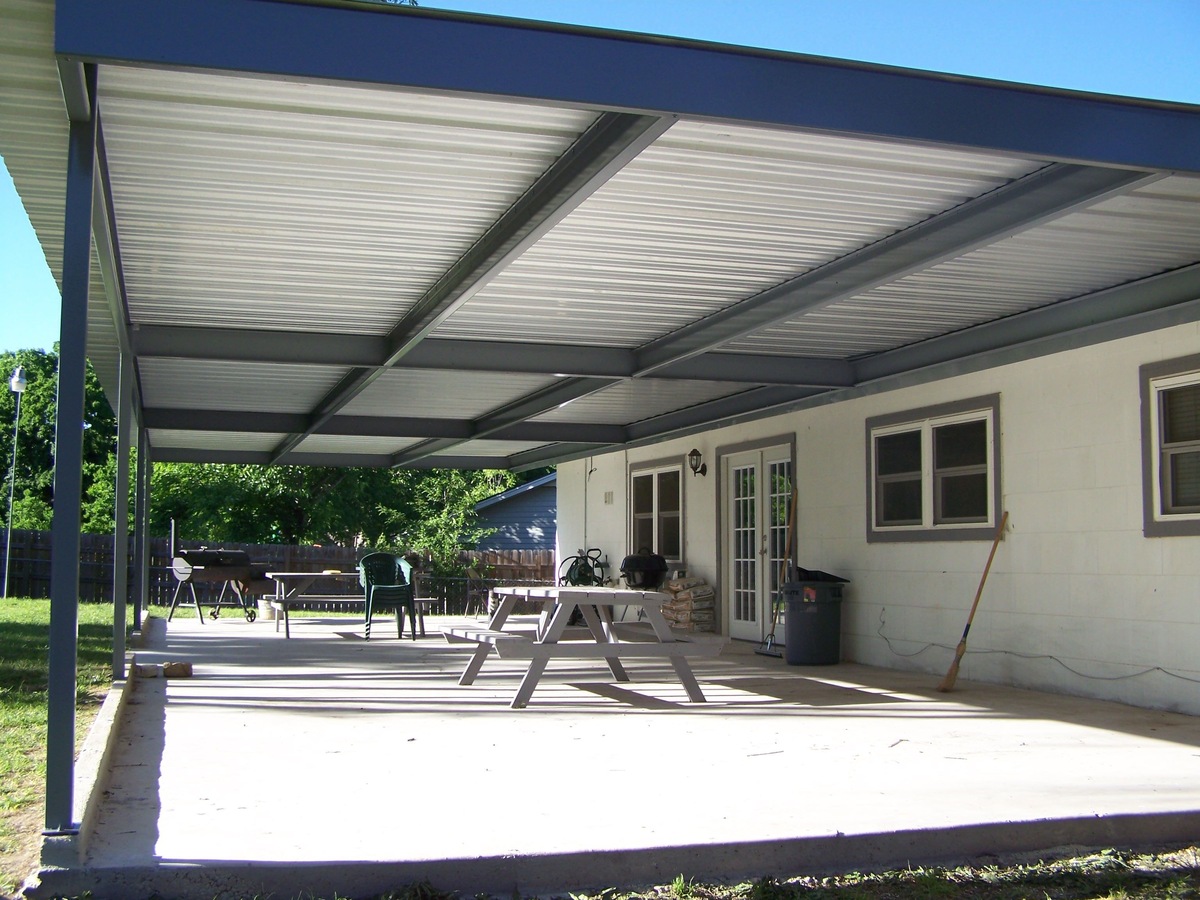
- Metal panels: Metal roofing offers durability and a modern aesthetic. It is available in different metals such as aluminum, steel, or copper, each with its unique advantages.
- Polycarbonate sheets: These translucent panels allow natural light to filter through while protecting from UV rays. They are lightweight and require minimal maintenance.
- Thatch: For those seeking a more tropical and exotic appeal, thatch is a traditional roofing material made from dried plant materials. It provides great insulation and a unique look.
Consider the climate conditions in your area when selecting the roofing material. If you experience heavy rain or snow, choose a material that offers proper water drainage and can withstand the elements.
Designing for Proper Drainage
Proper drainage is essential for preventing water accumulation and potential damage to your patio cover. When designing your patio cover, make sure to incorporate a slope into the roof to allow rainwater to drain effectively.
A minimum slope of 1/4 inch per foot is recommended to ensure proper water drainage. This means that for every horizontal foot, the roof should have a vertical rise of 1/4 inch. By sloping the roof, you can prevent water from pooling and causing structural issues or leaks.
In addition to the roof slope, consider adding gutters and downspouts to divert water away from the patio area and the foundation of your home. Properly installed gutters will help prevent water damage to the patio cover and its surroundings.
By considering the aesthetic and functional requirements, selecting the appropriate roofing material, and designing for proper drainage, you can create a patio cover that not only enhances the beauty of your outdoor space but also provides the necessary protection and functionality you desire. Once you have finalized the design, it’s time to move on to the next steps: measuring and marking your patio area for construction.
Measuring and Marking
Read more: How To Build A Freestanding Patio Cover
Measuring the Patio Area
Before you start building your patio cover, it is crucial to accurately measure the patio area where it will be constructed. This will ensure that your patio cover fits properly, aligns with existing structures, and meets your desired dimensions.
Start by measuring the length and width of the patio. Use a tape measure to record the dimensions, and note them down carefully. Take into consideration any irregularities or obstacles that may affect the placement or size of the patio cover, such as windows, doors, or eaves.
Consider the desired height and clearance of your patio cover as well. If you want it to be tall enough to accommodate furniture or to create a spacious feel, factor that into your measurements.
It is also important to account for any additional space required for overhangs, support beams, or other structural elements. These additional measurements will ensure that you have enough materials and space for the construction.
Marking the Locations for Posts and Supports
Once you have measured the patio area, the next step is to mark the locations where the posts and supports will be installed. This will serve as a guide during the construction process and ensure that everything is properly aligned.
Start by marking the positions for the vertical posts that will support the structure. Place stakes or markers at these locations, ensuring they align with the dimensions of your measured patio area. Use a tape measure and a level to ensure accuracy and to ensure that the posts are perfectly vertical.
Next, mark the locations where the supports will attach to the existing structure (typically the house). These supports provide additional stability and strength to the patio cover. Carefully measure and mark these points, ensuring they line up with the dimensions and positioning of the existing structure.
Double-check your measurements and markings to ensure everything is accurate. It is essential to take your time during this step to avoid future issues or the need for adjustments during construction.
With the patio area properly measured and the locations for posts and supports marked, you are now ready to move on to the next stage: preparing the existing structure for the patio cover installation. This involves inspecting the house structure and making any necessary repairs or reinforcements to ensure a solid foundation for your patio cover.
Preparing the Existing Structure
Inspection of House Structure
Before proceeding with the construction of your patio cover, it is crucial to thoroughly inspect the existing structure of your house. This step ensures that the house can support the additional load and provides a solid foundation for the patio cover.
Begin by visually examining the exterior walls where the patio cover will be attached. Look for any signs of damage, such as cracks, rot, or termite infestation. These issues need to be addressed before proceeding with the construction to prevent further deterioration.
Inspect the structural elements of the house, including the roof beams and framing, to ensure they are in good condition and can handle the added weight and stress of the patio cover. If you notice any signs of damage or weakness, it may be necessary to consult a professional or a structural engineer for further assessment.
Depending on the condition of the existing structure, you may need to reinforce or repair certain areas to ensure the stability and longevity of the patio cover. Don’t overlook this step, as neglecting to address any underlying issues can lead to complications and potential damage in the future.
Strengthening or Repairing the Existing Wall
One of the critical aspects of preparing the existing structure is to strengthen or repair the wall where the patio cover will be attached. This is necessary to ensure a secure and stable connection between the house and the patio cover.
Start by examining the wall for any signs of weakness or damage. Address any issues, such as cracks, rot, or termite damage, before proceeding. Repairing the existing wall may require removing damaged sections, replacing rotten wood, or applying sealants and coatings to protect against moisture and further deterioration.
If the wall is in good condition, reinforcing it may still be necessary to provide additional strength. This can be achieved by adding cross bracing or sistering new studs to the existing wall studs. These reinforcements will help distribute the weight of the patio cover evenly and prevent any structural issues over time.
It is essential to follow proper building practices and consult a professional if you are unsure about the structural integrity of the existing wall. Taking the time to properly prepare the existing structure will ensure a solid foundation for your patio cover and enhance its longevity.
Once you have inspected and prepared the existing structure, you can proceed to the next phase: installing the posts and supports for your patio cover. This step involves determining the positions, digging the post holes, and securing the posts in place.
Installing the Posts and Supports
Determining Post Positions and Alignments
Installing the posts and supports is a critical step in building a sturdy and reliable patio cover. Proper positioning and alignment of the posts are essential for the structural integrity of the entire structure.
Start by referring to your measurement and marking guidelines to determine the exact positions and distances between the posts. Measure and mark the locations on the ground, ensuring that they align with the dimensions and specifications of your patio cover design.
Use a string line or a laser level to establish a straight and level alignment for the posts. This will help maintain uniformity and ensure that the patio cover is square and properly balanced.
Digging Post Holes
After determining the post positions and alignments, the next step is to dig the post holes. The size and depth of the holes will depend on the size and specifications of your patio cover, as well as local building codes.
Use a post-hole digger or a mechanical auger to dig the holes. Ensure that the holes are deep enough to provide proper stability and support for the posts. Generally, the depth should be at least one-third the height of the above-ground post, with an additional few inches for gravel and cement.
Place a layer of gravel or crushed stone at the bottom of each hole to improve drainage and prevent moisture buildup. This will help prolong the lifespan of the posts.
Read more: How To Build A Wood Patio Cover
Cementing the Posts
Once the post holes are prepared, it’s time to cement the posts in place. This process ensures that the posts are securely anchored and will not shift or move over time.
Place the post in the hole, making sure it is aligned with your markings and in a plumb position. Use a level to check for vertical alignment from multiple angles. Adjust the post as necessary to ensure it is straight.
Mix the concrete according to the manufacturer’s instructions. Pour the concrete mixture into the hole, filling it up to a few inches below the ground level. Use a shovel or a trowel to compact the concrete and remove any air pockets.
While the concrete is still wet, double-check the post alignment and make any final adjustments. Allow the concrete to cure and harden according to the recommended time provided by the manufacturer.
Attaching Supports to the House
With the posts securely cemented in place, the next step is to attach the supports to the existing house structure. These supports will provide additional stability and connection points for the patio cover.
Position the support beams against the house, ensuring they are level and aligned with the markings and measurements. Attach the supports to the house using appropriate hardware, such as lag screws or anchor bolts.
Verify that the supports are firmly attached and provide a strong connection. Double-check the alignment and make any necessary adjustments before proceeding to the next phase of the construction.
With the posts and supports in place, you have laid the foundation for your patio cover. The next step is building the roof frame, which involves cutting and assembling the rafters and beams. This process brings your patio cover one step closer to completion.
Building the Roof Frame
Cutting and Assembling the Rafters and Beams
Building the roof frame is a crucial aspect of constructing your patio cover. The roof frame provides support, stability, and a framework for the roofing material.
Start by measuring and cutting the rafters and beams according to your design specifications. Use a saw or a miter saw to make clean and accurate cuts.
Assemble the rafters and beams to form the roof frame. Attach them securely using appropriate fasteners, such as screws or nails, ensuring that the joints are tight and secure. Double-check each connection to ensure proper alignment and stability.
If your patio cover design includes a ridge beam, make sure to install it at the highest point of the roof frame. The ridge beam provides structural support and helps distribute the weight of the roof evenly.
Read more: How Much To Build A Covered Patio
Attaching Joist Hangers
Once the rafters and beams are in place, it is important to properly attach joist hangers. These metal brackets provide support and stability for the joists that will hold the roofing material.
Position the joist hangers along the rafters, ensuring that they are evenly spaced and aligned. Attach the joist hangers using appropriate fasteners, such as joist hanger nails or screws, following the manufacturer’s instructions.
Verify that the joist hangers are securely attached and provide a strong connection between the rafters and the joists.
Installing the Roof Bracing
To enhance the structural stability and prevent any movement or sway, it is important to install roof bracing. Roof bracing consists of additional support beams or braces that reinforce the roof frame.
Measure and cut the roof braces according to your design specifications. Attach them securely to the rafters and beams, ensuring that they are in proper alignment and provide sufficient support.
The bracing should be strategically positioned to maintain the structural integrity and prevent any sagging or shifting of the roof frame.
Double-check all connections and ensure that the roof frame is sturdy and secure before proceeding to the next step.
With the roof frame complete, you are one step closer to finishing your patio cover. The next stage involves installing the roofing material, whether it is asphalt shingles, metal panels, polycarbonate sheets, or thatch, to provide protection and complete the look of your patio cover.
Installing the Roofing Material
Placing Underlayment for Weatherproofing
Once the roof frame is constructed, it’s time to install the underlayment to provide a layer of protection against weather elements such as rain, snow, and moisture.
Start by laying a waterproofing underlayment, such as roofing felt or synthetic underlayment, over the roof frame. Carefully roll it out, ensuring that it covers the entire roofing area and overlaps at the edges.
Secure the underlayment using appropriate fasteners, such as roofing nails or staples. Follow the manufacturer’s guidelines for spacing and installation techniques.
The underlayment acts as a barrier, preventing water penetration and protecting the roof structure. It also provides an extra layer of insulation and helps to reduce the transfer of heat, keeping your patio area cooler during the hot summer months.
Read more: How To Build An Aluminum Patio Cover
Attaching the Roofing Panels or Shingles
With the underlayment in place, it’s time to install the roofing material of your choice – whether it’s roofing panels or shingles.
If you are using roofing panels, carefully position them over the roof frame, starting from one side and working your way across. Fasten the panels securely to the roofing frame using appropriate fasteners, such as screws or nails, following the manufacturer’s guidelines for spacing and installation.
If you are using shingles, begin at the bottom edge of the roof and work your way up, overlapping each row to ensure proper water drainage. Secure the shingles with roofing nails, making sure to follow the manufacturer’s instructions for the correct placement.
When installing the roofing material, ensure that it is aligned and positioned correctly to maintain a uniform and aesthetically pleasing appearance. Take care to cut the material to fit around any obstacles, such as vents or chimneys, using appropriate cutting tools.
It is crucial to follow the specific installation guidelines provided by the manufacturer of your chosen roofing material. Each type of material may have its unique installation requirements and techniques.
Take your time during this step to ensure that the roofing material is properly installed, securely fastened, and provides the desired protection and aesthetic appeal for your patio cover.
With the roofing material successfully installed, your patio cover is almost complete. The final steps involve adding finishing touches, such as installing gutters and downspouts, painting or staining the patio cover, and enhancing it with lighting or decorative elements.
Adding Finishing Touches
Installing Gutters and Downspouts
One of the essential finishing touches for your patio cover is the installation of gutters and downspouts. Gutters help collect rainwater and direct it away from the patio area and the foundation of your home.
Start by measuring and cutting the gutter sections to fit the length of your patio cover. Use appropriate connectors and fasteners to attach the gutter sections together securely.
Install gutter brackets along the edge of the roof frame, ensuring that they are evenly spaced and aligned. Attach the gutters to the brackets, making sure they have a slight slope towards the downspouts for proper water drainage.
Place the downspout outlets at strategic locations along the gutter system, allowing water to flow down and away from the patio area and foundation. Connect the downspouts and ensure they are properly secured to the house or directed towards a drainage system.
Adding gutters and downspouts will help prevent water from dripping or flowing directly off the roof, keeping the patio area dry and protected during rainy weather.
Painting or Staining the Patio Cover
To enhance the appearance and durability of your patio cover, consider painting or staining the wood. This step adds a finished look and helps protect the wood from weathering and UV damage.
Clean the wood surface to remove any dirt or debris before applying the paint or stain. Use a wood cleaner or mild soap and water solution for cleaning. Allow the wood to dry completely before proceeding.
If you want to paint the patio cover, select a paint color that complements the style and aesthetics of your home. Apply the paint evenly using a brush, roller, or paint sprayer, following the manufacturer’s instructions for application and drying times.
If you prefer a more natural look, consider staining the wood instead. Choose a stain color that enhances the natural grains and beauty of the wood. Apply the stain using a brush or rag, making sure to follow the recommended application and drying instructions.
Regularly inspect the painted or stained surface of your patio cover and perform touch-ups or reapplications as needed to maintain its appearance and protection against the elements.
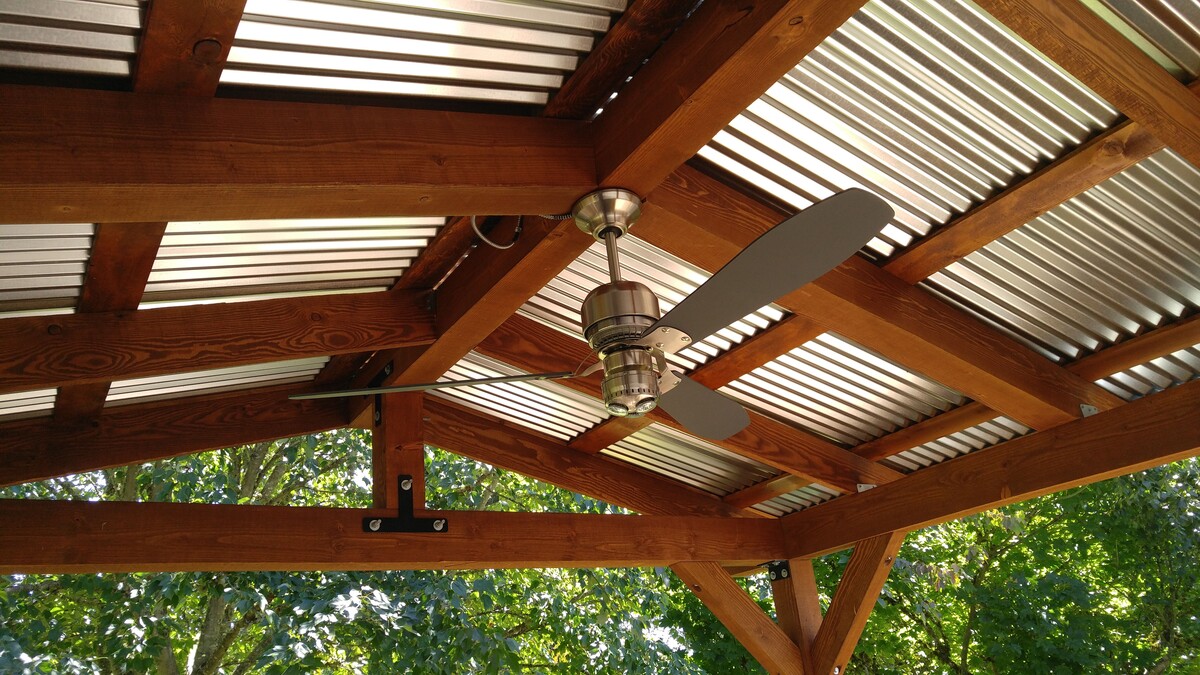
Enhancing with Lighting or Decorative Elements
To create a welcoming ambiance and enhance the functionality of your patio cover, consider adding lighting fixtures and decorative elements.
Install outdoor lighting fixtures such as string lights, lanterns, or wall-mounted lights to create a warm and inviting atmosphere in the evening. Choose energy-efficient and weather-resistant lighting options that suit the style of your patio cover.
You can also incorporate decorative elements like hanging plants, outdoor curtains, or outdoor furniture to personalize and enhance the visual appeal of your patio cover.
Before installing lighting or decorative elements, ensure that they are safely secured and properly wired to avoid any electrical hazards.
By adding these finishing touches, your patio cover will not only provide shade and protection but also become a beautiful and inviting outdoor space for relaxation and entertaining.
As a final step, remember to regularly maintain and inspect your patio cover to ensure its longevity and performance. Cleaning, removing debris, and addressing any visible wear or damage promptly will help you enjoy your patio cover for years to come!
Conclusion
Building a patio cover attached to your house is a rewarding project that can transform your outdoor space and provide a comfortable area for relaxation, entertainment, and protection from the elements. By following the steps outlined in this guide and incorporating your own creativity, you can construct a patio cover that not only meets your functional needs but also enhances the aesthetics of your home.
During the planning and preparation stage, understanding the purpose of your patio cover and complying with local building codes are essential. Obtaining the necessary permits and permissions ensures a smooth construction process without any legal complications.
Choosing the right design requires consideration of both aesthetic and functional aspects. Selecting an appropriate roofing material and designing for proper drainage are crucial for long-lasting and weather-resistant patio covers.
Accurate measurement and marking of the patio area, as well as proper preparation of the existing structure, lay the foundation for a secure and stable patio cover. Installing the posts and supports requires careful attention to alignment and cementing for structural integrity.
The construction of the roof frame involves cutting and assembling the rafters and beams, attaching joist hangers, and installing roof bracing. These steps ensure a strong and well-supported structure.
Installing the roofing material, placing underlayment for weatherproofing, and attaching roofing panels or shingles provide the necessary protection and complete the look of your patio cover.
Adding finishing touches, such as installing gutters and downspouts, painting or staining the patio cover, and enhancing with lighting or decorative elements, adds functionality, aesthetics, and personalization to your outdoor space.
In conclusion, building a patio cover attached to your house requires careful planning, attention to detail, and adherence to construction techniques. The process may seem complex, but with the right materials, tools, and guidance, you can create a beautiful and functional patio cover that will enhance your outdoor living experience for years to come.
Remember to stay safe during the construction process and consult professionals or experts if needed. Enjoy the process of creating your dream outdoor space and embrace the joy of having a well-designed and well-built patio cover attached to your house!
References
1. Patio Covers: How to Build a Patio Cover (DIY Network) – https://www.diynetwork.com/how-to/outdoors/structures/how-to-build-a-patio-cover
2. How to Build a Patio Cover (The Family Handyman) – https://www.familyhandyman.com/project/how-to-build-a-patio-cover/
3. Building a Patio Cover (This Old House) – https://www.thisoldhouse.com/decking/21015245/how-to-build-a-patio-cover
4. Patio Cover Ideas and Pictures (HGTV) – https://www.hgtv.com/outdoors/outdoor-remodel/patios-and-decks/patio-cover-ideas-and-pictures
5. Patio Cover Plans (Bob Vila) – https://www.bobvila.com/articles/patio-cover-plans/
6. Patio Cover Design and Installation Tips (The Spruce) – https://www.thespruce.com/design-and-installation-tips-for-patio-covers-2132360
7. Patio Cover Guide (Better Homes & Gardens) – https://www.bhg.com/home-improvement/porch/outdoor-rooms/patio-cover-guide/
8. Patio Covers for Your Outdoor Space (House Beautiful) – https://www.housebeautiful.com/home-remodeling/outdoor-projects/g28500843/patio-covers/
These references provide valuable information and resources for building a patio cover attached to a house. They offer detailed instructions, design ideas, and tips to help you with each step of the construction process. Remember to consult local building codes and regulations specific to your area for the most accurate information.
Now that you've mastered building a patio cover, why not bring vibrant vibes to your deck? Our next guide walks you through sprucing up your deck with colorful decor and simple enhancements, perfect for any fan of outdoor living. You'll find tips for selecting eye-catching accessories and creating a welcoming atmosphere that makes every alfresco gathering memorable.
Frequently Asked Questions about How To Build A Patio Cover Attached To A House
Was this page helpful?
At Storables.com, we guarantee accurate and reliable information. Our content, validated by Expert Board Contributors, is crafted following stringent Editorial Policies. We're committed to providing you with well-researched, expert-backed insights for all your informational needs.

0 thoughts on “How To Build A Patio Cover Attached To A House”