Home>Furniture>Outdoor Furniture>How To Fix Standing Water On A Patio
Outdoor Furniture
How To Fix Standing Water On A Patio
Modified: March 7, 2024
Learn how to fix standing water on your patio and prevent damage to your outdoor furniture with our helpful tips and advice.
(Many of the links in this article redirect to a specific reviewed product. Your purchase of these products through affiliate links helps to generate commission for Storables.com, at no extra cost. Learn more)
Introduction
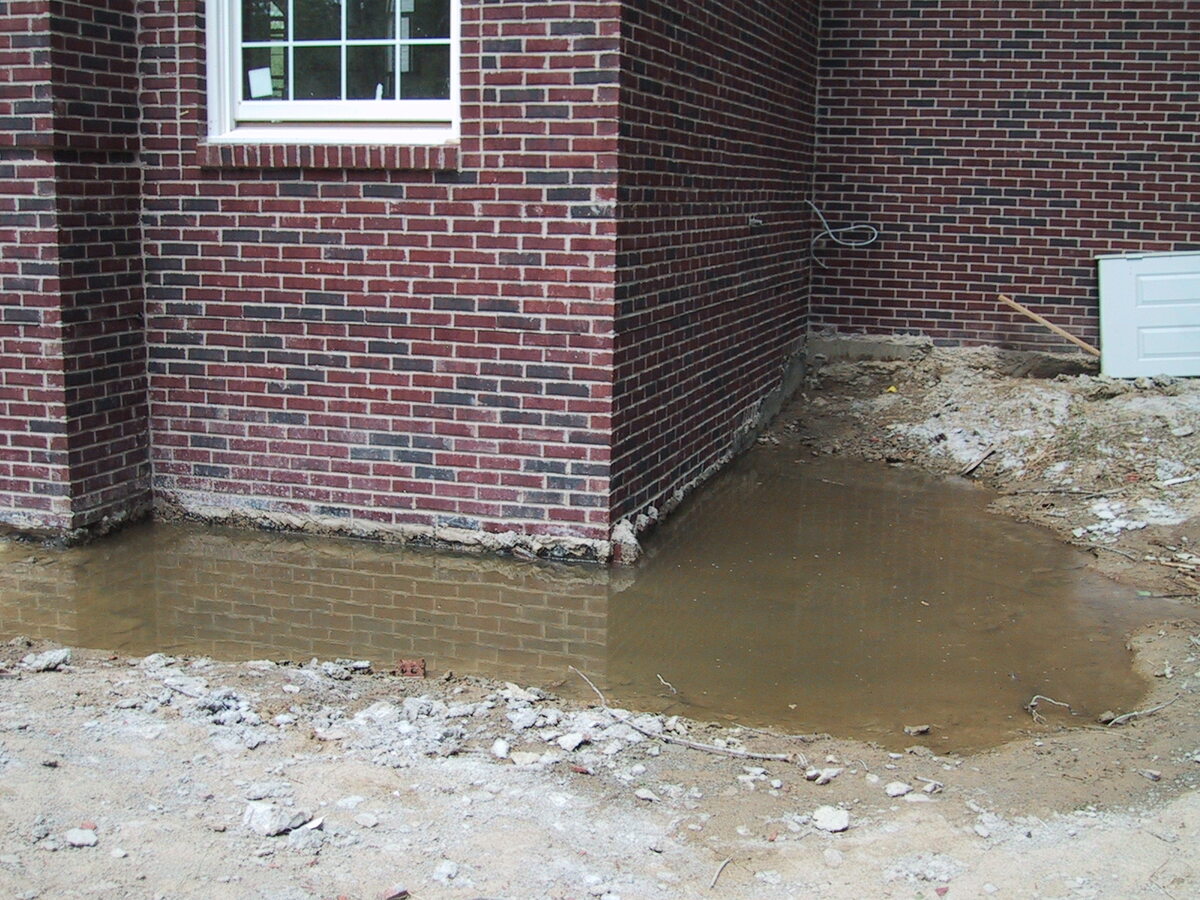
Welcome to our guide on how to fix standing water on a patio. There’s nothing more frustrating than having a beautiful outdoor space marred by pools of stagnant water. Not only does standing water make your patio impractical to use, but it can also cause damage to the surface and surrounding structures over time. The good news is that there are several solutions to combat this issue and restore your patio to its former glory.
In this article, we’ll explore the common causes of standing water on a patio and discuss practical steps to address the problem. Whether you’re dealing with a slight puddle or a large pool, understanding the underlying issues and implementing the right solutions can help you get rid of standing water and ensure a dry and functional outdoor space.
Before we dive into the solutions, it’s important to have a clear understanding of what causes standing water on a patio. Poor drainage, uneven surfaces, or obstacles blocking the water’s path are some of the most common factors. By identifying the root cause, you can take targeted steps to remedy the situation and prevent future pooling.
Throughout this guide, we’ll provide step-by-step instructions on various methods to fix standing water on your patio. These solutions range from simple maintenance techniques to more extensive installations. Depending on the severity of the issue and your preferences, you can choose the method that best suits your needs. So, let’s get started and restore your patio to its full potential!
Key Takeaways:
- Say goodbye to standing water on your patio by clearing debris, adjusting the slope, or installing drainage systems like French drains and dry wells. Enjoy a dry and functional outdoor space once again!
- Transform your patio with eco-friendly pervious pavers, channel drains, and proper maintenance. Say hello to a beautiful, dry, and enjoyable outdoor oasis!
Read more: How To Fix Standing Water On Balcony
Understanding the Causes of Standing Water
Before you can effectively address the issue of standing water on your patio, it’s crucial to understand its root causes. Here are some common factors that contribute to this problem:
- Poor Drainage: Insufficient or poorly designed drainage systems can lead to water accumulation on your patio. If water is not able to drain away properly, it will collect and create standing water.
- Low spots or Depressions: Uneven surfaces or areas with low spots can trap water, preventing it from flowing away. Whether due to settling or a design flaw, these depressions can be a significant contributing factor to standing water.
- Obstructions: Debris, such as fallen leaves, twigs, or dirt, can clog up your patio’s drainage system. This blockage prevents water from flowing freely and can lead to standing water.
- Inadequate Slope: A patio should be designed with a slight slope away from the house or structures to ensure proper drainage. If the slope is insufficient or has been compromised over time, water will accumulate instead of draining away.
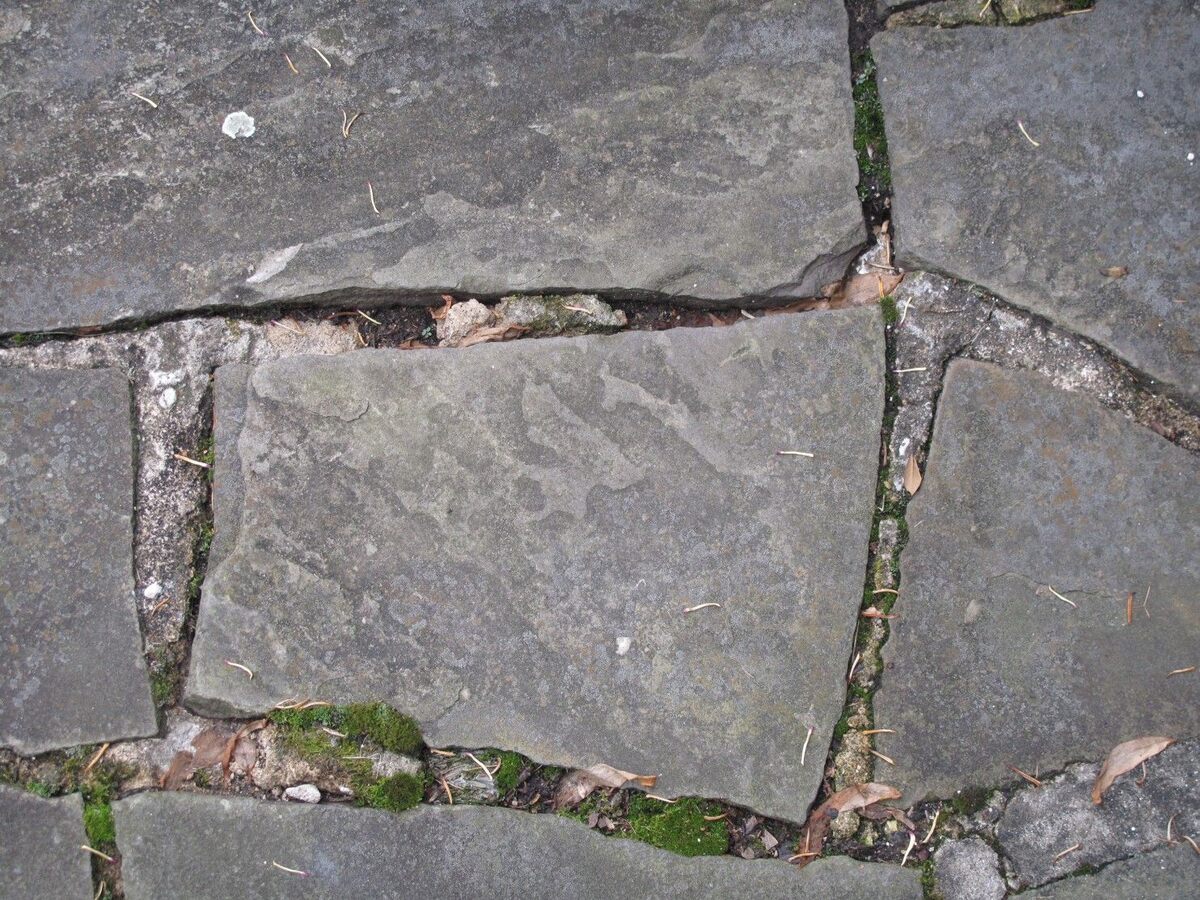
- Improperly Sealed Surfaces: If the surface of your patio is not adequately sealed or there are cracks and gaps, water can seep through and create puddles. Over time, this can lead to standing water and potential damage to the patio materials.
By identifying the specific causes of standing water on your patio, you can better determine the most appropriate solutions to implement. If you’re unsure about the root cause, it’s advisable to consult with a professional to ensure an accurate diagnosis.
Now that you have a better understanding of the causes, let’s move on to assessing drainage issues and finding the appropriate fixes for your patio.
Assessing Drainage Issues
Once you’ve identified the causes of standing water on your patio, the next step is to assess the specific drainage issues that may be present. This evaluation will help you determine the extent of the problem and guide you towards the most effective solution. Here are some key steps to assess the drainage issues:
- Observe Water Flow: During or after rainfall, carefully observe how water flows across your patio. Take note of any areas where water accumulates or appears to pool. This will give you a visual indication of where the drainage problem lies.
- Consider Slope and Gradient: Examine the slope of your patio to see if it allows water to naturally flow away from your home or structures. Ideally, there should be a gentle slope of at least 1/8 inch per foot away from the house to ensure proper drainage.
- Check for Obstructions: Inspect your patio’s drainage system, such as gutters, downspouts, and surface drains, for any obstructions or blockages. Remove any debris or build-up that may impede the water’s flow.
- Assess Surface Condition: Examine the surface of your patio for any cracks, gaps, or areas where water seems to seep through. These defects can contribute to standing water and may require repairs or sealing.
- Consider Soil Composition: Assess the type of soil around your patio. Some soils, like clay, have poor drainage capabilities and can exacerbate the issue of standing water. Understanding your soil composition will help in choosing appropriate solutions.
By conducting a thorough assessment of your patio’s drainage issues, you’ll gain valuable insights into the specific problems at hand. This information will allow you to tackle the issue with targeted solutions that effectively address the underlying causes of standing water. Remember, if you’re uncertain about assessing the drainage issues on your own, it’s always wise to consult with a professional for expert advice.
Now that you have a clear understanding of the drainage problems, let’s move on to exploring various methods to fix the standing water on your patio.
Clearing Debris and Blockages
One of the most common culprits for standing water on a patio is debris or blockages that prevent proper water flow. Leaves, dirt, twigs, and other debris can accumulate in your patio’s drainage system, clogging it and causing water to pool. Here are the steps to clear debris and blockages:
- Inspect the Drainage System: Begin by inspecting your patio’s drainage system, including gutters, downspouts, and surface drains. Look for any visible debris or blockages in these areas.
- Remove Surface Debris: Start by clearing away any obvious surface debris, such as leaves or twigs, from your patio. Use a broom, rake, or leaf blower to sweep them away.
- Clean Gutters and Downspouts: Clear any clogged gutters and downspouts using a ladder and gloved hands. Remove leaves, sticks, and other debris from these areas, allowing water to flow freely.
- Flush Surface Drains: If you have surface drains on your patio, such as gravel-filled channels or catch basins, use a hose to flush them out. This will help dislodge any accumulated debris and ensure proper water flow.
- Consider Installing Gutter Guards: To prevent future debris accumulation in your gutters, consider installing gutter guards. These protective covers will prevent leaves and larger debris from entering the gutter system, reducing the need for frequent cleaning.
Regular maintenance and clearing of debris from your patio’s drainage system will go a long way in preventing standing water issues. By removing blockages and ensuring proper water flow, you’ll be one step closer to a dry and functional outdoor space.
While clearing debris and blockages is an essential step, it may not fully resolve the problem of standing water if there are other underlying drainage issues. In the next sections, we’ll explore additional methods to help rectify the problem and restore proper drainage to your patio.
Adjusting the Slope of the Patio
If you’ve noticed standing water on your patio, it may indicate an insufficient slope or gradient that prevents water from draining properly. Fortunately, adjusting the slope of your patio is a practical solution to improve drainage and prevent water accumulation. Here’s how you can adjust the slope of your patio:
- Evaluate the Current Slope: Start by measuring the existing slope of your patio. Use a level tool to assess if it has the necessary slope of at least 1/8 inch per foot away from your home or any structures.
- Determine the Desired Slope: If the current slope is inadequate or nonexistent, you’ll need to determine the appropriate slope for effective drainage. Aim for a slope of 1/4 inch per foot or more to ensure optimal water flow.
- Mark the High and Low Points: Identify the high and low points on your patio’s surface. This will help you determine where adjustments need to be made to create the desired slope.
- Build Up Low Spots: If you have low spots on your patio, you can build them up using additional paver base material or compacted soil. Gradually add and compact the material until the surface is level and slopes away from the house.
- Remove Excess Material: For high spots, remove excess material to ensure a smooth and gradual slope. Use a shovel or a leveling tool to carefully remove any protruding sections.
- Compact and Recheck: After making adjustments, use a compactor or tamper to compact the surface and ensure stability. Recheck the slope with a level tool to confirm that it meets the desired slope specifications.
- Consider Professional Help: Adjusting the slope of a patio can be a labor-intensive task. If you’re uncertain about DIY, consider consulting with a professional to ensure the job is done correctly.
Remember, adjusting the slope of your patio may require some effort and expertise. If you’re unsure about the process or prefer to leave it in the hands of professionals, hiring a contractor experienced in patio slope adjustments would be a wise decision. By creating a proper slope, you’ll improve the drainage of your patio and minimize the risk of standing water.
In the next sections, we’ll explore other solutions, including the installation of French drains, dry wells, and channel drains, which can also help alleviate standing water issues.
Ensure proper drainage by sloping the patio away from the house at a 1/4 inch per foot. Use a level to check the slope and adjust as needed.
Installing a French Drain
If adjusting the slope of your patio is not enough to solve the problem of standing water, installing a French drain can be a highly effective solution. A French drain is a trench filled with gravel or rock and contains a perforated pipe that redirects water away from your patio. Here’s a step-by-step guide on how to install a French drain:
- Determine the Drainage Path: Identify the direction in which you want the water to flow away from your patio. This will determine the placement of your French drain.
- Mark the Trench Location: Use stakes and string to mark the location of the trench along the path you’ve determined. Dig the trench approximately 12 inches deep and wide enough to accommodate the drain pipe and gravel.
- Add a Layer of Gravel: Place a layer of 2-3 inches of gravel at the bottom of the trench. This will serve as a base for the drain pipe and allow for proper water filtration.
- Install the Perforated Pipe: Lay the perforated drain pipe on top of the layer of gravel. Ensure that the holes in the pipe are facing down to allow water entry. Connect multiple sections of pipe if needed, using pipe connectors and PVC adhesive.
- Cover the Pipe with Gravel: Fill the trench with gravel, covering the pipe completely. Use larger-sized gravel at the bottom and progressively smaller-sized gravel towards the top for optimal drainage.
- Add a Landscape Fabric: To prevent sediment from clogging the drain, place a landscape fabric or geotextile fabric on top of the gravel. This will allow water to flow through while keeping dirt and debris out.
- Backfill the Trench: Fill the remaining space in the trench with soil, ensuring that it slopes away from the patio. Compact the soil gently as you go to maintain stability.
- Create an Outlet: Direct the end of the French drain towards a suitable outlet, such as a storm drain or a designated drainage area, to ensure proper water discharge.
- Consider Professional Assistance: Installing a French drain can be complex, especially if you are dealing with large areas or complicated drainage issues. If you’re uncertain about the process, it’s best to consult with a professional for expert assistance.
Installing a French drain can significantly improve the drainage of your patio and effectively redirect water away from the problematic areas. This solution is particularly useful in situations where adjusting the slope of the patio alone is insufficient.
In the following sections, we’ll explore additional methods such as dry wells, channel drains, and the use of pervious pavers to further tackle standing water issues on your patio.
Installing a Dry Well
If you have persistent standing water issues on your patio, installing a dry well can be an effective solution to manage excess water and improve drainage. A dry well is a structure designed to collect and distribute water underground, preventing it from pooling on the surface. Follow these steps to install a dry well:
- Determine the Dry Well Location: Identify a suitable location away from your patio where the water can naturally drain. Ideally, this area should have permeable soil that allows water to percolate into the ground.
- Mark the Excavation Area: Measure and mark the area for excavation. The size of the dry well will depend on the amount of water you need to manage. It is recommended to consult with a professional or follow the manufacturer’s guidelines for the appropriate size.
- Excavate the Hole: Dig a hole that is wide and deep enough to accommodate the dry well structure. Remove any rocks, roots, and debris from the excavation area.
- Install the Dry Well: Place the dry well structure in the hole, ensuring it is level and stable. Follow the manufacturer’s instructions for proper installation, as it may vary depending on the type of dry well system you’re using.
- Connect the Inlet Pipe: Connect the inlet pipe to the dry well. This pipe will redirect the water from your patio towards the dry well. Ensure that the pipe is securely attached and properly sloped for efficient water flow.
- Backfill the Hole: Carefully backfill the hole around the dry well, using a mixture of soil and gravel. It is recommended to use a mixture with a high percentage of gravel to facilitate water filtration and percolation.
- Create an Outlet: Connect a perforated pipe or a solid pipe with drainage holes to the outlet of the dry well. This pipe will allow excess water to flow away from the dry well towards a suitable drainage area.
- Consider Professional Assistance: Installing a dry well may require expertise and knowledge of local regulations. If you’re unsure about the process or need assistance, it’s best to consult with a professional who can guide you through the installation.
A dry well is an excellent solution to manage excess water and prevent standing water on your patio. It provides an underground reservoir where water can slowly percolate into the surrounding soil, reducing the risk of water accumulation and potential damage to your patio.
In the next section, we’ll explore the installation of a channel drain as another option to address standing water on your patio.
Adding a Channel Drain
If you’re dealing with standing water on your patio caused by water flowing from higher ground or adjacent areas, adding a channel drain can effectively redirect the water and prevent pooling. A channel drain, also known as a trench drain, collects water from the surface and channels it away through an underground system. Here’s how you can add a channel drain to your patio:
- Determine the Drainage Path: Assess the direction of the water flow and identify the areas where water is entering your patio. This will help you determine the optimal placement of the channel drain.
- Mark the Drainage Channel: Use stakes and string to mark the path of the drainage channel. It should be positioned to capture the incoming water and direct it away from the patio.
- Prepare the Trench: Dig a trench along the marked path, ensuring it is deep and wide enough to accommodate the channel drain and its surrounding gravel or concrete bed.
- Install the Channel Drain: Place the channel drain in the trench, ensuring that it is level and securely positioned. Follow the manufacturer’s instructions for proper installation, as it may vary depending on the specific drainage system you choose.
- Connect the Outlet Pipe: Attach an outlet pipe to the end of the channel drain. This pipe will carry the collected water away from your patio towards a suitable drainage area.
- Backfill and Secure: Fill the trench with gravel or concrete, making sure to cover the channel drain completely. This will provide stability and help with water filtration.
- Consider Grate Design: Choose an appropriate grate design for your channel drain to prevent debris from clogging the drain. Options include slotted grates, mesh grates, or solid grates, depending on your specific needs.
- Regular Cleaning and Maintenance: Periodically clean the channel drain and remove any debris that may accumulate. This will ensure uninterrupted water flow and prevent potential clogs.
- Consult with a Professional: Adding a channel drain may involve complex installation and a proper understanding of local regulations. If you’re unsure about the process or need assistance, it’s best to consult with a professional for expert guidance.
Adding a channel drain to your patio can effectively divert water away from the area, preventing standing water and potential damage. By capturing and channeling the excess water, you can ensure a dry and safe outdoor space for your enjoyment.
Now that we’ve explored various drainage solutions, let’s take a look at using pervious pavers as another way to mitigate standing water on your patio.
Using Pervious Pavers
If you’re looking for an aesthetically pleasing and eco-friendly solution to address standing water on your patio, using pervious pavers is a great option. Pervious pavers, also known as porous or permeable pavers, allow water to filter through the surface, reducing runoff and minimizing the risk of standing water. Here’s how you can use pervious pavers for your patio:
- Assess the Existing Patio Surface: Evaluate the current surface of your patio. If it is made of impermeable materials like concrete or solid paving stones, you’ll need to remove or modify it to accommodate the pervious pavers.
- Prepare the Base: Excavate the existing surface and create a suitable base for the pervious pavers. This typically involves removing a few inches of soil, compacting the area, and adding a layer of gravel for proper drainage.
- Choose the Pervious Pavers: Select the type, shape, and color of pervious pavers that best complement your patio. There are various options available, including permeable concrete pavers, porous asphalt pavers, and eco-friendly grass pavers.
- Lay the Pervious Pavers: Install the pervious pavers according to the manufacturer’s instructions. Ensure proper spacing and alignment between the pavers to allow water to filter through the gaps.
- Fill the Joints: Fill the joints between the pervious pavers with permeable materials such as gravel or specially designed jointing sand. This will enhance water filtration and stability of the paved surface.
- Proper Edging: Install appropriate edging along the perimeter of the patio area to secure the pervious pavers in place. This will prevent shifting and maintain the integrity of the surface.
- Regular Maintenance: Perform routine maintenance by clearing any debris or sediment that may accumulate on the surface of the pervious pavers. This will help maintain their permeability and ensure effective water filtration.
- Consider Professional Installation: If you’re unsure about the installation process or prefer to leave it to professionals, consider hiring a contractor experienced in working with pervious pavers. They can ensure proper installation and optimize the performance of the pavers.
Using pervious pavers for your patio is not only a practical solution for managing water runoff, but it also adds an attractive and eco-friendly element to your outdoor space. By allowing water to filter through the paver surface, you’ll minimize the risk of standing water and contribute to environmental sustainability.
With the installation of pervious pavers, you now have a comprehensive range of solutions at your disposal to effectively combat standing water on your patio. By assessing the drainage issues, adjusting the slope, installing drainage systems like French drains or dry wells, adding a channel drain, or opting for pervious pavers, you can restore your patio to its full potential and enjoy a dry and functional outdoor space.
Remember, the choice of the most suitable solution will depend on the specific circumstances of your patio and the severity of the standing water issue. If you’re unsure about the best course of action or encounter any challenges during the process, it’s always recommended to consult with a professional for expert guidance.
Now, go forth and transform your patio into an oasis of dryness and enjoyment!
Read more: How To Fix A TV Stand
Conclusion
Standing water on a patio can be a frustrating problem that not only hampers the functionality of your outdoor space but also poses potential damage to the patio itself. However, with the right knowledge and solutions, you can effectively address this issue and restore your patio to its full potential.
We began by understanding the common causes of standing water, such as poor drainage, low spots, obstructions, inadequate slope, and improperly sealed surfaces. By identifying the root cause, you can take targeted steps to remedy the situation.
We then explored various methods to fix standing water on your patio, starting with clearing debris and blockages from the drainage system. By removing obstacles, you allow the water to flow freely and prevent pooling.
If the issue persists, adjusting the slope of the patio can greatly improve drainage. Creating a gentle slope away from your home or structures helps ensure that water is directed away from the patio surface.
In situations where adjusting the slope is not enough, installing a French drain provides an effective solution. This underground drainage system collects and redirects water away from your patio, preventing standing water and potential damage.
Another option is installing a dry well, which acts as an underground reservoir, collecting and dispersing excess water. This solution is particularly useful for managing large volumes of water and preventing it from pooling on the patio surface.
If the water is entering your patio from higher ground or adjacent areas, adding a channel drain can redirect the water away, effectively preventing standing water and ensuring optimal drainage.
Lastly, using pervious pavers offers an eco-friendly and visually appealing solution. These pavers allow water to filter through the surface, reducing runoff and minimizing standing water issues.
It’s important to note that the best solution for your patio will depend on the specific circumstances and severity of the standing water problem. If you’re unsure or facing significant challenges, consulting with a professional is always recommended to ensure successful resolution.
By implementing these strategies and taking proactive steps, you can restore your patio to a dry and functional space. Enjoying your outdoor living area without the frustration of standing water will not only enhance your overall experience but also extend the lifespan of your patio materials.
So, embrace these solutions, take action, and reclaim your patio from the clutches of standing water!
Frequently Asked Questions about How To Fix Standing Water On A Patio
Was this page helpful?
At Storables.com, we guarantee accurate and reliable information. Our content, validated by Expert Board Contributors, is crafted following stringent Editorial Policies. We're committed to providing you with well-researched, expert-backed insights for all your informational needs.

0 thoughts on “How To Fix Standing Water On A Patio”